


学习笔记
1.AppBar的简单使用
import 'package:flutter/material.dart';
void main() {
runApp(MyApp());
}
class MyApp extends StatelessWidget {
const MyApp({Key? key}) : super(key: key);
Widget build(BuildContext context) {
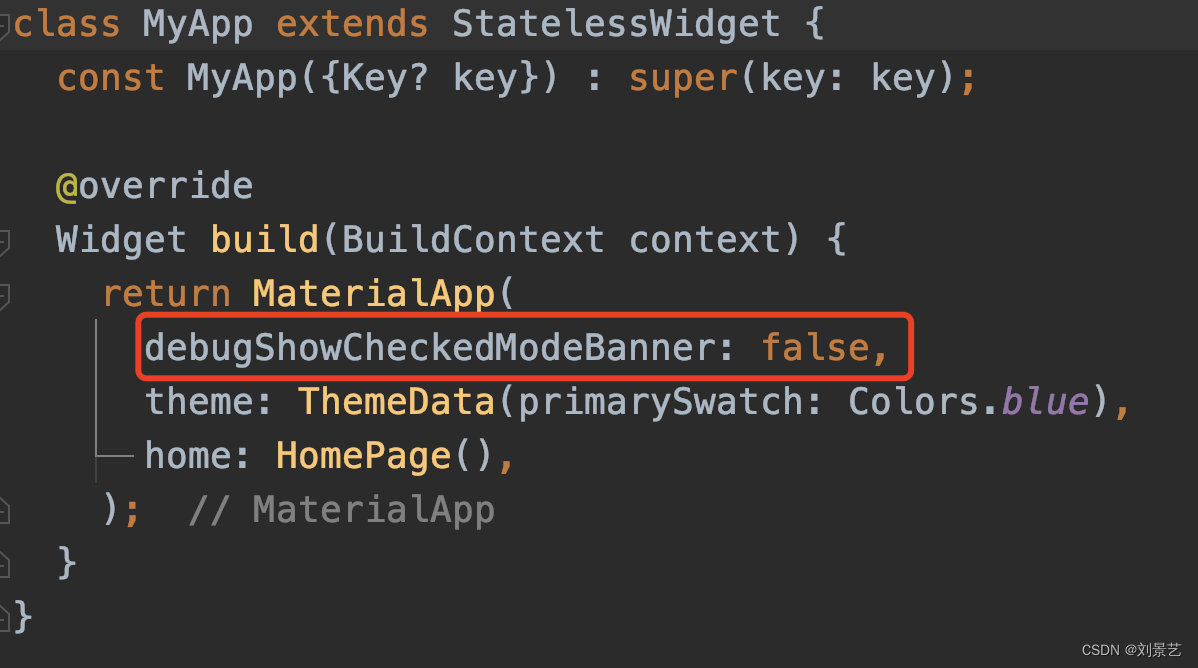
return MaterialApp(
debugShowCheckedModeBanner: false,
theme: ThemeData(primarySwatch: Colors.blue),
home: HomePage(),
);
}
}
class HomePage extends StatefulWidget {
const HomePage({Key? key}) : super(key: key);
_HomePageState createState() => _HomePageState();
}
class _HomePageState extends State<HomePage> {
Widget build(BuildContext context) {
return Scaffold(
appBar: AppBar(
title: Text("Flutter demo"),
backgroundColor: Colors.green,
leading: IconButton(
icon: Icon(Icons.person),
onPressed: () {},
),
actions: [
IconButton(icon: Icon(Icons.search), onPressed: () {}),
IconButton(icon: Icon(Icons.menu), onPressed: () {}),
],
),
);
}
}
效果

从左到右分别使用了:leading\title\actions属性
取消显示debug标签:
2.TabBar和TabBarView组合使用实现菜单栏
先混入SingleTickerProviderStateMixin
class _HomePageState extends State<HomePage>
    with SingleTickerProviderStateMixin
/// Provides a single [Ticker] that is configured to only tick while the current
/// tree is enabled, as defined by [TickerMode].
///
/// To create the [AnimationController] in a [State] that only uses a single
/// [AnimationController], mix in this class, then pass `vsync: this`
/// to the animation controller constructor.
///
/// This mixin only supports vending a single ticker. If you might have multiple
/// [AnimationController] objects over the lifetime of the [State], use a full
/// [TickerProviderStateMixin] instead.
mixin SingleTickerProviderStateMixin<T extends StatefulWidget> on State<T> implements TickerProvider
理解Mixin \ with关键字:https://juejin.cn/post/6844903764441202702
我的理解是:
class A with B
相当于A可以调用B的方法,但B不是A的父类。
class _HomePageState extends State<HomePage>
with SingleTickerProviderStateMixin {
late TabController _tabController;
void initState() {
super.initState();
_tabController = TabController(length: 3, vsync: this);
}
Widget build(BuildContext context) {
return Scaffold(
appBar: AppBar(
title: Text("Flutter demo"),
backgroundColor: Colors.green,
leading: IconButton(
icon: Icon(Icons.person),
onPressed: () {},
),
actions: [
IconButton(icon: Icon(Icons.search), onPressed: () {}),
IconButton(icon: Icon(Icons.menu), onPressed: () {}),
],
bottom: TabBar(
controller: _tabController,
tabs: [Text("推荐"), Text("新闻"), Text("视频")],
),
),
body: TabBarView(
controller: _tabController,
children: [Text("推荐"), Text("新闻"), Text("视频")],
),
);
}
}
效果

重点是要初始化一个TabController
TabController是在initState()方法里初始化的
TabBar配置在AppBar的bottom
TabBarView配置在Scaffold的body
然后两个控件都要配置同一个controller:TabController _tabController = TabController(length: 3, vsync: this)
TabController初始化需要的vsync参数,就是我们需要with SingleTickerProviderStateMixin的原因
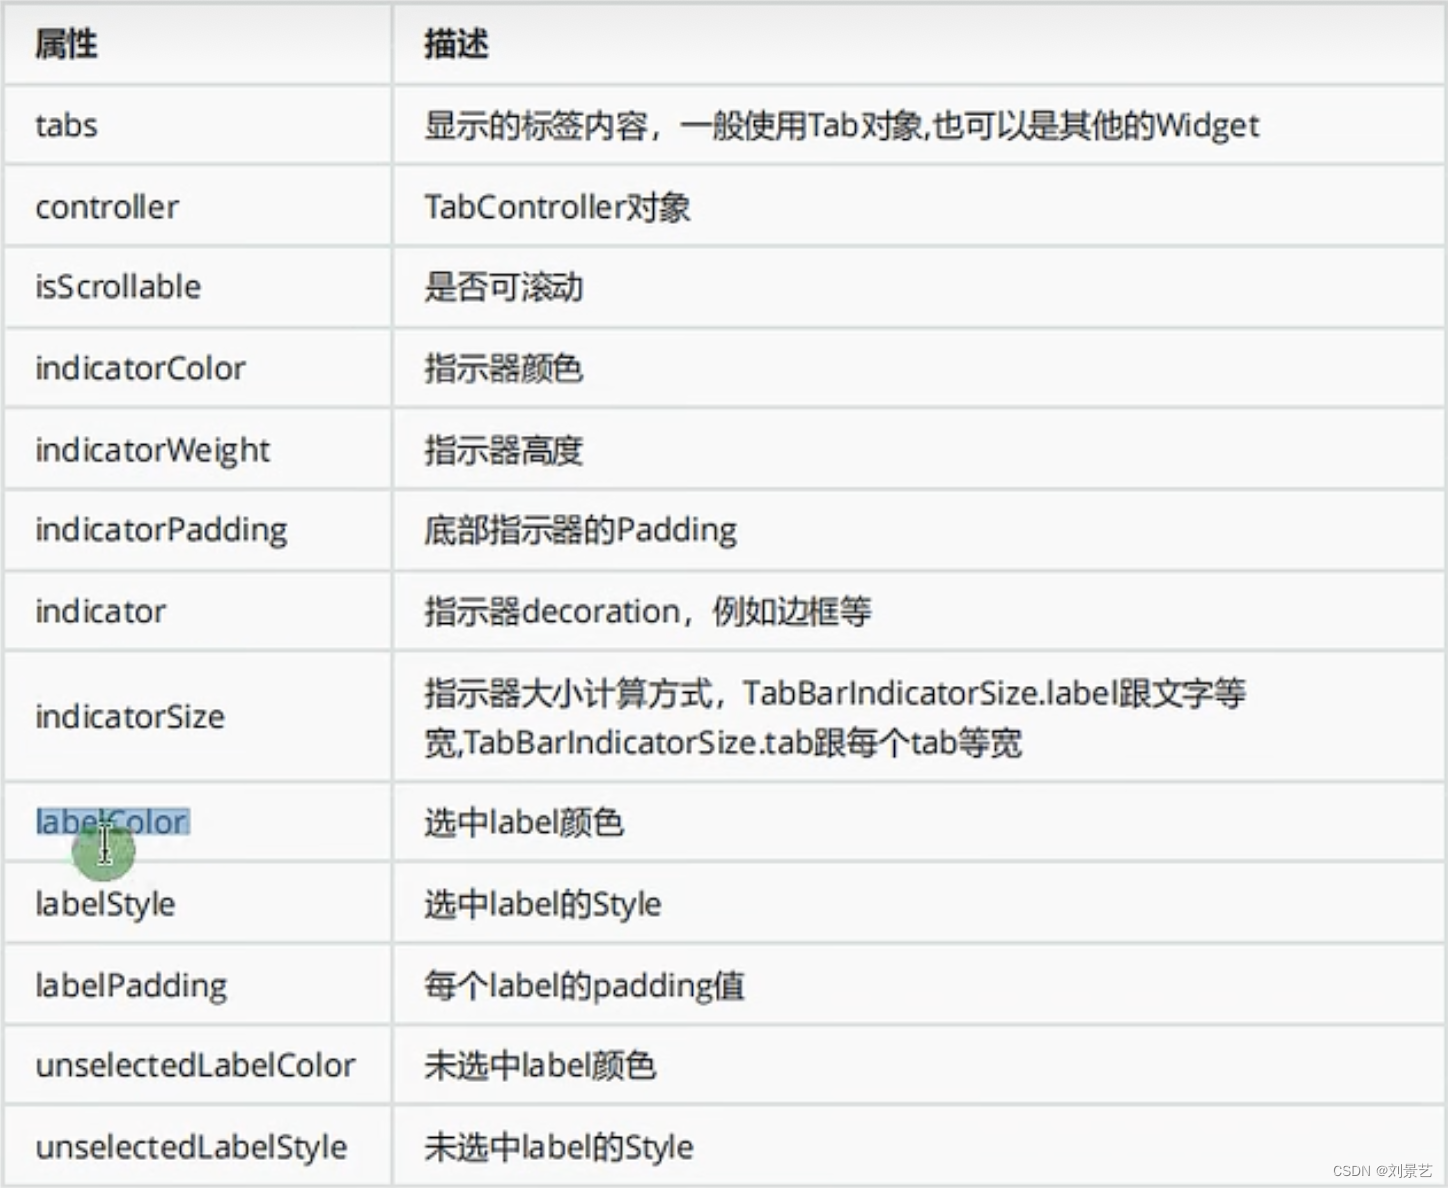
3.TabBar的其他属性概览
试一试
class HomePage extends StatefulWidget {
const HomePage({Key? key}) : super(key: key);
_HomePageState createState() => _HomePageState();
}
class _HomePageState extends State<HomePage>
with SingleTickerProviderStateMixin {
late TabController _tabController;
void initState() {
super.initState();
_tabController = TabController(length: 3, vsync: this);
}
Widget build(BuildContext context) {
return Scaffold(
appBar: AppBar(
title: Text("Flutter demo"),
backgroundColor: Colors.green,
leading: IconButton(
icon: Icon(Icons.person),
onPressed: () {},
),
actions: [
IconButton(icon: Icon(Icons.search), onPressed: () {}),
IconButton(icon: Icon(Icons.menu), onPressed: () {}),
],
bottom: TabBar(
tabs: [Text("推荐"), Text("新闻"), Text("视频")],
controller: _tabController,
isScrollable: true,
indicatorColor: Colors.red,
indicatorWeight: 10,
indicatorSize: TabBarIndicatorSize.tab,
// indicatorPadding: EdgeInsets.all(2),
labelColor: Colors.black,
labelStyle: TextStyle(fontSize: 20),
unselectedLabelColor: Colors.white,
unselectedLabelStyle: TextStyle(fontSize: 10),
),
),
body: TabBarView(
controller: _tabController,
children: [Text("推荐"), Text("新闻"), Text("视频")],
),
);
}
}
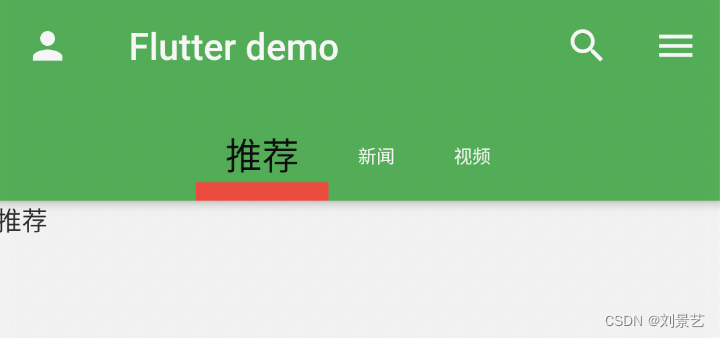
显示效果:


 2505
2505


 被折叠的 条评论
为什么被折叠?
被折叠的 条评论
为什么被折叠?
 到【灌水乐园】发言


