


话不多说,先看效果
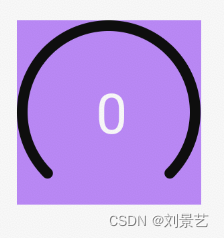
初始状态
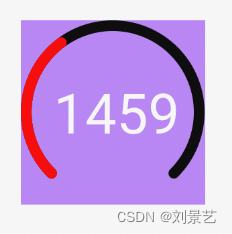
中间动画状态
最终状态
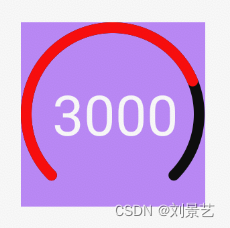
类似一个仪表盘,进度条从0增长到3000。
show you code :
分析图像,我们需要如下属性:
外圈颜色、内圈颜色、弧宽度、数字文本大小、数字文本颜色
<declare-styleable name="QQStepView">
        <attr name="outerColor" format="color"/>
        <attr name="innerColor" format="color"/>
        <attr name="borderWidth" format="dimension"/>
        <attr name="stepTextSize" format="dimension"/>
        <attr name="stepTextColor" format="color"/>
    </declare-styleable>
1.创建一个自定义View : QQStepView,让所有的构造方法都执行到同一个,并且在这个构造方法中去获取xml里设置的属性。
package com.example.view_day01;

import android.content.Context;
import android.content.res.TypedArray;
import android.graphics.Canvas;
import android.graphics.Color;
import android.graphics.Paint;
import android.graphics.Rect;
import android.graphics.RectF;
import android.util.AttributeSet;
import android.util.Log;
import android.view.View;

import androidx.annotation.Nullable;

public class QQStepView extends View {

    private int mOuterColor = Color.GRAY;
    private int mInterColor = Color.RED;
    private int mBorderWidth = 20; //20px
    private int mStepTextSize;
    private int mStepTextColor;

    public QQStepView(Context context) {
        this(context, null);
    }

    public QQStepView(Context context, @Nullable AttributeSet attrs) {
        this(context, attrs, 0);
    }

    public QQStepView(Context context, @Nullable AttributeSet attrs, int defStyleAttr) {
        super(context, attrs, defStyleAttr);
        //获取xml里的属性值
        TypedArray array = context.obtainStyledAttributes(attrs, R.styleable.QQStepView);
        mOuterColor = array.getColor(R.styleable.QQStepView_outerColor, mOuterColor);
        mInterColor = array.getColor(R.styleable.QQStepView_innerColor, mInterColor);
        mBorderWidth = (int) array.getDimension(R.styleable.QQStepView_borderWidth, mBorderWidth);
        mStepTextSize = array.getDimensionPixelSize(R.styleable.QQStepView_stepTextSize, mStepTextSize);
        mStepTextColor = array.getColor(R.styleable.QQStepView_stepTextColor, mStepTextColor);
        //释放资源
        array.recycle();

    }
- 重写onMeasure()方法,确定view的宽高,保证是个正方形
 @Override
    protected void onMeasure(int widthMeasureSpec, int heightMeasureSpec) {
        super.onMeasure(widthMeasureSpec, heightMeasureSpec);

        //宽高不一致,取小的,保证是个正方形
        int width = MeasureSpec.getSize(widthMeasureSpec);
        int height = MeasureSpec.getSize(heightMeasureSpec);

        setMeasuredDimension(width > height ? height : width, width > height ? height : width);
    }
- 重写绘制方法onDraw(Canvas canvas)
绘制就是用Paint在一定区域内Rect绘制到Canvas上
想画什么样的图形就调用Canvas.drawxxx方法
开始画之前,要在构造方法里先初始化画笔
//初始化外部画笔
        mOuterPaint = new Paint();
        mOuterPaint.setAntiAlias(true);
        mOuterPaint.setColor(mOuterColor);
        mOuterPaint.setStrokeWidth(mBorderWidth);//width 是弧的内外扩散的
        mOuterPaint.setStyle(Paint.Style.STROKE);//Fill画笔实心,Stroke描边
        mOuterPaint.setStrokeCap(Paint.Cap.ROUND);//线条尾部设置成圆角

        //初始化内部画笔
        mInnerPaint = new Paint();
        mInnerPaint.setAntiAlias(true);
        mInnerPaint.setColor(mInterColor);
        mInnerPaint.setStrokeWidth(mBorderWidth);//width 是弧的内外扩散的
        mInnerPaint.setStyle(Paint.Style.STROKE);//Fill画笔实心,Stroke描边
        mInnerPaint.setStrokeCap(Paint.Cap.ROUND);

		//画文字
        mTextPaint = new Paint();
        mTextPaint.setAntiAlias(true);
        mTextPaint.setColor(mStepTextColor);
        mTextPaint.setTextSize(mStepTextSize);
准备好画笔后,就可以在onDraw方法里绘制图形了
@Override
    protected void onDraw(Canvas canvas) {
        super.onDraw(canvas);
        int center = getWidth() / 2; //150
        int radius = getWidth() / 2 - mBorderWidth/2; //132  /2达到正切效果
        //会显示不完整,描边有宽度 mBorderWidth, 圆弧边界修圆
        RectF rectF = new RectF(center-radius, center-radius, center+radius, center+radius);
        //画外圆弧、内圆弧、文字 x-left is + | y-down is +
        //canvas.drawRect(rectF, mRectPaint);
        canvas.drawArc(rectF, 135, 270, false, mOuterPaint);

        //画内圆弧,百分比,肯定不能写死,使用者从外面传
        if (mMaxStep == 0) {
            return;
        }
        float sweepAngle = (float) mCurrentStep / mMaxStep;
        canvas.drawArc(rectF, 135, sweepAngle * 270, false, mInnerPaint);

        //画文字
        String stepText = mCurrentStep + "";
        Rect textBounds = new Rect();
        mTextPaint.getTextBounds(stepText, 0, stepText.length(), textBounds);
        //水平偏移dx
        int dx = getWidth()/2 - textBounds.width()/2;
        //基线baseLine
        Paint.FontMetricsInt fontMetricsInt = mTextPaint.getFontMetricsInt();
        int dy = (fontMetricsInt.bottom - fontMetricsInt.top) / 2 - fontMetricsInt.bottom;
        int baseLine = getHeight() / 2 + dy;
        canvas.drawText(stepText, dx, baseLine, mTextPaint);
    }
drawArc是第一次使用
其实很简单
canvas.drawArc(rectF, 135, 270, false, mOuterPaint);
共5个参数
rectF是绘制的区域
135是绘制弧开始的角度(水平向右是0度,顺时针角度增大)
270是扫过的角度
false 是是否绘制中间部分(也就是绘制的效果是弧,还是个封闭的扇形)
mOuterPaint 最后传入一个画笔
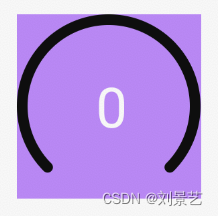
写到这里,就能绘制出初始图形了。
设置好如下属性
<com.example.view_day01.QQStepView
        android:id="@+id/qq_step_view"
        android:layout_width="100dp"
        android:layout_height="100dp"
        android:layout_margin="20dp"
        app:stepTextColor="@color/white"
        app:stepTextSize="30dp"
        app:outerColor="@color/black"
        android:background="@color/purple_200"
        app:borderWidth="6dp"/>
绘制出来的图形如下
4.让图形动起来
想让内圈弧形动起来,就要修改不断的内圈圆弧的绘制角度
public synchronized void setStepMax(int mMaxStep) {
       this.mMaxStep = mMaxStep;
    }

    public synchronized void setCurrentStep(int mCurrentStep) {
        this.mCurrentStep = mCurrentStep;
        //Invalidate the whole view. If the view is visible,
        // onDraw(Canvas) will be called at some point in the future.
        invalidate();
    }
提供两个设置方法,去设置最大值和当前值。
在外部调用这两个方法
qqStepView = findViewById(R.id.qq_step_view);
        qqStepView.setStepMax(4000);

        ValueAnimator valueAnimator = ValueAnimator.ofFloat(0, 3000);
        valueAnimator.setDuration(2000);
        //先快后慢的效果
        valueAnimator.setInterpolator(new DecelerateInterpolator());
        valueAnimator.addUpdateListener(new ValueAnimator.AnimatorUpdateListener() {
            @Override
            public void onAnimationUpdate(ValueAnimator animation) {
                float currentStep = (float) animation.getAnimatedValue();
                qqStepView.setCurrentStep((int)currentStep);
            }
        });
        qqStepView.postDelayed(new Runnable() {
            @Override
            public void run() {
                //延迟1s
                valueAnimator.start();
            }
        }, 1000);
使用了属性动画来生成当前值(2s内从0增长到3000),生成设置给QQStepView。
最后放上完整的自定义View代码
package com.example.view_day01;

import android.content.Context;
import android.content.res.TypedArray;
import android.graphics.Canvas;
import android.graphics.Color;
import android.graphics.Paint;
import android.graphics.Rect;
import android.graphics.RectF;
import android.util.AttributeSet;
import android.util.Log;
import android.view.View;

import androidx.annotation.Nullable;

public class QQStepView extends View {

    private int mOuterColor = Color.GRAY;
    private int mInterColor = Color.RED;
    private int mBorderWidth = 20; //20px
    private int mStepTextSize;
    private int mStepTextColor;

    private Paint mOuterPaint, mInnerPaint, mTextPaint;
    private Paint mRectPaint;

    private int mMaxStep = 0;
    private int mCurrentStep = 0;

    public QQStepView(Context context) {
        this(context, null);
    }

    public QQStepView(Context context, @Nullable AttributeSet attrs) {
        this(context, attrs, 0);
    }

    public QQStepView(Context context, @Nullable AttributeSet attrs, int defStyleAttr) {
        super(context, attrs, defStyleAttr);
        TypedArray array = context.obtainStyledAttributes(attrs, R.styleable.QQStepView);
        mOuterColor = array.getColor(R.styleable.QQStepView_outerColor, mOuterColor);
        mInterColor = array.getColor(R.styleable.QQStepView_innerColor, mInterColor);
        mBorderWidth = (int) array.getDimension(R.styleable.QQStepView_borderWidth, mBorderWidth);
        mStepTextSize = array.getDimensionPixelSize(R.styleable.QQStepView_stepTextSize, mStepTextSize);
        mStepTextColor = array.getColor(R.styleable.QQStepView_stepTextColor, mStepTextColor);
        array.recycle();

        //初始化外部画笔
        mOuterPaint = new Paint();
        mOuterPaint.setAntiAlias(true);
        mOuterPaint.setColor(mOuterColor);
        mOuterPaint.setStrokeWidth(mBorderWidth);//width 是弧的内外扩散的
        mOuterPaint.setStyle(Paint.Style.STROKE);//Fill画笔实心,Stroke描边
        mOuterPaint.setStrokeCap(Paint.Cap.ROUND);

        //初始化内部画笔
        mInnerPaint = new Paint();
        mInnerPaint.setAntiAlias(true);
        mInnerPaint.setColor(mInterColor);
        mInnerPaint.setStrokeWidth(mBorderWidth);//width 是弧的内外扩散的
        mInnerPaint.setStyle(Paint.Style.STROKE);//Fill画笔实心,Stroke描边
        mInnerPaint.setStrokeCap(Paint.Cap.ROUND);

        //画文字
        mTextPaint = new Paint();
        mTextPaint.setAntiAlias(true);
        mTextPaint.setColor(mStepTextColor);
        mTextPaint.setTextSize(mStepTextSize);

        //画背景
        mRectPaint = new Paint();
        mRectPaint.setAntiAlias(true);
        mRectPaint.setColor(Color.BLUE);
    }

    @Override
    protected void onMeasure(int widthMeasureSpec, int heightMeasureSpec) {
        super.onMeasure(widthMeasureSpec, heightMeasureSpec);

        //宽高不一致,取小的,保证是个正方形
        int width = MeasureSpec.getSize(widthMeasureSpec);
        int height = MeasureSpec.getSize(heightMeasureSpec);

        setMeasuredDimension(width > height ? height : width, width > height ? height : width);
    }

    @Override
    protected void onDraw(Canvas canvas) {
        super.onDraw(canvas);
        int center = getWidth() / 2; //150
        int radius = getWidth() / 2 - mBorderWidth/2; //132  /2达到正切效果
        //D/jingyide: width = 300,mBorderWidth = 18
        Log.d("jingyide", "width = " + getWidth() + ",mBorderWidth = " + mBorderWidth);
        //会显示不完整,描边有宽度 mBorderWidth, 圆弧边界修圆
        RectF rectF = new RectF(center-radius, center-radius, center+radius, center+radius);
        //画外圆弧、内圆弧、文字 x-left is + | y-down is +
        //canvas.drawRect(rectF, mRectPaint);
        canvas.drawArc(rectF, 135, 270, false, mOuterPaint);


        //画内圆弧,百分比,肯定不能写死,使用者从外面传
        if (mMaxStep == 0) {
            return;
        }
        float sweepAngle = (float) mCurrentStep / mMaxStep;
        canvas.drawArc(rectF, 135, sweepAngle * 270, false, mInnerPaint);

        //画文字
        String stepText = mCurrentStep + "";
        Rect textBounds = new Rect();
        mTextPaint.getTextBounds(stepText, 0, stepText.length(), textBounds);
        //水平偏移dx
        int dx = getWidth()/2 - textBounds.width()/2;
        //基线baseLine
        Paint.FontMetricsInt fontMetricsInt = mTextPaint.getFontMetricsInt();
        int dy = (fontMetricsInt.bottom - fontMetricsInt.top) / 2 - fontMetricsInt.bottom;
        int baseLine = getHeight() / 2 + dy;
        canvas.drawText(stepText, dx, baseLine, mTextPaint);
    }

    public synchronized void setStepMax(int mMaxStep) {
       this.mMaxStep = mMaxStep;
    }

    public synchronized void setCurrentStep(int mCurrentStep) {
        this.mCurrentStep = mCurrentStep;
        //Invalidate the whole view. If the view is visible,
        // onDraw(Canvas) will be called at some point in the future.
        invalidate();
    }
}


 339
339


 被折叠的 条评论
为什么被折叠?
被折叠的 条评论
为什么被折叠?
 到【灌水乐园】发言


