


4 Shiro
目录
- Shiro 简介
- Shiro- helloworld
- Shiro Subject分析
- SpringBoot 整合shiro 搭建环境
- Shiro 登录拦截
- Shiro用户认证
- Shiro 整合mybatis
- Shiro 请求授权
- Shiro 整合Thymeleaf
Shiro 简介
Apache Shiro是一个强大且易用的Java安全框架,执行身份验证、授权、密码和会话管理。
shiro有三大核心组件
Shiro有三大核心组件,即Subject、SecurityManager和Realm
- Subject: 为认证主体。应用代码直接交互的对象是Subject,Subject代表了当前的用户。包含Principals和Credentials两个信息。
Pricipals:代表身份。可以是用户名、邮件、手机号码等等,用来标识一个登陆主题的身份。
Credentials:代表凭证。常见的有密码、数字证书等等
-
**SecurityManager:**为安全管理员。是Shiro架构的核心。与Subject的所有交互都会委托给SecurityManager, Subject相当于是一个门面,而SecurityManager才是真正的执行者。它负责与Shiro 的其他组件进行交互。
-
Realm:是一个域。充当了Shiro与应用安全数据间的“桥梁”。Shiro从Realm中获取安全数据(如用户、角色、权限),就是说SecurityManager要验证用户身份,那么它需要从Realm中获取相应的用户进行比较,来确定用户的身份是否合法;也需要从Realm得到用户相应的角色、权限,进行验证用户的操作是否能过进行,可以把Realm看成DataSource,即安全数据源。
项目Gitee 地址
https://gitee.com/nutxi/springboot-shiro
public class Quickstart {

    private static final transient Logger log = LoggerFactory.getLogger(Quickstart.class);


    public static void main(String[] args) {

        // The easiest way to create a Shiro SecurityManager with configured
        // realms, users, roles and permissions is to use the simple INI config.
        // We'll do that by using a factory that can ingest a .ini file and
        // return a SecurityManager instance:

        // Use the shiro.ini file at the root of the classpath
        // (file: and url: prefixes load from files and urls respectively):


        // 使用classpath:shiro.ini 来创建一个SecurityManager 实例

        Factory<SecurityManager> factory = new IniSecurityManagerFactory("classpath:shiro.ini");
        SecurityManager securityManager = factory.getInstance();

        // for this simple example quickstart, make the SecurityManager
        // accessible as a JVM singleton.  Most applications wouldn't do this
        // and instead rely on their container configuration or web.xml for
        // webapps.  That is outside the scope of this simple quickstart, so
        // we'll just do the bare minimum so you can continue to get a feel
        // for things.
        SecurityUtils.setSecurityManager(securityManager);

        // Now that a simple Shiro environment is set up, let's see what you can do:

        // get the currently executing user:
        // 得到当前用户
        Subject currentUser = SecurityUtils.getSubject();

        // Do some stuff with a Session (no need for a web or EJB container!!!)
        Session session = currentUser.getSession();
        session.setAttribute("someKey", "aValue");
        String value = (String) session.getAttribute("someKey");
        if (value.equals("aValue")) {
            log.info("Retrieved the correct value! [" + value + "]");
        }

        // let's login the current user so we can check against roles and permissions:

        // 判断用户是否认证
        if (!currentUser.isAuthenticated()) {
        // 通过用户名和密码得到一个 token令牌
            UsernamePasswordToken token = new UsernamePasswordToken("lonestarr", "vespa");
            //记住我
            token.setRememberMe(true);
            try {
            // 执行登录
                currentUser.login(token);
                // 捕获异常
            } catch (UnknownAccountException uae) {
                log.info("There is no user with username of " + token.getPrincipal());
            } catch (IncorrectCredentialsException ice) {
                log.info("Password for account " + token.getPrincipal() + " was incorrect!");
            } catch (LockedAccountException lae) {
                log.info("The account for username " + token.getPrincipal() + " is locked.  " +
                        "Please contact your administrator to unlock it.");
            }
            // ... catch more exceptions here (maybe custom ones specific to your application?
            catch (AuthenticationException ae) {
                //unexpected condition?  error?
            }
        }

        //say who they are:
        //print their identifying principal (in this case, a username):
        log.info("User [" + currentUser.getPrincipal() + "] logged in successfully.");

        //test a role:
        //当前用户是否有角色
        if (currentUser.hasRole("schwartz")) {
            log.info("May the Schwartz be with you!");
        } else {
            log.info("Hello, mere mortal.");
        }

        //test a typed permission (not instance-level)
        if (currentUser.isPermitted("lightsaber:wield")) {
            log.info("You may use a lightsaber ring.  Use it wisely.");
        } else {
            log.info("Sorry, lightsaber rings are for schwartz masters only.");
        }

        //a (very powerful) Instance Level permission:
        if (currentUser.isPermitted("winnebago:drive:eagle5")) {
            log.info("You are permitted to 'drive' the winnebago with license plate (id) 'eagle5'.  " +
                    "Here are the keys - have fun!");
        } else {
            log.info("Sorry, you aren't allowed to drive the 'eagle5' winnebago!");
        }

        //all done - log out!
        currentUser.logout();

        System.exit(0);
    }
}
- SecurityUtils.setSecurityManager(securityManager); 设置SecurityManager
- SecurityUtils.getSubject(); 得到当前用户
- currentUser.getPrincipal() 获得用户认证的身份信息,包括用户名,密码等
- currentUser.isAuthenticated() 用户是否认证
- currentUser.login(token); // 执行登录
- currentUser.isPermitted 用户是否有权限
- currentUser.hasRole(“schwartz”) 用户是否有角色
- currentUser.logout(); 注销当前用户
SpringBoot 整合shiro 搭建环境
1 导入依赖
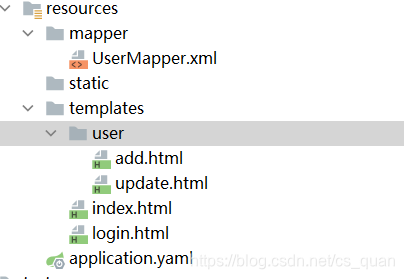
2 创建页面以及对应的controller
3 创建ShiroConfig 配置类
- 首先创建自定的Realme类
- 继承AuthorizingRealm
- 重写 授权和认真方法
- 在配置类中注册bean
- 创建DefaultWebSecurityManager
- 创建ShiroFilterFactoryBean
Gitee 地址
1 导入依赖
 		<dependency>
            <groupId>org.apache.shiro</groupId>
            <artifactId>shiro-spring</artifactId>
            <version>1.4.2</version>
        </dependency>

          <dependency>
            <groupId>org.apache.shiro</groupId>
            <artifactId>shiro-core</artifactId>
            <version>1.7.1</version>
            <scope>compile</scope>
        </dependency>
2 创建页面以及对应的controller
@Controller
public class RouterController {
    @RequestMapping({"/", "/index"})
    public String toIndex(Model model){
        model.addAttribute("msg", "hello");
        return "index";
    }

    @RequestMapping("/user/add")
    public String add(){
        return "/user/add";
    }

    @RequestMapping("/user/update")
    public String update(){
        return "/user/update";
    }
[外链图片转存失败,源站可能有防盗链机制,建议将图片保存下来直接上传(img-xzBLXJx1-1622186514643)(C:\Users\liujian\AppData\Roaming\Typora\typora-user-images\image-20210528145009983.png)]
3 创建ShiroConfig 配置类
- 创建自定义的Realm UserRealm
public class UserRealm   extends AuthorizingRealm{
    @Autowired
    private UserService userService;
    //授权
    @Override
    protected AuthorizationInfo doGetAuthorizationInfo(PrincipalCollection principals) {
        System.out.println("执行了授权");
     	return null;
    }

    //认证
    @Override
    protected AuthenticationInfo doGetAuthenticationInfo(AuthenticationToken token) throws AuthenticationException {
        System.out.println("执行了认证");

		return null;
    }
}
- 注册bean
@Controller
public class Shiroconfig {


    @Bean
    public ShiroFilterFactoryBean getShiroFilterBean(@Qualifier("securityManager") DefaultSecurityManager defaultSecurityManager){
        ShiroFilterFactoryBean bean = new ShiroFilterFactoryBean();
        //1 设置安全管理器
        bean.setSecurityManager(defaultSecurityManager);
        return bean;
    }


    @Bean(name="securityManager")
    public DefaultSecurityManager getDefaultSecurityManager(@Qualifier("userRealm") UserRealm userRealm){
        DefaultWebSecurityManager securityManager = new DefaultWebSecurityManager();
        //关联UserRealm
        securityManager.setRealm(userRealm);
        return securityManager;

    }


    @Bean(name = "userRealm")
    public UserRealm userRealm(){
        return  new UserRealm();
    }
}
搭建环境成功
3 Shiro 登录拦截
添加shiro内置过滤器
- anon 无需认证即可访问
- authc : 必须认证才能访问,即需要登录
- user 必须拥有 记住我可能才能用
- perms 拥有对某个资源的权限才能用
- role 拥有某个角色权限才能访问
1 创建一个hashMap 存储每个路径,以及对应的过滤名称
  Map<String,String> filterMap = new LinkedHashMap<>();
        //拦截
        filterMap.put("/user/add","anon");
        filterMap.put("/user/update","authc");
        //也可使用通配符*
        //filterMap.put("/user/*","authc");
2 调用ShiroFilterFactoryBean 对象 的setFilterChainDefinitionMap() 传递filterMap
bean.setFilterChainDefinitionMap(filterMap);
3 添加login.html
4 配置跳转Login.html 的路径
  @RequestMapping("/toLogin")
    public String toLogin(){
        return "login";
    }
5 在shiroConfig 中设置登录路径
        //若访问时用户未认证,则跳转至登录页面
        bean.setLoginUrl("/toLogin");
测试,访问/user/update 跳转到登录页面,成功
4 Shiro 用户认证
1 创建一个/login 的路径映射,点击登录后,执行登录方法
    @RequestMapping("/login")
    public String login(String username,String password,Model model){
        //1 获取当前用户
        Subject subject = SecurityUtils.getSubject();
        //2 封装用户的登录数据
        UsernamePasswordToken token = new UsernamePasswordToken(username, password);

        try {
        //登录,自动验证用户名和密码
            subject.login(token);
            return "index";
        }catch (UnknownAccountException e){ //用户名不存在
            model.addAttribute("msg","用户名不存在!");
            return "login";
        }catch (IncorrectCredentialsException e){
            model.addAttribute("msg","密码错误!");
            return "login";
        } catch (AuthenticationException e) {
            e.printStackTrace();
            return "login";
        }

    }
2 点击登录时候也会经过自定义userRealm 的授权方法,可以在这里进行判断
@Override
    protected AuthenticationInfo doGetAuthenticationInfo(AuthenticationToken token) throws AuthenticationException {
        System.out.println("执行了授权");
        //从数据库中获取数据
        String username = "jian";
        String password = "123456";

        UsernamePasswordToken userToken = (UsernamePasswordToken) token;


        if (!userToken.getUsername().equals(username)){
            return null; //抛出异常 UnknownAccountException
        }
        //密码认证,shiro做~
        return new SimpleAuthenticationInfo("",password,"");
    }
- SimpleAuthenticationInfo(Object principal, Object credentials, String realmName)
测试,访问/user/update 跳转到登录页面,登录后成功跳转
5 Shiro 整合mybatis
1 导入依赖 连接相应的数据库
<!--        导入druid 所需要的依赖-->
        <dependency>
            <groupId>org.apache.shiro</groupId>
            <artifactId>shiro-spring</artifactId>
            <version>1.4.2</version>
        </dependency>
        <dependency>
            <groupId>com.alibaba</groupId>
            <artifactId>druid</artifactId>
            <version>1.2.6</version>
        </dependency>
        <dependency>
            <groupId>log4j</groupId>
            <artifactId>log4j</artifactId>
            <version>1.2.17</version>
        </dependency>
        <dependency>
            <groupId>org.springframework.boot</groupId>
            <artifactId>spring-boot-starter-jdbc</artifactId>
        </dependency>
<dependency>
            <groupId>mysql</groupId>
            <artifactId>mysql-connector-java</artifactId>
            <scope>runtime</scope>
        </dependency>
        <!--        导入druid 所需要的依赖-->


            <!--    导入整合mybatis需要的依赖-->
        <dependency>
            <groupId>org.projectlombok</groupId>
            <artifactId>lombok</artifactId>
        </dependency>
        <!-- https://mvnrepository.com/artifact/org.mybatis.spring.boot/mybatis-spring-boot-starter -->
        <dependency>
            <groupId>org.mybatis.spring.boot</groupId>
            <artifactId>mybatis-spring-boot-starter</artifactId>
            <version>2.1.4</version>
        </dependency>
        <!--    导入整合mybatis需要的依赖-->
2 遍写application.yaml 配置Druid 数据源
spring:
  datasource:
    username: root
    password: root
    driver-class-name: com.mysql.cj.jdbc.Driver
    url: jdbc:mysql://localhost:3306/mybatis?serverTimezone=Asia/Shanghai
    type: com.alibaba.druid.pool.DruidDataSource
    #Spring Boot 默认是不注入这些属性值的,需要自己绑定
    #druid 数据源专有配置
    initialSize: 5
    minIdle: 5
    maxActive: 20
    maxWait: 60000
    timeBetweenEvictionRunsMillis: 60000
    minEvictableIdleTimeMillis: 300000
    validationQuery: SELECT 1 FROM DUAL
    testWhileIdle: true
    testOnBorrow: false
    testOnReturn: false
    poolPreparedStatements: true

    #配置监控统计拦截的filters,stat:监控统计、log4j:日志记录、wall:防御sql注入
    #如果允许时报错  java.lang.ClassNotFoundException: org.apache.log4j.Priority
    #则导入 log4j 依赖即可,Maven 地址:https://mvnrepository.com/artifact/log4j/log4j
    filters: stat,wall,log4j
    maxPoolPreparedStatementPerConnectionSize: 20
    useGlobalDataSourceStat: true
    connectionProperties: druid.stat.mergeSql=true;druid.stat.slowSqlMillis=500
3 编写Druid 的配置类
- 添加DruidDataSource 到组件中,并绑定配置文件中的属性
- 配置监控后台的servlet 使用 Spring Boot 的注册 Servlet方式
- 配置Druid web监控filter 过滤器,过滤哪些请求从而不统计
@Configuration
public class DruidConfig {


    @ConfigurationProperties(prefix = "spring.datasource")
    @Bean
    public DataSource druidDataSource(){
        return new DruidDataSource();
    }


    // 配置Druid 监控后台管理的Servlet
    //内置 Servlet 容器时没有web.xml文件,所以使用 Spring Boot 的注册 Servlet 方式
    @Bean
    public ServletRegistrationBean statViewServlet(){
        ServletRegistrationBean bean = new ServletRegistrationBean(new StatViewServlet());
        Map<String, String> initParams = new HashMap<>();
        // 这些参数可以在 com.alibaba.druid.support.http.StatViewServlet
        // 的父类 com.alibaba.druid.support.http.ResourceServlet 中找到
        //1 添加访问路径
        bean.addUrlMappings("/druid/*");

        //2  定义后台管理界面的登录账号
        initParams.put("loginUsername", "admin"); //后台管理界面的登录账号
        initParams.put("loginPassword", "123456"); //后台管理界面的登录密码

        //3 后台允许谁可以访问
        //initParams.put("allow", "localhost"):表示只有本机可以访问
        //initParams.put("allow", ""):为空或者为null时,表示允许所有访问
        initParams.put("allow", "");

        //后台拒绝谁访问
        //initParams.put("kuangshen", "192.168.1.20");表示禁止此ip访问

        //设置初始化参数
        bean.setInitParameters(initParams);
        return bean;
    }

    //配置Druid web监控filter 过滤器

    public FilterRegistrationBean webStatFilter(){
        FilterRegistrationBean bean = new FilterRegistrationBean();
        bean.setFilter(new WebStatFilter());

        //  //exclusions:设置哪些请求进行过滤排除掉,从而不进行统计

        Map<String, String> initParams = new HashMap<>();
        initParams.put("exclusions", "*.js,*.css,/druid/*,/jdbc/*");
        bean.setInitParameters(initParams);
        return bean;
    }
}
4 整合mybatis
1 编写配置文件application.yaml
mybatis:
  mapper-locations: classpath:mapper/*.xml
  type-aliases-package: com.shiro.pojo
2 resources 添加mapper 目录
3 编写pojo类
@Data
@AllArgsConstructor
@NoArgsConstructor
public class User {

    private Integer id;
    private String name;
    private String pwd;

}
3 编写mapper 层
@Repository
@Mapper
public interface UserMapper {
    User queryUserByName(String name);

}
- @Mapper 可以自动装配dao层,可替代启动时自动扫描
- @Repository 注册bean
4 编写UserMapper.xml 文件
<?xml version="1.0" encoding="UTF-8" ?>
<!DOCTYPE mapper
        PUBLIC "-//mybatis.org//DTD Mapper 3.0//EN"
        "http://mybatis.org/dtd/mybatis-3-mapper.dtd">
<mapper namespace="com.shiro.mapper.UserMapper">
    <select id="queryUserByName" resultType="User" parameterType="String">
        select * from user where name = #{name}
    </select>

</mapper>
5 编写service层
@Service("userService")
public class UserServiceImpl implements UserService {
    @Autowired
    private UserMapper userMapper;


    @Override
    public User queryUserByName(String name) {
        return userMapper.queryUserByName(name);
    }
}
6 测试 看能否根据名字查询到用户
@SpringBootTest
class SpringbootShiroApplicationTests {


    @Autowired
    public UserService userService;

    @Test
    void contextLoads() {
        System.out.println(userService.queryUserByName("狂神"));
    }

}
查询成功
7 将UserRealm 类中认证的数据替换为从底层连接数据库的数据
 @Override
    protected AuthenticationInfo doGetAuthenticationInfo(AuthenticationToken token) throws AuthenticationException {
        System.out.println("执行了授权");


        UsernamePasswordToken userToken = (UsernamePasswordToken) token;
        User user = userService.queryUserByName(userToken.getUsername());
        if (user == null){
            return null;
        }

        //密码认证,shiro做~
        return new SimpleAuthenticationInfo("",user.getPwd(),"");
    }
8 启动项目测试,测试成功
6 Shiro整合Thymeleaf
1 导入依赖
   <dependency>
            <groupId>org.thymeleaf</groupId>
            <artifactId>thymeleaf-spring5</artifactId>
            <version>3.0.11.RELEASE</version>
        </dependency>
        <dependency>
            <groupId>org.thymeleaf.extras</groupId>
            <artifactId>thymeleaf-extras-java8time</artifactId>
            <version>3.0.4.RELEASE</version>
        </dependency>
        <dependency>
            <groupId>com.github.theborakompanioni</groupId>
            <artifactId>thymeleaf-extras-shiro</artifactId>
            <version>2.0.0</version>
        </dependency>
2 在ShiroConfig添加整合thymeleaf
//整合ShiroDialect:用来整合shiro thymeleaf
    @Bean
    public ShiroDialect getShiroDialect(){
        return new ShiroDialect();
    }
添加shiro的内置过滤器
  //添加shiro的内置过滤器
        /*
        anon: 无需认证即可访问
        authc: 必须认证才能用
        user: 必须拥有 “记住我” 功能才能用
        perms: 拥有对某个资源的权限才能用
        role: 拥有某个角色权限才能访问
        */

        Map<String,String> filterMap = new LinkedHashMap<>();
        //拦截
        filterMap.put("/user/add","perms[user:add]");
        filterMap.put("/user/update","perms[user:update]");
        //也可使用通配符*
        //filterMap.put("/user/*","authc");

        bean.setFilterChainDefinitionMap(filterMap);
3 使用thymeleaf重写index登陆页面
<!DOCTYPE html>
<html lang="en" xmlns:th="http://www.thymeleaf.org" xmlns:shiro=http://www.pollix.at/thymeleaf/shiro>
<head>
    <meta charset="UTF-8">
    <title>Title</title>
</head>
<body>
<h>首页</h>

<!--/*@thymesVar id="msg" type=""*/-->
<p th:text="${msg}"></p>
<div th:if="${session.user == null}">
    <a th:href="@{/toLogin}">登录</a>
</div>

<div shiro:hasPermission="user:add">
    <a th:href="@{/user/add}">add</a>
</div>
<div shiro:hasPermission="user:update">
    <a th:href="@{/user/update}">update</a>
</div>


</body>
</html>
4 UserRealm添加session
 //认证
    @Override
    protected AuthenticationInfo doGetAuthenticationInfo(AuthenticationToken token) throws AuthenticationException {
        System.out.println("执行了认证");


        UsernamePasswordToken userToken = (UsernamePasswordToken) token;
        User user = userService.queryUserByName(userToken.getUsername());
        if (user == null){
            return null;
        }
        Subject subject = SecurityUtils.getSubject();
        Session session = subject.getSession();
        session.setAttribute("user",user);


        //密码认证,shiro做~
        return new SimpleAuthenticationInfo(user,user.getPwd(),"");
    }
5 测试没有问题


 1003
1003


 被折叠的 条评论
为什么被折叠?
被折叠的 条评论
为什么被折叠?
 到【灌水乐园】发言


