


大家好,在机器学习模型中,如果模型的参数太多,而训练样本又太少,训练出来的模型很容易产生过拟合的现象。在训练神经网络时,过拟合具体表现在模型训练数据损失函数较小,预测准确率较高,但是在测试数据上损失函数比较大,预测准确率较低。Dropout可以比较有效的缓解过拟合的发生,在一定程度上达到正则化的效果。
1.机器学习中的Dropout正则化
Dropout正则化是机器学习领域中一种有效的技术,通过随机丢弃神经网络中的某些单元,实现对多个不同网络架构的并行训练。
这种方法对于减少模型在训练过程中的过拟合现象非常关键,有助于提升模型的泛化能力。

深度网络
2.在PyTorch模型中集成Dropout
要在PyTorch模型中加入Dropout正则化,可以使用torch.nn.Dropout类来实现。这个类需要一个Dropout率作为输入参数,表示神经元被关闭的可能性,这可以应用于任何非输出层。
self.dropout = nn.Dropout(0.25)
3.观察Dropout对模型性能的影响
为了研究Dropout的效果,这里将训练一个用于图像分类的模型。最初,训练一个经过正则化的网络,然后是一个没有Dropout正则化的网络。两个模型都将在Cifar-10数据集上训练8个周期。
步骤1:首先,将导入需要实现网络的依赖项和库。
import torch
from torch import nn
from torch import optim
from torch.nn import functional as F
import torchvision
from torchvision import datasets, transforms
from torch.utils.data import DataLoader

import matplotlib.pyplot as plt
import numpy as np

device = torch.device("cuda:0" if torch.cuda.is_available() else "cpu")
print(device)
步骤2:将加载数据集并准备数据加载器。
BATCH_SIZE = 32

transform = transforms.Compose(
    [transforms.ToTensor(),
     transforms.Normalize((0.5, 0.5, 0.5), (0.5, 0.5, 0.5))])

trainset = torchvision.datasets.CIFAR10(root="./data", train=True,
                                        download=True, transform=transform)
trainloader = torch.utils.data.DataLoader(trainset, batch_size=BATCH_SIZE,
                                          shuffle=True, num_workers=2)

testset = torchvision.datasets.CIFAR10(root="./data", train=False,
                                       download=True, transform=transform)
testloader = torch.utils.data.DataLoader(testset, batch_size=BATCH_SIZE,
                                         shuffle=False, num_workers=2)

CLASS_NAMES = ("plane", "car", "bird", "cat",
               "deer", "dog", "frog", "horse", "ship", "truck")
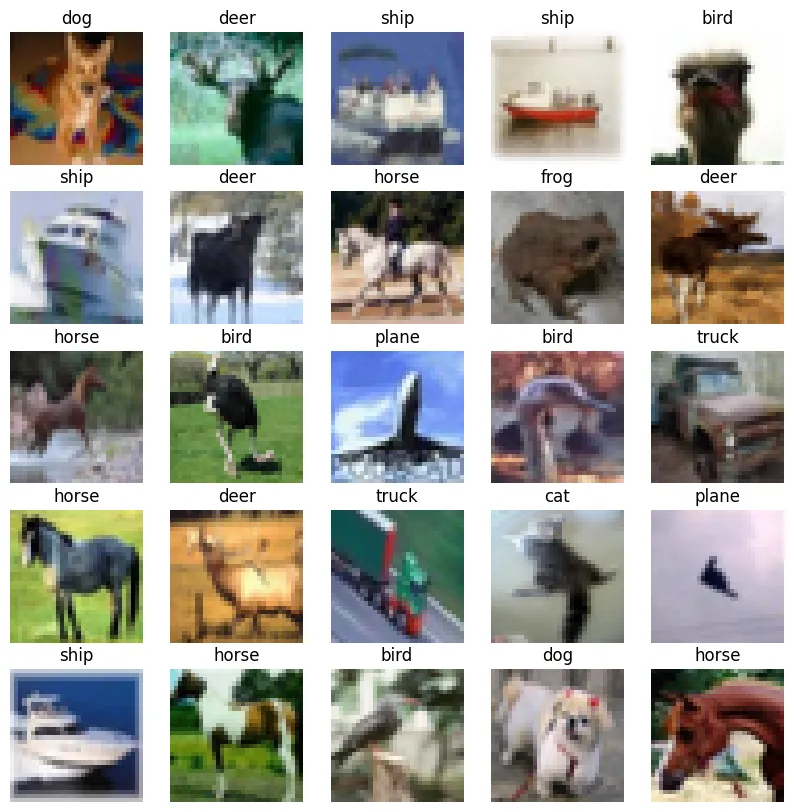
步骤3:加载并可视化一些数据
def show_batch(image_batch, label_batch):
    plt.figure(figsize=(10,10))
    for n in range(25):
        ax = plt.subplot(5,5,n+1)
        img = image_batch[n] / 2 + 0.5     # 取消归一化
        img = img.numpy()
        plt.imshow(np.transpose(img, (1, 2, 0)))
        plt.title(CLASS_NAMES[label_batch[n]])
        plt.axis("off")
sample_images, sample_labels = next(iter(trainloader))
show_batch(sample_images, sample_labels)
输出:
步骤4:在Dropout正则化中实现网络
class Net(nn.Module):
    def __init__(self, input_shape=(3,32,32)):
        super(Net, self).__init__()

        self.conv1 = nn.Conv2d(3, 32, 3)
        self.conv2 = nn.Conv2d(32, 64, 3)
        self.conv3 = nn.Conv2d(64, 128, 3)

        self.pool = nn.MaxPool2d(2,2)

        n_size = self._get_conv_output(input_shape)

        self.fc1 = nn.Linear(n_size, 512)
        self.fc2 = nn.Linear(512, 10)

        self.dropout = nn.Dropout(0.25)

    def _get_conv_output(self, shape):
        batch_size = 1
        input = torch.autograd.Variable(torch.rand(batch_size, *shape))
        output_feat = self._forward_features(input)
        n_size = output_feat.data.view(batch_size, -1).size(1)
        return n_size

    def _forward_features(self, x):
        x = self.pool(F.relu(self.conv1(x)))
        x = self.pool(F.relu(self.conv2(x)))
        x = self.pool(F.relu(self.conv3(x)))
        return x

    def forward(self, x):
        x = self._forward_features(x)
        x = x.view(x.size(0), -1)
        x = self.dropout(x)
        x = F.relu(self.fc1(x))
        x = self.dropout(x)
        x = self.fc2(x)
        return x
步骤5:实现训练
def train(model, device, train_loader, optimizer, criterion, epoch, steps_per_epoch=20):
    # 将模型切换到训练模式。这对于像dropout、batchnorm等在训练和评估模式下表现不同的层是必要的
    model.train()

    train_loss = 0
    train_total = 0
    train_correct = 0

    # 我们循环遍历数据迭代器,并将输入数据提供给网络并调整权重。
    for batch_idx, (data, target) in enumerate(train_loader, start=0):

        # 从训练数据集中加载输入特征和标签
        data, target = data.to(device), target.to(device)

        # 将所有可学习权重参数的梯度重置为0
        optimizer.zero_grad()

        # 前向传播:传递训练数据集中的图像数据,预测图像所属的类别(在本例中为0-9)
        output = model(data)

        # 定义我们的损失函数,并计算损失
        loss = criterion(output, target)
        train_loss += loss.item()

        scores, predictions = torch.max(output.data, 1)
        train_total += target.size(0)
        train_correct += int(sum(predictions == target))

        # 将所有可学习权重参数的梯度重置为0
        optimizer.zero_grad()

        # 反向传播:计算损失相对于模型参数的梯度
        loss.backward()

        # 更新神经网络权重
        optimizer.step()

    acc = round((train_correct / train_total) * 100, 2)
    print("Epoch [{}], Loss: {}, Accuracy: {}".format(epoch, train_loss/train_total, acc), end="")
步骤6:实现测试函数
def test(model, device, test_loader, criterion, classes):
    # 将模型切换到评估模式。这对于像dropout、batchnorm等在训练和评估模式下表现不同的层是必要的
    model.eval()

    test_loss = 0
    test_total = 0
    test_correct = 0

    example_images = []
    with torch.no_grad():
        for data, target in test_loader:
            # 从测试数据集中加载输入特征和标签
            data, target = data.to(device), target.to(device)

            # 进行预测:传递测试数据集中的图像数据,预测图像所属的类别(在本例中为0-9)
            output = model(data)

            # 计算损失,累加批次损失
            test_loss += criterion(output, target).item()

            scores, predictions = torch.max(output.data, 1)
            test_total += target.size(0)
            test_correct += int(sum(predictions == target))

    acc = round((test_correct / test_total) * 100, 2)
    print("Test_loss: {}, Test_accuracy: {}".format(test_loss/test_total, acc))
步骤7:初始化网络的损失和优化器
net = Net().to(device)
print(net)

criterion = nn.CrossEntropyLoss()
optimizer = optim.Adam(net.parameters())
输出:
Net(
  (conv1): Conv2d(3, 32, kernel_size=(3, 3), stride=(1, 1))
  (conv2): Conv2d(32, 64, kernel_size=(3, 3), stride=(1, 1))
  (conv3): Conv2d(64, 128, kernel_size=(3, 3), stride=(1, 1))
  (pool): MaxPool2d(kernel_size=2, stride=2, padding=0, dilation=1, ceil_mode=False)
  (fc1): Linear(in_features=512, out_features=512, bias=True)
  (fc2): Linear(in_features=512, out_features=10, bias=True)
  (dropout): Dropout(p=0.25, inplace=False)
)
步骤8:开始训练
for epoch in range(8):
    train(net, device, trainloader, optimizer, criterion, epoch)
    test(net, device, testloader, criterion, CLASS_NAMES)

print("Finished Training")
输出:
Epoch [0], Loss: 0.0461193907892704, Accuracy: 45.45 Test_loss: 0.036131812924146654, Test_accuracy: 58.58
Epoch [1], Loss: 0.03446852257728577, Accuracy: 60.85 Test_loss: 0.03089196290373802, Test_accuracy: 65.27
Epoch [2], Loss: 0.029333480607271194, Accuracy: 66.83 Test_loss: 0.027052838513255118, Test_accuracy: 70.41
Epoch [3], Loss: 0.02650276515007019, Accuracy: 70.21 Test_loss: 0.02630699208676815, Test_accuracy: 70.99
Epoch [4], Loss: 0.024451716771125794, Accuracy: 72.41 Test_loss: 0.024404651895165445, Test_accuracy: 73.03
Epoch [5], Loss: 0.022718262011408807, Accuracy: 74.35 Test_loss: 0.023125074282288553, Test_accuracy: 74.86
Epoch [6], Loss: 0.021408387248516084, Accuracy: 75.76 Test_loss: 0.023151200053095816, Test_accuracy: 74.43
Epoch [7], Loss: 0.02033562403023243, Accuracy: 76.91 Test_loss: 0.023537022879719736, Test_accuracy: 73.93
Finished Training
4.没有Dropout正则化的网络
在这里将构建相同的网络,但是没有dropout层。在相同的数据集和周期数上训练网络,并评估Dropout对网络性能的影响,使用相同的训练和测试函数。
步骤1:实现网络
class Net(nn.Module):
    def __init__(self, input_shape=(3,32,32)):
        super(Net, self).__init__()

        self.conv1 = nn.Conv2d(3, 32, 3)
        self.conv2 = nn.Conv2d(32, 64, 3)
        self.conv3 = nn.Conv2d(64, 128, 3)

        self.pool = nn.MaxPool2d(2,2)

        n_size = self._get_conv_output(input_shape)

        self.fc1 = nn.Linear(n_size, 512)
        self.fc2 = nn.Linear(512, 10)

    def _get_conv_output(self, shape):
        batch_size = 1
        input = torch.autograd.Variable(torch.rand(batch_size, *shape))
        output_feat = self._forward_features(input)
        n_size = output_feat.data.view(batch_size, -1).size(1)
        return n_size

    def _forward_features(self, x):
        x = self.pool(F.relu(self.conv1(x)))
        x = self.pool(F.relu(self.conv2(x)))
        x = self.pool(F.relu(self.conv3(x)))
        return x

    def forward(self, x):
        x = self._forward_features(x)
        x = x.view(x.size(0), -1)
        x = F.relu(self.fc1(x))
        x = self.fc2(x)
        return x
步骤2:损失和优化器
net = Net().to(device)
print(net)

criterion = nn.CrossEntropyLoss()
optimizer = optim.Adam(net.parameters())
输出:
Net(
  (conv1): Conv2d(3, 32, kernel_size=(3, 3), stride=(1, 1))
  (conv2): Conv2d(32, 64, kernel_size=(3, 3), stride=(1, 1))
  (conv3): Conv2d(64, 128, kernel_size=(3, 3), stride=(1, 1))
  (pool): MaxPool2d(kernel_size=2, stride=2, padding=0, dilation=1, ceil_mode=False)
  (fc1): Linear(in_features=512, out_features=512, bias=True)
  (fc2): Linear(in_features=512, out_features=10, bias=True)
)
步骤3:开始训练
for epoch in range(8):
    train(net, device, trainloader, optimizer, criterion, epoch)
    test(net, device, testloader, criterion, CLASS_NAMES)

print("Finished Training")
输出:
Epoch [0], Loss: 0.04425342482566833, Accuracy: 48.29 Test_loss: 0.03506121407747269, Test_accuracy: 59.93
Epoch [1], Loss: 0.0317487561249733, Accuracy: 63.97 Test_loss: 0.029791217082738877, Test_accuracy: 66.4
Epoch [2], Loss: 0.026000032302737237, Accuracy: 70.83 Test_loss: 0.027046055325865747, Test_accuracy: 69.97
Epoch [3], Loss: 0.022179243130385877, Accuracy: 75.11 Test_loss: 0.02481114484965801, Test_accuracy: 72.95
Epoch [4], Loss: 0.01933788091301918, Accuracy: 78.26 Test_loss: 0.024382170912623406, Test_accuracy: 73.55
Epoch [5], Loss: 0.016771901984512807, Accuracy: 81.04 Test_loss: 0.024696413831412793, Test_accuracy: 73.53
Epoch [6], Loss: 0.014588635778725148, Accuracy: 83.41 Test_loss: 0.025593858751654625, Test_accuracy: 73.94
Epoch [7], Loss: 0.01255791916936636, Accuracy: 85.94 Test_loss: 0.026889967443048952, Test_accuracy: 73.69
Finished Training


 1207
1207

 被折叠的 条评论
为什么被折叠?
被折叠的 条评论
为什么被折叠?
 到【灌水乐园】发言


