


Xinference与Langchain-chatchat-0.2.10
简介
本文主要借助大模型运行平台Xinference与本地知识库问答应用搭建工具实现在本地搭建一个知识库问答应用。后续将主要基于0.12.3版本的Xinference与0.2.10版本的Langchain-chatchat进行本地知识库的搭建。
Xinference
Xorbits Inference (Xinference) 是一个开源平台,用于简化各种 AI 模型的运行和集成。借助 Xinference,您可以使用任何开源 LLM、嵌入模型和多模态模型在云端或本地环境中运行推理,并创建强大的 AI 应用。
Langchain-chatchat
Langchain-Chatchat 一种利用 langchain 思想实现的基于本地知识库的问答应用,目标期望建立一套对中文场景与开源模型支持友好、可离线运行的知识库问答解决方案。
部署Xinference
主要采用docker部署方式对Xinference进行部署。
准备工作
-
Xinference 使用 GPU 加速推理,该镜像需要在有 GPU 显卡并且安装 CUDA 的机器上运行。
-
保证 CUDA 在机器上正确安装。可以使用 nvidia-smi 检查是否正确运行。
-
镜像中的 CUDA 版本是 12.1 ,推荐机器上的版本与之保持一致。如果不一致,需要保证CUDA 版本在 11.8 与 12.2 之间。
Docker 镜像拉取
docker pull xprobe/xinference:v0.12.3
初次启动
为了方便后续使用过程中修改代码,通过初次启动容器,将容器内的代码拷贝到主机,后续通过挂载的方式,将代码(修改后)挂载到容器内。
启动命令:
docker run -e XINFERENCE_MODEL_SRC=modelscope -p 9998:9997 --gpus all xprobe/xinference:v<your_version> xinference-local -H 0.0.0.0 --log-level debug
启动成功之后,将容器内的/opt/conda/lib/python3.10/site-packages/xinference拷贝出来,放在你自己的部署目录下</your/home/path>。
创建docker-compose文件
进入你自己的部署目录</your/home/path>,创建docker-compose-xinference.yaml,用于启动xinference容器。
version: '3.9'

services:
  xinference:
    image: xprobe/xinference:v0.12.3
    container_name: xinference
    shm_size: 1gb
    restart: always
    command: xinference-local -H 0.0.0.0 --log-level debug
    ports: # 不使用 host network 时可打开.
     - "9998:9997"
    # 模型源更改为 ModelScope, 默认为 HuggingFace
    environment:
      - XINFERENCE_MODEL_SRC=modelscope
    # network_mode: "host"
    # 将本地路径(~/xinference)挂载到容器路径(/root/.xinference)中,
    # 详情见: https://inference.readthedocs.io/zh-cn/latest/getting_started/using_docker_image.html
    volumes:
      - </your/home/path>/xinference:/root/.xinference
      - </your/home/path>/xinference/cache/huggingface:/root/.cache/huggingface
      - </your/home/path>/xinference/cache/modelscope:/root/.cache/modelscope
      - </your/home/path>/xcode/xinference:/opt/conda/lib/python3.10/site-packages/xinference    #将拷贝出来的代码挂载到容器内
      - /rgzn-data/weights:/root/weights    #将主机的权重目录挂载到容器内
    deploy:
      resources:
        reservations:
          devices:
            - driver: nvidia
              count: all
              capabilities: [gpu]
    runtime: nvidia
正式启动Xinference
进入你自己的部署目录</your/home/path>,运行以下命令:
docker-compose -f docker-compose-xinference.yaml up -d
进入Your_IP:Your_PORT,可以看到如下页面:

注册模型
进入Register Model选项:
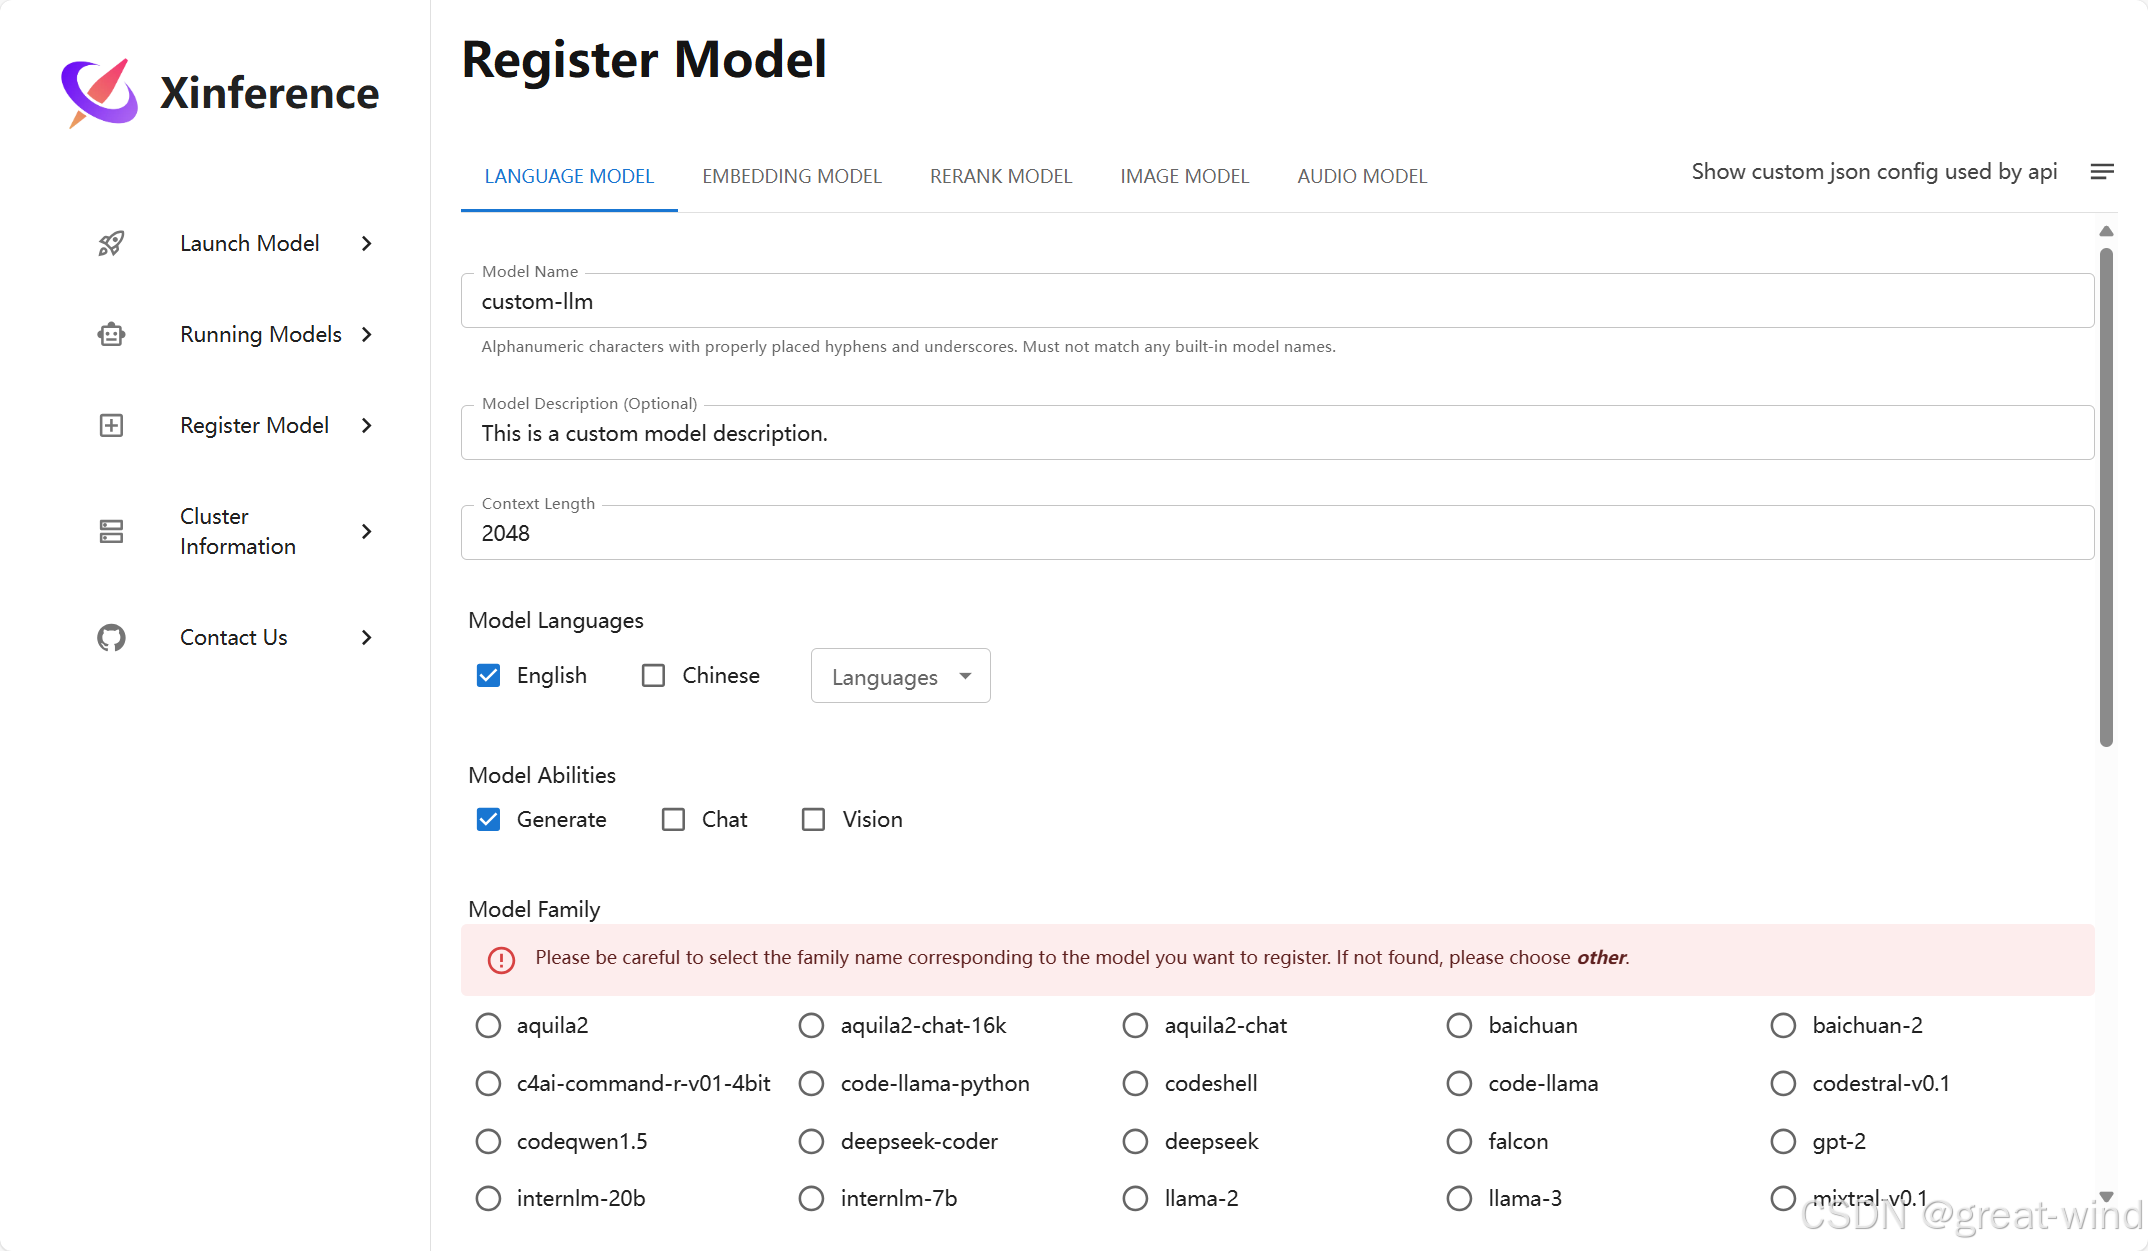
注意,离线环境下,model path填写容器内的具体模型目录,比如,/root/weights/LLM/Qwen2.5-32B-Instruct-GPTQ-Int4。
启动模型
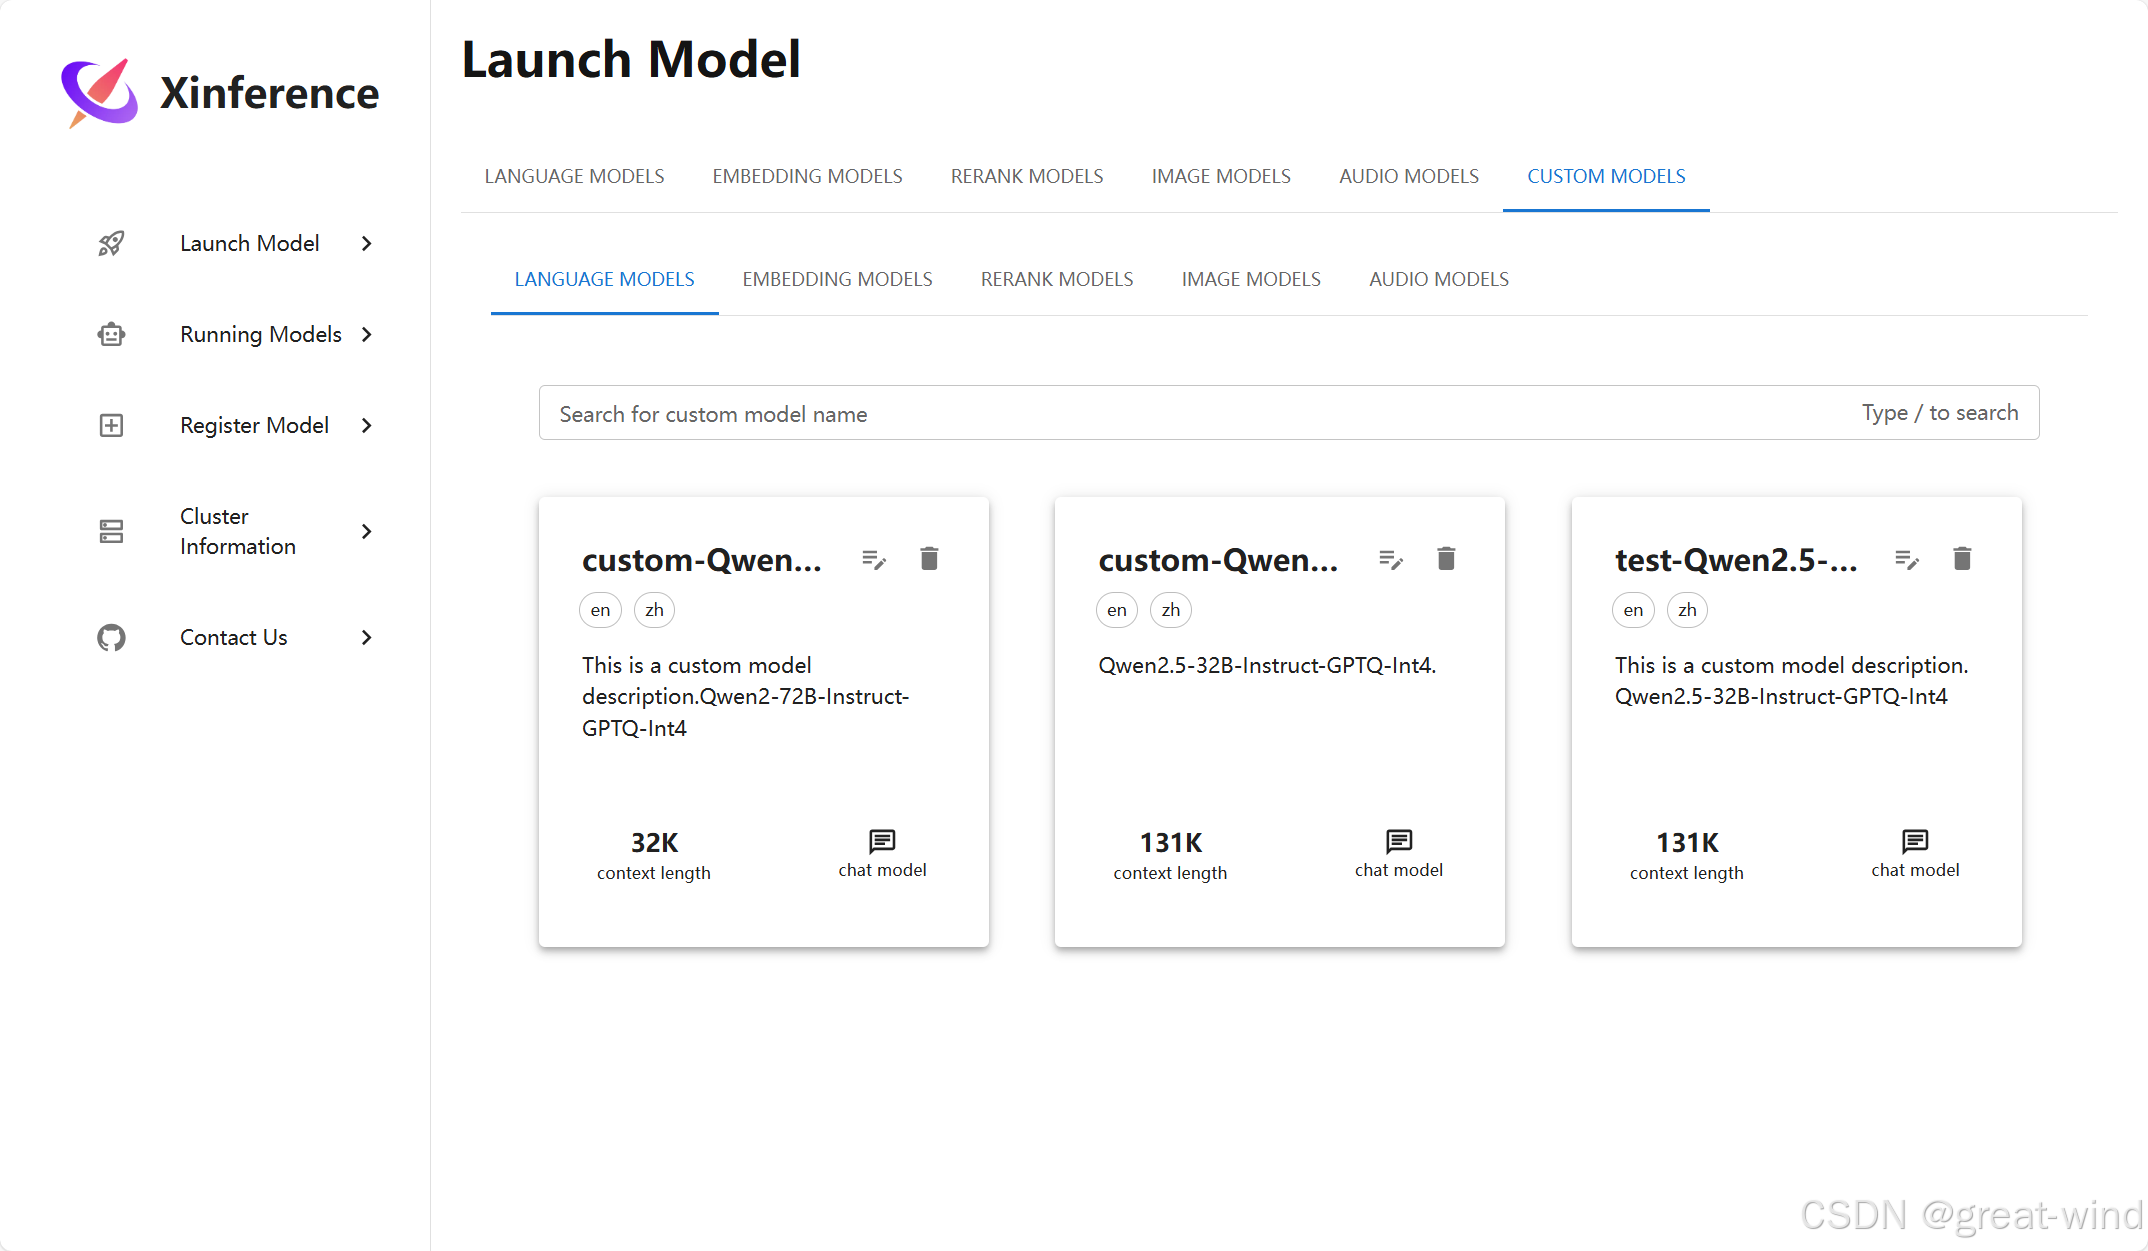
进入Launch Model选项,在CUSTOM MODELS下,有着注册的各种类型模型,如下:
点击对应的模型卡片,可以看到启动模型的具体参数:
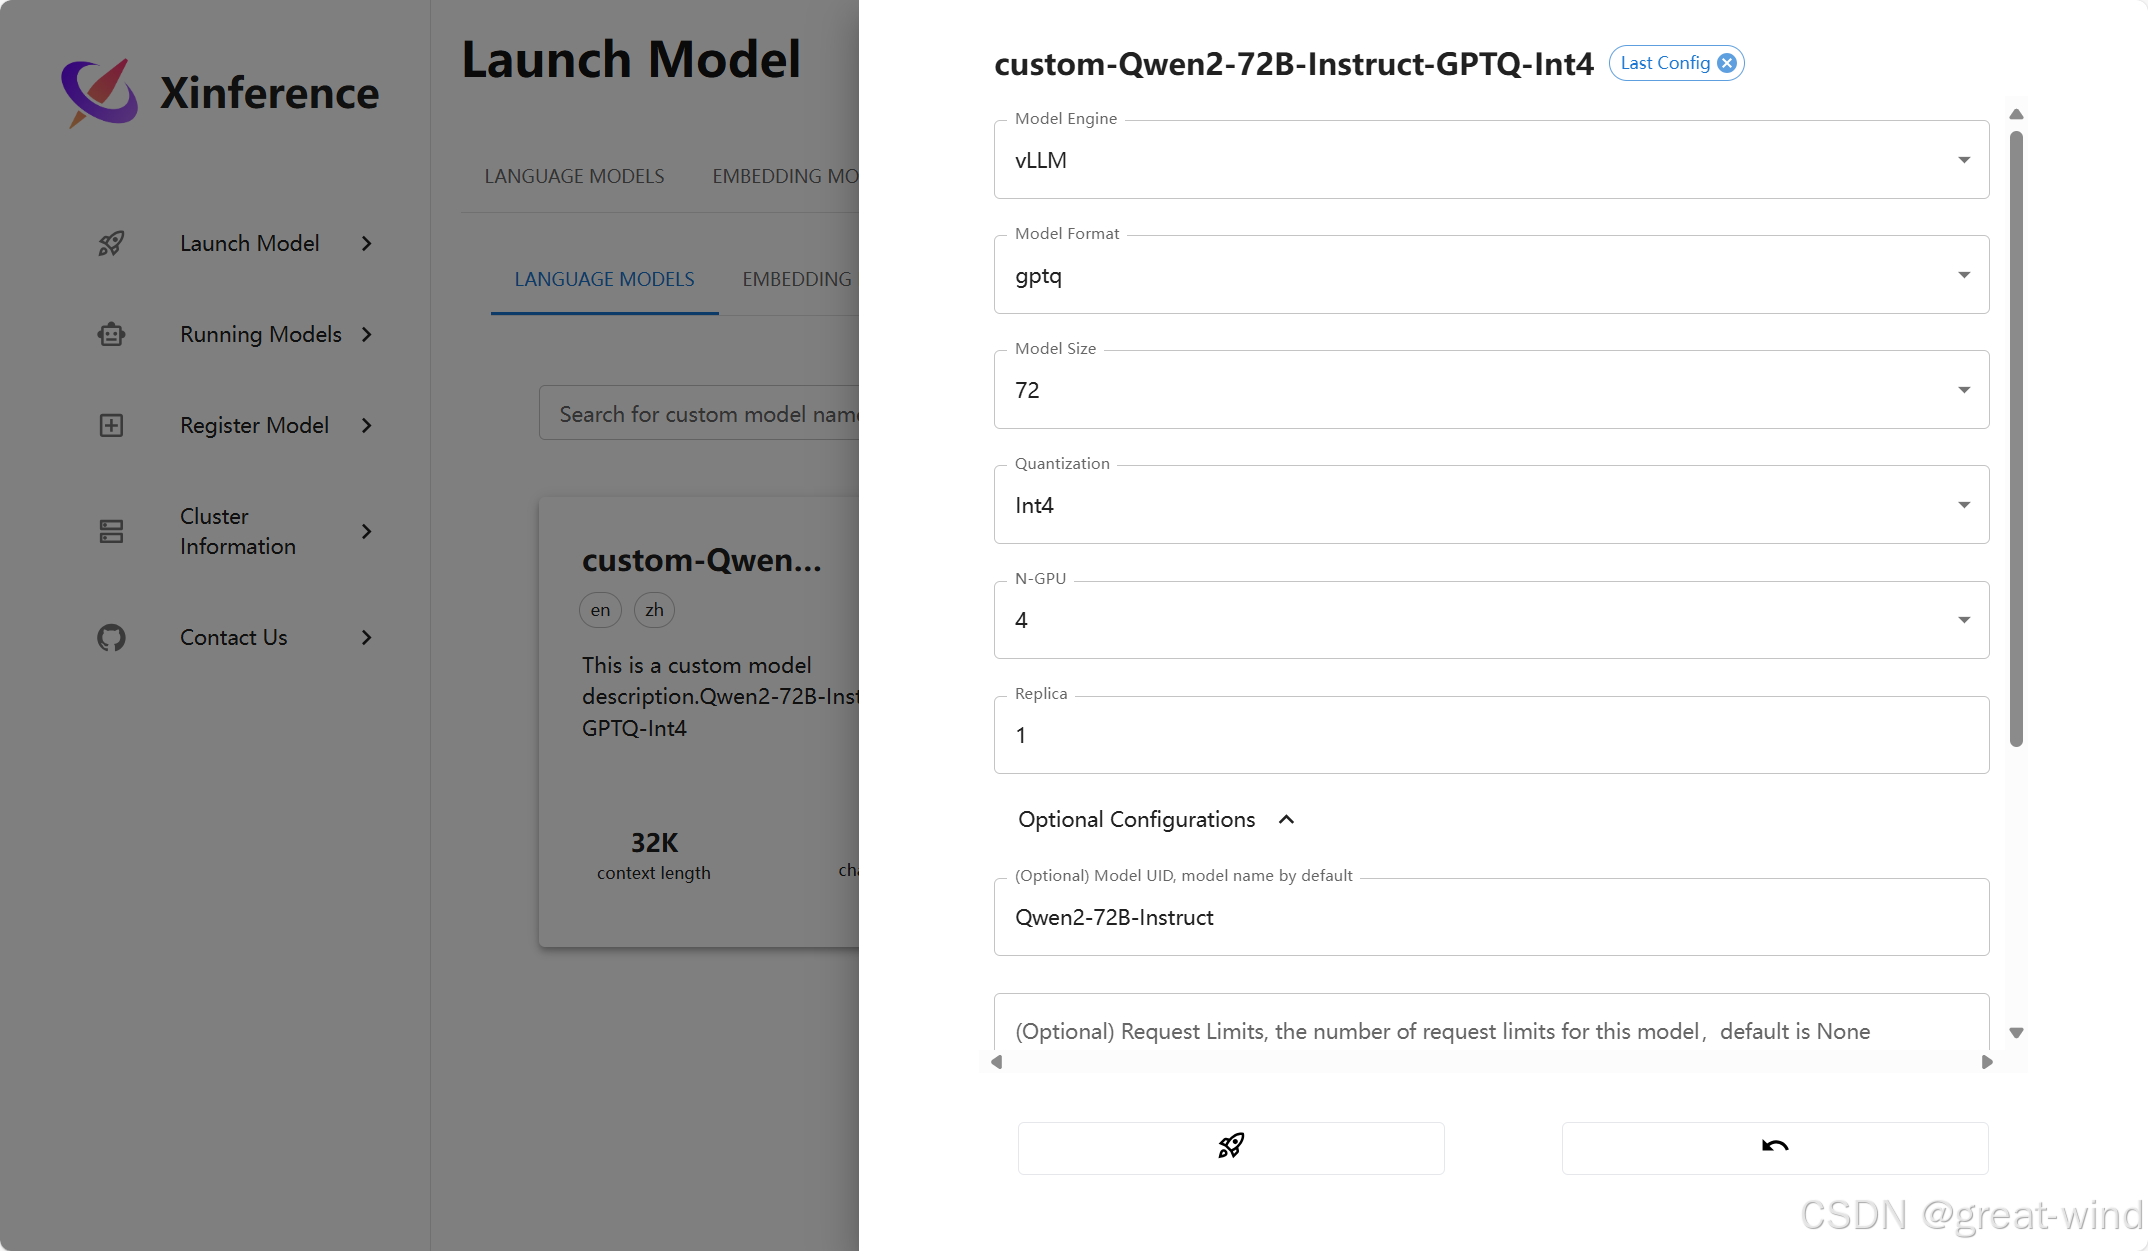
填写完成后,点击下方火箭即可启动。
部署Langchain-chatchat
下载源代码
环境配置
- 首先,确保你的机器安装了 Python 3.8 - 3.11 (我们强烈推荐使用 Python3.11)。
- 接着,创建一个虚拟环境,并在虚拟环境内安装项目的依赖
# 进入目录
$ cd Langchain-Chatchat

# 安装全部依赖
$ pip install -r requirements.txt
$ pip install -r requirements_api.txt
$ pip install -r requirements_webui.txt

# 默认依赖包括基本运行环境(FAISS向量库)。如果要使用 milvus/pg_vector 等向量库,请将 requirements.txt 中相应依赖取消注释再安装。
初始化知识库和配置文件
按照下列方式初始化自己的知识库和简单的复制配置文件
$ python copy_config_example.py
$ python init_database.py --recreate-vs
接入Xinference配置的模型
在configs/model_config.py文件中,找到ONLINE_LLM_MODEL,添加上xinference中的模型,比如:
ONLINE_LLM_MODEL = {
	"Qwen2-72B-Instruct-api": {
        "model_name": "Qwen2-72B-Instruct",
        "api_base_url": "https://api.openai.com/v1",
        "api_key": "not used actually",
        "openai_proxy": "",
    },
    "openai-api": {
        "model_name": "gpt-4",
        "api_base_url": "https://api.openai.com/v1",
        "api_key": "",
        "openai_proxy": "",
    },
}
在server\utils.py文件中,找到get_ChatOpenAI与get_OpenAI,添加以下内容:
...
    if model_name == "openai-api":
        model_name = config.get("model_name")
    # 添加模型
    if model_name == "Qwen2-72B-Instruct-api":
        model_name = config.get("model_name")
...
一键启动
$ python startup.py -a
问题整理
输入文本过长模型返回为空
在xinference中,使用vllm运行大模型时,会出现输入文本过长模型返回为空的问题。修改xinference/model/llm/vllm/core.py中关于vllm的参数max_model_len。
{
    'tokenizer_mode': 'auto',
    'trust_remote_code': True,
    'tensor_parallel_size': 2,
    'block_size': 16,
    'swap_space': 4,
    'gpu_memory_utilization': 0.9,
    'max_num_seqs': 256,
    'quantization': None,
    'max_model_len': 4096
}


 16万+
16万+

 被折叠的 条评论
为什么被折叠?
被折叠的 条评论
为什么被折叠?
 到【灌水乐园】发言


