


jquery 幻灯片
No matter what’s the basic purpose of your website, if you’ve equipped it with a fully-functional Javascript slideshow, you’ve reduced the gap between your business and the targeted customers. As an incredible way of displaying lots and lots of information within a relatively small space, the Javascript slideshows have served as great add-ons for web pages. If these details have enticed you for the creation of your very own slideshow(with sliding panels) using Javascript, then you’ve landed on the right tutorial. Here, I’ll be sharing with you some easy-to-follow steps for creating a Javascript slideshow.
无论您网站的基本目的是什么,如果您为其配备了功能齐全的Javascript幻灯片演示,都可以减少业务与目标客户之间的差距。 作为在相对较小的空间中显示大量信息的一种令人难以置信的方式,Javascript幻灯片演示已成为网页的重要附加组件。 如果这些细节诱使您使用Javascript创建自己的幻灯片(带有滑动面板),那么您已找到了正确的教程。 在这里,我将与您分享一些易于执行的创建Javascript幻灯片演示的步骤。
了解Javascript幻灯片创建过程中的步骤流程 (Understanding the flow of steps within the Javascript slideshow creation process)
In this tutorial, I’ll be using simple HTML and CSS for creating the slideshow where the sliding functionality would be created using jQuery Javascript library. I’ll be also be using two popular plugins viz: LocalScroll and ScrollTo for providing the underlying effects within the javasrcipt slideshow. While the former plugin lets the anchors to jump the slideshow to an accurate slide as per the targeted ID, the latter one offers an excellent sliding functionality which transitions the slides instead of simply jumping from one to another.
在本教程中,我将使用简单HTML和CSS来创建幻灯片,其中将使用jQuery Javascript库创建滑动功能。 我还将使用两个流行的插件,即LocalScroll和ScrollTo,以在javasrcipt幻灯片中提供基础效果。 前者插件可以让锚点根据目标ID将幻灯片跳转到准确的幻灯片,而后者插件提供了出色的滑动功能,可以转换幻灯片,而不仅仅是简单地从一个跳到另一个。
Since we’ll be keeping the basic accessibility parameter in mind while building the slideshow, every user will be able to navigate and view the slides even when the Javascript option has been turned off.
由于我们在构建幻灯片时会牢记基本的可访问性参数,因此即使关闭了Javascript选项,每个用户也可以浏览和查看幻灯片。
这是幻灯片HTML结构的外观: (Here’s a look at the HTML structure for the slideshow:)
<!DOCTYPE html>
<html lang="en">
<head>
  <meta charset="utf-8" />
  <title>Sliding-enabled slideshow using jQuery | Script Tutorials</title>
  <meta name="description" content="Sliding-enabled slideshow using jQuery demo - Script Tutorials">
  <!-- include to stylesheet -->
  <link rel="stylesheet" href="css/style.css" type="text/css" />
  <!-- include jQuery library and other javascripts -->
  <script src="https://ajax.googleapis.com/ajax/libs/jquery/1.11.3/jquery.min.js"></script>
  <script src="js/jquery.scrollTo.js"></script>
  <script src="js/jquery.localscroll.js"></script>
  <script src="js/custom-scripts.js"></script>
</head>
<body>
  <div id="slideshow">
    <!-- List of slider images -->
    <ul>
      <li id="slide1"><img src="images/slide1.jpg" alt="Slide 1" /></li>
      <li id="slide2"><img src="images/slide2.jpg" alt="Slide 2" /></li>
      <li id="slide3"><img src="images/slide3.jpg" alt="Slide 3" /></li>
      <li id="slide4"><img src="images/slide4.jpg" alt="Slide 4" /></li>
      <li id="slide5"><img src="images/slide5.jpg" alt="Slide 5" /></li>
    </ul>
  </div>
  <div id="slideshow-nav">
    <!-- Navigation list of slider images -->
    <ul>
      <li><a href="#slide1">Slide 1</a></li>
      <li><a href="#slide2">Slide 2</a></li>
      <li><a href="#slide3">Slide 3</a></li>
      <li><a href="#slide4">Slide 4</a></li>
      <li><a href="#slide5">Slide 5</a></li>
    </ul>
  </div>
</body>
</html>
On observing the above code carefully, you’ll find that the HTML for demo pages begins with Doctype, title and a link to the CSS stylesheet. After this, the two plugins(already explained above), jQuery library and the empty scripts.js file can be linked together so as to get the slideshow up and working.
仔细观察以上代码,您会发现演示页面HTML以Doctype,标题和CSS样式表的链接开头。 之后,可以将两个插件(上面已经解释过),jQuery库和空的scripts.js文件链接在一起,以使幻灯片放映并开始工作。
HTML which forms the slideshow has been split into two sections viz: a div with ID of slideshow and other with ID of slideshow-nav. Here, it is vital to note that the slideshow div will include an unordered list of linked images, <li> tag with an ID which corresponds to the slideshow-nav anchors.
构成幻灯片HTML已分为两部分:一个ID为幻灯片ID的div和另一个ID为slideshow-nav的div。 在这里,至关重要的是要注意,幻灯片div将包括一个无序的链接图像列表,<li>标签的ID与幻灯片-导航锚对应。
现在,让我们看一下CSS样式: (Now, let’s have a look at the CSS styling:)
css/style.css
css / style.css
#slideshow {/*slider container css*/
  width: 800px;
  height: 400px;
  overflow: hidden;
  margin: 50px auto 50px auto;
  box-shadow: 0px 0px 50px #333;
  -moz-box-shadow: 0px 0px 50px #333;
  -webkit-box-shadow: 0px 0px 50px #333;
}
#slideshow ul {/*manage slider scroll elements css*/
  width: 4000px;
  list-style: none;
}
#slideshow ul li {
  float: left;
}
The above CSS will style each page into something more like a slideshow. Starting with setting the height and width of slideshow to the dimensions exactly similar to those of the image slides. With each slide floating side by side, the total width of unordered list scales up to 4590px. Also, I’ve used the overflow property for preventing the multiple images to run across the entire page. Here, all you need to do is simply set the overflow property to overflow: scroll; making the slideshow work even in the lack of Javascript.
上面CSS会将每个页面的样式设置得更像幻灯片。 首先将幻灯片放映的高度和宽度设置为与图像幻灯片完全相同的尺寸。 每张幻灯片并排浮动,无序列表的总宽度最大可扩展到4590px。 另外,我使用了溢出属性来防止多个图像在整个页面上运行。 在这里,您要做的只是将overflow属性设置为overflow: 即使没有Javascript也可以使幻灯片显示正常工作。
Next, a cool shadow is being added using CSS3-box shadow as shown below:
接下来,使用CSS3-box阴影添加一个很酷的阴影,如下所示:
#slideshow-nav {/* Slider navigation container css */
  width: 150px;
  margin: 0 auto 100px auto;
}
#slideshow-nav ul {
  list-style: none;
}
#slideshow-nav ul li {
  float: left;
}
#slideshow-nav ul li a {/* navigation styling css */
  display: block;
  width: 20px;
  height: 20px;
  float: left;
  margin: 0 5px;
  background: #fff;
  text-indent: -9999px;
  border-radius: 50%;
  -webkit-border-radius: 50%;
  box-shadow: 0px 0px 30px #000;
  -webkit-box-shadow: 0px 0px 30px #000;
}
#slideshow-nav ul li a:hover, #slideshow-nav ul li a.active {
/* hover and active navigation css */
  background: #333;
}
Here, if you observe carefully, the slideshow-nav div is being moved into a position that is under the main slideshow section. Also, we don’t want multiple buttons which don’t work under a situation where Javascript has been enabled. You can use visibility: hidden; for hiding these buttons on a default basis, making them visible at a later point of time. It might also interest you to know that anchors of each navigation list are being transformed into circular buttons with the help of CSS3 border-radius, with the default text being shifted off screen using negative text-indent.
在这里,如果您仔细观察,则会将slideshow-nav div移动到主幻灯片显示部分下方的位置。 另外,我们不希望多个按钮在启用Javascript的情况下不起作用。 您可以使用可见性:隐藏; 默认情况下隐藏这些按钮,以使其在以后的时间点可见。 您可能还想知道,借助CSS3 border-radius,每个导航列表的锚点都已转换为圆形按钮,并且使用负的文本缩进将默认文本移出了屏幕。
So far the slideshow is visible in its working state even without Javascript. There is just a scroll bar which allows the user to move back and forth between multiple images.
到目前为止,即使没有Java脚本,也可以在其工作状态下看到幻灯片。 只有一个滚动条,允许用户在多个图像之间来回移动。
最后,让我们看一下jQuery功能 (Finally, let’s have a look at the jQuery functionality)
js/custom-scripts.js
js / custom-scripts.js
$(document).ready(function() {
  var slider = $("#slideshow");
  var slider_nav = $("#slideshow-nav");
  slider_nav.find("a[href=#slide1]").addClass("active");
  slider_nav.localScroll({
    target:'#slideshow',
    axis: 'x'
  });
  slider_nav.find("a").click(function(){
    slider_nav.find("a").removeClass("active");
    $(this).addClass("active");
  });
});
If you look at the above code, you’ll find the slideshow div’s CSS has been changed from overflow: scroll; to overflow; hidden; in order to remove the scrollbar. After this, the visibility of nav buttons has been set to visible with an ‘active’ class being automatically added to the very first button. Both the plugins viz: LocalScroll and ScrollTo are now being activated, with the localScroll functionality being applied to the slideshow-nav items, guiding them to target slideshow items by simply moving along the X-axis.
如果看上面的代码,您会发现幻灯片divCSS已从溢出更改为: 溢出 隐; 为了删除滚动条。 此后,已将导航按钮的可见性设置为可见,并且将“活动”类自动添加到第一个按钮。 现在已激活两个插件,即LocalScroll和ScrollTo,并将localScroll功能应用到slideshow-nav项,只需沿X轴移动即可将其引导到目标幻灯片项目。
Finally, in order to ensure that all the buttons within the slideshow light up with their relevant active class(whenever clicked), we’ll be using a simple jQuery rule which would remove the active class from different buttons. This particular active class would then appear within the CSS stylesheet for rendering a grey background color to the respective button. Running a quick test in the browser will reveal the entire javascript slideshow working in its best possible manner.
最后,为了确保幻灯片中的所有按钮都显示有相关的活动类(无论何时单击),我们将使用一个简单的jQuery规则,该规则将从不同的按钮中删除活动类。 然后,该特定的活动类将出现在CSS样式表中,以为相应的按钮呈现灰色背景色。 在浏览器中运行快速测试将以最佳方式显示整个javascript幻灯片。
That’s it!
而已!
输出: (Output:)
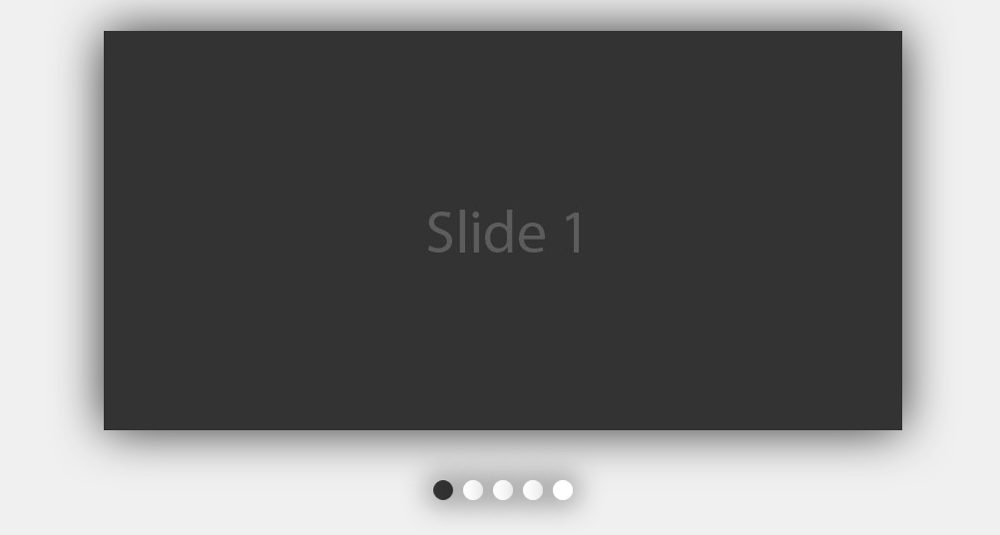
现场演示
[sociallocker]
[社交储物柜]
打包下载
[/sociallocker]
[/ sociallocker]
结论 (Conclusion)
So that was all about creating an eye-catchy Javascript slideshow that can add a brilliant amount of visual appeal and elegance into your dull, boring web pages.
因此,这就是创建引人注目的Javascript幻灯片演示,该幻灯片演示可以为沉闷而无聊的Web页面增加大量的视觉吸引力和优雅感。
jquery 幻灯片


 589
589

 被折叠的 条评论
为什么被折叠?
被折叠的 条评论
为什么被折叠?
 到【灌水乐园】发言


