


wordpress远程附件
We’ve previously covered how to maintain WordPress, through backups, optimization, updates and using centralized WordPress Management Dashboards.
我们之前已经介绍了如何通过备份,优化,更新以及使用集中式WordPress管理仪表盘来维护WordPress 。
Today we’ll look at some of those WordPress Management Dashboards in more detail, to see how they help keep WordPress up to date.
今天,我们将更详细地介绍一些WordPress管理仪表盘,以了解它们如何帮助WordPress更新。
什么是集中式WordPress管理仪表板? (What Is a Centralized WordPress Management Dashboard?)
A centralized WordPress management dashboard allows you to manage several WordPress websites from a single, central interface. Instead of having to go to each WordPress website’s administration interface and update your themes and plugins, you can perform all of these operations, across all of your WordPress websites, from a single interface.
集中式WordPress管理仪表板使您可以从单个中央界面管理多个WordPress网站。 无需访问每个WordPress网站的管理界面并更新主题和插件,您可以从一个界面跨所有WordPress网站执行所有这些操作。
集中仪表板如何与我的WordPress网站通信? (How Do Centralized Dashboards Communicate with My WordPress Website?)
Almost all WordPress management dashboards require you to install a WordPress Plugin, and use an API key to securely read your WordPress theme and plugin information. This same mechanism is used to tell WordPress to update its themes and plugins.
几乎所有的WordPress管理仪表板都要求您安装WordPress插件,并使用API密钥安全地读取WordPress主题和插件信息。 使用相同的机制来告诉WordPress更新其主题和插件。
All of the solutions we’ll be looking at today use this method for communication: WP Remote, iThemes Sync and ManageWP. There are others, but these are some of the more popular options.
我们今天将要研究的所有解决方案都使用这种方法进行通信:WP Remote,iThemes Sync和ManageWP。 还有其他一些,但是这些是一些较流行的选项。
WP遥控器 (WP Remote)
WP Remote provides monitoring for an unlimited number of WordPress websites, for free.
WP Remote免费提供对无限数量的WordPress网站的监视。
注册 (Registration)
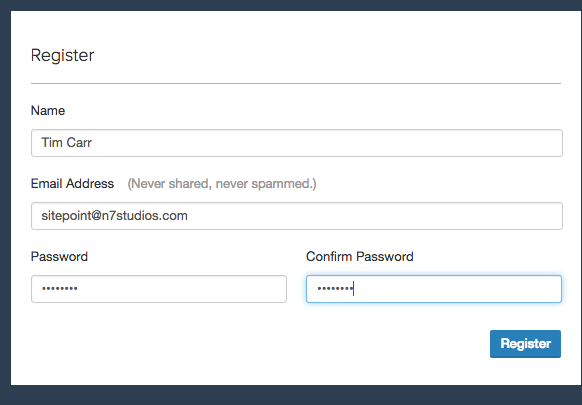
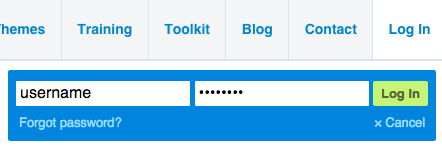
To register for WP Remote, visit WP Remote, and click the Add your first site option. Then, enter your name, email address and a password:
要注册WP Remote,请访问WP Remote ,然后单击“ 添加您的第一个站点”选项。 然后,输入您的姓名,电子邮件地址和密码:
建立 (Setup)
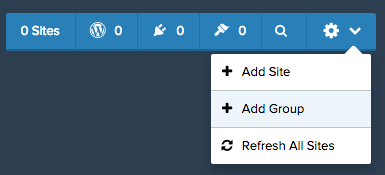
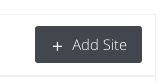
Once you’ve registered, you’ll automatically be taken to the WP Remote Dashboard. From here, let’s add our first site by clicking the Add Site option:
注册后,您将自动进入WP Remote Dashboard。 从这里,我们通过单击“添加站点”选项来添加我们的第一个站点:
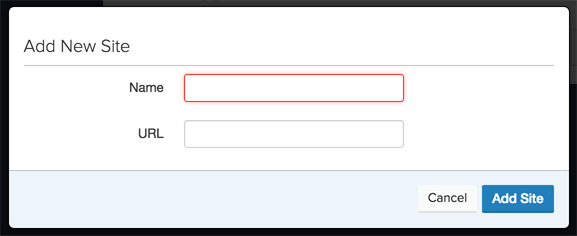
In the modal box which appears, enter the name and URL of your website.
在出现的模式框中,输入网站的名称和URL。
After a moment, you’ll see some on screen instructions covering how to install the WP Remote WordPress plugin onto your website. This allows WP Remote to communicate with your website, check for updates for your themes and plugins, and update those themes and plugins from the central dashboard.
片刻之后,您会在屏幕上看到一些说明,内容涉及如何将WP Remote WordPress插件安装到您的网站上。 这使WP Remote可以与您的网站进行通信,检查主题和插件的更新,并从中央仪表板更新这些主题和插件。
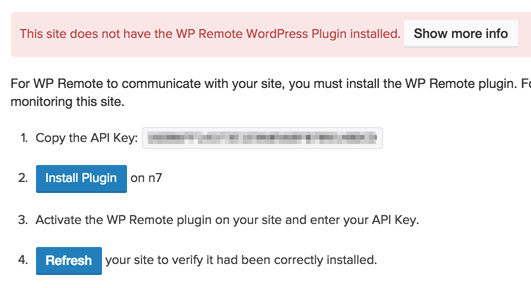
Make a note of the API key, and click the Install Plugin button.
记下API密钥,然后单击“安装插件”按钮。
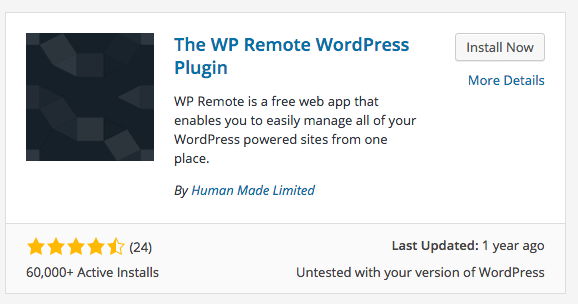
This will load your WordPress Administration interface in a new browser window/tab, where you can login. Once logged in, you’ll see the familiar Add Plugins screen, with the WP Remote WordPress Plugin. Click the Install Now button:
这会将您的WordPress管理界面加载到新的浏览器窗口/标签中,您可以在其中登录。 登录后,您将看到熟悉的“ 添加插件”屏幕,以及WP Remote WordPress插件。 单击立即安装按钮:
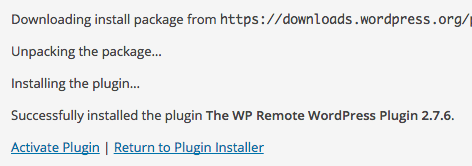
Once installed, click Activate Plugin:
安装后,点击激活插件 :
A notification will appear on screen asking for your API key. If you didn’t copy this from the WP Remote dashboard, open the dashboard to get your API key.
屏幕上会显示一条通知,询问您的API密钥。 如果您没有从WP Remote仪表板复制此文件,请打开仪表板以获取API密钥。

Once you’ve entered your API key, click Save API Key:
输入API密钥后,点击保存API密钥 :

If everything worked, you’ll see a success notice in WordPress:
如果一切正常,您将在WordPress中看到成功通知:
Back at the WP Remote dashboard, click the Refresh button so that WP Remote can start managing your WordPress website.
返回WP Remote仪表板,单击“ 刷新”按钮,以便WP Remote可以开始管理WordPress网站。
更新 (Updates)
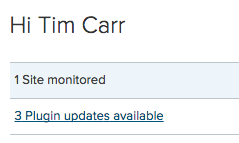
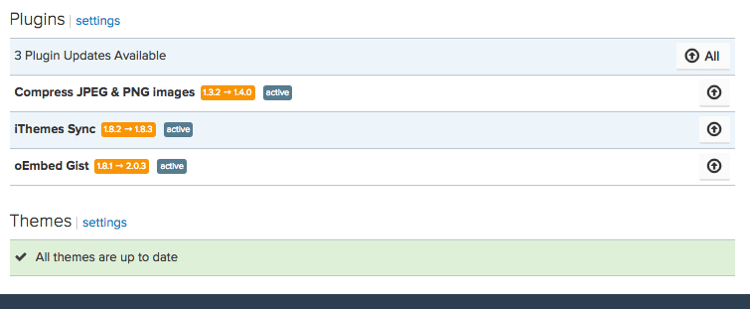
When you login to your WP Remote dashboard, you’ll be able to see an overview of the number of theme and plugin updates available:
登录到WP Remote仪表板时,您将能够查看可用的主题和插件更新数量的概述:
To update your themes or plugins, click the notice or the Updates tab. Here, you have two options:
要更新主题或插件,请单击通知或“更新”选项卡。 在这里,您有两个选择:
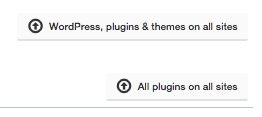
WordPress, plugins & themes on all sites: This is a true one click option to tell WP Remote to update all themes and plugins across all of your WordPress websites.
所有站点上的WordPress,插件和主题 :这是一个真正的一键式选项,告诉WP Remote更新您所有WordPress网站上的所有主题和插件。
All plugins on all sites.: This is a one click option to tell WP Remote to just update all plugins across all of your WordPress websites.
所有网站上的所有插件。 :这是一个一键式选项,告诉WP Remote仅更新您所有WordPress网站上的所有插件。
All plugins on all sites.: This is a one click option to tell WP Remote to just update all plugins across all of your WordPress websites.
所有网站上的所有插件。 :这是一个一键式选项,告诉WP Remote仅更新您所有WordPress网站上的所有插件。
To update your themes or plugins for a single site, click the individual site in the left hand sidebar.
要为单个站点更新主题或插件,请单击左侧边栏中的单个站点。
You’ll then see a breakdown of the themes and plugins available for update for that specific WordPress installation, with more granular control to update all themes, all plugins or individual themes & plugins.
然后,您将看到可用于该特定WordPress安装更新的主题和插件的细目分类,并具有更精细的控件来更新所有主题,所有插件或单个主题和插件。
利弊 (Pros and Cons)
Pros:
优点:
- Simple, fast registration process 简单,快速的注册过程
- Free for an unlimited number of WordPress websites 免费提供无限数量的WordPress网站
- One click update to all themes and plugins across all sites 一键式更新所有网站上的所有主题和插件
Cons:
缺点:
- A lengthly process to setup, although this is only once per site 设置过程很漫长,尽管每个站点只有一次
- Sometimes harder to see whether a site has any updates in the sidebar, compared with iThemes Sync 与iThemes Sync相比,有时更难查看网站的侧边栏中是否有任何更新
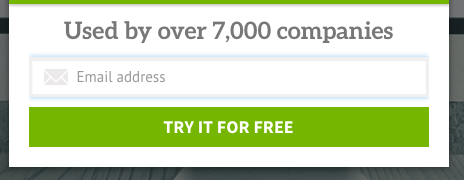
iThemes同步 (iThemes Sync)
iThemes Sync provides free monitoring for up to 10 WordPress websites. Additional sites can be purchased.
iThemes Sync可以免费监视多达10个WordPress网站。 可以购买其他站点。
注册 (Registration)
Registration for iThemes Sync requires several steps.
注册iThemes Sync需要几个步骤。
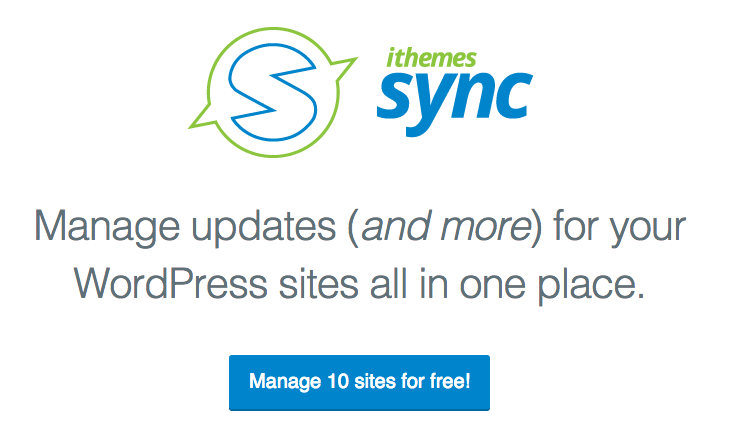
First, visit iThemes Sync and click the Manage 10 sites for free! button.
首先,访问iThemes Sync并免费单击“ 管理10个站点”! 按钮。
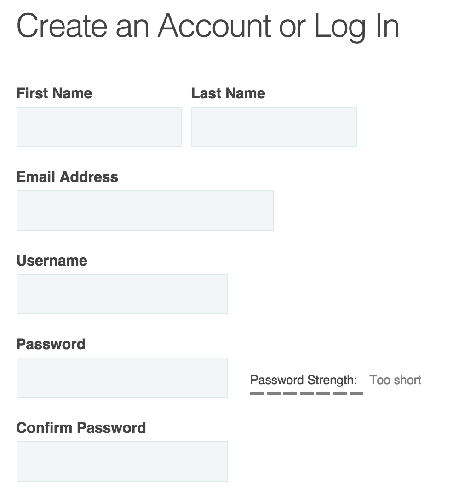
You’ll then be taken through a checkout process (but don’t worry, there’s nothing to pay for). Click the Checkout button, and then enter your details to register an account with iThemes.
然后,您将被执行结帐流程(但请放心,无需支付任何费用)。 单击“ 签出”按钮,然后输入您的详细信息以向iThemes注册帐户。
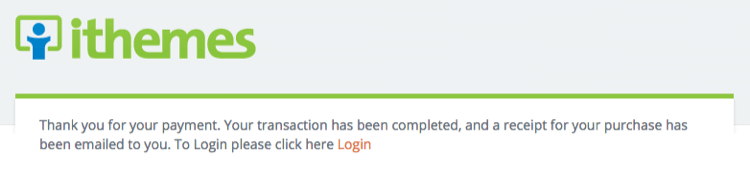
Once completed, you’ll see confirmation thanking you for your payment (although there was nothing to pay for, so don’t panic!). Whilst you could click the Login link to login, I found this didn’t actually log you into iThemes Sync, but instead logs you into your account where you can see your previous orders.
完成后,您会看到确认感谢您的付款(尽管没有什么可支付的,所以请不要着急!)。 尽管您可以单击“ 登录”链接进行登录,但我发现这实际上并没有使您登录iThemes Sync,而是使您登录了可以查看以前订单的帐户。
Instead, let’s now navigate to iThemes Sync Dashboard, where you can login with the username and password used during the checkout process:
现在,让我们导航到iThemes Sync Dashboard ,您可以在其中使用在结帐过程中使用的用户名和密码登录:
建立 (Setup)
Once logged in, click the Add Site button towards the top right:
登录后,单击右上角的“ 添加站点”按钮:
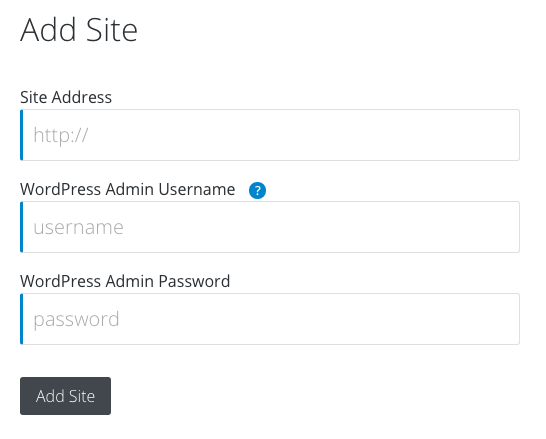
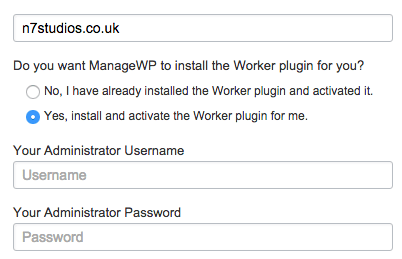
Enter your WordPress Site Address, Admin Username and Password, and click Add Site:
输入您的WordPress网站地址,管理员用户名和密码,然后点击添加网站 :
iThemes Sync will attempt to login using the details provided, and if successful, will automatically install the iThemes Sync WordPress Plugin so it can communicate with your WordPress website to remotely update its themes and plugins.
iThemes Sync将尝试使用提供的详细信息登录,如果成功,将自动安装iThemes Sync WordPress插件,以便它可以与您的WordPress网站进行通信以远程更新其主题和插件。
更新 (Updates)

iThemes Sync allows you to view Core Updates (that’s updates to WordPress itself), Plugin Updates, Theme Updates or All Updates across your WordPress websites, by using the appropriate button towards the top of the screen.
iThemes Sync允许您使用屏幕顶部的相应按钮来查看WordPress网站上的核心更新(即WordPress本身的更新),插件更新,主题更新或所有更新。
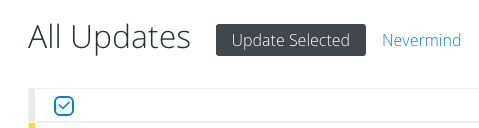
Clicking an Update button then lets you review the updates that will be carried out. By default, all items for all sites are selected, so if you want to update everything, just click the Update Selected button:
单击更新按钮,然后让您查看将要执行的更新。 默认情况下,所有站点的所有项目均处于选中状态,因此,如果要更新所有内容,只需单击“ 更新所选”按钮:
Alternatively, select the updates to apply, and then click the button. You can use this option to select updates on a per-site basis, or for a specific theme or plugin.
或者,选择要应用的更新,然后单击按钮。 您可以使用此选项在每个站点上或针对特定主题或插件来选择更新。
Another feature of iThemes Sync is its support for two factor authentication (2FA). For security, this is important, as if your iThemes Sync username and password were compromised, hackers could potentially manage all of your WordPress websites (although they’d only be able to perform updates).
iThemes Sync的另一个功能是它支持两因素身份验证(2FA)。 为了安全起见,这很重要,就像您的iThemes Sync用户名和密码遭到破坏一样,黑客可能会管理您所有的WordPress网站(尽管他们只能执行更新)。
利弊 (Pros and Cons)
Pros:
优点:
- Quick to setup a new site – iThemes Sync will handle plugin installation etc. 快速设置新站点– iThemes Sync将处理插件安装等。
- Free for up to 10 WordPress Sites 免费最多10个WordPress网站
- Easy to see which sites require updates 轻松查看哪些网站需要更新
- Two factor authentication (SMS) 两因素验证(SMS)
Cons:
缺点:
- Registration process is slightly confusing 注册过程有点混乱
管理WP (ManageWP)
ManageWP provides free monitoring for up to 5 domains.
ManageWP提供最多5个域的免费监视。
注册 (Registration)
To register for ManageWP, visit https://managewp.com, and click the Let’s get started button. Then, enter your name, email address and a password:
要注册ManageWP,请访问https://managewp.com ,然后单击“ 开始使用”按钮。 然后,输入您的姓名,电子邮件地址和密码:
建立 (Setup)
Once you’ve registered, you’ll automatically be taken to the ManageWP Dashboard. From here, let’s add our first site by entering the domain name of the WordPress website we want to manage. Make sure you also choose the Yes, install and activate the Worker plugin for me. option, and then enter your WordPress Administrator username and password:
注册后,您将自动进入ManageWP仪表板。 从这里开始,通过输入我们要管理的WordPress网站的域名来添加我们的第一个站点。 确保您还选择了是,为我安装并激活Worker插件。 选项,然后输入您的WordPress管理员用户名和密码:
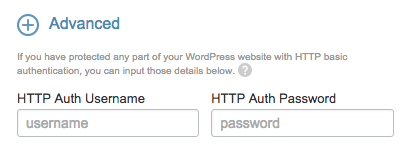
Note: If you’ve protected your WordPress Administration login with HTTP authentication, ManageWP has a really useful feature where you can specify those credentials. Click the Advanced option and enter the additional login details:
注意:如果您已使用HTTP身份验证保护WordPress管理登录,则ManageWP具有一项非常有用的功能,您可以在其中指定这些凭据。 单击高级选项,然后输入其他登录详细信息:
更新 (Updates)
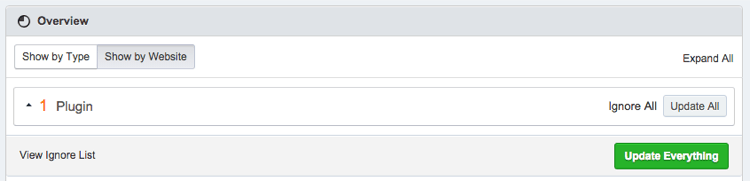
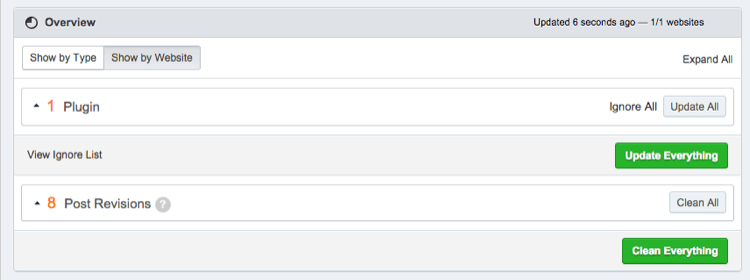
When you login to your ManageWP dashboard, you’ll be able to see an overview of the number of theme and plugin updates available in the Overview panel:
登录ManageWP仪表板时,您将能够在“概述”面板中查看可用的主题和插件更新数量的概述:

To update all of your themes and plugins, click the Update Everything button:
要更新所有主题和插件,请单击“ 更新所有内容”按钮:
To view the available updates for a specific site, click the site domain in the left hand sidebar.
要查看特定站点的可用更新,请单击左侧边栏中的站点域。
You can then use the Overview panel to update all themes and plugins for that specific site:
然后,您可以使用“概述”面板来更新该特定站点的所有主题和插件:
利弊 (Pros and Cons)
Pros:
优点:
- Simple, fast registration process 简单,快速的注册过程
- Free for up to 5 WordPress websites 最多免费提供5个WordPress网站
- Supports HTTP authentication 支持HTTP认证
- One click update to all themes and plugins across all sites 一键式更新所有网站上的所有主题和插件
Cons:
缺点:
- Site registration process requires an additional step vs. iThemes Sync 与iThemes Sync相比,网站注册过程需要额外的步骤
结论 (Conclusion)
The WordPress dashboards we’ve reviewed today all provide one click WordPress plugin and theme updates, making managing WordPress a breeze.
我们今天审查的WordPress仪表板都提供了一键式WordPress插件和主题更新,使WordPress管理变得轻而易举。
WP Remote allow you to manage an unlimited number of WordPress websites, however require a manual process to setup the WordPress Plugin to connect each site to WP Remote.
WP Remote允许您管理无限数量的WordPress网站,但是需要手动过程来设置WordPress插件才能将每个站点连接到WP Remote。
iThemes Sync provides support for up to 10 WordPress websites. Whilst the initial registration process has several steps, adding each WordPress site to iThemes Sync is quick, with the WordPress Plugin automatically installed by iThemes. It’s UI is one of the simplest to use, with clear indications of the number of updates available.
iThemes Sync最多可支持10个WordPress网站。 尽管初始注册过程需要几个步骤,但是将每个WordPress网站添加到iThemes Sync的过程非常快捷,而iThemes会自动安装WordPress插件。 它的UI是最简单的用户界面之一,其中清楚地指示了可用的更新数量。
Finally, ManageWP provides support for up to 5 WordPress websites. With a quick registration and WordPress website setup process, and HTTP authentication support, it’s ideal for those wanting to get started the quickest. However the UI can be confusing at times, with a lot of information and options available.
最后,ManageWP为多达5个WordPress网站提供支持。 借助快速注册和WordPress网站设置过程以及HTTP身份验证支持,它是那些希望最快入门的人的理想选择。 但是,UI有时会令人困惑,其中包含许多可用的信息和选项。
翻译自: https://www.sitepoint.com/managing-wordpress-updates-remotely/
wordpress远程附件


 548
548

 被折叠的 条评论
为什么被折叠?
被折叠的 条评论
为什么被折叠?
 到【灌水乐园】发言


