In this series, we’re going to see how we can use the Google Analytics API to interact with our Google Analytics data via PHP. We’ll be using Laravel on Homestead Improved, but you can follow along with any framework on any development environment – Laravel + HI is simply the fastest and recommended starting point.
在本系列中,我们将了解如何使用Google Analytics(分析)API通过PHP与Google Analytics(分析)数据进行交互。 我们将在Homestead Improvementd上使用Laravel ,但您可以在任何开发环境上使用任何框架-Laravel + HI只是最快且建议的起点。
要求 (Requirements)
To be able to follow along, you need to have a Google Analytics account which you can get from the Google Analytics page.
为了能够跟进,您需要拥有一个Google Analytics(分析)帐户,该帐户可以从Google Analytics(分析)页面获取 。
You also need to be familiar with the basic usage of the Google Analytics dashboard.
您还需要熟悉Google Analytics(分析)信息中心的基本用法。

我们要建造什么? (What are we going to build?)
In this article we’re going to build an app that looks like Google Analytics Explorer, but to make it short, we’re going to limit the functionality and discuss how we can extend our demo.
在本文中,我们将构建一个类似于Google Analytics(分析)Explorer的应用程序,但为了简短起见,我们将限制功能并讨论如何扩展演示。
Google Analytics API (Google Analytics API)
总览 (Overview)
The Google Analytics API is divided into a number of APIs. We use each API depending on our needs:
Google Analytics(分析)API分为许多API。 我们根据需要使用每个API:
Management API: Provides access to Google Analytics configuration data like accounts, properties, views, goals…
管理API :提供对Google Analytics(分析)配置数据的访问,例如帐户,属性,视图,目标…
Metadata API: Provides access to the list of columns (Dimensions, Metrics) so that we don’t need to hard code them inside our app.
元数据API :提供对列列表(维度,指标)的访问权限,因此我们无需在应用程序内对其进行硬编码。
Core Reporting API: Provides access to dashboard data, and most of the tasks are available through this API.
核心报告API :提供对仪表板数据的访问,并且大多数任务都可以通过此API使用。
Real Time Reporting API: Gives you access to real time data, like the one on your Google Analytics dashboard. At the time of this writing, this API is in beta.
实时报告API :使您可以访问实时数据,例如Google Analytics(分析)仪表板上的数据。 在撰写本文时,此API尚处于测试阶段。
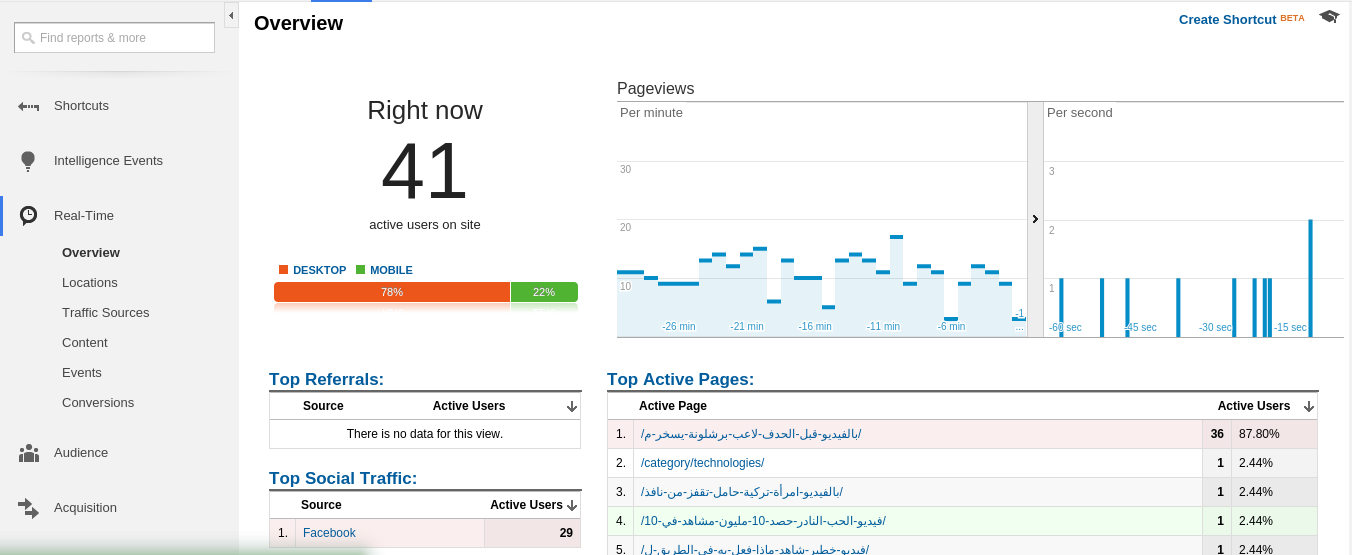
Embed API: This API allows you to create and embed dashboards in your website using javascript.
嵌入API :使用此API,您可以使用JavaScript在网站中创建和嵌入仪表板。
MCF Reporting API: Multi-Channel Funnels Reporting API enables you to request Multi-Channel Funnels data for an authenticated user, which means you can query data from multiple sources and use it for your own statistics.
MCF Reporting API :多渠道路径Reporting API使您可以为经过身份验证的用户请求“多渠道路径”数据,这意味着您可以从多个来源查询数据并将其用于自己的统计信息。
In this article, we’re going to be focused on the Management API, Metadata API and Core reporting API. First, let’s start with some basic usage.
在本文中,我们将重点介绍管理API,元数据API和核心报告API。 首先,让我们从一些基本用法开始。
基本用法 (Basic Usage)
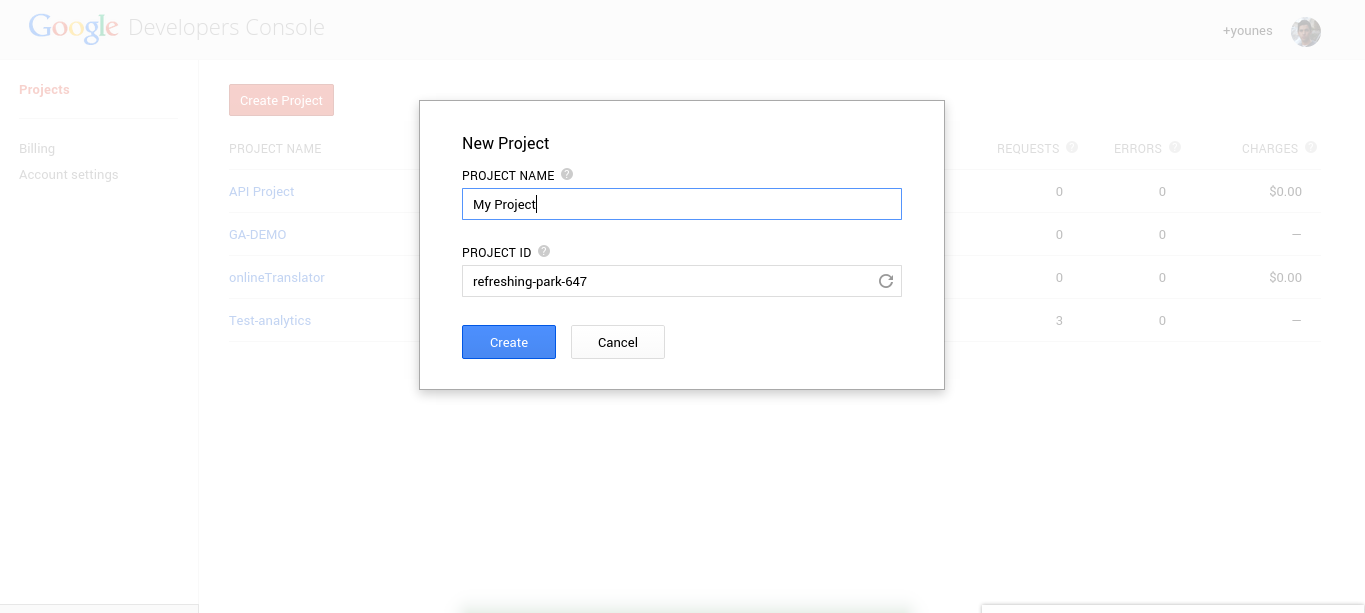
To start using the API, we need to create a new project on the Google Developers Console.
要开始使用API,我们需要在Google Developers Console上创建一个新项目。
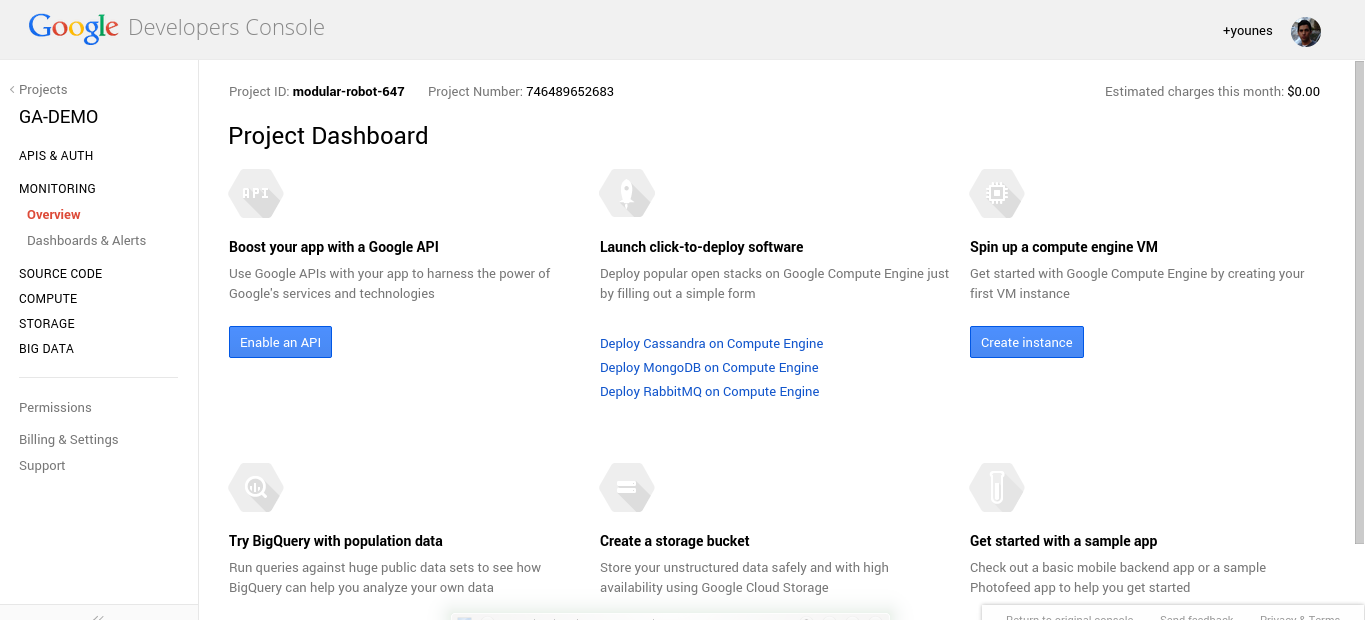
You project dashboard should look like this:
您的项目仪表板应如下所示:
Now we have a project ready to use any of the provided Google services. Because we intend to use Google Analytics API, we need to activate it.
现在,我们有一个项目可以使用任何提供的Google服务。 由于我们打算使用Google Analytics(分析)API,因此需要将其激活。
When you want to use a Google API you need to provide two things:
当您想使用Google API时,需要提供两件事:
1) Your API credentials. 2) Your developer keys.
1)您的API凭据。 2)您的开发人员密钥。
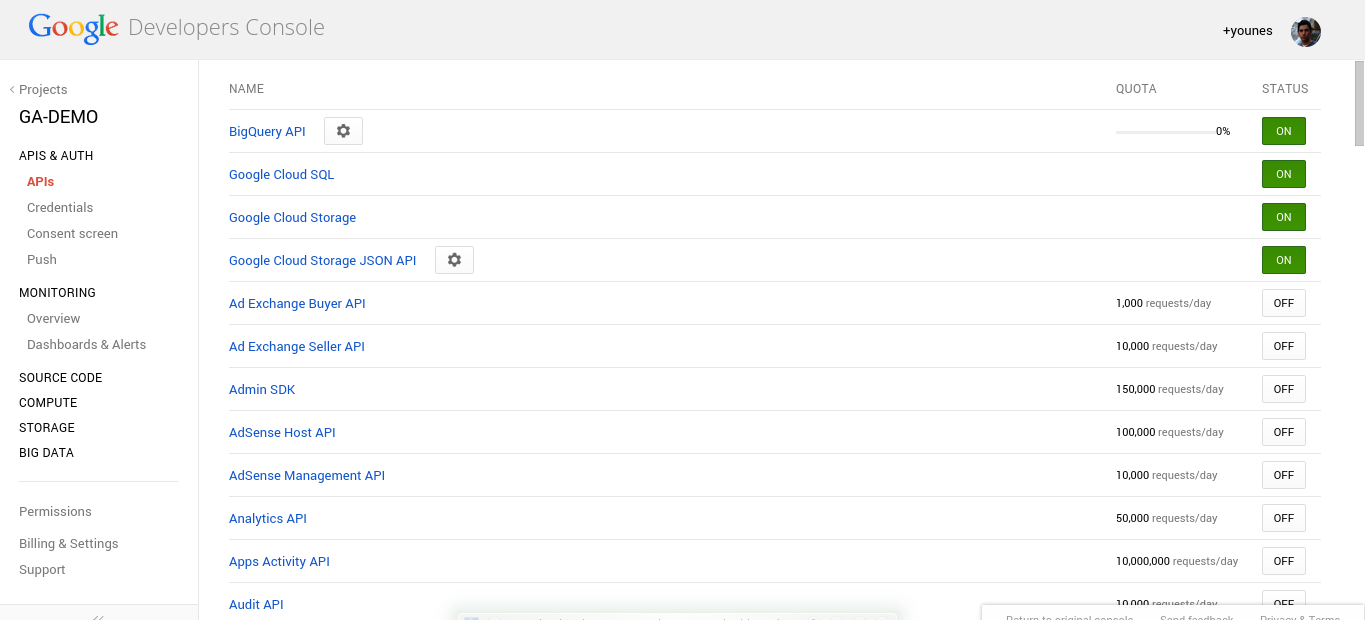
Go to menu, API & AUTH, select “APIs” and enable Analytics API
转到菜单, API & AUTH ,选择“ API”并启用Analytics API
Under the API & AUTH menu, select the Credentials link, and select Create new client ID.
在API & AUTH菜单下,选择Credentials链接,然后选择Create new client ID 。
Select Web Application for our app, then enter your website URL and your login redirect page URL. Because we will be using Laravel in our demo, you can use localhost:8000 for the development phase, and don’t forget to change https to http in your URL.
为我们的应用选择“ Web Application程序”,然后输入您的网站URL和登录重定向页面URL。 因为我们将在演示中使用Laravel ,所以在开发阶段可以使用localhost:8000 ,并且不要忘记在URL中将https更改为http 。
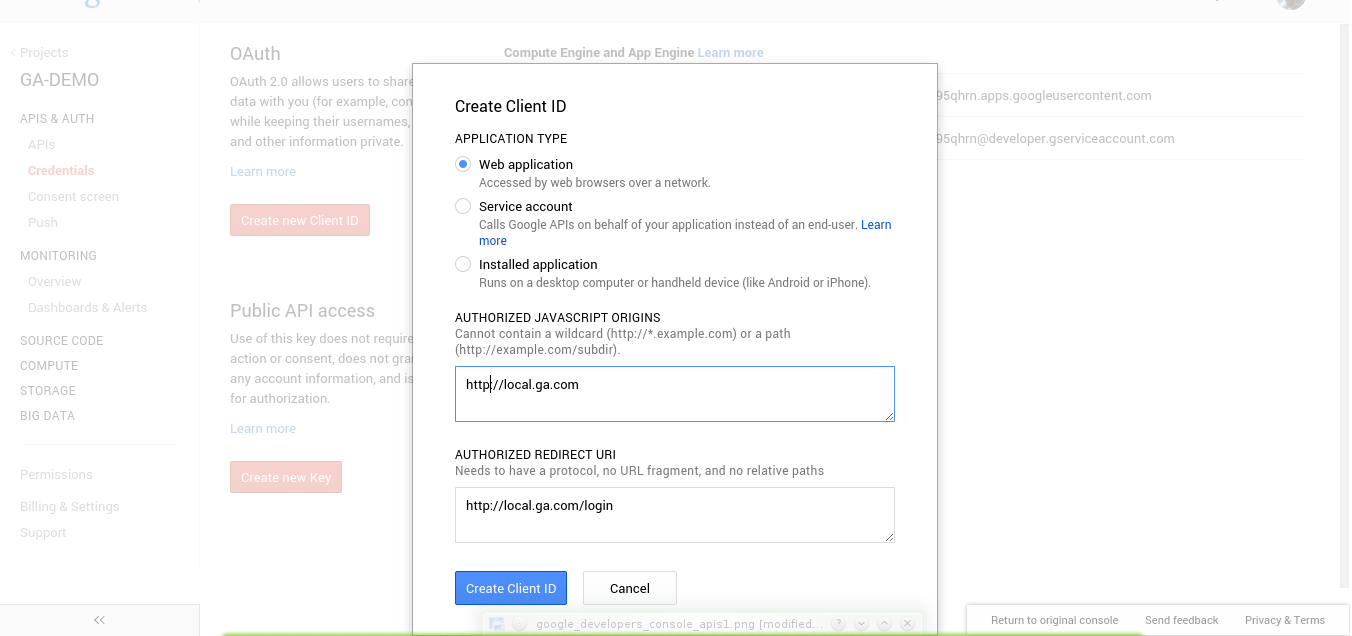
At the bottom of the page, you have the Public API access. We need to create a new access key.
在页面底部,您具有Public API access 。 我们需要创建一个新的访问密钥。
1) choose the Browser Key option for our demo. 2) on the http referrers box, you can leave the value empty to accept requests from anywhere, or specify your domain address.
1)为我们的演示选择“浏览器密钥”选项。 2)在http Referrers框上,您可以将该值保留为空以接受来自任何地方的请求,或者指定您的域名地址。
Now we are ready to start playing around with the API.
现在,我们准备开始使用API。
限额和配额 (Limits and Quotas)
When working with Google Analytics API, we are limited to a number of requests per day, per second, etc. You can read the full doc page for more information.
使用Google Analytics(分析)API时,每天,每秒等的请求数量受到限制。您可以阅读完整的文档页面以了解更多信息。
项目配置 (Project Configuration)
I will assume that you already know how to set up a new Laravel project on Homestead Improved.
我假设您已经知道如何在Homestead Improvement上建立一个新的Laravel项目 。
We need to require "google/api-client": "dev-master" in our composer.json and update the dependencies.
我们需要在composer.json要求"google/api-client": "dev-master"并更新依赖项。
In my app/config/, I will create a file called analytics.php where I can put my configuration.
在我的app/config/ ,我将创建一个名为analytics.php的文件,在其中可以放置我的配置。
return [
    'app_name'          => 'Your app name', //Can be anything
    'client_id'         => 'Your ID',//can be found on the credentials page
    'client_secret'     => 'Your secret ID',//on the credentials page
    'api_key'           => 'Your key'//can be found at the bottom of your credentials page
];
To keep things separated, i will create a folder named src inside my app directory and create a file called GA_Service.php where I can put all request logic.
为了使事情分开,我将在我的app目录中创建一个名为src的文件夹,并创建一个名为GA_Service.php的文件,在其中可以放置所有请求逻辑。
// app/src/GA_Service.php

class GA_Service{
    //...
}
Trying to access this class somewhere in our code will result in a Class not found exception, so we can take advantage of composer autoloading feature.
尝试在代码中的某个位置访问该类将导致Class not found异常,因此我们可以利用composer自动加载功能。
In the composer.json file, go to the autoload classmap section and add our path to the list.
在composer.json文件中,转到autoload classmap部分,然后将我们的路径添加到列表中。
// composer.json

...
"autoload":{
    "classmap": [
        ...
        ,
		"app/src"
    ]
}
Don’t forget to run composer dump-autoload after saving the changes.
保存更改后,请不要忘记运行composer dump-autoload 。
By default, Laravel includes a file called HomeController.php in the app/controllers directory. We will use it as our main app controller.
默认情况下,Laravel在app/controllers目录中包含一个名为HomeController.php的文件。 我们将其用作我们的主要应用程序控制器。
Back to the GA_Service class; to communicate with Google APIs we use a class called Google_Client. In our constructor, we will create a new instance and start filling the necessary parameters.
返回GA_Service类; 为了与Google API通信,我们使用了一个名为Google_Client的类。 在我们的构造函数中,我们将创建一个新实例并开始填充必要的参数。
public function __construct( Google_Client $client ){
	$this->client = $client;
	$this->init();
}

private function init(){
		$this->client->setClientId(Config::get('analytics.client_id') );
		$this->client->setClientSecret(Config::get('analytics.client_secret'));
		$this->client->setDeveloperKey(Config::get('analytics.api_key'));
		$this->client->setRedirectUri('http://localhost:8000/login');
		$this->client->setScopes(array('https://www.googleapis.com/auth/analytics'));
}
Instead of instantiating the class inside the constructor, we pass it as a parameter and let Laravel’s IoC resolve it for us. For more details, be sure to check this article out.
与其在构造函数内部实例化该类,不如将其作为参数传递,并让Laravel的IoC为我们解决它。 有关更多详细信息,请务必查看本文 。
The first three lines of the init method are self explanatory; the Config::get method grabs the configuration from the analytics.php file.
init方法的前三行是不言自明的; Config::get方法从analytics.php文件中Config::get配置。
The redirect URI method is the redirection URL to be used after Google verification and it should match the one registered previously on the Google Console Dashboard.
重定向URI方法是Google验证后要使用的重定向URL,它应与先前在Google Console控制台上注册的重定向URL相匹配。
The setScope method is where we specify the access level needed for our app:
在setScope方法中,我们可以指定应用所需的访问级别:
https://www.googleapis.com/auth/analytics View and manage Google Analytics Data
https://www.googleapis.com/auth/analytics查看和管理Google Analytics(分析)数据
https://www.googleapis.com/auth/analytics.manage.users View and manage user permissions for Analytics accounts.
https://www.googleapis.com/auth/analytics.manage.users查看和管理Google Analytics(分析)帐户的用户权限。
https://www.googleapis.com/auth/analytics.readonly Read-only access to the Analytics API.
https://www.googleapis.com/auth/analytics.readonly对Google Analytics(分析)API的只读访问权限。
After setting up our google client we’re going to set our login process:
设置好我们的google客户之后,我们将设置登录过程:
// app/src/GA_Service.php
public function isLoggedIn(){
	if (isset($_SESSION['token'])) {
	  $this->client->setAccessToken($_SESSION['token']);
	  return true;
	}

	return $this->client->getAccessToken();
}//authenticate

public function login( $code ){ 	$this->client->authenticate($code);
 	$token = $this->client->getAccessToken();
  	$_SESSION['token'] = $token;

	return token;
}//login

public function getLoginUrl(){
	$authUrl = $this->client->createAuthUrl();
	return $authUrl;
}//getLoginUrlisLoggedIn: return true if the user has an access token to be used.isLoggedIn:如果用户具有要使用的访问令牌,则返回true。getLoginUrl: if the user is not logged in, we get an authentication URL.getLoginUrl:如果用户未登录,我们将获得一个身份验证URL。login: we have already set a redirect URL on the Google API Dashboard, we receive back a$_GET['code']parameter that we can use to get a token for our requests.login:我们已经在Google API仪表板上设置了重定向URL,我们收到了一个$_GET['code']参数,该参数可用于获取请求的令牌。
Let’s use what we’ve got for now. Inside our controller:
让我们使用我们现在所拥有的。 在我们的控制器内:
// app/controllers/HomeController.php

class HomeController extends BaseController {
	private $ga;

	public function __construct( GA_Service $ga ){
		$this->ga = $ga;
	}

	public function index()
	{
		if( $this->ga->isLoggedIn() ){
			return 'Show home page';
		}
		else{
            $url = $this->ga->getLoginUrl();
			return View::make('login', [ 'url' => $url ]);

		}

	}//index
}//class


// app/routes.php

Route::get('/', 'HomeController@index');
Route::get('/login', 'HomeController@login');
We inject GA_Service into our controller, and when the user hits our index route, we check if he’s logged in. If not, we generate the authentication URL.
我们将GA_Service注入到我们的控制器中,当用户点击我们的索引路由时,我们会检查他是否已登录。如果未登录,则会生成身份验证URL。
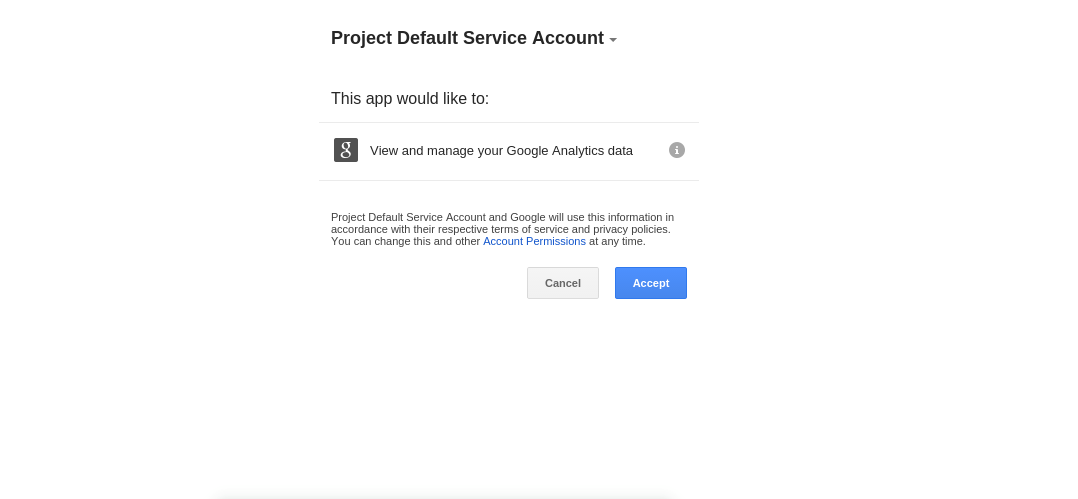
After accepting the request permission, you will be redirected to the login page with the code parameter.
接受请求权限后,将使用code参数将您重定向到登录页面。
// app/controllers/HomeController.php
public function login(){
	if( Input::has('code') ){
		$code = Input::get('code');
		$this->ga->login($code);

		return "Go to the home <a href='/'>page</a>";
	}
	else{
		return "Invalide request parameters";
	}//else
}//login
In our login function, we test if the code exists. If so, we pass it to our GA_Service::login function so we can authenticate and get a token for the user.
在登录功能中,我们测试code存在。 如果是这样,我们将其传递给我们的GA_Service::login函数,以便我们可以进行身份验证并为用户获取令牌。
结语 (Wrapping up)
In this part we discussed the basic usage of Google Analytics API. At this point, we have a token that we can use to query the list of APIs, and in the next part, we’re going to continue building our demo app using the Google Analytics API.
在这一部分中,我们讨论了Google Analytics(分析)API的基本用法。 至此,我们有了一个令牌,可以用来查询API列表,在下一部分中,我们将继续使用Google Analytics(分析)API来构建演示应用程序。
翻译自: https://www.sitepoint.com/using-google-analytics-api-php-logging/


 726
726

 被折叠的 条评论
为什么被折叠?


