


 本文介绍了如何使用three.js的自定义着色器材质扩展SpriteMaterial,来创建动画云。通过滑动纹理、噪声、遮罩和Alpha等技术,实现了云的视觉效果。虽然不是最优化的解决方案,但这个简单的技术可以帮助理解如何使用three.js创建过程云。
three.js 雪精灵
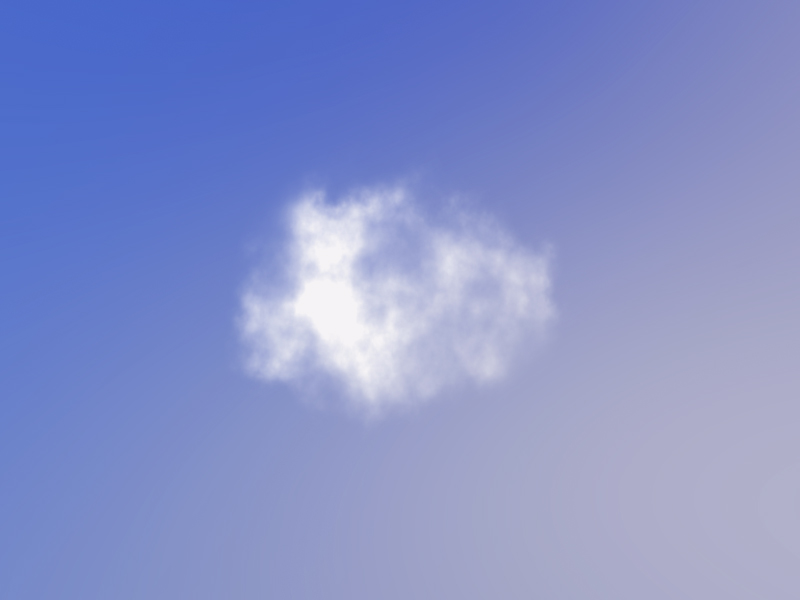
Today we are going to create an animated cloud using a custom shader material, extending the built-in Sprite material of Three.js.
今天,我们将使用自定义着色器材质创建一个动画云,从而扩展了Three.js的内置Sprite材质。
We’ll assume that you are familiar with React (including Hooks), Three.js and React-Three-Fiber. If not, you might find this article that I wrote as a beginner’s intro to the library helpful as a quick start.
我们假设您熟悉React (包括Hooks ),Three.js和React-Three-Fiber 。 如果不是这样,您可能会发现我作为图书馆初学者撰写的这篇文章对快速入门很有帮助。
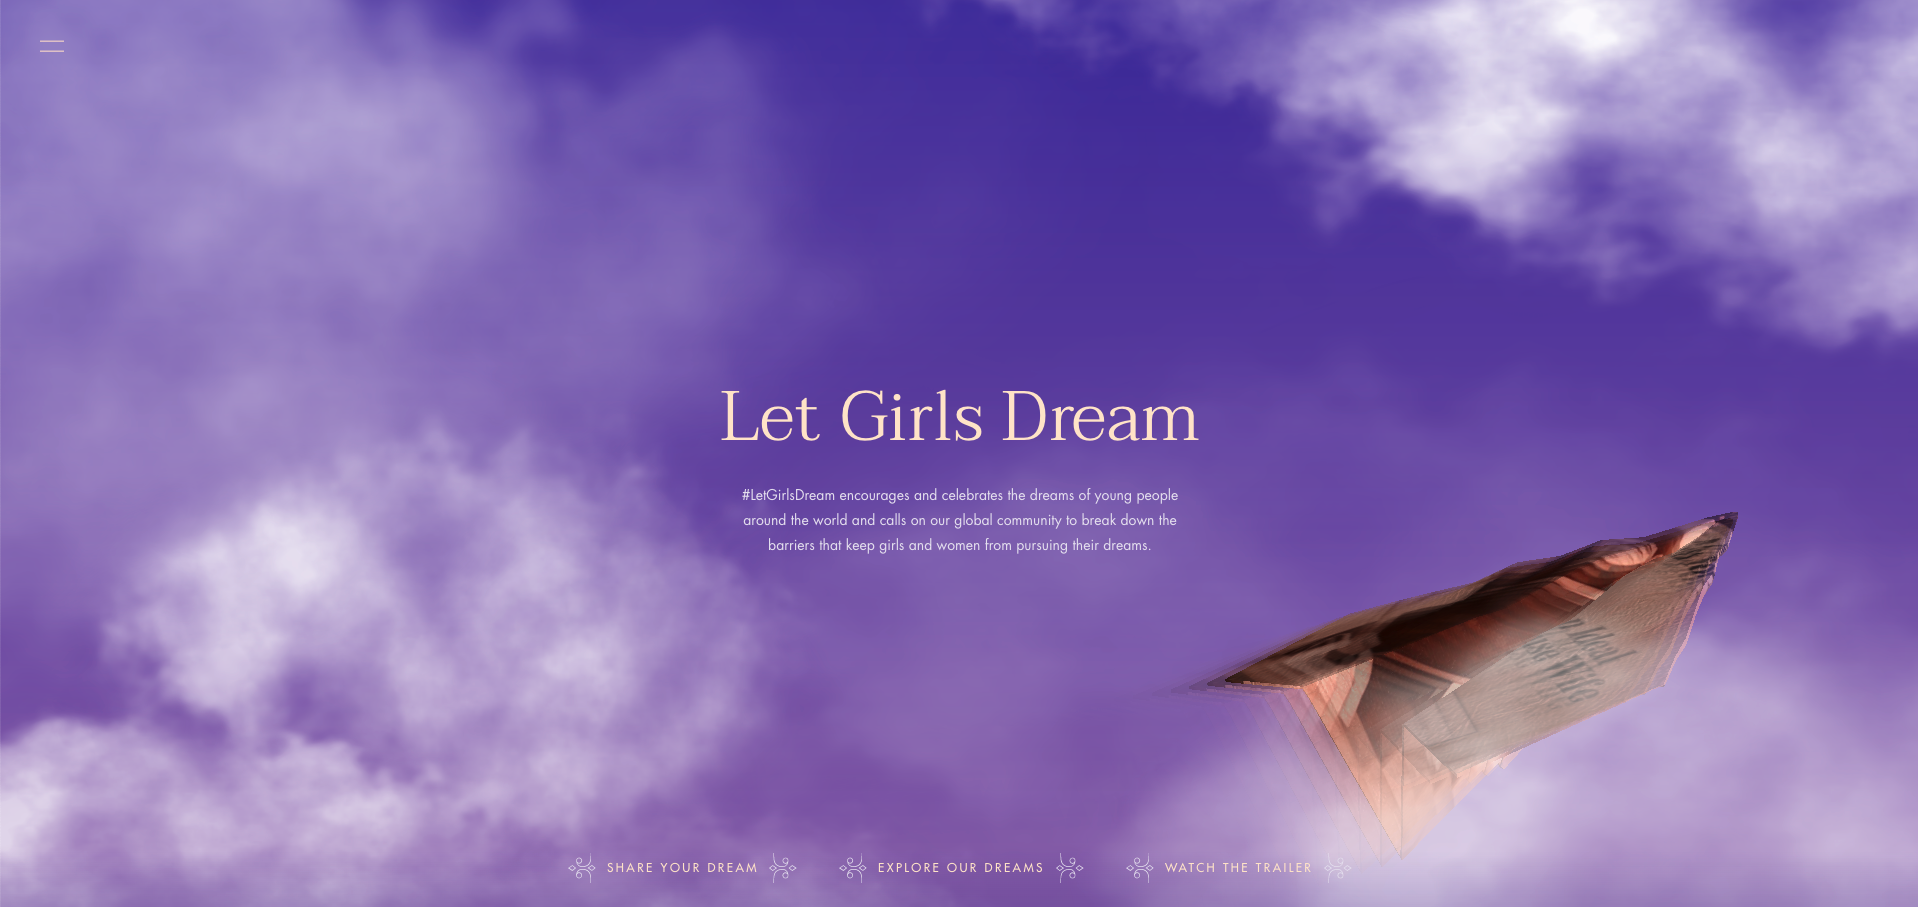
The technique that we’ll explain was used in two recent projects made at Low:
我们将介绍的技术已在Low的两个最新项目中使用:

We won’t cover the other elements, like the background, and we also won’t create the most performant cloud because it would get a bit too complex and the purpose of this article is to get you familiar with the technique while keeping it simple.
我们不会覆盖其他元素,例如背景,也不会创建性能最高的云,因为它会变得有点太复杂,本文的目的是让您熟悉该技术,同时保持其简单性。
Note that the use of React it’s not obligatory here but I started using React-Three-Fiber for all my demos and projects, so I’ve opted to use it here, too.
注意,这里没有强制使用React,但是我开始在我的所有演示和项目中使用React-Three-Fiber,因此我也选择在这里使用它。
We will cover two main points in this article:
我们将在本文中介绍两点:
How to extend a SpriteMaterial
如何扩展SpriteMaterial
- How to write the shader of the cloud 如何编写云的着色器
扩展精灵材质(Extending the sprite material)
Since the goal is not to create a volumetric cloud (a real 3D cloud), I decided to extend a Three.js SpriteMaterial. We can instead leverage the fact that using a Sprite, the cloud will always be facing the camera, independently of the camera position or orientation. So if you move the cloud or move the camera you’ll always see it and it helps to fake the missing of 3D volume (check out the debug mode to get the idea).
由于目标不是创建体积云(真正的3D云),所以我决定扩展Three.js SpriteMaterial 。 相反,我们可以利用一个事实,即使用Sprite,云将始终面向相机,而与相机的位置或方向无关。 因此,如果您移动云或移动相机,您将始终看到它,并有助于伪造缺少的3D体积(请查看调试模式以了解想法)。
Note: If you head to the demo and add
/?debug=trueto the URL it will enable the Orbit Controls which will give you some visual insight into why I decided to use the Sprite material.注意:如果您进入演示并将
/?debug=true添加到URL,它将启用Orbit Controls,这将使您对为什么我决定使用Sprite材质有一些直观的了解。
There are multiple ways to extend a built-in material of Three.js, and you can find a good explanation in this article by Dusan Bosnjak.
有多种方法可以扩展Three.js的内置材料,您可以在Dusan Bosnjak的本文中找到很好的解释。
import {ShaderMaterial, UniformsUtils, ShaderLib} from 'three'
import fragment from '~shaders/cloud.frag'
import vertex from '~shaders/cloud.vert'

/**
* We are going to take the uniforms of the Sprite material
* and we'll merge with our uniforms
*/
const myUniforms = useMemo(() => ({
   .......
}), [])

const material = useMemo(() => {
  const mat = new ShaderMaterial({
    uniforms: {...UniformsUtils.clone(ShaderLib.sprite.uniforms), ...myUniforms},
     vertexShader: vertex,
     fragmentShader: fragment,
     transparent: true,
  })
  return mat
}, [])
We need to compose our vertex shader, adding the necessary #include code snippets. If you are interested in how materials are built in Three.js you can have a look at the source code.
我们需要组成我们的顶点着色器,添加必要的#include代码片段。 如果您对Three.js中的材料构建方式感兴趣,可以查看源代码。
uniform float rotation;
uniform vec2 center;
#include <common>
#include <uv_pars_vertex>
#include <fog_pars_vertex>
#include <logdepthbuf_pars_vertex>
#include <clipping_planes_pars_vertex>

varying vec2 vUv;

void main() {
  vUv = uv;

	vec4 mvPosition = modelViewMatrix * vec4( 0.0, 0.0, 0.0, 1.0 );
	vec2 scale;
	scale.x = length( vec3( modelMatrix[ 0 ].x, modelMatrix[ 0 ].y, modelMatrix[ 0 ].z ) );
	scale.y = length( vec3( modelMatrix[ 1 ].x, modelMatrix[ 1 ].y, modelMatrix[ 1 ].z ) );

	vec2 alignedPosition = ( position.xy - ( center - vec2( 0.5 ) ) ) * scale;
	vec2 rotatedPosition;
	rotatedPosition.x = cos( rotation ) * alignedPosition.x - sin( rotation ) * alignedPosition.y;
	rotatedPosition.y = sin( rotation ) * alignedPosition.x + cos( rotation ) * alignedPosition.y;
	mvPosition.xy += rotatedPosition;

	gl_Position = projectionMatrix * mvPosition;

	#include <logdepthbuf_vertex>
	#include <clipping_planes_vertex>
	#include <fog_vertex>
}
In this way we created a custom Sprite material. We can achieve the same effect in other ways for sure, but I decided to extend a built-in material because it could be useful in the future to add a custom logic. It’s now time to dig into the fragment.
通过这种方式,我们创建了一个自定义的Sprite材质。 我们可以肯定地通过其他方式实现相同的效果,但是我决定扩展内置材料,因为将来添加自定义逻辑可能会很有用。 现在是时候深入研究这个fragment 。
云的片段 (Cloud’s fragment)
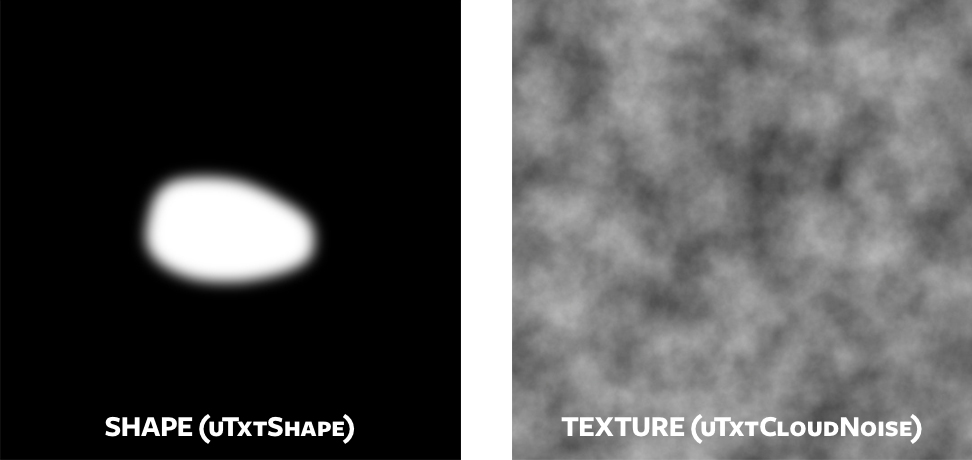
To create the cloud we need two assets. One is the rough starting shape of the cloud, the other one is the starting point of the texture/pattern.Keep in mind that both of the textures can be created directly in the shader but it will take some GPU calculations. That is fine, but if you can avoid it it’s a good practice to optimise the shader, too.
要创建云,我们需要两个资产。 一个是云的粗略起始形状,另一个是纹理/图案的起点,请记住,这两个纹理都可以直接在着色器中创建,但需要进行一些GPU计算。 很好,但是如果可以避免的话,优化着色器也是一个好习惯。
Using some images instead of creating them with code could save you some computational power.
使用某些图像而不是使用代码创建图像可以节省一些计算能力。
滑动纹理 (Sliding textures)
First of all let’s create two sliding textures, using the texture image above (uTxtCloudNoise), that we will use later to handle the alpha channel of the output. These are sliding textures that helps us to create a “fake” noise effect by concatenate, adding and multiply them.
首先,我们使用上面的纹理图像( uTxtCloudNoise )创建两个滑动纹理,稍后我们将使用它们来处理输出的alpha通道。 这些是滑动纹理,可帮助我们通过串联,相加和相乘来创建“伪”噪声效果。
vec4 txtNoise1 = texture2D(uTxtCloudNoise, vec2(vUv.x + uTime * 0.0001, vUv.y - uTime * 0.00014));
vec4 txtNoise2 = texture2D(uTxtCloudNoise, vec2(vUv.x - uTime * 0.00002, vUv.y + uTime * 0.000017 + 0.2));噪声(Noise)
We now need some GLSL noise: the Simpex noise and the Fractional Brownian motion (FBM) that allows us to morph the shape and create the vaporous border effect.
现在,我们需要一些GLSL噪声: Simpex噪声和分数布朗运动(FBM) ,它使我们可以变形形状并产生蒸气状边框效果。
Let’s first create the Simplex and FBM noise to distort our UV. We will use the FBM to achieve the effect for the border of the cloud, to make it like smoke, and we will use the Simplex to do the shape morphing of the cloud.
让我们首先创建单纯形和FBM噪声以扭曲UV 。 我们将使用FBM来实现云边界的效果,使其像烟雾一样,并且将使用单纯形对云进行形状变形。
The distorted UV, now called newUv, will be used during the declaration of the txtShape:
扭曲的UV (现在称为newUv )将在txtShape的声明期间使用:
#pragma glslify: fbm3d = require('glsl-fractal-brownian-noise/3d')
#pragma glslify: snoise3 = require(glsl-noise/simplex/3d)

// FBM
float noiseBig = fbm3d(vec3(vUv, uTime), 4)+ 1.0 * 0.5;
newUv += noiseBig * uDisplStrenght1;

//SIMPLEX
float noiseSmall = snoise3(vec3(newUv, uTime)) + 1.0 * 0.5;
newUv += noiseSmall * uDisplStrenght2;

......
vec4 txtShape = texture2D(uTxtShape, newUv);
And this is how the noise looks like:
这就是噪音的样子:
遮罩和Alpha(Mask & Alpha)
To create the mask for the cloud we will use the shape texture (uTxtShape) we saw at the beginning and the result of the sliding textures we mentioned earlier.
为了创建云的遮罩,我们将使用开始时看到的形状纹理(uTxtShape)以及前面提到的滑动纹理的结果。
The following output is the result of the masking only. The border and the shape effect is fine but the internal pattern/color is not:
以下输出仅是掩蔽的结果。 边框和形状效果很好,但内部图案/颜色不佳:
Now we calculate the alpha used on the sliding textures from before. We’ll use the levels function, that was taken from here, which is more or less like the Photoshop levels function.
现在,我们从以前计算滑动纹理上使用的Alpha。 我们将使用从此处获取的levels功能,该功能或多或少类似于Photoshop的关卡功能。
Concatenating the distorted shape (uTxtShape) and the red channel of the sliding textures will give us the external shape and even the internal “cloud pattern” to create a more real look and feel:
将扭曲的形状(uTxtShape)与滑动纹理的红色通道结合起来,将为我们提供外部形状,甚至内部的“云纹”,以创建更真实的外观:
vec4 txtShape = texture2D(uTxtShape, newUv);

float alpha = levels((txtNoise1 + txtNoise2) * 0.6, 0.2, 0.4, 0.7).r;
alpha *= txtShape.r;

gl_FragColor = vec4(vec3(0.95,0.95,0.95), alpha);
串联一切 (Concatenating everything)
It’s time now to wrap everything up to display the final output:
现在该包装所有内容以显示最终输出:
void main() {
  vec2 newUv = vUv;

  // Sliding textures
  vec4 txtNoise1 = texture2D(uTxtCloudNoise, vec2(vUv.x + uTime * 0.0001, vUv.y - uTime * 0.00014)); // noise txt
  vec4 txtNoise2 = texture2D(uTxtCloudNoise, vec2(vUv.x - uTime * 0.00002, vUv.y + uTime * 0.000017 + 0.2)); // noise txt

  // Calculate the FBM and distort the UV
  float noiseBig = fbm3d(vec3(vUv * uFac1, uTime * uTimeFactor1), 4)+ 1.0 * 0.5;
  newUv += noiseBig * uDisplStrenght1;

  // Calculate the Simplex and distort the UV
  float noiseSmall = snoise3(vec3(newUv * uFac2, uTime * uTimeFactor2)) + 1.0 * 0.5;

  newUv += noiseSmall * uDisplStrenght2;

  // Create the shape (mask)
  vec4 txtShape = texture2D(uTxtShape, newUv);

  // Alpha
  float alpha = levels((txtNoise1 + txtNoise2) * 0.6, 0.2, 0.4, 0.7).r;
  alpha *= txtShape.r;

  gl_FragColor = vec4(vec3(0.95,0.95,0.95), alpha);
}
最后的想法 (Final thoughts )
Keep in mind that this is not the most performant way to create a cloud, but it’s a simple one. Using noise functions is expensive, but for the sake of this tutorial it should suffice.
请记住,这不是创建云的最有效方法,但这是一种简单的方法。 使用噪声函数很昂贵,但是就本教程而言,它就足够了。
If you have any thoughts, improvements or doubts, please feel free to write to me in Twitter, I’ll be happy to help.
如果您有任何想法,改进或疑问,请随时在Twitter中写信给我,我们将竭诚为您服务。
翻译自: https://tympanus.net/codrops/2020/01/28/how-to-create-procedural-clouds-using-three-js-sprites/
three.js 雪精灵


 762
762

 被折叠的 条评论
为什么被折叠?
被折叠的 条评论
为什么被折叠?
 到【灌水乐园】发言


