


Animations play a big role in how users feels about your website. They convey a lot of the personality and feel of your site. They also help the user navigate new and already known screens with more ease.
动画在用户对您的网站的感觉方面起着重要作用。 它们传达了您网站的许多个性和感觉。 它们还帮助用户更轻松地浏览新的和已知的屏幕。
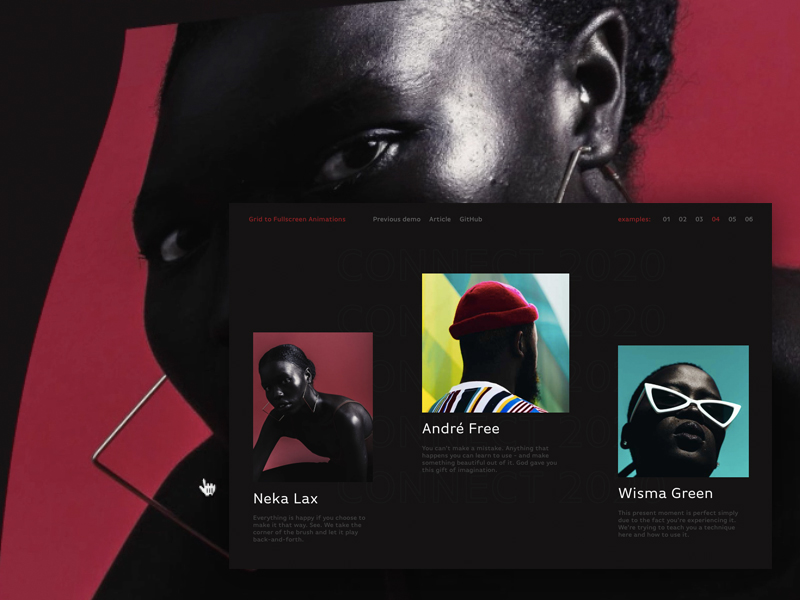
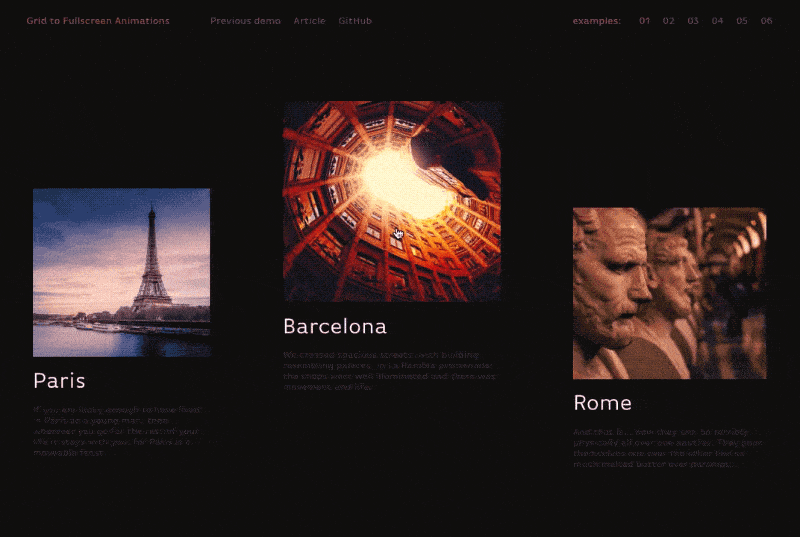
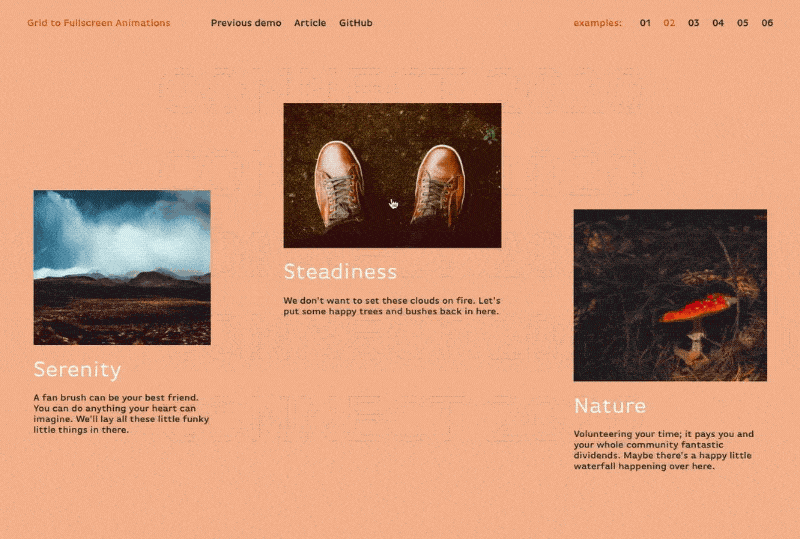
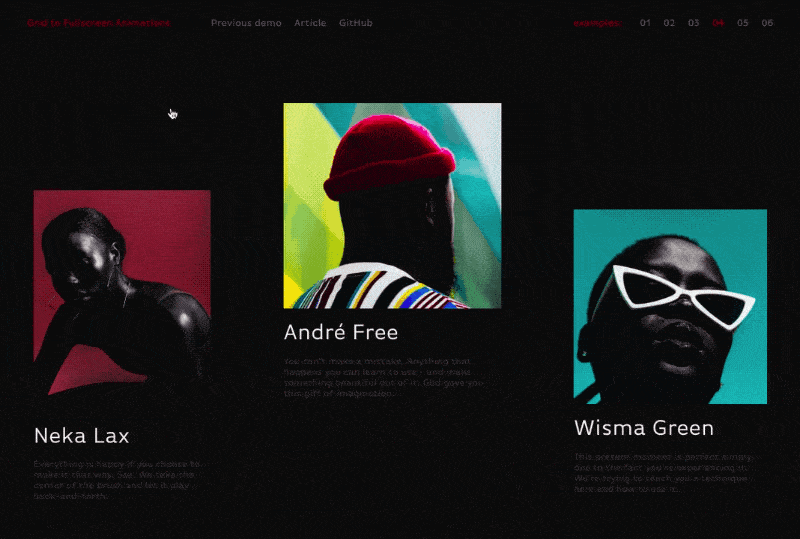
In this tutorial we want to look at how to create some interesting grid-to-fullscreen animations on images. The idea is to have a grid of smaller images and when clicking on one, the image enlarges with a special animation to cover the whole screen. We’ll aim for making them accessible, unique and visually appealing. Additionally, we want to show you the steps for making your own.
在本教程中,我们要研究如何在图像上创建一些有趣的从网格到全屏动画。 这个想法是要有一个较小的图像网格,当单击一个图像时,图像会放大并带有特殊的动画以覆盖整个屏幕。 我们的目标是使它们易于使用,独特且具有视觉吸引力。 此外,我们想向您展示制作自己的步骤。
积木 (The building blocks)
Before we can start doing all sorts of crazy animations, timing calculations and reality deformation we need to get the basic setup of the effect ready:
在开始进行各种疯狂的动画,时序计算和现实变形之前,我们需要准备好效果的基本设置:
- Initialize Three.js and the plane we’ll use 初始化Three.js和我们将使用的飞机
- Position and scale the plane so it is similar to the item’s image whenever the user clicks an item定位和缩放平面,以便每当用户单击项目时,它都类似于项目的图像
- Animate the plane so it covers the complete screen对飞机进行动画处理,使其覆盖整个屏幕
For the sake of not going too crazy with all the effects we can make, we’ll focus on making a flip effect like the one in our first demo.
为了不对我们可以制作的所有效果太疯狂,我们将集中精力制作像我们第一个演示中那样的翻转效果。
初始化 (Initialization)
To begin, lets make a basic Three.js setup and add a single 1×1 plane which we’ll re-use for the animation of every grid item. Since only one animation can happen at the time. We can have better performance by only using one plane for all animations.
首先,让我们进行基本的Three.js设置,并添加一个1×1平面,我们将其重新用于每个网格项目的动画。 由于一次只能发生一个动画。 通过对所有动画仅使用一个平面,我们可以获得更好的性能。
This simple change is going to allow us to have any number of HTML items without affecting the performance of the animation.
这个简单的更改将使我们能够拥有任意数量HTML项目,而不会影响动画的性能。
As a side note, in our approach we decided to only use Three.js for the time of the animation. This means all the items are good old HTML.
附带说明一下,在我们的方法中,我们决定在动画制作时仅使用Three.js。 这意味着所有项目都是好的旧HTML。
This allows our code to have a natural fallback for browsers that don’t have WebGL support. And it also makes our effect more accessible.
这使我们的代码对于不支持WebGL的浏览器具有自然的后备功能。 这也使我们的效果更容易获得。
class GridToFullscreenEffect {
	...
	init(){
		...
		const segments = 128;
		var geometry = new THREE.PlaneBufferGeometry(1, 1, segments, segments);
		// We'll be using the shader material later on ;)
		var material = new THREE.ShaderMaterial({
		  side: THREE.DoubleSide
		});
		this.mesh = new THREE.Mesh(geometry, material);
		this.scene.add(this.mesh);
	}
}
Note: We are skipping over the Three.js initialization since it’s pretty basic.
注意:由于它非常基础,因此我们跳过Three.js初始化。
Setting the the plane geometry’s size to be 1×1 simplifies things a little bit. It removes a some of the math involved with calculating the correct scale. Since 1 scaled by any number is always going to return that same number.
将平面几何图形的大小设置为1×1会稍微简化一些事情。 它消除了一些与计算正确比例有关的数学运算。 由于1可以按任意数字缩放,因此总是会返回相同的数字。
定位和调整大小 (Positioning and resizing)
Now, we’ll resize and position the plane to match the item’s image. To do this, we’ll need to get the item’s getBoundingClientRect. Then we need to transform its values from pixels to the camera’s view units. After, we need to transform them from relative to the top left, to relative from the center. Summarized:
现在,我们将调整平面大小并放置平面以匹配项目的图像。 为此,我们需要获取项目的getBoundingClientRect 。 然后,我们需要将其值从像素转换为相机的视图单位。 之后,我们需要将它们从相对于左上方的位置转换为相对于中心的位置。 总结:
- Map pixel units to camera’s view units 将像素单位映射到相机的视角单位
- Make the units relative to the center instead of the top left使单位相对于中心而不是左上方
- Make the position’s origin start on the plane’s center, not on the top left使位置的原点从飞机的中心开始,而不是从左上角开始
- Scale and position the mesh using these new values使用这些新值缩放和定位网格
class GridToFullscreenEffect {
...
 onGridImageClick(ev,itemIndex){
	// getBoundingClientRect gives pixel units relative to the top left of the pge
	 const rect = ev.target.getBoundingClientRect();
	const viewSize = this.getViewSize();

	// 1. Transform pixel units to camera's view units
	const widthViewUnit = (rect.width * viewSize.width) / window.innerWidth;
	const heightViewUnit = (rect.height * viewSize.height) / window.innerHeight;
	let xViewUnit =
	  (rect.left * viewSize.width) / window.innerWidth;
	let yViewUnit =
	  (rect.top * viewSize.height) / window.innerHeight;

	// 2. Make units relative to center instead of the top left.
	xViewUnit = xViewUnit - viewSize.width / 2;
	yViewUnit = yViewUnit - viewSize.height / 2;


	// 3. Make the origin of the plane's position to be the center instead of top Left.
	let x = xViewUnit + widthViewUnit / 2;
	let y = -yViewUnit - heightViewUnit / 2;

	// 4. Scale and position mesh
	const mesh = this.mesh;
	// Since the geometry's size is 1. The scale is equivalent to the size.
	mesh.scale.x = widthViewUnit;
	mesh.scale.y = heightViewUnit;
	mesh.position.x = x;
	mesh.position.y = y;

	}
 }
As a side note, scaling the mesh instead of scaling the geometry is more performant. Scaling the geometry actually changes its internal data which is slow and expensive, while scaling the mesh happens at rendering. This decision will come into play later on, so keep it in mind.
附带说明一下,缩放网格而不是缩放几何图形性能更高。 缩放几何实际上会更改其内部数据,这既缓慢又昂贵,而缩放网格发生在渲染时。 该决定将在稍后生效,因此请记住这一点。
Now, bind this function to each item’s onclick event. Then our plane resizes to match the item’s image.
现在,将此函数绑定到每个项目的onclick事件。 然后,我们的飞机调整大小以匹配项目的图像。
It’s a very simple concept, yet quite performant in the long run. Now that our plane is ready to go when clicked, lets make it cover the screen.
这是一个非常简单的概念,但从长远来看却表现出色。 现在我们的飞机已经准备就绪,可以单击它,使其覆盖屏幕。
基本动画 (Basic animation)
First, lets initialize the few uniforms:
首先,让我们初始化一些制服:
uProgress– Progress of the animationuProgress–动画进度uMeshScale– Scale of the meshuMeshScale–网格比例uMeshPosition– Mesh’s position from the centeruMeshPosition–网格从中心的位置uViewSize– Size of the camera’s viewuViewSize–相机视图的大小
We’ll also create the base for our shaders.
我们还将为着色器创建基础。
class GridToFullscreenEffect {
	constructor(container, items){
		this.uniforms = {
		  uProgress: new THREE.Uniform(0),
		  uMeshScale: new THREE.Uniform(new THREE.Vector2(1, 1)),
		  uMeshPosition: new THREE.Uniform(new THREE.Vector2(0, 0)),
		  uViewSize: new THREE.Uniform(new THREE.Vector2(1, 1)),
		}
	}
	init(){
		...
		const viewSize = this.getViewSize();
		this.uniforms.uViewSize.x = viewSize.width;
		this.uniforms.uViewSize.y = viewSize.height;
		var material = new THREE.ShaderMaterial({
			uniform: this.uniforms,
			vertexShader: vertexShader,
			fragmentShader: fragmentShader,
			side: THREE.DoubleSide
		});

		...
	}
	...
}
const vertexShader = `
	uniform float uProgress;
	uniform vec2 uMeshScale;
	uniform vec2 uMeshPosition;
	uniform vec2 uViewSize;

	void main(){
		vec3 pos = position.xyz;
		 gl_Position = projectionMatrix * modelViewMatrix * vec4(pos,1.);
	}
`;
const fragmentShader = `
	void main(){
		 gl_FragColor = vec4(vec3(0.2),1.);
	}
`;
We need to update uMeshScale and uMeshPositon uniforms whenever we click an item.
每当我们单击一个项目时,我们都需要更新uMeshScale和uMeshPositon制服。
class GridToFullscreenEffect {
	...
	onGridImageClick(ev,itemIndex){
		...
		// Divide by scale because on the fragment shader we need values before the scale
		this.uniforms.uMeshPosition.value.x = x / widthViewUnit;
		this.uniforms.uMeshPosition.value.y = y / heightViewUnit;

		this.uniforms.uMeshScale.value.x = widthViewUnit;
		this.uniforms.uMeshScale.value.y = heightViewUnit;
	}
}
Since we scaled the mesh and not the geometry, on the vertex shader our vertices still represent a 1×1 square in the center of the scene. But it ends up rendered in another position and with a different size because of the mesh. As a consequence of this optimization, we need to use “down-scaled” values in the vertex shaders. With that out of the way, lets make the effect happen in our vertex Shader:
由于我们缩放网格而不是缩放几何,因此在顶点着色器上,我们的顶点仍代表场景中心的1×1正方形。 但是由于网格的缘故,最终以其他位置和不同的大小进行渲染。 作为此优化的结果,我们需要在顶点着色器中使用“缩小比例”的值。 顺便说一句,让效果在我们的顶点着色器中发生:
- Calculate the scale needed to match the screen size using our mesh’s scale 使用我们的网格比例来计算与屏幕尺寸匹配所需的比例
- Move the vertices by their negative position so they move to the center将顶点移动到其负位置,以便它们移动到中心
- Multiply those values by the progress of the effect将这些值乘以效果的进度
...
const vertexShader = `
	uniform float uProgress;
	uniform vec2 uPlaneSize;
	uniform vec2 uPlanePosition;
	uniform vec2 uViewSize;

	void main(){
		vec3 pos = position.xyz;

		// Scale to page view size/page size
		vec2 scaleToViewSize = uViewSize / uPlaneSize - 1.;
		vec2 scale = vec2(
		  1. + scaleToViewSize * uProgress
		);
		pos.xy *= scale;

		// Move towards center
		pos.y += -uPlanePosition.y * uProgress;
		pos.x += -uPlanePosition.x * uProgress;


		 gl_Position = projectionMatrix * modelViewMatrix * vec4(pos,1.);
	}
`;
Now, when we click an item. We are going to:
现在,当我们单击一个项目时。 我们准备去:
- set our canvas container on top of the items 将我们的画布容器放在项目上方
- make the HTML item invisible使HTML项目不可见
- tween uProgress between 0 and 1在0和1之间进行补间
class GridToFullscreenEffect {
	...
	constructor(container,items){
		...
		this.itemIndex = -1;
		this.animating = false;
		this.state = "grid";
	}
	toGrid(){
		if (this.state === 'grid' || this.isAnimating) return;
		this.animating = true;
		this.tween = TweenLite.to(
		  this.uniforms.uProgress,1.,
		  {
			value: 0,
			onUpdate: this.render.bind(this),
			onComplete: () => {
			  this.isAnimating = false;
			  this.state = "grid";
			this.container.style.zIndex = "0";
			}
		  }
		);
	}
	toFullscreen(){
	if (this.state === 'fullscreen' || this.isAnimating) return;
		this.animating = true;
		this.container.style.zIndex = "2";
		this.tween = TweenLite.to(
		  this.uniforms.uProgress,1.,
		  {
			value: 1,
			onUpdate: this.render.bind(this),
			onComplete: () => {
			  this.isAnimating = false;
			  this.state = "fullscreen";
			}
		  }
		);
	}

	onGridImageClick(ev,itemIndex){
		...
		this.itemIndex = itemIndex;
		this.toFullscreen();
	}
}
We start the tween whenever we click an item. And there you go, our plane goes back and forth no matter which item we choose.
每当我们单击一个项目时,我们就会启动补间。 然后,无论选择哪种项目,我们的飞机都会来回走动。
Pretty good, but not too impressive yet.
不错,但还不算令人印象深刻。
Now that we have the basic building blocks done, we can start making the cool stuff. For starters, lets go ahead and add timing.
既然我们已经完成了基本的构建块,那么我们就可以开始制作很棒的东西了。 首先,让我们继续并增加时间。
激活和计时 (Activation and timing)
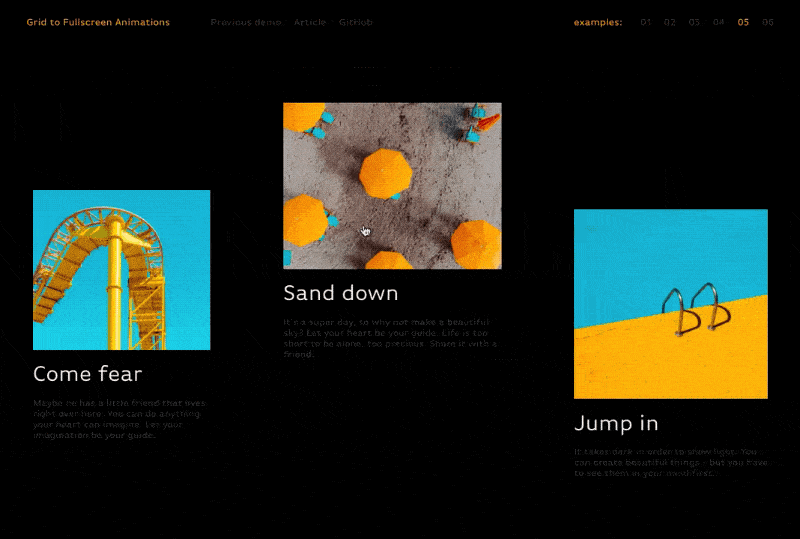
Scaling the whole plane is a little bit boring. So, lets give it some more flavor by making it scale with different patterns: Top-to-bottom, left-to-right, topLeft-to-bottomRight.
缩放整个平面有点无聊。 因此,让它具有不同的样式,使其具有更多的风味:从上到下,从左到右,topLeft到bottomRight。
Lets take a look at how those effects behave and figure out what we need to do:
让我们看一下这些效果如何表现并弄清楚我们需要做什么:
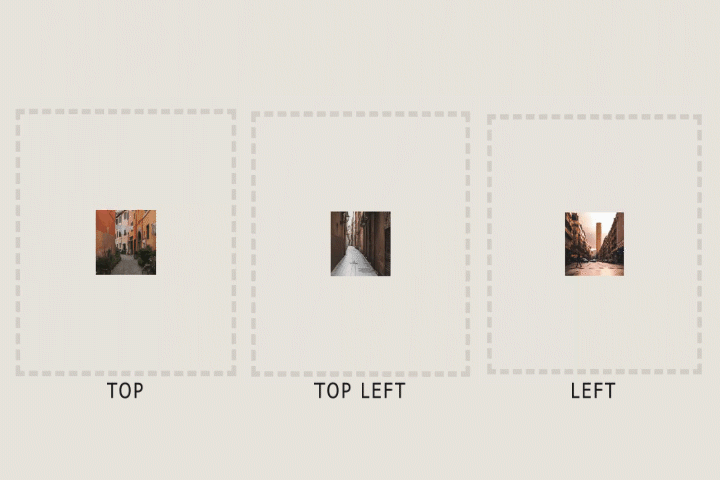
By observing the effects for a minute, we can notice that the effect is all about timing. Some parts of the plane start later than others.
通过观察效果一分钟,我们可以注意到效果完全取决于时间。 飞机的某些部分比其他部分开始晚。
What we are going to do is to create an “activation” of the effect. We’ll use that activation to determine which vertices are going to start later than others.
我们要做的是创建效果的“激活”。 我们将使用该激活来确定哪些顶点要比其他顶点开始得晚。

And lets see how that looks like in code:
让我们看看代码中的样子:
...
const vertexShader = `
	...
	void main(){
		vec3 pos = position.xyz;

		// Activation for left-to-right
		float activation = uv.x;

		float latestStart = 0.5;
		float startAt = activation * latestStart;
		float vertexProgress = smoothstep(startAt,1.,uProgress);

		...
	}
`;
We’ll replace uProgress with vertexprogres for any calculations in the vertex shader.
我们将更换uProgress与vertexprogres在顶点着色器的任何计算。
...
const vertexShader = `
	...
	void main(){
		...
		float vertexProgress = smoothstep(startAt,1.,uProgress);

		vec2 scaleToViewSize = uViewSize / uMeshScale - 1.;
		vec2 scale = vec2(
		  1. + scaleToViewSize * vertexProgress
		);
		pos.xy *= scale;

		// Move towards center
		pos.y += -uMeshPosition.y * vertexProgress;
		pos.x += -uMeshPosition.x * vertexProgress;
		...
	}
`;
With this little change, our animation is not much more interesting.
有了这个小小的变化,我们的动画就没那么有趣了。
Note that the gradients on the demo are there for demonstration purposes. They have nothing to do with the effect itself.
请注意,演示中的渐变仅用于演示目的。 它们与效果本身无关。
The great thing about these “activation” and “timing” concepts is that they are interchangeable implementations. This allows us to create a ton of variations.
这些“激活”和“定时”概念的妙处在于它们是可互换的实现。 这使我们可以创建大量的变体。
With the activation and timing in place, lets make it more interesting with transformations.
在激活和定时的情况下,让转换变得更加有趣。
转变 (Transformations)
If you haven’t noticed, we already know how to make a transformation. We successfully scaled and moved the plane forwards and backwards.
如果您没有注意到,我们已经知道如何进行转换。 我们成功地缩放了飞机并使其前后移动。
We interpolate or move from one state to another using vertexProgress. Just like we are doing in the scale and movement:
我们使用vertexProgress插值或从一种状态移动到另一种状态。 就像我们在规模和运动方面所做的一样:
...
const vertexShader = `
	...
	void main(){
	...
		// Base state = 1.
		// Target state = uScaleToViewSize;
		// Interpolation value: vertexProgress
		scale = vec2(
		  1. + uScaleToViewSize * vertexProgress
		);

		// Base state = pos
		// Target state = -uPlaneCenter;
		// Interpolation value: vertexProgress
		pos.y += -uPlaneCenter.y * vertexProgress;
		pos.x += -uPlaneCenter.x * vertexProgress;
	...
	}
`
Lets apply this same idea to make a flip transformation:
让我们应用相同的想法进行翻转转换:
- Base state: the vertex’s current position 基本状态:顶点的当前位置
- Target state: The vertex flipped position目标状态:顶点翻转位置
- Interpolate with: the vertex progress插值:顶点进度
...
const vertexShader = `
	...
	void main(){
		...
		float vertexProgress = smoothstep(startAt,1.,uProgress);
		// Base state: pos.x
		// Target state: flippedX
		// Interpolation with: vertexProgress
		float flippedX = -pos.x;
		pos.x = mix(pos.x,flippedX, vertexProgress);
		// Put vertices that are closer to its target in front.
		pos.z += vertexProgress;
		...
	}
`;
Note that, because this flip sometimes puts vertices on top of each other we need to bring some of them slightly to the front to make it look correctly.
请注意,由于此翻转有时会使顶点彼此重叠,因此我们需要将其中一些顶点稍微移到最前面,以使其看起来正确。
Combining these flips with different activations, these are some of the variations we came up with:
结合使用不同的激活这些翻转,这些是我们想出的一些变化:
If you pay close attention to the flip you’ll notice it also flips the color/image backwards. To fix this issue we have to flip the UVs along with the position.
如果您密切注意翻转,您会注意到它还将色彩/图像向后翻转。 要解决此问题,我们必须将UV与位置翻转。
And there we have it! We’ve not only created an interesting and exciting flip effect, but also made sure that using this structure we can discover all kinds of effects by changing one or more of the pieces.
我们终于得到它了! 我们不仅创造了一种有趣而激动人心的翻转效果,而且确保使用此结构,我们可以通过更改一个或多个片段来发现各种效果。
In fact, we created the effects seen in our demos using the configurations as part of our creative process.
实际上,我们将配置作为创意过程的一部分来创建了演示中看到的效果。
There is so much more to explore! And we would love to see what you can come up with.
还有更多值得探索的地方! 我们很乐意看到您可以提出的建议。
Here are the most interesting variations we came up with:
以下是我们想到的最有趣的变体:
Different timing creation:
不同的计时创建:
Activation based on mouse position, and deformation with noise:
基于鼠标位置的激活,以及带有噪声的变形:
Distance deformation and mouse position activation:
距离变形和鼠标位置激活:
We hope you enjoyed this tutorial and find it helpful!
我们希望您喜欢本教程并对它有所帮助!
翻译自: https://tympanus.net/codrops/2019/05/22/creating-grid-to-fullscreen-animations-with-three-js/


 2437
2437


 被折叠的 条评论
为什么被折叠?
被折叠的 条评论
为什么被折叠?
 到【灌水乐园】发言


