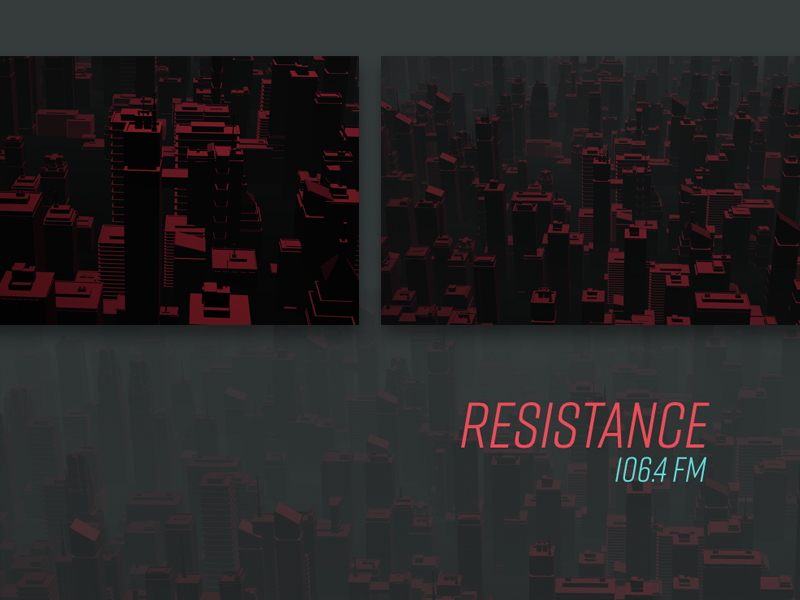
three.js绘制波浪面_使用Three.js构建建筑物波浪动画

three.js绘制波浪面

three.js绘制波浪面

BuildingsWave_featured

This tutorial is going to demonstrate how to build a wave animation effect for a grid of building models using three.js and TweenMax (GSAP).

本教程将演示如何使用three.js和TweenMax(GSAP)为建筑模型网格构建波浪动画效果。

Attention: This tutorial assumes you already have a some understanding of how three.js works. 注意:本教程假定您已经对Three.js的工作原理有所了解。
If you are not familiar, I highly recommend checking out the official
如果您不熟悉,我强烈建议您查看官方 documentation and 文档examples . 示例

灵感 (Inspiration)

Source: View by: Baran Kahyaoglu

来源:查看者: Baran Kahyaoglu

核心理念 (Core Concept)

The idea is to create a grid of random buildings, that reveal based on their distance towards the camera. The motion we are trying to get is like a wave passing through, and the farthest elements will be fading out in the fog.

这个想法是创建一个随机建筑物的网格,该网格根据它们到相机的距离进行显示。 我们试图获得的运动就像波涛通过,最远的元素将在雾中逐渐消失。

side-view

We also modify the scale of each building in order to create some visual randomness.

我们还修改了每座建筑物的比例,以创建视觉上的随机性。

入门 (Getting started)

First we have to create the markup for our demo. It’s a very simple boilerplate since all the code will be running inside a canvas element:

首先,我们必须为我们的演示创建标记。 这是一个非常简单的样板,因为所有代码都将在canvas元素内运行:

<html lang="en">
  <head>
    <meta charset="UTF-8">
    <meta name="viewport" content="width=device-width, initial-scale=1.0">
    <meta http-equiv="X-UA-Compatible" content="ie=edge">
    <meta name="target" content="all">
    <meta http-equiv="cleartype" content="on">
    <meta name="apple-mobile-web-app-capable" content="yes">
    <meta name="mobile-web-app-capable" content="yes">
    <title>Buildings Wave</title>
    <script src="https://cdnjs.cloudflare.com/ajax/libs/three.js/100/three.min.js">></script>
    <script src="https://Threejs.org/examples/js//loaders/OBJLoader.js" ></script>
    <script src="https://Threejs.org/examples/js/controls/OrbitControls.js"></script>
    <script src="https://cdnjs.cloudflare.com/ajax/libs/gsap/1.20.3/TweenMax.min.js"></script>
  </head>
  <body>
  </body>
</html>

基本CSS样式(Basic CSS Styles)

html, body {
  margin: 0;
  padding: 0;
  background-color: #fff;
  color: #fff;
  box-sizing: border-box;
  overflow: hidden;
}

canvas {
  width: 100%;
  height: 100%;
}

3D世界的初始设置(Initial setup of the 3D world)

We create a function called init inside our main class. All subsequent methods will be added inside this method.

我们在主类中创建一个称为init的函数。 所有后续方法都将添加到此方法内。

init() {
  this.group = new THREE.Object3D();
  this.gridSize = 40;
  this.buildings = [];
  this.fogConfig = {
    color: '#fff',
    near: 1,
    far: 138
  };
}

创建我们的3D场景(Creating our 3D scene)

createScene() {
  this.scene = new THREE.Scene();

  this.renderer = new THREE.WebGLRenderer({ antialias: true, alpha: true });
  this.renderer.setSize(window.innerWidth, window.innerHeight);

  this.renderer.shadowMap.enabled = true;
  this.renderer.shadowMap.type = THREE.PCFSoftShadowMap;

  document.body.appendChild(this.renderer.domElement);

  // this is the line that will give us the nice foggy effect on the scene
  this.scene.fog = new THREE.Fog(this.fogConfig.color, this.fogConfig.near, this.fogConfig.far);
}

相机(Camera)

Let’s add a camera for to scene:

让我们为场景添加一个摄像机:

createCamera() {
  const width = window.innerWidth;
  const height = window.innerHeight;

  this.camera = new THREE.PerspectiveCamera(20, width / height, 1, 1000);

  // set the distance our camera will have from the grid
  // this will give us a nice frontal view with a little perspective
  this.camera.position.set(3, 16, 111);

  this.scene.add(this.camera);
}

地面(Ground)

Now we need to add a shape to serve as the scene’s ground

现在我们需要添加一个形状作为场景的地面

addFloor() {
  const width = 200;
  const height = 200;
  const planeGeometry = new THREE.PlaneGeometry(width, height);

  // all materials can be changed according to your taste and needs
  const planeMaterial = new THREE.MeshStandardMaterial({
    color: '#fff',
    metalness: 0,
    emissive: '#000000',
    roughness: 0,
  });

  const plane = new THREE.Mesh(planeGeometry, planeMaterial);

  planeGeometry.rotateX(- Math.PI / 2);

  plane.position.y = 0;

  this.scene.add(plane);
}

载入3D模型(Load 3D models)

Before we can build the grid, we have to load our models.

在构建网格之前,我们必须加载模型。

models
loadModels(path, onLoadComplete) {
  const loader = new THREE.OBJLoader();

  loader.load(path, onLoadComplete);
}

onLoadModelsComplete(model) {
  // our buildings.obj file contains many models
  // so we have to traverse them to do some initial setup

  this.models = [...model.children].map((model) => {
    // since we don't control how the model was exported
    // we need to scale them down because they are very big

    // scale model down
    const scale = .01;
    model.scale.set(scale, scale, scale);

    // position it under the ground
    model.position.set(0, -14, 0);

    // allow them to emit and receive shadow
    model.receiveShadow = true;
    model.castShadow = true;

    return model;
  });

  // our list of models are now setup
}

环境光(Ambient Light)

addAmbientLight() {
  const ambientLight = new THREE.AmbientLight('#fff');

  this.scene.add(ambientLight);
}

网格设置(Grid Setup)

Now we are going to place those models in a grid layout.

现在,我们将这些模型放置在网格布局中。

initialgrid
createGrid() {
  // define general bounding box of the model
  const boxSize = 3;

  // define the min and max values we want to scale
  const max = .009;
  const min = .001;

  const meshParams = {
    color: '#fff',
    metalness: .58,
    emissive: '#000000',
    roughness: .18,
  };

  // create our material outside the loop so it performs better
  const material = new THREE.MeshPhysicalMaterial(meshParams);

  for (let i = 0; i < this.gridSize; i++) {
    for (let j = 0; j < this.gridSize; j++) {

      // for every iteration we pull out a random model from our models list and clone it
      const building = this.getRandomBuiding().clone();

      building.material = material;

      building.scale.y = Math.random() * (max - min + .01);

      building.position.x = (i * boxSize);
      building.position.z = (j * boxSize);

      // add each model inside a group object so we can move them easily
      this.group.add(building);

      // store a reference inside a list so we can reuse it later on
      this.buildings.push(building);
    }
  }

  this.scene.add(this.group);

  // center our group of models in the scene
  this.group.position.set(-this.gridSize - 10, 1, -this.gridSize - 10);
}

射灯(Spot Light)

We also add a SpotLight to the scene for a nice light effect.

我们还向场景中添加了SpotLight,以获得不错的灯光效果。

spot-light
addSpotLight() {
  const light = { color: '#fff', x: 100, y: 150, z: 100 };
  const spotLight = new THREE.SpotLight(light.color, 1);

  spotLight.position.set(light.x, light.y, light.z);
  spotLight.castShadow = true;

  this.scene.add(spotLight);
}

点光源(Point Lights)

Let’s add some point lights.

让我们添加一些点光源。

point-lights
addPointLight(params) {
  // sample params
  // {
  //   color: '#00ff00',
  //   intensity: 4,
  //   position: {
  //     x: 18,
  //     y: 22,
  //     z: -9,
  //   }
  // };

  const pointLight = new THREE.PointLight(params.color, params.intensity);

  pointLight.position.set(params.position.x, params.position.y, params.position.z);

  this.scene.add(pointLight);
}

排序模型(Sort Models)

Before we animate the models into the scene, we want to sort them according to their z distance to the camera.

在将模型制作动画到场景中之前,我们想根据它们到相机的z距离对它们进行排序。

sortBuildingsByDistance() {
  this.buildings.sort((a, b) => {
    if (a.position.z > b.position.z) {
      return 1;
    }

    if (a.position.z < b.position.z) {
      return -1;
    }

    return 0;
  }).reverse();
}

动画模型(Animate Models)

This is the function where we go through our buildings list and animate them. We define the duration and the delay of the animation based on their position in the list.

这是我们浏览建筑物清单并对它们进行动画处理的功能。 我们根据动画在列表中的位置来定义动画的持续时间和延迟。

showBuildings() {
  this.sortBuildingsByDistance();

  this.buildings.map((building, index) => {
    TweenMax.to(building.position, .3 + (index / 350), { y: 1, ease: Power3.easeOut, delay: index / 350 });
  });
}

Here is how a variation with camera rotation looks like:

这是相机旋转的变化形式:

学分 (Credits)

翻译自: https://tympanus.net/codrops/2019/01/30/buildings-wave-animation-with-three-js/

three.js绘制波浪面

  • 0
    点赞
  • 4
    收藏
    觉得还不错? 一键收藏
  • 0
    评论

“相关推荐”对你有帮助么?

  • 非常没帮助
  • 没帮助
  • 一般
  • 有帮助
  • 非常有帮助
提交
评论
添加红包

请填写红包祝福语或标题

红包个数最小为10个

红包金额最低5元

当前余额3.43前往充值 >
需支付:10.00
成就一亿技术人!
领取后你会自动成为博主和红包主的粉丝 规则
hope_wisdom
发出的红包
实付
使用余额支付
点击重新获取
扫码支付
钱包余额 0

抵扣说明:

1.余额是钱包充值的虚拟货币,按照1:1的比例进行支付金额的抵扣。
2.余额无法直接购买下载,可以购买VIP、付费专栏及课程。

余额充值