


狭缝天线原理 pdf
In this tutorial we’ll create a fullscreen slideshow with a twist: we’ll slice the current slide open in order to reveal the next or previous slide. Using different data-attributes, we’ll define the type, rotation angle and scale of a slide’s parts, giving us the possibility to create unique effects of each slide transition.
在本教程中,我们将创建带有扭曲的全屏幻灯片:我们将打开当前幻灯片,以显示下一张或上一张幻灯片。 使用不同的数据属性,我们将定义幻灯片部件的类型,旋转角度和比例,从而使我们有可能为每个幻灯片过渡创建独特的效果。
We’ll be using jQuery cond, jQuery plugin by Ben Alman for chainable “if-then-else” statements.
我们将使用Ben Alman的jQuery jQuery插件cond来链接可链接的“ if-then-else”语句。
The animal icon font that we’ll be using is by Alan Carr and you can find it here.
我们将使用的动物图标字体是Alan Carr编写的,您可以在这里找到。
The images in the second demo are by Majownik and they are licensed under a Creative Commons Attribution License.
第二个演示中的图像是由Majownik制作的,并已根据知识共享署名许可协议获得许可。
Let’s start with the HTML.
让我们从HTML开始。
标记 (The Markup)
Our initial markup will consist of a main container with the class and id sl-slide-wrapper which will hold the slider and all the slides, each one having the class sl-slide. Then, we will add two types of navigation, one will be the arrows to go to the previous and next slide and the other will be the dots for navigating directly to a certain slide. We’ll also add a background class to each slide which will control the background color of every slide.
我们的初始标记将包括一个具有class和id sl-slide-wrapper的主容器,该容器将容纳滑块和所有幻灯片,每一个都具有sl-slide类。 然后,我们将添加两种类型的导航,一种是指向上一张和下一张幻灯片的箭头,另一种是直接导航到特定幻灯片的点。 我们还将为每张幻灯片添加一个背景类,以控制每张幻灯片的背景色。
<div id="slider" class="sl-slider-wrapper">

	<div class="sl-slider">

		<div class="sl-slide bg-1">
			<div class="sl-slide-inner">
				<div class="deco" data-icon="H"></div>
				<h2>A bene placito</h2>
				<blockquote>
					<p>You have just dined...</p>
					<cite>Ralph Waldo Emerson</cite>
				</blockquote>
			</div>
		</div>

		<div class="sl-slide bg-2">
			<div class="sl-slide-inner">
				<div class="deco" data-icon="q"></div>
				<h2>Regula aurea</h2>
				<blockquote>
					<p>Until he extends the circle...</p>
					<cite>Albert Schweitzer</cite>
				</blockquote>
			</div>
		</div>

		<div class="sl-slide bg-2">
			<!-- ... -->
		</div>

		<!-- ... -->

	</div>

	<nav id="nav-arrows" class="nav-arrows">
		<span class="nav-arrow-prev">Previous</span>
		<span class="nav-arrow-next">Next</span>
	</nav>

	<nav id="nav-dots" class="nav-dots">
		<span class="nav-dot-current"></span>
		<span></span>
		<span></span>
		<span></span>
		<span></span>
	</nav>

</div>
Every slide will also have some data-attributes that we will use in order to control the effect for each slide. The data attributes that we want are the following:
每张幻灯片还将具有一些数据属性,我们将使用这些数据属性来控制每张幻灯片的效果。 我们想要的数据属性如下:
data-orientation
data-slice1-rotation
data-slice2-rotation
data-slice1-scale
data-slice2-scale
The first one, data-orientation should be either “vertical” or “horizontal”. This we need in order to know where to “slice” the slide. It will be either slice horizontally or vertically. The data-slice1-rotation and data-slice2-rotation value will be the rotation degree for each one of the slices and the data-slice1-scale and data-slice2-scale value will be the scale value.
第一个是数据导向,应该是“垂直的”或“水平的”。 我们需要这样做才能知道在哪里“切片”幻灯片。 将水平或垂直切片。 data-slice1-rotation和data-slice2-rotation值将是每个切片的旋转度, data-slice1-scale和data-slice2-scale值将是比例值。
So, our first slide will have something like this:
因此,我们的第一张幻灯片将具有以下内容:
<div class="sl-slide" data-orientation="horizontal" data-slice1-rotation="-25" data-slice2-rotation="-25" data-slice1-scale="2" data-slice2-scale="2">
Our structure is a “base structure”. We will build upon that structure using JavaScript in order to be able to create the effects. So, we will want to transform it into this (each slide will also have the data attributes):
我们的结构是“基础结构”。 为了能够创建效果,我们将使用JavaScript构建该结构。 因此,我们将希望将其转换为此(每个幻灯片还将具有数据属性):
<div id="slider" class="sl-slider-wrapper">

	<div class="sl-slider">

		<div class="sl-slides-wrapper">

			<div class="sl-slide bg-1 sl-slide-horizontal">
				<div class="sl-content-wrapper">
					<div class="sl-content">
						<!-- the content -->
					</div>
				</div>
			</div>

			<!-- ... -->

		</div>

	</div>

	<!-- navs -->

</div>
The content will basically be our “sl-slide-inner” and everything that is inside of it.
内容基本上是我们的“ sl-slide-inner”以及其中的所有内容。
In the moment that we navigate to the next or previous slide we will take the current slide and duplicate its content wrapper, creating the “slices”:
在导航到下一张或上一张幻灯片的那一刻,我们将获取当前幻灯片并复制其内容包装器,以创建“切片”:
<div class="sl-slide sl-slide-horizontal" >

	<div class="sl-content-slice">
		<div class="sl-content-wrapper">
			<div class="sl-content">
				<!-- ... -->
			</div>
		</div>
	</div>

	<div class="sl-content-slice">
		<div class="sl-content-wrapper">
			<div class="sl-content">
				<!-- ... -->
			</div>
		</div>
	</div>

</div>
Now, let’s style it!
现在,让我们对其进行样式设置!
CSS (The CSS)
Note, that we will omit vendor prefixes here.
请注意,我们将在此处省略供应商前缀。
Since we will make a reusable plugin out of this we don’t want the slider to be fullscreen by default. So, we won’t set the default style of the wrapper to 100% width and height but to this:
由于我们将使用此插件制作可重复使用的插件,因此我们不希望滑块在默认情况下为全屏显示。 因此,我们不会将包装器的默认样式设置为宽度和高度的100%,而是设置为:
.sl-slider-wrapper {
	width: 800px;
	height: 400px;
	margin: 0 auto;
	position: relative;
	overflow: hidden;
}
The slider will be of position absolute and we’ll set the top and left to zero. The width and height will be set dynamically with JavaScript. The slides, the dyamic wrapper and the inner part will all need absolute positioning and they’ll have a width and height of 100%:
滑块的位置是绝对的,我们将顶部和左侧设置为零。 宽度和高度将使用JavaScript动态设置。 幻灯片,动态包装纸和内部部件都需要绝对定位,并且它们的宽度和高度为100%:
.sl-slider {
	position: absolute;
	top: 0;
	left: 0;
}

.sl-slide,
.sl-slides-wrapper,
.sl-slide-inner {
	position: absolute;
	width: 100%;
	height: 100%;
	top: 0;
	left: 0;
}
Each slide should have a z-index of 1; we’ll control the appearance and the stacking of the slides with JavaScript:
每张幻灯片的z索引应为1; 我们将使用JavaScript控制幻灯片的外观和堆叠:
.sl-slide {
	z-index: 1;
}
The content “slices” will be positioned absolutely and their common style is the following:
内容“切片”将绝对定位,其共同样式如下:
/* The duplicate parts/slices */

.sl-content-slice {
	overflow: hidden;
	position: absolute;
	box-sizing: content-box;
	background: #fff;
}
We use box-sizing: content-box here because by default we use border-box .
我们在这里使用box-sizing:content-box ,因为默认情况下,我们使用border-box 。
The content “slices” will be horizontal or vertical, meaning that either the height or the width will be half of the screensize. In order to avoid seeing the edges of a slice when we rotate it, we’ll add some paddings.
内容“切片”将是水平或垂直的,这意味着高度或宽度将是屏幕尺寸的一半。 为了避免在旋转切片时看到切片的边缘,我们将添加一些填充。
/* Horizontal slice */

.sl-slide-horizontal .sl-content-slice {
	width: 100%;
	height: 50%;
	left: -200px;
}

.sl-slide-horizontal .sl-content-slice:first-child {
	top: -200px;
	padding: 200px 200px 0px 200px;
}

.sl-slide-horizontal .sl-content-slice:nth-child(2) {
	top: 50%;
	padding: 0px 200px 200px 200px;
}

/* Vertical slice */

.sl-slide-vertical .sl-content-slice {
	width: 50%;
	height: 100%;
	top: -200px;
}

.sl-slide-vertical .sl-content-slice:first-child {
	left: -200px;
	padding: 200px 0px 200px 200px;
}

.sl-slide-vertical .sl-content-slice:nth-child(2) {
	left: 50%;
	padding: 200px 200px 200px 0px;
}
We use negative position values in order to “pull” the divisions into place.
我们使用负位置值以将划分“拉”到适当位置。
Let’s style the content wrapper and the content division:
让我们设置内容包装器和内容划分器的样式:
/* Content wrapper */
/* Width and height is set dynamically */

.sl-content-wrapper {
	position: absolute;
}

.sl-content {
	width: 100%;
	height: 100%;
	background: #fff;
}
The division with the class sl-content-wrapper will get a height and width dynamically. If, for example, the slide is horizontal, the wrapper will have a width of 100% of the parent’s container width and 50% of the parent’s container height. The wrapper of the second slice will also have a negative top (horizontal) or left (vertical) margin in order to “pull” the duplicated content up or to the left.
带有sl-content-wrapper类的除法将动态获得高度和宽度。 例如,如果幻灯片是水平的,则包装纸的宽度将为父容器宽度的100%和父容器高度的50%。 第二切片的包装纸还将具有负的顶部(水平)或左侧(垂直)边距,以便将重复的内容“向上”拉至左侧。
This is all the styling for the slider to work by default. Let’s take a look at some custom elements, like the nav items and the content elements that we’ll animate when we navigate through the slides.
这就是滑块默认情况下可以使用的所有样式。 让我们看一些自定义元素,例如导航项和在幻灯片中导航时将创建动画的内容元素。
For the navigation arrows we will use this image-less technique. We’ll simply have a little box and rotate it 45 degrees. Then we’ll add some border to the sides and voilà, we made ourselves some neat arrows:
对于导航箭头,我们将使用这种无图像技术。 我们只需要一个小盒子并将其旋转45度即可。 然后,我们在边上添加一些边框并贴上边,我们为自己制作了一些整洁的箭头:
/* Custom navigation arrows */

.nav-arrows span {
	position: absolute;
	z-index: 2000;
	top: 50%;
	width: 40px;
	height: 40px;
	border: 8px solid #ddd;
	border: 8px solid rgba(150,150,150,0.4);
	text-indent: -90000px;
	margin-top: -40px;
	cursor: pointer;
	transform: rotate(45deg);
}

.nav-arrows span:hover {
	border-color: rgba(150,150,150,0.9);
}

.nav-arrows span.nav-arrow-prev {
	left: 5%;
	border-right: none;
	border-top: none;
}

.nav-arrows span.nav-arrow-next {
	right: 5%;
	border-left: none;
	border-bottom: none;
}
Now, let’s style the navigation dots. We’ll position them absolutely and make the span display as inline-blocks so that we can somply center them. They will look like little dots because we’ll apply a border radius of 50% to them. With some box shadows, we’ll make them look inset. The currently active navigation dot will have a pseudo-element (white dot) which will be placed on top of it:
现在,让我们设置导航点的样式。 我们将它们绝对定位,并使跨度显示为嵌入式块,以便我们可以使它们居中对齐。 它们看起来像小点,因为我们将对其应用50%的边界半径。 带有一些盒子阴影,我们将使它们看起来像嵌入式的。 当前活动的导航点将带有一个伪元素(白点),该元素将位于其上方:
.nav-dots {
	text-align: center;
	position: absolute;
	bottom: 2%;
	height: 30px;
	width: 100%;
	left: 0;
	z-index: 1000;
}

.nav-dots span {
	display: inline-block;
	position: relative;
	width: 16px;
	height: 16px;
	border-radius: 50%;
	margin: 3px;
	background: #ddd;
	background: rgba(150,150,150,0.4);
	cursor: pointer;
	box-shadow:
		0 1px 1px rgba(255,255,255,0.4),
		inset 0 1px 1px rgba(0,0,0,0.1);
}

.nav-dots span.nav-dot-current:after {
	content: "";
	position: absolute;
	width: 10px;
	height: 10px;
	top: 3px;
	left: 3px;
	border-radius: 50%;
	background: rgba(255,255,255,0.8);
}
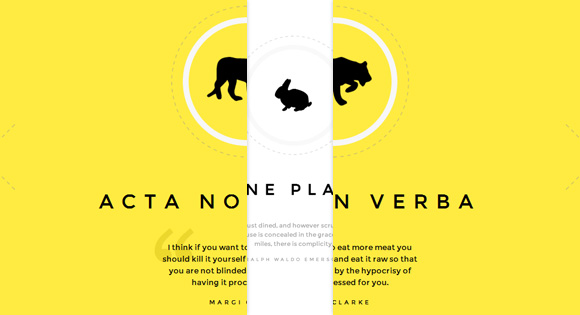
The elements that we’ll use in the content will be a decorative element (the animal with the circles), a headline and a blockquote. We’ll use a font to give us some cute animal “icons” that we’ll place as a pseudo element of the decorative div.
我们将在内容中使用的元素将是装饰元素(带有圆圈的动物),标题和标语。 我们将使用一种字体为我们提供一些可爱的动物“图标”,将其作为装饰div的伪元素放置。
The division with the class deco, just like all the other content elements, will have an absolute position. We’ll center it horizontally and give it a bottom value of 50%:
就像所有其他内容元素一样,使用deco类进行的划分将具有绝对位置。 我们将其水平居中,并将其底值设置为50%:
.deco {
	width: 260px;
	height: 260px;
	border: 2px dashed #ddd;
	border: 2px dashed rgba(150,150,150,0.4);
	border-radius: 50%;
	position: absolute;
	bottom: 50%;
	left: 50%;
	margin: 0 0 0 -130px;
}
We use a data attribute “data-icon” in the decorative element and we’ll style the pseudo-element :after to contain the letter from the animal icon font as its content:
我们在装饰元素中使用数据属性“ data-icon”,并对伪元素:after设置样式,以包含来自动物图标字体的字母作为其内容:
[data-icon]:after {
    content: attr(data-icon);
    font-family: 'AnimalsNormal';
	color: #999;
	text-shadow: 0 0 1px #999;
	position: absolute;
	width: 220px;
	height: 220px;
	line-height: 220px;
	text-align: center;
	font-size: 100px;
	top: 50%;
	left: 50%;
	margin: -110px 0 0 -110px;
	box-shadow: inset 0 0 0 10px #f7f7f7;
	border-radius: 50%;
}
The box shadow will create a “fake” inset border.
框阴影将创建“假”插图边框。
The headline will also be positioned absolutely and we’ll give it the same bottom value like we gave to the decorative element, which is 50%. We then add a negative bottom margin in order to place it under the other element. Like that we can use the decorative element as a reference point and position the other elements relatively to it using a negative bottom margin:
标题也将绝对定位,我们将为其赋予与装饰元素相同的底值,即50%。 然后,我们添加一个负的底边距,以便将其放置在其他元素下。 这样,我们可以将装饰元素用作参考点,并使用负底边距将其他元素相对于其定位:
.sl-slide h2 {
	color: #000;
	text-shadow: 0 0 1px #000;
	padding: 20px;
	position: absolute;
	font-size: 34px;
	font-weight: 700;
	letter-spacing: 13px;
	text-transform: uppercase;
	width: 80%;
	left: 10%;
	text-align: center;
	line-height: 50px;
	bottom: 50%;
	margin: 0 0 -120px 0;
}
The blockquote will be of 100% width and we will center the paragraph inside which will have a maximum width of 400 pixel:
块引用的宽度为100%,我们将段落的内部居中放置,该段落的最大宽度为400像素:
.sl-slide blockquote {
	position: absolute;
	width: 100%;
	text-align: center;
	left: 0;
	font-weight: 400;
	font-size: 14px;
	line-height: 20px;
	height: 70px;
	color: #8b8b8b;
	z-index: 2;
	bottom: 50%;
	margin: 0 0 -200px 0;
	padding: 0;
}

.sl-slide blockquote p{
	margin: 0 auto;
	width: 60%;
	max-width: 400px;
	position: relative;
}
Let’s add a quotation mark to the blockquote. Using the pseudo-class :before, we’ll add a over-sized quotation mark behind the blockquote:
让我们在blockquote中添加一个引号。 使用伪类:before,我们将在blockquote后面添加一个超大的引号:
.sl-slide blockquote p:before {
	color: #f0f0f0;
	color: rgba(244,244,244,0.65);
	font-family: "Bookman Old Style", Bookman, Garamond, serif;
	position: absolute;
	line-height: 60px;
	width: 75px;
	height: 75px;
	font-size: 200px;
	z-index: -1;
	left: -80px;
	top: 35px;
	content: '201C';
}
And the cite will have a different look:
引用将具有不同的外观:
.sl-slide blockquote cite {
	font-size: 10px;
	padding-top: 10px;
	display: inline-block;
	font-style: normal;
	text-transform: uppercase;
	letter-spacing: 4px;
}
Next, we’ll define some classes for controling the colors of the slides. When we give this color class to the slide, we want the background color and the color of the elements to be different. By default, our slides are white/gray and the content elements are black and gray.
接下来,我们将定义一些类来控制幻灯片的颜色。 当我们为幻灯片提供该颜色类别时,我们希望背景颜色和元素的颜色不同。 默认情况下,我们的幻灯片为白色/灰色,内容元素为黑色和灰色。
We also need to give the same background color to the dynamic slice element, the one that will have a large padding:
我们还需要为动态slice元素赋予相同的背景颜色,该元素将具有较大的填充:
/* First Slide */
.bg-1 .sl-slide-inner,
.bg-1 .sl-content-slice {
	background: #fff;
}

/* Second Slide */
.bg-2 .sl-slide-inner,
.bg-2 .sl-content-slice {
	background: #000;
}

.bg-2 [data-icon]:after,
.bg-2 h2 {
	color: #fff;
}

.bg-2 blockquote:before {
	color: #222;
}

/* Third Slide */
.bg-3 .sl-slide-inner,
.bg-3 .sl-content-slice {
	background: #db84ad;
}

.bg-3 .deco {
	border-color: #fff;
	border-color: rgba(255,255,255,0.5);
}

.bg-3 [data-icon]:after {
	color: #fff;
	text-shadow: 0 0 1px #fff;
	box-shadow: inset 0 0 0 10px #b55381;
}

.bg-3 h2,
.bg-3 blockquote{
	color: #fff;
	text-shadow: 0px 1px 1px rgba(0,0,0,0.3);
}

.bg-3 blockquote:before {
	color: #c46c96;
}

/* Forth Slide */
.bg-4 .sl-slide-inner,
.bg-4 .sl-content-slice {
	background: #5bc2ce;
}

.bg-4 .deco {
	border-color: #379eaa;
}

.bg-4 [data-icon]:after {
	text-shadow: 0 0 1px #277d87;
	color: #277d87;
}

.bg-4 h2,
.bg-4 blockquote{
	color: #fff;
	text-shadow: 1px 1px 1px rgba(0,0,0,0.2);
}

.bg-4 blockquote:before {
	color: #379eaa;
}

/* Fifth Slide */
.bg-5 .sl-slide-inner,
.bg-5 .sl-content-slice {
	background: #ffeb41;
}

.bg-5 .deco {
	border-color: #ECD82C;
}

.bg-5 .deco:after {
	color: #000;
	text-shadow: 0 0 1px #000;
}

.bg-5 h2,
.bg-5 blockquote{
	color: #000;
	text-shadow: 1px 1px 1px rgba(0,0,0,0.1);
}

.bg-5 blockquote:before {
	color: #ecd82c;
}
And now, let’s add some motion to the content elements! When we navigate the slides, we want the content elements to do something fun, so we will add a class to the next slide whenever we navigate to the “right” (or “in” since this almost looks like as if we are moving further). That class will “trigger” an animation for each one of the content elements:
现在,让我们向内容元素添加一些动作! 当我们浏览幻灯片时,我们希望内容元素做一些有趣的事情,因此,每当导航到“右边”(或“里面”)时,我们都会在下一张幻灯片中添加一个类,因为这看起来好像我们在进一步前进)。 该类将为每个内容元素“触发”动画:
/* Animations for elements */

.sl-trans-elems .deco{
	animation: roll 1s ease-out both;
}

.sl-trans-elems h2{
	animation: moveUp 1s ease-in-out both;
}

.sl-trans-elems blockquote{
	animation: fadeIn 0.5s linear 0.5s both;
}

@keyframes roll{
	0% {transform: translateX(500px) rotate(360deg); opacity: 0;}
	100% {transform: translateX(0px) rotate(0deg); opacity: 1;}
}

@keyframes moveUp{
	0% {transform: translateY(40px);}
	100% {transform: translateY(0px);}
}

@keyframes fadeIn{
	0% {opacity: 0;}
	100% {opacity: 1;}
}
The decorative element will “roll in” from the right side, the heading will move up and the blockquote will simply fade in.
装饰元素将从右侧“卷入”,标题将向上移动,并且引用框将简单地淡入。
Now, when we navigate back (or “out”), we want to see the reverse happening:
现在,当我们向后浏览(或“跳出”)时,我们希望看到相反的情况:
.sl-trans-back-elems .deco{
	animation: scaleDown 1s ease-in-out both;
}

.sl-trans-back-elems h2{
	animation: fadeOut 1s ease-in-out both;
}

.sl-trans-back-elems blockquote{
	animation: fadeOut 1s linear both;
}

@keyframes scaleDown{
	0% {transform: scale(1);}
	100% {transform: scale(0.5);}
}

@keyframes fadeOut{
	0% {opacity: 1;}
	100% {opacity: 0;}
}
Here we will scale down the decorative element and simply fade out the rest. And that’s all the style! Let’s take a look at the JavaScript.
在这里,我们将按比例缩小装饰元素,然后简单地淡出其余部分。 这就是所有样式! 让我们看一下JavaScript。
JavaScript (The JavaScript)
Let’s first take a look at our plugin options:
首先让我们看一下我们的插件选项:
$.Slitslider.defaults 	= {
	// transitions speed
	speed : 800,
	// if true the item's slices will also animate the opacity value
	optOpacity : false,
	// amount (%) to translate both slices - adjust as necessary
	translateFactor : 230,
	// maximum possible angle
	maxAngle : 25,
	// maximum possible scale
	maxScale : 2,
	// slideshow on / off
	autoplay : false,
	// keyboard navigation
	keyboard : true,
	// time between transitions
	interval : 4000,
	// callbacks
	onBeforeChange : function( slide, idx ) { return false; },
	onAfterChange : function( slide, idx ) { return false; }
};
We can set the speed of the transitions, set the slideshow to play automatically with a specific interval and also make the slide’s slices opacity change during the transition.
我们可以设置过渡的速度,将幻灯片放映设置为以特定间隔自动播放,还可以使幻灯片的切片不透明度在过渡期间发生变化。
The translateFactor option is the amount in percentage for translating both slices. You can adjust this value as necessary as you change the slide’s scale and angle data attributes and the maxAngle and maxScale values.
translateFactor选项是用于翻译两个切片的百分比数量。 更改幻灯片的比例和角度数据属性以及maxAngle和maxScale值时,可以根据需要调整此值。
We will start by executing the _init function.
我们将从执行_init函数开始。
_init				: function( options ) {

	// options
	this.options = $.extend( true, {}, $.Slitslider.defaults, options );

	// https://github.com/twitter/bootstrap/issues/2870
	this.transEndEventNames = {
		'WebkitTransition' : 'webkitTransitionEnd',
		'MozTransition' : 'transitionend',
		'OTransition' : 'oTransitionEnd',
		'msTransition' : 'MSTransitionEnd',
		'transition' : 'transitionend'
	};
	this.transEndEventName = this.transEndEventNames[ Modernizr.prefixed( 'transition' ) ];
	// suport for css 3d transforms and css transitions
	this.support = Modernizr.csstransitions && Modernizr.csstransforms3d;
	// the slider
	this.$el = this.$elWrapper.children( '.sl-slider' );
	// the slides
	this.$slides = this.$el.children( '.sl-slide' ).hide();
	// total slides
	this.slidesCount = this.$slides.length;
	// current slide
	this.current = 0;
	// control if it's animating
	this.isAnimating = false;
	// get container size
	this._getSize();
	// layout
	this._layout();
	// load some events
	this._loadEvents();
	// slideshow
	if( this.options.autoplay ) {

		this._startSlideshow();

	}

}
Let’s take a look at the _layout function:
让我们看一下_layout函数:
_layout				: function() {

	this.$slideWrapper = $( '<div class="sl-slides-wrapper" />' );

	// wrap the slides
	this.$slides.wrapAll( this.$slideWrapper ).each( function( i ) {

		var $slide = $( this ),
			// vertical || horizontal
			orientation = $slide.data( 'orientation' );

		$slide.addClass( 'sl-slide-' + orientation )
			  .children()
			  .wrapAll( '<div class="sl-content-wrapper" />' )
			  .wrapAll( '<div class="sl-content" />' );

	} );

	// set the right size of the slider/slides for the current window size
	this._setSize();
	// show first slide
	this.$slides.eq( this.current ).show();

}
We are wrapping the slides into a division with the class “sl-slides-wrapper”. As we’ve mentioned before, each slide’s content will also be wrapped by two divisions, one with the class sl-content and one with the class sl-content-wrapper.
我们将幻灯片包装为“ sl-slides-wrapper”类的一个分区。 如前所述,每张幻灯片的内容也将由两个部分包装,一个部分为sl-content类,另一个为sl-content-wrapper类。
We also add the respective orientation class to the slide (sl-slide-vertical or sl-slide-horizontal).
我们还将相应的方向类添加到幻灯片中( sl-slide-vertical或sl-slide-horizontal )。
The slider and its sl-content-wrapper division need to have the main container’s width and height. That’s what we do in the _setSize function.
滑块及其sl-content-wrapper分区需要具有主容器的宽度和高度。 这就是我们在_setSize函数中所做的。
Finally, we’ll show the current/first slide.
最后,我们将显示当前/第一张幻灯片。
In the _loadEvents function we will bind the click events for the keyboard navigation and the resize (smartresize) event to the window:
在_loadEvents函数中,我们将键盘导航的click事件和resize(smartresize)事件绑定到窗口:
_loadEvents			: function() {

	var self = this;

	$window.on( 'debouncedresize.slitslider', function( event ) {

		// update size values
		self._getSize();
		// set the sizes again
		self._setSize();

	} );

	if ( this.options.keyboard ) {

		$document.on( 'keydown.slitslider', function(e) {

			var keyCode = e.keyCode || e.which,
				arrow = {
					left: 37,
					up: 38,
					right: 39,
					down: 40
				};

			switch (keyCode) {

				case arrow.left :

					self._stopSlideshow();
					self._navigate( 'prev' );
					break;

				case arrow.right :

					self._stopSlideshow();
					self._navigate( 'next' );
					break;

			}

		} );

	}

}
Let’s see how we “slice” the slides and move to the next one:
让我们看看如何“切片”幻灯片并移至下一张:
_navigate : function( dir, pos ) {

	if( this.isAnimating || this.slidesCount < 2 ) {

		return false;

	}

	this.isAnimating = true;

	var self = this,
		$currentSlide = this.$slides.eq( this.current );

	// if position is passed
	if( pos !== undefined ) {

		this.current = pos;

	}
	// if not check the boundaries
	else if( dir === 'next' ) {

		this.current = this.current < this.slidesCount - 1 ? ++this.current : 0;

	}
	else if( dir === 'prev' ) {

		this.current = this.current > 0 ? --this.current : this.slidesCount - 1;

	}

	this.options.onBeforeChange( $currentSlide, this.current );

	// next slide to be shown
	var $nextSlide = this.$slides.eq( this.current ),
		// the slide we want to cut and animate
		$movingSlide = ( dir === 'next' ) ? $currentSlide : $nextSlide,

		// the following are the data attrs set for each slide
		configData = $movingSlide.data(),
		config = {};

	config.orientation = configData.orientation || 'horizontal',
	config.slice1angle = configData.slice1Rotation || 0,
	config.slice1scale = configData.slice1Scale || 1,
	config.slice2angle = configData.slice2Rotation || 0,
	config.slice2scale = configData.slice2Scale || 1;

	this._validateValues( config );

	var cssStyle = config.orientation === 'horizontal' ? {
			marginTop : -this.size.height / 2
		} : {
			marginLeft : -this.size.width / 2
		},
		// default slide's slices style
		resetStyle = {
			'transform' : 'translate(0%,0%) rotate(0deg) scale(1)',
			opacity : 1
		},
		// slice1 style
		slice1Style	= config.orientation === 'horizontal' ? {
			'transform' : 'translateY(-' + this.options.translateFactor + '%) rotate(' + config.slice1angle + 'deg) scale(' + config.slice1scale + ')'
		} : {
			'transform' : 'translateX(-' + this.options.translateFactor + '%) rotate(' + config.slice1angle + 'deg) scale(' + config.slice1scale + ')'
		},
		// slice2 style
		slice2Style	= config.orientation === 'horizontal' ? {
			'transform' : 'translateY(' + this.options.translateFactor + '%) rotate(' + config.slice2angle + 'deg) scale(' + config.slice2scale + ')'
		} : {
			'transform' : 'translateX(' + this.options.translateFactor + '%) rotate(' + config.slice2angle + 'deg) scale(' + config.slice2scale + ')'
		};

	if( this.options.optOpacity ) {

		slice1Style.opacity = 0;
		slice2Style.opacity = 0;

	}

	// we are adding the classes sl-trans-elems and sl-trans-back-elems to the slide that is either coming "next"
	// or going "prev" according to the direction.
	// the idea is to make it more interesting by giving some animations to the respective slide's elements
	//( dir === 'next' ) ? $nextSlide.addClass( 'sl-trans-elems' ) : $currentSlide.addClass( 'sl-trans-back-elems' );

	$currentSlide.removeClass( 'sl-trans-elems' );

	var transitionProp = {
		'transition' : 'all ' + this.options.speed + 'ms ease-in-out'
	};

	// add the 2 slices and animate them
	$movingSlide.css( 'z-index', this.slidesCount )
				.find( 'div.sl-content-wrapper' )
				.wrap( $( '<div class="sl-content-slice" />' ).css( transitionProp ) )
				.parent()
				.cond(
					dir === 'prev',
					function() {

						var slice = this;
						this.css( slice1Style );
						setTimeout( function() {

							slice.css( resetStyle );

						}, 50 );

					},
					function() {

						var slice = this;
						setTimeout( function() {

							slice.css( slice1Style );

						}, 50 );

					}
				)
				.clone()
				.appendTo( $movingSlide )
				.cond(
					dir === 'prev',
					function() {

						var slice = this;
						this.css( slice2Style );
						setTimeout( function() {

							$currentSlide.addClass( 'sl-trans-back-elems' );

							if( self.support ) {

								slice.css( resetStyle ).on( self.transEndEventName, function() {

									self._onEndNavigate( slice, $currentSlide, dir );

								} );

							}
							else {

								self._onEndNavigate( slice, $currentSlide, dir );

							}

						}, 50 );

					},
					function() {

						var slice = this;
						setTimeout( function() {

							$nextSlide.addClass( 'sl-trans-elems' );

							if( self.support ) {

								slice.css( slice2Style ).on( self.transEndEventName, function() {

									self._onEndNavigate( slice, $currentSlide, dir );

								} );

							}
							else {

								self._onEndNavigate( slice, $currentSlide, dir );

							}

						}, 50 );

					}
				)
				.find( 'div.sl-content-wrapper' )
				.css( cssStyle );

	$nextSlide.show();

}
So, the trick is to duplicate the slide’s content into the divisions with the class sl-content-slice and to set the second one’s margin-left or margin-top to half the container’s width or height. That will make everything look “normal” and we won’t see any separation.
因此,诀窍是将幻灯片的内容复制到类sl-content-slice的分区中,并将第二个幻灯片的边距左边或边距顶部设置为容器宽度或高度的一半。 这将使一切看起来都“正常”,我们不会看到任何分离。
Then, according to the values defined in the element’s data attributes, we’ll animate the slide’s slices.
然后,根据元素的数据属性中定义的值,对幻灯片的切片进行动画处理。
According to the direction, we will either slice the current slide and show the next one, or we will slice the previous one (not shown), and put together its slices on top of the current one.
根据方向,我们将切片当前幻灯片并显示下一张幻灯片,或者将切片前一张幻灯片(未显示),并将其切片放在当前幻灯片的顶部。
We are adding the classes sl-trans-elems and sl-trans-back-elems to the slide that is next (when we navigate “next”) or the current one (when we navigate “prev”). Like we have seen before in the CSS part, adding those classes will make the content elements of the respective slide animate in a specific way.
我们将sl-trans-elems和sl-trans-back-elems类添加到下一张幻灯片(当我们导航“下一个”时)或当前幻灯片(当我们导航“上一个”时)。 就像我们之前在CSS部分中看到的那样,添加这些类将使特定幻灯片的内容元素以特定方式进行动画处理。
Once the transition ends, we call the _onEndNavigate function where we will unwrap the content of the current slide, thus removing the two sl-content-slice divisions:
转换结束后,我们调用_onEndNavigate函数,在其中我们将解开当前幻灯片的内容,从而删除两个sl-content-slice划分:
_onEndNavigate : function( $slice, $oldSlide, dir ) {

	// reset previous slide's style after next slide is shown
	var $slide = $slice.parent(),
		removeClasses = 'sl-trans-elems sl-trans-back-elems';

	// remove second slide's slice
	$slice.remove();
	// unwrap..
	$slide.css( 'z-index', 1 )
		  .find( 'div.sl-content-wrapper' )
		  .unwrap();

	// hide previous current slide
	$oldSlide.hide().removeClass( removeClasses );
	$slide.removeClass( removeClasses );
	// now we can navigate again..
	this.isAnimating = false;
	this.options.onAfterChange( $slide, this.current );

}
Finally, the plugin offers several public methods which one can call to trigger specific actions (navigation, pause the slideshow etc..)
最后,该插件提供了几种公共方法,可以调用这些方法来触发特定的操作(导航,暂停幻灯片播放等)。
// public method: adds more slides to the slider
add : function( $slides, callback ) {

	this.$slides = this.$slides.add( $slides );

	var self = this;


	$slides.each( function( i ) {

		var $slide = $( this ),
			// vertical || horizontal
			orientation = $slide.data( 'orientation' );

		$slide.hide().addClass( 'sl-slide-' + orientation )
			  .children()
			  .wrapAll( '<div class="sl-content-wrapper" />' )
			  .wrapAll( '<div class="sl-content" />' )
			  .end()
			  .appendTo( self.$el.find( 'div.sl-slides-wrapper' ) );

	} );

	this._setSize();

	this.slidesCount = this.$slides.length;

	if ( callback ) {

		callback.call( $items );

	}

},
// public method: shows next slide
next : function() {

	this._stopSlideshow();
	this._navigate( 'next' );

},
// public method: shows previous slide
previous : function() {

	this._stopSlideshow();
	this._navigate( 'prev' );

},
// public method: goes to a specific slide
jump : function( pos ) {

	pos -= 1;

	if( pos === this.current || pos >= this.slidesCount || pos < 0 ) {

		return false;

	}

	this._stopSlideshow();
	this._navigate( pos > this.current ? 'next' : 'prev', pos );

},
// public method: starts the slideshow
// any call to next(), previous() or jump() will stop the slideshow
play : function() {

	if( !this.isPlaying ) {

		this.isPlaying = true;

		this._navigate( 'next' );
		this.options.autoplay = true;
		this._startSlideshow();

	}

},
// public method: pauses the slideshow
pause : function() {

	if( this.isPlaying ) {

		this._stopSlideshow();

	}

},
// public method: check if isAnimating is true
isActive : function() {

	return this.isAnimating;

},
// publicc methos: destroys the slicebox instance
destroy : function( callback ) {

	this._destroy( callback );

}
And that’s it! I hope you enjoyed this tutorial and find it useful!
就是这样! 我希望您喜欢本教程并发现它有用!
翻译自: https://tympanus.net/codrops/2012/06/05/fullscreen-slit-slider-with-jquery-and-css3/
狭缝天线原理 pdf


 7562
7562


 被折叠的 条评论
为什么被折叠?
被折叠的 条评论
为什么被折叠?
 到【灌水乐园】发言


