


raspberry pi
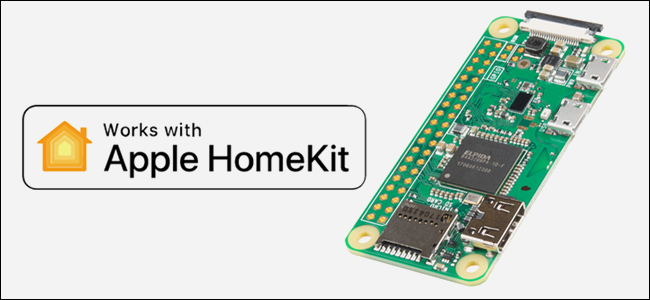
Many smart devices skip Apple HomeKit support and integrate only with Alexa, Google, and other platforms. With this Raspberry Pi hack, though, you can add HomeKit support to any smart device with the open-source Homebridge software.
许多智能设备跳过Apple HomeKit支持,仅与Alexa,Google和其他平台集成。 但是,借助此Raspberry Pi hack,您可以使用开源Homebridge软件将HomeKit支持添加到任何智能设备。
适用于任何智能设备的HomeKit (HomeKit for Any Smart Device)
If you’re all-in on HomeKit, one big problem is how few smart devices support it. For example, the only thing holding back some inexpensive smart light bulbs is their lack of HomeKit support. Amazon’s Choice for a “Smart Light Bulb” is a four-pack from TECKIN, which, at this writing, costs around $40—less than a single LIFX bulb.
如果您全神贯注于HomeKit,那么一个大问题就是很少有智能设备支持它。 例如,阻碍某些廉价智能灯泡的唯一原因是它们缺乏对HomeKit的支持。 亚马逊的 “智能灯泡”之选是TECKIN的四支装 ,在撰写本文时,其成本约为40美元-低于单个LIFX灯泡。
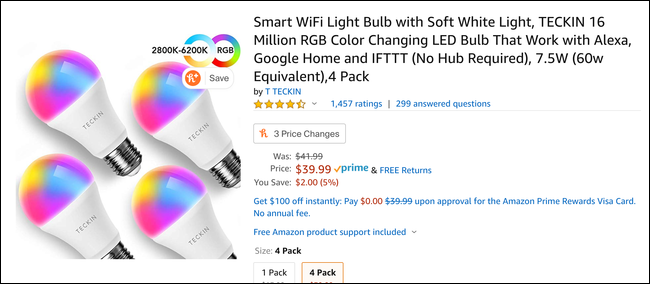
Sure, they’re not as premium as LIFX; the colors aren’t as vibrant, and they emit an audible buzz in the bathroom, but for $10 a pop, they’re a pretty unbeatable value.
当然,它们不如LIFX贵。 颜色并不那么鲜艳,并且它们在浴室中发出嗡嗡声,但只要$ 10美元,这是一个无与伦比的价值。
The main issue, though, is that they don’t have HomeKit support. They’re not entirely dumb—they work with Google Home, Alexa, IFTTT, and the manufacturer’s app. They’re fine for someone who only has TECKIN smart bulbs.
但是,主要的问题是他们没有HomeKit支持。 它们并不完全傻,它们可以与Google Home,Alexa,IFTTT和制造商的应用程序一起使用。 对于只有TECKIN智能灯泡的人来说,它们很好。
However, because you can’t access them from HomeKit, you can’t control them from the Home app, the widget in Control Center, or Siri. You also can’t include them in scenes with bulbs from other brands or use them in Automations. If you’ve already invested in HomeKit, this is most likely a dealbreaker.
但是,由于无法从HomeKit访问它们,因此无法从Home应用程序,Control Center中的小部件或Siri控制它们。 您也不能将它们与其他品牌的灯泡一起包含在场景中,也不能在Automations中使用它们。 如果您已经在HomeKit上进行了投资,那么这很可能是一个大问题。
认识Homebridge (Meet Homebridge)
Luckily, there’s a hack that makes these particular bulbs much more useful. The HomeKit API allows devices called bridges, like this one from Philips Hue, to connect child devices that operate on other protocols. You simply add the bridge as a device in HomeKit, and it registers each light connected to it in HomeKit. Whenever you make a request to update a light, your phone talks to the bridge, and the bridge talks to the light.
幸运的是,有一种使这些特殊灯泡更加有用的黑客手段。 HomeKit API允许称为网桥的设备(例如Philips Hue的这种设备)连接以其他协议运行的子设备。 您只需将桥接器添加为HomeKit中的设备,并在HomeKit中注册连接到它的每盏灯。 每当您请求更新灯光时,您的电话都会与网桥通话,而网桥则与灯光通话。
So, a bridge just relays information from one API to another. Because you can control the TECKIN light bulbs over the internet, it’s entirely possible to connect them to HomeKit with just software—no proprietary hardware is required.
因此,网桥只是将信息从一个API中继到另一个。 由于您可以通过互联网控制TECKIN灯泡,因此完全可以仅通过软件将其连接到HomeKit,而无需专有硬件。
If you’ve got a Raspberry Pi laying around (a $5 Pi Zero is fine), you can set it up as a bridge with a framework called Homebridge. This lightweight, NodeJS application emulates the HomeKit API and forwards requests to your non-HomeKit smart devices.
如果您有Raspberry Pi(5美元的Pi Zero可以使用),则可以将其设置为带有称为Homebridge的框架的桥。 这个轻量级的NodeJS应用程序模拟HomeKit API,并将请求转发到非HomeKit智能设备。
Basically, you run it on the Pi, and it adds each ‘dumb’ device to the Home app. When you try to control the bulb through the Home app or Siri, Homebridge talks to the devices for you. After you set it up, it’s just like the device had HomeKit support in the first place.
基本上,您可以在Pi上运行它,并将每个“哑”设备添加到Home应用中。 当您尝试通过Home应用或Siri控制灯泡时,Homebridge为您与设备对话。 设置好之后,就好像该设备首先具有HomeKit支持一样。
This requires that the device runs Homebridge at all times, so this isn’t something you would install on your laptop. A Raspberry Pi is ideal, but if you’ve got an old device you can repurpose as a server or desktop that’s always running, you can install it on there.
这要求设备始终运行Homebridge,因此这不是您要在笔记本电脑上安装的东西。 Raspberry Pi是理想的选择,但是如果您有一台旧设备,可以将其重新用作始终运行的服务器或台式机,则可以在其中安装它。
Homebridge is a framework, and you can extend it with plug-ins. It has a fairly large community backing, so there’s a good chance any given smart device probably has a Homebridge plug-in to add support for it. If your device doesn’t have a plug-in, but your smart device has an API, and you’re tech-savvy, you can write one yourself.
Homebridge是一个框架,您可以使用插件对其进行扩展。 它具有相当大的社区支持,因此任何给定的智能设备都很有可能具有Homebridge插件来添加对它的支持。 如果您的设备没有插件,但是您的智能设备具有API,并且您精通技术,则可以自己编写。
For most people, though, the setup is just installing Homebridge and the brand plug-in for the device, along with a bit of configuration. If you can use the command line and have a bit of time, it’s fairly easy.
但是,对于大多数人来说,设置只是安装Homebridge和该设备的品牌插件,以及一些配置。 如果您可以使用命令行并花一点时间,那将非常容易。
安装和配置Homebridge (Installing and Configuring Homebridge)
Homebridge is a NodeJS app, so you have to install node and npm to use it. If your machine runs Linux, you can probably get it from your package manager.
Homebridge是一个NodeJS应用程序,因此您必须安装node和npm才能使用它。 如果您的计算机运行Linux,则可以从软件包管理器中获取它。
On Ubuntu, you have to type the following to set up the Node repo manually, and then install nodejs:
在Ubuntu上,您必须键入以下内容以手动设置Node repo,然后安装nodejs :
curl -sL https://deb.nodesource.com/setup_13.x | sudo -E bash -
sudo apt-get install -y nodejs
Otherwise, you can consult Node’s download page for information on how to install it for your particular OS.
否则,您可以查阅Node的下载页面以获取有关如何为您的特定OS安装它的信息。
If you’re on Linux, you also need to install some dependencies, as shown below:
如果您使用的是Linux,则还需要安装一些依赖项,如下所示:
sudo apt-get install libavahi-compat-libdnssd-dev
Afterward, you can install Homebridge globally through npm, as shown below:
之后,您可以通过npm全局安装Homebridge,如下所示:
sudo npm install -g --unsafe-perm homebridge
You also want to install the brand plug-ins you need, as Homebridge is just a framework. For the TECKIN bulbs, for example, the plug-in is homebridge-tuya-web, which also installs globally.
您还需要安装所需的品牌插件,因为Homebridge只是一个框架。 例如,对于TECKIN灯泡,该插件为homebridge-tuya-web ,它也可在全球范围内安装。
You would type the following:
您将输入以下内容:
npm i homebridge-tuya-web -g
After everything’s installed, you can actually use the thing! Type the following to run Homebridge once and initialize everything:
安装完所有内容后,您就可以实际使用它了! 输入以下内容以一次运行Homebridge并初始化所有内容:
homebridge
It will complain about a lack of configuration, which you have to create. The default directory is ~/.homebridge/, but you can use the -U parameter if you want to move it.
它将抱怨您必须创建的缺少配置。 缺省目录是~/.homebridge/ ,但是如果要移动它,可以使用-U参数。
Type the following to create a new JSON configuration file in this folder:
键入以下内容在此文件夹中创建一个新的JSON配置文件:
nano ~/.homebridge/config.json
Regardless of the plug-ins you use, you need the following basic configuration:
无论您使用什么插件,都需要以下基本配置:
{
  "bridge": {
    "name": "Homebridge",
    "username": "CC:22:3D:E3:CE:30",
    "port": 51826,
    "pin": "031-45-154"
  },

  "description": "Custom HomeBridge Server",

  "ports": {
    "start": 52100,
    "end": 52150,
  },

  "platforms": [

  ]
}
This configures Homebridge with a default port, name, PIN, and port range available to allocate to other devices.
这将为Homebridge配置默认端口,名称,PIN和可分配给其他设备的端口范围。
Inside the empty platforms array, you place the configuration for each plug-in. You should be able to find instructions and examples of this on each plug-in’s GitHub page.
在空platforms阵列内部,放置每个插件的配置。 您应该能够在每个插件的GitHub页面上找到说明和示例。
In the example below, the homebridge-tuya-web plug-in for the TECKIN bulbs wants to know my username and password to connect to the API for the bulb’s app, and a few other things:
在下面的示例中,TECKIN灯泡的homebridge-tuya-web插件想知道我的用户名和密码,以连接到灯泡应用程序的API,以及其他一些事项:
  "platforms": [
     {
       "platform": "TuyaWebPlatform",
       "name": "TuyaWebPlatform",
       "options":
         {
           "username": "username",
           "password": "password",
           "countryCode": "1",
           "platform": "smart_life",
           "pollingInterval": 10
         }
     }
   ]
Once that’s all configured, Homebridge should be ready to go. Run it again, and your terminal should display a giant QR code that might force you to zoom out. Scan this with the Home app to add it and all connected devices to HomeKit.
完成所有配置后,Homebridge应该准备就绪了。 再次运行它,您的终端应显示一个巨大的QR码,可能会迫使您缩小地图。 使用Home应用程序进行扫描,以将其和所有连接的设备添加到HomeKit。
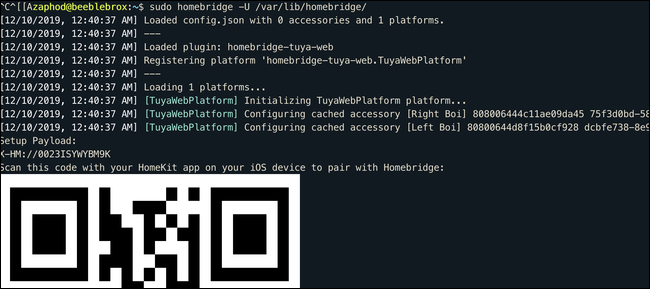
Homebridge loads your plug-ins and should log a message to the screen for each device it finds. You should see them all in HomeKit after they’re added, and they should be fully functional.
Homebridge会加载您的插件,并应在其找到的每个设备的屏幕上记录一条消息。 添加它们后,您应该在HomeKit中看到它们的全部,并且它们应该功能齐全。
I did notice a slight delay compared to my LIFX bulbs. This is probably because the bulbs are controlled over an API rather than directly. At first, the bulbs also didn’t display some whites and warm whites correctly, but after a bit of tweaking, I was able to set up proper scenes.
与LIFX灯泡相比,我确实注意到了一点延迟。 这可能是因为灯泡是通过API而非直接控制的。 刚开始时,灯泡也无法正确显示一些白色和暖白色,但是经过一些调整后,我能够设置适当的场景。
You can always configure the devices in their own apps, wait for the Home app to update, and then set the scene in HomeKit with the premade configuration.
您始终可以在自己的应用程序中配置设备,等待Home应用程序更新,然后使用预制配置在HomeKit中设置场景。
If you need to re-add Homebridge, you’ll want to delete the persist/ folder in the config directory, and then remove the bridge from HomeKit from the settings of any connected bulb under the “Bridge” tab.
如果您需要重新添加Homebridge,则需要删除config目录中的persist/文件夹,然后从“ Bridge”选项卡下任何已连接灯泡的设置中从HomeKit中删除该桥接器。
将Homebridge作为服务添加 (Adding Homebridge as a Service)
If you want Homebridge to run all the time, you’ll probably want to configure it to restart if it crashes or if your Raspberry Pi restarts. You can do this via a Unix service. Set this up after you’ve verified Homebridge is working as intended.
如果希望Homebridge一直运行,则可能需要将其配置为在崩溃或Raspberry Pi重新启动时重新启动。 您可以通过Unix服务执行此操作。 在确认Homebridge可以正常工作之后,进行设置。
First, add a new service user, called homebridge:
首先,添加一个新的服务用户,称为homebridge :
sudo useradd -M --system homebridge
Set a password:
设置密码:
sudo passwd homebridge
Next, you’ll have to move the homebridgeconfiguration outside your personal home directory. /var/lib/homebridge/ should be fine:
接下来,您必须将homebridge配置移到个人主目录之外。 /var/lib/homebridge/应该没问题:
sudo mv ~/.homebridge /var/lib/homebridge/
Make sure the person using homebridge has ownership of that directory and all subfolders:
确保使用homebridge的人对该目录及其所有子文件夹拥有所有权:
sudo chown -R homebridge /var/lib/homebridge/
Once that’s done, you can create the service. To do so, create a new file called homebridge.service in /etc/systemd/system/:
完成后,您可以创建服务。 为此,请在/etc/systemd/system/创建一个名为homebridge.service的新文件:
sudo nano /etc/systemd/system/homebridge.service
And then paste the following configuration:
然后粘贴以下配置:
[Unit]
Description=Homebridge service
After=syslog.target network-online.target

[Service]
Type=simple
User=homebridge
ExecStart=/usr/bin/homebridge -U /var/lib/homebridge
Restart=on-failure
RestartSec=10
KillMode=process


[Install]
WantedBy=multi-user.target
Reload the services daemon to update it with your changes:
重新加载服务守护程序以使用您的更改对其进行更新:
sudo systemctl daemon-reload
Now, you should be able to enable your service (setting it to run at boot):
现在,您应该能够启用服务(将其设置为在引导时运行):
sudo systemctl enable homebridge
And start it:
并开始:
sudo systemctl start homebridge
If you need to debug errors that arise from the service configuration, you can view the logs for the service by typing:
如果需要调试服务配置引起的错误,可以通过键入以下内容查看服务的日志:
journalctl -fn 50 -u homebridge
翻译自: https://www.howtogeek.com/450676/how-to-connect-any-smart-device-to-homekit-with-a-raspberry-pi/
raspberry pi


 2023
2023

 被折叠的 条评论
为什么被折叠?
被折叠的 条评论
为什么被折叠?
 到【灌水乐园】发言


