


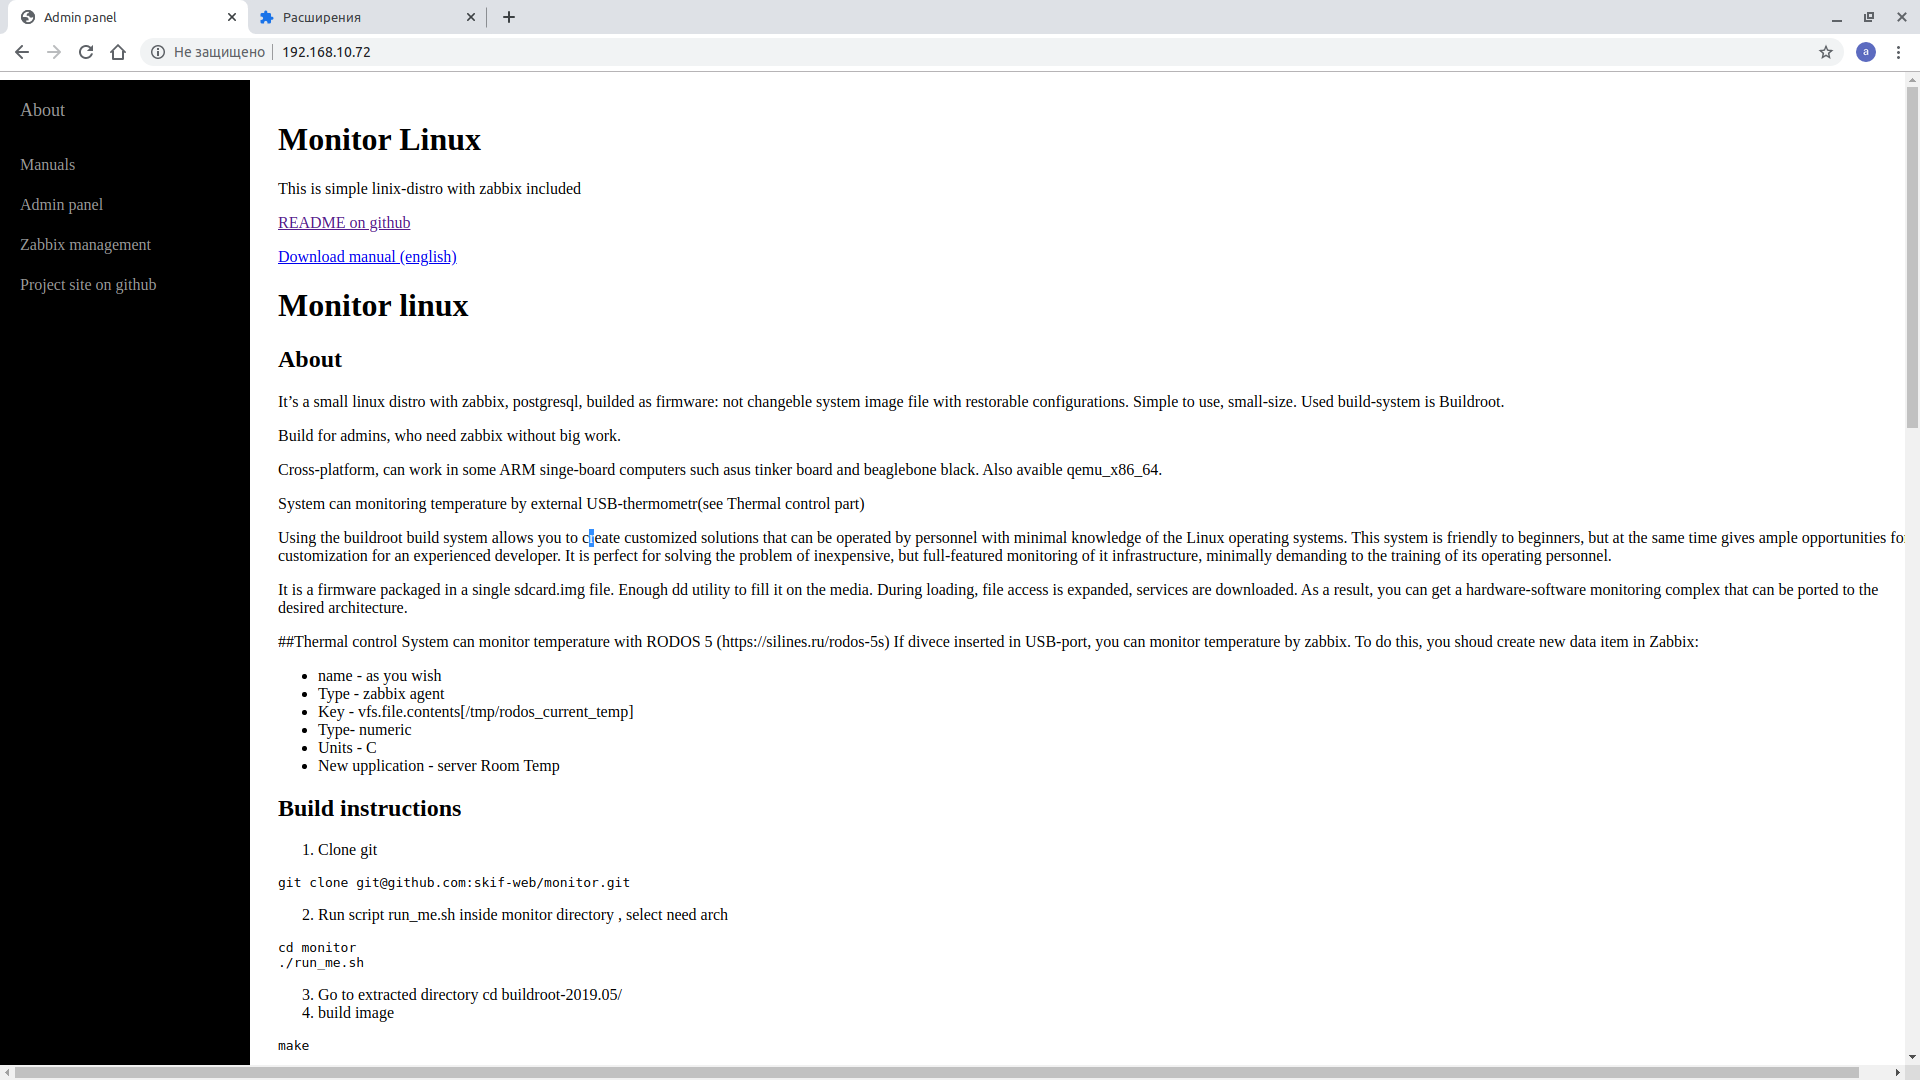
关于 (About)
This is small cross-platform linux-distro with zabbix server. It's a simple way to deploy powerful monitoring system on ARM platfornms and x86_64.
这是带有zabbix服务器的小型跨平台linux-distro。 这是在ARM平台和x86_64上部署功能强大的监视系统的简单方法。
Worked as firmware (non-changeable systemd image with config files), have web-interface for system management like network settings, password and other.
用作固件(带有配置文件的不可更改的系统映像),具有用于系统管理的Web界面,例如网络设置,密码等。
谁有兴趣 (Who is interested)
- System admins/engineers who need to fast deploy of zabbix server. 需要快速部署zabbix服务器的系统管理员/工程师。
- Everyone, who want to deploy zabbix on ARM. 想要在ARM上部署zabbix的所有人。
-
准备好图像 (Ready images)
Ready images can be found here: https://github.com/skif-web/monitor/releases
准备好的图像可以在这里找到: https : //github.com/skif-web/monitor/releases
支持的硬件 (Supported hardware)
- Rasberry pi 4 Rasberry pi 4
- Asus tinker board 华硕修补板
- Beaglebone black (not recommend) Beaglebone黑色(不推荐)
- qemu/kvm x86_64 qemu / kvm x86_64
从源构建 (Build from source)
First, clone repo from github:
首先,从github克隆回购:
git clone https://github.com/skif-web/monitor.gitNext, going go cloned directory:
接下来,进入克隆目录:
cd monitorRun prepare script and select target board:
运行准备脚本并选择目标板:
cd monitor
./run_me.sh
[0] my_asus-tinker_defconfig
[1] my_beaglebone-black_defconfig
[2] my_rasberry-4_defconfig
[3] my_x86-64_defconfig
Select defconfig, press A for abort. Default [0]
After that, go to buildroot-2019.11 directory and run command make:
之后,转到buildroot-2019.11目录并运行命令make:
cd  buildroot-2019.11
make
After some time (depends on you build machine performance), you will have ready images:
一段时间后(取决于您构建计算机的性能),您将获得就绪的映像:
ls -1 output/images/
boot.img
boot.vfat
bzImage
data
data.img
external.img
external.qcow2
grub-eltorito.img
grub.img
intel-ucode
monitor-0.9-beta.tar.gz
qemu.qcow2
rootfs.cpio
sdcard.img
sys
update
Interesting files:
有趣的文件:
- sdcard.img — image for microsd-card (write via dd or rufus on windows). sdcard.img —微型SD卡的图像(在Windows上通过dd或rufus写入)。
- qemu.qcow2 — image for qemu (only for x86_64) qemu.qcow2 — qemu的图像(仅用于x86_64)
- external.qcow2 — qemu external drive for database files (only for x86_64) external.qcow2 —用于数据库文件的qemu外部驱动器(仅用于x86_64)
- monitor-0.9-beta.tar.gz — update arch monitor-0.9-beta.tar.gz-更新架构
选项:ramdisk使用情况 (Option: ramdisk usage)
You can decrease build time by using ramdisk. To do it, open run_me.sh in root dir of repo and find this strings:
您可以使用ramdisk减少构建时间。 为此,请在repo的根目录中打开run_me.sh并找到以下字符串:
USE_RAMDISK=y
RAMDISK_SIZE=16G
If USE_RAMDISK=y, buuildroot will work on ramdisk. Ramdisk-size in hard coded because i am couch potato.
如果USE_RAMDISK = y,则buuildroot将在ramdisk上运行。 Ramdisk-size硬编码,因为我是沙发土豆。
安装 (Install)
通用信息 (Generic information)
This firmware don't have any installer. Just write image in microsd (or use images in qemu ) and run it. All prepare operations (disk resize, first boot prepare) will be run without your.
该固件没有任何安装程序。 只需在microsd中写入图像(或在qemu中使用图像)并运行它。 所有准备操作(磁盘大小调整,首次引导准备)将在没有您的情况下运行。
华硕修补板,Beaglebone黑色和覆盆子pi 4 (Asus tinker board, Beaglebone black and raspberry pi 4)
First, write image to microsd-card(for example, microsd is /dev/sdb):
首先,将图片写入microsd卡(例如,microsd为/ dev / sdb):
dd if=output/images/sdcard.img of=/dev/sdb && syncAfter that, insert this microsd to your board and boot from them. Asus tinker board — Always boot from miscosd card
之后,将该microsd插入您的电路板并从中启动。 华硕修补板—始终从错配的卡引导
Asus tinker board S- Read instructions here: https://tinkerboarding.co.uk/wiki/index.php/Setup#Boot_Priority
华硕修补板S-请在此处阅读说明: https : //tinkerboarding.co.uk/wiki/index.php/Setup#Boot_Priority
Beaglebone black — hold down the USER/BOOT button and apply power OR remove bootloader from build-im emmc( https://www.erdahl.io/2016/12/beaglebone-black-booting-from-sd-by.html )
Beaglebone black —按住USER / BOOT按钮并通电,或者从build-im emmc中移除引导程序( https://www.erdahl.io/2016/12/beaglebone-black-booting-from-sd-by.html )
Raspberry pi 4 — Always boot from microsd card
Raspberry pi 4-始终从microSD卡启动
Qemu x86_64 (Qemu x86_64)
qemu-system-x86_64 -smp 4 -m 4026M -enable-kvm -machine q35,accel=kvm -device intel-iommu -cpu host -net nic -net bridge,br=bridge0 -device virtio-scsi-pci,id=scsi0 -drive file=output/images/qemu.qcow2,format=qcow2,aio=threads -device virtio-scsi-pci,id=scsi0 -drive file=output/images/external.qcow2,format=qcow2,aio=threadsThis command will run system with 4 cpu, 2048 RAM, enabled KVM, virtio-net device bridged to real NIC and 2 hdd drive: sdcard and second device for data.
该命令将运行具有4个cpu,2048个RAM,启用的KVM,桥接到实际NIC的virtio-net设备和2个HDD驱动器的系统:sdcard和用于数据的第二个设备。
工作 (Work)
开机 (Boot)
First boot can take long time. It's happened because:
首次启动可能需要很长时间。 发生的原因是:
- System resizes partition 系统调整分区大小
- Postgresql prepares own data directory PostgreSQL准备自己的数据目录
Also, long time needed if new external drive connected because system format it.
另外,如果连接了新的外部驱动器,则需要较长时间,因为系统对其进行了格式化。
While system booting, you can see "System starting, please wait" message on display. Wait until it will be replaced by other message like:
系统启动时,您会看到“系统正在启动,请稍候”消息。 等到它将被其他消息替换,例如:
current ip 192.168.1.32
Ready to work
网络界面 (Web-interface)
Main system management way — web-interface. It available by system ip (see boot part).
主要系统管理方式-Web界面。 它可以通过系统ip使用(请参阅引导部分)。
Admin panel — web-interface for device manage http://${system_ip}/manage
管理面板-设备管理的Web界面http:// $ {system_ip} / manage
Zabbix management — Zabbix native web-interface http://${system_ip}/zabbix
Zabbix管理-Zabbix本机Web界面http:// $ {system_ip} / zabbix
About page http://${system_ip}
Default user-pass for ssh and web-console is root:admin Default zabbix web-interface credentials is Admin:zabbix.
ssh和Web控制台的默认用户密码为root:admin。默认的zabbix Web界面凭据为Admin:zabbix。
管理面板 (Admin panel)
Open in web-browser: http://${system_ip}/manage Available functions:
在网络浏览器中打开: http:// $ {system_ip} / manage可用功能:
- System status: uptime, load average, free memory, free disk space 系统状态:正常运行时间,平均负载,可用内存,可用磁盘空间
Network settings: hostname, static/dhcp IP4 settings
网络设置:主机名,静态/ DHCP IP4设置

- Admin password 管理员密码
- Backup/restore (settings and database dump separately), factory reset 备份/还原(分别设置和数据库转储),恢复出厂设置
NOTE Warning! Factory reset destroy ALL data!!! Restore and Reset operations need reboot after them.
注意警告! 恢复出厂设置会销毁所有数据!!! 恢复和重置操作之后需要重新启动。
- External drive support 外置硬盘支持
System upgrade
系统升级

温度控制 (Temperature control)
Temperature control use RODOS-5 usb thermometer. Its usb device with dallas 1820. Of course, i know, that dallas 1820 can bi user directly, but you may need to buy 1-wire device (if not exist on your board). Steps to enable thermal control:
温度控制使用RODOS-5 USB温度计。 它的带有达拉斯1820的USB设备。当然,我知道,达拉斯1820可以直接供用户使用,但是您可能需要购买1-wire设备(如果您的主板上不存在)。 启用热控制的步骤:
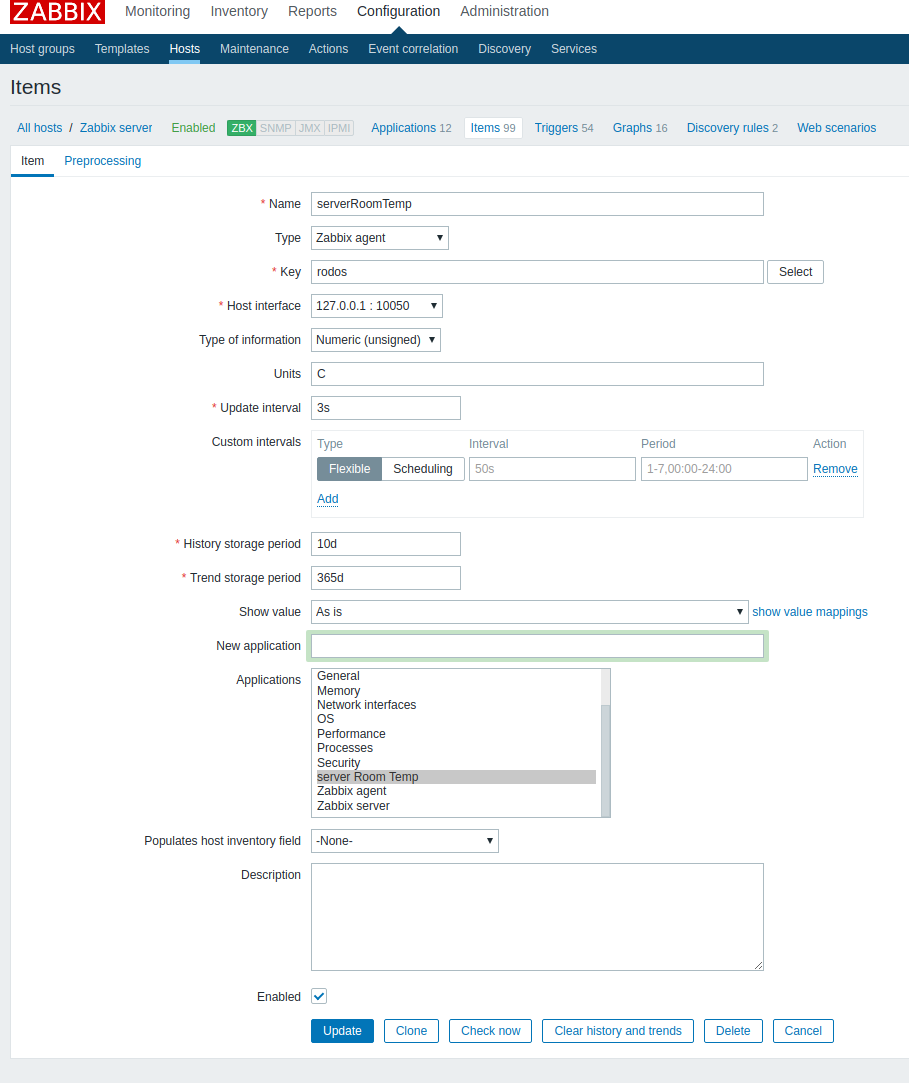
1) insert device to usb port 2) Create data item in zabbix: 1)Configuration -> Hosts 2)Click ITEMS in your server line 3)Click "Create item" button
1)将设备插入USB端口2)在zabbix中创建数据项:1)配置->主机2)在服务器行中单击ITEMS 3)单击“创建项”按钮
- name — serverRoomTemp 名称— serverRoomTemp
- Type — zabbix agent 类型-zabbix代理
- Key — rodos 钥匙—牛仔
- Type- numeric 类型-数字
- Units — C 单位— C
- History storage period — 10 days 历史记录存储期-10天
- Trend storage period — 30 days 趋势储存期-30天
- New application — server Room Temp 新应用程序-服务器机房温度
- Click ADD button 点击添加按钮
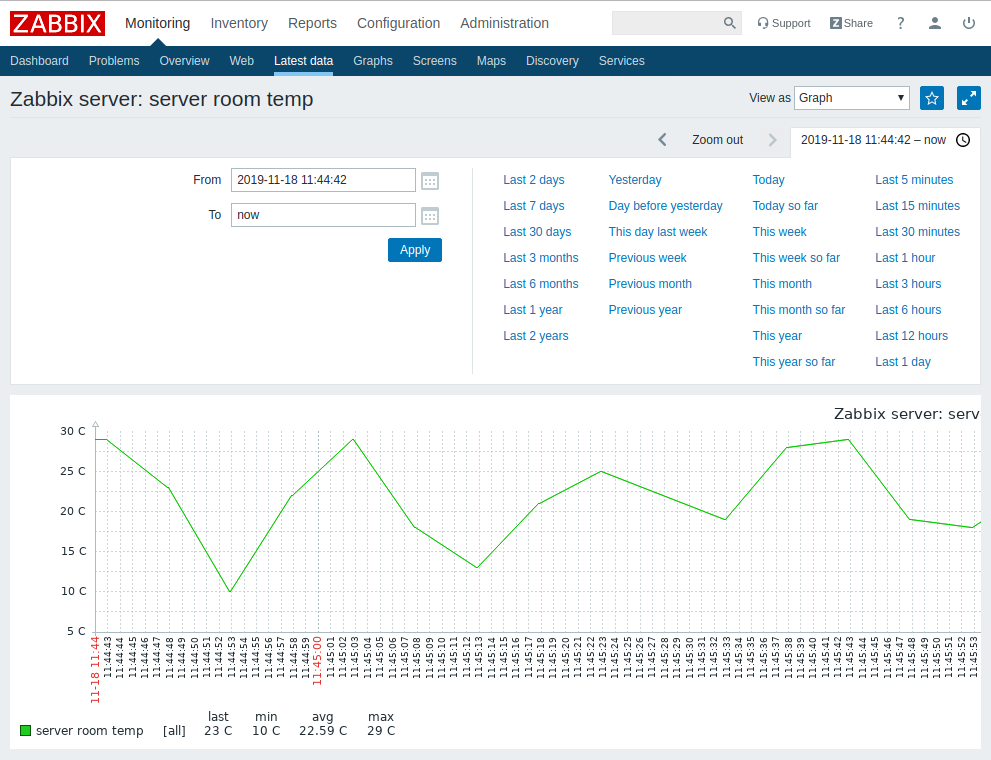
Graph of temperature
温度图
使用外接硬盘 (Use external hard drive)
I'm recommend to use external device because postgresql can kill microsd-card. Yes, you can use SLC cards with 30000-50000 cycles, but they expensive. Just connect usb-device such flash,hdd or ssd, enable external drive support in web-interface and reboot.
我建议使用外部设备,因为postgresql会杀死microsd卡。 是的,您可以使用具有30000-50000个周期的SLC卡,但是它们昂贵。 只需连接USB设备(例如flash,hdd或ssd),在Web界面中启用外部驱动器支持并重启即可。
WARNING! System will destroy all data on new external device WARNING! System does not move data from sdcard to external drive and back. You need to save backup (settings and database dump), enable/disable external drive, reboot and than — restore settings and zabbix database dump and reboot.
警告! 系统将销毁新外部设备上的所有数据。警告! 系统不会将数据从sdcard移至外部驱动器,也不会移回。 您需要保存备份(设置和数据库转储),启用/禁用外部驱动器,重新启动,然后-还原设置以及zabbix数据库转储和重新启动。


 638
638

 被折叠的 条评论
为什么被折叠?
被折叠的 条评论
为什么被折叠?
 到【灌水乐园】发言


