


hue权限控制
Being able to turn your lights on and off with your voice is one of the best things about having a smart home. If you don’t have an Amazon Echo or Google Home, though—or just prefer keyboard shortcuts—you can use an AutoHotkey script to control your Philips Hue lights from your computer.
能够用声音打开和关闭灯是拥有智能家居的最好的事情之一。 但是,如果您没有Amazon Echo或Google Home,或者只希望使用键盘快捷键,则可以使用AutoHotkey脚本从计算机控制Philips Hue灯。
For this guide, we’re going to be using AutoHotkey, an amazing little program that lets you write custom automation scripts and even remap keys on your keyboard. If you’re not familiar with AutoHotkey or need to download it to your Windows machine, check out our beginner’s guide here.
对于本指南,我们将使用AutoHotkey ,这是一个了不起的小程序,可让您编写自定义自动化脚本,甚至在键盘上重新映射键。 如果您不熟悉AutoHotkey或需要将其下载到Windows计算机,请在此处查看我们的初学者指南 。
你需要什么 (What You’ll Need)
We’re going to show you a basic script that you can use to turn a set of lights on and off (which you can customize later). Before we do that, you’ll need a few things.
我们将向您展示一个基本脚本,您可以使用该脚本打开和关闭一组灯(以后可以自定义)。 在此之前,您需要准备一些东西。
A Windows machine with AutoHotkey installed: If you haven’t already, you can download AutoHotkey here. It’s only available for Windows machines, unfortunately. The application will run in the background and interpret the scripts you create (usually in a program like Notepad).
装有AutoHotkey的Windows计算机:如果尚未安装 ,则可以在此处下载AutoHotkey 。 不幸的是,它仅适用于Windows计算机。 该应用程序将在后台运行,并解释您创建的脚本(通常在记事本之类的程序中)。
Your Philips Hue Bridge IP address: You’ll need to enter your Bridge’s IP address into the script in order for it to work. We’ll walk you through how to find this information below.
您的Philips Hue Bridge IP地址:您需要在脚本中输入Bridge的IP地址,以使其正常工作。 我们将在下面引导您如何找到此信息。
A Philips Hue Developer API username: The script we’re using also uses the developer API. In order to make use of it, you’ll need to have an account and know your developer API username. Once again, we’ll show you how to get an account and find your ID below.
Philips Hue开发人员API用户名:我们使用的脚本也使用开发人员API。 为了使用它,您需要拥有一个帐户并知道您的开发人员API用户名。 再一次,我们将在下面向您展示如何获取帐户并找到您的ID。
The AutoHotkey script: In the next large section below, we’ll have the script we’re basing this guide off of. Reddit user tarrosion created a template that we’ll be basing ours off of here if you want to dive a little deeper. However, we’ve tweaked this script to simplify it. Copy the script from the section below, paste it in a blank Notepad document, and then save it with a name like
hueshortcut.ahk.AutoHotkey脚本:在下面的下一个大部分中,我们将基于该指南编写脚本。 reddit的用户tarrosion创建一个模板,我们将立足关的我们这里 ,如果你想潜水更深一点。 但是,我们已经对该脚本进行了调整以简化它。 从下面的部分复制脚本,将其粘贴到空白的记事本文档中,然后使用诸如
hueshortcut.ahk类的名称进行保存。
If you already know your bridge IP address and API username, then you can skip ahead.
如果您已经知道网桥IP地址和API用户名,则可以跳过。
如何找到您的网桥IP地址 (How to Find your Bridge IP Address)
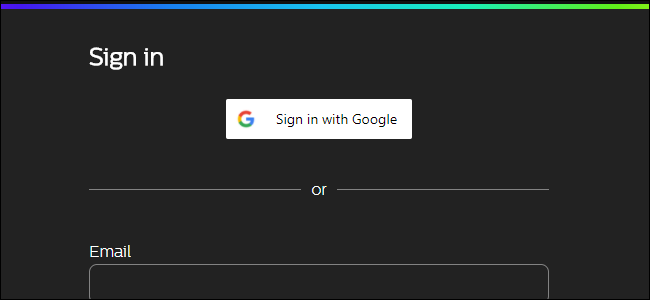
Your bridge IP address is relatively simple to find. Head to this link and sign into your Philips Hue account.
您的网桥IP地址相对容易找到。 转到此链接并登录您的Philips Hue帐户。
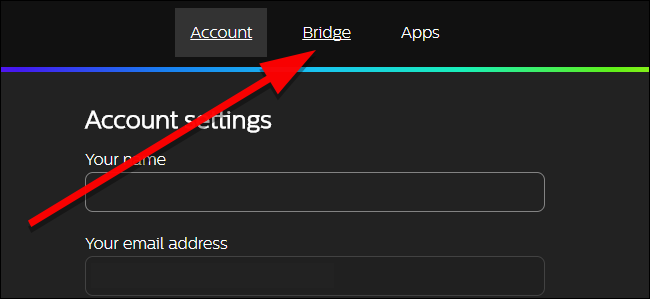
Along the top of the page, click Bridge.
在页面顶部,单击“桥接”。
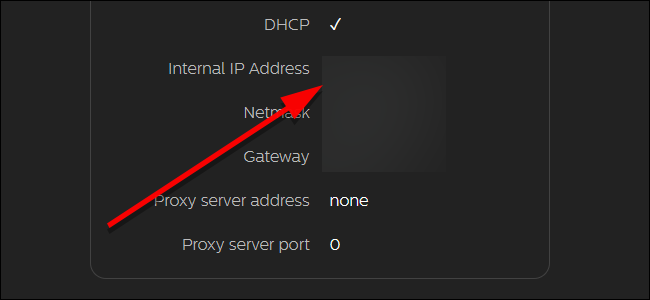
Click the “Show more bridge details” button.
单击“显示更多桥梁详细信息”按钮。
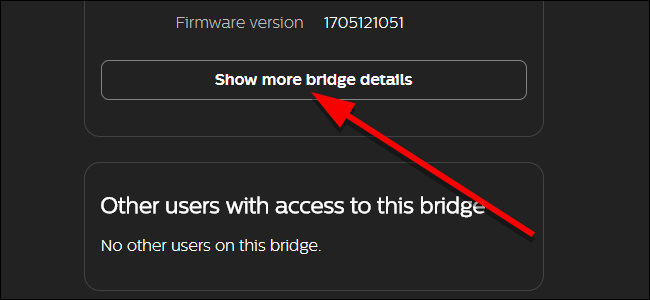
Make a note of your Internal IP Address. You’ll need it later.
记下您的内部IP地址。 稍后您将需要它。
Hang on to this for the next section.
继续下一节。
如何获取Hue开发人员API帐户 (How to Get a Hue Developer API Account)
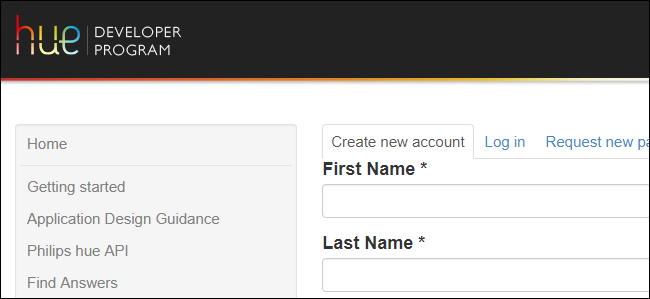
If you don’t already have a Hue Developer account, or if you’ve forgotten your API username, you’ll need to get one now. This part is a little more complicated, but if you’re comfortable using a few text commands it should be straightforward. Start by heading here and creating a new developer account with Hue.
如果您还没有Hue Developer帐户,或者忘记了API用户名,则需要立即获取一个。 这部分比较复杂,但是如果您愿意使用一些文本命令,它应该很简单。 首先前往此处,并使用Hue创建一个新的开发人员帐户。
You’ll get an email asking you to confirm your account and create a password. Once that’s done, head to the following URL, replacing <bridge ip address> with the IP address you grabbed from the previous section.
您会收到一封电子邮件,要求您确认您的帐户并创建密码。 完成后,转到以下URL,将<bridge ip address>替换为您从上一节中获取的IP地址。
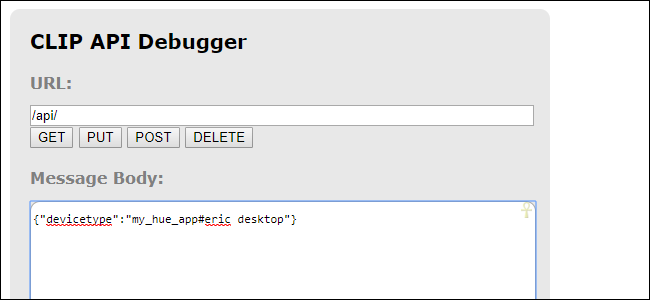
http://<bridge ip address>/debug/clip.htmlHere, you’ll see a tool that lets you manually send commands to your Hue bridge. If you don’t understand everything on this page, that’s alright. You only need to use this tool to get your API username. To do that, enter /api/ in the URL box. Under Message Body, enter {"devicetype":"my_hue_app#iphone peter"} replacing iphone peter with whatever descriptor you want, preferably one that describes the device you’re using it on.
在这里,您将看到一个工具,可用于将命令手动发送到Hue桥。 如果您不了解此页面上的所有内容,那很好。 您只需要使用此工具即可获取您的API用户名。 为此,请在URL框中输入/api/ 。 在“邮件正文{"devicetype":"my_hue_app#iphone peter"}下,输入{"devicetype":"my_hue_app#iphone peter"}用所需的描述符(最好是描述您正在使用该设备的描述符{"devicetype":"my_hue_app#iphone peter"}替换iphone peter 。
When you’ve entered all the info, tap the link button on your Hue bridge. This is a security step to make sure that only you or someone inside your home can create applications to control your lights. Once you’ve pressed the link button on your bridge, click POST.
输入所有信息后,请点击色相桥上的链接按钮。 这是一个安全步骤,以确保只有您或您家中的任何人都可以创建应用程序来控制您的灯光。 按下网桥上的链接按钮后,单击POST。
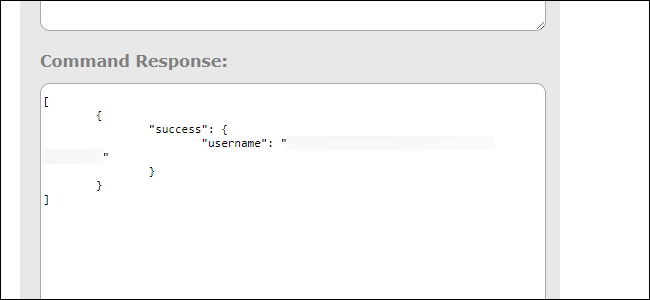
In the Command Response box, you should see a result that looks like the one below (minus the censor blur, naturally). You’ll be given a long, randomized username. Copy this down somewhere and save it. You’ll need it for the script later on.
在“命令响应”框中,您应该看到类似于以下结果(自然会减去检查器模糊)的结果。 您将获得一个随机的长用户名。 将其复制到某个地方并保存。 稍后,您将在脚本中使用它。
Now that you have those two pieces of information, you’re ready to set up your script!
现在,您已经掌握了这两条信息,现在就可以设置脚本了!
如何设置自动热键脚本 (How to Set Up the AutoHotkey Script)
As I mentioned earlier, for this guide, we’re using a modified version of this script from redditor tarrosion. We’ve tweaked it to add shortcuts so you can turn a group of lights on and off at once instead of every light in your house. Here are the following hotkeys you’ll be able to use with this script:
如前所述,在本指南中,我们使用的是Redditor tarrosion脚本的修改版本。 我们对其进行了调整,以添加快捷方式,以便您可以一次打开和关闭一组灯,而不是打开房子中的每盏灯。 您可以在此脚本中使用以下热键:
Ctrl+Alt+L: Toggle all of your lights on or off.
Ctrl + Alt + L:开启或关闭所有灯光。
Ctrl+Alt+I: Turn all lights off.
Ctrl + Alt + I:关闭所有灯。
Ctrl+Alt+O: Turn the current group of lights on.
Ctrl + Alt + O:打开当前的灯光组。
Ctrl+Alt+I: Turn the current group of lights off.
Ctrl + Alt + I:关闭当前的灯光组。
Ctrl+Alt+1: Switch to Group 1.
Ctrl + Alt + 1:切换到组1。
Ctrl+Alt+2: Switch to Group 2.
Ctrl + Alt + 2:切换到组2。
Ctrl+Alt+Up: Increase warmth of current group of lights (requires Color or Ambiance bulbs).
Ctrl + Alt +向上键:增加当前灯组的温暖度(需要“ Color”或“ Ambiance”灯泡)。
Ctrl+Alt+Down: Decrease warmth of current group of lights (requires Color or Ambiance bulbs).
Ctrl + Alt + Down:降低当前组的灯光的温暖度(需要“ Color”或“ Ambiance”灯泡)。
Ctrl+Alt+Left: Increase brightness of current group of lights.
Ctrl + Alt +左键:增加当前灯组的亮度。
Ctrl+Alt+Right: Decrease brightness of current group of lights.
Ctrl + Alt +向右:降低当前灯组的亮度。
You can create or modify as many groups of lights as you need. For this example, I’ve created two groups of two lights each: one for an office and one for the living room. You can change the names of these as you see fit. You also may need to change the values of each group depending on how many lights you have.
您可以根据需要创建或修改任意数量的灯光。 在此示例中,我创建了两组,每组两盏灯:一组用于办公室,另一组用于客厅。 您可以根据需要更改这些名称。 您还可能需要根据您拥有多少灯来更改每个组的值。
First, copy the script below into a Notepad document and save it as something like “huelights.ahk” making sure to replace the .txt extension with .ahk. Without that, Notepad will save it as a .txt file and AutoHotkey won’t be able to run it.
首先,将以下脚本复制到记事本文档中,然后将其另存为“ huelights.ahk”,以确保将.txt扩展名替换为.ahk。 否则,记事本会将其另存为.txt文件,而AutoHotkey将无法运行它。
WinHTTP := ComObjCreate("WinHTTP.WinHttpRequest.5.1")
lightsOn := 1
office := [1,2]
livingroom := [3,4]
curgroup := office
Now, you’ll need to make a couple of adjustments. First, in the script, change every instance of <your-bridge-ip-address> to the IP address you got from your bridge earlier. Next, replace <your-api-username> with your Hue API username. There should be seven instances of each in the script above.
现在,您需要进行一些调整。 首先,在脚本中,将<your-bridge-ip-address>每个实例更改为您之前从网桥获得的IP地址。 接下来,将<your-api-username>替换为您的Hue API用户名。 上面的脚本中每个应有七个实例。
Next, you’ll see a section at the top that defines the groups you can control. That section looks like this:
接下来,您将在顶部看到一个部分,定义可以控制的组。 该部分如下所示:
office := [1,2]
livingroom := [3,4]
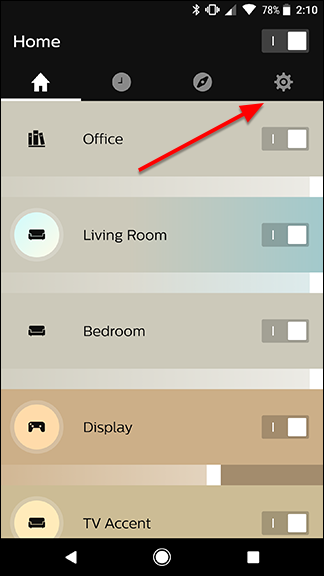
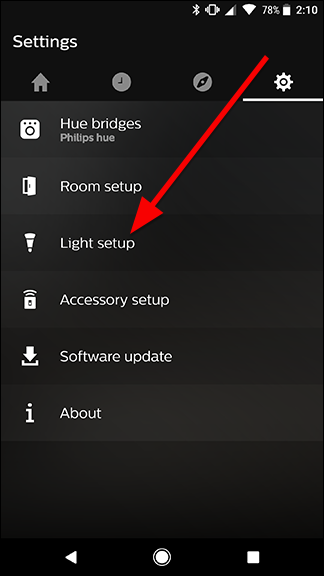
The first two lines define your groups of lights. Each bulb is assigned a number, though it’s not always obvious what number each of your lights corresponds to. The easiest way to check is to open up your Hue app and tap Settings, then tap Light Setup.
前两行定义灯组。 每个灯泡都分配有一个编号,尽管并非总是很明显每个灯对应的编号。 最简单的检查方法是打开Hue应用程序,然后依次单击“设置”和“ Light Setup”。
Here, you’ll see a list of all your lights. Count each one down in order to figure out which number your lights are. For example, the two lights in my office are at the top, so they would be 1 and 2. Below that are my living room lights, so those should be 3 and 4. If you’ve removed and added new lights from your setup, these numbers may shift a bit, so test your scripts and use a little trial and error to make sure you’re using the right lights.
在这里,您会看到所有灯光的列表。 倒数每个,以便弄清楚您的灯是多少。 例如,我办公室中的两个灯在顶部,所以分别是1和2。下面是我的客厅灯,所以应该是3和4。如果您从设置中移除并添加了新的灯,这些数字可能会有所变化,因此请测试您的脚本并进行一些反复试验以确保您使用的光源正确。

Once you’ve found the numbers that correspond to your lights, change them in the two lines above. You can also change the name of each of the groups if you want to. Just make sure to change every instance of that group name in the script. If you want to add a third group (or more), create a new line below the first two using the following format, replacing X, Y with the numbers of the lights you want to add to that group:
找到与灯光相对应的数字后,请在上面的两行中进行更改。 如果需要,您还可以更改每个组的名称。 只需确保在脚本中更改该组名称的每个实例即可 。 如果要添加第三组(或更多组),请使用以下格式在前两个下方创建新行,将X,Y替换为要添加到该组的灯号:
roomname := [X, Y]
You’ll also need to add another shortcut to be able to change to the third group. Select the following block of text in the script above and make a copy of it below this text block, changing all the 2s to 3s and change “livingroom” (or whatever name you gave your second group) to the name of the third group:
您还需要添加另一个快捷方式才能更改为第三组。 在上面的脚本中选择以下文本块,并在该文本块下进行复制,将所有2改为3,然后将“ livingroom”(或您为第二组指定的任何名称)更改为第三组的名称:
;ctrl-alt-2: change to group 2
 ^!2::
 curgroup := livingroom
 return
If you’re familiar with AutoHotkey, you can tweak this script even more to add new shortcuts or control your lights in different ways. Check out the AutoHotkey documentation if you need help. You can also check out the Philips Hue API here for more commands you can integrate into your script.
如果您熟悉AutoHotkey,则可以进一步调整此脚本以添加新的快捷方式或以其他方式控制灯光。 如果需要帮助,请查看AutoHotkey文档 。 您也可以在此处查看Philips Hue API,以获取更多可以集成到脚本中的命令。
翻译自: https://www.howtogeek.com/319428/how-to-control-your-philips-hue-lights-with-keyboard-shortcuts/
hue权限控制


 2903
2903


 被折叠的 条评论
为什么被折叠?
被折叠的 条评论
为什么被折叠?
 到【灌水乐园】发言


