


 本文介绍了如何在Azure机器学习中进行预测,包括数据选择与清理、数据分割、模型训练、评估与部署。通过实例展示了如何构建预测模型,并将其部署为Web服务,以便非技术人员也能使用。
azure机器学习
介绍 (Introduction)
After discussing the basic features of azure machine learning and how to clean the data from Azure Machine learning, let us look at how to perform prediction in Azure Machine Learning. Prediction is one of the important aspects of machine learning as it will help to make strategic decisions.
在讨论了天蓝色机器学习的基本功能以及如何从Azure机器学习中清除数据之后,让我们看一下如何在Azure机器学习中执行预测。 预测是机器学习的重要方面之一,因为它将有助于做出战略决策。
数据选择和数据清理 (Data Selection and Data Cleaning)
Like we did in the last two articles, let us quickly select a data source, Bike Buyer, and apply the normalization if needed after choosing only the relevant columns as shown in the below screenshot.
就像我们在前两篇文章中所做的一样,让我们快速选择一个数据源“ Bike Buyer”,并在只选择了相关列之后根据需要应用规范化,如下面的屏幕快照所示。
In the above configuration, columns such as addresses, names, keys and attributes with different languages other than English were removed. These columns were ignored to improve the Prediction in Azure Machine Learning as those columns do not make major contributions towards buying a bike. For example, customer name and address will not make any contributions towards a bike buyer.
在上述配置中,地址,名称,键和属性之类的列已用英语以外的其他语言删除。 忽略这些列以提高Azure机器学习的预测能力,因为这些列在购买自行车方面没有做出重大贡献。 例如,客户名称和地址不会对自行车购买者做出任何贡献。
数据分割 (Data Split)
In most of the machine learning techniques, we need to have two datasets, Training and Testing datasets. The training dataset is used to build the model while the Testing dataset is used to evaluate the trained model. Though there are different techniques available for data splitting, like SQL Server, in Azure Machine Learning, the percentage split is the available technique to split the data. In this technique, random data of a given percentage will be split to train and test data.
在大多数机器学习技术中,我们需要有两个数据集,即训练和测试数据集。 训练数据集用于构建模型,而测试数据集用于评估训练后的模型。 尽管在Azure机器学习中有多种可用的数据拆分技术(例如SQL Server),但百分比拆分是拆分数据的可用技术。 在这种技术中,给定百分比的随机数据将被拆分为训练和测试数据。
Under Data Transformation -> Sample & Split, there is a control called Split Data. It is configured as shown in the below screenshot.
在“ 数据转换 -> 采样与拆分”下 ,有一个名为“ 拆分数据”的控件。 如以下屏幕截图所示配置它。
The following are the settings for the Split Data in Prediction in Azure Machine Learning.
以下是Azure Machine Learning中的预测中的拆分数据设置。
As shown in the above configuration, the train dataset is 0.7 from the dataset. Further, it is a random split and data will be split randomly to train and test dataset. When the Stratified split is set to true, data is split such a way that both training and testing dataset has almost the same sample percentage of data for the selected column. In this configuration, training data will have 70% of data with bike buyer yes and no values. When the stratified split is set to true, you need to choose the relevant attribute which is BikeBuyer.
如上面的配置所示,火车数据集为0.7。 此外,这是随机分割,数据将被随机分割以训练和测试数据集。 当“分层”拆分设置为true时,将对数据进行拆分,以使训练和测试数据集具有与所选列几乎相同的数据采样百分比。 在此配置中,训练数据将包含70%的数据,自行车购买者为“是”和“无”值。 当分层拆分设置为true时,您需要选择相关属性,即BikeBuyer。
It is should be noted that there are two outputs in the Data Split control where the first one is the training dataset and the second one is the testing data set.
应当注意,数据拆分控件中有两个输出,其中第一个是训练数据集,第二个是测试数据集。
培训模式 (The Training Model)
Training is an important aspect of prediction. You can find the Training Model control by navigating Machine Learning -> Train path. Similar to Data Split where you had two outputs, Training Model has two inputs. One input is the data set while the other input is for the training algorithm as shown below.
训练是预测的重要方面。 您可以通过导航机器学习->训练路径找到训练模型控件。 与您有两个输出的数据拆分类似,训练模型也有两个输入。 一个输入是数据集,另一输入是用于训练算法的,如下所示。
As observed in the above screenshot, the training dataset is connected to the second input of the Train Model while the algorithm is connected to the first input. In this example, we have chosen the Two-Class decision jungle algorithm whereas there are a lot of available algorithms to choose from.
如上面的屏幕截图所示,训练数据集连接到训练模型的第二个输入,而算法连接到第一个输入。 在此示例中,我们选择了两类决策丛林算法,但是有很多可用算法可供选择。
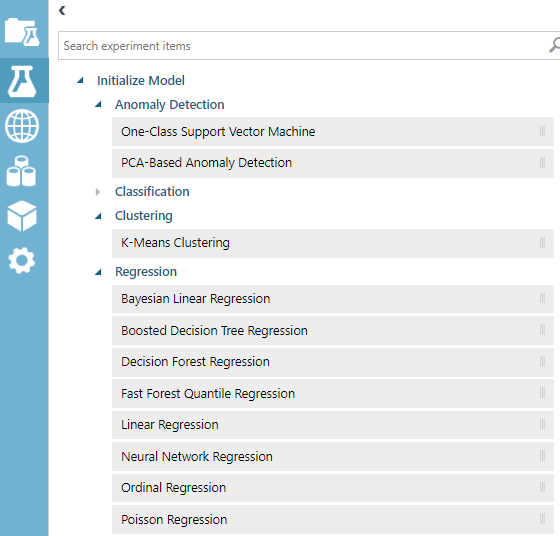
The following list contains the list of available algorithms for Prediction in Azure Machine Learning:
以下列表包含Azure机器学习中的预测可用算法列表:
We will be discussing these techniques in future articles with details as every technique has different types of usages.
我们将在以后的文章中详细讨论这些技术,因为每种技术都有不同的用法类型。
In the trained model, we need to choose the class variable since we have chosen a classification technique. For this data set, we are looking at predicting BikeBuyer, hence we will be choosing the BikeBuyer variable as shown in the below screenshot.
在训练好的模型中,由于我们选择了分类技术,因此需要选择类变量。 对于此数据集,我们正在预测BikeBuyer,因此,我们将选择BikeBuyer变量,如下面的屏幕快照所示。
得分模型 (The Score Model)
After the model is trained, let us see how the model is predicted using Machine Learning -> Score -> Score Model control. The Score model has two inputs, one from the train model and the other one is test data set from split data control as shown in the below screenshot.
训练模型后,让我们看看如何使用机器学习->得分->得分模型控制来预测模型 。 得分模型有两个输入,一个来自火车模型,另一个是来自拆分数据控件的测试数据集,如下面的屏幕快照所示。

We can view the output from the score model as shown in the below screenshot
我们可以查看分数模型的输出,如以下屏幕截图所示
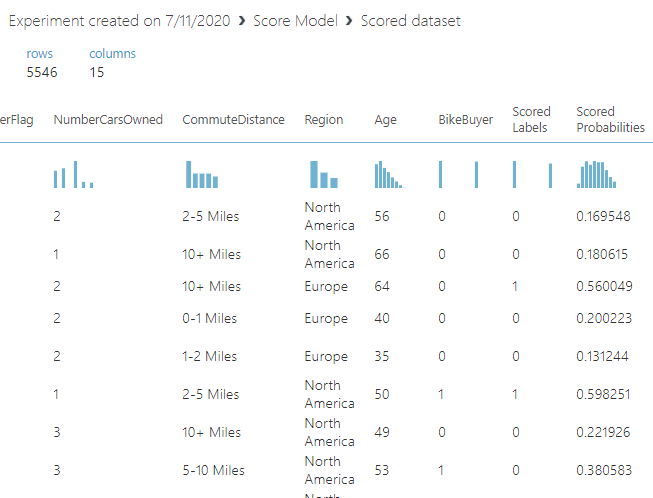
In the above screen, Bike Buyer is the actual value whereas scored labels are the predicted value with probability.
在上面的屏幕中,Bike Buyer是实际值,而打分的标签是带有概率的预测值。
评估模型 (Evaluating the Model)
As you know, every algorithm has its own evaluation parameters. Model evaluation can be done from the control Machine Learning -> Evaluate -> Evaluate Model. With the inclusion of the Evaluation model, an experiment for Prediction in Azure Machine Learning is completed as shown in the below screenshot.
如您所知,每种算法都有其自己的评估参数。 可以通过控制机器学习->评估->评估模型来完成模型评估。 通过包含评估模型,完成了Azure机器学习中的预测实验,如下面的屏幕快照所示。
Let us see the Evaluate Model output and it is important to note that, evaluation parameters are different from the technique that you used. Since we have chosen classification techniques, we will see most of the output, relevant to classification techniques such as Precision/Recall.
让我们看一下“评估模型”的输出,需要注意的是,评估参数与您使用的技术不同。 由于我们选择了分类技术,因此我们将看到大多数与分类技术(例如Precision / Recall)有关的输出。
Following is the confusion matric and other accuracy parameters such as Accuracy, Precision, Recall and F1 score as shown in the below screenshot.
以下是混淆矩阵和其他准确性参数,例如准确性,准确性,召回率和F1得分,如以下屏幕截图所示。
发布到图库 (Publish to Gallery)
You can publish the created experiment if you wish to share it with others. For this, you can use the Publish to Gallery option as shown below.
如果您希望与他人共享创建的实验,则可以将其发布。 为此,可以使用如下所示的“发布到图库”选项。
When the above option is clicked, the following screen will appear.
单击以上选项时,将出现以下屏幕。
In this screen, you need to enter the Experiment Name, which is the Prediction in Azure Machine Learning. Tag names are entered so that this can be easily searched. Summary and description are entered so that the consumer knows what is the model that they are selecting.
在此屏幕中,您需要输入实验名称,这是Azure机器学习中的预测。 输入标签名称,以便可以轻松搜索。 输入摘要和描述,以便消费者知道他们选择的型号是什么。
From the following screen, a proper image can be selected so that a better interface can be viewed.
从以下屏幕中,可以选择适当的图像,以便可以查看更好的界面。
There are available images and also, you have an option to choose your own image to brand your model. After the image selection, next is to decide whether the model is available to the public or whether it is available to users who have the direct link which you have shared.
有可用的图像,此外,您还可以选择自己的图像来标记您的模型。 选择图像后,下一步是确定该模型是否对公众可用或对您共享了直接链接的用户是否可用。
After publishing the built model, you will have the following screen.
发布构建的模型后,将显示以下屏幕。
部署Azure模型 (Deployment of Azure Model)
When the model is deployed, any user who does not have any understanding of the machine learning technique can use this model for their usages. For example, your marketing team can utilize this model to find out who are the most prospective customers from the existing list without knowing the technical details of machine learning.
部署模型后,对机器学习技术不了解的任何用户都可以使用此模型进行使用。 例如,您的营销团队可以利用此模型从现有列表中找出谁是最有潜力的客户,而无需了解机器学习的技术细节。
There are a few changes needed for the previously created model. In the model, we need to eliminate unnecessary columns such as CustomerKey etc. If not, those attributes will be shown as inputs. Let us remove these unnecessary columns and upload the file again to the Azure Machine Learning dataset. Then we do not need the filter columns and the final model will look like the following screenshot.
先前创建的模型需要进行一些更改。 在模型中,我们需要消除不必要的列,例如CustomerKey等。否则,这些属性将显示为输入。 让我们删除这些不必要的列,然后将文件再次上传到Azure机器学习数据集。 然后,我们不需要过滤器列,最终模型将如下图所示。
Then we need to set up this model as a web service so that it is usable. Make sure you have saved the model and run the model successfully in order to set up the web service.
然后,我们需要将此模型设置为Web服务,以使其可用。 确保已保存模型并成功运行模型,以设置Web服务。
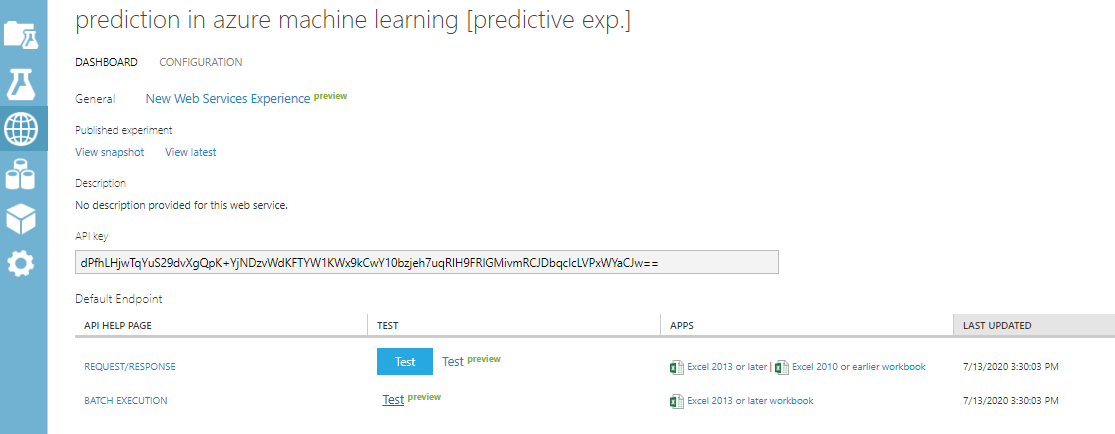
When the web service is created, a new tab named predictive experiment will appear as shown in the below screenshot.
创建Web服务后,将出现一个名为“预测性实验”的新标签,如下面的屏幕快照所示。
When you go to the web service on the left-hand side, you will see the web service that was created for Prediction in Azure Machine Learning.
当您转到左侧的Web服务时,您将看到为Azure机器学习中的预测创建的Web服务。
In this, you can perform the prediction in Azure Machine Learning.
这样,您可以在Azure机器学习中执行预测。
You can either do a prediction for one entry or for a batch. The following screenshot shows how to perform Prediction in Azure Machine Learning for a single entry.
您可以为一个条目或批次进行预测。 下面的屏幕快照显示了如何在Azure机器学习中为单个条目执行预测。

After you enter the values, click the Test Response option and you will see the result in the right-hand side as shown in the below screenshot.
输入值后,单击“测试响应”选项,您将在右侧看到结果,如以下屏幕截图所示。
As shown in the above screenshot, it was predicted as a bike buyer with 77% of probability.
如上面的屏幕截图所示,被预测为自行车购买者的概率为77%。
应用领域 (Applications)
Prediction in Azure Machine Learning can be done using other tools such as Excel and other customize tools. You can find the relevant code for C#, python and R.
可以使用其他工具(例如Excel)和其他自定义工具来完成Azure机器学习中的预测。 您可以找到C#,python和R的相关代码。
结论 (Conclusion)
In this article, we discussed how prediction can be done in the Azure Machine learning by building the model and setting up as a web service. Further, we can publish the built model so that others can use the built model.
在本文中,我们讨论了如何通过构建模型并将其设置为Web服务来在Azure机器学习中进行预测。 此外,我们可以发布构建的模型,以便其他人可以使用构建的模型。
目录 (Table of contents)
| Introduction to Azure Machine Learning using Azure ML Studio |
| Data Cleansing in Azure Machine Learning |
| Prediction in Azure Machine Learning |
| 使用Azure ML Studio的Azure机器学习简介 |
| Azure机器学习中的数据清理 |
| Azure机器学习中的预测 |
翻译自: https://www.sqlshack.com/prediction-in-azure-machine-learning/
azure机器学习


 887
887

 被折叠的 条评论
为什么被折叠?
被折叠的 条评论
为什么被折叠?
 到【灌水乐园】发言


