


 本文详细介绍了如何设置和使用Synology NAS的QuickConnect功能,以便远程访问DiskStation Manager界面。用户需要启用QuickConnect,登录或注册Synology帐户,创建QuickConnect ID,然后通过提供的链接和ID即可在任何地方访问NAS。

Your Synology NAS includes a QuickConnect feature that lets you access its DiskStation Manager interface remotely. Here’s how to set it up.
Synology NAS包含快速连接功能,可让您远程访问其DiskStation Manager界面。 设置方法如下。
You were likely greeted with the QuickConnect setup page when you first installed your Synology NAS, but it’s possible that you may have skipped it. If you changed your mind, though, it’s never too late to set it up. Plus, it’s fairly easy to do.
首次安装Synology NAS时,您可能会遇到QuickConnect设置页面,但是有可能您跳过了它。 但是,如果您改变了主意,则永远不会太迟。 另外,这很容易做到。
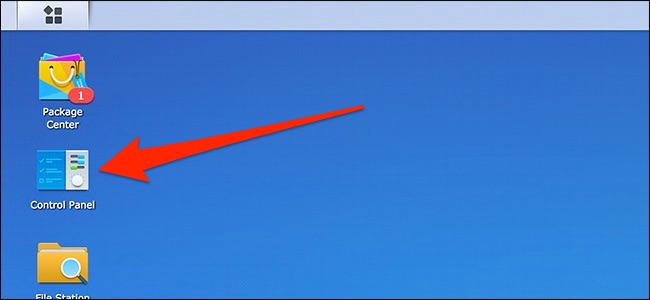
To get started, fire up DiskStation Manager, and then open up Control Panel.
首先,启动DiskStation Manager,然后打开“控制面板”。
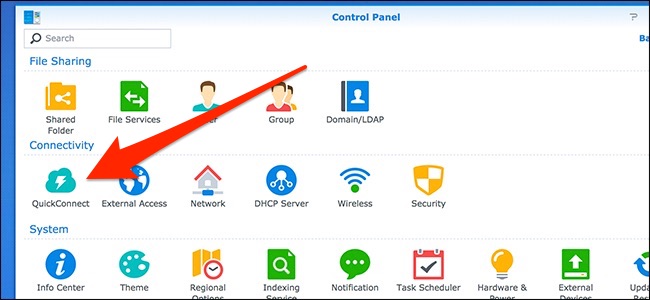
In the Control Panel window, click the “QuickConnect” setting.
在控制面板窗口中,单击“ QuickConnect”设置。
Click the “Enable QuickConnect” check box to enable the feature.
单击“启用QuickConnect”复选框以启用该功能。
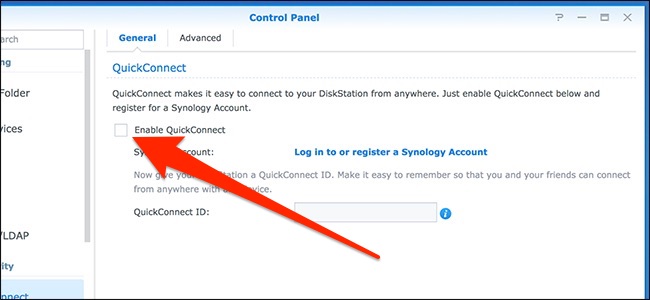
Next, click the “Log in to or register a Synology account” option.
接下来,单击“登录或注册Synology帐户”选项。

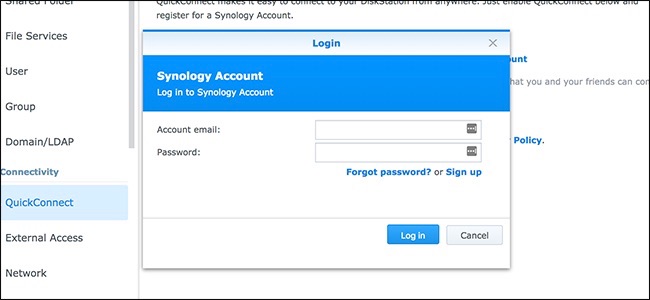
You probably already created a Synology account when you set up your NAS, so just log in using your credentials, and then hit the “Log In” button. If you haven’t already signed up for an account, you can do that here as well.
设置NAS时,您可能已经创建了一个Synology帐户,因此只需使用您的凭据登录,然后单击“登录”按钮即可。 如果您尚未注册帐户,也可以在此处进行。
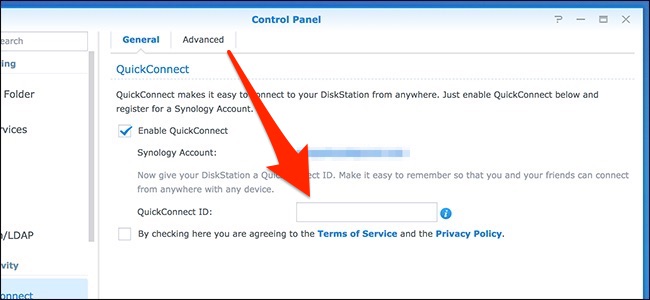
After you log in, create a QuickConnect ID. This is a username of sorts that you’ll use to access your NAS remotely.
登录后,创建一个QuickConnect ID。 这是用于远程访问NAS的各种用户名。
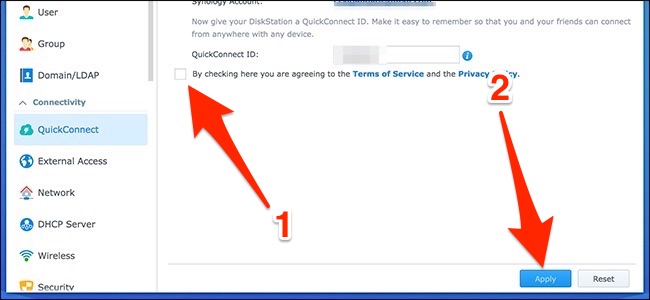
After that, tick the check box to agree to the terms of service and privacy policy, and then hit the “Apply” button.
之后,勾选复选框以同意服务条款和隐私政策,然后点击“应用”按钮。
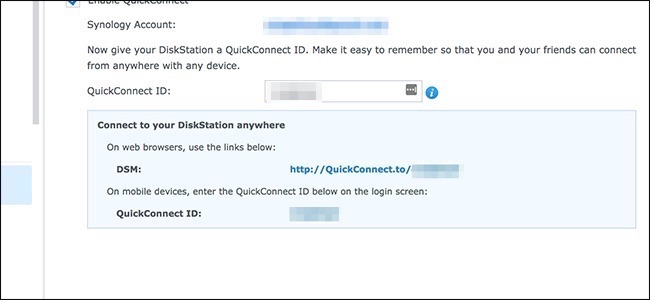
When that’s done, a new box appear with the link you’ll use to access your NAS remotely from a web browser, as well as the ID you’ll use when remotely accessing your NAS from a mobile device using Synology’s mobile apps.
完成此操作后,将出现一个新框,其中包含用于从Web浏览器远程访问NAS的链接以及在使用Synology的移动应用程序从移动设备远程访问NAS时使用的ID。
Whenever you’re away from home, you can simply go to http://quickconnect.to/YourID (where “YourID” is your QuickConnect ID). You’ll then have access to your NAS’s user interface just like you would if you were at home. And if you want to access your NAS’s files on your mobile device, you can download Synology’s apps and enter your QuickConnect ID when logging in.
每当您出门在外时,只需访问http://quickconnect.to/YourID您的ID(其中“您的ID”是您的QuickConnect ID)即可。 然后,您将可以访问NAS的用户界面,就像在家里一样。 而且,如果您想在移动设备上访问NAS的文件,则可以下载Synology的应用程序并在登录时输入QuickConnect ID。
翻译自: https://www.howtogeek.com/346744/how-to-remotely-access-your-synology-nas-using-quickconnect/


 313
313

 被折叠的 条评论
为什么被折叠?
被折叠的 条评论
为什么被折叠?
 到【灌水乐园】发言


