


windows os x
Apple’s recent announcement that the upcoming OS X release (El Capitan or 10.11) will finally, at long last, come with the ability to snap windows to your screen edges. A feature Windows users have enjoyed since 2009.
苹果公司最近宣布即将发布的OS X版本(El Capitan或10.11)最终将终于具有将窗口捕捉到屏幕边缘的功能。 自2009年以来,Windows用户就喜欢使用此功能。
If you’re a Mac user who has no idea what we’re talking about, then let’s review. When Microsoft released Windows 7, it introduced its Snap feature, which lets users simply grab and drag a window to a screen edge and “snap” it there.
如果您是不知道我们在说什么的Mac用户,那么让我们回顾一下。 当Microsoft发布Windows 7时,它引入了Snap功能,使用户可以简单地将窗口抓取并拖动到屏幕边缘,然后在其中“捕捉”。
So for example, if you drag a window to the right edge, it will snap there and resize to half the screen’s width. If you drag it to the top, it will snap there and expand to maximum.
因此,例如,如果将窗口拖动到右侧边缘,它将在此处对齐并调整为屏幕宽度的一半。 如果将其拖动到顶部,它将在此处捕捉并扩展到最大。
Apple has resisted adding this feature, which may not matter much to Mac users who really don’t know what they’re missing, but may feel curiously absent for switchers and people who use both systems. This is set to change with the aforementioned El Capitan release, but for OS X users who can’t upgrade to 10.11, or simply want to have snap powers right now, we want to suggest a solution: Window Tidy.
苹果公司拒绝添加此功能,这对于确实不知道自己缺少什么的Mac用户而言可能并不重要,但对于切换器和使用这两种系统的用户可能会感到奇怪。 对于前面提到的El Capitan版本,这将发生变化,但是对于无法升级到10.11或仅想立即拥有快照功能的OS X用户,我们想提出一个解决方案:Window Tidy。
超级充电 (Super Charged Snapping)
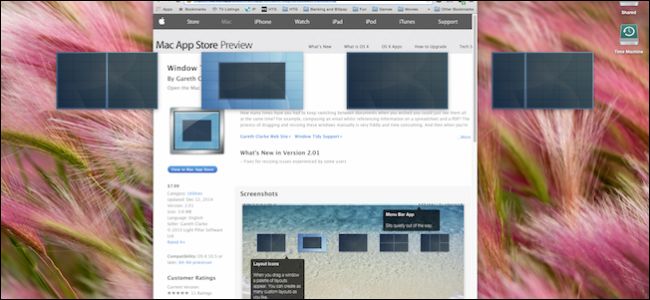
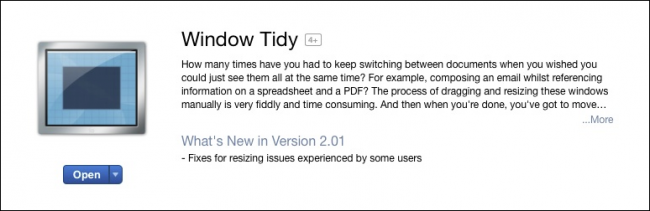
Window Tidy is an app available for download in the Mac App Store. It’s $7.99, which might seem like a lot for something that will be free in the next release but we think that the extra features really make the price a secondary consideration. Especially again, if you’re not on track or not planning on upgrading to El Capitan.
Window Tidy是可在Mac App Store中下载的应用程序。 它的价格为$ 7.99,对于在下一个版本中将免费提供的功能来说,可能看起来很多,但我们认为这些额外功能确实使价格成为了次要考虑因素。 尤其是如果您不按计划进行或不计划升级到El Capitan。
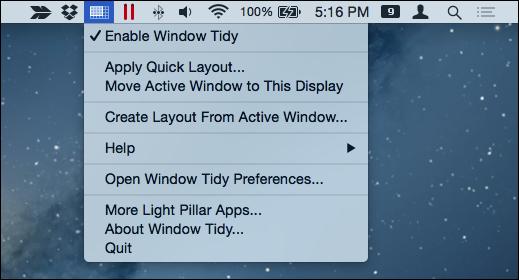
Windows Tidy comes with a menu bar icon that provides quick controls as well as access to its preferences.
Windows Tidy带有一个菜单栏图标,该菜单栏图标提供快速控制以及对其首选项的访问。
If you want to apply a “Quick Layout” for example, you’re able to draw out where and at what size you want to affect a selected window.
例如,如果要应用“快速布局”,则可以绘制出要影响选定窗口的位置和大小。
You can thus place windows precisely, at a size that isn’t obtrusive but still effective.
因此,您可以精确放置窗户,其尺寸不会引人注目,但仍然有效。
There’s also an option accessible from the menu bar that lets you move the active window to the current display, but this can already be accomplished using the “Command + #” keyboard shortcuts, which we’ve previously discussed.
您还可以从菜单栏中访问一个选项,该选项可让您将活动窗口移至当前显示,但是已经可以使用前面讨论过的“ Command +#”键盘快捷键来实现。
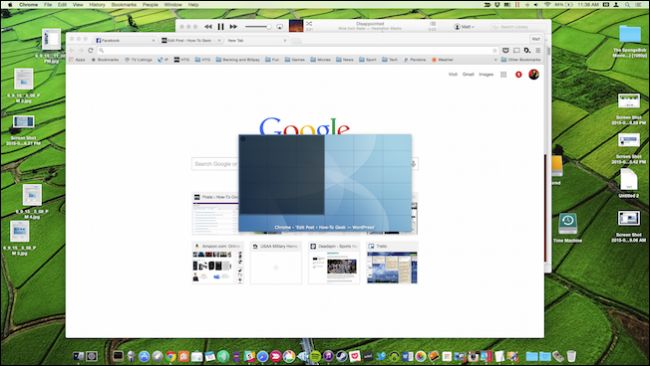
Snapping with Window Tidy is accomplished by grabbing a window’s title bar. An overlay will then appear and you can drag a window to its desired location and size.
通过抓取窗口的标题栏可以完成Window Tidy的抓取。 然后会出现一个叠加层,您可以将窗口拖动到所需的位置和大小。
If you don’t want this overlay to appear every time you drag a window, you can change its behavior so that it only appears when you grab the title bar and hold the ever-useful “Option” key. This option can be enabled/disabled in the preferences.
如果您不想在每次拖动窗口时都显示此覆盖,则可以更改其行为,以便仅在抓住标题栏并按住有用的“ Option”键时才显示。 可以在首选项中启用/禁用此选项。
偏好设置的力量 (Power to the Preferences)
The Windows Tidy preferences have a lot of power contained within them. Let’s go through each tab and talk briefly about what they do.
Windows Tidy首选项包含很多功能。 让我们浏览每个选项卡,简要讨论它们的作用。
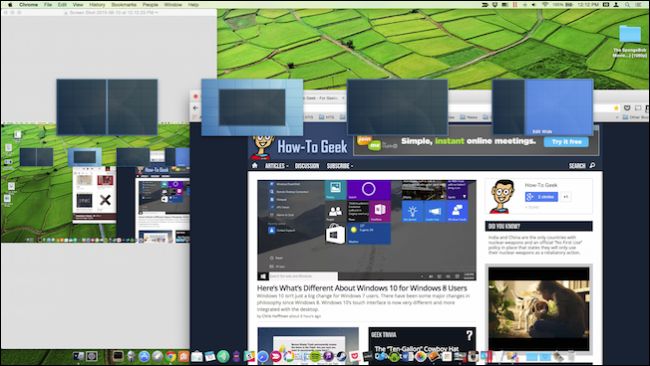
The first tab let’s you create and order layouts. Take a look at how ours is set up in the preferences and then in the next screenshot, how it looks when we activate the overlay.
第一个选项卡让您创建和排序布局。 看看我们在首选项中的设置方式,然后在下一个屏幕截图中,我们激活叠加层时的外观如何。

Your overlay will appear as layouts are ordered in the preferences, so make sure that if you want something that will let you snap windows to the right and left edges, that each half is together in the layout order.
您的叠加层将按照首选项中的布局顺序显示,因此请确保如果您想要使窗口对齐到左右边缘的东西,那么每个部分都按布局顺序排列在一起。

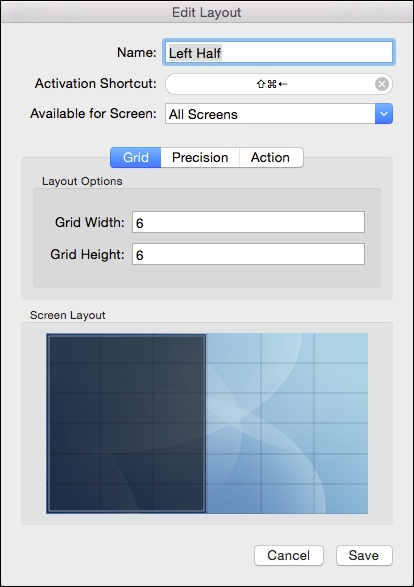
You’re more than likely to spend most of your time in the Window Tidy preferences messing with layouts. Make sure you double-click on each one if you want to really refine its behavior, size, and create a quick activation shortcut. This is the kind of fine-grained control that adds considerable value to the app.
您很有可能会花费大部分时间在“窗口整洁”首选项中,以使布局混乱。 如果要真正优化其行为,大小并创建快速激活快捷方式,请确保双击每个。 这是一种细粒度的控件,可为应用程序增加可观的价值。
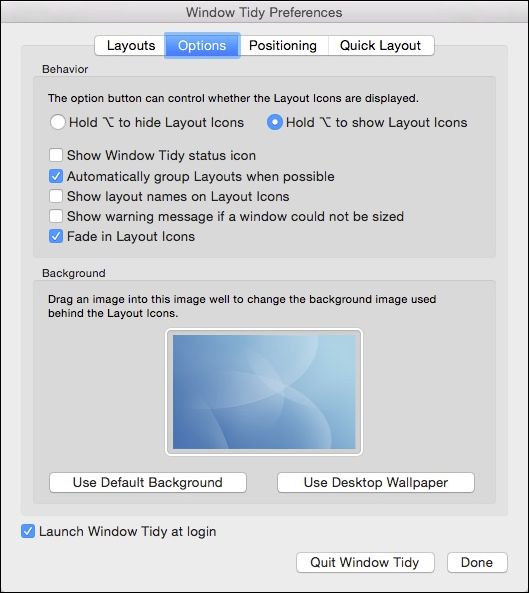
Next, the “Options” tab has many very useful items that you’re going to want to go through. Most of them are pretty self-explanatory.
接下来,“选项”选项卡包含许多非常有用的项目,您将要经历这些项目。 其中大多数都是不言自明的。
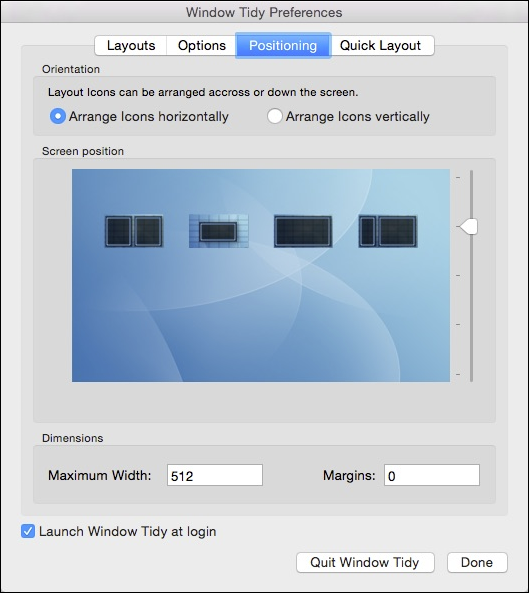
With the “Positioning” tab, you can elect to arrange the layout icons horizontally or vertically, as well where they appear on the screen.
使用“定位”选项卡,您可以选择水平或垂直排列布局图标,以及它们在屏幕上的显示位置。
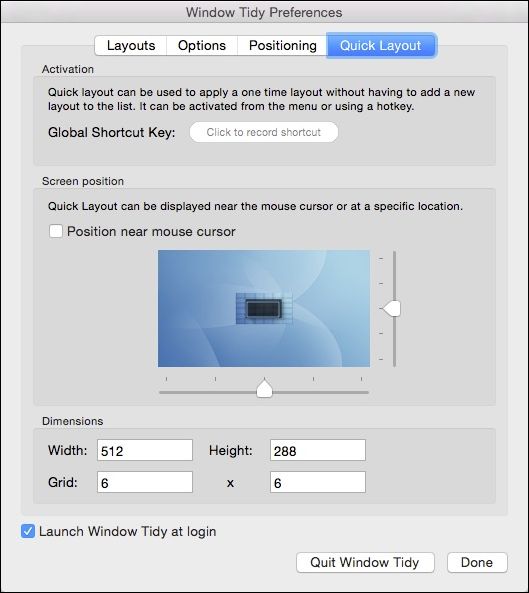
Finally, there’s a tab devoted solely to the “Quick Layout” feature we discussed earlier. Here we can assign a global shortcut key so you can access Quick Layouts without using the menu bar icon; change the Quick Layout overlay’s size and location; and alter its dimensions.
最后,有一个选项卡专门用于我们前面讨论的“快速布局”功能。 在这里,我们可以分配一个全局快捷键,这样您就可以在不使用菜单栏图标的情况下访问快速布局。 更改快速布局叠加层的大小和位置; 并更改其尺寸。
Regardless of whether you are a diehard Mac user, a longtime Windows user, or someone who jumps between the two operating systems on a regular basis, windows snapping is definitely a very useful feature.
无论您是Mac的顽固用户,长期的Windows用户,还是定期在两种操作系统之间切换的人,Windows捕捉绝对是一项非常有用的功能。
No doubt the snap features that are being rolled out in the upcoming OS X release will be warmly received and widely used, but if you want this feature now, or you really want something that’s going to give you an almost extreme amount of control over the experience, then we recommend you consider Window Tidy for OS X.
毫无疑问,即将在OS X发行版中推出的快照功能将受到热烈欢迎并得到广泛使用,但是,如果您现在想要此功能,或者您确实想要某种功能,可以使您几乎完全控制该功能。经验丰富,那么我们建议您考虑OS X的Window Tidy 。
Let us know what you think. Do you as a Mac user find the idea of snapping windows useful or is it just ho-hum? Sound off in our discussion forum with your questions and comments.
让我们知道您的想法。 作为Mac用户,您觉得捕捉窗口的想法有用吗? 在我们的讨论区中畅所欲言,并提出您的问题和意见。
翻译自: https://www.howtogeek.com/219465/how-to-get-windows-like-snapping-on-os-x/
windows os x


 1187
1187

 被折叠的 条评论
为什么被折叠?
被折叠的 条评论
为什么被折叠?
 到【灌水乐园】发言


