


mac 写入 ntfs
Apple’s macOS can read from Windows-formatted NTFS drives, but can’t write to them out of the box. Here are a few solutions for getting full read/write access to NTFS drives.
苹果的macOS可以读取Windows格式的NTFS驱动器,但不能立即对其进行写入。 以下是一些获得NTFS驱动器完全读写访问权限的解决方案。
This could be useful if you want to write to a Boot Camp partition on your Mac, as Windows system partitions must use the NTFS file system. However, for external drives, you should probably use exFAT instead. macOS can natively read and write to exFAT drives, just like Windows can.
如果要写入Mac上的Boot Camp分区,这可能很有用,因为Windows系统分区必须使用NTFS文件系统。 但是,对于外部驱动器,您可能应该改用exFAT 。 macOS可以本地读取和写入exFAT驱动器,就像Windows一样。
三种选择 (Three Options)
There are several options for this, and you’ll need to choose one:
有几种选择,您需要选择一个:
Paid Third-Party Drivers: There are third-party NTFS drivers for Mac that you can install, and they’ll work quite well. These are paid solutions, but they’re easy to install and should offer better performance than the free solutions below.
付费的第三方驱动程序:您可以安装适用于Mac的第三方NTFS驱动程序,它们会很好地工作。 这些是付费解决方案,但是它们易于安装,并且比下面的免费解决方案具有更好的性能。
Free Third-Party Drivers: There’s a free and open-source NTFS driver you can install on a Mac to enable write support. Unfortunately, this take a bit of extra work to install, especially on Macs with the new System Integrity Protection feature, added in 10.11 El Capitan. It’s slower than paid solutions and automatically mounting NTFS partitions in read-write mode is a security risk.
免费的第三方驱动程序:您可以在Mac上安装免费的开源NTFS驱动程序以启用写支持。 不幸的是,这需要花费一些额外的工作来安装,尤其是在Mac OS上10.11 El Capitan中新增的系统完整性保护功能。 它比付费解决方案要慢,并且以读写模式自动挂载NTFS分区存在安全风险。
Apple’s Experimental NTFS-Write Support: The macOS operating system includes experimental support for writing to NTFS drives. However, it’s off by default and requires some messing around in the terminal to enable it. It isn’t guaranteed to work properly and could potentially cause problems with your NTFS file system. In fact, we’ve had it corrupt data before. We really don’t recommend using this. It’s disabled by default for a reason.
苹果公司的实验性NTFS写入支持:macOS操作系统包括对写入NTFS驱动器的实验性支持。 但是,默认情况下处于关闭状态,并且需要在终端中进行一些修改才能启用它。 无法保证它可以正常工作,并可能导致NTFS文件系统出现问题。 实际上,我们之前曾破坏过数据。 我们真的不建议使用此功能。 由于某种原因,默认情况下禁用此功能。
We highly recommend paying for a third-party NTFS driver if you need to do this as the other solutions don’t work as well and are more work to set up.
如果您需要这样做,我们强烈建议您购买第三方NTFS驱动程序,因为其他解决方案效果不佳,需要更多的工作。
最佳付费第三方驱动程序:Mac的Paragon NTFS (The Best Paid Third-Party Driver: Paragon NTFS for Mac)
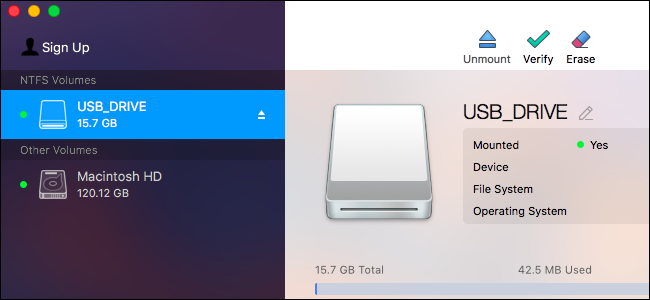
Paragon NTFS for Mac costs $19.95 and offers a ten-day free trial. It’ll install cleanly and easily on modern versions of macOS, including macOS 10.12 Sierra and Mac OS X 10.11 El Capitan. It really does “just work”, so it’s the best option if you’re willing to pay a small amount of money for this feature.
用于Mac的Paragon NTFS售价19.95美元,并提供十天免费试用。 它将轻松,干净地安装在现代版本的macOS上,包括macOS 10.12 Sierra和Mac OS X 10.11 El Capitan。 它确实可以“正常工作”,因此,如果您愿意为此功能支付少量资金,那么它是最佳选择。
You also won’t have to fiddle with terminal commands to manually mount partitions, insecurely mount partitions automatically, or deal with potential corruption as you will with the free drivers below. If you need this feature, paying for software that does it properly is worth it. We cannot stress this enough.
您也无需费心使用终端命令来手动安装分区,自动不安全地安装分区或像下面的免费驱动程序那样处理潜在的损坏。 如果您需要此功能,值得购买能够正确执行此功能的软件。 我们对此不能足够强调。
If you own a Seagate drive, be aware that Seagate offers a free download of Paragon NTFS for Mac so you won’t have to purchase anything extra.
如果您拥有Seagate驱动器,请注意,Seagate可免费下载Mac版Paragon NTFS,因此您无需购买任何其他产品。
You could also purchase Tuxera NTFS for Mac, which costs $31 and offers a fourteen-day free trial. But Paragon NTFS does the same thing and is cheaper.
您还可以购买Mac版Tuxera NTFS ,价格为31美元,并提供14天免费试用。 但是Paragon NTFS可以做到这一点,而且价格便宜。
最好的免费第三方驱动程序:适用于macOS的FUSE (The Best Free Third-Party Drivers: FUSE for macOS)
This method is free, but it requires a good bit of work, and is less secure. To make your Mac automatically mount NTFS partitions in read-write mode, you’ll have to temporarily disable System Integrity Protection and replace one of Apple’s built-in tools with a binary that is more vulnerable to attack. So this method is a security risk.
此方法是免费的,但需要大量工作,而且安全性较低。 为了使Mac以读写模式自动挂载NTFS分区,您必须暂时禁用系统完整性保护,并用更容易受到攻击的二进制文件替换Apple的内置工具之一。 因此,此方法存在安全风险。
However, you can use FUSE to mount NTFS partitions in read-write mode manually if you don’t mind using the Terminal. This is more secure, but it’s more work.
但是,如果您不介意使用终端,则可以使用FUSE以读写模式手动安装NTFS分区。 这样更安全,但需要更多工作。
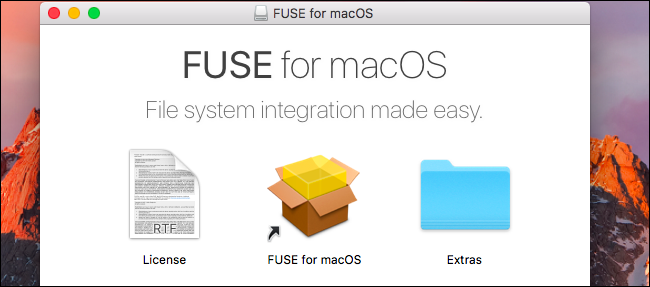
First, download FUSE for macOS and install it. Use the default options when installing it.
首先,下载适用于macOS的FUSE并安装它。 安装时使用默认选项。
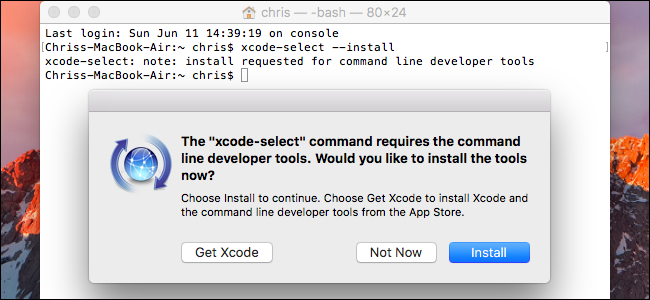
You’ll also need Apple’s command line developer tools installed to continue. If you haven’t installed them yet, you can open a Terminal window from Finder > Applications > Utilities and run the following command to do so:
您还需要安装Apple的命令行开发人员工具才能继续。 如果尚未安装它们,则可以从Finder>应用程序>实用程序中打开“终端”窗口,然后运行以下命令来这样做:
xcode-select --install
Click “Install” when you’re prompted to install the tools.
当提示您安装工具时,单击“安装”。
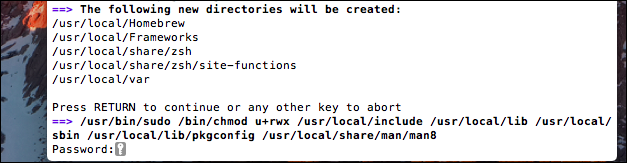
In addtion, you’ll need to download and install homebrew if you haven’t already installed it on your Mac. Homebrew is a “package manager” for Mac OS X. Copy-paste the following command into a Terminal window and press Enter to install it:
另外,如果尚未在Mac上安装homebrew,则需要下载并安装它。 Homebrew是Mac OS X的“程序包管理器” 。 将以下命令复制并粘贴到“终端”窗口中,然后按Enter进行安装:
/usr/bin/ruby -e "$(curl -fsSL https://raw.githubusercontent.com/Homebrew/install/master/install)"
Press Enter and provide your password when prompted. The script will automatically download and install Homebrew.
按Enter并在出现提示时提供密码。 该脚本将自动下载并安装Homebrew。
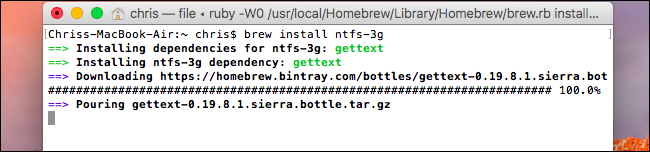
Once you’ve installed the developer tools and Homebrew, run the following command in a Terminal window to install ntfs-3g:
安装开发人员工具和Homebrew后,请在“终端”窗口中运行以下命令来安装ntfs-3g:
brew install ntfs-3g
You can now manually mount NTFS partitions in read/write mode. From a terminal window, run the following command to create a mount point at /Volumes/NTFS. You only need to do this once.
现在,您可以在读/写模式下手动安装NTFS分区。 在终端窗口中,运行以下命令以在/ Volumes / NTFS中创建安装点。 您只需要执行一次。
sudo mkdir /Volumes/NTFS
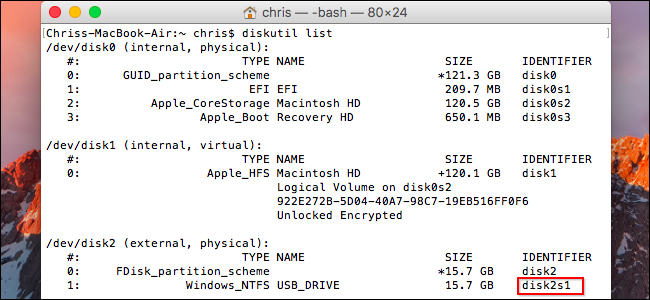
When you connect an NTFS drive to the computer, run the following command to list any disk partitions:
将NTFS驱动器连接到计算机时,运行以下命令列出所有磁盘分区:
diskutil list
You can then identify the device name of the NTFS partition. Just look for the partition with the Windows_NTFS file system. In the screenshot below, it’s /dev/disk3s1 .
然后,您可以标识NTFS分区的设备名称。 只需使用Windows_NTFS文件系统查找分区。 在下面的屏幕快照中,它是/dev/disk3s1 。
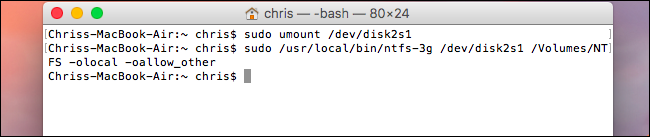
The NTFS partition was probably automatically mounted by your Mac, so you’ll need to unmount it first. Run the following command, replacing /dev/disk2s1 with the device name of your NTFS partition.
Mac可能会自动挂载NTFS分区,因此您需要先将其卸载。 运行以下命令,将/dev/disk2s1替换为NTFS分区的设备名称。
sudo umount /dev/disk2s1
To mount the drive, run the following command, replacing /dev/disk2s1 with the device name of your NTFS partition.
要安装驱动器,请运行以下命令,将/dev/disk2s1替换为您的NTFS分区的设备名称。
sudo /usr/local/bin/ntfs-3g /dev/disk2s1 /Volumes/NTFS -olocal -oallow_other
You’ll see the file system mounted at /Volumes/NTFS. It will also appear on your desktop as a normal mounted drive. You can eject it normally when you want to unplug it.
您将看到在/ Volumes / NTFS上挂载的文件系统。 它也将作为普通的已安装驱动器出现在您的桌面上。 要拔出插头时,可以正常弹出它。
If you’re happy manually mounting partitions with the above instructions, you don’t have to continue.
如果您愿意按照上述说明手动安装分区,则不必继续。
If you want to make your Mac automatically mount NTFS drives you connect in read-write mode, you’ll need to disable System Integrity Protection.
如果要使Mac自动安装以读写模式连接的NTFS驱动器,则需要禁用系统完整性保护。
Warning: You probably don’t want to do this! The software’s official instructions warn that this is a security risk. You will be replacing the NTFS mount tools in your Mac with the ntfs-3g tools, which will run as the root user. Because of the way Homebrew installs software, malware running on your Mac could overwrite these tools. It’s probably not work the risk, but we’ll explain how to do if if you want to take the risk.
警告:您可能不想这样做! 该软件的官方说明警告这是安全隐患。 您将用ntfs-3g工具替换Mac中的NTFS挂载工具,该工具将以root用户身份运行。 由于Homebrew安装软件的方式,Mac上运行的恶意软件可能会覆盖这些工具。 冒险可能不会起作用,但是如果您要冒险,我们将说明如何做。
Reboot your Mac and hold Command+R while it’s booting. It’ll boot into a special recovery mode environment.
重新启动Mac,并在启动时按住Command + R。 它将引导进入特殊的恢复模式环境。
Launch a terminal from the Utilities menu in recovery mode and run the following command:
在恢复模式下从“实用工具”菜单启动终端,然后运行以下命令:
csrutil disable
Once you have, reboot your Mac normally.
拥有后,请正常重启Mac。

From the Mac desktop, open a Terminal window again and run the following commands to make ntfs-3g function:
在Mac桌面上,再次打开“终端”窗口,然后运行以下命令以使ntfs-3g起作用:
sudo mv /sbin/mount_ntfs /sbin/mount_ntfs.original

sudo ln -s /usr/local/sbin/mount_ntfs /sbin/mount_ntfs

Lastly, re-enable System Integrity Protection. Reboot your Mac and hold Command+R while it’s booting to enter recovery mode. Launch a terminal in recovery mode and run the following command:
最后,重新启用系统完整性保护。 重新启动Mac,并在启动时按住Command + R进入恢复模式。 以恢复模式启动终端并运行以下命令:
csrutil enable
Once you have, reboot your Mac. NTFS-write support should be functioning now.
拥有后,重新启动Mac。 NTFS写入支持现在应该可以运行。
To undo your changes and uninstall everything, you’ll need to first disable System Integrity Protection. After you do, run the following commands:
要撤消更改并卸载所有内容,您需要首先禁用系统完整性保护。 完成后,运行以下命令:
sudo rm /sbin/mount_ntfs

sudo mv /sbin/mount_ntfs.original /sbin/mount_ntfs

brew uninstall ntfs-3g
You can then uninstall FUSE for macOS from its panel in the System Preferences window and re-enable System Integrity Protection.
然后,您可以从“系统偏好设置”窗口中的面板中卸载macOS的FUSE,然后重新启用系统完整性保护。
You can see why we recommend the $20 option instead now, huh?
Apple的实验性NTFS编写支持:请不要认真做 (Apple’s Experimental NTFS-Writing Support: Don’t Do This, Seriously)
We don’t recommend the below method because it’s the least tested. This might not work properly, so don’t blame us or Apple if you experience problems. It’s still unstable as of macOS 10.12 Sierra, and it may never be fully stable. This is really just here for educational purposes.
我们不建议使用以下方法,因为它是经过最少测试的。 这可能无法正常工作,因此如果遇到问题,请不要怪我们或苹果。 从macOS 10.12 Sierra开始,它仍然不稳定,并且可能永远不会完全稳定。 这实际上只是出于教育目的。
First, be sure that your drive has a convenient single-word label. If it doesn’t, change its label. This will make this process easier.
首先,请确保您的驱动器带有方便的单字标签。 如果没有,请更改其标签。 这将使此过程更容易。
You’ll first need to launch a terminal. Navigate to Finder > Applications > Utilities > Terminal or press Command+Space, type Terminal, and press Enter.
您首先需要启动一个终端。 导航到Finder>应用程序>实用程序>终端,或者按Command + Space,键入Terminal,然后按Enter。
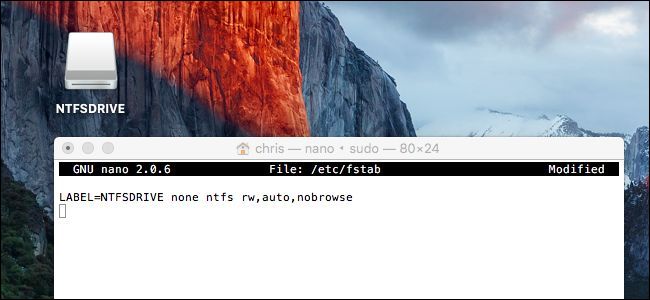
Type the following command into the terminal to open the /etc/fstab file for editing in the nano text editor:
在终端中键入以下命令以打开/ etc / fstab文件,以便在nano文本编辑器中进行编辑:
sudo nano /etc/fstab

Add the following line to nano, replacing “NAME” with the label of your NTFS drive:
将以下行添加到nano,用您的NTFS驱动器的标签替换“ NAME”:
LABEL=NAME none ntfs rw,auto,nobrowse
Press Ctrl+O to save the file after you’re done, and then press Ctrl+X to close nano.
完成后,按Ctrl + O保存文件,然后按Ctrl + X关闭nano。
(If you have multiple NTFS drives you want to write to, add a different line for each.)
(如果要写入多个NTFS驱动器,请为每个驱动器添加不同的行。)
Connect the drive to the computer—unplug it and reconnect it if it’s already connected—and you’ll see it under the “/Volumes” directory. In a Finder window, you can click Go > Go to Folder and type “/Volumes” into the box to access it. It won’t pop up automatically and appear on your desktop like drives normally do.
将驱动器连接到计算机(拔出驱动器,然后重新连接)(如果已连接),您将在“ / Volumes”目录下看到它。 在Finder窗口中,可以单击“转到”>“转到文件夹”,然后在框中键入“ / Volumes”以进行访问。 它不会像驱动器一样自动弹出并显示在桌面上。
To undo this change later, just repeat the above process to open the /etc/fstab file in nano. Delete the line you added to the file and save your changes.
要稍后撤消此更改,只需重复上述过程以在nano中打开/ etc / fstab文件即可。 删除添加到文件中的行并保存更改。
Most Mac users will be better off formatting external drives with exFAT, ensuring they work well on both Windows and Mac OS X without any extra work. if you must write to an NTFS drive, one of the paid, third-party drivers will be the easiest option with the best performance and least risk of file corruption.
大多数Mac用户最好使用exFAT格式化外部驱动器,以确保它们在Windows和Mac OS X上都能正常工作,而无需任何额外的工作。 如果您必须写入NTFS驱动器,则付费的第三方驱动程序之一将是最简单的选择,它具有最佳的性能和最小的文件损坏风险。
翻译自: https://www.howtogeek.com/236055/how-to-write-to-ntfs-drives-on-a-mac/
mac 写入 ntfs


 9138
9138

 被折叠的 条评论
为什么被折叠?
被折叠的 条评论
为什么被折叠?
 到【灌水乐园】发言


