


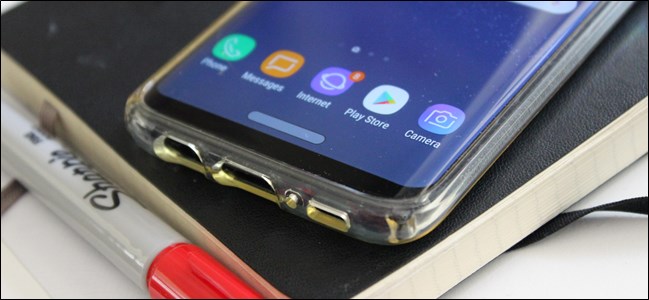
Android’s upcoming iteration (currently just called “P”) contains a new gesture navigation feature. But if you don’t have a phone that supports the P beta (or don’t feel like waiting), there’s a way to add gestures to your phone now.
Android即将推出的迭代(当前仅称为“ P”)包含一项新的手势导航功能。 但是,如果您没有支持P beta的手机(或者不想等待),现在可以使用一种方法向手机添加手势。
And here’s the best part: these aftermarket gesture navigation options are significantly better than what Android P offers. In fact, P’s gesture options are pretty bad—so don’t feel left out if your phone can’t access the P beta. You’re really not missing out on much where gestures are concerned.
这是最好的部分:这些售后市场手势导航选项明显优于Android P提供的功能。 实际上,P的手势选项非常糟糕-因此,如果您的手机无法访问P beta,不要感到被遗忘。 您实际上并没有错过很多有关手势的信息。
But that’s where Navigation Gestures—an app by XDA—comes into play. It adds excellent and customizable gesture options to any phone (though it arguably looks/works better on phones with on-screen navigation over ones with capacitive keys). That said, there is a bit of set up involved before you can get started with Navigation Gestures—it’s not as simple as “install and go” with this one.
但这就是XDA应用程序Navigation Gestures发挥作用的地方。 它为任何手机都添加了出色且可自定义的手势选项(尽管可以说它在具有屏幕导航功能的手机上比具有电容键的手机看起来/更好)。 就是说,您需要进行一些设置才能开始使用Navigation Gestures(导航手势),这并不像“安装并运行”那么简单。
Before we get started, it’s worth noting that you’ll need to have ADB—the Android Debugging Bridge—set up for this. Navigation Gestures doesn’t require root access, but it does require one permission to be granted with ADB. If you’re not familiar with ADB, you’ll need to check out our full primer on installing and using it. It seems a little daunting at first, but it’s not bad.
在开始之前,值得注意的是,您需要为此设置ADB(Android调试桥)。 导航手势不需要root用户访问权限,但需要ADB授予一项权限。 如果您不熟悉ADB,则需要查看有关安装和使用它的完整入门手册。 一开始似乎有些令人生畏,但这还不错。
设置导航手势 (Setting Up Navigation Gestures)
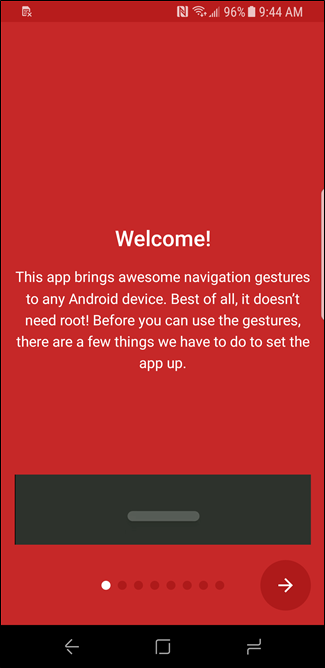
Once you have the app installed, go ahead and fire it up. After swiping past the welcome screen, you’ll need to grant Accessibility Service access to the app. Press the “Grant” button.
安装完应用程序后,继续进行启动。 轻扫欢迎屏幕后,您需要授予无障碍服务访问该应用的权限。 按下“授予”按钮。

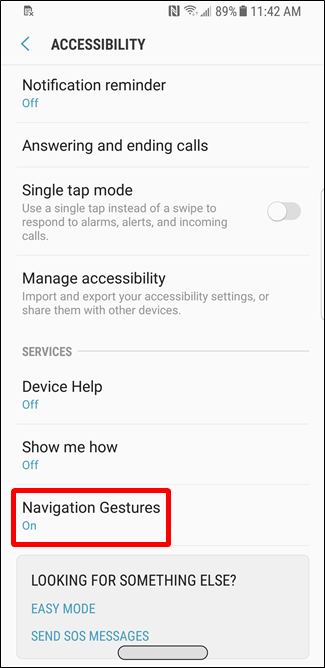
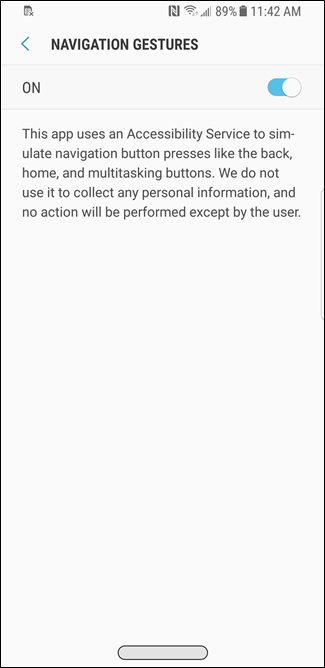
When the Accessibility menu opens, scroll down until and tap the “Navigation Gestures” setting. Slide the toggle to enable access, and then back out until you’re at the app’s setup screen again.
当“辅助功能”菜单打开时,向下滚动直到,然后点击“导航手势”设置。 滑动切换开关以启用访问权限,然后退出,直到再次进入应用程序的设置屏幕。
You’ll need ADB for the next step, so go ahead and connect your phone to your computer. Again, if you haven’t used ADB before, check out our post on setting it up and using it.
下一步需要ADB,因此继续将手机连接到计算机。 同样,如果您以前从未使用过ADB,请查看我们有关设置和使用ADB的文章。

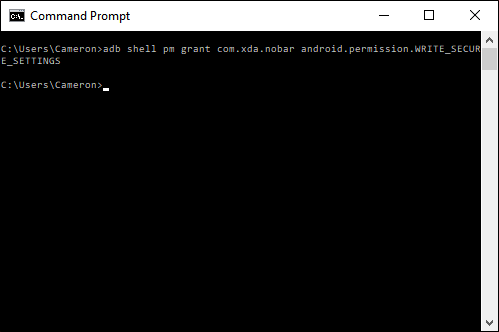
With the phone connected and debugging access granted, type the following command into the PowerShell or Command Prompt window:
连接电话并授予调试访问权限后,在PowerShell或“命令提示符”窗口中键入以下命令:
adb shell pm grant com.xda.nobar android.permission.WRITE_SECURE_SETTINGS
If everything goes correctly, it should do nothing for a couple of seconds, and then return you to the prompt. There won’t be any confirmation that the command was properly executed.
如果一切正常,则应在几秒钟内不执行任何操作,然后将您返回提示。 不会确认该命令已正确执行。
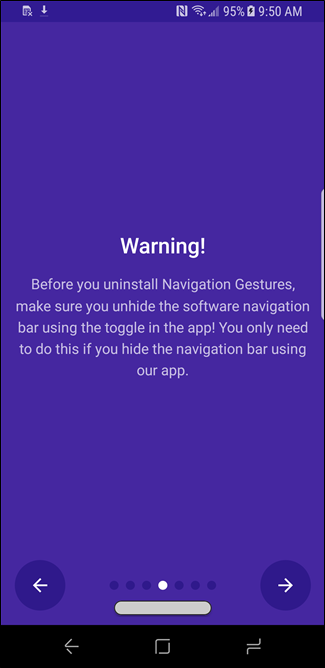
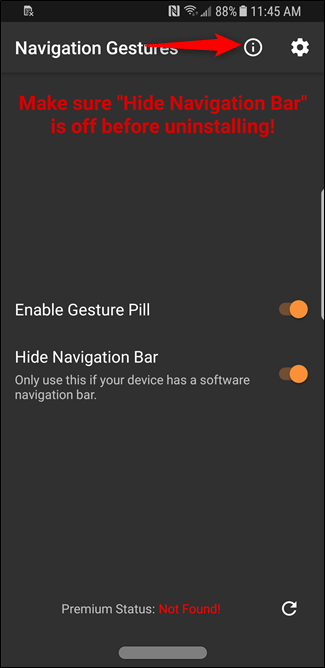
After that, the rest is pretty straightforward. You’ll get details about the Quick Settings tile, and a warning that you should definitely pay attention to: If you decide to uninstall Navigation Gestures, make sure to unhide the navigation bar first. Seriously, if you don’t do this, it will be bad.
之后,其余的工作就非常简单了。 您将获得有关“快速设置”磁贴的详细信息,以及一定要注意的警告:如果您决定卸载导航手势,请确保先取消隐藏导航栏。 严重的是,如果您不这样做,那将是不好的。
There are a couple more screens you should read through here, but for the most part you’re good to go.
您应该在这里阅读更多的屏幕,但是在大多数情况下,您都可以使用。
使用和自定义导航手势 (Using and Customizing Navigation Gestures)
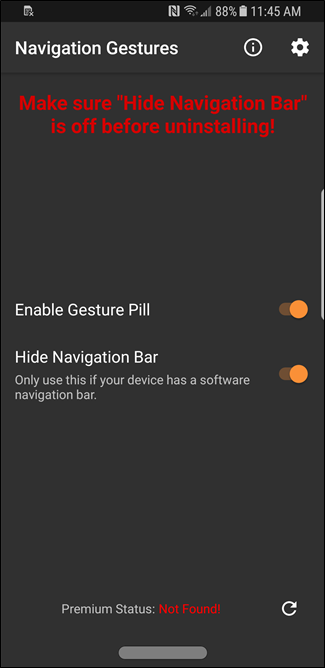
On the first screen you’ll see after running through setup, there are only two options—both of which you’ll want to enable. The first one enables the gesture “pill” (read: button), and the second hides the on-screen navigation bar, replacing it with said pill. That’s a cleaner look.
在完成设置后,您会在第一个屏幕上看到只有两个选项-您都希望启用这两个选项。 第一个启用手势“药丸”(阅读:按钮),第二个隐藏屏幕上的导航栏,将其替换为所述药丸。 看起来更干净。
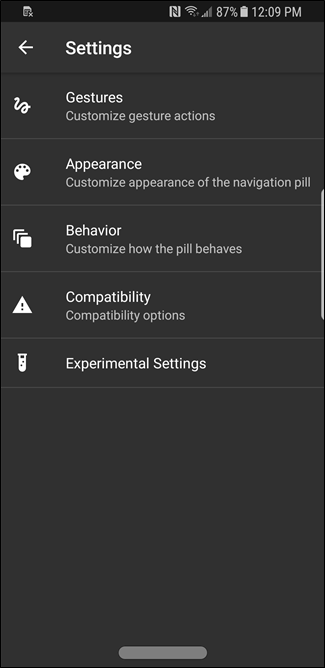
To start tweaking how the gestures work, tap the cog icon at the top right.
要开始调整手势的工作方式,请点击右上角的齿轮图标。
The first options is for gestures. From here it gets super subjective, because you can set it up pretty much however you like. By default, tapping the button takes you home, long-pressing the pill opens Assistant, swiping to the left goes back, and swiping right opens the recents menu.
第一个选项是手势。 从这里开始,它变得超级主观,因为您可以随意设置它。 默认情况下,点击按钮可将您带回家,长按药丸可打开“助手”,向左滑动会返回,而向右滑动会打开“最近使用”菜单。
You don’t have to stick with this layout, of course, as there are tons of options to choose from. Some of these are tucked into the Pro version—which will set you back $1.49 in the Play Store—but the app is still quite useful in its free version.
你不必坚持用这个布局,当然,因为有吨的选项可供选择。 其中一些存储在Pro版本中(在Play商店中的价格为1.49美元),但该应用在其免费版本中仍然非常有用。


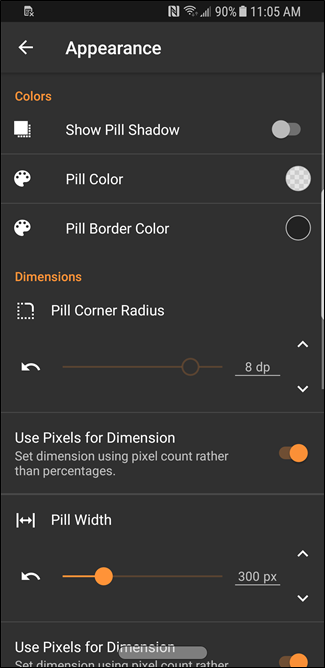
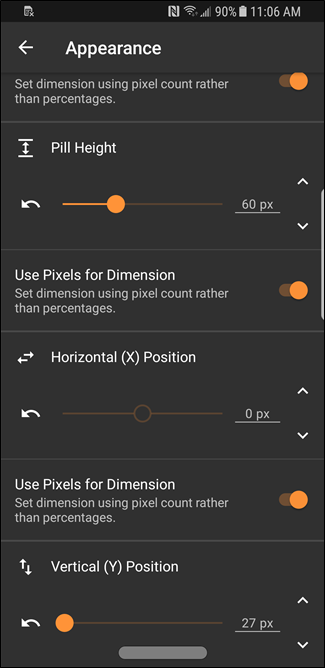
You can also customize the pill itself to your liking. Color, border, transparency, size, width, corner radius, and position are all options in the Appearance menu, so go crazy and make it look how you want.
您也可以根据自己的喜好定制药丸。 颜色,边框,透明度,大小,宽度,角半径和位置都是外观菜单中的所有选项,因此请发疯并使它看起来像您想要的。
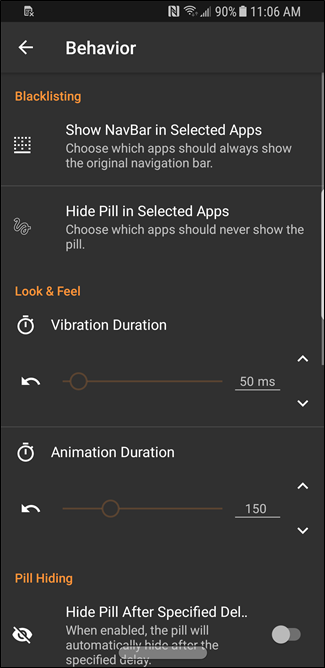
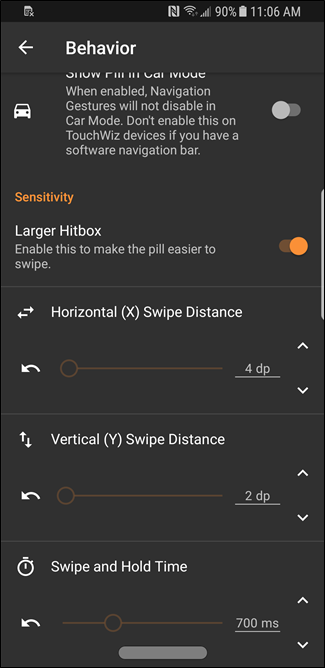
But wait, there’s more! You can also change the pill’s behavior—which isn’t the same thing as its gestures, mind you. Under the behavior menu, there are some insanely cool features. You can choose to show the stock navigation bar (instead of the pill) in specific apps, completely hide the pill in specific apps, change the vibration and animation durations, automatically hide the pill after a certain time or in specific apps, and tweak the sensitivity. Talk about getting granular.
但是,等等,还有更多! 您还可以更改药丸的行为-请注意,这与药丸的手势不同。 在行为菜单下,有一些非常酷的功能。 您可以选择在特定应用程序中显示药丸导航栏(而不是药丸),在特定应用程序中完全隐藏药丸,更改振动和动画持续时间,在特定时间后或在特定应用程序中自动隐藏药丸,并进行调整灵敏度。 谈论变得越来越细。
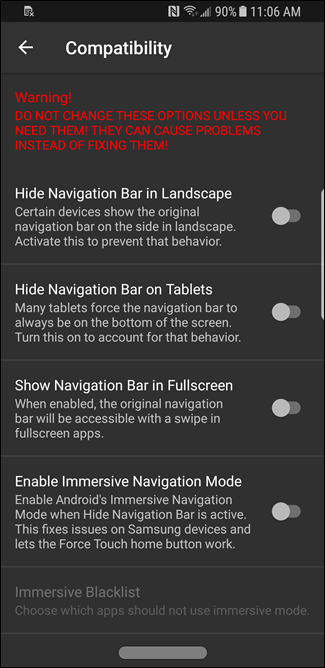
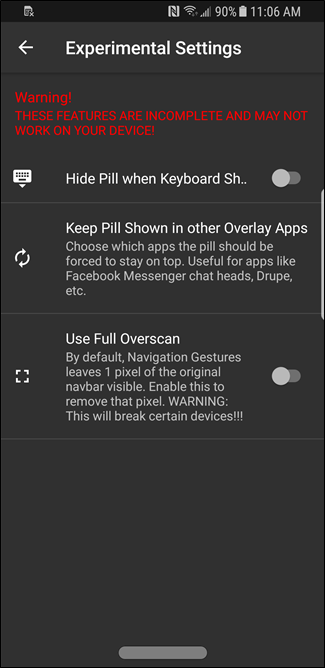
Finally, there are Compatibility menu and Experimental Settings. These menus are best avoided as these settings can cause issues instead of fixing them, but there are some specific tweaks here that may be appealing. If you find them causing adverse issues, however, you’ll need to disable them. And if you do want to try them out, we suggest enabling only one at a time and then testing things out.
最后,还有兼容性菜单和实验设置。 最好避免使用这些菜单,因为这些设置可能会导致问题而不是解决问题,但是这里有一些特定的调整可能会吸引人。 但是,如果发现它们导致不良问题,则需要禁用它们。 如果您确实想尝试一下它们,我们建议一次只启用一个,然后再进行测试。
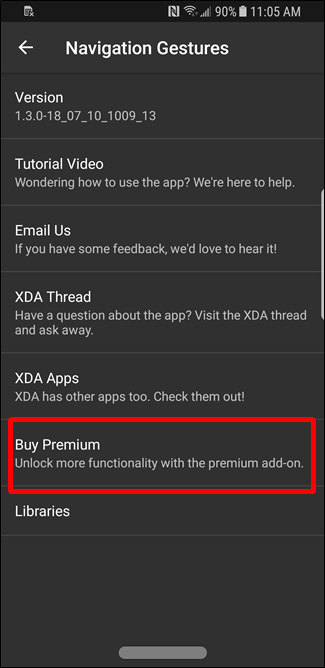
That’s pretty much all there is to adding gesture navigation to your phone—Navigation Gestures is easy to use, but incredibly powerful and customizable. If you find value in it, we encourage buying the pro version, which can be found under the “i” menu of the app’s main screen. At a buck fifty, it’s almost a no brainer.
这几乎就是在手机中添加手势导航的全部功能-导航手势易于使用,但功能强大且可自定义。 如果您发现其中的价值,我们建议您购买专业版,该专业版可以在应用程序主屏幕的“ i”菜单下找到。 五十美元的价格,几乎是徒劳。
翻译自: https://www.howtogeek.com/361168/how-to-get-gesture-navigation-on-any-android-phone/


 224
224

 被折叠的 条评论
为什么被折叠?
被折叠的 条评论
为什么被折叠?
 到【灌水乐园】发言


