


React-navigation is the navigation library that comes to my mind when we talk about navigation in React Native.
当我们谈论React Native中的导航时,React-navigation是我想到的导航库。
I'm a big fan of this library and it's always the first solution I use to handle navigation in React Native. This is in part becausae it has an awesome and easy API and is very customizable.
我是这个库的忠实拥护者,它始终是我用来在React Native中处理导航的第一个解决方案。 这部分是因为它具有一个很棒且简单的API,并且非常可定制。
I'm writing this article because version 5 just went from beta to stable. It comes with some feature changes and a new API design that provides a simple and different way to declare routes.
我写这篇文章是因为版本5刚从Beta发行到稳定版。 它带有一些功能更改和新的API设计,提供了一种简单而又不同的方法来声明路由。
In this article, we are going to go through the new APIs and look at ways to use them in our applications.
在本文中,我们将介绍新的API,并研究在我们的应用程序中使用它们的方法。
Originally published on saidhayani.com
最初发布于saidhayani.com
正在安装 (Installing)
The way you install react-navigation has changed a little bet compared to previous versions (>4.x):
与以前的版本(> 4.x)相比,您安装react-navigation的方式已发生了一些变化:
// > 4.x verions
yarn add react-navigation
Installing react-navigation 5 will look like this:
安装react-navigation 5将如下所示:
// yarn
yarn add @react-navigation/native
// npm
npm install @react-navigation/native
The latest versions of react-navigation use many third party library like react-native-gesture-handler for animation and handling transitions. So you always need to install those libraries.
最新版本的react-navigation使用许多第三方库(例如react-native-gesture-handler)进行动画和处理过渡。 因此,您始终需要安装这些库。
// yarn
yarn add react-native-reanimated react-native-gesture-handler react-native-screens react-native-safe-area-context @react-native-community/masked-view
// npm
npm install react-native-reanimated react-native-gesture-handler react-native-screens react-native-safe-area-context @react-native-community/masked-view
动态画面 (Dynamic screens)
The new API introduces dynamism in initializing routes. Previously it was done statically - basically, we had to define our Routes in a config file.
新的API在初始化路由时引入了动态性。 以前是静态完成的-基本上,我们必须在配置文件中定义路由。
// @flow
import React from "react";

import { createAppContainer, createSwitchNavigator } from "react-navigation";
import { createStackNavigator } from "react-navigation-stack";


/** ---------Screens----------- */
// import LaunchScreen from "../Containers/LaunchScreen";
import HomeScreen from "../Containers/HomeScreen";

import ProfileScreen from "../Containers/ProfileScreen";
import LoginScreen from "../Containers/LoginScreen";


const StackNavigator = createStackNavigator(
  {
    initialRouteName: "Home"
  },
  {
    Home: {
      screen: HomeScreen
    },
     Login: {
      screen: LoginScreen,
      headerMode: "none",

    },
      Profile: {
      screen: ProfileScreen
    }


);

export default createAppContainer(StackNavigator);
The new API comes with dynamic components. and made the navigation to be more dynamic. The new way to declare the Routes will be much like the following.
新的API带有动态组件。 并使导航更加动态。 声明路线的新方法将非常类似于以下内容。
import React from "react"
import { SafeAreaView, StyleSheet, View, Text, StatusBar } from "react-native"

import { NavigationContainer } from "@react-navigation/native"
import { createStackNavigator } from "@react-navigation/stack"

const App: () => React$Node = () => {
  return (
    <>
      <StatusBar barStyle="dark-content" />
      <SafeAreaView style={styles.containerStyle}>
        <AppNavigation />
      </SafeAreaView>
    </>
  )
}
const Stack = createStackNavigator()
const AppNavigation = () => {
  return (
    <NavigationContainer>
      <Stack.Navigator initialRouteName="home">
        <Stack.Screen name="home" component={HomeScreen} />
      </Stack.Navigator>
    </NavigationContainer>
  )
}
const HomeScreen = () => {
  return (
    <View style={styles.containerStyle}>
      <Text style={styles.title}>Home Screen</Text>
    </View>
  )
}
This new way is dynamic, simpler to use, and is kinda similar to react-router API.
这种新方法是动态的,易于使用,并且有点类似于react-router API。
动态选项 (Dynamic options)
This has been the most requested feature by the community for a long time. I always had issues with the old method (static) and it was really hard to change the navigation behavior dynamically.
长期以来,这一直是社区最要求的功能。 我总是遇到旧方法(静态)的问题,而且很难动态更改导航行为。
旧方法=> <4.x (The old method => < 4.x)
With older versions of react-navigation we had to define static options. And there was no way to change this dynamically.
对于旧版本的React导航,我们必须定义静态选项。 而且没有办法动态地改变它。
static navigationOptions = {
    title: "Sign In",
    header: null,
    mode: "modal",
    headerMode: "none"
  };
新方法(第5版) (The new method (version 5))
React-navigation comes with a dynamic method which is quite simple. We can set the options to any screen using just props.
React导航带有一个非常简单的动态方法。 我们可以仅使用props将选项设置为任何屏幕。
const AppNavigation = ({}) => {
  let auth = {
    authenticated: true,
    user: {
      email: "user@mail.com",
      username: "John",
    },
  }
  let ProfileScreenTitle = auth.authenticated ? auth.user.username : "Profile"
  return (
    <NavigationContainer>
      <Stack.Navigator initialRouteName="Home">
        <Stack.Screen name="Home" component={HomeScreen} />
        <Stack.Screen
          name="Profile"
          component={ProfileScreen}
          options={{
            title: ProfileScreenTitle,
            headerTintColor: "#4aa3ba",
            headerStyle: {
              backgroundColor: darkModeOn ? "#000" : "#fff",
            },
          }}
        />
        <Stack.Screen name="About" component={AboutScreen} />
      </Stack.Navigator>
    </NavigationContainer>
  )
}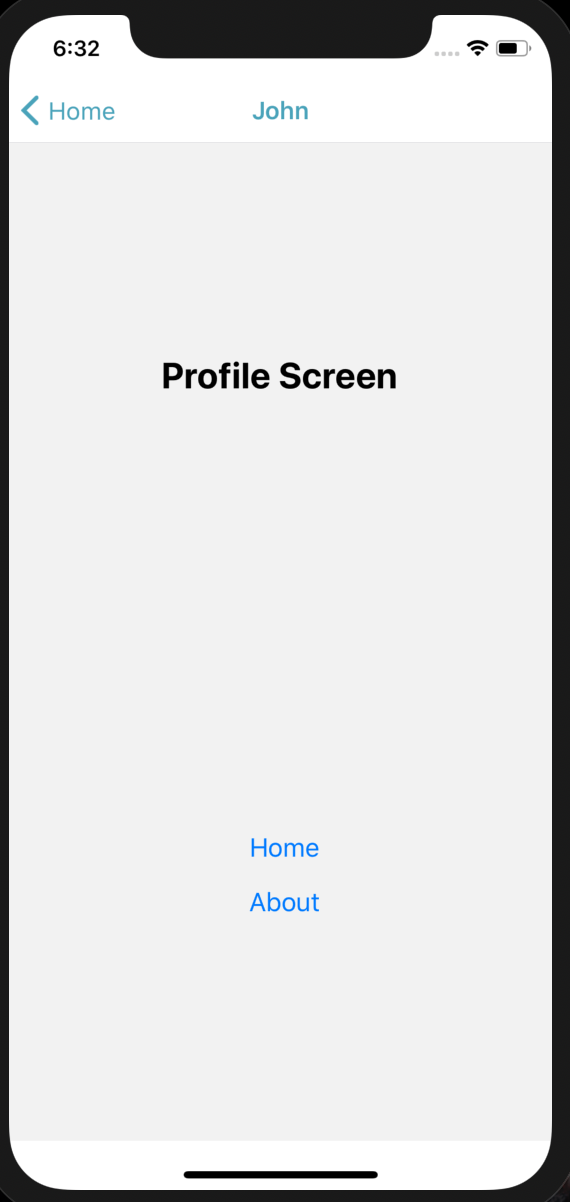
With dynamic options, I can change the title based on authentication. For example if the user is authenticated, I can set the screen title to be the user’s username, or I can change the backgroundColor for the header.
使用动态选项,我可以基于身份验证更改标题。 例如,如果用户通过了身份验证,则可以将屏幕标题设置为用户的用户名,也可以更改标题的backgroundColor。
This is more useful especially if you are using dynamic themes or if you are willing to implement dark mode in your app.
特别是在使用动态主题或愿意在应用中实现暗模式时,此功能特别有用。
钩子 (Hooks)
This is my favorite feature so far, and it’s a time-saver. The new API introduced some custom hooks to perform certain actions.
到目前为止,这是我最喜欢的功能,它可以节省时间。 新的API引入了一些自定义的挂钩来执行某些操作。
In previous versions, for example, if I had to get the currentName of the active screen, I had to create some helpers to do that for me pretty much like the following.
例如,在以前的版本中,如果必须获取活动屏幕的currentName,则必须创建一些帮助程序来为我执行此操作,类似于以下内容。
export function getCurrentRouteName(): string | null {
  const tag = "[getCurrentRouteNameSync] "
  const navState = getStore().getState().nav
  const currentRoute = getActiveRouteState(navState)
  console.log(tag + " currentRoute > ", currentRoute)
  return currentRoute && currentRoute.routeName ? currentRoute.routeName : null
}
The hooks API helps me avoid all these things and makes it easier for me to access the Navigation API with one single line using a hook.
钩子API可以帮助我避免所有这些事情,并使我更容易使用钩子在一行中访问Navigation API。
Now I can easily get the RouteName using useRoute Hook.
现在,我可以使用useRoute Hook轻松获取useRoute 。
import { useRoute } from "@react-navigation/native"
const AboutScreen = ({ navigation }) => {
  const route = useRoute()
  return (
    <View
      style={{
        justifyContent: "space-around",
        flex: 1,
        alignItems: "center",
      }}
    >
      {/*    Display the RouteName here */}
      <Text style={styles.title}>{route.name}</Text>
    </View>
  )
}
We can do the same thing with the useNavigationState Hook. It gives us access to the navigation state.
我们可以使用useNavigationState Hook做同样的事情。 它使我们能够访问导航状态。
const navigationState = useNavigationState(state => state)
let index = navigationState.index
let routes = navigationState.routes.length
console.log(index)
console.log(routes)
React-navigation offers other hooks as well, for example:
React-navigation也提供其他钩子,例如:
useFocuseEffect: a side effect hook that, when the screens are loaded, returns the focused screenuseFocuseEffect:一个副作用挂钩,当加载屏幕时,该挂钩将返回已聚焦的屏幕useLinking: handles deepLinkinguseLinking:处理deepLinking
I highly recommend that you check them out.
我强烈建议您检查一下 。
结语 (Wrapping Up)
The new react-navigation API definitely moves from static to dynamic. It’s a great direction that will absolutely change the way we handle navigation in React Native. Dynamic routes were a major request by react-navigation users, and this new way will help us create a better user navigation experience.
新的react-navigation API肯定从静态变为动态。 这是一个很好的方向,它将绝对改变我们在React Native中处理导航的方式。 动态路线是响应导航用户的主要要求,这种新方式将帮助我们创造更好的用户导航体验。
您可以在此处找到有关React Native的更多内容 (You can find more content about React Native here)
Thanks for reading
谢谢阅读
Looking for a React Native developer for your project? Hit me up.
在为您的项目寻找React Native开发人员吗? 打我 。
翻译自: https://www.freecodecamp.org/news/introducing-react-navigation-5/


 729
729

 被折叠的 条评论
为什么被折叠?
被折叠的 条评论
为什么被折叠?
 到【灌水乐园】发言


