


安装meme
Memes are great - they're such a fun way of describing ideas and opinions. So it's no coincidence that I picked a meme generator app as the capstone project in my free React course on Scrimba. The app works by pulling a random meme image from an API and placing your text over the top of it to create your very own, personalized meme.
模因很棒-它们是描述想法和观点的一种有趣方式。 因此,在Scrimba上的免费React课程中 ,我选择了一个模因生成器应用作为顶峰项目并非偶然。 该应用程序的工作原理是从API中提取随机的模因图像,然后将文本放在其顶部以创建自己的个性化模因。
So in this article, I'll give you a step-by-step guide to creating the app. If you ever get confused, you can also follow these steps in the Scrimba course, starting at this lecture.
因此,在本文中,我将为您提供创建应用程序的分步指南。 如果您感到困惑,也可以从本演讲开始,在Scrimba课程中按照以下步骤进行操作。
And then if you like my teaching style and are in the mood for a tougher challenge after you complete this tutorial, please check out my upcoming advanced course on Scrimba.
然后,如果您喜欢我的教学风格,并且在完成本教程后仍想面对一个艰巨的挑战,请查看我即将推出的有关Scrimba的高级课程 。
Note: You should already be fairly familiar with some of the fundamental concepts of React, like components, state, props, and lifecycle methods. Also, this tutorial doesn't use Hooks, but in my upcoming course we'll cover Hooks in depth and get tons of practice using them.
注意:您应该已经相当熟悉React的一些基本概念,例如组件,状态,属性和生命周期方法。 另外,本教程不使用Hook,但是在我即将开始的课程中,我们将深入介绍Hook,并获得大量使用它们的练习。
1.创建样板并呈现App组件 (1. Creating the boilerplate and rendering an App component)

The first thing we need to do is to create the boilerplate code for the app. To do this, we import React and ReactDOM and use ReactDOM to render a component called App, which we will create later. We then put the App component at the 'root'. We also import App from its file "./App", which we will create shortly.
我们需要做的第一件事是为应用程序创建样板代码。 为此,我们导入React和ReactDOM并使用ReactDOM渲染一个名为App的组件,稍后我们将对其进行创建。 然后,我们将App组件放在“根”目录下。 我们还将从其文件"./App"导入App ,我们将很快创建该文件。
// index.js
import React from 'react';
import ReactDOM from 'react-dom';
import App from './App';

ReactDOM.render(<App />, document.getElementById('root'));
We then create our App.js file. In it, we create a functional component called App which, for now, returns a simple <h1>. We then export it. The <h1> allows us to check that the app is displaying correctly to the screen.
然后,我们创建App.js文件。 在其中,我们创建了一个名为App的功能组件,该组件现在返回一个简单的<h1> 。 然后,我们将其导出。 <h1>允许我们检查应用程序是否正确显示在屏幕上。
import React from 'react';
function App() {
  return <h1>Hello world!</h1>;
}
export default App;
The resulting output is this:
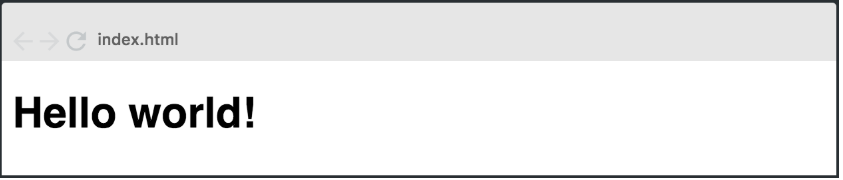
结果输出是这样的:
2.创建Header和MemeGenerator组件 (2. Creating the Header and MemeGenerator components)

Next up, we create the Header and MemeGenerator components. The Header will only display elements, while MemeGenerator will call to the API and retain the data in state.
接下来,我们创建Header和MemeGenerator组件。 标头将仅显示元素,而MemeGenerator将调用API并将数据保留在状态中。
Let's start by creating the Header.js file. Since Header is a component which is only used to display, it should be a functional component. For now, the component should return a simple <h1>. After creating it, we then export Header.
让我们从创建Header.js文件开始。 由于页眉是仅用于显示的组件,因此它应该是功能组件。 现在,该组件应该返回一个简单的<h1> 。 创建它之后,我们然后导出Header。
import React from 'react';
function Header() {
  return <h1>HEADER</h1>;
}
export default Header;
Next, we create the MemeGenerator.js file. As the MemeGenerator component will be holding data and making calls to an API, it needs to be a class component. We still need to import React, and since it is going to be a class component, we'll import Component as well (which is a named import).
接下来,我们创建MemeGenerator.js文件。 由于MemeGenerator组件将保存数据并调用API,因此它必须是一个类组件。 我们仍然需要导入React,并且由于它将成为一个类组件,因此我们也将导入Component (这是一个名为import )。
MemeGenerator needs a constructor() which calls super() and as it will be holding state, we add some empty state to it now. Like in the Header component, we render a simple <h1> to start with. We then export MemeGenerator.
MemeGenerator需要一个constructor() ,该constructor()调用super() ,因为它将保持状态,所以我们现在向其中添加一些空状态。 像在Header组件中一样,我们以一个简单的<h1>开始。 然后,我们导出MemeGenerator。
import React, { Component } from 'react';
class MemeGenerator extends Component {
  constructor() {
    super();
    this.state = {}; //empty state
  }
  render() {
    return <h1>MEME GENERATOR SECTION</h1>;
  }
}
export default MemeGenerator;
Now, we import both Header and MemeGenerator into App.js and create an instance of each one in our App component. In order to display the components correctly, we wrap them in a <div>.
现在,我们将Header和MemeGenerator都导入App.js并在App组件中创建每个实例。 为了正确显示组件,我们将它们包装在<div> 。
import React from 'react';
import Header from './Header';
import MemeGenerator from './MemeGenerator';
function App() {
  return (
    <div>
      <Header />
      <MemeGenerator />
    </div>
  );
}
export default App;
3.完成页眉组件。 (3. Completing the Header component.)
To complete the <Header> component, we add a trollface image by inserting an <img> tag and setting the src to the image's URL. We then add a <p> tag with the name of our app and wrap them both in the semantic HTML5 <header> tag.
为了完成<Header>组件,我们通过插入<img>标记并将src设置为图像的URL来添加一个trollface图像。 然后,添加一个带有应用程序名称的<p>标记,并将它们都包装在语义HTML5 <header>标记中。
function Header() {
  return (
    <header>
      <img
        src='http://www.pngall.com/wp-content/uploads/2016/05/Trollface.png'
        alt='Problem?'
      />
      <p>Meme Generator</p>
    </header>
  );
}
As styling is outside the scope of this course, the CSS styles have already been created and applied to the <header> tag. The result is this:
由于样式超出了本课程的范围,因此已经创建了CSS样式并将其应用于<header>标记。 结果是这样的:

That said, learners can always play around with the styling and hone their CSS skills by themselves. With the <Header/> now complete, the rest of the challenge will take place in <MemeGenerator/>
就是说,学习者可以随时使用样式并自己磨练CSS技能。 现在<Header/>完成,其余的挑战将在<MemeGenerator/>
4.初始化状态 (4. Initializing state)

We now have to initialize state so that it saves a top text, a bottom text and a random image, which is already supplied.
现在,我们必须初始化状态,以便保存顶部文本,底部文本和随机图像(已提供)。
To do this, we build up the empty object we placed in the <MemeGenerator/> when we originally built it. We initialize topText and bottomText as empty strings and randomImg as the provided URL.
为此,我们将构建最初构建时放置在<MemeGenerator/>的空对象。 我们将topText和bottomText初始化为空字符串,并将randomImg为提供的URL。
class MemeGenerator extends Component {
  constructor() {
    super();
    this.state = {
      topText: '',
      bottomText: '',
      randomImg: 'http://i.imgflip.com/1bij.jpg'
    };
  }
}
5.进行API调用 (5. Making the API call)

Next, we make an API call to the provided URL and save the data returned (which is an array found in response.data.memes) to a new state property called allMemeImgs. When we need to load data from an endpoint to use in our component, a good place to make the request is the componentDidMount() lifecycle method. As soon as the component mounts, we use the native fetch() function to call to the provided URL.
接下来,我们对提供的URL进行API调用,并将返回的数据(这是在response.data.memes找到的数组)保存到名为allMemeImgs的新状态属性中。 当我们需要从端点加载数据以在组件中使用时,发出请求的一个好地方是componentDidMount()生命周期方法。 组件装入后,我们便使用本机fetch()函数调用提供的URL。
componentDidMount() {
  fetch("https://api.imgflip.com/get_memes")
}
This returns a promise which we turn into a Javascript object with the .json() method.
这将返回一个承诺,我们将使用.json()方法将其转换为Javascript对象。
componentDidMount() {
  fetch("https://api.imgflip.com/get_memes")
    .then(response => response.json())
}
Then we get the response which is useful to us by pulling the memes array from response.data.
然后,通过从response.data提取memes数组,获得对我们有用的response.data 。
componentDidMount() {
fetch("https://api.imgflip.com/get_memes")
  .then(response => response.json())
  .then(response => {
  const { memes } = response.data
  })
}
Now, we save the results to a new state property called allMemeImgs. To do this, we initialize allMemeImgs as an empty array.
现在,我们将结果保存到一个名为allMemeImgs的新状态属性中。 为此,我们将allMemeImgs初始化为一个空数组。
this.state = {
  topText: '',
  bottomText: '',
  randomImg: 'http://i.imgflip.com/1bij.jpg',
  allMemeImgs: []
};
Now, back in componentDidMount(), we set state. As we are not interested in what the previous state was, we set allMemeImgs to memes.
现在,回到componentDidMount() ,我们设置状态。 由于我们对以前的状态不感兴趣,因此将allMemeImgs设置为memes。
componentDidMount() {
  fetch("https://api.imgflip.com/get_memes")
    .then(response => response.json())
    .then(response => {
  const { memes } = response.data
  this.setState({ allMemeImgs: memes })
  })
}
To ensure that it works, we console.log the first item, which looks something like this:
为确保其正常工作,我们在console.log的第一项中输入如下内容:

Here's an overview of the entire componentDidMount() function.
这是整个componentDidMount()函数的概述。
componentDidMount() { //ensure that data is fetched at the beginning
  fetch("https://api.imgflip.com/get_memes") //call to URL
    .then(response => response.json()) //turn promise into JS object
    .then(response => {
  const { memes } = response.data //pull memes array from response.data
  console.log(memes[0]) // check data is present
  this.setState({ allMemeImgs: memes }) // set allMemeImgs state
})
}
6.创建输入表单 (6. Creating the input form)
We now want to create a form which will eventually allow the user to input the top and bottom texts. We do this with an HTML <form> tag and a simple <button> which says 'Gen'. We style it with the pre-provided CSS.
现在,我们要创建一个最终将允许用户输入顶部和底部文本的表单。 我们使用HTML <form>标记和一个简单的<button>来标记“ Gen”。 我们使用预先提供CSS对其进行样式设置。
render() {
  return (
    <div>
      <form className="meme-form">
        <button>Gen</button>
      </form>
    </div>
  )
}
7.将输入字段添加到表单 (7. Adding input fields to the form)

Next, it is up to us to add the two input fields (one for the top text and one for the bottom text). The form should be a controlled form, so we will need to add all the attributes needed in order for that to work. We will create the onChange handler later.
接下来,由我们决定添加两个输入字段(一个用于顶部文本,一个用于底部文本)。 该表单应为受控表单,因此我们将需要添加所有必需的属性才能使其正常工作。 我们稍后将创建onChange处理程序。
We create two input fields which both have the type text and appropriate name attributes (topText and bottomText). Rather than using labels, we use placeholders: 'Top Text' and 'Bottom Text'.
我们创建两个输入字段,它们都具有text类型和适当的名称属性( topText和bottomText )。 我们不使用标签,而是使用占位符:“顶部文本”和“底部文本”。
Lastly, in order to make this a controlled form, we set the value as equal to the current value in state with {this.state.topText} and {this.state.bottomText}.
最后,为了使其成为受控形式 ,我们使用{this.state.topText}和{this.state.bottomText}将值设置为等于state的当前值。
render() {
  return (
    <div>
      <form className="meme-form">
        <input
          type="text"
          name="topText"
          placeholder="Top Text"
          value={this.state.topText}
        />
        <input
          type="text"
          name="bottomText"
          placeholder="Bottom Text"
          value={this.state.bottomText}
        />
        <button>Gen</button>
      </form>
    </div>
  )
}
8.创建onChange处理程序。 (8. Creating the onChange handler.)

Now, we create the onChange handler, which will update the corresponding state on every change of the input field.
现在,我们创建onChange处理程序,该处理程序将在输入字段的每次更改时更新相应的状态。
First, we create a handleChange() function which receives an event.
首先,我们创建一个handleChange()函数来接收事件。
handleChange(event) {

}
Now, we set the onChange of both input fields to equal handleChange.
现在,我们将两个输入字段的onChange设置为等于handleChange 。
<form className='meme-form'>
  <input
    type='text'
    name='topText'
    placeholder='Top Text'
    value={this.state.topText}
    onChange={this.handleChange}
  />
  <input
    type='text'
    name='bottomText'
    placeholder='Bottom Text'
    value={this.state.bottomText}
    onChange={this.handleChange}
  />
  <button>Gen</button>
</form>
We need to remember to bind the method in the constructor — a common gotcha for React developers.
我们需要记住将方法绑定到构造函数中-这是React开发人员的常见陷阱。
constructor() {
  super()
  this.state = {
    topText: "",
    bottomText: "",
    randomImg: "http://i.imgflip.com/1bij.jpg",
    allMemeImgs: []
  }
  this.handleChange = this.handleChange.bind(this)
}
To test the new handleChange() function, we add a simple console.log:
为了测试新的handleChange()函数,我们添加了一个简单的console.log :
handleChange(event) {
  console.log("Working!")
}
If it is correctly firing, you'll see something like this:
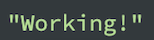
如果发射正确,您将看到类似以下内容:
Now to fill in the handleChange() function. To do this, we want to pull the name and value properties from event.target so that we can get the name of the state we are supposed to update (topText or bottomText) and the value which is typed into the box.
现在填写handleChange()函数。 为此,我们想从event.target中提取名称和值属性,以便获得要更新的状态的名称( topText或bottomText )以及在框中键入的值。
handleChange(event) {
  const { name, value } = event.target
}
We will now use these to update state. As we are not interested in what the previous state was, we can just provide an object in which we set the [name] to the value typed into the input field.
现在,我们将使用它们来更新状态。 因为我们对先前的状态不感兴趣,所以我们可以提供一个对象,在其中将[name]设置为在输入字段中键入的值。
handleChange(event) {
const {name, value} = event.target
this.setState({ [name]: value })
}
9.在顶部和底部文本旁边显示一个模因图像 (9. Displaying a meme image alongside the top and bottom text)
We now want the app to display a meme image alongside the top and bottom text. We insert an <img> tag underneath the <form> and set the randomImg which we initialized as its source by using src={this.state.randomImg}. We then add two <h2> tags which display the corresponding text which is also saved in state. All of this is wrapped in a div and styled with the pre-provided meme class.
现在,我们希望该应用在顶部和底部文本旁边显示一个模因图像。 我们在<form>下插入一个<img>标签,并使用src={this.state.randomImg}将我们初始化的randomImg设置为其源。 然后,我们添加两个<h2>标签,这些标签显示相应的文本,该文本也保存在状态中。 所有这些都包装在div并使用预先提供的meme类进行样式设置。
<div className='meme'>
  <img src={this.state.randomImg} alt='' />
  <h2 className='top'>{this.state.topText}</h2>
  <h2 className='bottom'>{this.state.bottomText}</h2>
</div>
We can now test the app by typing into the text boxes. As state is being correctly set on every keystroke, the text displayed on the image changes each time we type.
现在,我们可以通过在文本框中输入内容来测试该应用程序。 由于在每次击键时都正确设置了状态,因此每次输入时,图像上显示的文本都会更改。

10.在顶部和底部文本旁边显示随机的模因图像 (10. Displaying a random meme image alongside the Top and Bottom text)

Now, we need to create a method which displays a meme image which it randomly chooses from our allMemeImgs array when the Gen button is clicked. The property on the chosen image in the array is .url. We can break this task down into smaller parts.
现在,我们需要创建一个,其显示它随机从我们选择了一个米姆图像方法allMemeImgs的时候阵列Gen按钮被点击。 数组中所选图像的属性为.url 。 我们可以将此任务分解为较小的部分。
Firstly, we set the form's onSubmit to equal the name of our new method, which we will call handleSubmit().
首先,我们将表单的onSubmit设置为等于新方法的名称,我们将其称为handleSubmit() 。
<form className="meme-form" onSubmit={this.handleSubmit}>
<form className="meme-form" onSubmit={this.handleSubmit}>
We now create the handleSubmit() function above the render() function. We need to preventDefault on the event, otherwise, the method will try to refresh the page.
现在,我们在handleSubmit()函数上方创建handleSubmit() render()函数。 我们需要在事件上阻止Default,否则,该方法将尝试刷新页面。
handleSubmit(event) {
  event.preventDefault()
}
We also need to bind handleSubmit() in our constructor().
我们还需要在我们的handleSubmit()中绑定handleSubmit() constructor() 。
constructor() {
  super()
  this.state = {
    topText: "",
    bottomText: "",
    randomImg: "http://i.imgflip.com/1bij.jpg",
    allMemeImgs: []
  }
  this.handleChange = this.handleChange.bind(this)
  this.handleSubmit = this.handleSubmit.bind(this)
}
Now, we need to get a random number, get the meme from that index and set randomImg to the .url of the random item.
现在,我们需要获取一个随机数,从该索引中获取模因,并将randomImg设置为随机项的.url 。
handleSubmit(event) {
  event.preventDefault()
  // get a random int (index in the array)
  // get the meme from that index
  // set `randomImg` to the `.url` of the random item I grabbed
}
To get a random number, we use Math.floor(Math.random). To make sure that it is one of the indices in our allMemeImgs array, we multiply by the length of the array.
为了获得一个随机数,我们使用Math.floor(Math.random) 。 为了确保它是allMemeImgs数组中的索引之一,我们乘以数组的长度。
const randNum = Math.floor(Math.random() * this.state.allMemeImgs.length);We now set randMemeImg to equal allMemeImgs, with the index of allMemeImgs as the randNum we just got. We then add .url to the end of it.
我们现在设置randMemeImg等于allMemeImgs ,随着指数allMemeImgs作为randNum我们刚刚得到。 然后,在其末尾添加.url 。
const randMemeImg = this.state.allMemeImgs[randNum].url;Now, all we need to do is update the state by updating the randomImg property with randMemeImg.
现在,我们要做的就是通过用randMemeImg更新randomImg属性来更新状态。
this.setState({ randomImg: randMemeImg });Our completed handleSubmit() function looks like this:
我们完成的handleSubmit()函数如下所示:
handleSubmit(event) {
  event.preventDefault()
  const randNum = Math.floor(Math.random() * this.state.allMemeImgs.length)
  const randMemeImg = this.state.allMemeImgs[randNum].url
  this.setState({ randomImg: randMemeImg })
}
完成的米姆发生器 (Completed Meme Generator)

We now have completed the meme generator app, and get a different image every time we hit the Gen button, which is then overlaid with the text we input.
我们现在已经完成了米姆发生器应用程序,我们每次打的时候得到不同的影像Gen按钮,然后将其与文本输入我们覆盖。
To further our learning, we could play with code and see whether we can improve it, or try to get images from a different API. For some really heavy-duty practice, we could even delete all the code and try building it again from scratch.
为了进一步学习,我们可以玩一些代码,看看是否可以改进它,或者尝试从其他API获取图像。 对于一些非常繁重的实践,我们甚至可以删除所有代码,然后尝试从头开始重新构建。
Congratulations on following through the tutorial and learning all the skills used in this project.
恭喜您完成了本教程并学习了该项目中使用的所有技能。
And if you're ready for it, do check out my upcoming advanced course, as it'll take you to a professional level in React!
如果您已经准备好了,请查看我即将举行的高级课程 ,因为它会带您进入React的专业水平!
翻译自: https://www.freecodecamp.org/news/learn-react-by-building-a-meme-generator/
安装meme


 800
800


 被折叠的 条评论
为什么被折叠?
被折叠的 条评论
为什么被折叠?
 到【灌水乐园】发言


