
tinymce 插件
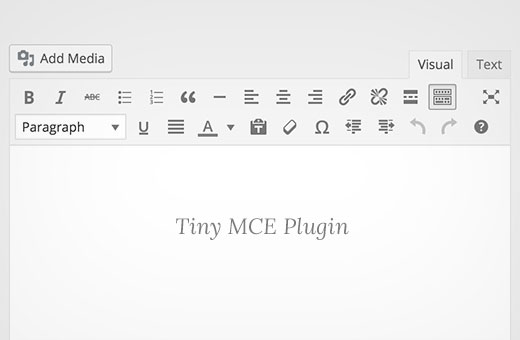
If you are WordPress developer, then at some point you may come across customizing or extending the WordPress Visual Editor. For example, you may want to add a button to the Visual Editor’s toolbar to allow your client to easily insert a text box or a call to action button without writing any HTML code. In this article, we will show you how to create a TinyMCE plugin in WordPress.
如果您是WordPress开发人员,那么有时您可能会遇到自定义或扩展WordPress Visual Editor的问题。 例如,您可能想在Visual Editor的工具栏中添加一个按钮,以使您的客户端无需编写任何HTML代码即可轻松地插入文本框或号召性用语按钮。 在本文中,我们将向您展示如何在WordPress中创建TinyMCE插件。
要求 (Requirements)
This tutorial is intended for advanced users. If you are a beginner level user who just wants to extend visual editor, then please check out TinyMCE Advanced plugin or take a look at these tips on using WordPress visual editor.
本教程适用于高级用户。 如果您是只想扩展可视化编辑器的初学者级用户,那么请查看TinyMCE Advanced插件或查看有关使用WordPress可视化编辑器的这些提示。
For this tutorial, you will need basic coding skills, access to a WordPress install where you can test it out.
对于本教程,您将需要基本的编码技能,并可以在WordPress安装中进行测试。
It is a bad practice to develop plugins on a live website. A minor mistake in the code can make your site inaccessible. But if you must do it on a live site, then at least backup WordPress first.
在实时网站上开发插件是一种不良做法。 代码中的一个小错误会使您的网站无法访问。 但是,如果必须在实时站点上进行操作,则至少应首先备份WordPress 。
创建您的第一个TinyMCE插件 (Creating Your First TinyMCE Plugin)
We will begin by creating a WordPress plugin to register our custom TinyMCE toolbar button. When clicked, this button will allow user to add a link with a custom CSS class.
我们将首先创建一个WordPress插件来注册我们的自定义TinyMCE工具栏按钮。 单击时,此按钮将允许用户添加带有自定义CSS类的链接。
The source code will be provided in full at the end of this article, but until then, let’s create the plugin step-by-step.
本文结尾将提供完整的源代码,但在此之前,让我们逐步创建插件。
First, you need to create a directory in wp-content/plugins folder of your WordPress install. Name this folder tinymce-custom-link-class.
首先,您需要在WordPress安装的wp-content/plugins文件夹中创建一个目录。 将此文件夹命名为tinymce-custom-link-class 。
From here, we’ll begin adding our plugin code.
从这里开始,我们将开始添加插件代码。
插件头 (The Plugin Header)
Create a new file in the plugin directory we just created and name this file tinymce-custom-link-class.php. Add this code to the file and save it.
在我们刚刚创建的插件目录中创建一个新文件,并将其命名为tinymce-custom-link-class.php 。 将此代码添加到文件并保存。
/**
 * Plugin Name: TinyMCE Custom Link Class
 * Plugin URI: http://wpbeginner.com
 * Version: 1.0
 * Author: WPBeginner
 * Author URI: https://www.wpbeginner.com
 * Description: A simple TinyMCE Plugin to add a custom link class in the Visual Editor
 * License: GPL2
 */
This is just a PHP comment, which tells WordPress the name of the plugin, as well as the author and a description.
这只是一个PHP注释,它告诉WordPress插件的名称以及作者和描述。
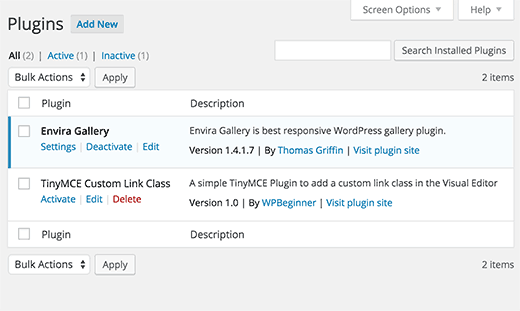
In the WordPress admin area, activate your new plugin by going to Plugins > Installed Plugins, and then clicking Activate beside the TinyMCE Custom Link Class plugin:
在WordPress的admin管理区域中 ,转到插件>已安装的插件,然后单击TinyMCE自定义链接类插件旁边的激活,以激活新插件:
设置我们的插件课程 (Setting Up Our Plugin Class)
If two WordPress plugins have functions with the same name, then this would cause an error. We will avoid this problem by having our functions wrapped in a class.
如果两个WordPress插件具有相同名称的功能,则将导致错误。 通过将函数包装在类中,可以避免此问题。
class TinyMCE_Custom_Link_Class {

	/**
	* Constructor. Called when the plugin is initialised.
	*/
	function __construct() {

	}

}

$tinymce_custom_link_class = new TinyMCE_Custom_Link_Class;
This creates our PHP class, along with a construct, which is called when we reach the line $tinymce_custom_link_class = new TinyMCE_Custom_Link_Class;.
这将创建我们PHP类以及一个构造,当我们到达行$tinymce_custom_link_class = new TinyMCE_Custom_Link_Class;时,将调用该$tinymce_custom_link_class = new TinyMCE_Custom_Link_Class; 。
Any functions we add inside this class shouldn’t conflict with other WordPress plugins.
我们在此类中添加的任何函数都不应与其他WordPress插件冲突。
开始设置我们的TinyMCE插件 (Start Setting Up Our TinyMCE Plugin)
Next, we need to tell TinyMCE that we might want to add our custom button to the Visual Editor‘s toolbar. To do this, we can use WordPress’ actions – specifically, the init action.
接下来,我们需要告诉TinyMCE,我们可能想将自定义按钮添加到Visual Editor的工具栏中。 为此,我们可以使用WordPress的操作 -特别是init操作。
Add the following code inside your plugin’s __construct() function:
在插件的__construct()函数内添加以下代码:
if ( is_admin() ) {
	add_action( 'init', array(  $this, 'setup_tinymce_plugin' ) );
}
This checks if we are in the WordPress Administration interface. If we are, then it asks WordPress to run the setup_tinymce_plugin function inside our class when WordPress has finished its initial loading routine.
这将检查我们是否在WordPress管理界面中。 如果是这样,那么当WordPress完成其初始加载例程后,它会要求WordPress在我们的类中运行setup_tinymce_plugin函数。
Next, add the setup_tinymce_plugin function:
接下来,添加setup_tinymce_plugin函数:
/**
* Check if the current user can edit Posts or Pages, and is using the Visual Editor
* If so, add some filters so we can register our plugin
*/
function setup_tinymce_plugin() {

// Check if the logged in WordPress User can edit Posts or Pages
// If not, don't register our TinyMCE plugin

if ( ! current_user_can( 'edit_posts' ) && ! current_user_can( 'edit_pages' ) ) {
	        return;
}

// Check if the logged in WordPress User has the Visual Editor enabled
// If not, don't register our TinyMCE plugin
if ( get_user_option( 'rich_editing' ) !== 'true' ) {
return;
}

// Setup some filters
add_filter( 'mce_external_plugins', array( &$this, 'add_tinymce_plugin' ) );
add_filter( 'mce_buttons', array( &$this, 'add_tinymce_toolbar_button' ) );

	}
This checks if the current logged in WordPress user can edit Posts or Pages. If they can’t, there’s no point in registering our TinyMCE Plugin for that User, as they’ll never see the Visual Editor.
这将检查当前登录的WordPress用户是否可以编辑Posts或Pages 。 如果他们不能这样做,则没有必要为该用户注册我们的TinyMCE插件,因为他们将永远不会看到Visual Editor。
We then check if the user is using the Visual Editor, as some WordPress users turn this off via Users > Your Profile. Again, if the user is not using the Visual Editor, we return (exit) the function, as we don’t need to do anything else.
然后,我们检查用户是否正在使用可视编辑器,因为某些WordPress用户通过“用户”>“您的个人资料”将其关闭。 同样,如果用户没有使用Visual Editor,我们将返回(退出)该函数,因为我们无需执行其他任何操作。
Finally, we add two WordPress Filters – mce_external_plugins and mce_buttons, to call our functions which will load the required Javascript file for TinyMCE, and add a button to the TinyMCE toolbar.
最后,我们添加两个WordPress过滤器– mce_external_plugins和mce_buttons ,以调用我们的函数,这些函数将加载TinyMCE所需的Javascript文件,并在TinyMCE工具栏上添加一个按钮。
将Javascript文件和按钮注册到可视化编辑器 (Registering the Javascript File and Button to the Visual Editor)
Let’s go ahead and add the add_tinymce_plugin function:
让我们继续添加add_tinymce_plugin函数:
/**
* Adds a TinyMCE plugin compatible JS file to the TinyMCE / Visual Editor instance
*
* @param array $plugin_array Array of registered TinyMCE Plugins
* @return array Modified array of registered TinyMCE Plugins
*/
function add_tinymce_plugin( $plugin_array ) {

$plugin_array['custom_link_class'] = plugin_dir_url( __FILE__ ) . 'tinymce-custom-link-class.js';
return $plugin_array;

}
This function tells TinyMCE that it needs to load the Javascript files stored in the $plugin_array array. These Javascript files will tell TinyMCE what to do.
该函数告诉TinyMCE,它需要加载存储在$plugin_array数组中的Javascript文件。 这些Javascript文件将告诉TinyMCE该怎么做。
We also need to add some code to the add_tinymce_toolbar_button function, to tell TinyMCE about the button we’d like to add to the toolbar:
我们还需要向add_tinymce_toolbar_button函数添加一些代码,以向TinyMCE告知我们要添加至工具栏的按钮:
/**
* Adds a button to the TinyMCE / Visual Editor which the user can click
* to insert a link with a custom CSS class.
*
* @param array $buttons Array of registered TinyMCE Buttons
* @return array Modified array of registered TinyMCE Buttons
*/
function add_tinymce_toolbar_button( $buttons ) {

array_push( $buttons, '|', 'custom_link_class' );
return $buttons;
}
This pushes two items onto the array of TinyMCE buttons: a separator (|), and our button’s programmatic name (custom_link_class).
这会将两项推送到TinyMCE按钮的数组上:分隔符(|)和按钮的程序名称( custom_link_class )。
Save your plugin, and then edit a Page or Post to view the Visual Editor. Chances are, the toolbar isn’t displaying right now:
保存您的插件,然后编辑页面或帖子以查看可视编辑器。 可能是,该工具栏目前未显示:

Don’t worry – if we use our web browser’s inspector console, we’ll see that a 404 error and notice have been generated by TinyMCE, telling us that it can’t find our Javascript file.
不用担心-如果我们使用Web浏览器的检查器控制台,我们将看到TinyMCE生成了404错误和通知,告诉我们找不到Javascript文件。

That’s good – it means we’ve successfully registered our TinyMCE custom plugin, and now need to create the Javascript file to tell TinyMCE what to do.
很好–这意味着我们已经成功注册了TinyMCE自定义插件,现在需要创建Javascript文件来告诉TinyMCE该怎么做。
创建Javascript插件 (Creating the Javascript Plugin)
Create a new file in your wp-content/plugins/tinymce-custom-link-class folder, and name it tinymce-custom-link-class.js. Add this code in your js file:
在wp-content/plugins/tinymce-custom-link-class文件夹中创建一个新文件,并将其命名为tinymce-custom-link-class.js 。 将此代码添加到您的js文件中:
(function() {
	tinymce.PluginManager.add( 'custom_link_class', function( editor, url ) {

	});
})();
This calls the TinyMCE Plugin Manager class, which we can use to perform a number of TinyMCE plugin related actions. Specifically, we’re adding our plugin to TinyMCE using the add function.
这将调用TinyMCE插件管理器类,我们可以使用该类执行许多与TinyMCE插件相关的操作。 具体来说,我们正在使用add函数将插件添加到TinyMCE中。
This accepts two items; the name of the plugin (custom_link_class) and an anonymous function.
这接受两个项目; 插件的名称( custom_link_class )和一个匿名函数。
If you’re familiar with the concept of functions in coding, an anonymous function is simply a function with no name. For example, function foobar() { ... } is a function that we could call somewhere else in our code by using foobar().
如果您熟悉编码中的函数概念,那么匿名函数就是没有名称的函数。 例如, function foobar() { ... }是一个函数,我们可以使用foobar()在代码中的其他地方调用该函数。
With an anonymous function, we can’t call that function somewhere else in our code – it’s only being called at the point the add() function is invoked.
使用匿名函数,我们无法在代码中的其他位置调用该函数–仅在调用add()函数时调用它。
Save your Javascript file, and then edit a Page or Post to view the Visual Editor. If everything worked, you’ll see the toolbar:
保存您的Javascript文件,然后编辑“页面”或“帖子”以查看可视编辑器。 如果一切正常,您将看到工具栏:

Right now, our button hasn’t been added to that toolbar. That’s because we’ve only told TinyMCE that we are a custom plugin. We now need to tell TinyMCE what to do – that is, add a button to the toolbar.
目前,我们的按钮尚未添加到该工具栏。 那是因为我们只告诉TinyMCE我们是一个自定义插件。 现在,我们需要告诉TinyMCE该怎么做–也就是说,在工具栏上添加一个按钮。
Update your Javascript file, replacing your existing code with the following:
更新您的Javascript文件,将您的现有代码替换为以下内容:
(function() {
	tinymce.PluginManager.add( 'custom_link_class', function( editor, url ) {
		// Add Button to Visual Editor Toolbar
		editor.addButton('custom_link_class', {
			title: 'Insert Button Link',
			cmd: 'custom_link_class',
		});
	});
})();
Notice our anonymous function has two arguments. The first is the editor instance – this is the TinyMCE Visual Editor. In the same way we can call various functions on the PluginManager, we can also call various functions on the editor. In this case, we’re calling the addButton function, to add a button to the toolbar.
注意我们的匿名函数有两个参数。 第一个是editor实例–这是TinyMCE可视编辑器。 以同样的方式,我们可以在PluginManager上调用各种函数,也可以在editor上调用各种函数。 在这种情况下,我们将调用addButton函数,以将按钮添加到工具栏。
Save your Javascript file, and go back to your Visual Editor. At a first look, nothing seems to have changed. However, if you hover your mouse cursor over to the right of the top row’s rightmost icon, you should see a tooltip appear:
保存Javascript文件,然后返回到可视编辑器。 乍一看,似乎没有任何改变。 但是,如果将鼠标光标悬停在第一行最右侧图标的右侧,则应该看到一个工具提示出现:

We’ve successfully added a button to the toolbar, but it needs an image. Add the following parameter to the addButton function, below the title: line:
我们已经成功向工具栏添加了一个按钮,但是它需要一个图像。 在title:下面的行中,将以下参数添加到addButton函数中:
image: url + '/icon.png',
url is the URL to our plugin. This is handy if we want to reference an image file within our plugin folder, as we can append the image file name to the URL. In this case, we’ll need an image called icon.png in our plugin’s folder. Use the below icon:
url是我们插件的URL。 如果我们要在插件文件夹中引用图像文件,这很方便,因为我们可以将图像文件名附加到URL。 在这种情况下,我们在插件的文件夹中需要一个名为icon.png的图像。 使用以下图标:
Reload our Visual Editor, and you’ll now see your button with the icon:

重新加载我们的Visual Editor,现在您将看到带有图标的按钮:
定义要运行的命令 (Defining a Command to Run)
Right now, if you click the button, nothing will happen. Let’s add a command to TinyMCE telling it what to do when our button is clicked.
现在,如果您单击按钮,则什么也不会发生。 让我们向TinyMCE添加一个命令,告诉它单击按钮时该怎么做。
In our Javascript file, add the following code below the end of the editor.addButton section:
在我们的Javascript文件中,将以下代码添加到editor.addButton部分的末尾:
// Add Command when Button Clicked
editor.addCommand('custom_link_class', function() {
	alert('Button clicked!');
});
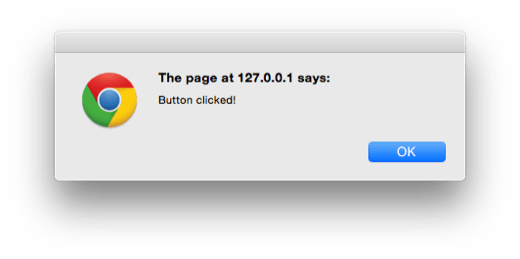
Reload our Visual Editor, click the button and an alert will appear confirming we just clicked the button:
重新加载我们的Visual Editor,单击按钮,然后将出现一条警告,确认我们刚刚单击了按钮:
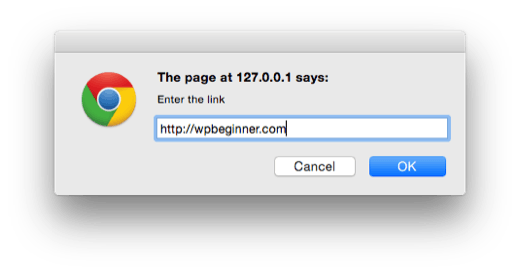
Let’s replace the alert with a prompt, asking the user for the link they want to wrap around the selected text in the Visual Editor:
让我们用提示替换警报,询问用户要在Visual Editor中环绕所选文本的链接:
// Add Command when Button Clicked
editor.addCommand('custom_link_class', function() {
	// Check we have selected some text that we want to link
	var text = editor.selection.getContent({
		'format': 'html'
	});
	if ( text.length === 0 ) {
		alert( 'Please select some text to link.' );
		return;
	}

	// Ask the user to enter a URL
	var result = prompt('Enter the link');
	if ( !result ) {
		// User cancelled - exit
		return;
	}
	if (result.length === 0) {
		// User didn't enter a URL - exit
		return;
	}

	// Insert selected text back into editor, wrapping it in an anchor tag
	editor.execCommand('mceReplaceContent', false, '<a class="button" href="' + result + '">' + text + '</a>');
});
This block of code performs a few actions.
此代码块执行一些操作。
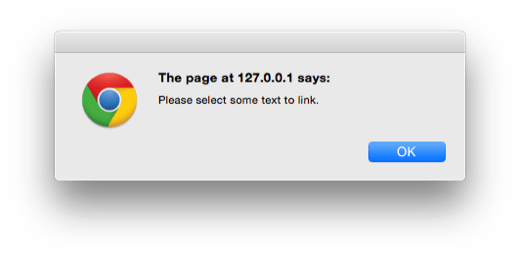
First, we check if the user selected some text to be linked in the Visual Editor. If not, they’ll see an alert telling them to select some text to link.
首先,我们检查用户是否在可视编辑器中选择了要链接的文本。 如果不是,他们将看到警报,告诉他们选择一些文本进行链接。
Next, we ask them to enter a link, again checking if they did. If they cancelled, or didn’t enter anything, we don’t do anything else.
接下来,我们要求他们输入链接,再次检查是否存在。 如果他们取消了,或者什么也没输入,我们就什么也不做。
Finally, we run the execCommand function on the TinyMCE editor, specifically running the mceReplaceContent action. This replaces the selected text with our HTML code, which comprises of an anchor link with class=”button”, using the text the user selected.
最后,我们在TinyMCE编辑器上运行execCommand函数,特别是运行mceReplaceContent操作。 这将使用我们选择的文本,用我们HTML代码替换选择的文本,该HTML代码包含一个带有class =“ button”的锚链接。
If everything worked, you’ll see your selected text is now linked in the Visual Editor and Text views, with the class set to button:
如果一切正常,您将看到在Visual Editor和Text视图中链接了选定的文本,并将类设置为button :

摘要 (Summary)
We’ve successfully created a WordPress plugin which adds a button to the TinyMCE visual editor in WordPress. This tutorial has also covered some of the basics of the TinyMCE API and WordPress filters available for TinyMCE integrations.
我们已经成功创建了一个WordPress插件,该插件在WordPress的TinyMCE可视编辑器中添加了一个按钮。 本教程还介绍了可用于TinyMCE集成的TinyMCE API和WordPress过滤器的一些基础知识。
We added code so that when a user clicks our custom button, they’re prompted to select some text in the Visual Editor, which they can then link to a URL of their choice. Finally, our plugin then replaces the selected text with a linked version that contains a custom CSS class called button.
我们添加了代码,以便当用户单击我们的自定义按钮时,系统会提示他们在视觉编辑器中选择一些文本,然后他们可以链接到他们选择的URL。 最后,我们的插件然后用包含一个名为button的自定义CSS类的链接版本替换所选文本。
We hope this tutorial helped you learn how to create a WordPress TinyMCE plugin. You may also want to check out our guide on how to create a site-specific WordPress plugin.
我们希望本教程可以帮助您学习如何创建WordPress TinyMCE插件。 您可能还需要查看有关如何创建特定于站点的WordPress插件的指南 。
If you liked this article, then please subscribe to our YouTube Channel for WordPress video tutorials. You can also find us on Twitter and Facebook.
如果您喜欢这篇文章,请订阅我们的YouTube频道 WordPress视频教程。 您也可以在Twitter和Facebook上找到我们。
翻译自: https://www.wpbeginner.com/wp-tutorials/how-to-create-a-wordpress-tinymce-plugin/
tinymce 插件


 370
370

 被折叠的 条评论
为什么被折叠?


