


arcore与unity
In this tutorial, we’ll be discussing ARCore introduced by Google. We’ll be breezing through the basics of ARCore. After that, we’ll be developing an android application to get the distance of a node object from the camera. We have already covered a Hello World example in ARCore earlier. Now let’s get started!
在本教程中,我们将讨论Google推出的ARCore。 我们将简要介绍ARCore的基础知识。 之后,我们将开发一个Android应用程序以获取节点对象与摄像机之间的距离。 我们已经覆盖ARCORE一个Hello World例子更早 。 现在开始吧!
ARCore基础 (ARCore Basics)
Augmented Reality basically allows us to show virtual objects in a real-world environment and allow interactions with them.
增强现实基本上可以使我们在现实环境中显示虚拟对象并允许与它们进行交互。
ARCore requires :
ARCore要求:
- Android N+ Android N +
- OpenGL 3.0 + OpenGL 3.0以上
Knowledge in OpenGL 3d graphics programming is not necessary since Sceneform SDK is introduced for the same.
无需引入OpenGL 3d图形编程知识,因为为此引入了Sceneform SDK。
Sceneform allows us to create 3d models. It consists of ShapeFactory and MaterialFactory classes that allow us to create renderable objects from simple shapes and materials.
Shapes like a sphere, cube, cylinder can easily we created as we shall see later in this tutorial.
Sceneform允许我们创建3d模型。 它由ShapeFactory和MaterialFactory类组成,这些类允许我们从简单的形状和材料创建可渲染对象。
我们将在本教程的后面部分很容易地创建球形,立方体,圆柱等形状。
ARFragment is used to create an Ar scene and AR Session (both are created automatically).
Using an ARFragment we detect planes or feature points.
ARFragment用于创建Ar场景和AR Session(两者都是自动创建的)。
使用ARFragment我们可以检测平面或特征点。
setOnTapArPlaneListener is set on the ArFragment to listen to changes whenever the click event takes place.
在ArFragment上设置了setOnTapArPlaneListener,以在单击事件发生时侦听更改。
Few terms that form of the core of ARCore are listed below with descriptions:
以下列出了构成ARCore核心的几个术语,并提供了描述:
- Scene – This is where our 3D objects are rendered. 场景 –这是渲染3D对象的地方。
- HitResult – On tap, this provides us the location of a real-world object. Basically, it estimates the position by finding the first point of intersection with an imaginary ray of light coming from infinity. HitResult –点击后,可为我们提供真实对象的位置。 基本上,它通过找到与来自无限远的虚构光线的相交的第一个点来估计位置。
- Anchor – A fixed location in real-world in terms of x,y,z coordinates in 3D space. Just like a ship anchor 锚点 –现实世界中3D空间中x,y,z坐标的固定位置。 就像船锚
- Pose – provides the position and orientation of the object in the scene. 姿势 –提供对象在场景中的位置和方向。
- AnchorNode – This is the node that automatically positions itself in the world. This is the first node that gets set when a plane is detected. AnchorNode –这是自动在世界上定位自己的节点。 这是检测到平面时设置的第一个节点。
- TransformableNode – This node is where we set our 3d object. It can interact, scale, transform, rotate according to the user interactions. TransformableNode –此节点是我们设置3d对象的位置。 它可以根据用户交互进行交互,缩放,转换和旋转。
In the next section, we’ll be developing our AR application in which we’ll calculate the distance of an object from us i.e the camera.
在下一部分中,我们将开发AR应用程序,在该应用程序中,我们将计算物体与我们之间的距离,即相机。
Once we place an object on a plane, we know it’s a pose.
一旦将物体放在飞机上,我们就知道它是一个姿势。
As our scene changes, the frame gets updated. From the frame, we can get the camera pose.
随着场景的变化,框架会更新。 从框架中,我们可以获得相机的姿势。
Now that we have the two poses, the distance between them is just a Math formula!
现在我们有了两个姿势,它们之间的距离只是一个数学公式!
项目结构 (Project Structure)
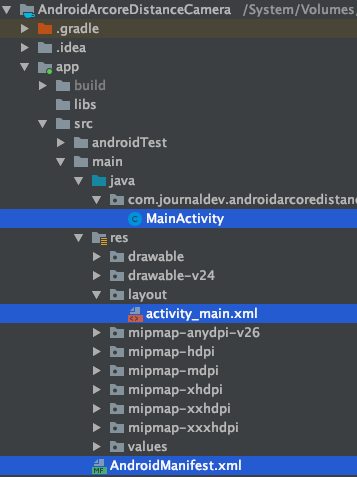
Android Arcore Project Structure
Android Arcore项目结构
Add the following dependency to the build.gradle:
将以下依赖项添加到build.gradle :
implementation 'com.google.ar.sceneform.ux:sceneform-ux:1.10.0'In the AndroidManifest file we need to add the following:
在AndroidManifest文件中,我们需要添加以下内容:
<uses-permission android:name="android.permission.CAMERA" />
    <uses-feature
        android:name="android.hardware.camera.ar"
        android:required="true" />
Inside the application tag add the following:
在application标签内添加以下内容:
<meta-data
                android:name="com.google.ar.core"
                android:value="required" />
码 (Code)
The code for the activity_main.xml is given below:
下面给出了activity_main.xml的代码:
<?xml version="1.0" encoding="utf-8"?>
<FrameLayout xmlns:android="https://schemas.android.com/apk/res/android"
    android:layout_width="match_parent"
    android:layout_height="match_parent">

    <fragment
        android:id="@+id/ux_fragment"
        android:name="com.google.ar.sceneform.ux.ArFragment"
        android:layout_width="match_parent"
        android:layout_height="match_parent" />

    <TextView
        android:id="@+id/tvDistance"
        android:layout_width="match_parent"
        android:layout_height="wrap_content"
        android:layout_gravity="bottom"
        android:background="@android:color/black"
        android:gravity="center"
        android:padding="8dp"
        android:text="Distance from camera"
        android:textColor="@android:color/white"
        android:textSize="20sp" />

</FrameLayout>
The code for the MainActivity.java is given below:
MainActivity.java的代码如下:
package com.journaldev.androidarcoredistancecamera;

import androidx.appcompat.app.AppCompatActivity;

import android.app.Activity;
import android.app.ActivityManager;
import android.content.Context;
import android.os.Bundle;
import android.util.Log;
import android.widget.TextView;
import android.widget.Toast;

import com.google.ar.core.Anchor;
import com.google.ar.core.Frame;
import com.google.ar.core.Pose;
import com.google.ar.sceneform.AnchorNode;
import com.google.ar.sceneform.FrameTime;
import com.google.ar.sceneform.Scene;
import com.google.ar.sceneform.math.Vector3;
import com.google.ar.sceneform.rendering.Color;
import com.google.ar.sceneform.rendering.MaterialFactory;
import com.google.ar.sceneform.rendering.ModelRenderable;
import com.google.ar.sceneform.rendering.ShapeFactory;
import com.google.ar.sceneform.ux.ArFragment;
import com.google.ar.sceneform.ux.TransformableNode;

import java.util.Objects;

public class MainActivity extends AppCompatActivity implements Scene.OnUpdateListener {


    private static final double MIN_OPENGL_VERSION = 3.0;
    private static final String TAG = MainActivity.class.getSimpleName();

    private ArFragment arFragment;
    private AnchorNode currentAnchorNode;
    private TextView tvDistance;
    ModelRenderable cubeRenderable;
    private Anchor currentAnchor = null;

    @Override
    protected void onCreate(Bundle savedInstanceState) {
        super.onCreate(savedInstanceState);

        if (!checkIsSupportedDeviceOrFinish(this)) {
            Toast.makeText(getApplicationContext(), "Device not supported", Toast.LENGTH_LONG).show();
        }

        setContentView(R.layout.activity_main);

        arFragment = (ArFragment) getSupportFragmentManager().findFragmentById(R.id.ux_fragment);
        tvDistance = findViewById(R.id.tvDistance);


        initModel();

        arFragment.setOnTapArPlaneListener((hitResult, plane, motionEvent) -> {
            if (cubeRenderable == null)
                return;

            // Creating Anchor.
            Anchor anchor = hitResult.createAnchor();
            AnchorNode anchorNode = new AnchorNode(anchor);
            anchorNode.setParent(arFragment.getArSceneView().getScene());

            clearAnchor();

            currentAnchor = anchor;
            currentAnchorNode = anchorNode;


            TransformableNode node = new TransformableNode(arFragment.getTransformationSystem());
            node.setRenderable(cubeRenderable);
            node.setParent(anchorNode);
            arFragment.getArSceneView().getScene().addOnUpdateListener(this);
            arFragment.getArSceneView().getScene().addChild(anchorNode);
            node.select();


        });


    }

    public boolean checkIsSupportedDeviceOrFinish(final Activity activity) {

        String openGlVersionString =
                ((ActivityManager) Objects.requireNonNull(activity.getSystemService(Context.ACTIVITY_SERVICE)))
                        .getDeviceConfigurationInfo()
                        .getGlEsVersion();
        if (Double.parseDouble(openGlVersionString) < MIN_OPENGL_VERSION) {
            Log.e(TAG, "Sceneform requires OpenGL ES 3.0 later");
            Toast.makeText(activity, "Sceneform requires OpenGL ES 3.0 or later", Toast.LENGTH_LONG)
                    .show();
            activity.finish();
            return false;
        }
        return true;
    }

    private void initModel() {
        MaterialFactory.makeTransparentWithColor(this, new Color(android.graphics.Color.RED))
                .thenAccept(
                        material -> {
                            Vector3 vector3 = new Vector3(0.05f, 0.01f, 0.01f);
                            cubeRenderable = ShapeFactory.makeCube(vector3, Vector3.zero(), material);
                            cubeRenderable.setShadowCaster(false);
                            cubeRenderable.setShadowReceiver(false);
                        });
    }

    private void clearAnchor() {
        currentAnchor = null;


        if (currentAnchorNode != null) {
            arFragment.getArSceneView().getScene().removeChild(currentAnchorNode);
            currentAnchorNode.getAnchor().detach();
            currentAnchorNode.setParent(null);
            currentAnchorNode = null;
        }
    }

    @Override
    public void onUpdate(FrameTime frameTime) {
        Frame frame = arFragment.getArSceneView().getArFrame();

        Log.d("API123", "onUpdateframe... current anchor node " + (currentAnchorNode == null));


        if (currentAnchorNode != null) {
            Pose objectPose = currentAnchor.getPose();
            Pose cameraPose = frame.getCamera().getPose();

            float dx = objectPose.tx() - cameraPose.tx();
            float dy = objectPose.ty() - cameraPose.ty();
            float dz = objectPose.tz() - cameraPose.tz();

            ///Compute the straight-line distance.
            float distanceMeters = (float) Math.sqrt(dx * dx + dy * dy + dz * dz);
            tvDistance.setText("Distance from camera: " + distanceMeters + " metres");


            /*float[] distance_vector = currentAnchor.getPose().inverse()
                    .compose(cameraPose).getTranslation();
            float totalDistanceSquared = 0;
            for (int i = 0; i < 3; ++i)
                totalDistanceSquared += distance_vector[i] * distance_vector[i];*/
        }
    }
}
In the above code we do the following things:
在上面的代码中,我们执行以下操作:
- Check if the phone is AR compatible. 检查手机是否兼容AR。
- Create a 3d cube shaped model. 创建一个3d立方体形状的模型。
- Add it on tap once the plane is detected. 一旦检测到飞机,点击添加。
- Update the distance from the camera to the anchor in every frame. 在每帧中更新从相机到锚点的距离。
- Once you tap again, clear the previous anchor. 再次点击时,清除上一个锚点。
node.setOnTapListener{} and do stuff with the node when it is clicked ( play sound etc.).
node.setOnTapListener{}上设置一个轻敲监听器,并在单击该节点时对其进行填充(播放声音等)。
The output of the application in action is given below:
实际应用程序的输出如下:

Android Arcore Distance Camera Output
Android Arcore距离相机输出
As you can see the distance changes when we move the camera closer to the cube we placed in the scene.
如您所见,当我们将相机移近放置在场景中的立方体时,距离会发生变化。
You can download the project from the link below.
您可以从下面的链接下载项目。
You can also view the source code from our GitHub repository.
您还可以从我们的GitHub存储库中查看源代码。
翻译自: https://www.journaldev.com/31895/android-arcore-distance-from-camera
arcore与unity


 2347
2347

 被折叠的 条评论
为什么被折叠?
被折叠的 条评论
为什么被折叠?
 到【灌水乐园】发言


