


 本文档详细记录了如何在Windows 7的Virtual PC上成功安装Ubuntu 10.4的过程,包括下载软件、创建虚拟机、设置启动参数、解决启动和分辨率问题,并提供了遇到的声卡、鼠标滚轮和分辨率更改困难等问题的说明。
There's lots of info spread around on how to install various older versions of Ubuntu under various older versions of Virtual PC, but I didn't find any referring to the newish Ubuntu 10.4 and VPC on Win 7.
关于如何在各种旧版本的Virtual PC上安装各种旧版本的Ubuntu的信息很多,但是我没有找到关于Win 7上最新的Ubuntu 10.4和VPC的信息。
I did now find some useful command-line parameters in this blog post from Mark Wilson. I'm trying to make this post as complete as possible. If you have new or update or better info that is specific to the new changes in Ubuntu 10.4, let me know.
我现在确实在Mark Wilson的这篇博客文章中找到了一些有用的命令行参数。 我正在尝试使这篇文章尽可能完整。 如果您有特定于Ubuntu 10.4中新更改的新信息,更新信息或更好的信息,请告诉我。
Here's what I did.
这就是我所做的。
Download Ubuntu.
下载Ubuntu 。
Download Windows Virtual PC.
- (You don't need to get Windows XP Mode, but if you want, it's nice.) (您不需要获得Windows XP Mode,但是如果您愿意的话,这很好。)
(When you have VPC, you can also some of the various free IE browser testing VMs as well)
(拥有VPC时,您还可以通过一些免费的IE浏览器来测试虚拟机)
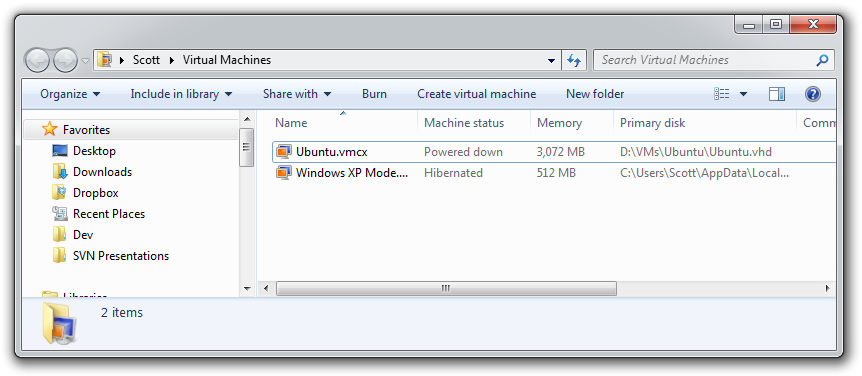
- Go into the Virtual Machines folder, and click Create Virtual Machine. Give you VM at least a gig of RAM. I have 8 gigs on my machine, so I give it probably more than was needed and allocated 3gigs. 进入“虚拟机”文件夹,然后单击“创建虚拟机”。 给您的VM至少一个RAM的演出。 我的机器上有8个演出,所以我给的可能比需要的更多,并分配了3个演出。
When you create a Hard Drive, create a Fixed one rather than a dynamic one. I find this is faster and can avoid some strange disk errors with Ubuntu and the VM. I saw some strangeness with dynamically expanding disks.
创建硬盘驱动器时,请创建固定驱动器而不是动态驱动器。 我发现这更快,可以避免Ubuntu和VM出现一些奇怪的磁盘错误。 我看到了动态扩展磁盘的一些奇怪之处。
In the Settings for your VM, tell it that the DVD drive actually be the Ubuntu ISO that you downloaded.
在“ VM的设置”中,告诉它DVD驱动器实际上是您下载的Ubuntu ISO。
Hit OK and start your VM.
单击确定,然后启动您的VM。
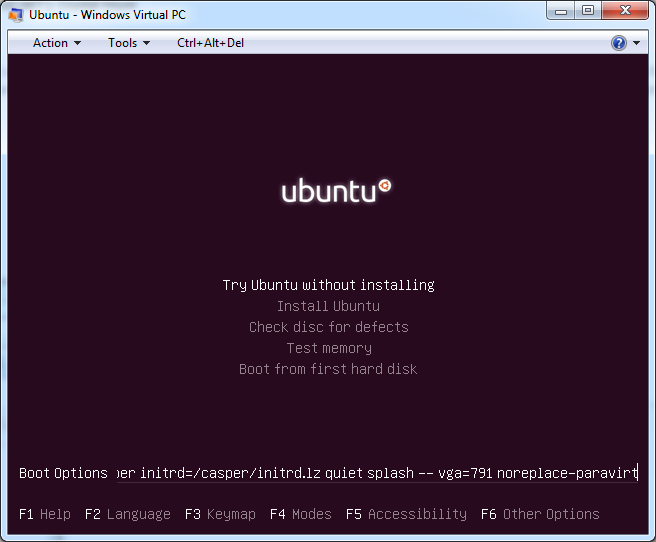
IMPORTANT: When it starts booting, hit ESC when you see a blinking cursor, then you'll find yourself here. If you let it just boot without hitting ESC it'll start a bit, then give up.
重要说明:当它开始引导时,当您看到光标闪烁时,按ESC,然后您会发现自己在这里。 如果让它直接启动而不点击ESC,它将重新启动,然后放弃。
Hit F6, then ESC. Then add vga=791 noreplace-paravirt at the end of the white command line so it looks like:
按F6,然后按ESC。 然后在白色命令行的末尾添加vga = 791 noreplace-paravirt,如下所示:
Hit Enter
按下Enter
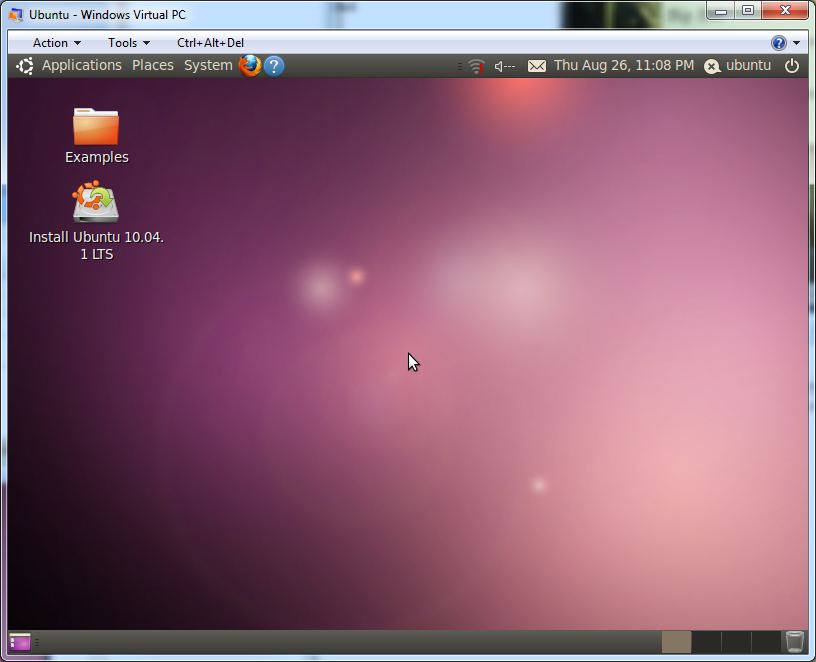
You find yourself at a desktop...make sure that from Tools|Settings that your Network Card in the VM is attached to a REAL physical network card.
您会发现自己在桌面上...请从“工具|设置”中确保VM中的网卡已连接到REAL物理网卡。
If you click in your VM, the mouse will be captured. You can get out with Ctrl+Alt+Left Arrow.
如果单击您的VM,将捕获鼠标。 您可以使用Ctrl + Alt +向左键退出。
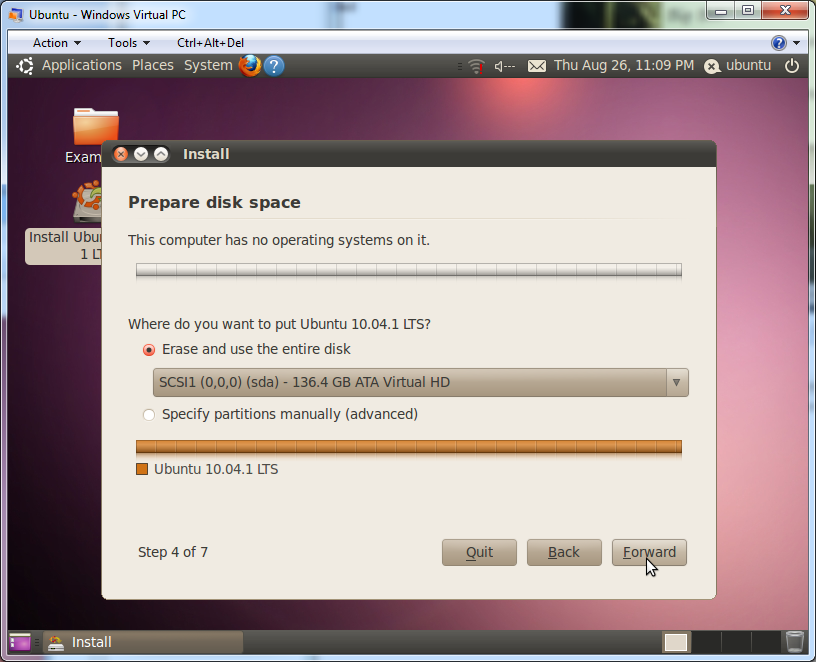
Double-Click Install Ubuntu and start the process using all the defaults.
双击安装Ubuntu,并使用所有默认值启动该过程。
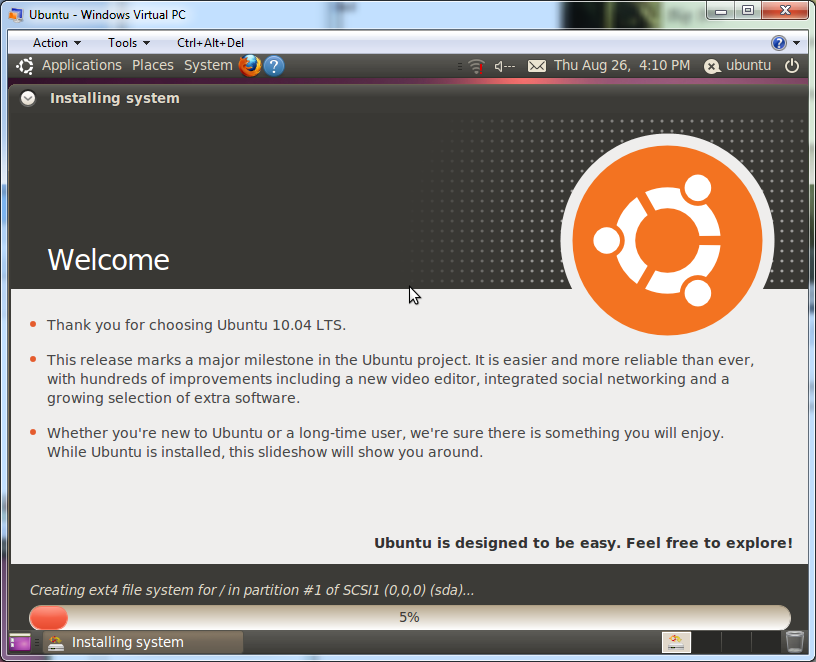
Blah blah blah...
等等等等等等...
Wait a while...and IMPORTANT do not restart when it's done or you are screwed.
请稍等...完成后,重要的操作不会重启。
Instead, you need to make a few changes to make your new system bootable. Click "Continue Testing."
相反,您需要进行一些更改以使新系统可引导。 点击“继续测试”。
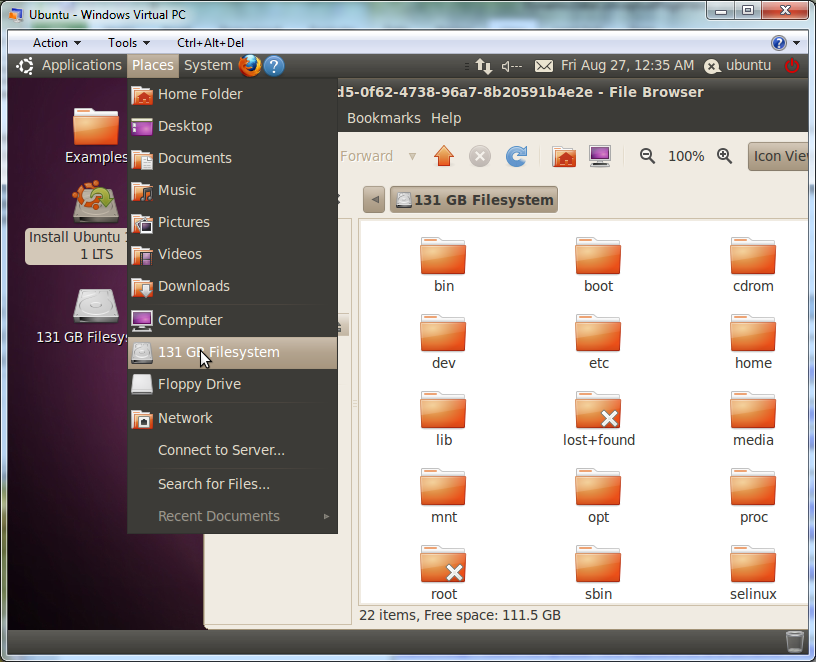
Now, go to the Places Menu in the top menu and click your File System. That will open up a disk browsing window with a GUID (yes, a GUID) in the title bar. You're going to need to type that, so get emotionally ready. You'll also want to rearrange the windows so you can open up a Terminal Window (from Applications, Accessories) and have the two near each other.
现在,转到顶部菜单中的位置菜单,然后单击文件系统。 这将打开一个磁盘浏览窗口,在标题栏中带有GUID(是,GUID)。 您将需要输入该内容,因此请做好情绪准备。 您还需要重新排列窗口,以便可以打开终端窗口(来自“应用程序”,“附件”),并使两个窗口彼此靠近。
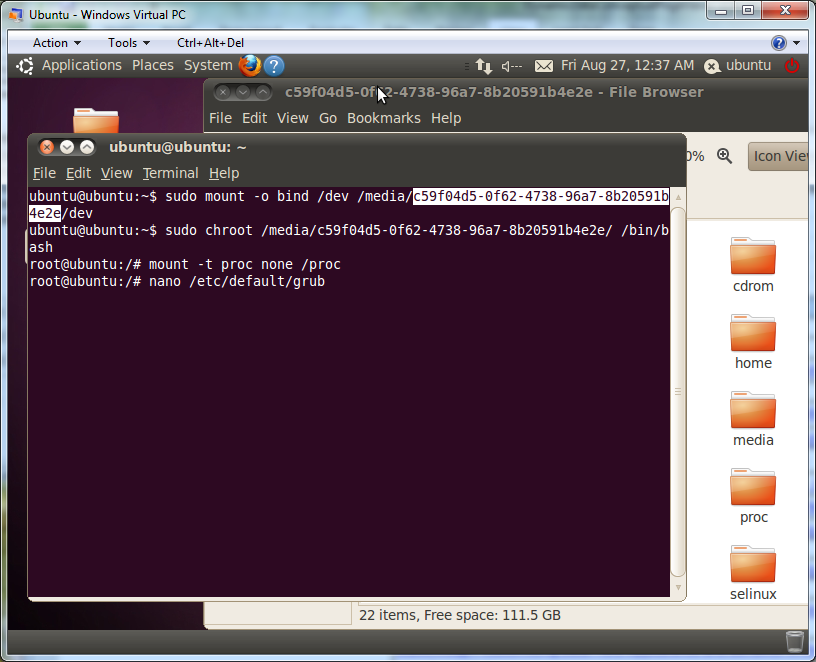
Now, open your Terminal. From Marks's blog, type:
现在,打开您的终端。 在Marks的博客中,输入:
sudo mount -o bind /dev /media/THATGUID/dev
sudo chroot /media/THATGUID/ /bin/bash
mount -t proc none /proc
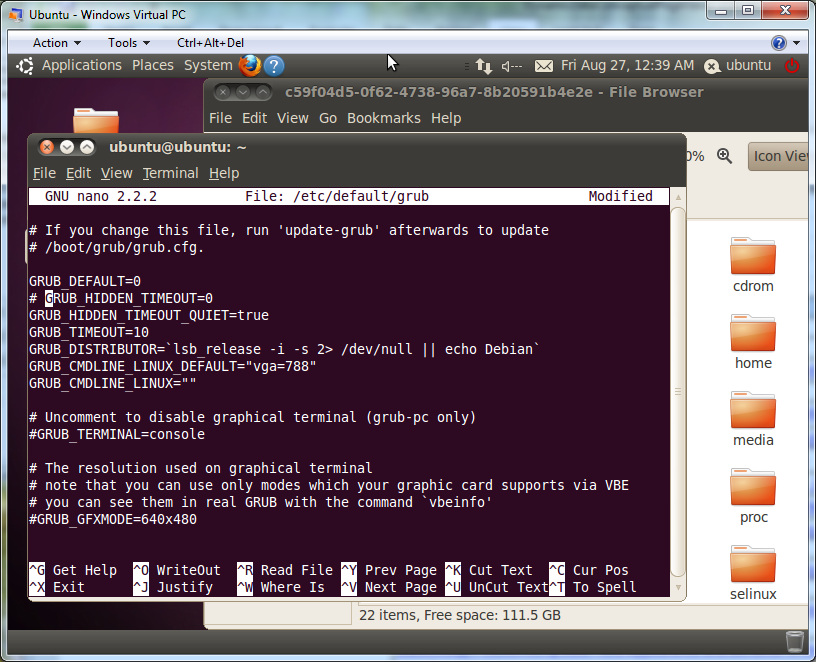
nano /etc/default/grub
That last line will bring up a text editor.
最后一行将显示一个文本编辑器。
From the text editor, change "quiet splash" to VGA=788 or one of the VGA codes from this table. Mark also recommends commenting outu GRUD_HIDDEN_TIMEOUT with a #. Oddly, while the codes for resolutions seem to work initially, X switches back to 800x600 when it starts.
在文本编辑器中,将“ quiet splash”更改为VGA = 788或该表中的VGA代码之一。 Mark还建议用#注释输出GRUD_HIDDEN_TIMEOUT。 奇怪的是,虽然分辨率代码最初似乎可以正常工作,但X在启动时会切换回800x600。
| Depth | 800×600 | 1024×768 | 1152×864 | 1280×1024 | 1600×1200 |
| 8 bit | vga=771 | vga=773 | vga=353 | vga=775 | vga=796 |
| 16 bit | vga=788 | vga=791 | vga=355 | vga=794 | vga=798 |
| 24 bit | vga=789 | vga=792 | vga=795 | vga=799 |
| 深度 | 800×600 | 1024×768 | 1152×864 | 1280×1024 | 1600×1200 |
| 8位 | vga = 771 | vga = 773 | vga = 353 | vga = 775 | vga = 796 |
| 16位 | vga = 788 | vga = 791 | vga = 355 | vga = 794 | vga = 798 |
| 24位 | vga = 789 | vga = 792 | vga = 795 | vga = 799 |
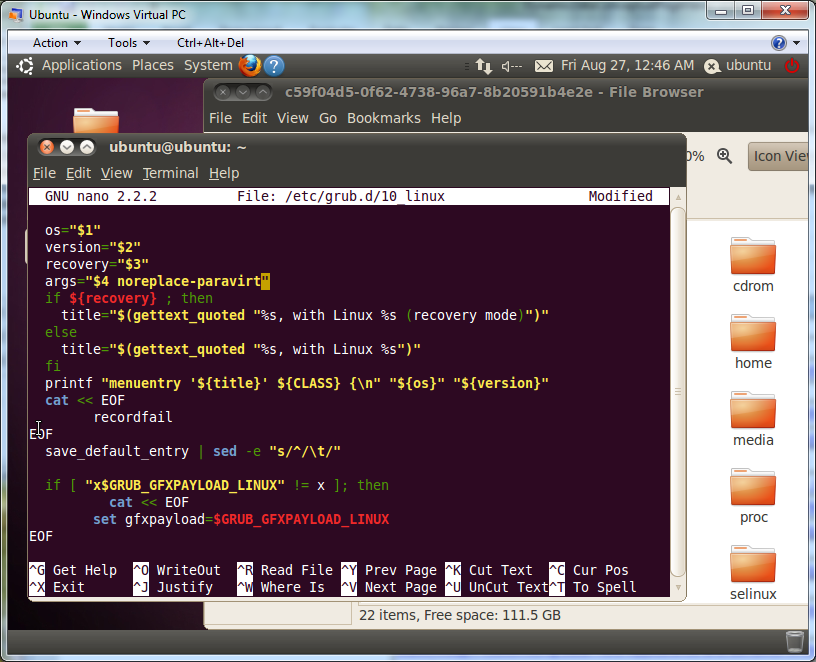
Save with Ctrl-X, then run nano /etc/grub.d/10_linux from the terminal to edit one more file. Add noreplace-paravirt (remember that) after args="$4" like this:
使用Ctrl-X保存,然后从终端运行nano /etc/grub.d/10_linux来编辑另一个文件。 在args =“ $ 4”之后添加noreplace-paravirt(请记住),如下所示:
Finally, run "update-grub" from the command line. NOW you can restart using the on-off button dealie on in the upper-right corner. I had to hit enter a few times in text mode to get it to finally restart. Ignore the error about Casper and just press enter.
最后,从命令行运行“ update-grub”。 现在,您可以使用右上角的开/关按钮Dealie重新启动。 我不得不在文本模式下按回车几次才能使其最终重启。 忽略有关Casper的错误,只需按Enter。
At this point with Ubuntu 10.4 on Virtual PC:
此时,在Virtual PC上使用Ubuntu 10.4:
- No sound - faking it with modprobe snd-sb16 doesn't work 没有声音-使用modprobe snd-sb16伪造它不起作用
- No mouse wheel - hacks found around don't appear to work没有鼠标滚轮-周围的黑客似乎没有用
- Difficult to change resolution.难以更改分辨率。
Of course, using the Virtual Box virtualization tool works great with Ubuntu right out of the box and includes Virtual Additions that are custom to Linux and allow resizing, but I was (am) hoping to get this VPC thing working completely so I can stick with my one standard virtualization solution.
当然,使用Virtual Box虚拟化工具可以很好地与Ubuntu配合使用,并且包括针对Linux定制并允许调整大小的Virtual Additions,但是我(我)希望使VPC能够完全正常工作,因此我可以坚持使用我的一个标准虚拟化解决方案。
If you've solved any of these, specific to Ubuntu 10.4, then please let me know and I'll update this post.
如果您已解决所有这些问题,尤其是针对Ubuntu 10.4的问题,请告诉我,我将对其进行更新。
翻译自: https://www.hanselman.com/blog/installing-ubuntu-104-lts-on-windows-virtual-pc-on-windows-7


 被折叠的 条评论
为什么被折叠?
被折叠的 条评论
为什么被折叠?
 到【灌水乐园】发言


