


初学Opencv实现一点点的功能都感觉很是吃力,所以不得不写点东西记忆一下,不然明天又忘记了
好记星不如烂笔头
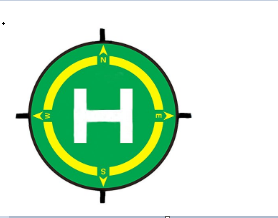
我就想能不能处分出图片中的正方形和圆形,标记出来,我们这边就绘制器图像,下一步就是认识图片中的图像
发现轮廓

上图中是我们要区分的画出轮廓的图片看很简单,一个正方形两个圆,并且一个实心圆和一个空心圆
代码:
public static void main(String[] args) throws IOException {
try {
ResourceBundle bundle = ResourceBundle.getBundle("opencv");
String opencvDllName = bundle.getString("opencv.dllpath");
System.load(opencvDllName);
} catch (Exception e) {
e.printStackTrace();
}
Range r1 = new Range(2, 5);
Range r2 = new Range(1, 3);
Mat src = Imgcodecs.imread("D:\\svnp\\MyYan\\res\\drawable\\rectangle.png");
Mat dst = new Mat();
Imgproc.cvtColor(src, dst, Imgproc.COLOR_BGR2GRAY);
List<MatOfPoint> contours = new ArrayList<MatOfPoint>();
Mat hierarchy = new Mat();
Imgproc.findContours(dst, contours, hierarchy, Imgproc.CV_BLUR, Imgproc.CHAIN_APPROX_NONE);
Mat background=new Mat(src.size(),CvType.CV_8UC3, new Scalar(0,255,0));
for (int i = 0; i < contours.size(); i++) {
// Imgproc.drawContours(src,contours,k,new Scalar(255,0,0),1,20,hierarchy);
// System.out.println(point.dump());
Imgproc.drawContours(background, contours, i, new Scalar(255, 0, 0), 1, 8, hierarchy);
// Imgproc.drawMarker(Contours, point, new Scalar(255,0,0));
}
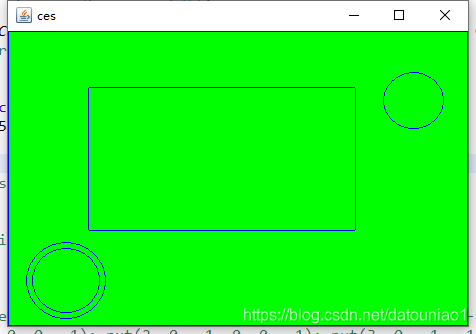
HighGui.imshow("ces", background);
HighGui.waitKey(5);
}最后显示出来的结果:
我们来分析上面的代码,只有分析才能学到东西啊
1.首先获取图片,并且灰度化,不解释了
Mat src = Imgcodecs.imread("D:\\svnp\\MyYan\\res\\drawable\\rectangle.png");
Mat dst = new Mat();
Imgproc.cvtColor(src, dst, Imgproc.COLOR_BGR2GRAY);
2.创建容器,获取轮廓 所谓的容器是绘制轮廓返回的结果存储的位置
	List<MatOfPoint> contours = new ArrayList<MatOfPoint>();

	Mat hierarchy = new Mat();

	Imgproc.findContours(canny_r, contours, hierarchy, Imgproc.RETR_TREE,Imgproc.CHAIN_APPROX_SIMPLE);
3.绘制轮廓,并且显示结果
Mat background = new Mat(src.size(), CvType.CV_8UC3, new Scalar(0, 255, 0));

    for (int i = 0; i < contours.size(); i++) {

            Imgproc.drawContours(background, contours, i, new Scalar(255, 0, 0), 1, 8, hierarchy);

        }
        HighGui.imshow("ces", background);
        HighGui.waitKey(5);
主要方法是绘制轮廓的方法

参数含义:
image 数据源
contours 轮廓点集合 List<MatOfPoint>
hierarchy 层级轮廓层级描述 和contours是对应的
第四个参数:int型的mode,定义轮廓的检索模式:
取值一 RETR_EXTERNAL只检测最外围轮廓,包含在外围轮廓内的内围轮廓被忽略
取值二:RETR_LIST 检测所有的轮廓,包括内围、外围轮廓,但是检测到的轮廓不建立等级关
系,彼此之间独立,没有等级关系,这就意味着这个检索模式下不存在父轮廓或内嵌轮廓,
所以hierarchy向量内所有元素的第3、第4个分量都会被置为-1,具体下文会讲到
取值三:RETR_CCOMP 检测所有的轮廓,但所有轮廓只建立两个等级关系,外围为顶层,若外围
内的内围轮廓还包含了其他的轮廓信息,则内围内的所有轮廓均归属于顶层
取值四:RETR_TREE, 检测所有轮廓,所有轮廓建立一个等级树结构。外层轮廓包含内层轮廓,内
层轮廓还可以继续包含内嵌轮廓。
第五个参数:int型的method,定义轮廓的近似方法:
取值一:CHAIN_APPROX_NONE 保存物体边界上所有连续的轮廓点到contours向量内
取值二 CHAIN_APPROX_SIMPLE 仅保存轮廓的拐点信息,把所有轮廓拐点处的点保存入contours
向量内,拐点与拐点之间直线段上的信息点不予保留
取值三和四:CHAIN_APPROX_TC89_L1,CHAIN_APPROX_TC89_KCOS使用teh-Chinl chain 近
似算法
再次可以在第一步图片处理上进行优化
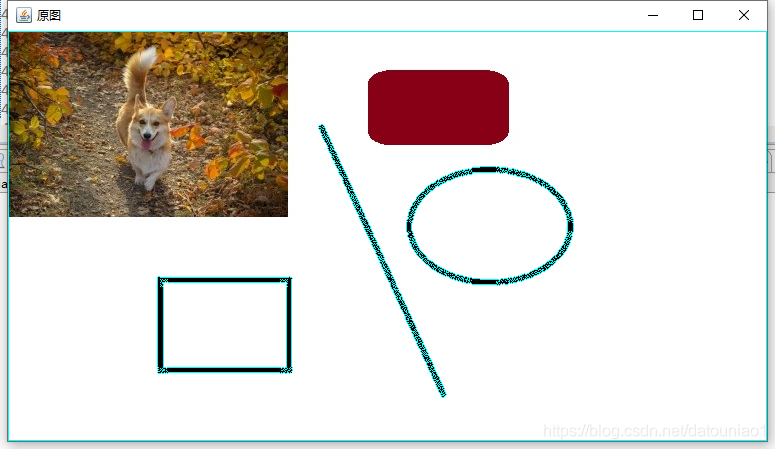
我们用其他的图片进行测试一下:
灰度化之后,可以使用canny进行边缘检测
	    Mat dst = new Mat();

		Imgproc.cvtColor(src, dst, Imgproc.COLOR_BGR2GRAY);


		Mat canny_r=new Mat();

		Imgproc.Canny(dst, canny_r, 90, 180);
进行了边缘检测之后,再去绘制轮廓,效果会更好

我们当然还可以进一步的优化,进行高斯滤波
	   Imgproc.cvtColor(src, dst, Imgproc.COLOR_BGR2GRAY);

		Mat canny_r=new Mat();

		Imgproc.Canny(dst, canny_r, 90, 180);

		Imgproc.GaussianBlur(canny_r, canny_r, new Size(5, 5),3);

		List<MatOfPoint> contours = new ArrayList<MatOfPoint>();

		Mat hierarchy = new Mat();

		Imgproc.findContours(canny_r, contours, hierarchy,

        Imgproc.RETR_TREE,Imgproc.CHAIN_APPROX_SIMPLE);
进行了高斯滤波之后

可以看到不进行高斯滤波和进行高斯滤波还是有区别的
我们可以看到的是,其实我们进行绘制轮廓之前可以进行基本的图片处理
轮廓的绘制
函数:

image 绘制轮廓的背景图片
contours 轮廓信息
contourIdx 绘制轮廓的索引 -1 标识绘制所有的轮廓点 其他的值标识绘制轮廓的contours.get(0)对应的轮廓点
color 颜色
thickness 线条粗细
lintType : // C++: enum LineTypes
public static final int
FILLED = -1,
LINE_4 = 4,
LINE_8 = 8,
LINE_AA = 16;
默认的thickness
thickness=2

画出其中高和宽度相差大于100的图形
	Mat src = Imgcodecs.imread(filename);// 加载需要被蒙太奇的图片,原图

		Mat dst = new Mat();

		Imgproc.cvtColor(src, dst, Imgproc.COLOR_BGR2GRAY);

		Imgproc.medianBlur(dst, dst,3);

		Mat oepn=Imgproc.getStructuringElement(Imgproc.CV_SHAPE_RECT, new Size(5,5));

		Imgproc.morphologyEx(dst, dst, Imgproc.MORPH_HITMISS,oepn,new Point(-1,-1));

		Imgproc.threshold(dst,dst,0,255,Imgproc.THRESH_BINARY | Imgproc.THRESH_OTSU);

		List<MatOfPoint> contours = new ArrayList<MatOfPoint>();
		Mat hierarchy = new Mat();
		Imgproc.findContours(dst, contours, hierarchy, Imgproc.RETR_TREE, Imgproc.CHAIN_APPROX_NONE);
		for (int i = 0; i < contours.size(); i++) {
			// 外边界
			Rect rect = Imgproc.boundingRect(contours.get(i));
			double w = rect.width;
			double h = rect.height;
			if(Math.abs(w-h)>100) {
				Imgproc.drawContours(src, contours,i+1, new Scalar(255, 255, 0), 2,Imgproc.LINE_8,hierarchy);

			}
		}
		HighGui.imshow("原图", src);
//	    HighGui.imshow("矩形操作", dst2);
		HighGui.waitKey(0);

Imgproc.drawContours(src, contours,0, new Scalar(255, 255, 0), 2,Imgproc.LINE_8);
当第三个值contoursIdx的值确定的是时候,其实就是绘制的contours.get(contoursIdx)所表示的轮廓,当第三个值contoursIdx的值确定的是时候,表示绘制所有的轮廓
什么是轮廓
List<MatOfPoint> contours = new ArrayList<MatOfPoint>();
可以看到的是轮廓是存储在MatOfPoint,我们查看MatOfPoint发现是一些像素点,
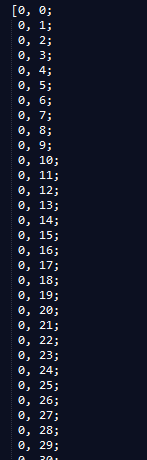
轮廓是像素点组成的数组,集合
轮廓分析
我们可以从轮廓这里面或者到一个矩阵rect
Rect rect = Imgproc.boundingRect(contours.get(i));
并且获取到顶点,和矩阵的长度和宽度
		System.out.println(rect.tl()+"**********"+rect.br());
		double w = rect.width;
		double h = rect.height;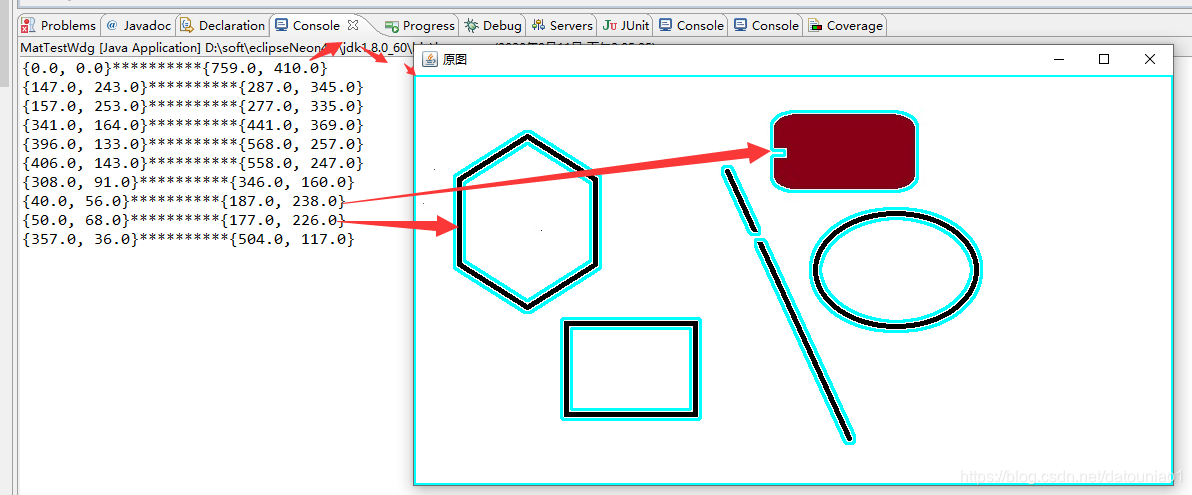
我们可以绘制具体位置的图形,比如我要绘制六边形的轮廓

我们通过简单的位置可以定位到最左侧的图形并绘制出其轮廓
我觉得我们设置是可以对MatOfPoint进行分析,轮廓分析,比如最简单的正方形,如果说rect.x=rect.y我们就可以认准为正方形
在一群图像中进行识别正方形
希望对你有所帮助


 303
303


 被折叠的 条评论
为什么被折叠?
被折叠的 条评论
为什么被折叠?
 到【灌水乐园】发言


