


数据集准备与描述
本次使用的数据集是来自Laurence Moroney的Rock Paper Sissors数据集,其中训练集中提供了2520张,来自不同性别,不同肤色以及不同年龄段的手的图片,他们分别摆出了石头,剪刀,布三种形态,另外在验证集中也提供了高达372张图片来进行验证。
·如果访问Laurence Moroney访问不上去的小伙伴可以直接访问博主的网盘自行领取,包含数据集和本次博客中使用到的代码哦。
链接:https://pan.baidu.com/s/1nLKq_Ohdjoy9beCdfM18XQ?pwd=VGGN
提取码:VGGN
模型描述
本次实验我是用到了著名的VGG16模型,集成在tensorflow.keras.applications当中
另外在权重上,我也使用了VGG16的“老搭档”:imagenet参数模型初始化。
当然,因为我们需要手动“魔改”这个模型,因此呢我们在初始化的时候需要将include_top这个参数设为False啦。
模型调参
首先我们先导入keras和Numpy,因为深度学习和机器学习本质上都是在计算复杂的矩阵,因此我们在所难免的需要导入到numpy。
from tensorflow import keras
import numpy as np
接下来我们就开始初始化我们的VGG16模型啦,还记得上面说的吗?对的,照搬下来就好了,那么我们首先设置的两个内核参数是:
weights = imagenet,include_top = False。
但是呢,这并没有完,为什么?
相信细心地你应该发现了,我们忽略了机器学习模型最重要的一个参数,那就是:输入大小。
那么这里我们应该给多大呢?如果你了解过VGG16模型,或者通过summary()的方式了解到:VGG16模型是接收一个标准的244*244像素的RGB位图的。
那么换算下来,RGB一共是三种颜色通道,结合前面的244*244像素大小,那么最终就可以得知VGG16模型的input_shape=(1,244,244,3)。
vgg_16_model = keras.applications.VGG16(weights='imagenet', include_top=False, input_shape=(224, 224, 3))
2022-07-16 11:38:46.410383: I tensorflow/core/common_runtime/gpu/gpu_device.cc:1616] Could not identify NUMA node of platform GPU id 0, defaulting to 0.  Your kernel may not have been built with NUMA support.
2022-07-16 11:38:46.410727: I tensorflow/stream_executor/cuda/cuda_gpu_executor.cc:961] could not open file to read NUMA node: /sys/bus/pci/devices/0000:01:00.0/numa_node
Your kernel may have been built without NUMA support.
2022-07-16 11:38:46.410830: I tensorflow/core/common_runtime/gpu/gpu_device.cc:1532] Created device /job:localhost/replica:0/task:0/device:GPU:0 with 3920 MB memory:  -> device: 0, name: NVIDIA GeForce RTX 2060, pci bus id: 0000:01:00.0, compute capability: 7.5
可以看到,由于我使用的是笔记本电脑,所以的CPU无论是在Windows还是Linux上都无法支持NUMA节点管理我的CPU内核,因此TensorFlow直接在我的GPU上初始化了模型
因为我们需要魔改我们的模型,因此首先最重要的一步就是冻结我们的模型
# Freeze the model first
vgg_16_model.trainable = False
接下来就开始我们的魔改阶段,首先我们需要使用keras.layers.Input来重新进行输入约束,将其约束在VGG16的原始大小(244,244,3)上
# Create Input Layer
input = keras.layers.Input(shape=(224, 224, 3))
之后我们再对模型进行输入套用,就得到了如下的代码
# Initialize the model
x = vgg_16_model(input,training=False)
这样我们就得到了一个被做了输入限制的VGG16模型了
接下来我们需要调用全局最大池化层,使得输入进来的图像进行降分辨率的操作,为什么要这样做呢?
原因有二:
- 第一,我们通过使用最大赤化降低输入图像的画质的目的,是为了减轻循环神经网络的网络负载压力,从而进一步的提升网络性能
- 第二,最大池化的第二个好处就是当目标输入的分辨率特殊的低的时候,依旧不影响模型的判断力。
综上,我们得到了如下的代码
# Max Pooling
from tensorflow.compat.v1.keras.layers import GlobalMaxPool2D
x = GlobalMaxPool2D()(x)
值得一提的是,如果你使用的是TensorFlow1.x版本你就不需要像我这样从compact.v1.keras.layers中导入GlobalMaxPooling2D()这个函数啦,直接在keras.layer中调用即可
另外为了防止模型出现明显的过拟合现象(虽然说在VGG16这种很强大的模型不太可能),但是为了防止意外的发生,我们还是需要Dropput()层来按比例限制我们使用到的神经元数量。
from tensorflow.compat.v1.keras.layers import Dropout
x = Dropout(0.5)(x)
最后我们只需要添加一个Dense()层来接收前面多重网络训练的最终数据即可啦,那么神经元数量就是3,因为石头剪刀布嘛,对吧?
激活函数还是老规矩使用softmax
# Add Final Receivers,Since we need to recognize which is rock,which is papaer,which is scissors
# So our num_classes should be 3
# Also we need to avoiding overfitting,so we use dropout to reduce that as possible
# Create Model
model = keras.Model(inputs=input, outputs=outputs)
使用model.summary()来看一下我们的新网络长什么样子吧
# Summary of the model
model.summary()`
Model: "model_5"
_________________________________________________________________
 Layer (type)                Output Shape              Param #
=================================================================
 input_8 (InputLayer)        [(None, 224, 224, 3)]     0

 vgg16 (Functional)          (None, 7, 7, 512)         14714688

 global_max_pooling2d_4 (Glo  (None, 512)              0
 balMaxPooling2D)

 dropout_3 (Dropout)         (None, 512)               0

 dense_5 (Dense)             (None, 3)                 1539

=================================================================
Total params: 14,716,227
Trainable params: 1,539
Non-trainable params: 14,714,688
_________________________________________________________________
使用model.compile()来编译我们的模型,因为我们这里的类,即num_classes大于2了,因此我们的损失函数和准确率函数不能使用基于二元分类(Binary Classification)的
因此在编译模型时,我们损失函数使用类别化交叉熵损失计算法(categorical_crossentropy),准确度函数则使用accuracy(精度)作为衡量标准。
# Compile the model
model.compile(loss='categorical_crossentropy', metrics=['accuracy'])
数据生成
我使用了keras下的图像预处理模块ImageDataGenerator来进行数据生成
# Generate the data
from tensorflow.keras.preprocessing.image import ImageDataGenerator
gener = ImageDataGenerator(
    rotation_range=10, # 设置迭代旋转角度
    featurewise_center=True,
    samplewise_center=True,
    zoom_range=0.1, # 设置缩放比为0.1
    horizontal_flip=True, # 设置水平翻转为True,这么做是为了让出手动作无论是朝上超前,还是朝下朝后,都能被识别出来
    vertical_flip=False,# 垂直翻转设为False,除非你想自己自己的手腕子掰断
    width_shift_range=10, # 长宽位移量均设置为10
    height_shift_range=10,
)
初始化好生成器后,我们可以开始进行训练集和验证集的生成了
# Generating Training Data and Validating Data
train_data = gener.flow_from_directory(
    './data/train',
    target_size=(224, 224),
    batch_size=32,
    class_mode='categorical')
valid_data = gener.flow_from_directory(
    './data/valid',
    target_size=(224, 224),
    batch_size=32,
    class_mode='categorical'
    #这里我们需要将其设置为categorical来让生成器为我们自动进行分类)
Found 2520 images belonging to 3 classes.
Found 372 images belonging to 3 classes.
可以看到,在训练集中招待了2520张图片,在验证集中找到了372张图片。
那么剩下的就是训练我们的神经网络啦,因为我们的ImageDataGenerator类下带着很多的属性参数,例如samples(样本数量)和batch_size大小
因此我们分别设置训练集和验证集的步长设置为:采样数量 / batch_size
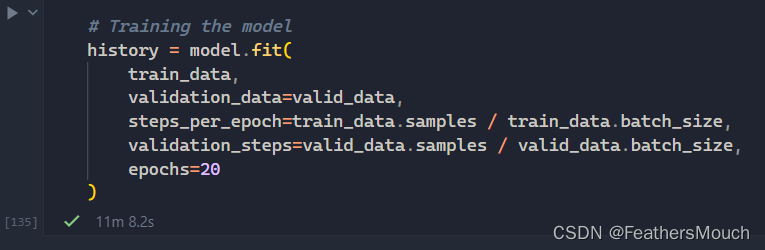
# Training the model
history = model.fit(
    train_data,
    validation_data=valid_data,
    steps_per_epoch=train_data.samples / train_data.batch_size,
    validation_steps=valid_data.samples / valid_data.batch_size,
    epochs=20
)
剩下的就是静默等待了,可是点下开始运行按钮的一刹那,我的心就凉了半截了,为啥
2022-07-16 11:49:37.148709:W tensorfLow/core/common_runtime/bfc_allocator.cc:290] Allocator(GPU_@_bfc) ran out of memory trying to allocate 3.@4GiB with freed_by_count=0. The caller indicates that this is not a failure, but this may mean that there could be performance gains if more memory were available.
所以,神说:孩子,加钱加到九万八,八路A100抱回家啊
看来这是妥妥的官方想让我换显卡了啊

另外我的RTX 2060也不负众望,最终用时11分8秒2完成了20次迭代的训练
那么最终这个模型的表现如何呢?来,走图
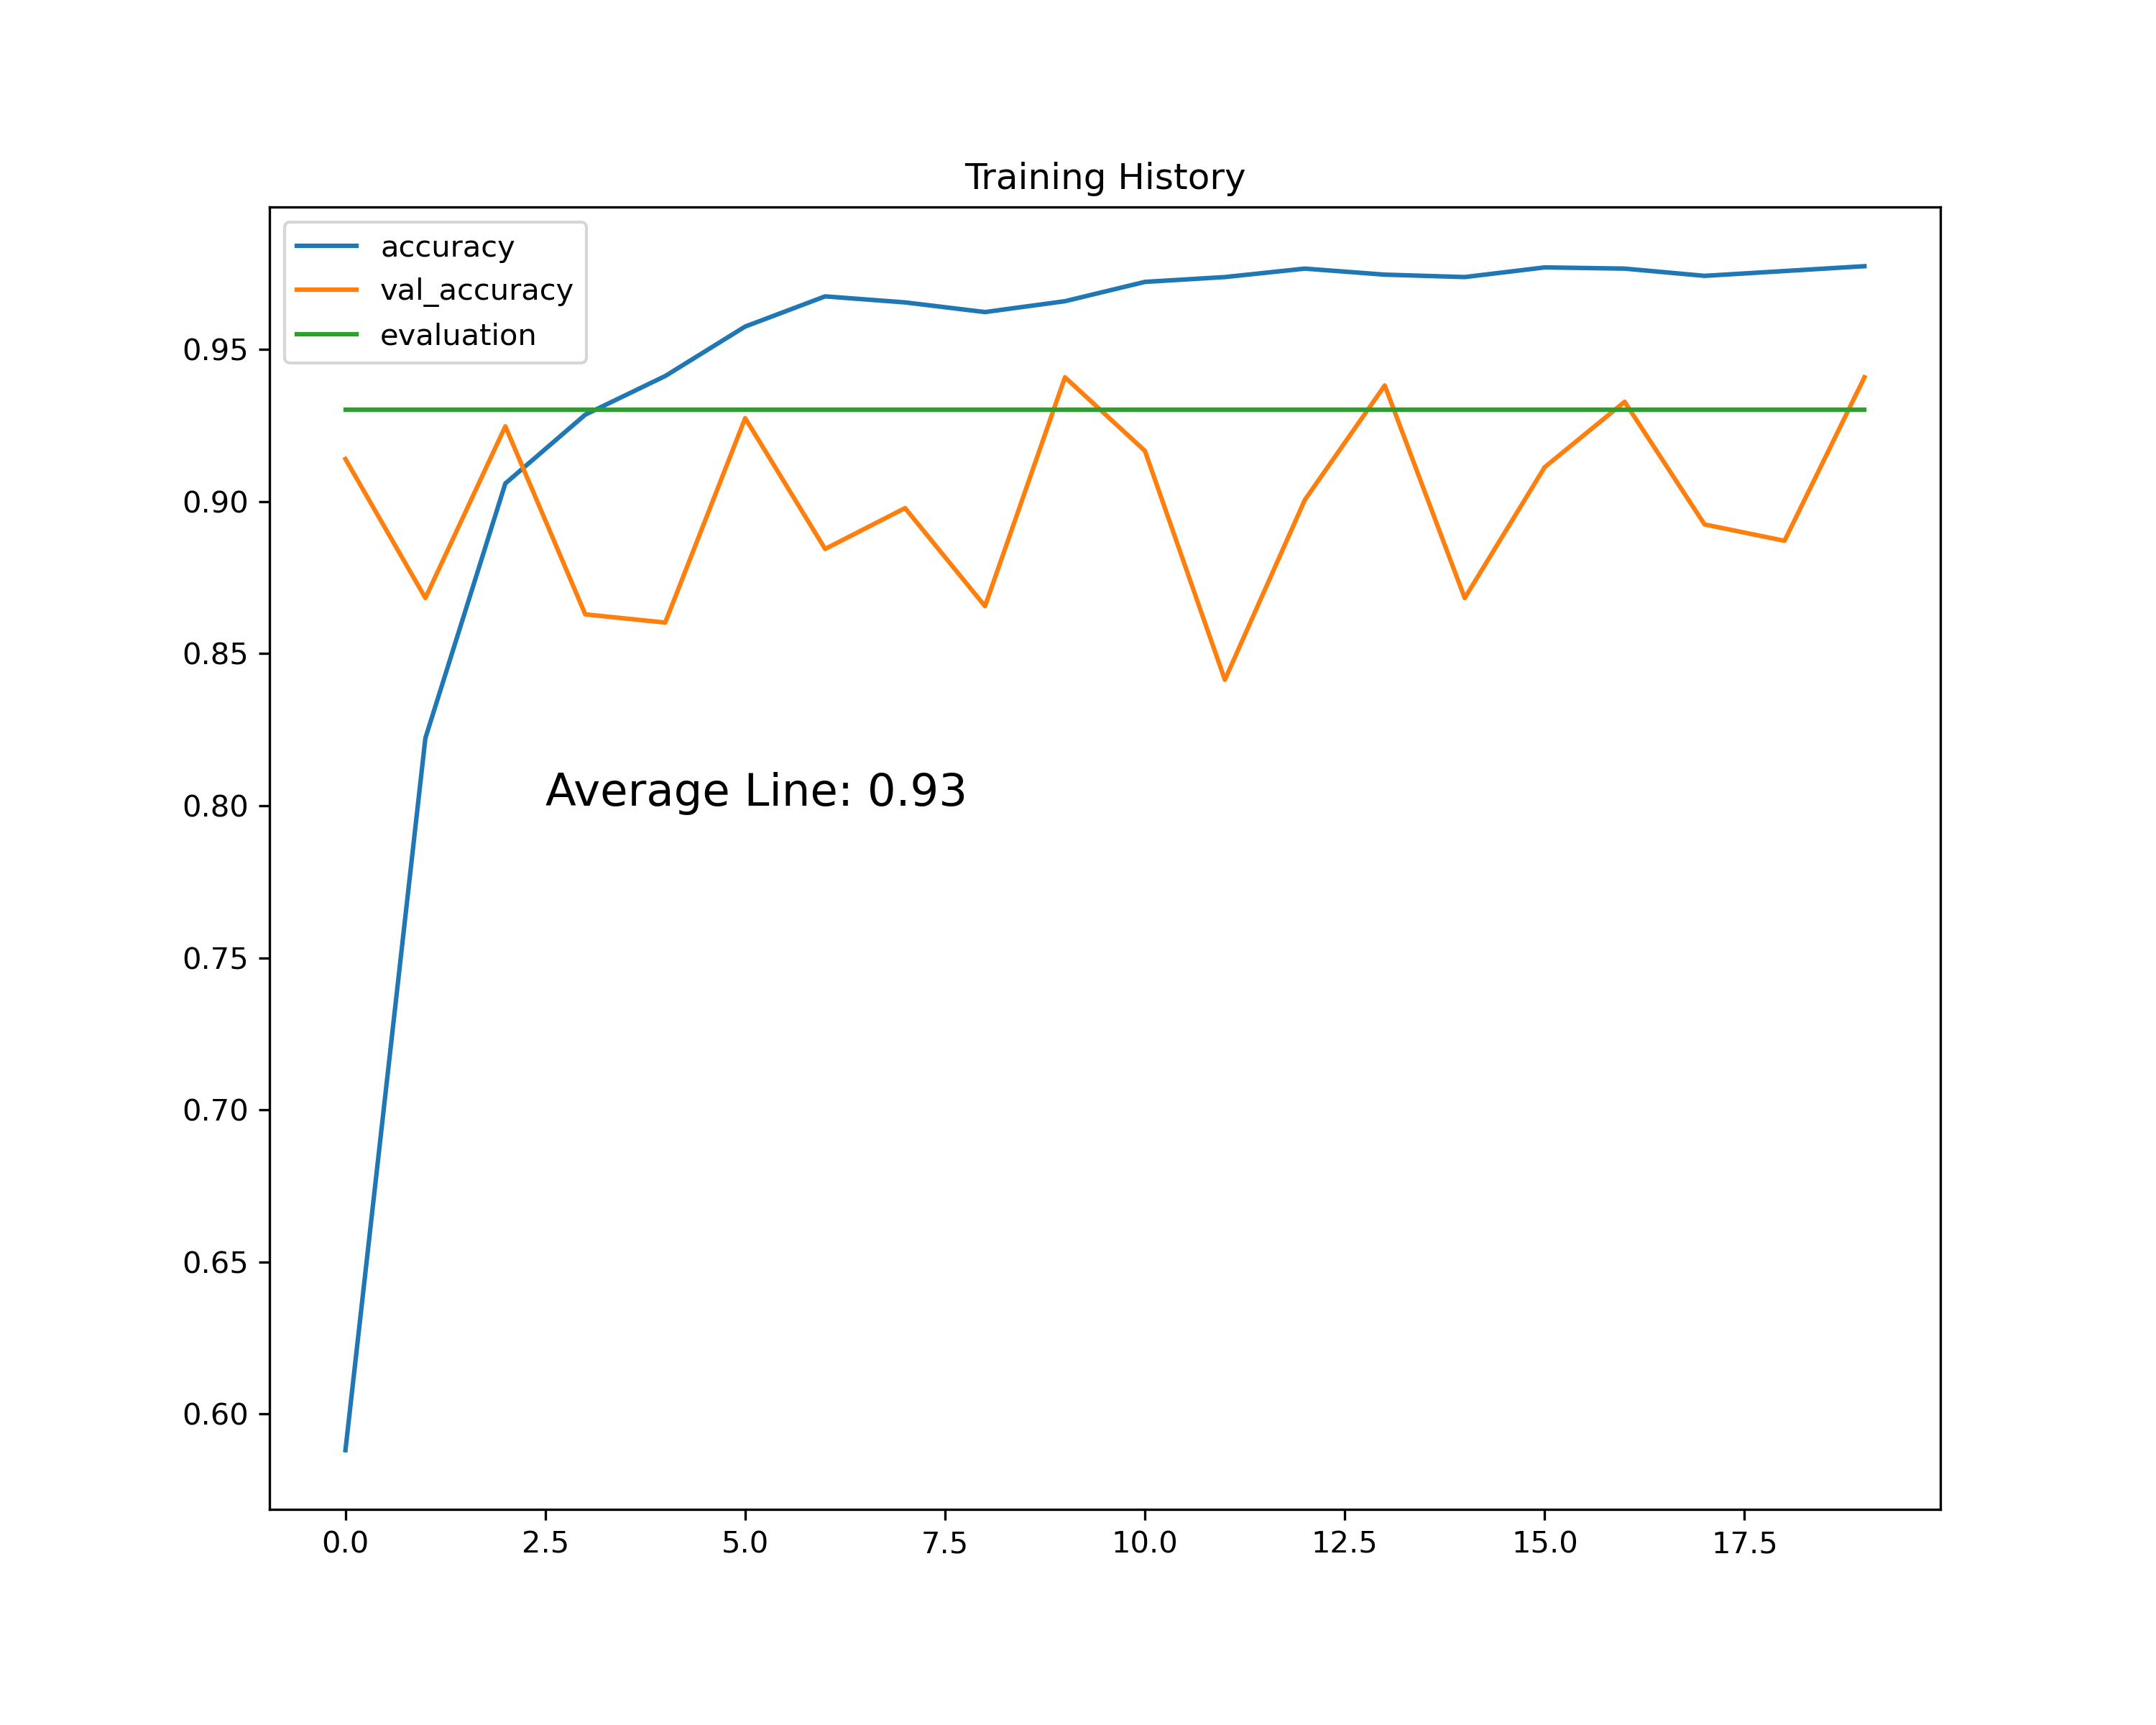
可以看到,在训练集上,网络的性能一直表现和稳定,超越了model.evluate()给出的0.93基线
可是在验证集上,模型的分数曲线看起来抖动很大,去程维持0.85-0.93这个区间抖动。
预测与验证
那么模型的真实性能究竟怎么样,我们分别挑选一张石头剪刀布的图片来验证一下
# Create dict
dict = {0:'paper',1:'rock',2:'scissors'}
# Try to predict the result
import matplotlib.image as mpimg
from tensorflow.compat.v1.keras.preprocessing import image
from tensorflow.keras.applications.imagenet_utils import preprocess_input
def show_image(img_path):
    image = mpimg.imread(img_path)
    plt.imshow(image)
def predict(img_path):
    show_image(img_path)
    # 限制输入大小为(244,244)
    img = image.load_img(img_path, target_size=(224, 224))
    img = image.img_to_array(img)
    img = img.reshape((1,224, 224,3)) # 重塑图像矩阵
    img = preprocess_input(img)
    # 使用np.argmax()函数获得预测下标并带回字典中
    prediction = model.predict(img).argmax()
    return f"This is {dict[prediction]}"
实际的结果如下


可以看到,模型很完美的推理除了输入图片中人物摆出的手势
结语
可以看到,VGG16是一个非常强大的深度神经网络模型,在图像识别领域广为使用,但是也正因为模型涉及到太多的交叉层,因此训练起来的时长也会很长,所以这也告诫我们:当你没有充足的计算能力时,不要冒死训练超大神经网络,否则就会出现:加钱加到九万八,四路泰坦抱回家的笑话了。


 5588
5588


 被折叠的 条评论
为什么被折叠?
被折叠的 条评论
为什么被折叠?
 到【灌水乐园】发言


