


目录:
(1)secured注解进行角色控制
(2)PreAuthorize注解 PostAutothorize
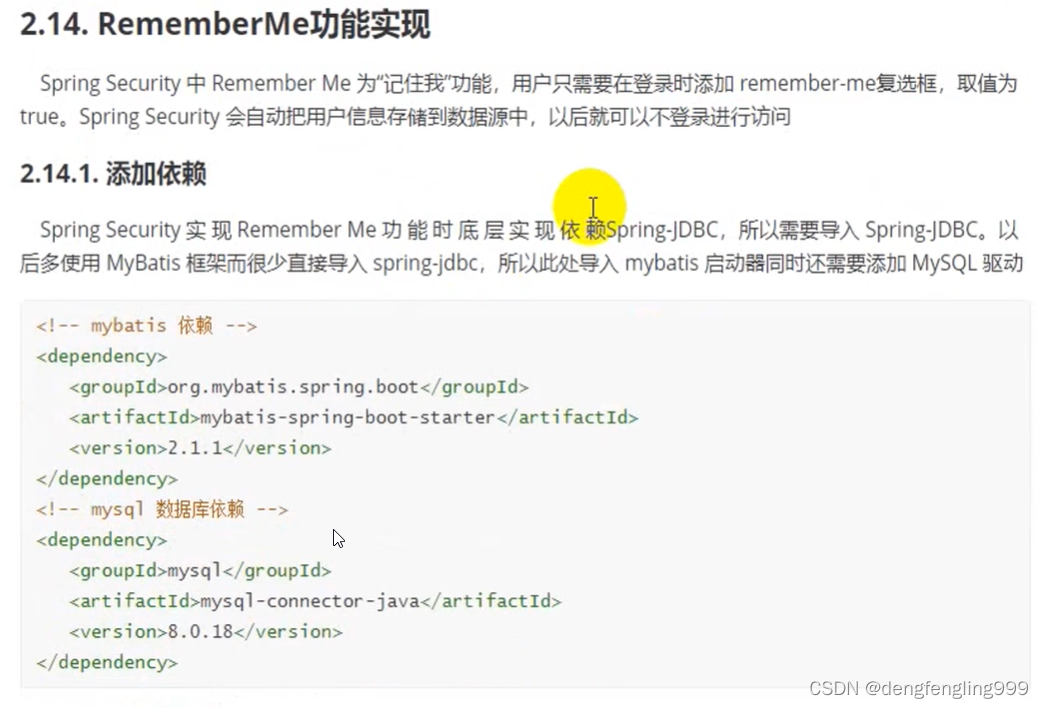
(3)RememberME功能
(4)在Thymeleaf中获取属性值
(5)Thymeleaf中进行权限的判断
(6)退出登录
(7)SpringSecurity中的csrf
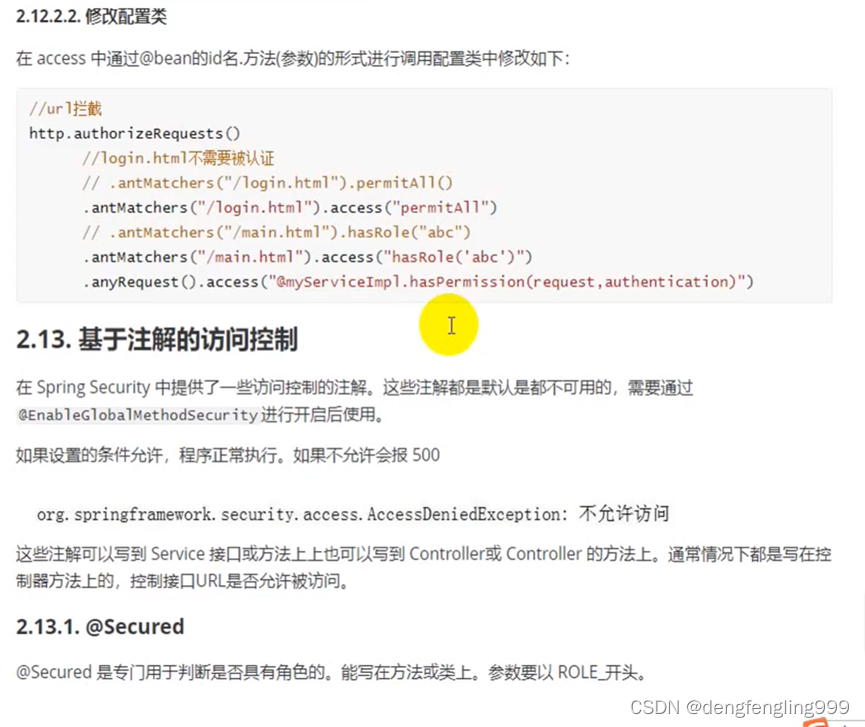
(1)secured注解进行角色控制
原来的权限判断是在SecurityConfig配置类中判断的,现在可以使用注解来判断
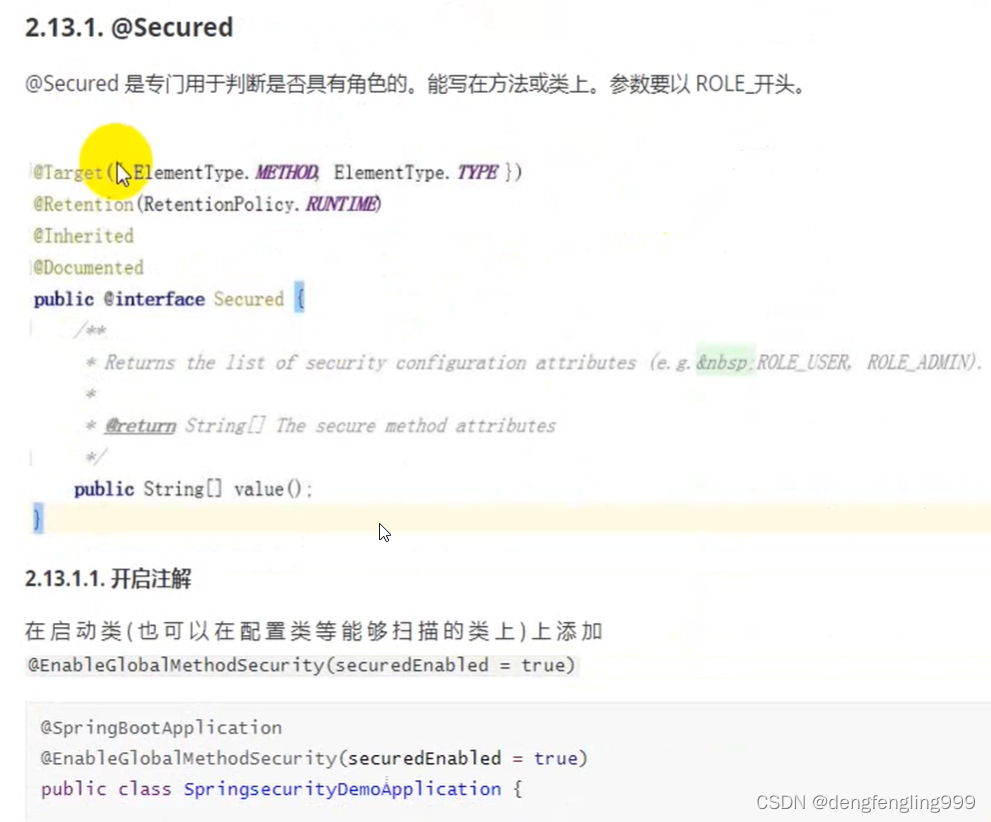
主启动类:加上注解开启SpringSecurity权限注解,因为SpringSecurity的权限注解默认是关闭的
package com.xxxx.springsecuritydemo;

import org.springframework.boot.SpringApplication;
import org.springframework.boot.autoconfigure.SpringBootApplication;
import org.springframework.security.config.annotation.method.configuration.EnableGlobalMethodSecurity;

@SpringBootApplication
@EnableGlobalMethodSecurity(securedEnabled = true)
public class SpringsecuritydemoApplication {

    public static void main(String[] args) {
        SpringApplication.run(SpringsecuritydemoApplication.class, args);
    }

}
package com.xxxx.springsecuritydemo.service;
import org.springframework.beans.factory.annotation.Autowired;
import org.springframework.security.core.authority.AuthorityUtils;
import org.springframework.security.core.userdetails.User;
import org.springframework.security.core.userdetails.UserDetails;
import org.springframework.security.core.userdetails.UserDetailsService;
import org.springframework.security.core.userdetails.UsernameNotFoundException;
import org.springframework.security.crypto.password.PasswordEncoder;
import org.springframework.stereotype.Service;
@Service
public class UserDetailsServiceImpl implements UserDetailsService {
@Autowired
private PasswordEncoder pw;
@Override
public UserDetails loadUserByUsername(String username) throws UsernameNotFoundException {
//1.查询数据库判断用户名是否存在,如果不存在就会抛出UsernameNotFoundException异常
//这里进行模拟,用户名为admin
if (!"admin".equals(username)) {
throw new UsernameNotFoundException("用户名不存在");
}
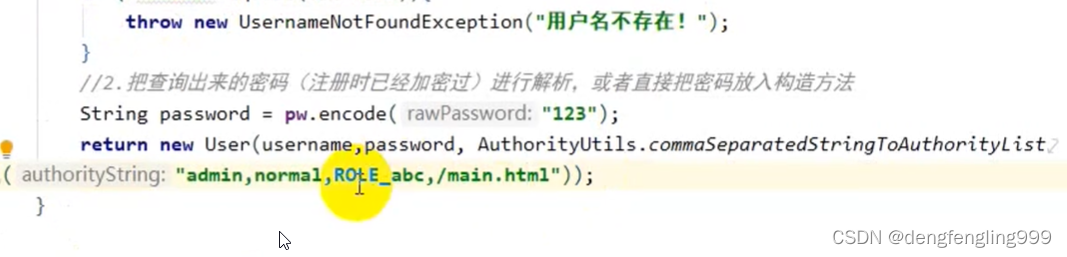
//2.//如果存在,把查询出来的密码(注册时已经经过加密) 进行解析,或者直接把密码放到构造方法
String password=pw.encode("123");
return new User(username,password, AuthorityUtils.commaSeparatedStringToAuthorityList("admin,normall,ROLE_abc,/main.html"));
}
}
LoginController:方法上加注解要和 上面的角色相对应:这里ROLE_ 是不能少的
package com.xxxx.springsecuritydemo.controller;
import org.springframework.security.access.annotation.Secured;
import org.springframework.stereotype.Controller;
import org.springframework.web.bind.annotation.GetMapping;
import org.springframework.web.bind.annotation.RequestMapping;
import org.springframework.web.bind.annotation.ResponseBody;
@Controller
public class LoginController {
/*@RequestMapping("login")
public String login(){
System.out.println("执行登录方法");
return "redirect:main.html";
}*/
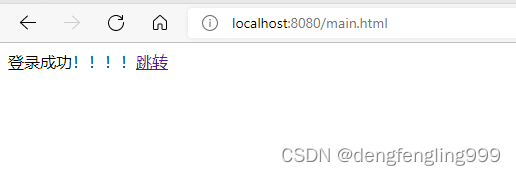
//页面登录成功跳转
@Secured("ROLE_abc") //角色注解
@RequestMapping("toMain")
public String toMain(){
return "redirect:main.html";
}
//跳转登录失败页面
@RequestMapping("toError")
public String toError(){
return "redirect:error.html";
}
@GetMapping("demo")
@ResponseBody
public String demo(){
return "demo";
}
}
配置类的角色判断权限是注释掉的,不使用配置类来进行权限判断,使用注解方式
package com.xxxx.springsecuritydemo.config;

import com.xxxx.springsecuritydemo.handle.MyAccessDeniedHandler;
import com.xxxx.springsecuritydemo.handle.MyAuthenticationFailureHandler;
import com.xxxx.springsecuritydemo.handle.MyAuthenticationSucessHandler;
import org.springframework.beans.factory.annotation.Autowired;
import org.springframework.context.annotation.Bean;
import org.springframework.context.annotation.Configuration;
import org.springframework.http.HttpMethod;
import org.springframework.security.config.annotation.web.builders.HttpSecurity;
import org.springframework.security.config.annotation.web.configuration.WebSecurityConfigurerAdapter;
import org.springframework.security.crypto.bcrypt.BCryptPasswordEncoder;
import org.springframework.security.crypto.password.PasswordEncoder;

@Configuration
public class SecurityConfig extends WebSecurityConfigurerAdapter {
    //引用403处理这个类
    @Autowired
    private MyAccessDeniedHandler myAccessDeniedHandler;

    //自定义登录页面,不使用自带的
    @Override
    protected void configure(HttpSecurity http) throws Exception {

        //表单提交
        http.formLogin()
                //和Login中input的属性相对应
                .usernameParameter("username1")
                .passwordParameter("password1")
                //当发现是 /login是认为是登录,必须和表单提交的地址一样,去执行UserDetailsServiceImpl登录逻辑
                .loginProcessingUrl("/login")
                //自定义登录页面
                .loginPage("/login.html")
                //登录成功之后跳转页面,必须是Post请求
                .successForwardUrl("/toMain")
                //登录成功后的处理器,不能和sucessForwardUrl共存
                //.successHandler(new MyAuthenticationSucessHandler("/main.html"))

                //登录失败跳转页面,Post请求
                .failureForwardUrl("/toError");
                //登录失败后的处理器,不能和failureForwardUrl共存
                //.failureHandler(new MyAuthenticationFailureHandler("/error.html"));

        //授权认证 相当于拦截器一样
        http.authorizeRequests()
                //error.html不需要被认证
                .antMatchers("/error.html").permitAll()
                //login.html不需要被认证
                .antMatchers("/login.html").permitAll()
                //resources目录下的静态资源
                .antMatchers("/static/js/**", "/static/css/**", "/static/images/**").permitAll()

                //regexMatchers放行的使用
                //.regexMatchers(".+[.]png").permitAll()
                //.regexMatchers(HttpMethod.GET,"/demo").permitAll()

                //.mvcMatchers("/demo").servletPath("/xxxx").permitAll()
                //如果不习惯mvcMatchers还可以用antMatchers设置等效
                .antMatchers("/xxxx/demo").permitAll()
                //任何目录下的png图片
                //.antMatchers("/**/*.png").permitAll()


                //判断用户是否有admin权限
                //.antMatchers("/main1.html").hasAuthority("admin")
                //可以设置这个页面,多个权限去访问
                //.antMatchers("/main1.html").hasAnyAuthority("admin","normall")

                //角色判断
                //.antMatchers("/main1.html").hasRole("abc")
                //判断有多个角色权限
                //.antMatchers("/main1.html").hasAnyRole("abc,abC")

                //IP地址判断
                //.antMatchers("/main1.html").hasIpAddress("127.0.0.1")

                //所有请求都必须被认证,必须登录之后能被访问
                .anyRequest().authenticated();
                //自定义访问权限
                //.anyRequest().access("@myServiceImpl.hasPermission(request,authentication)");

        //关闭csrf防护
        http.csrf().disable();


        //异常处理
        http.exceptionHandling()
                .accessDeniedHandler(myAccessDeniedHandler);
    }

    //创建PasswordEncoder实例
    @Bean
    public PasswordEncoder getPw(){
        return new BCryptPasswordEncoder();
    }
}
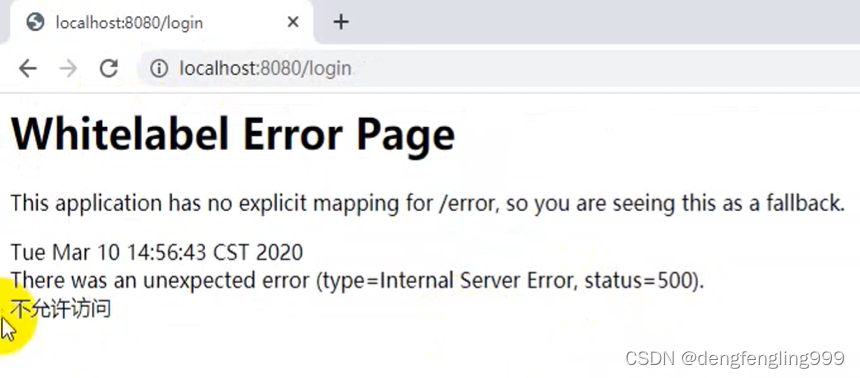
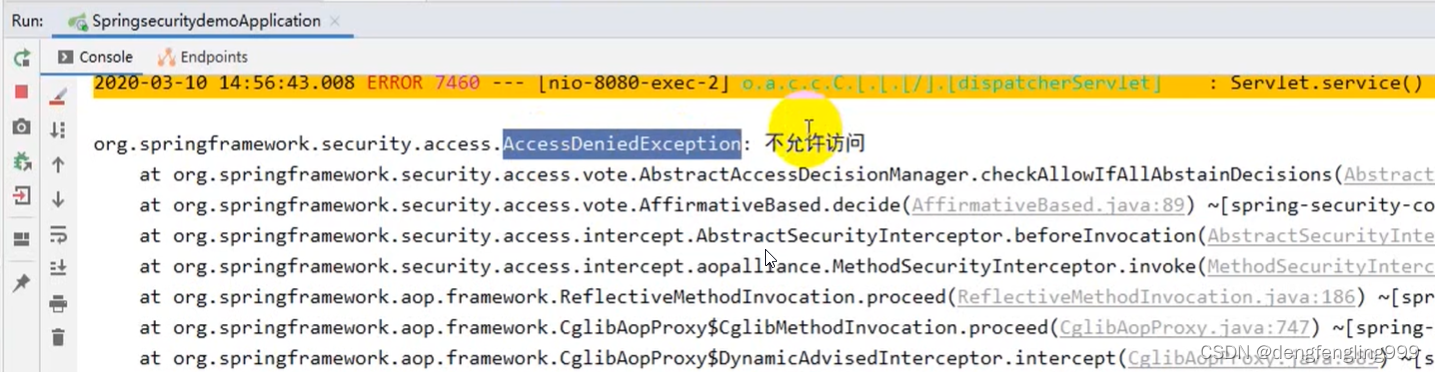
如果角色写的是abc: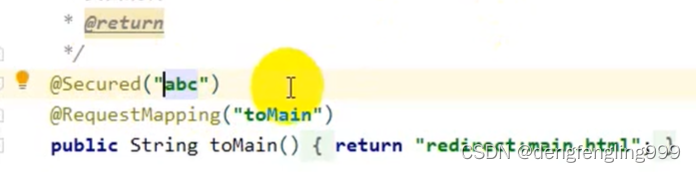
会报500:
(2)PreAuthorize注解 PostAutothorize
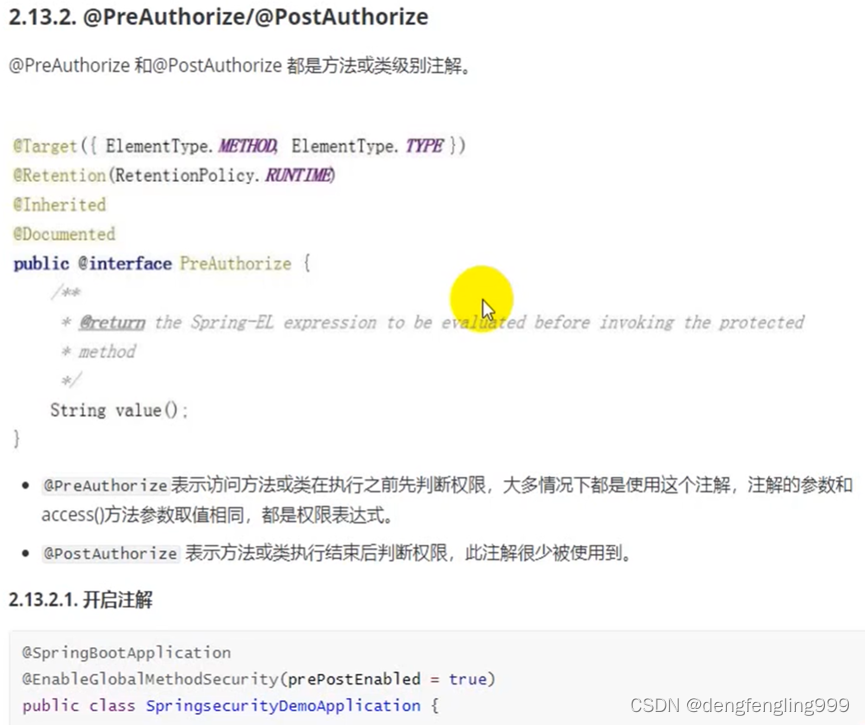
主启动类添加注解:prePostEnabled
package com.xxxx.springsecuritydemo;

import org.springframework.boot.SpringApplication;
import org.springframework.boot.autoconfigure.SpringBootApplication;
import org.springframework.security.config.annotation.method.configuration.EnableGlobalMethodSecurity;

@SpringBootApplication
@EnableGlobalMethodSecurity(securedEnabled = true,prePostEnabled = true)
public class SpringsecuritydemoApplication {

    public static void main(String[] args) {
        SpringApplication.run(SpringsecuritydemoApplication.class, args);
    }

}
LoginControiller:注释掉@Secured注解,使用@PreAuthorize 进行角色判断
package com.xxxx.springsecuritydemo.controller;

import org.springframework.security.access.annotation.Secured;
import org.springframework.security.access.prepost.PreAuthorize;
import org.springframework.stereotype.Controller;
import org.springframework.web.bind.annotation.GetMapping;
import org.springframework.web.bind.annotation.RequestMapping;
import org.springframework.web.bind.annotation.ResponseBody;

@Controller
public class LoginController {

    /*@RequestMapping("login")
    public String login(){
        System.out.println("执行登录方法");
        return "redirect:main.html";
    }*/

    //页面登录成功跳转
    //@Secured("ROLE_abc") //角色注解
    @PreAuthorize("hasRole('abc')") //PreAuthorize参数是权限表达式 hasRole('ROLE_abc')允许ROLE_开头,配置类不允许,区分大小写
    @RequestMapping("toMain")
    public String toMain(){
        return "redirect:main.html";
    }

    //跳转登录失败页面
    @RequestMapping("toError")
    public String toError(){
        return "redirect:error.html";
    }

    @GetMapping("demo")
    @ResponseBody
    public String demo(){
        return "demo";
    }
}
这个注解是在方法或类执行之前判断权限
(3)RememberME功能
配置文件:application.properties
spring.datasource.driver-class-name=com.mysql.cj.jdbc.Driver
spring.datasource.url= jdbc:mysql://localhost:3306/security?useUnicode=true&characterEncoding=UTF-8&serverTimezone=Asia/Shanghai
spring.datasource.username=root
spring.datasource.password=123456

#若出现循环依赖加上没有出现不用
#spring.main.allow-circular-references=true
配置类:SecurityConfig:

package com.xxxx.springsecuritydemo.config;
import com.xxxx.springsecuritydemo.handle.MyAccessDeniedHandler;
import com.xxxx.springsecuritydemo.handle.MyAuthenticationFailureHandler;
import com.xxxx.springsecuritydemo.handle.MyAuthenticationSucessHandler;
import com.xxxx.springsecuritydemo.service.UserDetailsServiceImpl;
import org.springframework.beans.factory.annotation.Autowired;
import org.springframework.context.annotation.Bean;
import org.springframework.context.annotation.Configuration;
import org.springframework.http.HttpMethod;
import org.springframework.security.config.annotation.web.builders.HttpSecurity;
import org.springframework.security.config.annotation.web.configuration.WebSecurityConfigurerAdapter;
import org.springframework.security.crypto.bcrypt.BCryptPasswordEncoder;
import org.springframework.security.crypto.password.PasswordEncoder;
import org.springframework.security.web.authentication.rememberme.JdbcTokenRepositoryImpl;
import org.springframework.security.web.authentication.rememberme.PersistentTokenRepository;
import javax.sql.DataSource;
@Configuration
public class SecurityConfig extends WebSecurityConfigurerAdapter {
//引用403处理这个类
@Autowired
private MyAccessDeniedHandler myAccessDeniedHandler;
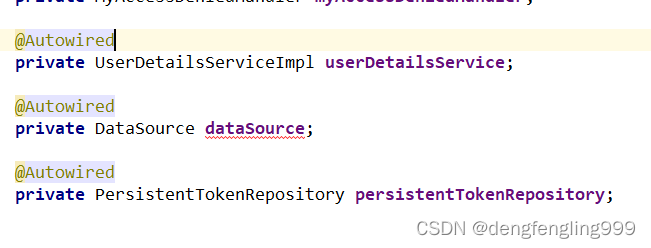
@Autowired
private UserDetailsServiceImpl userDetailsService;
@Autowired
private DataSource dataSource;
@Autowired
private PersistentTokenRepository persistentTokenRepository;
//自定义登录页面,不使用自带的
@Override
protected void configure(HttpSecurity http) throws Exception {
//表单提交
http.formLogin()
//和Login中input的属性相对应
.usernameParameter("username1")
.passwordParameter("password1")
//当发现是 /login是认为是登录,必须和表单提交的地址一样,去执行UserDetailsServiceImpl登录逻辑
.loginProcessingUrl("/login")
//自定义登录页面
.loginPage("/login.html")
//登录成功之后跳转页面,必须是Post请求
.successForwardUrl("/toMain")
//登录成功后的处理器,不能和sucessForwardUrl共存
//.successHandler(new MyAuthenticationSucessHandler("/main.html"))
//登录失败跳转页面,Post请求
.failureForwardUrl("/toError");
//登录失败后的处理器,不能和failureForwardUrl共存
//.failureHandler(new MyAuthenticationFailureHandler("/error.html"));
//授权认证 相当于拦截器一样
http.authorizeRequests()
//error.html不需要被认证
.antMatchers("/error.html").permitAll()
//login.html不需要被认证
.antMatchers("/login.html").permitAll()
//resources目录下的静态资源
.antMatchers("/static/js/**", "/static/css/**", "/static/images/**").permitAll()
//regexMatchers放行的使用
//.regexMatchers(".+[.]png").permitAll()
//.regexMatchers(HttpMethod.GET,"/demo").permitAll()
//.mvcMatchers("/demo").servletPath("/xxxx").permitAll()
//如果不习惯mvcMatchers还可以用antMatchers设置等效
.antMatchers("/xxxx/demo").permitAll()
//任何目录下的png图片
//.antMatchers("/**/*.png").permitAll()
//判断用户是否有admin权限
//.antMatchers("/main1.html").hasAuthority("admin")
//可以设置这个页面,多个权限去访问
//.antMatchers("/main1.html").hasAnyAuthority("admin","normall")
//角色判断
//.antMatchers("/main1.html").hasRole("abc")
//判断有多个角色权限
//.antMatchers("/main1.html").hasAnyRole("abc,abC")
//IP地址判断
//.antMatchers("/main1.html").hasIpAddress("127.0.0.1")
//所有请求都必须被认证,必须登录之后能被访问
.anyRequest().authenticated();
//自定义访问权限
//.anyRequest().access("@myServiceImpl.hasPermission(request,authentication)");
//关闭csrf防护
http.csrf().disable();
//异常处理
http.exceptionHandling()
.accessDeniedHandler(myAccessDeniedHandler);
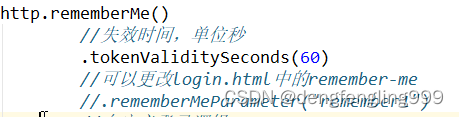
//记住我
http.rememberMe()
//失效时间,单位秒
.tokenValiditySeconds(60)
//可以更改login.html中的remember-me
//.rememberMeParameter("remember1")
//自定义登录逻辑
.userDetailsService(userDetailsService)
//持久层对象
.tokenRepository(persistentTokenRepository);
}
//创建PasswordEncoder实例
@Bean
public PasswordEncoder getPw(){
return new BCryptPasswordEncoder();
}
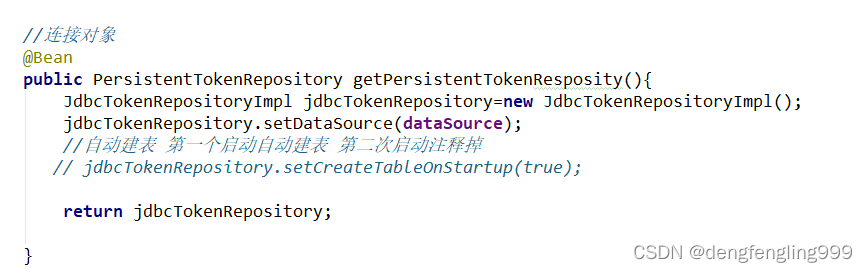
//连接对象
@Bean
public PersistentTokenRepository getPersistentTokenResposity(){
JdbcTokenRepositoryImpl jdbcTokenRepository=new JdbcTokenRepositoryImpl();
jdbcTokenRepository.setDataSource(dataSource);
//自动建表 第一个启动自动建表 第二次启动注释掉
// jdbcTokenRepository.setCreateTableOnStartup(true);
return jdbcTokenRepository;
}
}
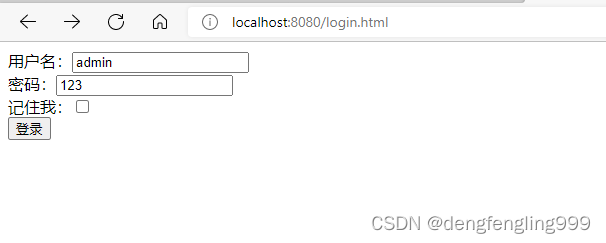
Login.html:添加checkbox按钮
<!DOCTYPE html>
<html lang="en">
<head>
<meta charset="UTF-8">
<title>Title</title>
</head>
<body>
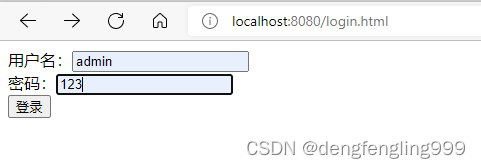
<form action="/login" method="post">
用户名:<input type="text" name="username1"/><br>
密码:<input type="text" name="password1"/><br>
记住我:<input type="checkbox" name="remember-me" value="true"><br>
<input type="submit" value="登录"/>
</form>
</body>
</html>启动主启动类:会帮助我们生成一张表
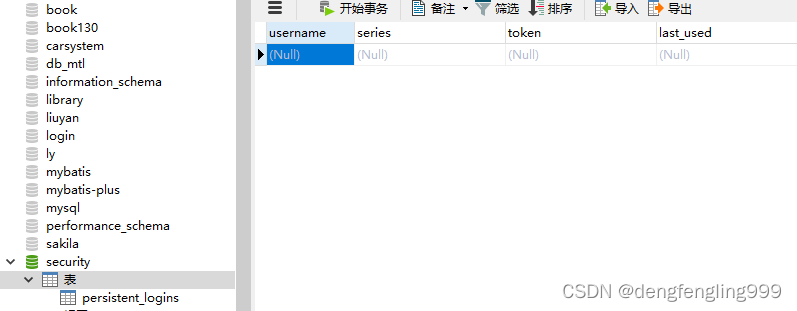
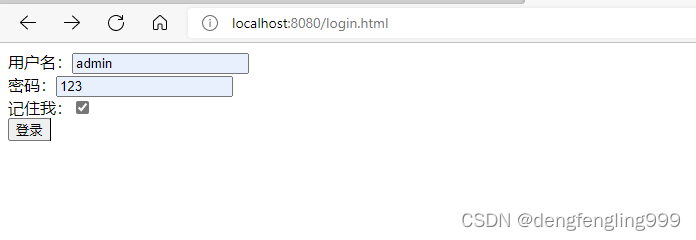
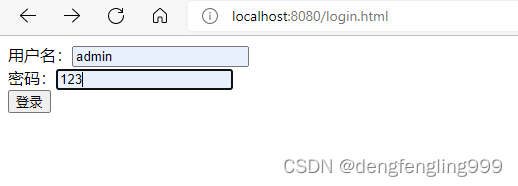
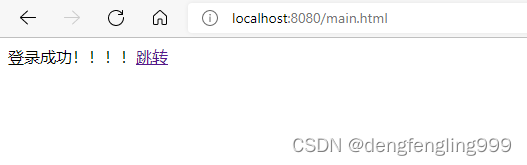
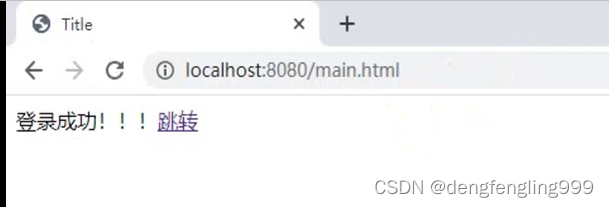
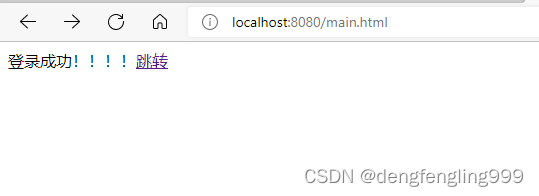
点击登录之后:
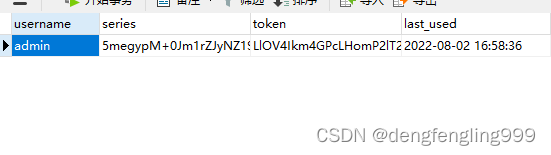
关闭浏览器输入:main.html就可以进来了,不用在进行登录,这就是记住我的功能
他默认的失效时间为两周,我们可以自定义失效时间
(4)在Thymeleaf中获取属性值
什么是Thymeleaf?
Thymeleaf是一个现代服务器端Java模板引擎,适用于Web和独立环境,能够处理HTML,XML,JavaScript,CSS甚至纯文本。
Thymeleaf的主要目标是提供一种优雅且高度可维护的模板创建方式。为实现这一目标,它以自然模板的概念为基础,将其逻辑注入模板文件,其方式不会影响模板被用作设计原型。这改善了设计沟通,缩小了设计和开发团队之间的差距。
Thymeleaf也从一开始就设计了Web标准-特别是HTML5-允许您创建完全验证的模板,如果您需要的话。
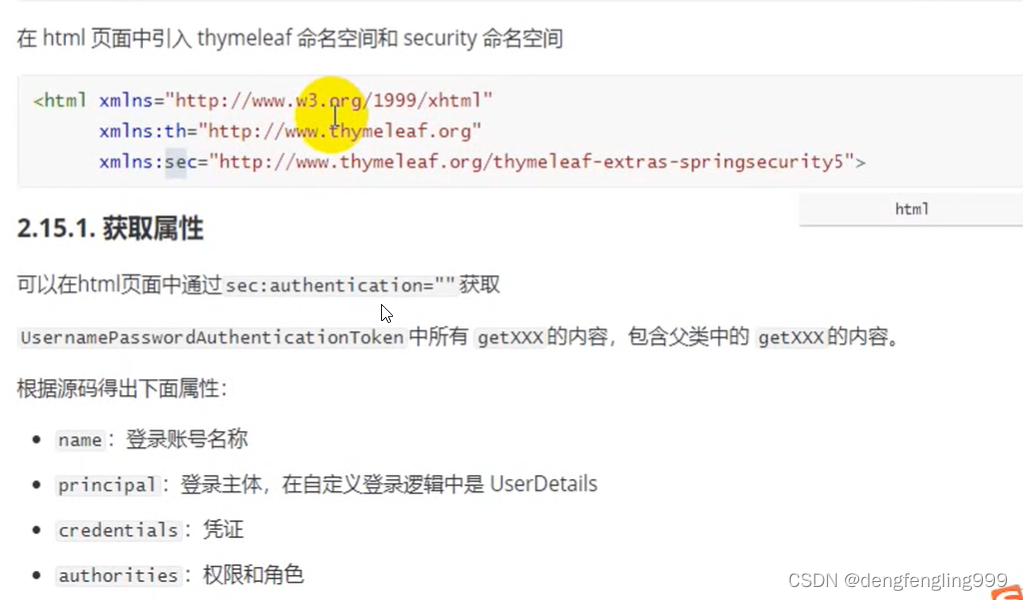

demo.html:
<!DOCTYPE html>
<html xmlns="http://www.w3.org/1999/xhtml"
xmlns:sec="http://www.thymeleaf.org/thymeleaf-extras-springsecurity5">
<head>
<meta charset="UTF-8">
<title>Title</title>
</head>
<body>
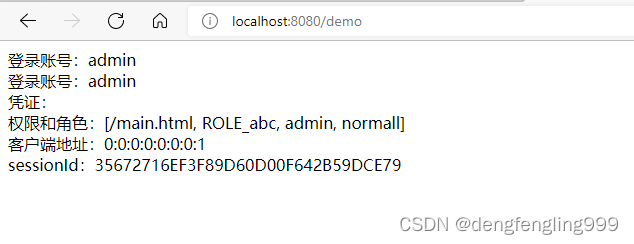
登录账号:<span sec:authentication="name"></span><br>
登录账号:<span sec:authentication="principal.username"></span><br>
凭证:<span sec:authentication="credentials"></span><br>
权限和角色:<span sec:authentication="authorities"></span><br>
客户端地址:<span sec:authentication="details.remoteAddress"></span><br>
sessionId:<span sec:authentication="details.sessionId"></span><br>
</body>
</html>LoginController:加入访问demo的方法:
package com.xxxx.springsecuritydemo.controller;

import org.springframework.security.access.annotation.Secured;
import org.springframework.security.access.prepost.PreAuthorize;
import org.springframework.stereotype.Controller;
import org.springframework.web.bind.annotation.GetMapping;
import org.springframework.web.bind.annotation.RequestMapping;
import org.springframework.web.bind.annotation.ResponseBody;

@Controller
public class LoginController {

    /*@RequestMapping("login")
    public String login(){
        System.out.println("执行登录方法");
        return "redirect:main.html";
    }*/

    //页面登录成功跳转
    //@Secured("ROLE_abc") //角色注解
    @PreAuthorize("hasRole('abc')") //PreAuthorize参数是权限表达式 hasRole('ROLE_abc')允许ROLE_开头,配置类不允许,区分大小写
    @RequestMapping("toMain")
    public String toMain(){
        return "redirect:main.html";
    }

    //跳转登录失败页面
    @RequestMapping("toError")
    public String toError(){
        return "redirect:error.html";
    }

    //Thymeleaf页面跳转
    @RequestMapping("demo")
    public String demo(){
        return "demo";
    }
}
运行项目:
在访问demo:
(5)Thymeleaf中进行权限的判断
Thymeleaf除了可以获取SpringSecurity的一些属性,还可以进行权限的判断
在自定义逻辑类中添加权限:
package com.xxxx.springsecuritydemo.service;

import org.springframework.beans.factory.annotation.Autowired;
import org.springframework.security.core.authority.AuthorityUtils;
import org.springframework.security.core.userdetails.User;
import org.springframework.security.core.userdetails.UserDetails;
import org.springframework.security.core.userdetails.UserDetailsService;
import org.springframework.security.core.userdetails.UsernameNotFoundException;
import org.springframework.security.crypto.password.PasswordEncoder;
import org.springframework.stereotype.Service;

@Service
public class UserDetailsServiceImpl implements UserDetailsService {
    @Autowired
    private PasswordEncoder pw;

    @Override
    public UserDetails loadUserByUsername(String username) throws UsernameNotFoundException {

        //1.查询数据库判断用户名是否存在,如果不存在就会抛出UsernameNotFoundException异常

        //这里进行模拟,用户名为admin
        if (!"admin".equals(username)) {
            throw new UsernameNotFoundException("用户名不存在");
        }
        //2.//如果存在,把查询出来的密码(注册时已经经过加密) 进行解析,或者直接把密码放到构造方法

        String password=pw.encode("123");
        return new User(username,password, AuthorityUtils.commaSeparatedStringToAuthorityList("admin,normall,ROLE_abc," +
                "/main.html,/insert,/delete"));
    }
}
demo.htmll:
<!DOCTYPE html>
<html xmlns="http://www.w3.org/1999/xhtml"
      xmlns:sec="http://www.thymeleaf.org/thymeleaf-extras-springsecurity5">
<head>
    <meta charset="UTF-8">
    <title>Title</title>
</head>
<body>
登录账号:<span sec:authentication="name"></span><br>
登录账号:<span sec:authentication="principal.username"></span><br>
凭证:<span sec:authentication="credentials"></span><br>
权限和角色:<span sec:authentication="authorities"></span><br>
客户端地址:<span sec:authentication="details.remoteAddress"></span><br>
sessionId:<span sec:authentication="details.sessionId"></span><br>


<br>
通过权限判断:
<button sec:authorize="hasAuthority('/insert')">新增</button>
<button sec:authorize="hasAuthority('/delete')">删除</button>
<button sec:authorize="hasAuthority('/update')">修改</button>
<button sec:authorize="hasAuthority('/select')">查看</button>
<br>
通过角色判断:
<button sec:authorize="hasRole('abc')">新增</button>
<button sec:authorize="hasRole('abc')">删除</button>
<button sec:authorize="hasRole('abc')">修改</button>
<button sec:authorize="hasRole('abc')">查看</button>

</body>
</html>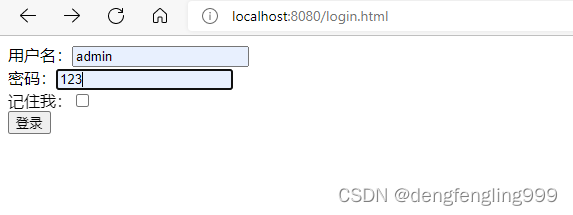
在访问demo:
发现登录的用户有delete、insert权限,新增删除按钮全都显示出来
登录用户有abc角色,所以按钮全部显示
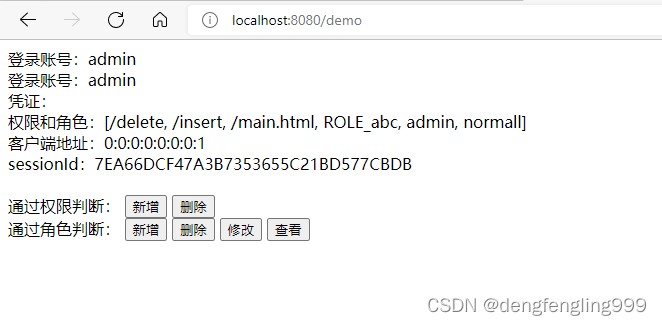
实际项目中有很多种实现的方式,这只是一种,通过这种实现方式,我们可以控制,那些按钮被哪些权限,哪些角色可以去使用,这就是Thymeleaf通过SpringSecurity通过权限的判断
(6)退出登录
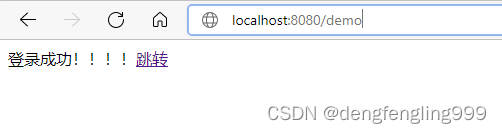
Login.html:添加a连接
<!DOCTYPE html>
<html lang="en">
<head>
<meta charset="UTF-8">
<title>Title</title>
</head>
<body>
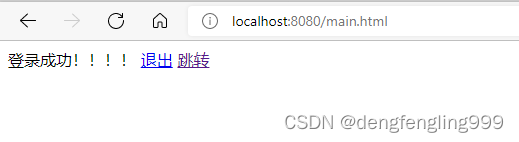
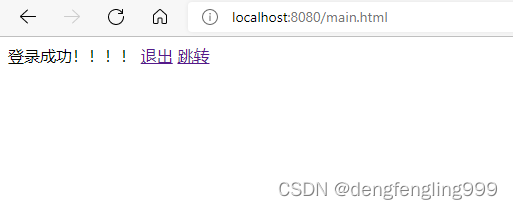
登录成功!!!!
<a href="/logout">退出</a>
<a href="/main1.html">跳转</a>
</body>
</html>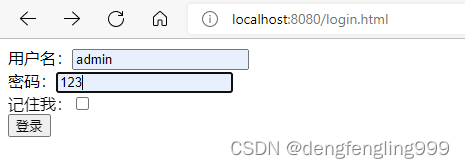
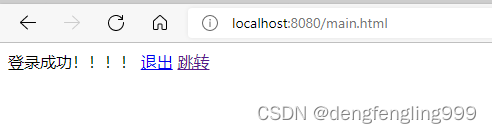
点击退出:退出到登录页面后,地址栏会带一个logout的参数
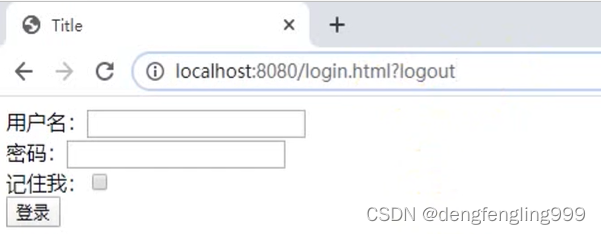
如果不想带logout的参数需要在配置类中进行设置:

package com.xxxx.springsecuritydemo.config;

import com.xxxx.springsecuritydemo.handle.MyAccessDeniedHandler;
import com.xxxx.springsecuritydemo.handle.MyAuthenticationFailureHandler;
import com.xxxx.springsecuritydemo.handle.MyAuthenticationSucessHandler;
import com.xxxx.springsecuritydemo.service.UserDetailsServiceImpl;
import org.springframework.beans.factory.annotation.Autowired;
import org.springframework.context.annotation.Bean;
import org.springframework.context.annotation.Configuration;
import org.springframework.http.HttpMethod;
import org.springframework.security.config.annotation.web.builders.HttpSecurity;
import org.springframework.security.config.annotation.web.configuration.WebSecurityConfigurerAdapter;
import org.springframework.security.crypto.bcrypt.BCryptPasswordEncoder;
import org.springframework.security.crypto.password.PasswordEncoder;
import org.springframework.security.web.authentication.rememberme.JdbcTokenRepositoryImpl;
import org.springframework.security.web.authentication.rememberme.PersistentTokenRepository;

import javax.sql.DataSource;

@Configuration
public class SecurityConfig extends WebSecurityConfigurerAdapter {
    //引用403处理这个类
    @Autowired
    private MyAccessDeniedHandler myAccessDeniedHandler;

    @Autowired
    private UserDetailsServiceImpl userDetailsService;

    @Autowired
    private DataSource dataSource;

    @Autowired
    private PersistentTokenRepository persistentTokenRepository;


    //自定义登录页面,不使用自带的
    @Override
    protected void configure(HttpSecurity http) throws Exception {

        //表单提交
        http.formLogin()
                //和Login中input的属性相对应
                .usernameParameter("username1")
                .passwordParameter("password1")
                //当发现是 /login是认为是登录,必须和表单提交的地址一样,去执行UserDetailsServiceImpl登录逻辑
                .loginProcessingUrl("/login")
                //自定义登录页面
                .loginPage("/login.html")
                //登录成功之后跳转页面,必须是Post请求
                .successForwardUrl("/toMain")
                //登录成功后的处理器,不能和sucessForwardUrl共存
                //.successHandler(new MyAuthenticationSucessHandler("/main.html"))

                //登录失败跳转页面,Post请求
                .failureForwardUrl("/toError");
                //登录失败后的处理器,不能和failureForwardUrl共存
                //.failureHandler(new MyAuthenticationFailureHandler("/error.html"));

        //授权认证 相当于拦截器一样
        http.authorizeRequests()
                //error.html不需要被认证
                .antMatchers("/error.html").permitAll()
                //login.html不需要被认证
                .antMatchers("/login.html").permitAll()
                //resources目录下的静态资源
                .antMatchers("/static/js/**", "/static/css/**", "/static/images/**").permitAll()

                //regexMatchers放行的使用
                //.regexMatchers(".+[.]png").permitAll()
                //.regexMatchers(HttpMethod.GET,"/demo").permitAll()

                //.mvcMatchers("/demo").servletPath("/xxxx").permitAll()
                //如果不习惯mvcMatchers还可以用antMatchers设置等效
                .antMatchers("/xxxx/demo").permitAll()
                //任何目录下的png图片
                //.antMatchers("/**/*.png").permitAll()


                //判断用户是否有admin权限
                //.antMatchers("/main1.html").hasAuthority("admin")
                //可以设置这个页面,多个权限去访问
                //.antMatchers("/main1.html").hasAnyAuthority("admin","normall")

                //角色判断
                //.antMatchers("/main1.html").hasRole("abc")
                //判断有多个角色权限
                //.antMatchers("/main1.html").hasAnyRole("abc,abC")

                //IP地址判断
                //.antMatchers("/main1.html").hasIpAddress("127.0.0.1")

                //所有请求都必须被认证,必须登录之后能被访问
                .anyRequest().authenticated();
                //自定义访问权限
                //.anyRequest().access("@myServiceImpl.hasPermission(request,authentication)");

        //关闭csrf防护
        http.csrf().disable();


        //异常处理
        http.exceptionHandling()
                .accessDeniedHandler(myAccessDeniedHandler);


        //记住我
        http.rememberMe()
                //失效时间,单位秒
                .tokenValiditySeconds(60)
                //可以更改login.html中的remember-me
                //.rememberMeParameter("remember1")
                //自定义登录逻辑
                .userDetailsService(userDetailsService)
                //持久层对象
                .tokenRepository(persistentTokenRepository);

        //退出登录
        http.logout()
                //退出登录跳转页面
                .logoutSuccessUrl("/login.html");
    }


    //创建PasswordEncoder实例
    @Bean
    public PasswordEncoder getPw(){
        return new BCryptPasswordEncoder();
    }


    //连接对象
    @Bean
    public PersistentTokenRepository getPersistentTokenResposity(){
        JdbcTokenRepositoryImpl jdbcTokenRepository=new JdbcTokenRepositoryImpl();
        jdbcTokenRepository.setDataSource(dataSource);
        //自动建表 第一个启动自动建表 第二次启动注释掉
       // jdbcTokenRepository.setCreateTableOnStartup(true);

        return jdbcTokenRepository;

    }
}
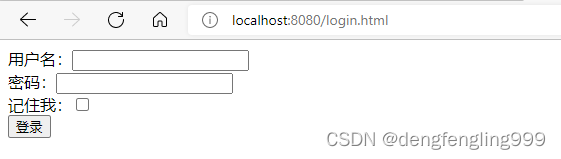
点击退出登录:
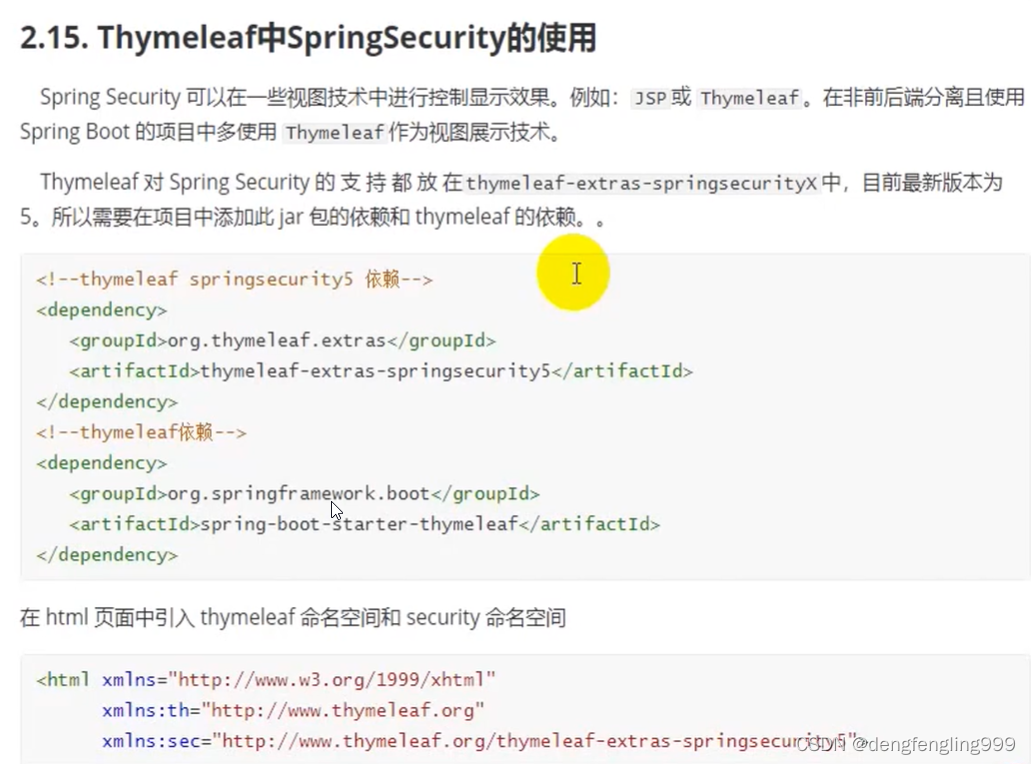
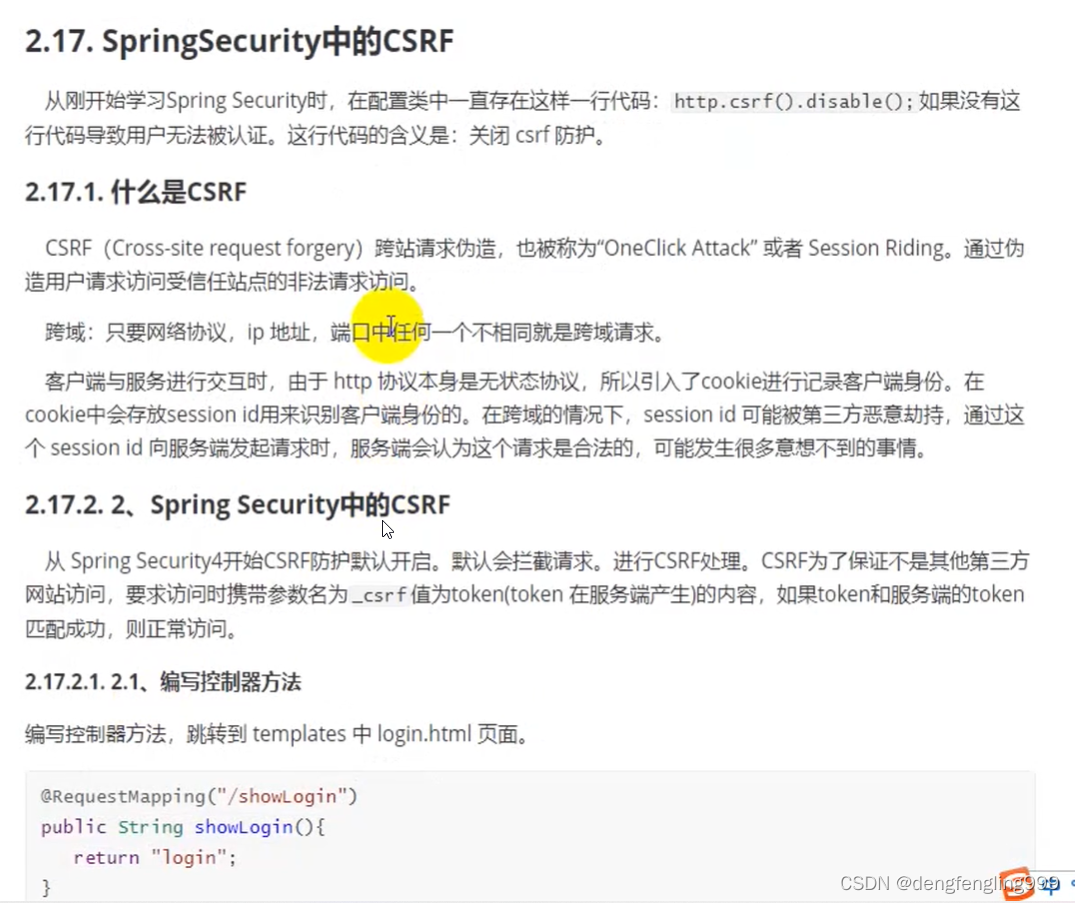
(7)SpringSecurity中的csrf

我们加了csrf的防护,但是为什么一定要关闭csrf的防护呢?
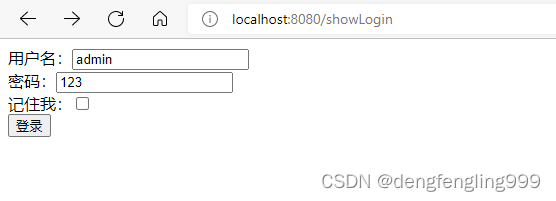
使用Thymeleaf的Login:
<!DOCTYPE html>
<html xmlns="http://www.w3.org/1999/xhtml"
      xmlns:th="http://www.thymeleaf.org">
<head>
    <meta charset="UTF-8">
    <title>Title</title>
</head>
<body>
   <form action="/login" method="post">
       <input type="hidden" th:value="${_csrf.token}" name="_csrf" th:if="${_csrf}">
       用户名:<input type="text" name="username1"/><br>
       密码:<input type="text" name="password1"/><br>
       记住我:<input type="checkbox" name="remember-me" value="true"><br>
       <input type="submit" value="登录"/>
   </form>
</body>
</html>
配置类:更改自定义登录页面,关闭csrf,认证权限

package com.xxxx.springsecuritydemo.config;
import com.xxxx.springsecuritydemo.handle.MyAccessDeniedHandler;
import com.xxxx.springsecuritydemo.handle.MyAuthenticationFailureHandler;
import com.xxxx.springsecuritydemo.handle.MyAuthenticationSucessHandler;
import com.xxxx.springsecuritydemo.service.UserDetailsServiceImpl;
import org.springframework.beans.factory.annotation.Autowired;
import org.springframework.context.annotation.Bean;
import org.springframework.context.annotation.Configuration;
import org.springframework.http.HttpMethod;
import org.springframework.security.config.annotation.web.builders.HttpSecurity;
import org.springframework.security.config.annotation.web.configuration.WebSecurityConfigurerAdapter;
import org.springframework.security.crypto.bcrypt.BCryptPasswordEncoder;
import org.springframework.security.crypto.password.PasswordEncoder;
import org.springframework.security.web.authentication.rememberme.JdbcTokenRepositoryImpl;
import org.springframework.security.web.authentication.rememberme.PersistentTokenRepository;
import javax.sql.DataSource;
@Configuration
public class SecurityConfig extends WebSecurityConfigurerAdapter {
//引用403处理这个类
@Autowired
private MyAccessDeniedHandler myAccessDeniedHandler;
@Autowired
private UserDetailsServiceImpl userDetailsService;
@Autowired
private DataSource dataSource;
@Autowired
private PersistentTokenRepository persistentTokenRepository;
//自定义登录页面,不使用自带的
@Override
protected void configure(HttpSecurity http) throws Exception {
//表单提交
http.formLogin()
//和Login中input的属性相对应
.usernameParameter("username1")
.passwordParameter("password1")
//当发现是 /login是认为是登录,必须和表单提交的地址一样,去执行UserDetailsServiceImpl登录逻辑
.loginProcessingUrl("/login")
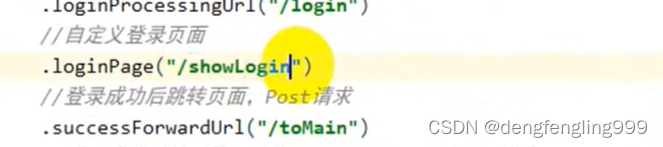
//自定义登录页面
.loginPage("/showLogin")
//登录成功之后跳转页面,必须是Post请求
.successForwardUrl("/toMain")
//登录成功后的处理器,不能和sucessForwardUrl共存
//.successHandler(new MyAuthenticationSucessHandler("/main.html"))
//登录失败跳转页面,Post请求
.failureForwardUrl("/toError");
//登录失败后的处理器,不能和failureForwardUrl共存
//.failureHandler(new MyAuthenticationFailureHandler("/error.html"));
//授权认证 相当于拦截器一样
http.authorizeRequests()
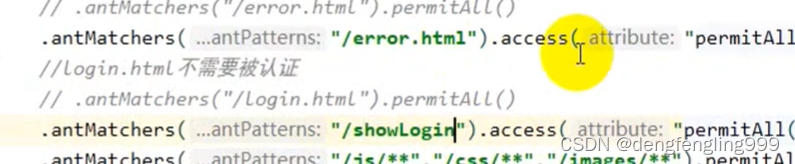
//error.html不需要被认证
.antMatchers("/error.html").permitAll()
//login.html不需要被认证
.antMatchers("/showLogin").permitAll()
//resources目录下的静态资源
.antMatchers("/static/js/**", "/static/css/**", "/static/images/**").permitAll()
//regexMatchers放行的使用
//.regexMatchers(".+[.]png").permitAll()
//.regexMatchers(HttpMethod.GET,"/demo").permitAll()
//.mvcMatchers("/demo").servletPath("/xxxx").permitAll()
//如果不习惯mvcMatchers还可以用antMatchers设置等效
.antMatchers("/xxxx/demo").permitAll()
//任何目录下的png图片
//.antMatchers("/**/*.png").permitAll()
//判断用户是否有admin权限
//.antMatchers("/main1.html").hasAuthority("admin")
//可以设置这个页面,多个权限去访问
//.antMatchers("/main1.html").hasAnyAuthority("admin","normall")
//角色判断
//.antMatchers("/main1.html").hasRole("abc")
//判断有多个角色权限
//.antMatchers("/main1.html").hasAnyRole("abc,abC")
//IP地址判断
//.antMatchers("/main1.html").hasIpAddress("127.0.0.1")
//所有请求都必须被认证,必须登录之后能被访问
.anyRequest().authenticated();
//自定义访问权限
//.anyRequest().access("@myServiceImpl.hasPermission(request,authentication)");
//关闭csrf防护
//http.csrf().disable();
//异常处理
http.exceptionHandling()
.accessDeniedHandler(myAccessDeniedHandler);
//记住我
http.rememberMe()
//失效时间,单位秒
.tokenValiditySeconds(60)
//可以更改login.html中的remember-me
//.rememberMeParameter("remember1")
//自定义登录逻辑
.userDetailsService(userDetailsService)
//持久层对象
.tokenRepository(persistentTokenRepository);
//退出登录
http.logout()
//退出登录跳转页面
.logoutSuccessUrl("/login.html");
}
//创建PasswordEncoder实例
@Bean
public PasswordEncoder getPw(){
return new BCryptPasswordEncoder();
}
//连接对象
@Bean
public PersistentTokenRepository getPersistentTokenResposity(){
JdbcTokenRepositoryImpl jdbcTokenRepository=new JdbcTokenRepositoryImpl();
jdbcTokenRepository.setDataSource(dataSource);
//自动建表 第一个启动自动建表 第二次启动注释掉
// jdbcTokenRepository.setCreateTableOnStartup(true);
return jdbcTokenRepository;
}
}
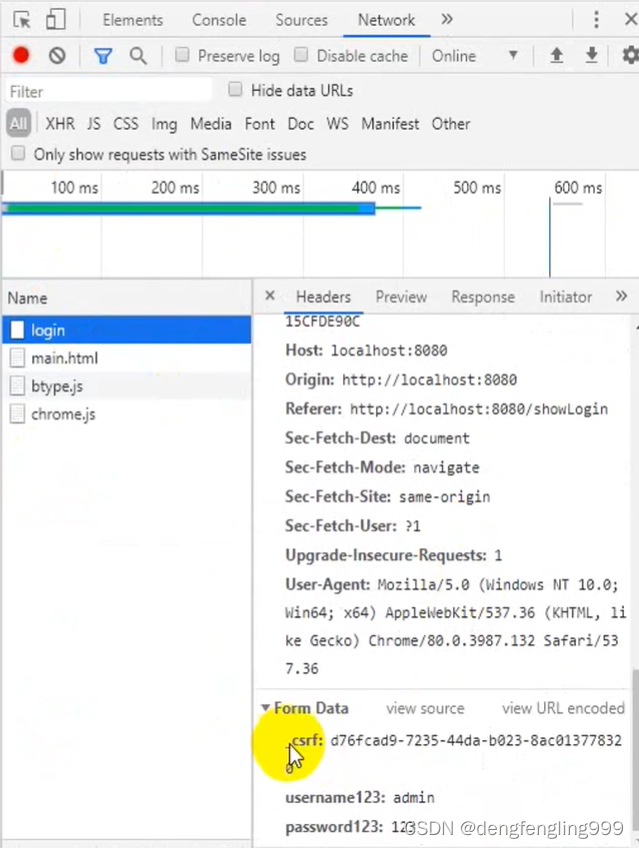
这个csrf是服务器端自动生成的,在学习阶段我们都是关闭csrf,在正是工作中,我们都是不关闭,都是取到服务器中生成的token,访问的时候带回服务器端,服务器会判断你带回的tocken和生成的tocken是否一致,如果一致就让你访问,不一致就不让你访问


 708
708


 被折叠的 条评论
为什么被折叠?
被折叠的 条评论
为什么被折叠?
 到【灌水乐园】发言


