


 本文介绍了使用pygame创建一个交互式的幸运大转盘,包括背景图片的加载、中间圆圈的绘制、大转盘和指针的旋转动画,以及随机奖励的实现。通过代码实例详细展示了如何利用pygame实现动态效果。
继续分享pygame有趣的技术知识,欢迎往下看。
一、先搭个架子
(一)黏贴背景图:
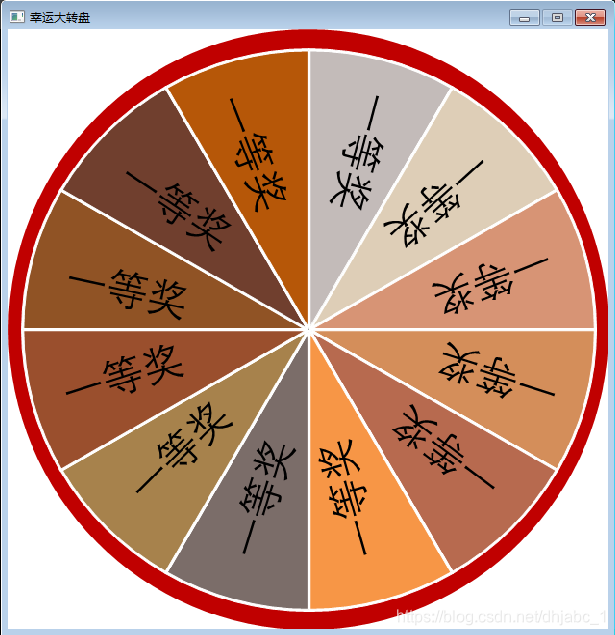
实现代码如下:
import pygame

pygame.init()  # 初始化pygame类
screen = pygame.display.set_mode((600, 600))  # 设置窗口大小
pygame.display.set_caption('幸运大转盘')  # 设置窗口标题
tick = pygame.time.Clock()
fps = 10  # 设置刷新率,数字越大刷新率越高
# 方法一
# bg = pygame.image.load("./幸运大转盘.png").convert()
# 方法二
picture = pygame.transform.scale(pygame.image.load("./幸运大转盘.png"), (600, 600))
bg=picture.convert()

while True:

    for event in pygame.event.get():
        if event.type == pygame.QUIT:
            sys.exit()
    # screen.fill((255, 255, 0))  # 设置背景为白色
    screen.blit(bg, (0, 0))
    tick.tick(fps)
    pygame.display.flip()  # 刷新窗口
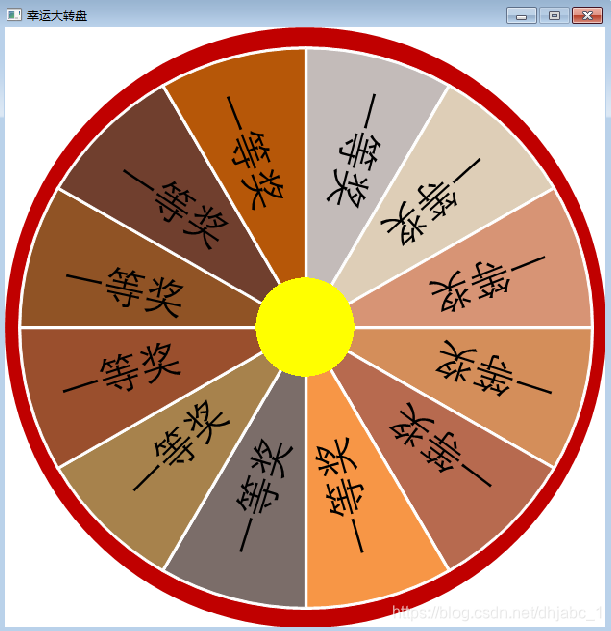
(二)增加中间的圈圈
核心代码:
pygame.draw.circle(screen,(255,255,0),(300,300),50)
代码解释:
绘制圆形方法:pygame.draw.circle(Surface, color, pos , raduis, width)
其中:
Surfuce参数: 传入需要在该Surface对象上绘制圆形的Surface对象
color参数: 需要绘制圆形的线的颜色,传入一个rgb三原色元组
pos参数:圆心的坐标
raduis 表示圆的半径
width参数:表示绘制圆的线的宽度,当为0时,圆内全部被填充
效果图:
相关代码如下:
import pygame

pygame.init()  # 初始化pygame类
screen = pygame.display.set_mode((600, 600))  # 设置窗口大小
pygame.display.set_caption('幸运大转盘')  # 设置窗口标题
tick = pygame.time.Clock()
fps = 10  # 设置刷新率,数字越大刷新率越高
# 方法一
# bg = pygame.image.load("./幸运大转盘.png").convert()
# 方法二
picture = pygame.transform.scale(pygame.image.load("./幸运大转盘.png"), (600, 600))
bg=picture.convert()

while True:

    for event in pygame.event.get():
        if event.type == pygame.QUIT:
            sys.exit()
    # screen.fill((255, 255, 0))  # 设置背景为白色
    screen.blit(bg, (0, 0))
    pygame.draw.circle(screen,(255,255,0),(300,300),50)
    tick.tick(fps)
    pygame.display.flip()  # 刷新窗口
(三)让大转盘自己动起来
核心代码:
    newbg = pygame.transform.rotate(bg, angle)
    newRect = newbg.get_rect(center=(300,300))
    angle -= 1
    screen.blit(newbg, newRect)
运行效果:

相关代码如下:
import pygame

pygame.init()  # 初始化pygame类
screen = pygame.display.set_mode((600, 600))  # 设置窗口大小
pygame.display.set_caption('幸运大转盘')  # 设置窗口标题
tick = pygame.time.Clock()
fps = 10  # 设置刷新率,数字越大刷新率越高
# 方法一
# bg = pygame.image.load("./幸运大转盘.png").convert()
# 方法二
picture = pygame.transform.scale(pygame.image.load("./幸运大转盘.png"), (600, 600))
bg=picture.convert()

angle = 0
while True:

    for event in pygame.event.get():
        if event.type == pygame.QUIT:
            sys.exit()
    # screen.fill((255, 255, 0))  # 设置背景为白色
    newbg = pygame.transform.rotate(bg, angle)
    newRect = newbg.get_rect(center=(300,300))
    angle -= 1
    screen.blit(newbg, newRect)

    # screen.blit(bg, (0, 0))
    pygame.draw.circle(screen,(255,255,0),(300,300),50)
    tick.tick(fps)
    pygame.display.flip()  # 刷新窗口
二、再加个指针,幸运的小指针
(一)小指针不动,转盘动
运行效果:

相关代码如下:
import pygame

pygame.init()  # 初始化pygame类
screen = pygame.display.set_mode((600, 600))  # 设置窗口大小
pygame.display.set_caption('幸运大转盘')  # 设置窗口标题
tick = pygame.time.Clock()
fps = 10  # 设置刷新率,数字越大刷新率越高
picture = pygame.transform.scale(pygame.image.load("./幸运大转盘.png"), (600, 600))
bg=picture.convert()
picture = pygame.transform.scale(pygame.image.load("./hand.png"), (30, 230))
hand = picture.convert_alpha()
angle = 0
while True:

    for event in pygame.event.get():
        if event.type == pygame.QUIT:
            sys.exit()
    newbg = pygame.transform.rotate(bg, angle)
    newRect = newbg.get_rect(center=(300,300))
    angle -= 1
    screen.blit(newbg, newRect)

    newRect = hand.get_rect(center=(300,150))
    screen.blit(hand,newRect)

    pygame.draw.circle(screen,(255,255,0),(300,300),50)
    tick.tick(fps)
    pygame.display.flip()  # 刷新窗口
(二)转盘不动,小指针动
思路:转盘指针的框的中心点按照圆的轨迹进行移动,然后在移动的过程中同步旋转对应的角度,这样就整个指针一方面移动,一方面转动。实现了自然的按照中心旋转的效果了。
1、先自己画指针矩形框的中心点移动
代码如下:
import pygame,sys
import math

pygame.init()  # 初始化pygame类
screen = pygame.display.set_mode((600, 600))  # 设置窗口大小
pygame.display.set_caption('幸运大转盘')  # 设置窗口标题
tick = pygame.time.Clock()
fps = 100  # 设置刷新率,数字越大刷新率越高
picture = pygame.transform.scale(pygame.image.load("./幸运大转盘.png"), (600, 600))
bg=picture.convert()
picture = pygame.transform.scale(pygame.image.load("./hand.png"), (30, 230))
hand = picture.convert_alpha()
angle = 0
pos_list = []
while True:
    posx = 300+int(150*math.sin(135+angle/360))
    posy = 300+int(150*math.cos(135+angle/360))
    for event in pygame.event.get():
        if event.type == pygame.QUIT:
            sys.exit()
    screen.blit(bg,(0,0))
    pos_list.append((posx,posy))
    for pos in pos_list:
        pygame.draw.circle(screen, (0, 0, 0), pos, 1)
    angle -= 2
    pygame.draw.circle(screen,(255,255,0),(300,300),80)
    tick.tick(fps)
    pygame.display.flip()  # 刷新窗口
效果如下:

2、增加指针转动(不完善的版本)
代码如下:
import pygame,sys
import math

pygame.init()  # 初始化pygame类
screen = pygame.display.set_mode((600, 600))  # 设置窗口大小
pygame.display.set_caption('幸运大转盘')  # 设置窗口标题
tick = pygame.time.Clock()
fps = 100  # 设置刷新率,数字越大刷新率越高
picture = pygame.transform.scale(pygame.image.load("./幸运大转盘.png"), (600, 600))
bg=picture.convert()
picture = pygame.transform.scale(pygame.image.load("./hand.png"), (30, 230))
hand = picture.convert_alpha()
angle = 0
pos_list = []
while True:
    posx = 300+int(150*math.sin(135+angle/360))
    posy = 300+int(150*math.cos(135+angle/360))
    for event in pygame.event.get():
        if event.type == pygame.QUIT:
            sys.exit()
    screen.blit(bg,(0,0))
    pos_list.append((posx,posy))
    for pos in pos_list:
        pygame.draw.circle(screen, (0, 0, 0), pos, 1)
    newhand = pygame.transform.rotate(hand, angle/6)
    # old_center = rect.center
    newRect = newhand.get_rect(center=(posx,posy))
    screen.blit(newhand,newRect)
    pygame.draw.rect(screen, (255,0,0), newRect, 1)
    # if angle>-10:
    angle -= 2
    print(angle)
    if angle < -2250:
        angle = 0

    pygame.draw.circle(screen,(255,255,0),(300,300),80)
    tick.tick(fps)
    pygame.display.flip()  # 刷新窗口
效果如下:

3、增加指针转动(修正版)
发现原来是math类库中的sin和cos函数传递的参数问题。
Math.Sin()里面的是弧度制。 如果是sin(30),就用Math.Sin(Math.PI*30.0/180.0);
因此主要修改的代码如下:
    posx = 300 + int(150 * math.sin(angle * math.pi / 180))
    posy = 300 - int(150 * math.cos(angle * math.pi / 180))
对应的运行效果如下:

想运行快点的话,就把angle的参数变大就好。
完整代码如下:
import pygame
import math
pygame.init()  # 初始化pygame类
screen = pygame.display.set_mode((600, 600))  # 设置窗口大小
pygame.display.set_caption('幸运大转盘')  # 设置窗口标题
tick = pygame.time.Clock()
fps = 10  # 设置刷新率,数字越大刷新率越高
picture = pygame.transform.scale(pygame.image.load("./幸运大转盘.png"), (600, 600))
bg=picture.convert()
picture = pygame.transform.scale(pygame.image.load("./hand.png"), (30, 230))
hand = picture.convert_alpha()
angle = 0
while True:
    posx = 300 + int(150 * math.sin(angle * math.pi / 180))
    posy = 300 - int(150 * math.cos(angle * math.pi / 180))
    print(posx, posy, math.sin(angle * math.pi / 180))

    for event in pygame.event.get():
        if event.type == pygame.QUIT:
            sys.exit()
    screen.blit(bg,(0,0))
    newhand = pygame.transform.rotate(hand, -angle)
    newRect = newhand.get_rect(center=(posx,posy))
    screen.blit(newhand,newRect)
    angle += 10
    pygame.draw.circle(screen,(255,255,0),(300,300),50)
    tick.tick(fps)
    pygame.display.flip()  # 刷新窗口
三、增加随时数算法,实现随机事件
直接借用了这个算法:
轮盘分为三部分: 一等奖, 二等奖和三等奖;
轮盘转的时候是随机的,
如果范围在[0,0.08)之间,代表一等奖,
如果范围在[0.08,0.3)之间,代表2等奖,
如果范围在[0.3, 1.0)之间,代表3等奖,
把该算法封装成函数,相关代码如下:
rewardDict = {
    '一等奖': (0, 0.03),
    '二等奖': (0.03, 0.2),
    '三等奖': (0.2, 1)
}
def rewardFun():
    """用户的得奖等级"""
    # 生成一个0~1之间的随机数
    number = random.random()
    # 判断随机转盘是几等奖
    for k, v in rewardDict.items():
        if v[0] <= number < v[1]:
            return k
四、增加开始函数
def start():
    while True:
        for event in pygame.event.get():

            # 处理退出事件
            if event.type == pygame.QUIT:
                pygame.quit()
                sys.exit()
            elif event.type == pygame.KEYDOWN:
                if (event.key == pygame.K_ESCAPE):
                    pygame.quit()
                    sys.exit()
                else:
                    return
        screen.blit(bg,(0,0))
        newRect = hand.get_rect(center=(300,150))
        screen.blit(hand,newRect)

        pygame.draw.circle(screen,(255,255,0),(300,300),50)

        textFont = pygame.font.Font("./font/font.ttf", 80)
        textSurface = textFont.render("go", True, (110, 55, 155))
        screen.blit(textSurface, (270, 230))
        pygame.display.update()
五、增加结束函数
def end(k):
    textFont = pygame.font.Font("./font/font.ttf", 50)
    textSurface = textFont.render("your awards is :%s" % k, True, (110, 55, 155))
    screen.fill((155, 155, 0))
    screen.blit(textSurface, (30, 230))
六、最终完整效果及代码
import pygame,sys
import math
import random

pygame.init()  # 初始化pygame类
screen = pygame.display.set_mode((600, 600))  # 设置窗口大小
pygame.display.set_caption('幸运大转盘')  # 设置窗口标题
tick = pygame.time.Clock()
fps = 10  # 设置刷新率,数字越大刷新率越高
picture = pygame.transform.scale(pygame.image.load("./幸运大转盘.png"), (600, 600))
bg=picture.convert()
picture = pygame.transform.scale(pygame.image.load("./hand.png"), (30, 230))
hand = picture.convert_alpha()

rewardDict = {
    'first level': (0, 0.03),
    'second level': (0.03, 0.2),
    'third level': (0.2, 1)
}
def rewardFun():
    """用户的得奖等级"""
    # 生成一个0~1之间的随机数
    number = random.random()
    # 判断随机转盘是几等奖
    for k, v in rewardDict.items():
        if v[0] <= number < v[1]:
            return k

def start():
    while True:
        for event in pygame.event.get():

            # 处理退出事件
            if event.type == pygame.QUIT:
                pygame.quit()
                sys.exit()
            elif event.type == pygame.KEYDOWN:
                if (event.key == pygame.K_ESCAPE):
                    pygame.quit()
                    sys.exit()
                else:
                    return
        screen.blit(bg,(0,0))
        newRect = hand.get_rect(center=(300,150))
        screen.blit(hand,newRect)

        pygame.draw.circle(screen,(255,255,0),(300,300),50)

        textFont = pygame.font.Font("./font/font.ttf", 80)
        textSurface = textFont.render("go", True, (110, 55, 155))
        screen.blit(textSurface, (270, 230))
        pygame.display.update()

def middle():
    angle = 0
    while True:
        posx = 300 + int(150 * math.sin(angle * math.pi / 180))
        posy = 300 - int(150 * math.cos(angle * math.pi / 180))
        print(posx, posy, math.sin(angle * math.pi / 180))

        for event in pygame.event.get():
            if event.type == pygame.QUIT:
                sys.exit()
        screen.blit(bg,(0,0))

        newhand = pygame.transform.rotate(hand, -angle)

        newRect = newhand.get_rect(center=(posx,posy))
        screen.blit(newhand,newRect)
        pygame.draw.circle(screen,(255,255,0),(300,300),50)

        angle += 10

        if angle > 500:
            k = rewardFun()
            end(k)

        tick.tick(fps)
        pygame.display.flip()  # 刷新窗口


def end(k):
    textFont = pygame.font.Font("./font/font.ttf", 50)
    textSurface = textFont.render("your awards is :%s" % k, True, (110, 55, 155))
    screen.fill((155, 155, 0))
    screen.blit(textSurface, (30, 230))


if __name__ == '__main__':
    start()
    middle()
运行效果如下:

七、尾声
总算完整写完了整个案例,发现通过在上班过程中抽空写这些博客,真的很难,码字不易、输出不易,且行且珍惜。
里面有很多细节么有优化、自己都发现很多bug,没有很多的时间去完善和改进,欢迎各位多多提出宝贵意见。
感谢各位的支持,比心!


 被折叠的 条评论
为什么被折叠?
被折叠的 条评论
为什么被折叠?
 到【灌水乐园】发言


