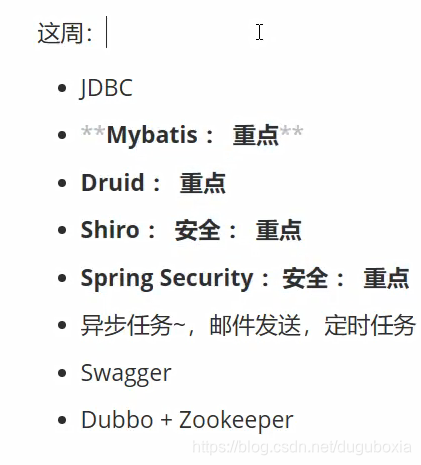
延续上一级
## 回顾上面的内容:
1.springBoot是什么
2.微服务
3.使用springBoot创建helloworld
4.探究源码~自动装配原理~
5.配置 yaml
6.多文档环境切换
7.静态资源映射
8.thymeleaf 格式: th:xxx
9.springBoot 如何扩展MVC javaconfig~
10.如何修改springBoot的默认配置 yaml
11.CRUD
12.国际化
13.拦截器
14.定制首页,错误也
15.销毁session

jdbc整合
创建项目时勾选jdbc-api mysql驱动
将resources下的文件改为.yml结尾

yml中:
设置数据连接相关的:
username,password,url,driver-class-name;
#数据连接
spring:
  datasource:
    username: root
    password: root
    url: jdbc:mysql://localhost:3306/ssmbuild?serverTimezone=UTC&useUnicode=true&characterEncoding=utf-8
    driver-class-name: com.mysql.jdbc.Driver
注意在URL中需要设置时区,编码格式等
如果遇到以下报错:
java.sql.SQLNonTransientConnectionException: CLIENT_PLUGIN_AUTH is required
报错原因:springBoot自动导入的mysql驱动过高,解决方法:
在mysql驱动依赖设置版本号,然后,右键pom.xml——>maven——>Download Source
详细讲解错误原因
测试:
可以在test中测试;
@SpringBootTest
class SpringbootDataApplicationTests {

    @Autowired
    DataSource dataSource;
    @Test
    void contextLoads() throws SQLException {
        //class com.zaxxer.hikari.HikariDataSource 查看默认的数据源
        System.out.println("这个是"+dataSource.getClass());

        //获得数据库连接
        Connection connection = dataSource.getConnection();
        System.out.println(connection);
        connection.close();
    }
}
crud
Spring 本身也对原生的JDBC 做了轻量级的封装,即 org.springframework.jdbc.core.JdbcTemplate。
数据库操作的所有 CRUD 方法都在 JdbcTemplate 中
新建一个控制层:
package com.example.wu.controller;

import org.springframework.beans.factory.annotation.Autowired;
import org.springframework.jdbc.core.JdbcTemplate;
import org.springframework.web.bind.annotation.PathVariable;
import org.springframework.web.bind.annotation.RequestMapping;
import org.springframework.web.bind.annotation.RestController;

import java.util.List;
import java.util.Map;

@RestController
public class jdbcController {
    @Autowired
    JdbcTemplate jdbcTemplate;
       //查询数据库的所有信息
        //没有实体类的封装,如何查询? map
    @RequestMapping("/query")
    public List<Map<String,Object>> paperList(){
        String sql="select * from paper";
        List<Map<String, Object>> mapList = jdbcTemplate.queryForList(sql);
        return mapList;
    }
    @RequestMapping("/add")
    public String add(){
        String sql="insert into paper(name,number,detail) values('语文',100,'测试')";
        jdbcTemplate.update(sql);
        return "add ok";
    }
    @RequestMapping("/update/{id}")
    public String update(@PathVariable("id") int id){
        String sql="update paper set name=?,number=?,detail=?   where id="+id;

        //封装
        Object[] objects=new Object[3];
        objects[0]="数学";
        objects[1]=150;
        objects[2]="测试一下";
        jdbcTemplate.update(sql,objects);
        return "update ok";
    }
    @RequestMapping("/delete/{id}")
    public String delete(@PathVariable("id") int id){
        String sql="delete  from paper where id = ?";
        jdbcTemplate.update(sql,id);
        return "delete ok";
    }

}
其中使用id时运用到@PathVariable,注意封装
druid连接池
druid为阿里巴巴的数据源,(数据库连接池),集合了c3p0、dbcp、proxool等连接池的优点,还加入了日志监控,有效的监控DB池连接和SQL的执行情况。
DRUID的DataSource类为:com.alibaba.druid.pool.DruidDataSource。
其参数如下:


1:导入相关依赖druid
2:在yml中调用spring.dataSource.type: com.alibaba.druid.pool.DruidDataSource
SpringBoot默认支持以下数据源:
com.zaxxer.hikari.HikariDataSource (Spring Boot 2.0 以上,默认使用此数据源)
org.apache.tomcat.jdbc.pool.DataSource
org.apache.commons.dbcp2.BasicDataSource
可以使用 spring.datasource.type 指定自定义的数据源类型
yml中:
#数据连接
spring:
  datasource:
    username: root
    password: root
    url: jdbc:mysql://localhost:3306/ssmbuild?serverTimezone=UTC&useUnicode=true&characterEncoding=utf-8
    driver-class-name: com.mysql.jdbc.Driver
    #    调用type 使用数据连接池
    type: com.alibaba.druid.pool.DruidDataSource

    #Spring Boot 默认是不注入这些属性值的,需要自己绑定
    #druid 数据源专有配置
    initialSize: 5
    minIdle: 5
    maxActive: 20
    maxWait: 60000
    timeBetweenEvictionRunsMillis: 60000
    minEvictableIdleTimeMillis: 300000
    validationQuery: SELECT 1 FROM DUAL
    testWhileIdle: true
    testOnBorrow: false
    testOnReturn: false
    poolPreparedStatements: true

    #配置监控统计拦截的filters,stat:监控统计、log4j:日志记录、wall:防御sql注入
    #如果允许时报错  java.lang.ClassNotFoundException: org.apache.log4j.Priority
    #则导入 log4j 依赖即可,Maven 地址: https://mvnrepository.com/artifact/log4j/log4j
    filters: stat,wall,log4j
    maxPoolPreparedStatementPerConnectionSize: 20
    useGlobalDataSourceStat: true
    connectionProperties: druid.stat.mergeSql=true;druid.stat.slowSqlMillis=500
导入log4j相关依赖
配置druid的后台监控:
package com.example.wu.config;

import com.alibaba.druid.pool.DruidDataSource;
import com.alibaba.druid.support.http.StatViewServlet;
import com.alibaba.druid.support.http.WebStatFilter;
import org.springframework.boot.context.properties.ConfigurationProperties;
import org.springframework.boot.web.servlet.FilterRegistrationBean;
import org.springframework.boot.web.servlet.ServletRegistrationBean;
import org.springframework.context.annotation.Bean;
import org.springframework.context.annotation.Configuration;

import javax.servlet.Filter;
import javax.sql.DataSource;
import java.util.HashMap;
import java.util.Map;

@Configuration
public class druidConfig {
    @ConfigurationProperties(prefix = "spring.datasource")
    @Bean  //注入bean中并绑定yml
    public DataSource druidDataSource(){
        return new DruidDataSource();
    }

    //后台监控 相当于web.xml
    //因为springBoot内置了servlet容器 所有没有web.xml,替代方法为 ServletRegistrationBean
    @Bean
    public ServletRegistrationBean StatViewServlet(){
        ServletRegistrationBean<StatViewServlet> bean = new ServletRegistrationBean<>(new StatViewServlet(), "/druid/*");

        //后台需要登录,账号密码配置

        HashMap<String, String> initParameters = new HashMap<>();
        //增加配置,注意登录的username and password是固定的 loginUsername loginPassword
        initParameters.put("loginUsername","admin");
        initParameters.put("loginPassword","123456");

        //允许谁可以访问
        initParameters.put("allow","");

        //禁止谁访问 initParameters.put("hhh","169.254.80.100");

        bean.setInitParameters(initParameters);//设置初始化参数
        return bean;
    }

    //filters
    @Bean
    public FilterRegistrationBean WebStatFilter(){
        FilterRegistrationBean bean = new FilterRegistrationBean<>();

        bean.setFilter(new WebStatFilter());

        HashMap<String, String> initParameters = new HashMap<>();

        //不过滤的内容
        initParameters.put("exclusions","*.js,*.css,/druid/*");

        bean.setInitParameters(initParameters);
        return bean;
    }
}
效果:


mybatis
导入jar包,mybatis-springboot-starer
<!--        mybatis-->
        <dependency>
            <groupId>org.mybatis.spring.boot</groupId>
            <artifactId>mybatis-spring-boot-starter</artifactId>
            <version>2.1.1</version>
        </dependency>
配置mybatis(在yml中)
#mybatis相关配置
mybatis:
  type-aliases-package: com.example.wu.pojo
  mapper-locations: classpath:mybatis/mapper/*.xml

#关闭默认图标
#配置数据库信息
spring:
  mvc:
    formcontent:
      filter:
        enabled: false
    date-format: yyyy-MM-dd
  thymeleaf:
    cache: false
  datasource:
    username: root
    password: root
    url: jdbc:mysql://localhost:3306/springboot?serverTimezone=UTC&useUnicode=true&characterEncoding=utf-8
    type: com.alibaba.druid.pool.DruidDataSource
其中,xml格式为:
<?xml version="1.0" encoding="UTF-8" ?>
<!DOCTYPE mapper
        PUBLIC "-//mybatis.org//DTD Mapper 3.0//EN"
        "http://mybatis.org/dtd/mybatis-3-mapper.dtd">
<mapper namespace="">
</mapper>
注意:两张表建立相关连时主键最好是设置如下

外键是另一张表的主键
mvc:

基于两张表的查询如下:
departmentMapper.xml:
<?xml version="1.0" encoding="UTF-8" ?>
<!DOCTYPE mapper
        PUBLIC "-//mybatis.org//DTD Mapper 3.0//EN"
        "http://mybatis.org/dtd/mybatis-3-mapper.dtd">
<mapper namespace="com.text.springbootdemo.mapper.DepartmentMapper">
 <select id="getAll" resultType="Department">
     select * from department
 </select>
</mapper>
employeeMapper.xml:
<?xml version="1.0" encoding="UTF-8" ?>
<!DOCTYPE mapper
        PUBLIC "-//mybatis.org//DTD Mapper 3.0//EN"
        "http://mybatis.org/dtd/mybatis-3-mapper.dtd">
<mapper namespace="com.text.springbootdemo.mapper.EmployeeMapper">
<resultMap id="employeeMap" type="Employee">
    <id property="id" column="id"></id>
    <result property="employeeName" column="employeeName"></result>
    <result property="gender" column="gender"></result>
    <result property="email" column="email"></result>
    <result property="birth" column="birth"></result>
    <result property="d_id" column="d_id"></result>

    <association property="department" javaType="Department">
        <id property="d_id" column="d_id"></id>
        <result property="departmentName" column="departmentName"></result>
    </association>
</resultMap>

    <select id="getAll" resultMap="employeeMap">
        select e.*, d.departmentName  from employee e,department d where e.d_id=d.d_id
    </select>
    <select id="queryById" parameterType="int" resultMap="employeeMap">
    select e.*,d.departmentName from employee e join department d using (d_id) where e.id=#{id}
    </select>
    <insert id="addEmployee" parameterType="Employee">
        insert into employee (employeeName, gender, email, birth,d_id) values (#{employeeName},#{gender},#{email},#{birth},#{d_id});
    </insert>
    <delete id="deleteEmployee" parameterType="int">
        delete from employee where id=#{id}
    </delete>
    <update id="updateEmployee" parameterType="Employee">
        update employee set employeeName =#{employeeName},gender=#{gender},email=#{email},birth=#{birth},d_id=#{d_id} where id=#{id}
    </update>

</mapper>
控制层:
package com.text.springbootdemo.controller;

import com.text.springbootdemo.pojo.Department;
import com.text.springbootdemo.pojo.Employee;
import com.text.springbootdemo.service.DepartmentService;
import com.text.springbootdemo.service.EmployeeService;
import org.springframework.beans.factory.annotation.Autowired;
import org.springframework.stereotype.Controller;
import org.springframework.ui.Model;
import org.springframework.web.bind.annotation.*;

import java.util.Collection;
import java.util.List;

@Controller
public class EmployeeController {

    @Autowired
     private DepartmentService departmentService;
    @Autowired
    private EmployeeService employeeService;
    @RequestMapping("/emp")
    public String list(Model model){
        List<Employee> employees = employeeService.getAll();
        //System.out.println("员工所有信息  "+employeeDao.getAll());
        model.addAttribute("employees",employees);
        return "emp/list";
    }
    @GetMapping("/add")
    public String toAdd(Model model){
        //查询部门的消息
        List<Department> department = departmentService.getAll();
        model.addAttribute("department",department);
        return "emp/addEmployee";
    }

    @PostMapping("/add")
    public String addEmployee(Employee employee){
        employeeService.addEmployee(employee);
        return "redirect:/emp";
    }

    @GetMapping("/del/{id}")
    public String delete(@PathVariable("id") Integer id){
        employeeService.deleteEmployee(id);
        return "redirect:/emp";
    }

    @GetMapping("/emp/{id}")
    public String toUpdate(@PathVariable("id")Integer id,Model model){
        //查出原来的员工数据
        Employee employee = employeeService.queryById(id);
        model.addAttribute("employee",employee);
        //查询部门的消息
        Collection<Department> department = departmentService.getAll();
        model.addAttribute("department",department);
        return "emp/update";
    }

    @PostMapping("/updateEmployee")
    public String update(Employee employee){
        employeeService.updateEmployee(employee);
        return "redirect:/emp";
    }
}
页面以及其他基本上不变,需要注意的是在增加页面和更新页面时传的值是d_id

自此与数据库的连接搞定,至于登录页面和注册页面,在这里小编就省略了哈


 2086
2086

 被折叠的 条评论
为什么被折叠?


