


AutoComplete控件是一个让TextBox拥有匹配功能的TextBox辅助控件。它可以在输入时给你一些提示,Google的搜索页面已经使用了类似功能。
它的效果图如下:
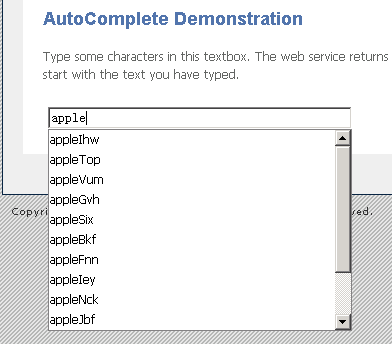
例子如下:
有一个名为“myTextBox”的TextBox,有一个WebService名为“AutoComplete.asmx”,当客户在TextBox输入字符时,TextBox把字符发回服务器端,并返回匹配的字符组,把他们显示在TextBox供客户选择。
这样的设计在ajax中是一个典型的应用,那么我们来看看atlas给我们提供的解决方案。
Atlas中存在一个控件AutoCompleteExtender,
在网页前端输入:
<asp:TextBox runat="server" ID="myTextBox" Width="300" autocomplete="off" />
<ajaxToolkit:AutoCompleteExtender
runat="server"
BehaviorID="AutoCompleteEx"
ID="autoComplete1"
TargetControlID="myTextBox"
ServicePath="AutoComplete.asmx"
ServiceMethod="GetCompletionList"
MinimumPrefixLength="4"
CompletionInterval="500"
EnableCaching="true"
CompletionSetCount="13"
CompletionListCssClass="autocomplete_completionListElement"
CompletionListItemCssClass="autocomplete_listItem"
CompletionListHighlightedItemCssClass="autocomplete_highlightedListItem"
DelimiterCharacters=";, :">
<Animations>
<OnShow>
<Sequence>
<%-- Make the completion list transparent and then show it --%>
<OpacityAction Opacity="100" />
<HideAction Visible="true" />
<%--Cache the original size of the completion list the first time
the animation is played and then set it to zero --
%>
<ScriptAction Script="
// Cache the size and setup the initial size
var behavior = $find('AutoCompleteEx');
if (!behavior._height) {
var target = behavior.get_completionList();
behavior._height = target.offsetHeight - 2;
target.style.height = '0px';
}"
/>
<%-- Expand from 0px to the appropriate size while fading in --%>
<Parallel Duration=".4">
<FadeIn />
<Length PropertyKey="height" StartValue="0" EndValueScript="$find('AutoCompleteEx')._height" />
</Parallel>
</Sequence>
</OnShow>
<OnHide>
<%-- Collapse down to 0px and fade out --%>
<Parallel Duration=".4">
<FadeOut />
<Length PropertyKey="height" StartValueScript="$find('AutoCompleteEx')._height" EndValue="0" />
</Parallel>
</OnHide>
</Animations>
</ajaxToolkit:AutoCompleteExtender>
常用属性
|
属性名称
|
说明
|
|
BehaviorID
|
显示在
TextBox
下的下拉列表的ID
|
|
ID
|
当前控件的
ID
|
|
TargetControlID
|
要匹配的
TextBox
ID
|
|
ServicePath
|
WebService
相对路径
|
|
ServiceMethod
|
WebService
中用来匹配的方法
|
|
MinimumPrefixLength
|
开始匹配的字符位数,从第几个字符开始匹配
|
|
CompletionInterval
|
下拉列表出现的延时
|
|
EnableCaching
|
是否使用缓存
|
|
CompletionSetCount
|
显示的下拉列表的列数
|
|
DelimiterCharacters
|
不需要匹配的字符集
|
|
|
|
再看中的匹配方法
WebService
///<summary>
///
返回匹配字符组
///</summary>
///<param name="prefixText">
用来匹配的字符</param>
///<param name="count">
返回匹配字符组数
</param>
///<returns></returns>
[WebMethod]
public string[] GetCompletionList(string prefixText, int count)
{
if (count == 0)
{
count = 10;
}
if (prefixText.Equals("xyz"))
{
return new string[0];
}
Random random = new Random();
List<string> items = new List<string>(count);
for (int i = 0; i < count; i++)
{
char c1 = (char) random.Next(65, 90);
char c2 = (char) random.Next(97, 122);
char c3 = (char) random.Next(97, 122);
items.Add(prefixText + c1 + c2 + c3);
}
return items.ToArray();
}


 4353
4353

 被折叠的 条评论
为什么被折叠?
被折叠的 条评论
为什么被折叠?
 到【灌水乐园】发言


