


点击上方“AI搞事情”关注我们
WeRoBot是个啥
WeRoBot 是一个基于Python的微信机器人框架,采用MIT协议发布。
git地址:https://github.com/offu/WeRoBot
文档地址:https://werobot.readthedocs.org/zh_CN/latest/
安装:
pip install werobotWeRoBot咋用呀
前提你得申请一个公众号,其次会简单的Python编程,更重要的是得有一个服务器。这些都准备好了的话,那就可以开始搭建你的对话机器人了。
* 后台配置
公众号后台进行基础配置,
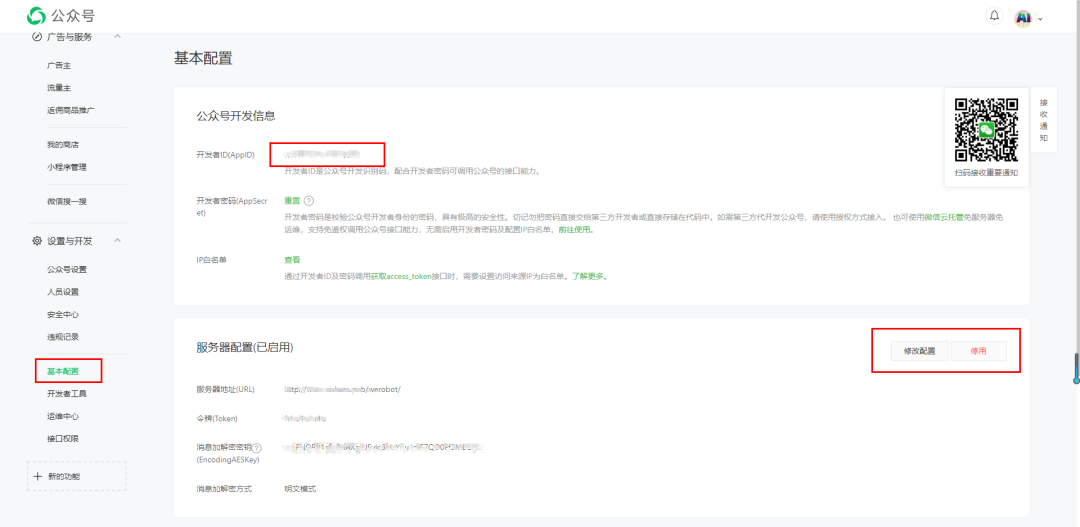
其中,AppID是公众号为你分配的开发识别码,配合开发者密码便拥有调用公众号的接口能力;服务器配置是我们需要配置的后台服务器地址(如果服务器只有一个微信后台服务,必须使用80端口!如果是https,必须使用443端口!,当然也可以利用Nginx进行反向代理),以及自定义的Token(后面需要在代码里关联),同时,有关素材的操作是需要access_token的,不过在werobot模块里,将APP_ID和APP_SECRET就好了,access_token是会自动获取。最后,不要忘了将云服务器公网IP加入IP白名单,否则也会报错。
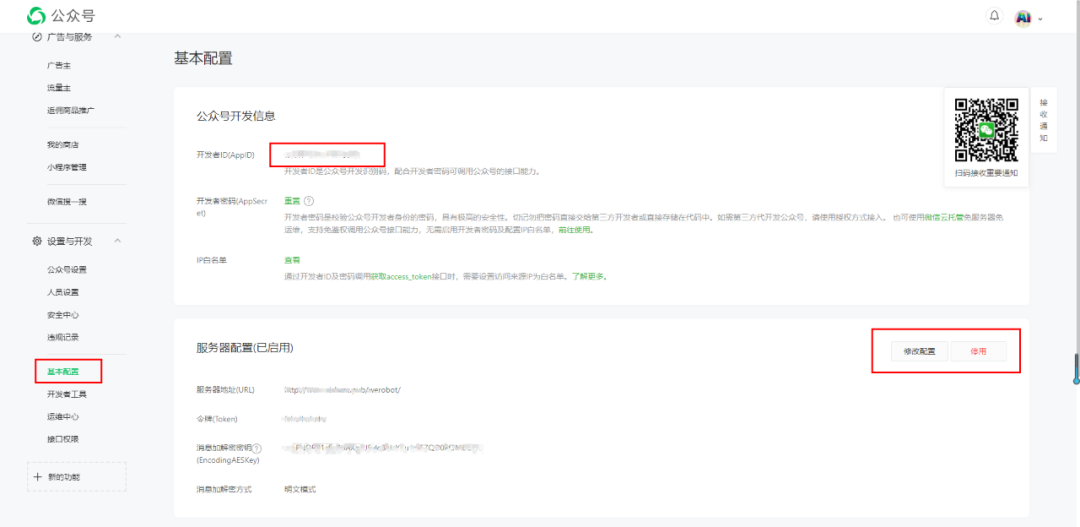
完成配置以后,点击提交,提示提交成功,说明咱们已经完成了第一步骤的配置。
* 程序开发
WeRoBot 是一个基于Python的框架,我们需要具备一定Python能力便能进行后续程序的开发,首先来一个hello world。
import werobot

robot = werobot.WeRoBot(token='tokenhere')
robot.config["APP_ID"] = "你的APP_ID"
robot.config["APP_SECRET"] = "你的APP_SECRET"

@robot.handler
def hello(message):
    return 'Hello World!'

# 让服务器监听在 0.0.0.0:80
robot.config['HOST'] = '0.0.0.0'
robot.config['PORT'] = 80
robot.run()
从上面代码我们需要知道:
@为Python中装饰器的用法,具备装饰、修改函数功能的函数。接受一个函数作为输入参数,并返回一个具备额外功能函数。
WeRoBot 会解析微信服务器发来的消息,并将消息转换成成
Message或者是Event。Message表示用户发来的消息,如文本消息、图片消息;Event则表示用户触发的事件, 如关注事件、扫描二维码事件。
在消息解析、转换完成后, WeRoBot 会将消息转交给Handler进行处理,并将Handler的返回值返回给微信服务器。
当然, 你也可以编写一些只能处理特定消息的Handler。比如常见的有:
@robot.text修饰的 Handler 只处理文本消息@robot.image修饰的 Handler 只处理图片消息@robot.subscribe修饰的 Handler 只处理订阅后的信息@robot.voice修饰的 Handler 只处理语音信息@robot.filter修饰的 Handler 处理有指定关键词的信息
回复信息种类
TextReply:文本消息
ImageReply:图片消息
VoiceReply:语音消息
VideoReply:视频消息
ArticlesReply:图文消息
MusicReply:音乐消息
TransferCustomerServiceReply:将消息转发到多客服
SuccessReply:微信服务器回复 “success”
更多关于WeRoBot的使用可以参考官方文档。
import random
import time
import requests
import werobot
from werobot.replies import ArticlesReply, Article, ImageReply, TextReply, MusicReply
from cogview_python import gen_image

robot = werobot.WeRoBot(token='fahaihahaha')
robot.config["APP_ID"] = "wxbfe73a1c91810e38"
robot.config["APP_SECRET"] = "c8414918aa9aa714b6416190b4892437"

# 订阅后的回复
@robot.subscribe
def subscribe():
    return "***欢迎关注公众号[愉快][愉快][愉快]***\n" \
           "***输入任意内容开始与我聊天!\n" \
           "***输入'博客'关注我的博客!\n" \
           "***输入'音乐'为小主送上舒缓的歌曲!\n"


# 关键字 博客 回复
@robot.filter('博客')
def blog(message):
    reply = ArticlesReply(message=message)
    article = Article(
        title="AI搞事情",
        description="我的个人博客",
        img="https://werobot.readthedocs.io/zh_CN/latest/_static/qq.png",
        url="https://www.cnblogs.com/fahaihappy/"
    )
    reply.add_article(article)
    return reply


# 用户发送图片
@robot.image
def blog(message, session):
    # print("msg", message.img)
    # print(type(message))
    # print(type(message.img))
    # print(message.__dict__)
    print("\n" + message.MediaId)
    changdu = str(len(session))
    session[changdu] = message.MediaId
    reply = ImageReply(message=message, media_id=message.MediaId)
    return reply


# 随机一首音乐
def music_data():
    music_list = [
        ['童话镇', '陈一发儿', 'https://e.coka.la/wlae62.mp3', 'https://e.coka.la/wlae62.mp3'],
        ['都选C', '缝纫机乐队', 'https://files.catbox.moe/duefwe.mp3', 'https://files.catbox.moe/duefwe.mp3'],
        ['精彩才刚刚开始', '易烊千玺', 'https://e.coka.la/PdqQMY.mp3', 'https://e.coka.la/PdqQMY.mp3']
    ]
    num = random.randint(0, 2)
    return music_list[num]


# 匹配 音乐 回复一首歌
@robot.filter('音乐')
def music(message):
    # reply = TextReply(message=message, content=music_data())
    # reply = MusicReply(message=message,source='https://www.kugou.com/song/#hash=D4EB517A405FCDF0286AA9A4487BBCE1&album_id=10409377')
    return music_data()
    # return reply


# 文字智能回复 生成图片(依赖悟道文字生成图片的api)
@robot.text
def replay(msg):
    print(msg.content)
    img = gen_image(msg.content)
    if img is not None:
        return_json = robot.client.upload_media("image", img)
        mediaid = return_json['media_id']
        reply = ImageReply(message=msg, media_id=mediaid)
        return reply
    return "神奇图博士也不知道这是啥呀!!!"


# 让服务器监听在 0.0.0.0:80
robot.config['HOST'] = '0.0.0.0'
robot.config['PORT'] = 8000
robot.run()
* 服务部署
如果服务器只有werobot应用,则只需要开放80(http)端口或者443端口(https),由于我服务器还有其他应用,则通过Nginx进行了方向代理,配置方式如下:
http {

	log_format  main  '$remote_addr - $remote_user [$time_local] "$request" '
                      '$status $body_bytes_sent "$http_referer" '
                      '"$http_user_agent" "$http_x_forwarded_for"';
    sendfile            on;
    tcp_nopush          on;
    tcp_nodelay         on;
    keepalive_timeout   65;
    types_hash_max_size 2048;
    include             /etc/nginx/mime.types;
    default_type        application/octet-stream;
    client_max_body_size     500m;
    client_header_timeout    1m;
    client_body_timeout      1m;
    proxy_connect_timeout     60s;
    proxy_read_timeout      1m;
    proxy_send_timeout      1m;
    proxy_cache_path /var/imgcachetest levels=1:2 keys_zone=cache_one:200m inactive=1d max_size=1g;

	server {
		# 端口和域名
		listen 80;
		server_name ip或者域名;

		# 日志
		access_log /var/log/nginx/access.log;
		error_log /var/log/nginx/error.log;


		location /werobot/ {
		    # 需要添加的代码
			proxy_set_header Upgrade $http_upgrade;
            proxy_set_header Connection "upgrade";
            proxy_http_version 1.1;
            proxy_set_header X-Forwarded-For $proxy_add_x_forwarded_for;
            proxy_set_header Host $host;
			proxy_pass http://127.0.0.1:4802;
		}
	}

}

events {
	worker_connections  1024;  ## Default: 1024
}
另外,Werobot还提供了和Python后端框架Django、Flask、Bottle和Tornado的集成使用方式。
部署方式还可以结合docker进行容器化部署。
* 效果展示
通过上面的流程,我们就可以通过公众号和后台进行交互,涵盖文字、图片、语音、视频等信息,再结合各种算法,如图像处理、OCR、目标检测,文本生成、智能对话等便能开发一款基于公众号的智能应用。
下图为通过输入文本,后台返回生成的图片,感兴趣的可以尝试一下。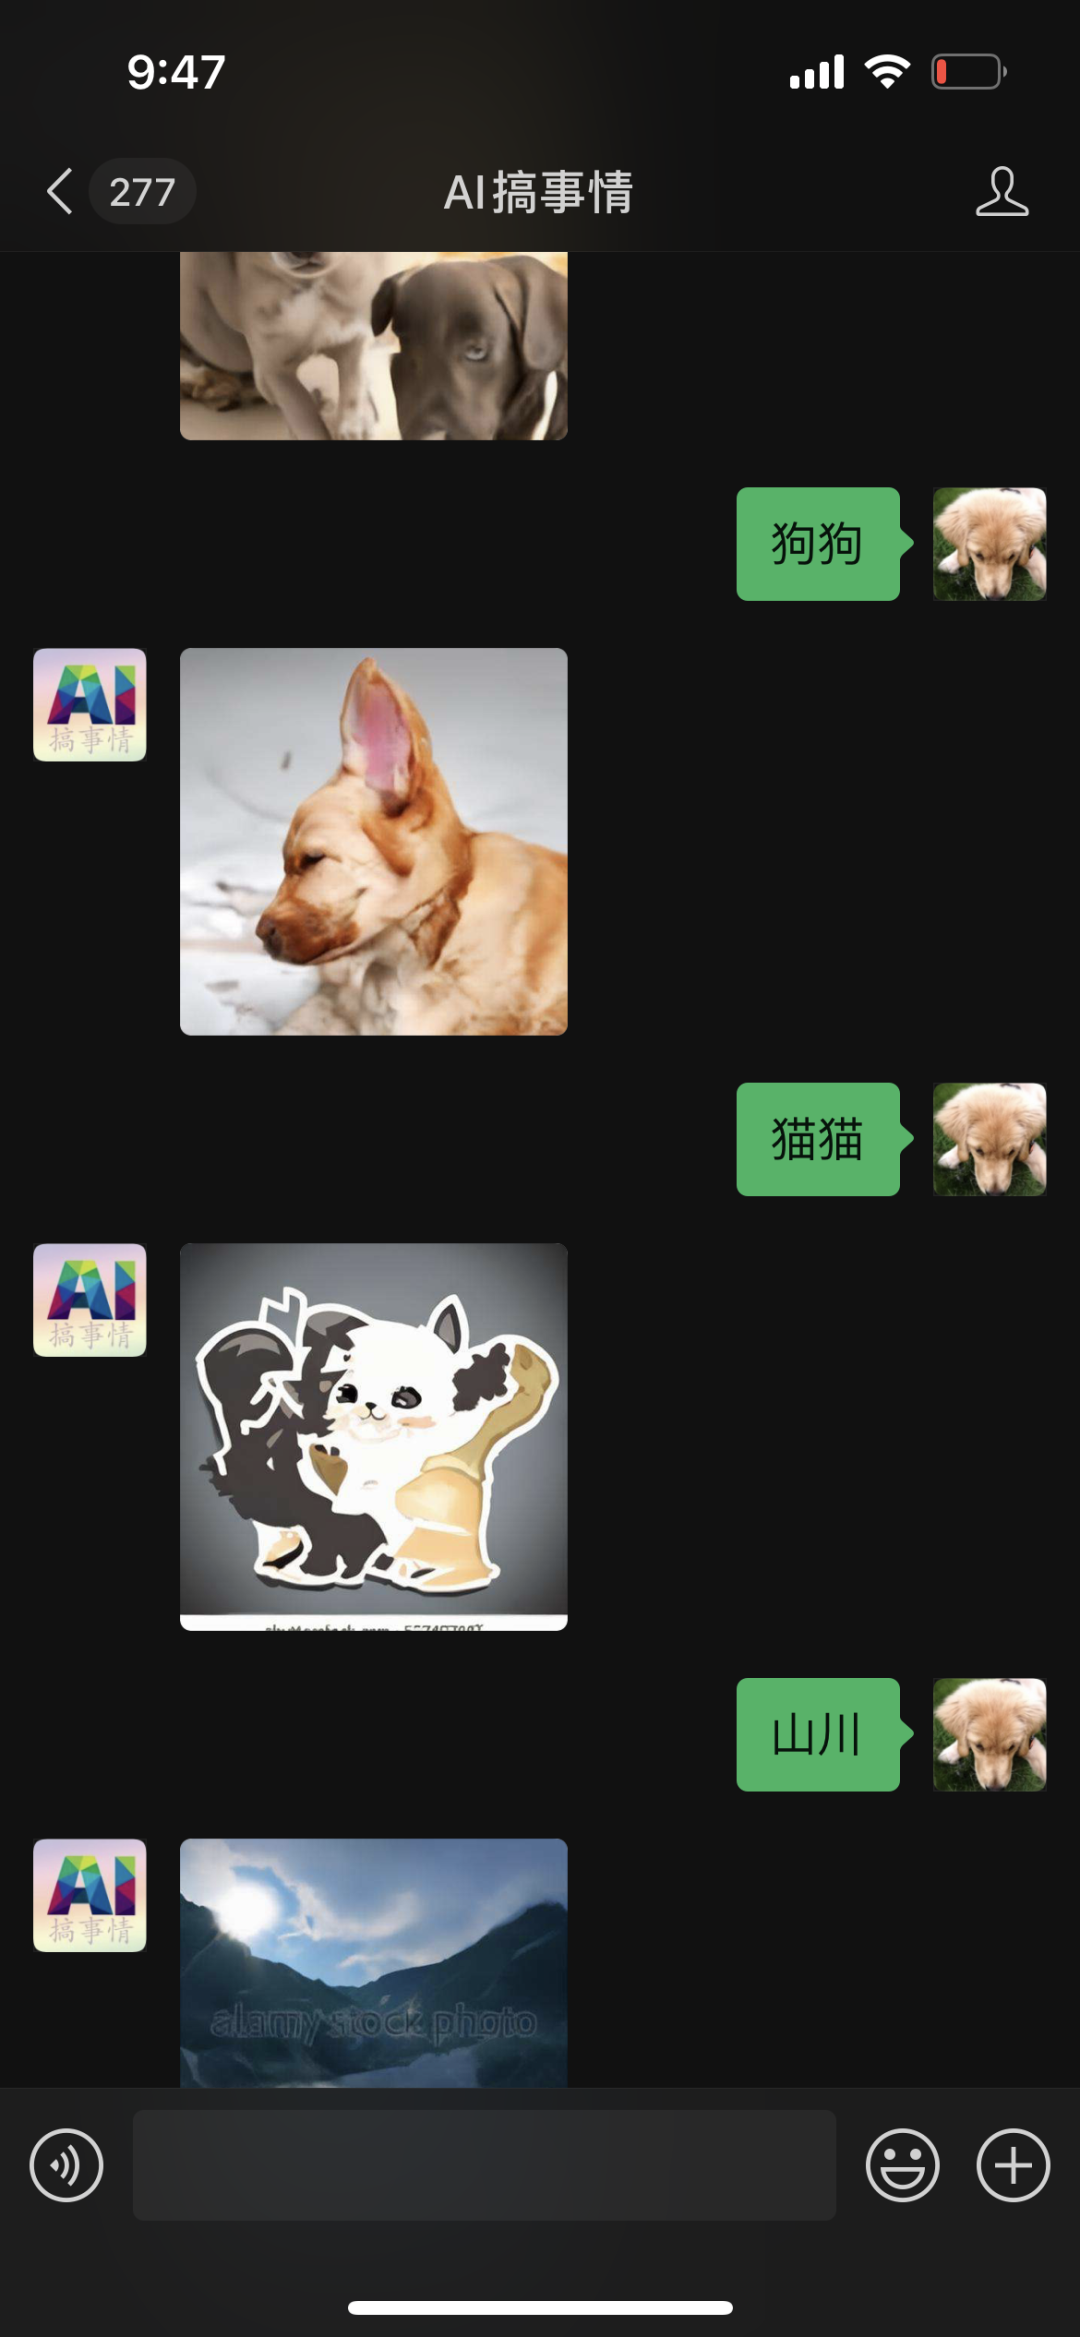


长按二维码关注我们
有趣的灵魂在等你


 5742
5742


 被折叠的 条评论
为什么被折叠?
被折叠的 条评论
为什么被折叠?
 到【灌水乐园】发言


