


目录
前言
TensorFlow分栏:
https://blog.csdn.net/freewebsys/category_6872378.html
本文的原文连接是:
https://blog.csdn.net/freewebsys/article/details/108971807
未经博主允许不得转载。
博主CSDN地址是:https://blog.csdn.net/freewebsys
博主掘金地址是:https://juejin.cn/user/585379920479288
博主知乎地址是:https://www.zhihu.com/people/freewebsystem
1,关于nvidia-docker
做模型训练,最好还是使用intel的CPU,保不齐有啥问题再AMD上的跑不起来。
然后最好是带核显的CPU,这样界面使用核显。
然后显卡就专门用来做模型训练使用。
同时因为不同的算法,都需要使用显卡,还是用docker切换环境最方便。
提示:最好使用没有用的电脑折腾,有点风险!!!做好数据备份!!!
而且一旦安装了nvidia驱动,就无法登录桌面了。报错:
提示错误:
Failed to use bus name org.freedesktop.DisplayManager, do you have appropriate permissions?
其实也可以把bios的设置切换回去,但是这样显卡就被占用了,资源就更少了。
之前的安装经验,这次精简了下。
https://blog.csdn.net/freewebsys/article/details/105269765
2,首先要关闭切换bios,默认使用集成显卡,禁用nouveau
依次进入CHIPSET–>System Agent configuration 将primary display设定为PEG或者是IGFX;
Internal graphics 设定为AUTO
这样就修改成集成显卡使用了。
然后禁用:Disable Nouveau,是个开源
sudo vim /etc/modprobe.d/blacklist-nouveau.conf
blacklist nouveau
options nouveau modeset=0
修改完成,更新再重启:
sudo update-initramfs -u
sudo reboot
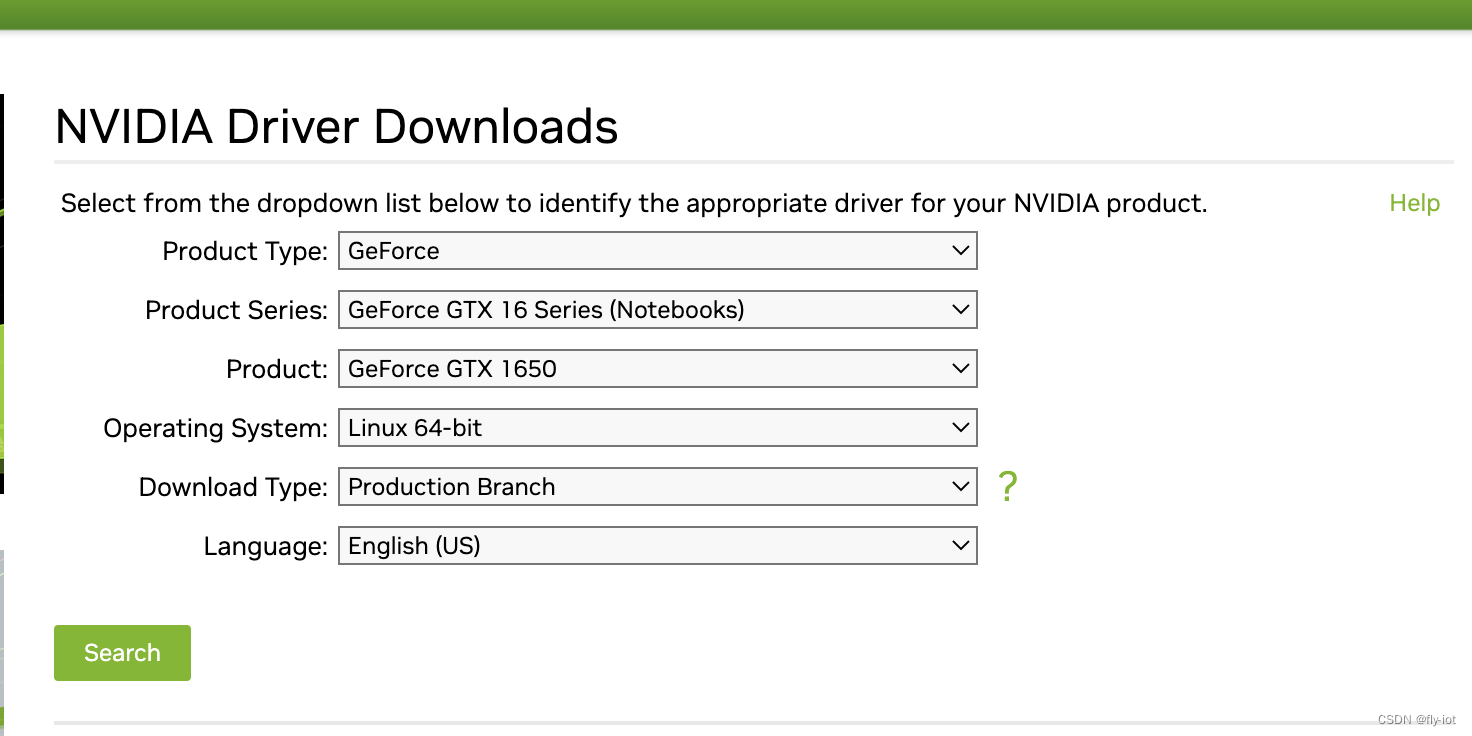
然后从nvidia的官网找到自己显卡的驱动,我的这个是个老显卡 gtx1650 4G显存的
下载驱动:
https://www.nvidia.com/Download/index.aspx?lang=en-us
然后就可以执行了安装驱动了:
3,安装nvidia的驱动和nvidia-docker2
必须关闭x-server
sudo  /etc/init.d/lightdm stop
#还依赖 gcc 库直接把工具包都安装上:
$ sudo apt install build-essential
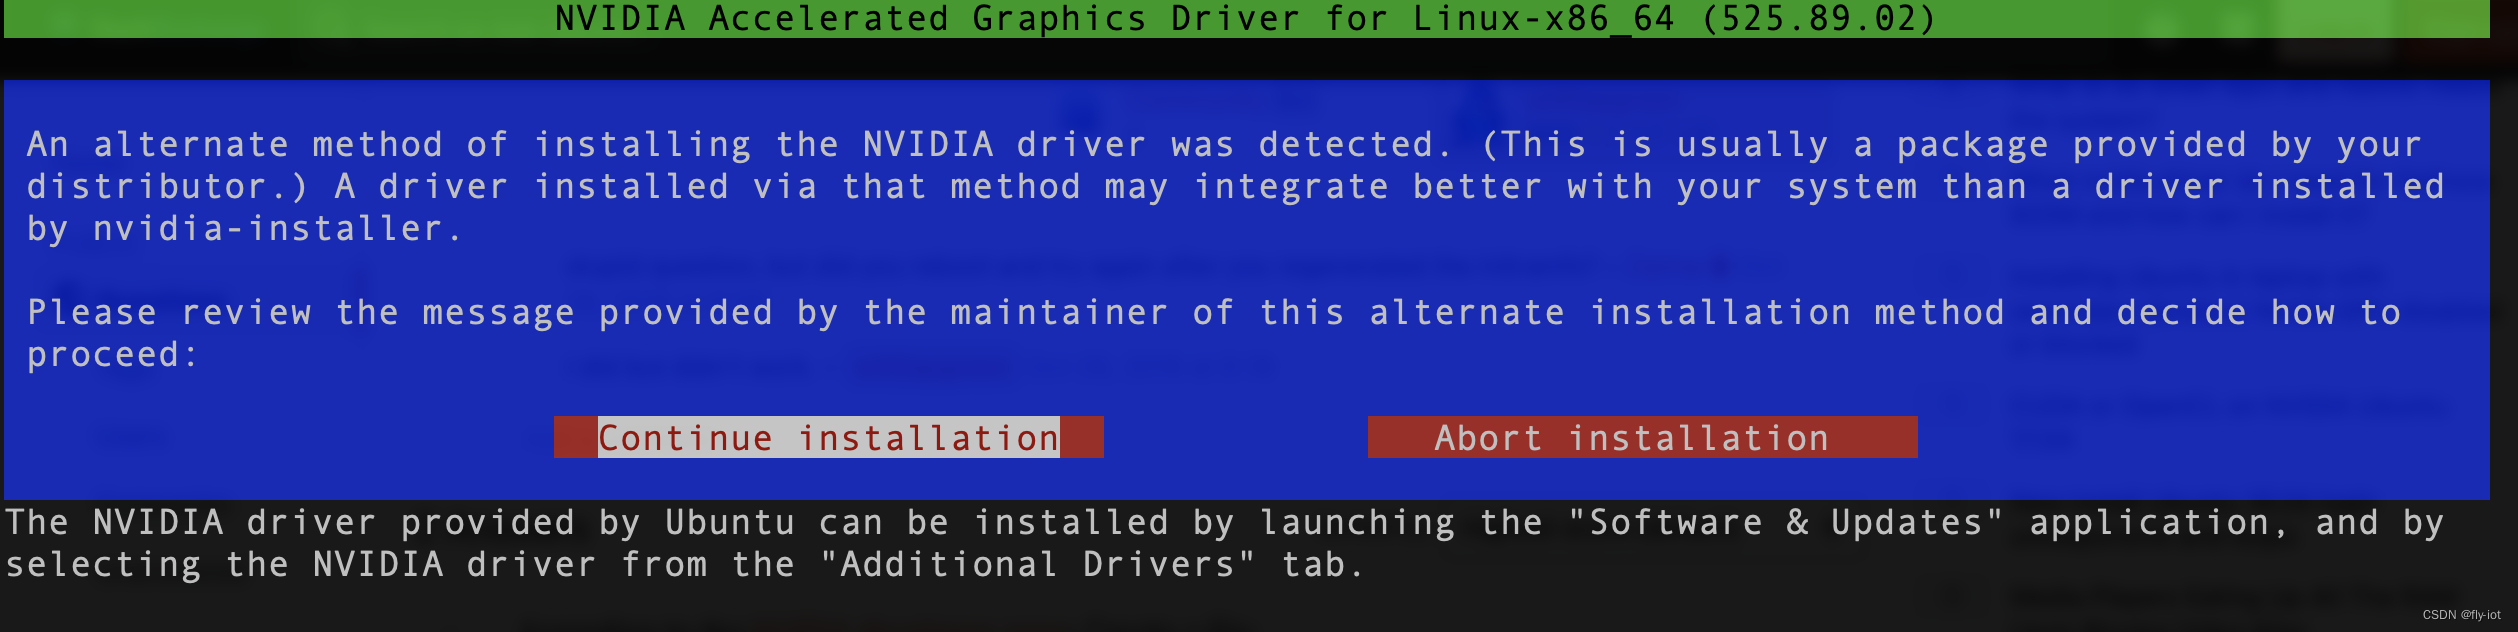
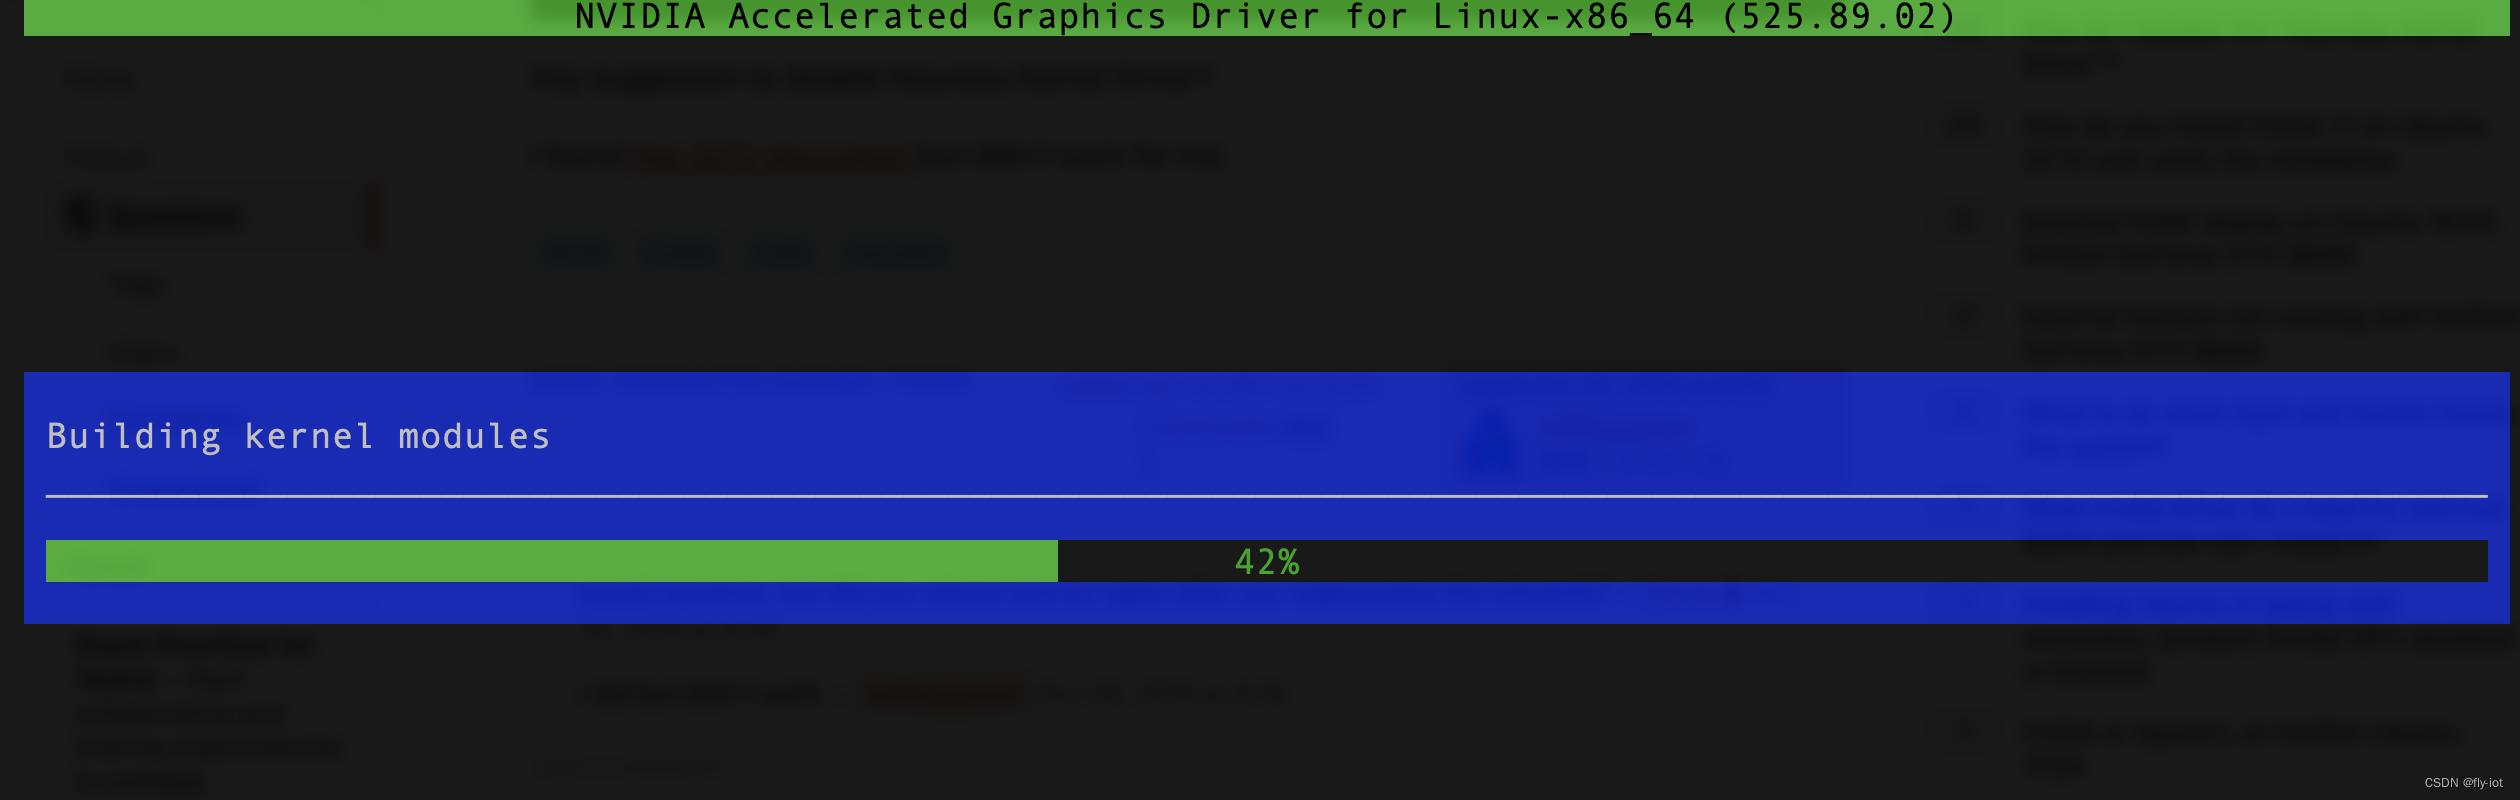
然后 按住 ctrl + alt + F1 切换到另外一个 tty1 终端上进行安装。
sudo ./NVIDIA-Linux-x86_64-525.89.02.run
之后就可以执行 nvidia-smi 查看设备了:
$ nvidia-smi
Tue Mar  7 22:15:34 2023
+-----------------------------------------------------------------------------+
| NVIDIA-SMI 525.89.02    Driver Version: 525.89.02    CUDA Version: 12.0     |
|-------------------------------+----------------------+----------------------+
| GPU  Name        Persistence-M| Bus-Id        Disp.A | Volatile Uncorr. ECC |
| Fan  Temp  Perf  Pwr:Usage/Cap|         Memory-Usage | GPU-Util  Compute M. |
|                               |                      |               MIG M. |
|===============================+======================+======================|
|   0  NVIDIA GeForce ...  Off  | 00000000:01:00.0 Off |                  N/A |
| 46%   54C    P0    13W /  75W |      0MiB /  4096MiB |      0%      Default |
|                               |                      |                  N/A |
+-------------------------------+----------------------+----------------------+

+-----------------------------------------------------------------------------+
| Processes:                                                                  |
|  GPU   GI   CI        PID   Type   Process name                  GPU Memory |
|        ID   ID                                                   Usage      |
|=============================================================================|
|  No running processes found                                                 |
+-----------------------------------------------------------------------------+
安装完成驱动之后就可以安装nvidia-docker了也是特别简单:
直接增加源进行安装:
# 先安装docker:
curl -fsSL https://get.docker.com -o get-docker.sh
sudo sh get-docker.sh
# 把当前用户加入到 docker 组;
sudo gpasswd -a $USER docker
# 更新docker组
newgrp docker
# 增加自动启动
sudo systemctl enable docker

distribution=$(. /etc/os-release;echo $ID$VERSION_ID)
curl -s -L https://nvidia.github.io/nvidia-docker/gpgkey | sudo apt-key add -
curl -s -L https://nvidia.github.io/nvidia-docker/$distribution/nvidia-docker.list | sudo tee /etc/apt/sources.list.d/nvidia-docker.list

sudo apt-get update && sudo apt-get install -y nvidia-container-toolkit nvidia-docker2
查看配置,已经又nvidia runtime了,再加上中国镜像和配置数据路径:
# cat /etc/docker/daemon.json
{
   "runtimes": {
        "nvidia": {
            "path": "nvidia-container-runtime",
            "runtimeArgs": []
        }
   },
  "data-root": "/data/docker",
  "registry-mirrors" : [
      "http://registry.docker-cn.com"
    ],
  "insecure-registries" : [
      "registry.docker-cn.com"
    ]
}
执行简单测试,使用TensorFlow 官方的GPU镜像即可:
docker run --name gpt2gpu -itd -v `pwd`:/data --gpus all -e NVIDIA_DRIVER_CAPABILITIES=compute,utility -e NVIDIA_VISIBLE_DEVICES=all tensorflow/tensorflow:latest-gpu
执行 python 脚本测试下:
# 先登录到 tensorflow gpu 容器中
docker exec -it gpt2gpu bash
# 执行测试脚本:

# python -c "import tensorflow as tf; print(tf.reduce_sum(tf.random.normal([1000, 1000])))"
2023-03-07 14:05:45.153075: I tensorflow/core/platform/cpu_feature_guard.cc:193] This TensorFlow binary is optimized with oneAPI Deep Neural Network Library (oneDNN) to use the following CPU instructions in performance-critical operations:  AVX2 FMA
To enable them in other operations, rebuild TensorFlow with the appropriate compiler flags.
2023-03-07 14:05:47.126280: I tensorflow/compiler/xla/stream_executor/cuda/cuda_gpu_executor.cc:981] successful NUMA node read from SysFS had negative value (-1), but there must be at least one NUMA node, so returning NUMA node zero
2023-03-07 14:05:47.166058: I tensorflow/compiler/xla/stream_executor/cuda/cuda_gpu_executor.cc:981] successful NUMA node read from SysFS had negative value (-1), but there must be at least one NUMA node, so returning NUMA node zero
2023-03-07 14:05:47.166419: I tensorflow/compiler/xla/stream_executor/cuda/cuda_gpu_executor.cc:981] successful NUMA node read from SysFS had negative value (-1), but there must be at least one NUMA node, so returning NUMA node zero
2023-03-07 14:05:47.167285: I tensorflow/core/platform/cpu_feature_guard.cc:193] This TensorFlow binary is optimized with oneAPI Deep Neural Network Library (oneDNN) to use the following CPU instructions in performance-critical operations:  AVX2 FMA
To enable them in other operations, rebuild TensorFlow with the appropriate compiler flags.
2023-03-07 14:05:47.168368: I tensorflow/compiler/xla/stream_executor/cuda/cuda_gpu_executor.cc:981] successful NUMA node read from SysFS had negative value (-1), but there must be at least one NUMA node, so returning NUMA node zero
2023-03-07 14:05:47.168727: I tensorflow/compiler/xla/stream_executor/cuda/cuda_gpu_executor.cc:981] successful NUMA node read from SysFS had negative value (-1), but there must be at least one NUMA node, so returning NUMA node zero
2023-03-07 14:05:47.169057: I tensorflow/compiler/xla/stream_executor/cuda/cuda_gpu_executor.cc:981] successful NUMA node read from SysFS had negative value (-1), but there must be at least one NUMA node, so returning NUMA node zero
2023-03-07 14:05:48.338063: I tensorflow/compiler/xla/stream_executor/cuda/cuda_gpu_executor.cc:981] successful NUMA node read from SysFS had negative value (-1), but there must be at least one NUMA node, so returning NUMA node zero
2023-03-07 14:05:48.338243: I tensorflow/compiler/xla/stream_executor/cuda/cuda_gpu_executor.cc:981] successful NUMA node read from SysFS had negative value (-1), but there must be at least one NUMA node, so returning NUMA node zero
2023-03-07 14:05:48.338375: I tensorflow/compiler/xla/stream_executor/cuda/cuda_gpu_executor.cc:981] successful NUMA node read from SysFS had negative value (-1), but there must be at least one NUMA node, so returning NUMA node zero
2023-03-07 14:05:48.338496: I tensorflow/core/common_runtime/gpu/gpu_device.cc:1613] Created device /job:localhost/replica:0/task:0/device:GPU:0 with 2622 MB memory:  -> device: 0, name: NVIDIA GeForce GTX 1650, pci bus id: 0000:01:00.0, compute capability: 7.5
tf.Tensor(45.326996, shape=(), dtype=float32)

可以看到已经在使用 NVIDIA GeForce GTX 1650 显卡了。
3,最后可以执行gpt-2-simple的项目了,然后显存太小OOM了
运行之前的gpt-2-simple的项目,使用gpu镜像,结果就OOM了。
看来4G内存还是太小了。
return tf_session.TF_SessionRun_wrapper(self._session, options, feed_dict,
tensorflow.python.framework.errors_impl.ResourceExhaustedError: failed to allocate memory
	 [[{{node gradients/model/h3/attn/Max_grad/Cast}}]]
Hint: If you want to see a list of allocated tensors when OOM happens, add report_tensor_allocations_upon_oom to RunOptions for current allocation info. This isn't available when running in Eager mode.
本文的原文连接是:
https://blog.csdn.net/freewebsys/article/details/108971807


 1671
1671


 被折叠的 条评论
为什么被折叠?
被折叠的 条评论
为什么被折叠?
 到【灌水乐园】发言


