


文章目录
本文介绍了如何用creat-react-app脚手架搭建一个react项目的基本结构,同时配置webpack、typescript、antd、axios、redux等常用的库,比较适合小白入门。
本文项目代码下载:https://download.csdn.net/download/ganyingxie123456/88800965(代码会不定时更新,可能会和本文中部分页面截图展示有所区别,但总的是会更完善)
(如果要跟着实现的话,建议下载哦参考哦~)
一、安装及初始化
1、create-react-app脚手架版本查看:create-react-app -V

如果没有安装create-react-app脚手架,可执行安装命令:npm install -g create-react-app
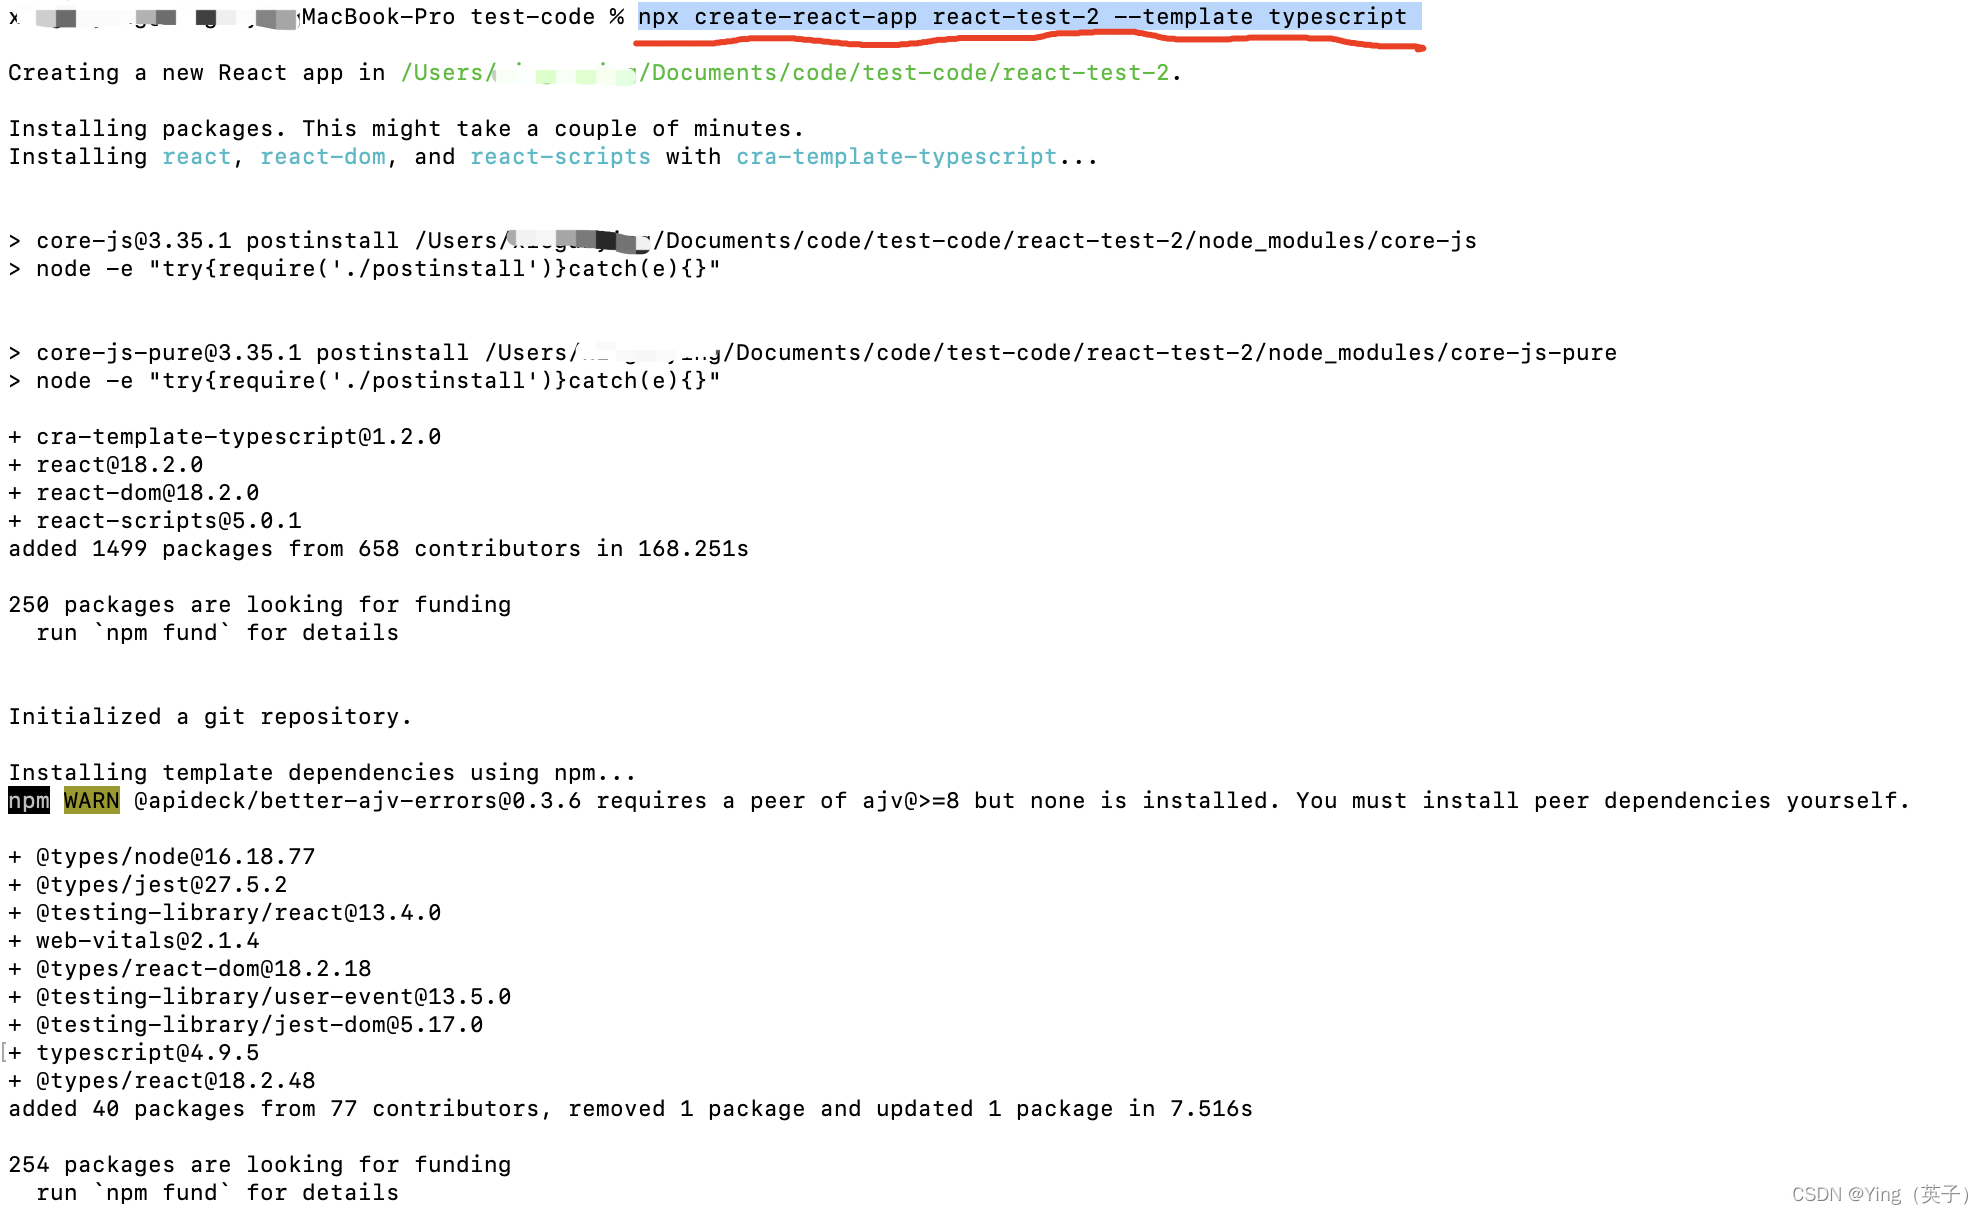
2、新建一个新项目:npx create-react-app react-test-2 --template typescript
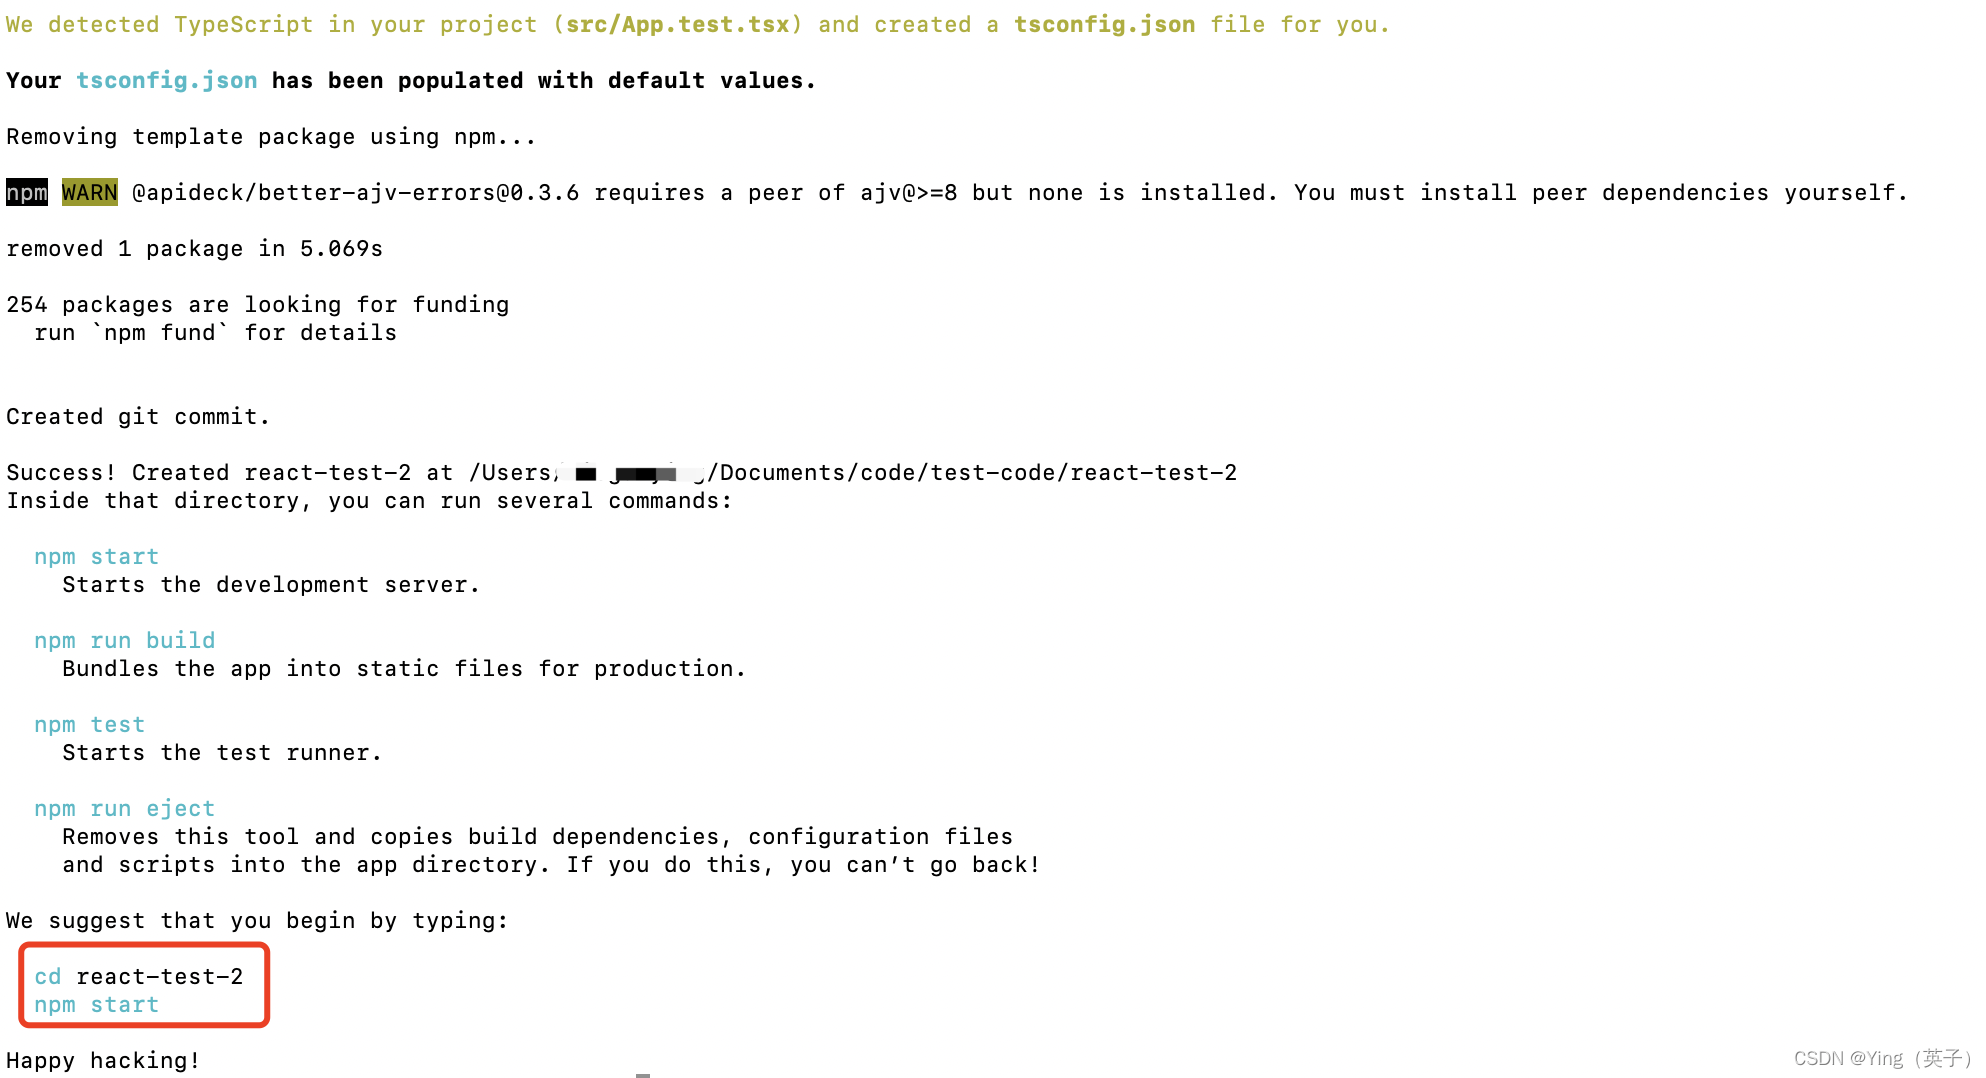
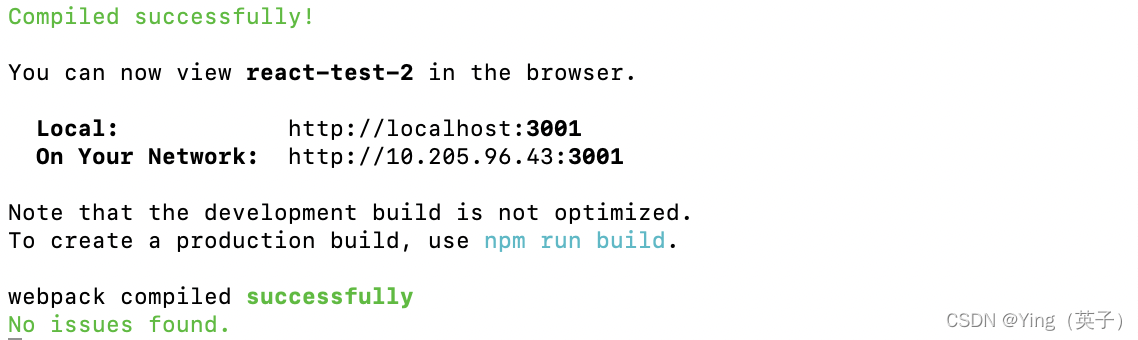
3、运行项目:cd react-test-1 > npm start
二、TypeScript配置
写给 React 开发者的 TypeScript 指南:https://www.freecodecamp.org/chinese/news/typescript-for-react-developers/
通过create-react-app脚手架生成的项目,会自动生成 tsconfig.json ,并且默认带有一些最基本的配置,更多配置可查阅 TypeScript 中文手册,配置适合自己的tsconfig,本文配置如下:
{
  "compilerOptions": {
  	"baseUrl": "./", // 配置vscode使用@提示(配合webpack配置)
    "paths": {
      "@/*": ["src/*"] // 配置vscode使用@提示(配合webpack配置)
    },
    "target": "es5", // 指定 ECMAScript 版本
    "lib": [ // 要包含在编译中的依赖库文件列表
      "dom",
      "dom.iterable",
      "esnext"
    ],
    "allowJs": true, // 允许编译 JavaScript 文件
    "skipLibCheck": true, // 跳过所有声明文件的类型检查
    "esModuleInterop": true, // 禁用命名空间引用(import * as fs from "fs"),启用CJS/AMD/UMD风格引用(import fs from "fs")
    "allowSyntheticDefaultImports": true, // 允许从没有默认导出的模块进行默认导入
    "strict": true, // 启用所有严格类型检查选项
    "forceConsistentCasingInFileNames": true, // 禁止对同一个文件的不一致的引用
    "noFallthroughCasesInSwitch": true, // 报告switch语句的fallthrough错误。(即不允许switch的case语句贯穿)
    "module": "esnext", // 指定模块代码生成
    "moduleResolution": "node", // 使用 Node.js 风格解析模块
    "resolveJsonModule": true, // 允许使用 .json 扩展名导入的模块
    "isolatedModules": false, // 将每个文件作为单独的模块
    "noEmit": true, // 不输出(意思是不编译代码,只执行类型检查)
    "jsx": "react-jsx",
    "noUnusedLocals": true, // 报告未使用的本地变量的错误
    "noUnusedParameters": false // 报告未使用参数的错
  },
  "include": [ // 应该进行类型检查的文件
    "src"
  ],
  "exclude": ["node_modules"] // 不进行类型检查的文件
}
三、Webpack配置
webpack中文文档地址:https://www.webpackjs.com/concepts/
通过create-react-app脚手架搭建的项目其中的webpack配置文件都是被封装起来的,要修改webpack配置,一般有以下3种方法:
1)通过 CRA 官方支持的 --scripts-version 参数,创建项目时使用自己重写过的 react-scripts 包;
2) 使用 react-app-rewired + customize-cra 组合覆盖配置;
-3)使用 craco 覆盖配置。
本文中我们通过craco 来修改。
1、引入craco:npm i @craco/craco
2、在项目目录下新增craco.config.ts文件
// craco.config.ts

const path = require("path");

const pathResolve = (pathUrl: string) => path.join(__dirname, pathUrl);

module.exports = {
  reactScriptsVersion: "react-scripts",
  // babel配置
  babel: {
    // babel插件
    plugins: [],
    // babel-loader选项
    loaderOptions: {},
  },
  // 插件配置
  plugins: [],
  // webpack配置
  webpack: {
    // 别名配置
    alias: {
      "@": pathResolve("src"),
    },
    // 修改webpack配置
    configure: (webpackConfig: any, { env }: any) => {
      // 在此处修改
      return webpackConfig;
    },
  },
  // 本地服务器配置
  devServer: {
    port: 3005, // 本地服务的端口号,如果package.json中配置了端口号,会覆盖package.json
    proxy: {
      "/api": {
        target: "http://localhost:3005",
        changeOrigin: true,
        secure: false,
        xfwd: false,
      },
    },
  },
};
- 注意:配置
webpack别名alias,还需要在tsconfig.json中也进行一下配置,如下:

caro更多配置可查看官网:https://github.com/dilanx/craco/blob/main/packages/craco/README.md
2、修改package.json文件
{
 "scripts": {
    "start": "set PORT=4000 & craco start",
    "build": "set GENERATE_SOURCEMAP=false & craco build",
    "test": "craco test",
    "eject": "craco eject"
  },
}
变量说明:
- PORT 启动端口
- GENERATE_SOURCEMAP 打包时是否生成 sourceMap
4、特别说明
从 react-scripts@2.1.0 开始,推荐使用其内置的配置覆盖机制(即 craco 或者直接编辑 react-scripts/config 中的文件)。但对于旧版本或者某些特定需求,react-app-rewired 仍然是一个实用的选择,具体使用步骤是:先执行安装命令 npm i react-app-rewired customize-cra -D,然后在项目目录下新增一个config-overrides.ts文件即可。
四、Prettier统一编码风格
-
安装:
npm i prettier -D -
在项目目录下新增:
.prettierignore和.prettierrc.ts
.prettierignore
# Ignore artifacts:
node_modules
dist
.prettierignore
.prettierrc.ts
module.exports = {
  // 一行代码的最大字符数,默认是80
  printWidth: 120,
  // tab宽度为2空格
  tabWidth: 2,
  // 是否使用tab来缩进,我们使用空格
  useTabs: false,
  // 结尾是否添加分号,false的情况下只会在一些导致ASI错误的其工况下在开头加分号,我选择无分号结尾的风格
  semi: true,
  // 使用单引号
  singleQuote: true,
  // 对象中key值是否加引号:as-needed在需要的情况下加引号,consistent是有一个需要引号就统一加,preserve是保留用户输入的引号
  quoteProps: "as-needed",
  // 在jsx文件中的引号需要单独设置
  jsxSingleQuote: false,
  // 尾部逗号设置,es5是尾部逗号兼容es5,none就是没有尾部逗号,all是指所有可能的情况,需要node8和es2017以上的环境
  trailingComma: "es5",
  // object对象里面的key和value值和括号间的空格
  bracketSpacing: true,
  // jsx标签多行属性写法时,尖括号是否另起一行
  jsxBracketSameLine: false,
  // 箭头函数单个参数的情况是否省略括号,默认always是总是带括号
  arrowParens: "avoid",
  // range是format执行的范围,可以选执行一个文件的一部分,默认的设置是整个文件
  rangeStart: 0,
  rangeEnd: Infinity,
  // vue script和style标签中是否缩进,开启可能会破坏编辑器的代码折叠
  vueIndentScriptAndStyle: false,
  // 行尾换行符,默认是lf,
  endOfLine: "auto",
  // 默认是auto,控制被引号包裹的代码是否进行格式化
  embeddedLanguageFormatting: "off",
};
五、使用less
- 安装依赖:
npm i less less-loader craco-less - 在
craco.config.ts中新增plugins配置:
const CracoLess = require('craco-less');

module.exports = {
	 plugins: [
	   {
	     plugin: CracoLess,
	     options: {
	       lessLoaderOptions: {
	         lessOptions: {
	           javascriptEnabled: true,
	           modifyVars: {
	             "@primary-color": "#1890ff",
	           },
	         },
	       },
	     },
	   },
	 ],
}
- 在项目目录下
react-app-env.d.ts新增:
declare module "*.less" {
  const classes: { readonly [key: string]: string };
  export default classes;
}
declare module "*.module.less" {
  const classes: { readonly [key: string]: string };
  export default classes;
}
六、Antd 安装及使用
1、安装:npm i antd
2、在项目目录index.ts文件引入antd样式文件

3、使用antd,在页面引入组件即可
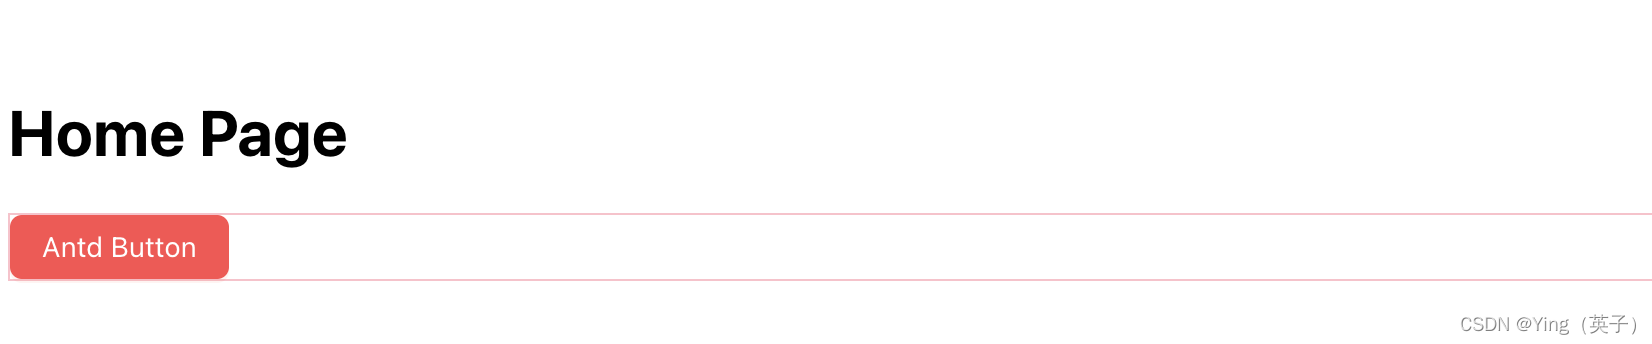
// APP.tsx
import "./App.less";
import { Button } from "antd";

function App() {
  return (
    <div className="App">
      <h1>Home Page</h1>
      <div className="content">
        <Button type="primary" danger>
          Antd Button
        </Button>
      </div>
    </div>
  );
}

export default App;
// App.less
.App {
  margin: 50px;
  .content {
    border: 1px solid pink;
  }
}
七、添加redux及使用
中文管网:https://cn.redux.js.org/tutorials/essentials/part-1-overview-concepts
redux不是项目必需的,如果你不确定是否需要,那就是不需要,在react无法实现时,再考虑。
- 安装:
npm i redux react-redux

- 使用
新增以下文件
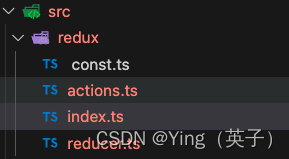
redux/index.ts
import { createStore } from "redux";
import reducer from "./reducers";

const store = createStore(reducer);

export default store;
reducers.ts
import { ModifyAction } from "./actions";
import { ADD, LESSEN } from "./const";

// 对action进行限制,必须是在ModifyAction定义的
export default (state = 0, action: ModifyAction): number => {
  switch (action.type) {
    case ADD:
      return state + 1;
    case LESSEN:
      return state - 1;
    default:
      return state;
  }
};
action.ts
import { ADD, ADD_TYPE, LESSEN, LESSEN_TYPE } from "./const";

export interface ADDAction {
  type: ADD_TYPE;
}
export interface LESSENAction {
  type: LESSEN_TYPE;
}

export type ModifyAction = ADDAction | LESSENAction;

export const Add = () => ({
  type: ADD,
});

export const Lessen = () => ({
  type: LESSEN,
});
const.ts常量文件
// 定义state增加的
export const ADD = "ADD";
export type ADD_TYPE = typeof ADD;

// 定义state减少
export const LESSEN = "LESSEN";
export type LESSEN_TYPE = typeof LESSEN;
修改入口文件index.tsx
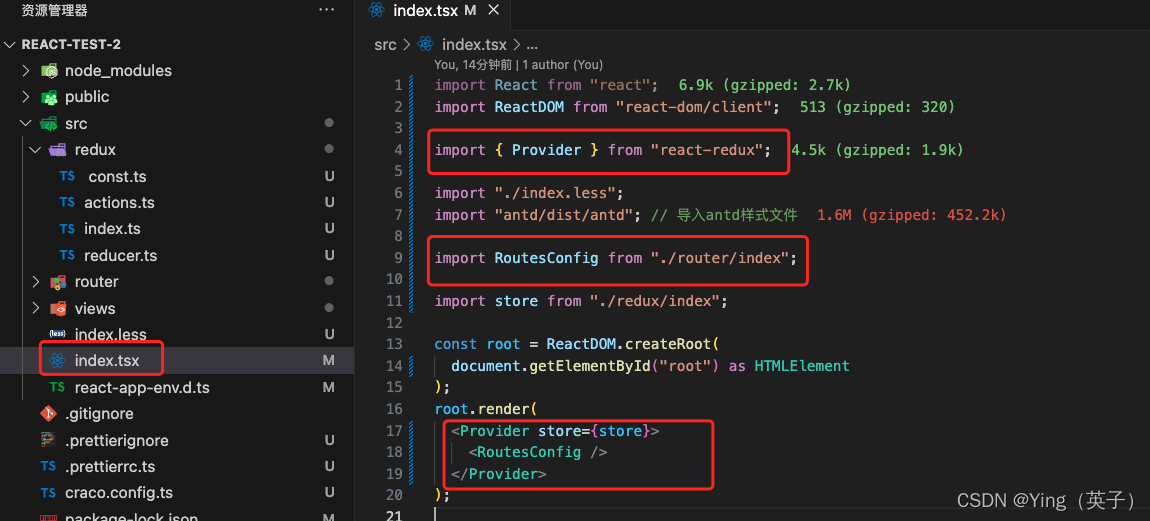
页面调用
import React, { Component } from "react";
import { connect } from "react-redux";
import { Dispatch } from "redux";

import { Add, Lessen } from "../../redux/actions";

import { Button } from "antd";

interface IProps {
  value?: number;
  handleAdd: () => void;
  handleMinus: () => void;
}

class Home extends Component<IProps> {
  public render() {
    const { value, handleAdd, handleMinus } = this.props;
    return (
      <div>
        <Button type="primary" onClick={handleAdd}>
          {value} + {" "}
        </Button>
        <Button type="primary" onClick={handleMinus}>
          {value} -{" "}
        </Button>
      </div>
    );
  }
}

// 将 reducer 中的状态插入到组件的 props 中
const mapStateToProps = (state: number): { value: number } => ({
  value: state,
});

// 将 对应action 插入到组件的 props 中
const mapDispatchToProps = (dispatch: Dispatch) => ({
  handleAdd: () => dispatch(Add()),
  handleMinus: () => dispatch(Lessen()),
});

// 使用 connect 高阶组件对 Counter 进行包裹
export default connect(mapStateToProps, mapDispatchToProps)(Home);
八、添加Router及配置
官网:https://baimingxuan.github.io/react-router6-doc/start/overview
React Router 是专为 React 设计的路由解决方案。它利用HTML5 的history API,来操作浏览器的 session history (会话历史)。
react-router包含3个库,react-router、react-router-dom和react-router-native。
react-router提供最基本的路由功能,实际使用的时候我们不会直接安装react-router,而是根据应用运行的环境选择安装react-router-dom(在浏览器中使用)或react-router-native(在rn中使用)。
react-router-dom和react-router-native都依赖react-router,所以在安装时,react-router也会自动安装,创建web应用。
- 安装:
npm i react-router-dom

- 使用示例1: 简单路由,没有子路由嵌套
- 新建一个目录及文件:router/index.tsx
import React, { Component } from "react";
import { BrowserRouter as Router, Routes, Route } from "react-router-dom";

import App from "../views/App";
import Home from "../views/home";
import About from "../views/about";

const routeConfig = [
  {
    path: "/",
    component: <App />,
  },
  {
    path: "/home",
    component: <Home />,
  },
  {
    path: "/about",
    component: <About />,
  },
];

class RoutesConfig extends Component {
  render() {
    return (
      <Router>
        <Routes>
          {routeConfig.map((route) => (
            <Route
              path={route.path}
              element={route.component}
              key={route.path}
            />
          ))}
        </Routes>
      </Router>
    );
  }
}

export default RoutesConfig;
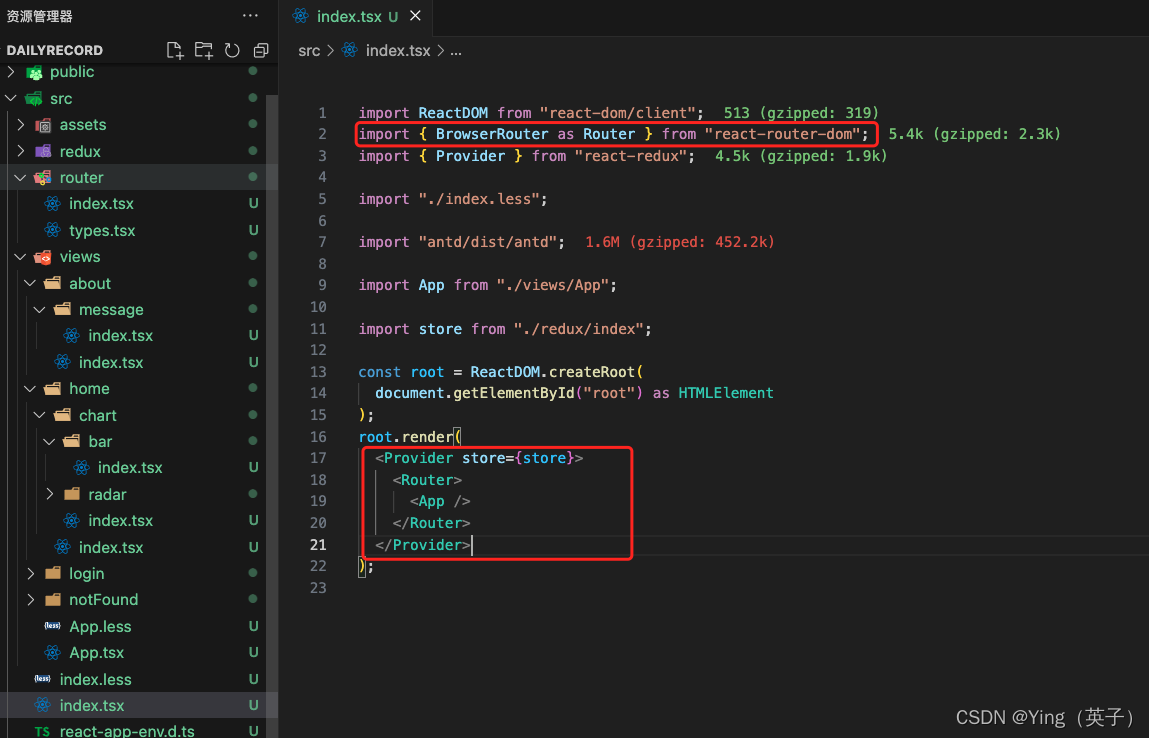
- 在项目入口文件引入路由配置文件

示例2: 有子路由嵌套
- 路由文件:
router/index.tsx
import { RouteIProps } from "./types";

import Home from "../views/home";
import About from "../views/about";
import Chart from "../views/home/chart/index";
import Bar from "../views/home/chart/bar/index";
import Radar from "../views/home/chart/radar/index";
import Message from "../views/about/message/index";
import NotFound from "../views/notFound";

const routesList: RouteIProps[] = [
  {
    key: "/",
    redirect: "/home",
  },
  {
    key: "/home",
    label: "首页",
    element: <Home />,
    children: [
      {
        key: "/chart",
        label: "图表",
        redirect: "/bar",
        children: [
          {
            key: "/bar",
            label: "柱状图",
            element: <Bar />,
          },
          {
            key: "/radar",
            label: "雷达图",
            element: <Radar />,
          },
        ],
      },
      {
        key: "/table",
        label: "表格",
        children: [
          {
            key: "/test",
            label: "表格",
            element: <Chart />,
          },
        ],
      },
    ],
  },
  {
    key: "/about",
    label: "关于",
    element: <About />,
    children: [
      {
        key: "/message",
        label: "Message",
        element: <Message />,
      },
    ],
  },
  {
    key: "/more",
    label: "更多",
    element: <About />,
  },
  {
    key: "*",
    label: "",
    element: <NotFound />,
  },
];

export default routesList;
- 路由对象类型定义:
router/types.tsx
import React from "react";

export interface RouteIProps {
  key: string;
  label?: string;
  redirect?: string;
  element?: React.ReactNode;
  children?: RouteIProps[];
}
- 修改项目入库文件:
index.tsx
- 页面使用:
src/App.tsx
import React, { useState, Suspense } from "react";
import { Routes, Route, useNavigate, Navigate } from "react-router-dom";
import type { MenuProps } from "antd";
import { Layout, Menu } from "antd";
import { RouteIProps } from "../router/types";
import routesList from "../router/index";

import "./App.less";

const { Header, Content, Sider, Footer } = Layout;

const App: React.FC = () => {
  const navigate = useNavigate();

  // 顶部菜单:高亮项
  const defaultSelectedKeys = ["/home"];

  // 侧边菜单:高亮项、 展开项
  const siderDefaultSelectedKeys: string[] = [];
  const siderDefaultOpenKeys: string[] = [];

  // 当前顶部菜单路径
  const [curPath, setCurPath] = useState(defaultSelectedKeys[0]);

  // 顶部菜单:过滤没有label的路由
  const menuList: MenuProps["items"] = routesList
    .filter((r) => r.label)
    .map((route) => ({
      key: route.key,
      label: route.label,
    }));

  // 左侧菜单:点击顶部菜单后更新左侧菜单
  let siderMenuList: MenuProps["items"] = [];
  const siderMenu = routesList.filter(
    (item) => item.label && item.key === curPath && item.children
  );
  if (siderMenu.length && siderMenu[0].children) {
    siderMenuList = siderMenu[0].children;
  }

  // 顶部菜单点击事件
  const clickTopMenu: MenuProps["onClick"] = (e) => {
    setCurPath(e.key);
    navigate(e.key, {
      replace: true,
      state: { curPath: e.key, id: 1, name: "home" },
    });
  };

  // 左侧菜单点击事件
  const clickSiderMenu: MenuProps["onClick"] = (e) => {
    navigate(e.key, { replace: true });
  };

  // 数组扁平化
  const flattenArray = (arr: RouteIProps[]): RouteIProps[] => {
    return arr.reduce((result: any, item: any) => {
      return result.concat(
        item,
        Array.isArray(item.children) ? flattenArray(item.children) : []
      );
    }, []);
  };

  return (
    <Layout className="layout-wrapper">
      <Header className="layout-header">
        <div className="sys-logo" />
        <Menu
          theme="dark"
          mode="horizontal"
          defaultSelectedKeys={defaultSelectedKeys}
          items={menuList}
          onClick={clickTopMenu}
          className="menu-wrapper"
        />
      </Header>
      <Layout className={!siderMenuList.length ? "no-sider-menu" : ""}>
        {siderMenuList.length > 0 && (
          <Sider className="layout-sider">
            <Menu
              theme="dark"
              mode="inline"
              defaultSelectedKeys={siderDefaultSelectedKeys}
              defaultOpenKeys={siderDefaultOpenKeys}
              items={siderMenuList}
              onClick={clickSiderMenu}
              className="menu-wrapper"
            />
          </Sider>
        )}
        <Content className="layout-content">
          <Routes>
           {/* 这里做数组扁平化,就是解决常遇到的说router6子路由页面不渲染的问题。
           因为react-router-dom的Routes组件不支持嵌套路由,所以要将路由扁平化,
           然后通过key来判断是否是当前路由,否则就会出现路由跳转错误的问题 */}
            {flattenArray(routesList).map(
              ({ key, element, redirect }: RouteIProps) => {
                return (
                  <Route
                    key={key}
                    path={key}
                    element={redirect ? <Navigate to={redirect} /> : element}
                  ></Route>
                );
              }
            )}
          </Routes>
        </Content>
      </Layout>
      <Footer className="layout-footer">
        ©{new Date().getFullYear()} Created by vickie
      </Footer>
    </Layout>
  );
};

export default App;
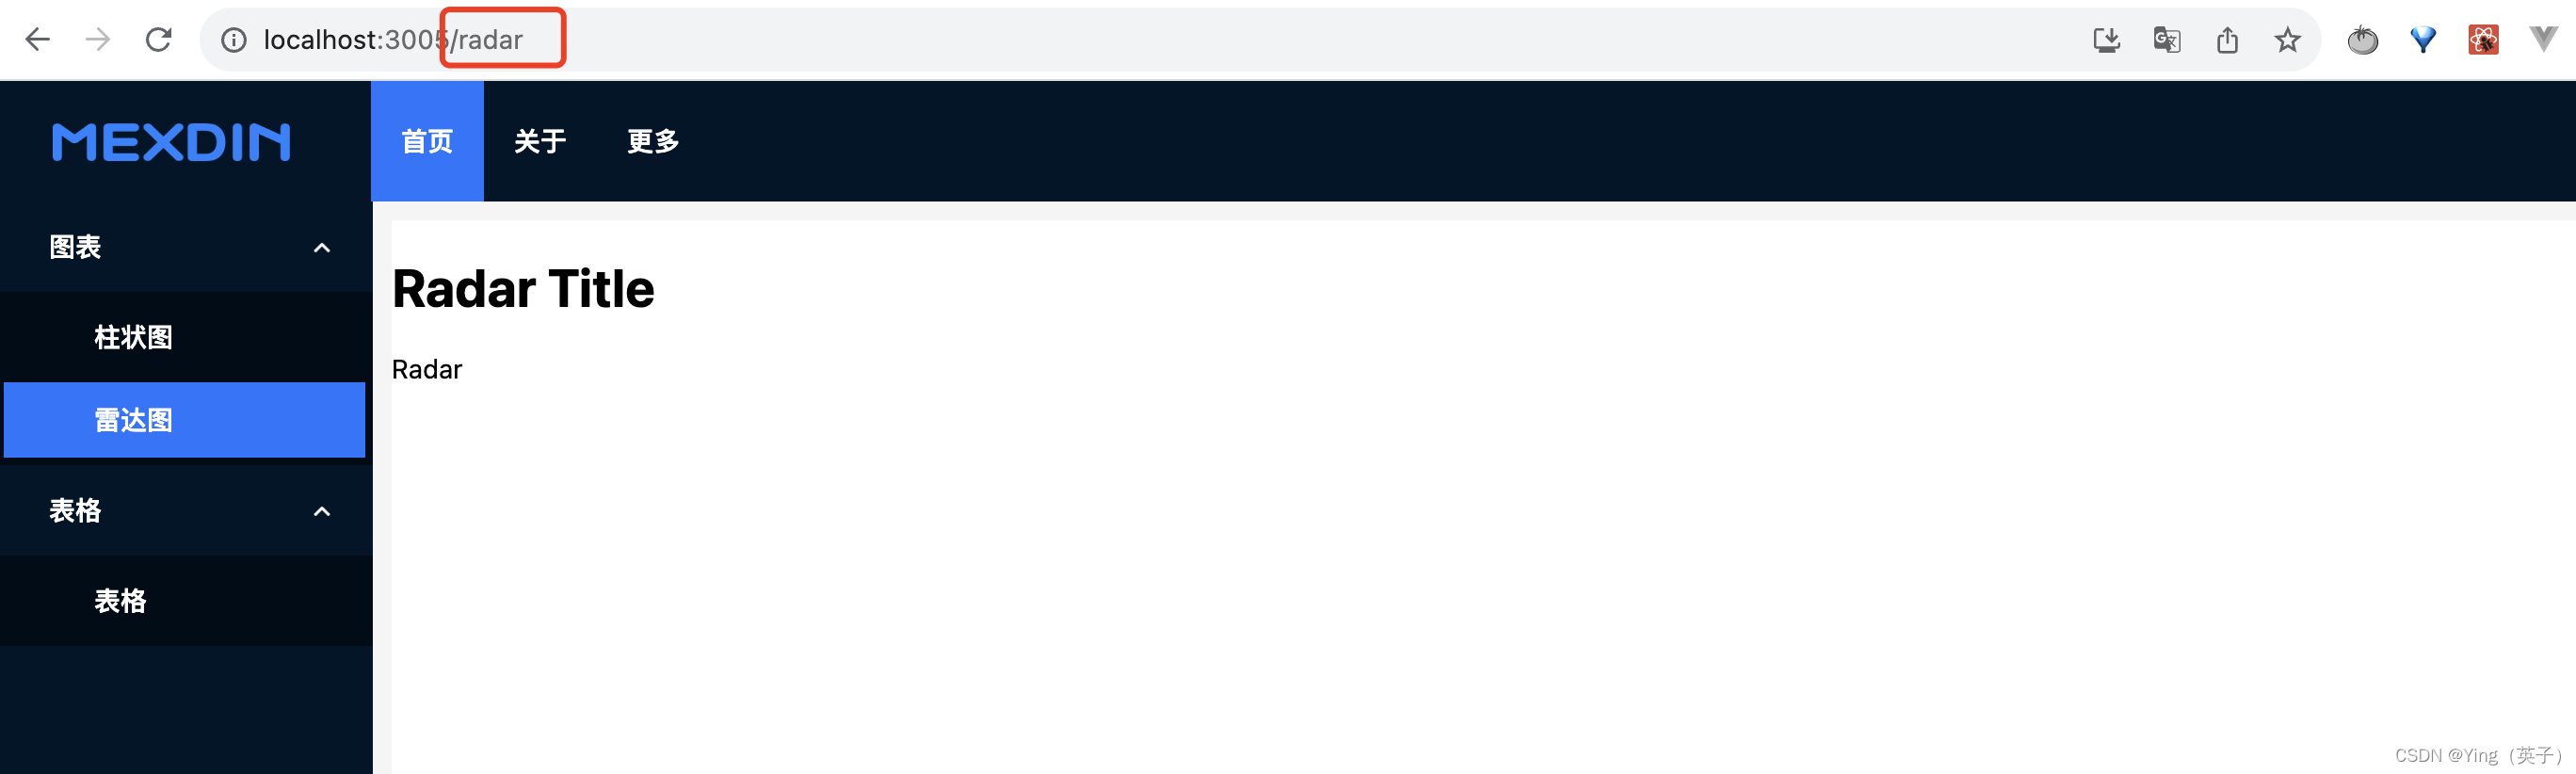
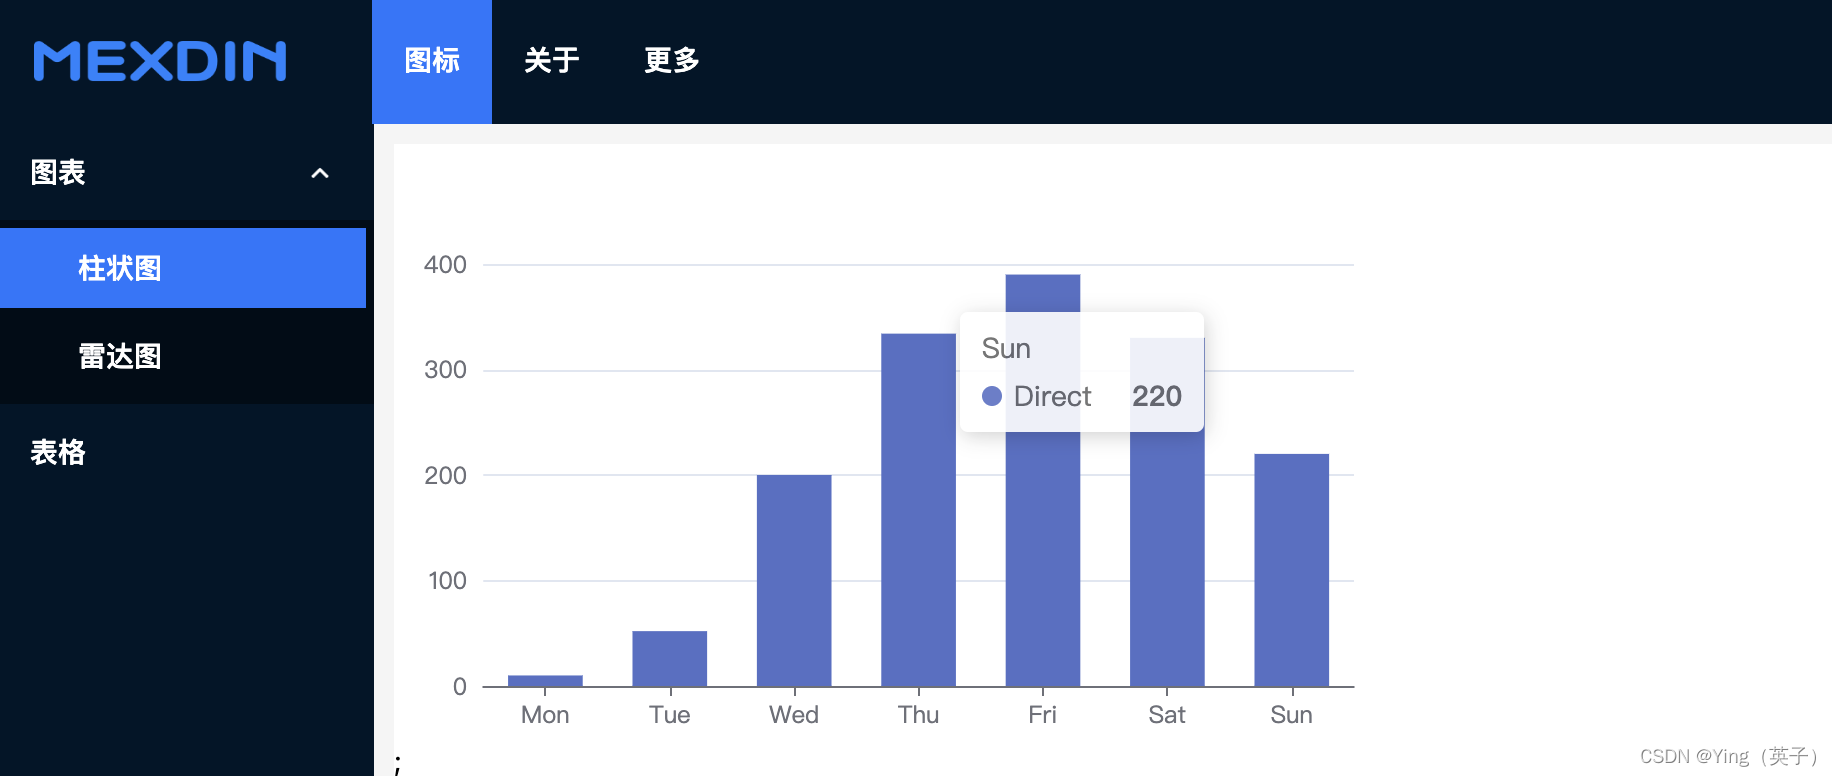
- 页面展示
九、安装axios
中文文档:https://www.axios-http.cn/docs/intro
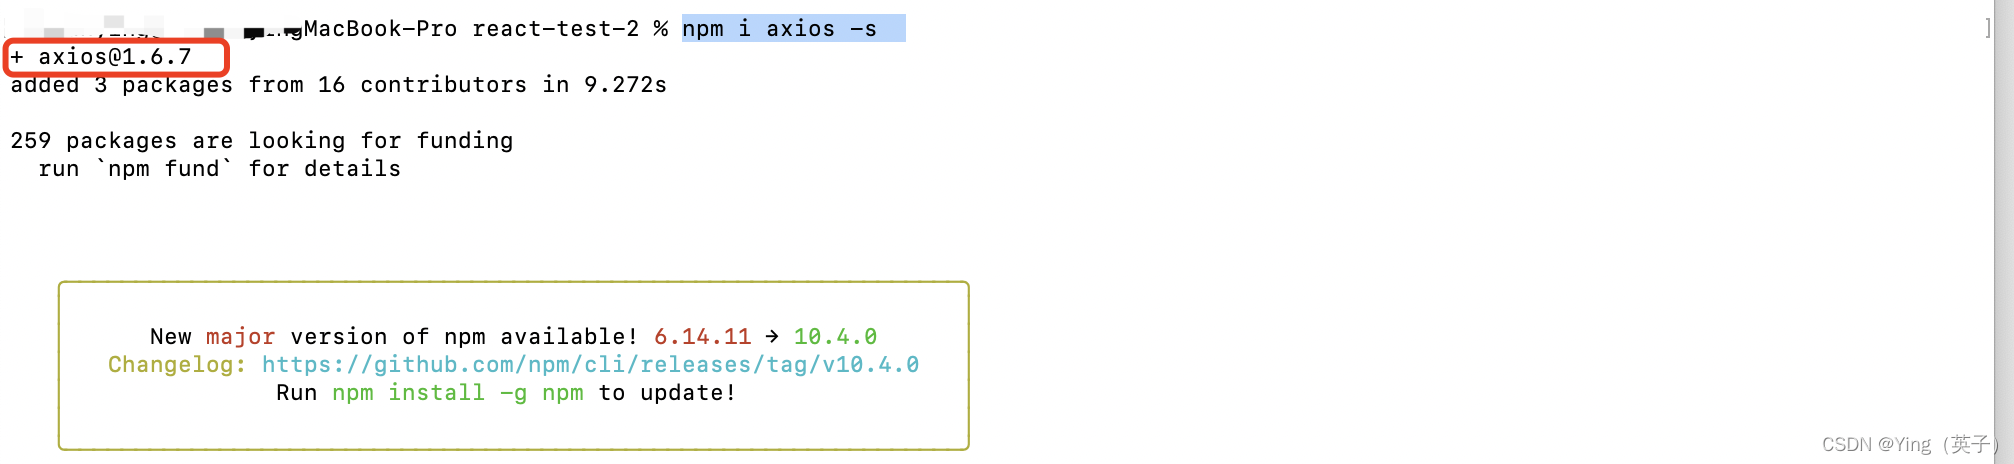
安装:npm i axios -s
十、echarts按需引入
1、安装: npm install echarts
2、封装组件
- 新增
src/components/charts/chartConfig.tsx
import * as echarts from "echarts/core";

import {
  TitleComponent,
  TooltipComponent,
  ToolboxComponent,
  DatasetComponent, // 数据集组件
  DataZoomComponent,
  GridComponent,
  LegendComponent,
  TransformComponent, // 内置数据转换器组件(filter, sort)
} from "echarts/components";
// 组件类型:后缀都为ComponentOption
import type {
  TitleComponentOption,
  TooltipComponentOption,
  ToolboxComponentOption,
  GridComponentOption,
  DatasetComponentOption,
  DataZoomComponentOption,
  LegendComponentOption,
} from "echarts/components";

// 组件:按需引入(需要更多可自行扩展)
import { BarChart, LineChart, PieChart } from "echarts/charts";
// 系列类型:后缀都为 SeriesOption
import type {
  BarSeriesOption,
  LineSeriesOption,
  PieSeriesOption,
} from "echarts/charts";

import { UniversalTransition } from "echarts/features";

import { SVGRenderer, CanvasRenderer } from "echarts/renderers";

// 注册用到的组件
echarts.use([
  TitleComponent,
  ToolboxComponent,
  TooltipComponent,
  DatasetComponent,
  DataZoomComponent,
  GridComponent,
  LegendComponent,
  TransformComponent,
  LineChart,
  BarChart,
  PieChart,
  UniversalTransition,
  SVGRenderer,
  CanvasRenderer,
]);

type ChartOption = echarts.ComposeOption<
  | DatasetComponentOption
  | DataZoomComponentOption
  | GridComponentOption
  | LegendComponentOption
  | TitleComponentOption
  | ToolboxComponentOption
  | TooltipComponentOption
  | LineSeriesOption
  | BarSeriesOption
  | PieSeriesOption
>;

export { ChartOption };
- 新增
src/components/charts/index.tsx
import React, {
  ForwardedRef,
  useEffect,
  useImperativeHandle,
  useLayoutEffect,
  useRef,
} from "react";

import * as echarts from "echarts/core";
import { EChartsType } from "echarts/core";
import { ECElementEvent } from "echarts/types/src/util/types";
import "./chartConfig";
import { ChartOption } from "./chartConfig";

interface ChartRef {
  instance(): EChartsType | undefined;
}

interface MyChartProps {
  option: ChartOption | null | undefined;
  width?: number | string;
  height?: number | string;
  empty?: React.ReactElement;
  onClick?(event: ECElementEvent): any;
}

const ChartInner: React.ForwardRefRenderFunction<ChartRef, MyChartProps> = (
  { option, width = 500, height = 300, onClick },
  ref: ForwardedRef<ChartRef>
) => {
  const chartRef = useRef<HTMLDivElement>(null);
  const chartInstance = useRef<EChartsType>();

  // 注册组件:监听chartRef和option变化
  useEffect(() => {
    if (chartRef.current) {
      chartInstance.current = echarts.getInstanceByDom(chartRef.current);
      if (!chartInstance.current) {
        chartInstance.current = echarts.init(chartRef.current);
        chartInstance.current.on("click", (event) => {
          const ec = event as ECElementEvent;
          if (ec && onClick) onClick(ec);
        });
      }
      if (option) chartInstance.current?.setOption(option);
    }
  }, [chartRef, option]);

  // 重新适配大小,同时开启过渡动画
  const resizeHandler = () => {
    chartInstance.current?.resize({
      animation: { duration: 300 },
    });
  };

  // 窗口大小变化
  useEffect(() => {
    window.addEventListener("resize", resizeHandler);
    return () => {
      window.removeEventListener("resize", resizeHandler);
    };
  }, [option]);

  // 高度变化
  useLayoutEffect(() => {
    resizeHandler();
  }, [width, height]);

  // 获取实例
  const instance = () => {
    return chartInstance.current;
  };

  // 对父组件暴露的方法
  useImperativeHandle(ref, () => ({
    instance,
  }));

  return <div ref={chartRef} style={{ width: width, height: height }} />;
};

const Chart = React.forwardRef(ChartInner);

export default Chart;
- 使用组件
import React from "react";

import Chart from "../../../components/charts/index";
import { ChartOption } from "../../../components/charts/chartConfig";

const Bar: React.FC = () => {
  const option = {
    tooltip: {
      trigger: "axis",
      axisPointer: {
        type: "shadow",
      },
    },
    grid: {
      left: "3%",
      right: "4%",
      bottom: "3%",
      containLabel: true,
    },
    xAxis: [
      {
        type: "category",
        data: ["Mon", "Tue", "Wed", "Thu", "Fri", "Sat", "Sun"],
        axisTick: {
          alignWithLabel: true,
        },
      },
    ],
    yAxis: [
      {
        type: "value",
      },
    ],
    series: [
      {
        name: "Direct",
        type: "bar",
        barWidth: "60%",
        data: [10, 52, 200, 334, 390, 330, 220],
      },
    ],
  } as ChartOption;

  return (
    <>
      <Chart option={option} width={500} height={300} />;
    </>
  );
};

export default Bar;
- 页面展示
本文涉及内容散多较零散,建议可以对着demo代码看看~
代码下载:https://download.csdn.net/download/ganyingxie123456/88800965(项目代码资源会不定时更新,可能会和本文中部分页面截图展示有所区别,但总的是会更完善)


 1596
1596


 被折叠的 条评论
为什么被折叠?
被折叠的 条评论
为什么被折叠?
 到【灌水乐园】发言


