


unsloth成功将 DeepSeek 的 R1 671B 参数模型量化至 131GB 大小,相比原始的 720GB 减少了 80%,同时保持了高度功能性。
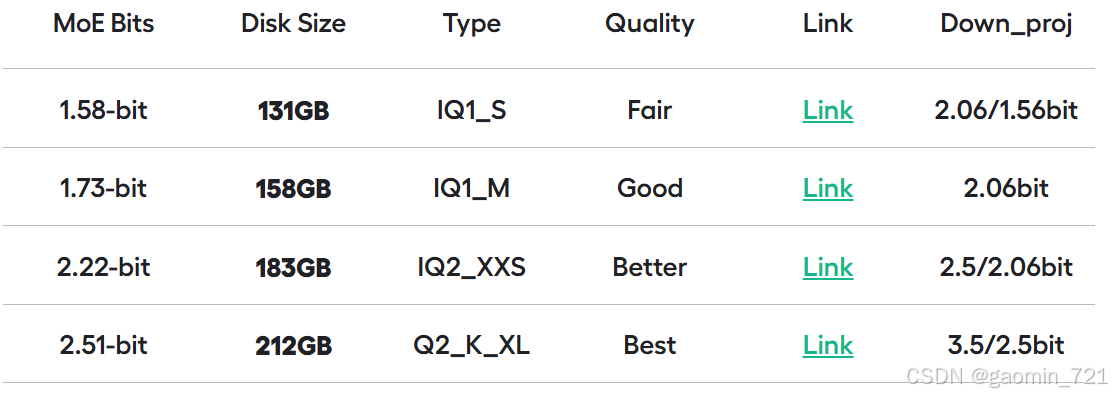
unsloth提供了 4 个动态量化版本(大小从 131GB 到 212GB 不等)上传至:huggingface.co/unsloth/DeepSeek-R1-GGUF
根据unsloth的描述,其量化模型并不一定需要显存(GPU),内存也可以运行。
unsloth官博内容:
“1.58bit 量化版本应可适配 160GB 显存(如 2 张 H100 80GB),以实现快速推理,其吞吐量约为每秒 140 个 token,单用户推理速度约为每秒 14 个 token。运行 1.58bit 的 R1 并不一定需要显存(GPU),仅需 20GB 内存(CPU)即可运行,但速度可能较慢。为了获得最佳性能,我们建议显存 + 内存的总和至少为 80GB 以上。”
因此我们尝试使用Autodl的服务器资源,部署unsloth量化的2.51-bit DeepSeek-R1 671B模型。
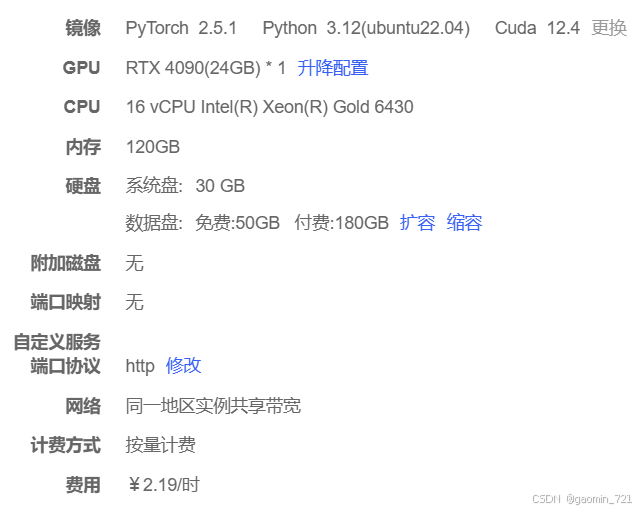
1、服务器资源配置
硬件上我们选用了RTX4090 的24G显存 + 120G内存的组合,镜像选用比较成熟的python 3.12 pytorch 2.5.1 Cuda 12.4,操作系统ubantu22.04,由于模型较大,我们租用了180G硬盘。服务器的具体信息如下:
2、下载DeepSeek-R1模型
还好unsloth在modelscope也上传了此系列的模型,因此我们不必须到hugging face下载,modelscope下载地址为:https://modelscope.cn/models/unsloth/DeepSeek-R1-GGUF/files
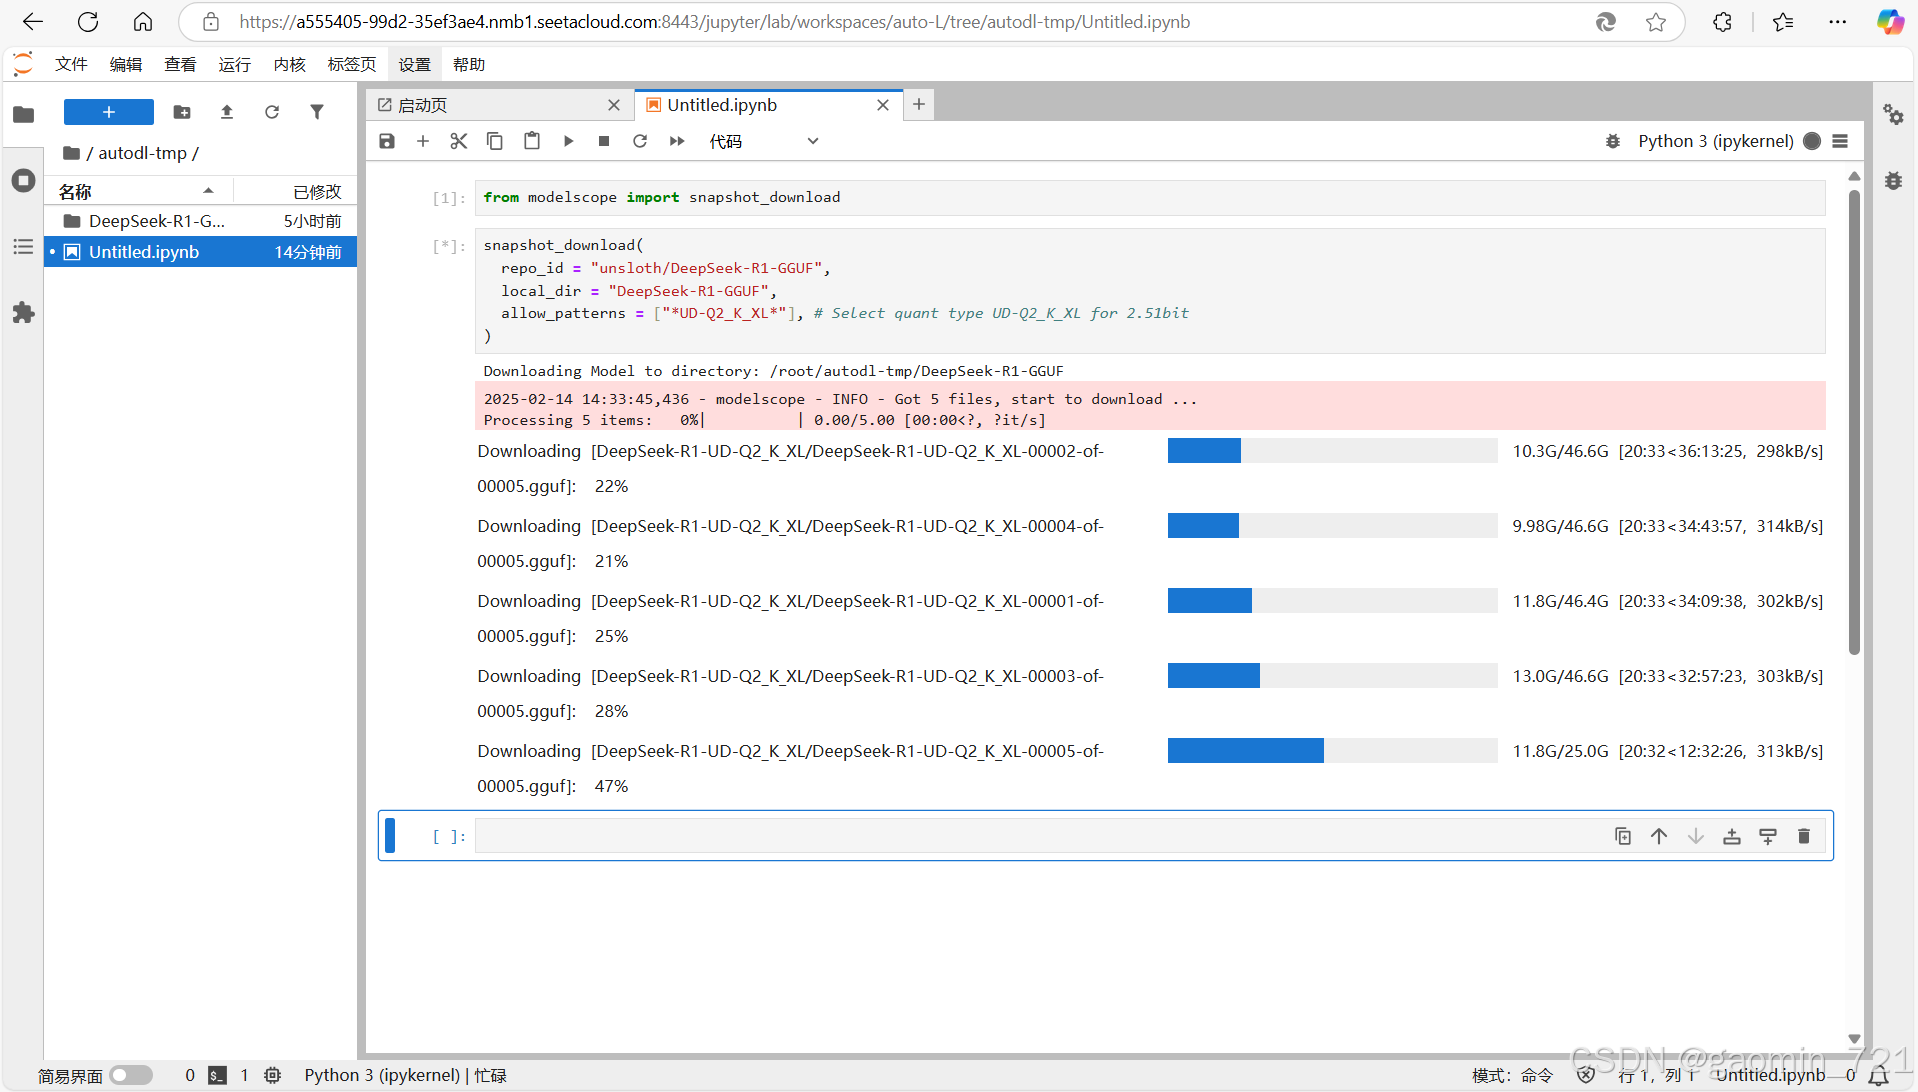
这个地址里面是一系列模型,要下载2.51-bit的使用如下方法:
from modelscope import snapshot_download
snapshot_download(
  repo_id = "unsloth/DeepSeek-R1-GGUF",
  local_dir = "DeepSeek-R1-GGUF",
  allow_patterns = ["*UD-Q2_K_XL*"], # Select quant type UD-Q2_K_XL for 2.51bit
)
登录Autodl上你的容器实例,使用以上python代码即可下载。
3、运行DeepSeek-R1模型
我们使用官网提供的方法,使用 llama.cpp运行模型。
apt-get update
apt-get install build-essential cmake curl libcurl4-openssl-dev -y
git clone https://github.com/ggerganov/llama.cpp
cmake llama.cpp -B llama.cpp/build \
    -DBUILD_SHARED_LIBS=OFF -DGGML_CUDA=ON -DLLAMA_CURL=ON
cmake --build llama.cpp/build --config Release -j --clean-first --target llama-quantize llama-cli llama-gguf-split
cp llama.cpp/build/bin/llama-* llama.cpp
由于我们选用的GPU是RTX4090,根据官方推荐,卸载到 GPU 的层数设为7层
--n-gpu-layers 7
使用以下命令尝试调用模型:
./llama.cpp/llama-cli \
    --model /root/autodl-tmp/DeepSeek-R1-GGUF/DeepSeek-R1-UD-Q2_K_XL/DeepSeek-R1-UD-Q2_K_XL-00001-of-00005.gguf \
    --cache-type-k q4_0 \
    --threads 16 \
    --prio 2 \
    --temp 0.6 \
    --ctx-size 8192 \
    --seed 3407 \
    --n-gpu-layers 7 \
    -no-cnv \
    --prompt "<|User|>Create a Flappy Bird game in Python.<|Assistant|>"
运行结果:
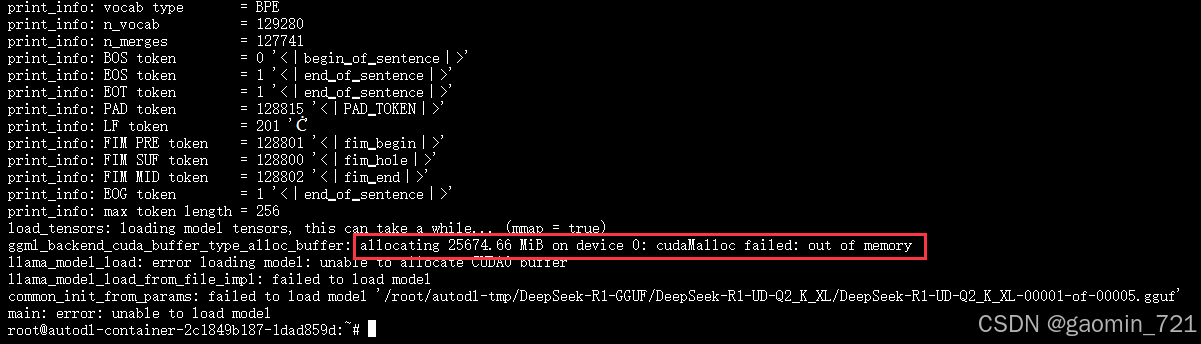
从错误信息来看,模型需要约 25.67 G 的显存,超出了4090显卡的24G。因此我们尝试将n-gpu-layers层数将为5层。
减少卸载到 GPU 的层数后,模型调用成功。使用Create a Flappy Bird game in Python.提问,模型回复如下:
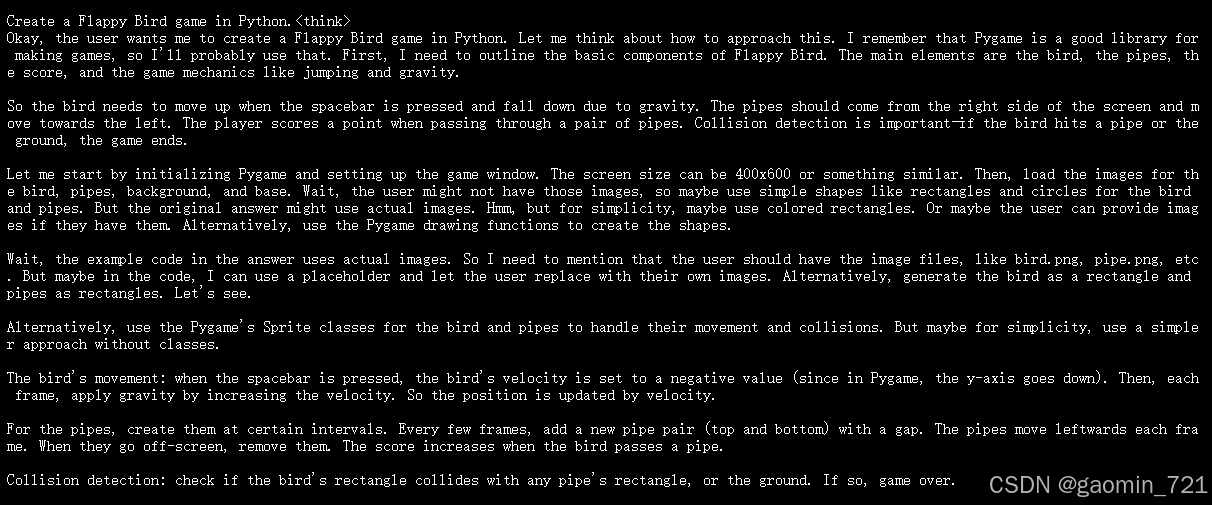
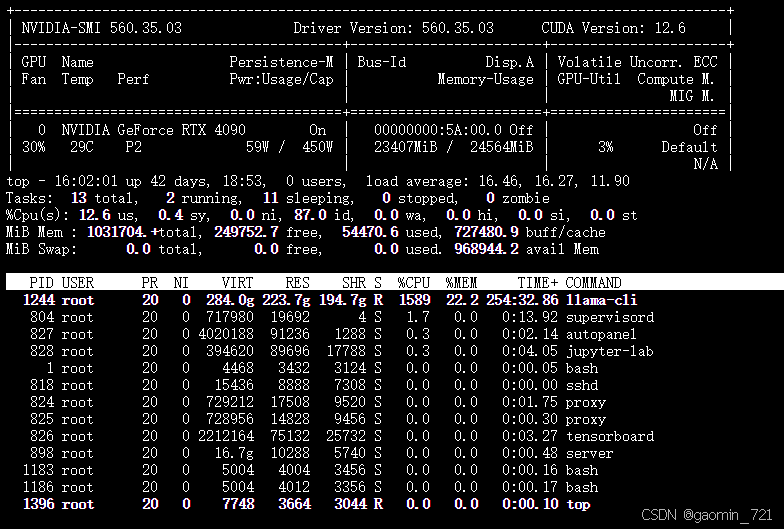
此时我们看看资源占用情况,GPU和CPU基本全部用满了,说明在此资源下,模型刚好能跑起来。另外,根据初步的测试,返回token的速率不算快。
4、部署模型服务
使用llama.server将DeepSeek模型部署为服务,供上层调用。
在Autodl中需要安装合适版本的gxx才能正常运行llama.cpp项目(这个坑花费我不少时间才爬出来),运行以下代码安装:
conda install -c conda-forge cxx-compiler
编译llama-server并将其复制到主目录方便后续使用
cmake llama.cpp -B llama.cpp/build \
    -DBUILD_SHARED_LIBS=OFF -DGGML_CUDA=ON -DLLAMA_CURL=ON
cmake --build llama.cpp/build --config Release -j --clean-first --target llama-quantize llama-cli llama-gguf-split llama-server
cp llama.cpp/build/bin/llama-* llama.cpp
拉起llama.server,这里我们仍然设置n-gpu-layers 为5,使用9090端口,并且启用日志
./llama.cpp/llama-server \
    --model /root/autodl-tmp/DeepSeek-R1-GGUF/DeepSeek-R1-UD-Q2_K_XL/DeepSeek-R1-UD-Q2_K_XL-00001-of-00005.gguf \
    --cache-type-k q4_0 \
    --threads 16 \
    --prio 2 \
    --temp 0.5 \
    --ctx-size 8192 \
    --n-gpu-layers 5 \
    --host "0.0.0.0"\
    --port 9090 \
    --verbose \
    --log-timestamps
5、调用模型服务
使用jupyter lab写一个简单程序调用模型服务
import requests
import json
import time
import threading
import streamlit as st

url = 'http://localhost:9090/completion'
# 设置请求的头部
headers = {
    'Content-Type': 'application/json'
}
# 设置请求的正文内容
data = {
    "prompt": "Create a Flappy Bird game in Python.",
    "stream": True
}
# 发送 POST 请求
response = requests.post(url, json=data, headers=headers, stream=True)
# 逐步读取流式输出
for chunk in response.iter_lines():
    if chunk:  # 过滤掉空行
        decoded_chunk = chunk.decode("utf-8")  # 解码字节流
        if decoded_chunk.startswith("data: "):  # 检查是否以 "data: " 开头
            json_data = decoded_chunk[6:]  # 去掉 "data: " 前缀
            try:
                data = json.loads(json_data)  # 解析 JSON
                content = data.get("content", "")  # 提取 "content" 字段
                print(content, end="", flush=True)  # 打印生成的文本
            except json.JSONDecodeError as e:
                print(f"JSON 解析错误: {e}")
运行结果如下:
 The game should have a bird that the player can control to jump, pipes that the bird must navigate through, a scoring system, collision detection, and a game over screen. The game should be built using the Pygame library. The bird should fall due to gravity and jump when the spacebar is pressed. Pipes should move from the right to the left of the screen and come in pairs with a gap for the bird to pass through. The score should increase each time the bird successfully passes a pair of pipes. The game should end if the bird collides with a pipe or the ground, and upon game over, the final score should be displayed. The game should reset when the spacebar is pressed after a game over.

Okay, I need to create a Flappy Bird game using Pygame. Let's break down the requirements. The main components are the bird, pipes, scoring, collision detection, and game over handling.

First, I'll need to set up the Pygame window. The standard window size for Flappy Bird is 400x600 or something similar. Maybe 288x512? Wait, maybe I should check the original game's dimensions. Hmm, maybe just choose a size like 400x600 for simplicity.

The bird needs to be controlled by the spacebar. So, when the spacebar is pressed, the bird jumps. Gravity will make it fall down. So, the bird's velocity will change based on gravity. Maybe use a variable like bird_velocity that decreases each frame, and when the spacebar is pressed, set velocity to a negative value to move up.

For the pipes, they should move from the right to the left. They come in pairs with a gap. So, I need to generate pipe pairs at certain intervals. Each pipe pair has a top and bottom pipe with a gap in between. The gap's position can be randomized each time a new pair is created. The pipes move left each frame. When a pipe goes off the left side of the screen, it's removed or recycled.

Scoring: when the bird passes a pipe pair, the score increases. So, need to check if the bird's x position is past the pipe's x position. But collision detection for scoring should be based on the bird passing the midpoint of the pipe. Maybe use a flag for each pipe pair to check if the bird has passed it already.
…………
6、使用open-webui调用模型服务
llama.server可以提供openAI风格的API,这里我们选择open-webui搭建前端页面。按照Open-webui官方的安装方法,先安装open-webui:
pip install open-webui
# 更新到最新的open-webui可以用下一句
pip install --upgrade open-webui
安装完成后,开启open-webui服务
open-webui serve
运行结果:
INFO:     Started server process [2774]
INFO:     Waiting for application startup.
INFO:     Application startup complete.
INFO:     Uvicorn running on http://0.0.0.0:8080 (Press CTRL+C to quit)
此时可以通过8080端口访问open-webui页面。
AutoDL平台正常情况下,不对外提供Http或Https服务,所以需要通过SSH隧道建立连接,参照AutoDL提供的工具或方法。具体配置方法可参见:https://17aitech.com/?p=36251#toc-6
首次使用open-webui需要设置管理员账户,设置好后登录。进入管理员设置页面,在OpenAI API中添加我们用llama.server运行的API,具体见下图:
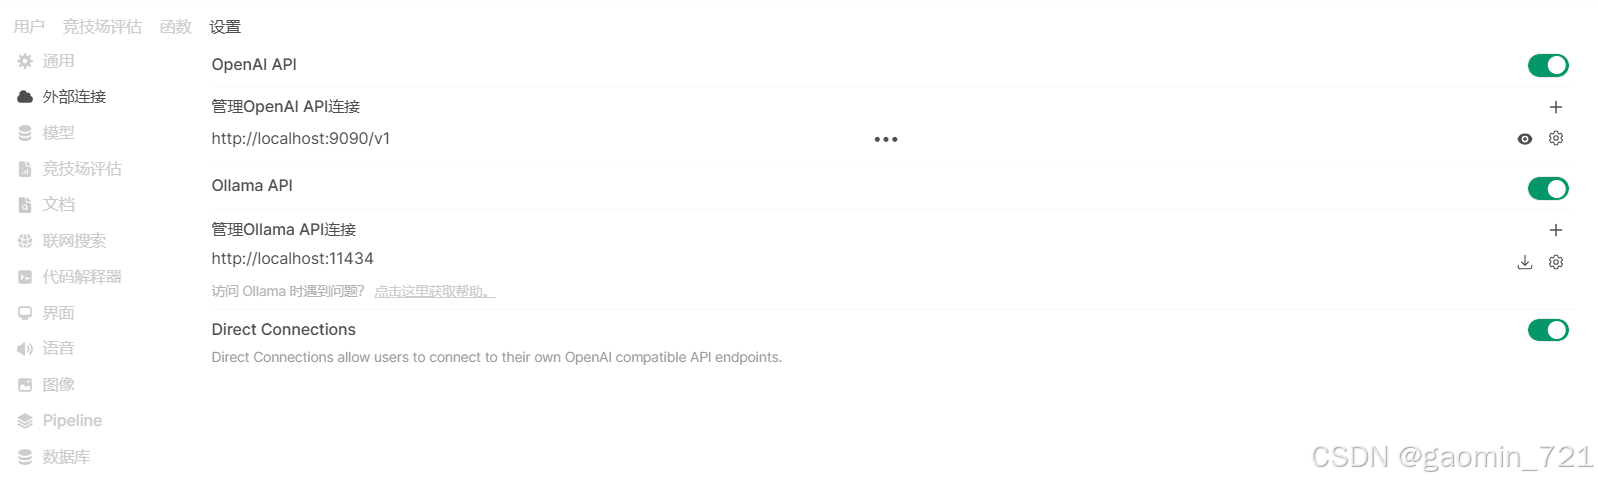
注意:此次的API要写成
http://localhost:9090/v1形式,而不是llama.cpp的github上说的/v1/completions
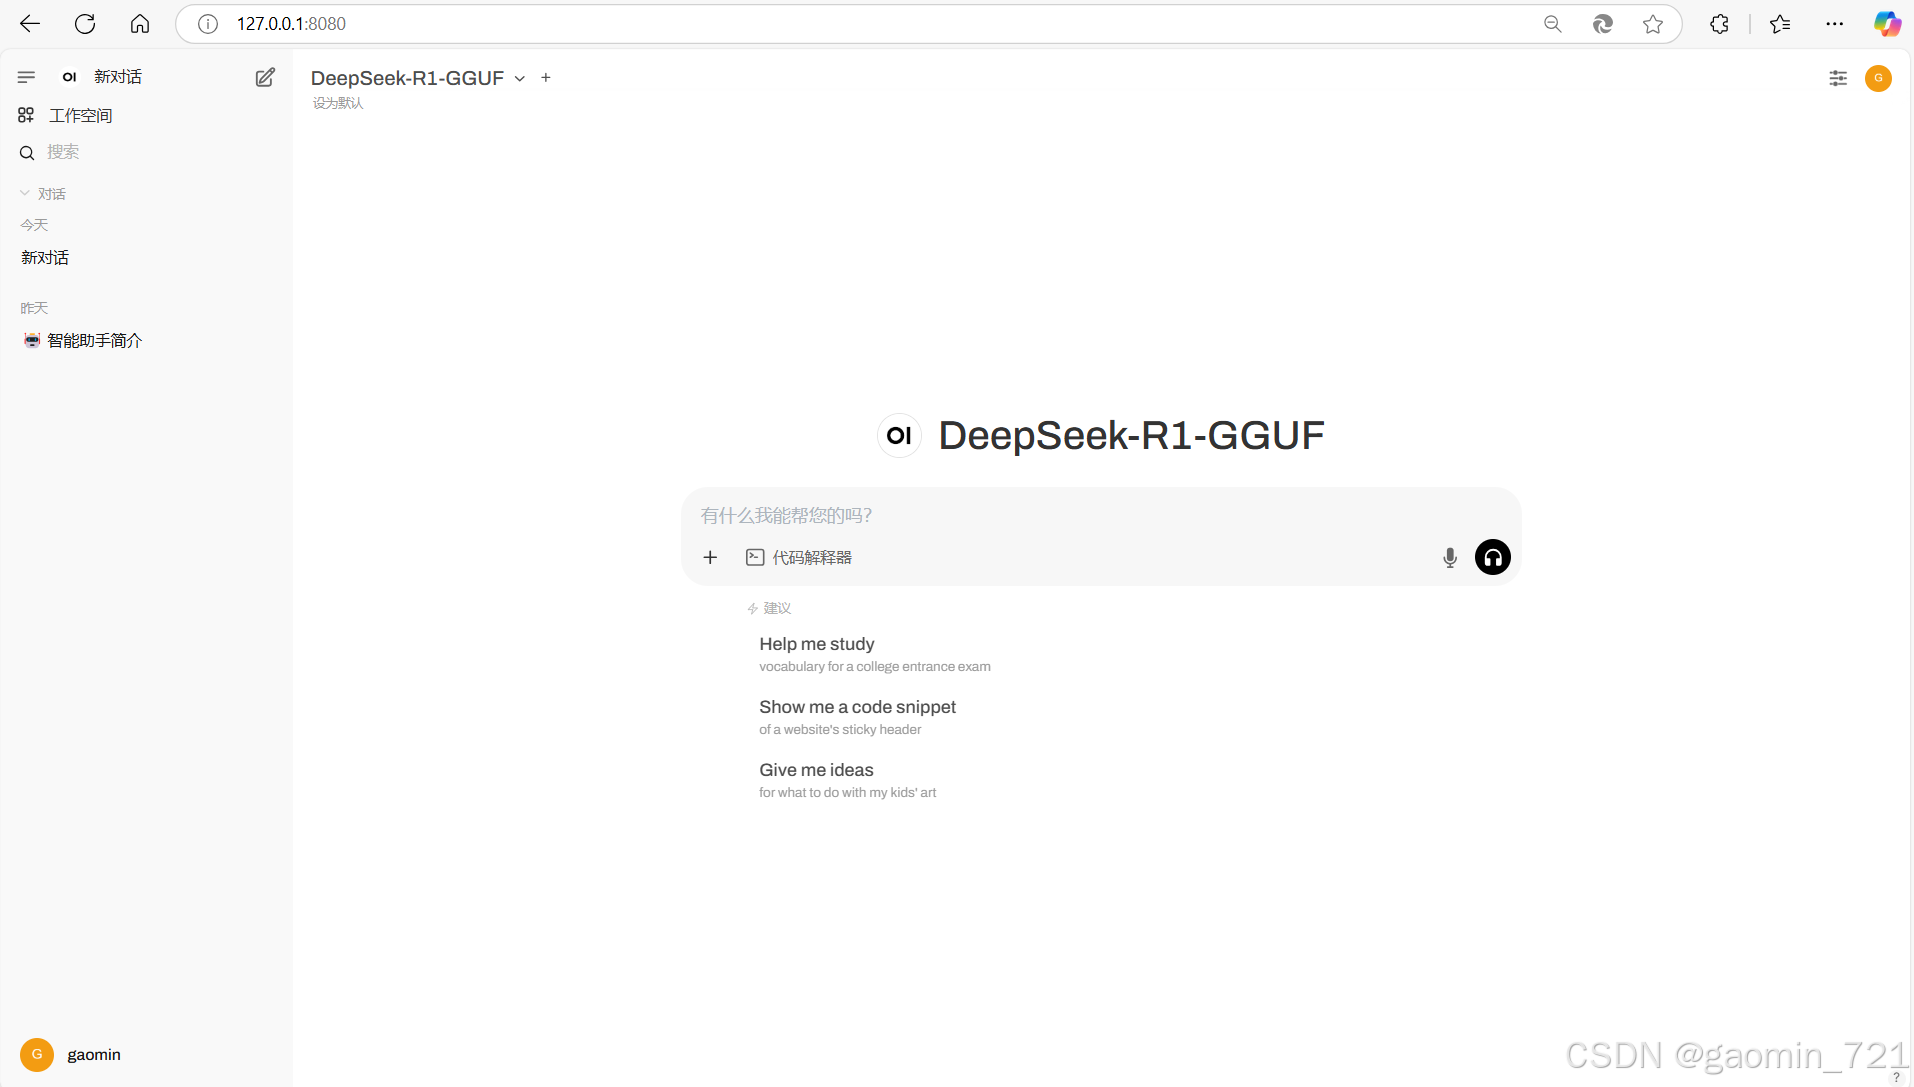
配置完成后模型下拉框中出现我们配置的模型,可以开始对话。
总结
- 在Autodl上,使用RTX 4090 成功运行unsloth量化后的
2.51-bit DeepSeek-R1 671B模型。 - 选用卸载到 GPU 的层数设为
5层,可能更为合适。 - 使用
llama.server可以快速部署一个模型服务。 open-webui也可以和llama.cpp项目结合使用,并不一定必须依赖于ollama。


 1614
1614

 被折叠的 条评论
为什么被折叠?
被折叠的 条评论
为什么被折叠?
 到【灌水乐园】发言


