


目录
基于vite创建vue3项目
首先要安装node和npm(node版本最好是16.0以上)
npm init vue@latest(创建vue3项目命令)
一、ref创建响应对象
作用是接收简单类型或者是对象类型的数据传入并返回一个响应式的对象(也就是可以理解成我们基本的创建类型,记住一定要引入ref函数)
<script setup>
import { ref } from 'vue'

const count=ref(1)
const str=ref("uiui")
const a1=ref({
  name:"张三",
  age:19
})
const addcount=()=>{
  count.value++;
}
</script>

<template>
  <h1>msg={{ count }}</h1>
  <button @click="addcount">+</button>
  <h1>a1={{ a1 }}</h1>
</template>
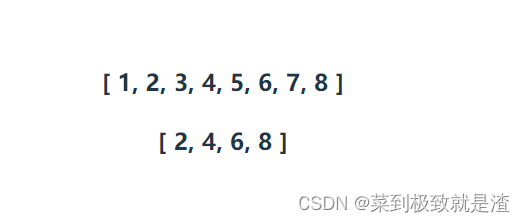
二、Computed计算属性
导入Computed函数
执行函数
<script setup>
import { computed, ref } from 'vue'

const list=ref([1,2,3,4,5,6,7,8])
const comlist=computed(()=>{
  return list.value.filter((item)=>{
     if(item%2==0)return item
  })
})
</script>

<template>
  <h3>{{ list }}</h3>
  <h3>{{ comlist }}</h3>
</template>
三、Watch监听属性
watch可以监听一个或者多个数据的变化
<script setup>
import { computed, ref, watch } from 'vue'

const count=ref(0)
const str=ref('str')
const v1=ref({
  name:'张三',
  age:18
})
const addcount=()=>{
  count.value++
}
const sunStr=()=>{
  str.value=str.value+'1'
}
const upV=()=>{
  v1.value.age++;
}
监听单个数据
 watch(count,(newvalue,olvalue)=>{
   console.log('新='+newvalue+'旧='+olvalue)
 })


监听多个数据
 watch([count,str],(newarr,oldarr)=>{
   console.log(newarr,oldarr)
 })

immediate属性
当immediate为true时,监听器会在对象属性改变的同一时刻立即被调用;当immediate为false时,监听器只有在下一次JavaScript事件循环中才会被调用。
 watch(count,(newvalue,oldvalue)=>{
 console.log(newvalue,oldvalue)
 },{
  immediate:true
 })

深度监视
watch默认监听的是浅层,也就是说只能监听简单数据类型,不能监听复杂类型数据,所以复杂类型数据的监听就需要深度监听
watch(v1,(newvalue)=>{
console.log(newvalue)
},{
  deep:true
})
</script>

<template>
  <h3>count={{ v1}}</h3>
  <button @click="upV">count++</button>

</template>
四、生命周期函数
| 选项式API | 组合式API |
|---|---|
| beforeCreate/created | setup |
| beforeMount | onBeforeMount |
| mounted | onMounted |
| beforeUpdate | onBeforeUpdate |
| updated | onUpdated |
| beforeUnmount | onBeforeUnmount |
| unmounted | onUnmounted |
五、父子组件通信
(1)父传子
父组件:
<template>
  <SonVue message="you are wh"></SonVue>
</template>
子组件(通过defineProps接受数据):
<script setup>
const props=defineProps({
    message:String,
})
console.log(props)
</script>
<template>
  <div>
    <h3>我是子组件</h3>
     <h4>message={{ message }}</h4>
  </div>
</template>
(2)子传父
1.父组件中给子组件标签通过@绑定事件
2.子组件内部通过emit方法触发事件父组件:
<script setup>
import HelloWorld from './components/HelloWorld.vue'
import SonVue from './components/Son.vue'
import { ref } from 'vue';
const count=ref()

const CountMath=(c)=>{
  console.log('获取的数据='+c)
  count.value=c
}
</script>

<template>
  <h2>count={{ count }}</h2>
  <SonVue @getCount="CountMath"></SonVue>
</template>
子组件:
<script setup>
const emit=defineEmits(['getCount'])
const sendCount=()=>{
    emit('getCount',20)
}
</script>
<template>
  <div>
    <h3>我是子组件</h3>
     <button @click="sendCount">给父组件信息</button>
  </div>
</template>
六、defineExpose的使用
默认情况下<script setup>语法糖下组件内部的属性和方法是不开放给父组件访问的,这时候就需要defineExpose了,它可以指定那些方法和属性可以访问
import { onMounted, ref } from 'vue';
const count=ref()

const f1=ref(null)
onMounted(()=>{
  console.log(f1.value)
})

<template>
  <h2>count={{ count }}</h2>
  <!-- 获取dom,通过ref -->
  <input name="tste" ref="f1">
</template>
子组件:
<template>

</template>

<script>
import { ref } from "vue";

const re=ref(20)
const s1=()=>{
    console.log("this is t1 text")
}

defineExpose({
    s1,
    re
})
</script>
父组件:
<script setup>
import HelloWorld from './components/HelloWorld.vue';
import SonVue from './components/Son.vue'
import { onMounted, ref } from 'vue';
import t1vue from './components/t1.vue'

const count=ref()
const t1=ref(null)
const f1=ref(null)
onMounted(()=>{
  console.log(f1.value)
  console.log('组件渲染')
  console.log(t1.value)
})
</script>

<template>
  <h2>count={{ count }}</h2>
  <!-- 获取dom,通过ref -->
  <t1vue ref="t1"></t1vue>
  <input name="tste" ref="f1">
</template>
七、provide和inject传递和接收数据
顶层组件向任意的顶层组件传递数据和方法,实现跨层组件通信。
跨层传递普通数据
1.顶层组件通过provide函数提供数据
2.顶层组件通过inject函数获取数据
provide('key',顶层组件中的数据)
const message=inject('key')子组件
<script setup>
import { inject, ref } from 'vue'


const a=inject('key')
const count = ref(0)
</script>

<template>
  <div style="border: 1px; width: 200px;height: 200px; background-color: green;">
    <h3>我是子组件</h3>
    <h3>{{ a }}</h3>
    </div>
</template>
父组件
<script setup>
import { provide } from 'vue'
import HelloWorld from './components/HelloWorld.vue'

provide('key',30)
</script>

<template>
  <div>我是父组件--</div>
  <HelloWorld msg="Vite + Vue" />
</template>
八、defineModel的使用
之前我写过关于这个知识点的文章,不多叙述,defineModel的使用
九、Pinia的使用
关于什么是Pinia,Pinia其实就是Vue2的Vuex,他是Vue的最新的状态管理工具,他提供了更加简单的API(去掉了mutation),提供符合,组合式风格的API,去掉了module的概念,每一个store都是一个独立的模块,配合TypeScript更加友好,提供可靠的类型判断
与Vuex不同的是他的state存放数据,getter相当于计算属性,Action是异步方法,其实方法一类都写在这里了!
import { defineStore } from "pinia";
import { computed, ref } from "vue";

//第一个参数是唯一标识
export const UserCounterStore=defineStore('counter',()=>{
    //声明数据,state
    const count=ref(89)
    //声明操作方法,action
     const addcount=()=>{
        console.log('加')
        count.value++;
     }
     const subcount=()=>{
        count.value--;
     }
    //声明数据派生的计算属性,getter
    const doubleCounte=computed(()=>{
        return count.value*2;
    })

    return{
        count,
        addcount,
        subcount,
        doubleCounte
    }
})
子组件
<script setup>
import { ref } from 'vue'
import {UserCounterStore} from '../store/counter'

const counterstore=UserCounterStore()

const count=counterstore.count
console.log(count)
console.log(counterstore)
</script>

<template>
  <div>
    <h3>子组件--count={{ counterstore.count }}------{{ counterstore.doubleCounte }}</h3>
     <button @click="counterstore.addcount">+</button>
     <button @click="counterstore.subcount">-</button>
  </div>
</template>
Action异步写法
import { defineStore } from "pinia";
import { ref } from "vue";
import axios from "axios";

export const userChanelStore=('chanel',()=>{
    //声明数据
    const list=ref([])
    const getlist=async ()=>{
        const res=await axios.get('网址')

    }
    return{
        list,
        getlist
    }
})


 2016
2016

 被折叠的 条评论
为什么被折叠?
被折叠的 条评论
为什么被折叠?
 到【灌水乐园】发言


