


转载请标明出处:
http://blog.csdn.net/gj782128729/article/details/52328317;
本文出自:【高境的博客】
1. 测试相关概念
1.1. 测试的分类
按照是否知道源代码:
1.黑盒测试:不知道源代码
2.白盒测试:知道源代码
按照测试的粒度:
1.方法测试 function test
2.单元测试 unit test
3.集成测试 integration test
4.系统测试 system test
按照测试的暴力程度:
1.冒烟测试 smoke test
2.压力测试 pressure test
1.2. Android下monkey测试
monkey程序由Android系统自带,使用Java语言写成,在Android SDK中的存放路径是:/sdk/tools/lib/monkey.jar
monkey测试的原理就是利用socket通讯的方式来模拟用户的按键输入,触摸屏输入,手势输入等。
monkey常用指令:monkey -p packagename count;
例子:monkey -p com.android.email 300;
首先我们在命令行中输入adb shell,挂载到Linux空间,然后我们输入monkey命令,会显示可选参数:
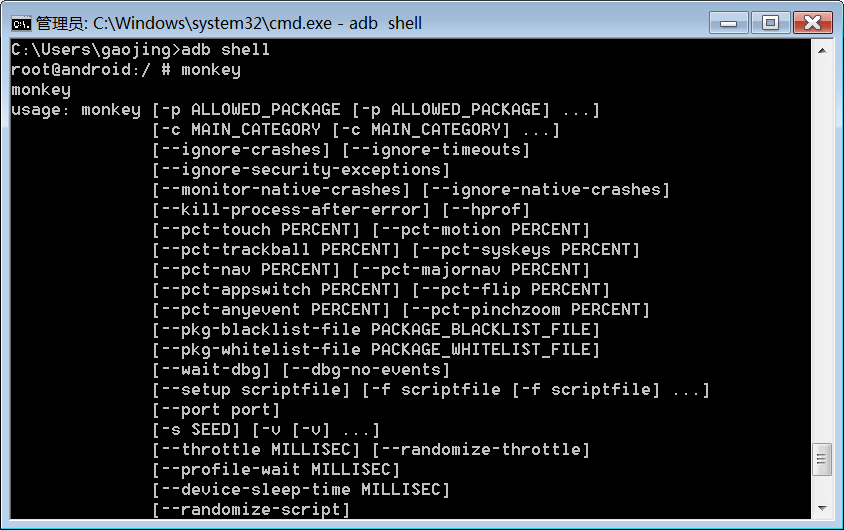
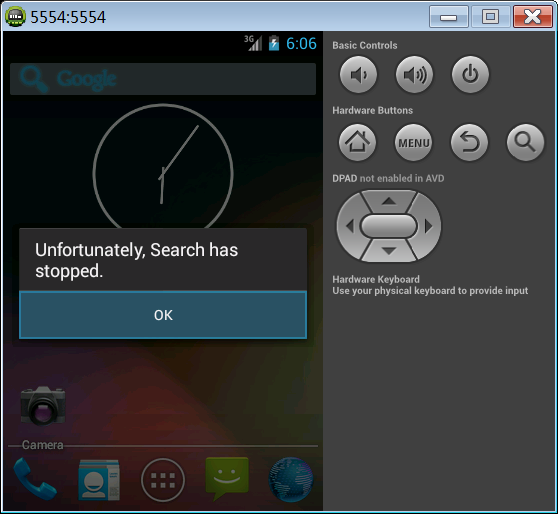
然后我们可以在后面加上count参数,例如monkey 2000
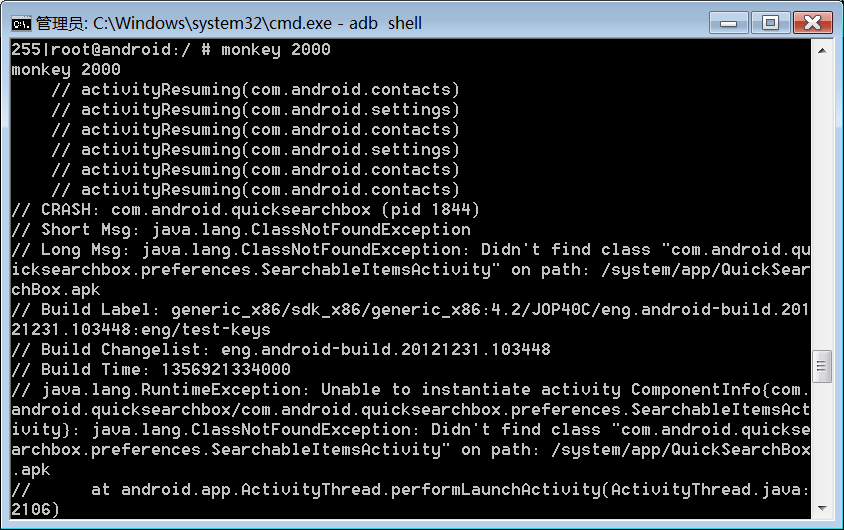
模拟器结果:由于我们使用monkey测试,当点击某个应用某些功能时程序崩溃,出现以下结果。
2. 单元测试
单元测试(unit test),是指对软件中的最小可测试单元进行检查和验证。
Android中单元测试的步骤:
1.写一个类继承AndroidTestCase
public class TestCalc extends AndroidTestCase{

      //需要写一个测试方法
      public void testAdd(){
          //想测试 计算器相加的方法
          Calc calc = new Calc();
          int result = calc.add(5, 6);
          //断言
          assertEquals(11,result);
      }
}
2.Androidmanifest中application节点下配置一个uses-library节点:
<uses-library android:name="android.test.runner" />3.androidmanifest中manifest节点下配置一个instrumentation:
<instrumentation android:name="android.test.InstrumentationTestRunner" android:targetPackage="com.gaojing.junit" />
注意:如果不知道如何配置androidmanifest可以右击新建一个android test project 的测试工程,会自动配置。
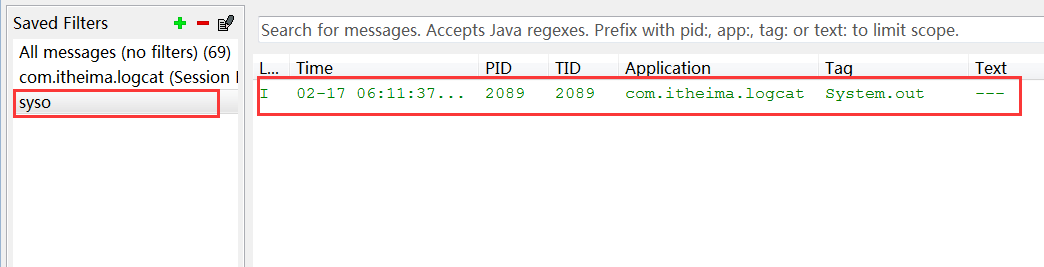
3. Logcat工具
1.可以按照tag ,packagename ,pid添加过滤器。
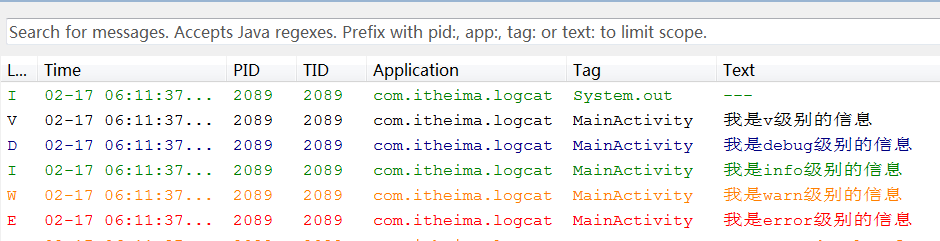
2.日志可以使用Log类来打印,有五种级别:e,w,i,d,v,如图:
3.一般公司开发打log需要封装一个工具类,通过一个开关来控制log什么时候打印。
4.logcat可以帮助我们分析程序运行的状况,帮助我们找到程序运行过程中出现的错误信息。
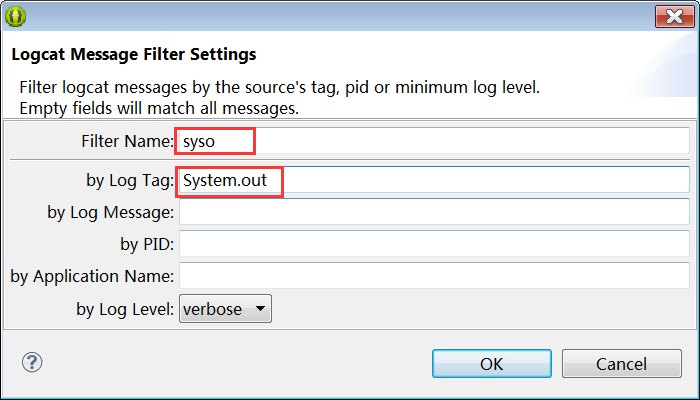
添加日志过滤器:
a) 点击“+”按钮

b) 填写过滤条件,第一行是自己起的名字,第二行是Tag的名称。这边按照打印输出这个标签来过滤日志。
4. 登录案例
4.1. 编写UI
整体布局是一个LinearLayout,最下面一行是相对布局。
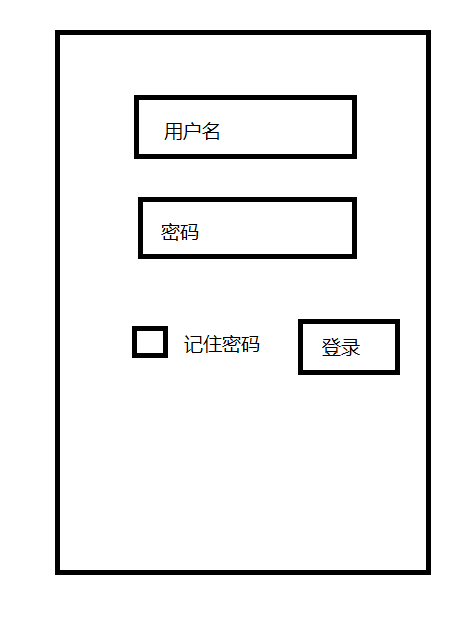
上图UI布局文件代码如下:
<LinearLayout
 xmlns:android="http://schemas.android.com/apk/res/android"
    xmlns:tools="http://schemas.android.com/tools"
    android:layout_width="match_parent"
    android:layout_height="match_parent"
    android:orientation="vertical"
    tools:context=".MainActivity" >
    <EditText
        android:id="@+id/et_username"
        android:layout_width="match_parent"
        android:layout_height="wrap_content"
        android:hint="请输入用户名" />
    <EditText
        android:id="@+id/et_userpassword"
        android:layout_width="match_parent"
        android:layout_height="wrap_content"
        android:password="true"
        android:hint="请输入密码" />
    <RelativeLayout
        android:layout_width="match_parent"
        android:layout_height="match_parent"
        android:layout_marginTop="20dp"
        >
        <CheckBox
            android:id="@+id/cb_ischeck"
            android:layout_width="wrap_content"
            android:layout_height="wrap_content"
            android:text="记住用户名密码" />
        <Button
            android:layout_width="wrap_content"
            android:layout_height="wrap_content"
            android:onClick="login"
            android:layout_alignParentRight="true"
            android:text="登录" />
    </RelativeLayout>
</LinearLayout>
4.2. 业务逻辑
1.找到相关的控件对象
et_name = (EditText) findViewById(R.id.et_username);
et_userpassword = (EditText) findViewById(R.id.et_userpassword);
cb_ischeck = (CheckBox) findViewById(R.id.cb_ischeck);
2.定义登录按钮的点击事件
//写按钮的点击事件
public void login(View v){

}
3.当按钮发生点击时,需要获取用户输入的用户名,密码,是否记住密码
//获取用户名和密码
String name = et_name.getText().toString().trim();
String pwd = et_userpassword.getText()<
最低0.47元/天 解锁文章


 3523
3523

 被折叠的 条评论
为什么被折叠?
被折叠的 条评论
为什么被折叠?
 到【灌水乐园】发言


