


编程就像学游泳,读了再多理论,不下水永远学不会。
编程就像学开车,初级程序猿的我,不需要理解发动机的原理,只需要先熟练掌握驾校的内容。
这个项目第一次学感觉挺懵逼的,但是做下来感觉就是对vue的使用更加熟练了哈哈,就计划着不断回放,返回看,反复做。
网页结构
- navbar(导航栏,位于页面上方)
- content(内容,位于导航栏下方):包含如下组件,其中每个组件可以继续由若干组件组成。每个组件对应一个页面
- 首页
- 好友列表
- 好友动态
- 登录
- 注册
- 404
Vue知识点(边做项目边积累ing)
script部分
export default对象的属性:
name:组件的名称components:存储<template>中用到的所有组件props:存储父组件传递给子组件的数据watch():当某个数据发生变化时触发computed:动态计算某个数据(比如用于:动态计算粉丝数量)setup(props,context):初始化变量、函数(可以在setup函数里面定义一堆变量)ref定义变量,可以接受对象和普通变量类型,可以用.value属性重新赋值(变量需要重新赋值的时候使用)reactive({})定义对象,只可以接受对象,不可重新赋值(变量不需要重新赋值的时候使用,效率比ref高)props存储父组件传递过来的数据context.emit():触发父组件绑定的函数
template部分
<slot></slot>:存放父组件传送过来的chrilden。v-on:click或者@click属性:绑定事件v-if、v-else、v-else-if属性:判断v-for属性:循环,:key循环的每一个元素要有唯一的keyv-bind:或::绑定属性
style部分
<style>标签添加scoped属性之后,不同组件之间的css不会相互影响。
第三方组件
项目实现
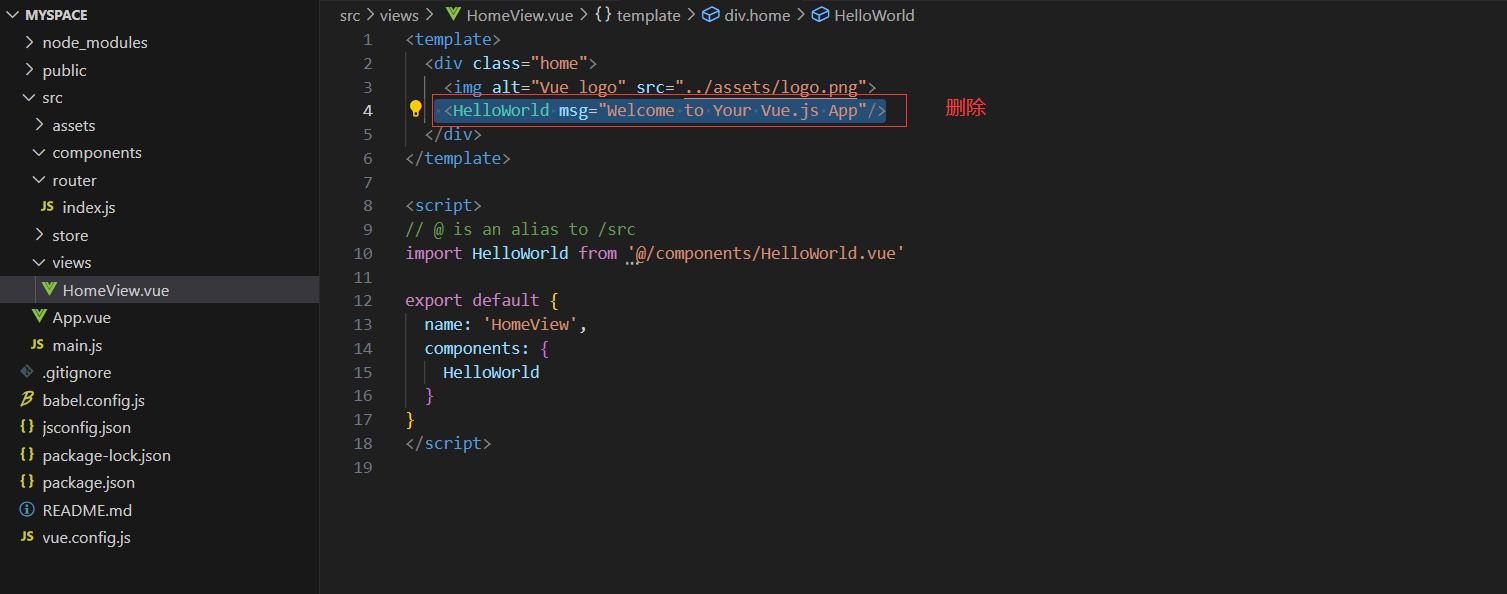
初始化项目
- 删除
HelloWorld.vue并将HomeView.vue中的引入组件标签删除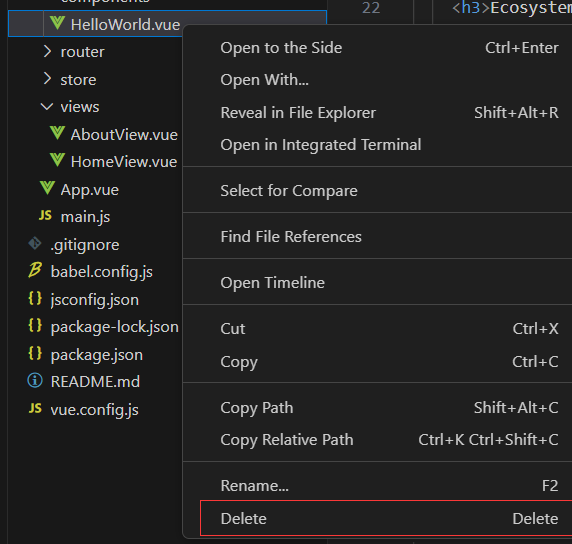
- 删除
AboutView.vue,并将router中对应的地址删除。
- 将
componts中的内容清空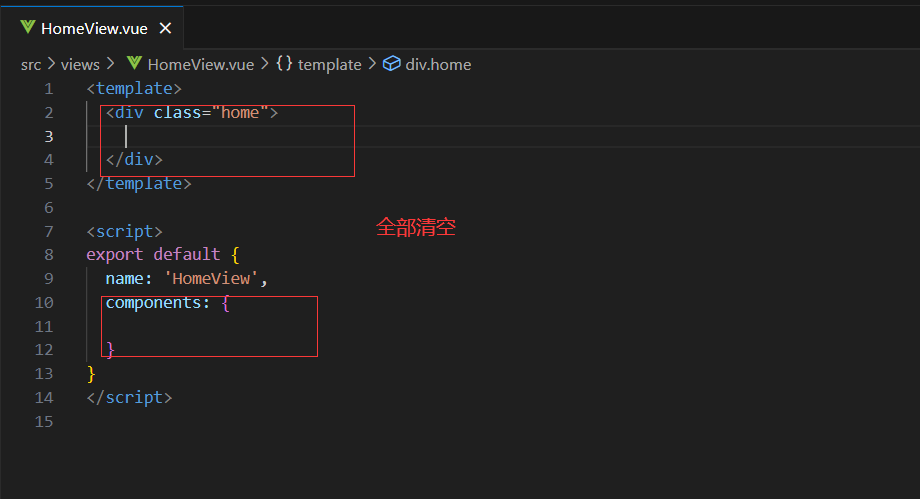
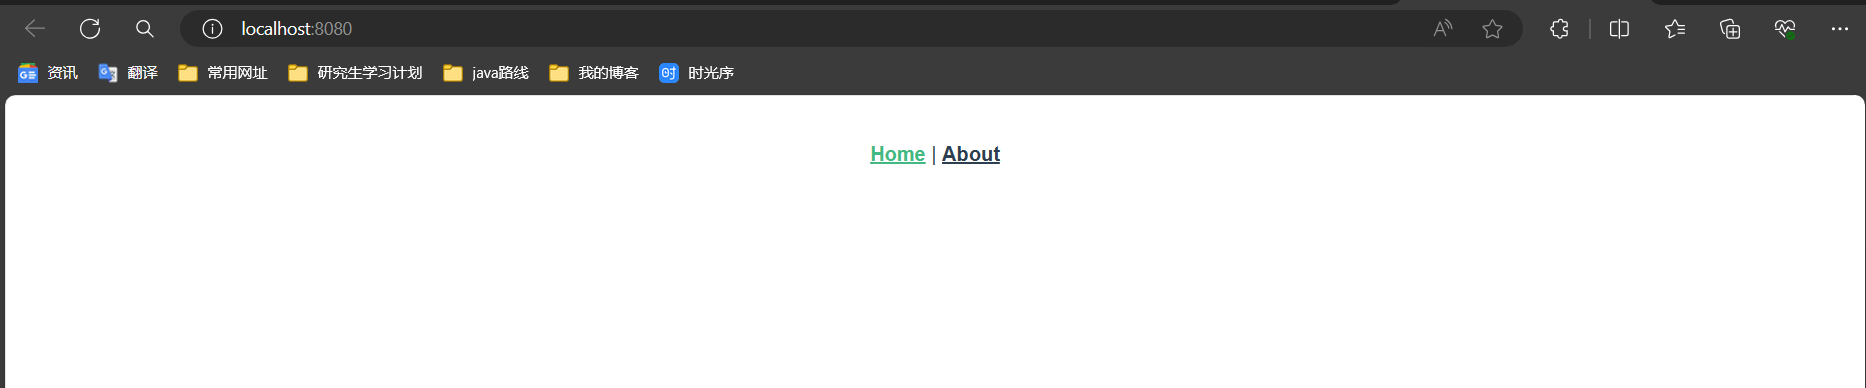
- 最后展示
导航栏组件的实现
components包下创建并编写NavBar.vue,然后到App.vue中引入,下面分别为其代码。
<template>
<!-- 写入导航栏的html,这里可以使用bootstrap,要先去main.js中引入bootstrap,到bootstrap复制代码到这里-->
<nav class="navbar navbar-expand-lg bg-body-tertiary">
    <!-- class="container-fluid"表示靠两边一些 去掉fluid则整体居中一些-->
  <div class="container">
    <!-- 修改名字 -->
    <a class="navbar-brand" href="#">Myspace</a>
    <button class="navbar-toggler" type="button" data-bs-toggle="collapse" data-bs-target="#navbarText" aria-controls="navbarText" aria-expanded="false" aria-label="Toggle navigation">
      <span class="navbar-toggler-icon"></span>
    </button>
    <div class="collapse navbar-collapse" id="navbarText">
      <ul class="navbar-nav me-auto mb-2 mb-lg-0">
        <li class="nav-item">
          <a class="nav-link" href="#">首页</a>
        </li>
        <li class="nav-item">
          <a class="nav-link" href="#">好友列表</a>
        </li>
        <li class="nav-item">
          <a class="nav-link" href="#">用户动态</a>
        </li>
      </ul>
      <ul class="navbar-nav">
        <li class="nav-item">
          <a class="nav-link" href="#">登录</a>
        </li>
        <li class="nav-item">
          <a class="nav-link" href="#">注册</a>
        </li>
      </ul>
    </div>
  </div>
</nav>
</template>

<script>
//写好之后,需要将他export出去
export default{
    name: "NavBar",
}
</script>

<style scoped>

</style>
<template>
  <!-- 导航栏 -->
  <NavBar />
  <!-- 内容:分页展示 -->
  <router-view/>
</template>
<script>
// 引入bootstrap脚本和样式
// 引入样式
import 'bootstrap/dist/css/bootstrap.css';
//引入脚本
import 'bootstrap/dist/js/bootstrap';
//每一个组件都会展示导航栏,所以将其引入到根组件
import NavBar from "./components/NavBar.vue";
export default{
  name: "App",
  components: {
    NavBar
  }
}
</script>
<style>
#app {
  font-family: Avenir, Helvetica, Arial, sans-serif;
  -webkit-font-smoothing: antialiased;
  -moz-osx-font-smoothing: grayscale;
  text-align: center;
  color: #2c3e50;
}

nav {
  padding: 30px;
}

nav a {
  font-weight: bold;
  color: #2c3e50;
}

nav a.router-link-exact-active {
  color: #42b983;
}
</style>
bootstrap地址,搜索NavBar,选择一个合适的导航栏!
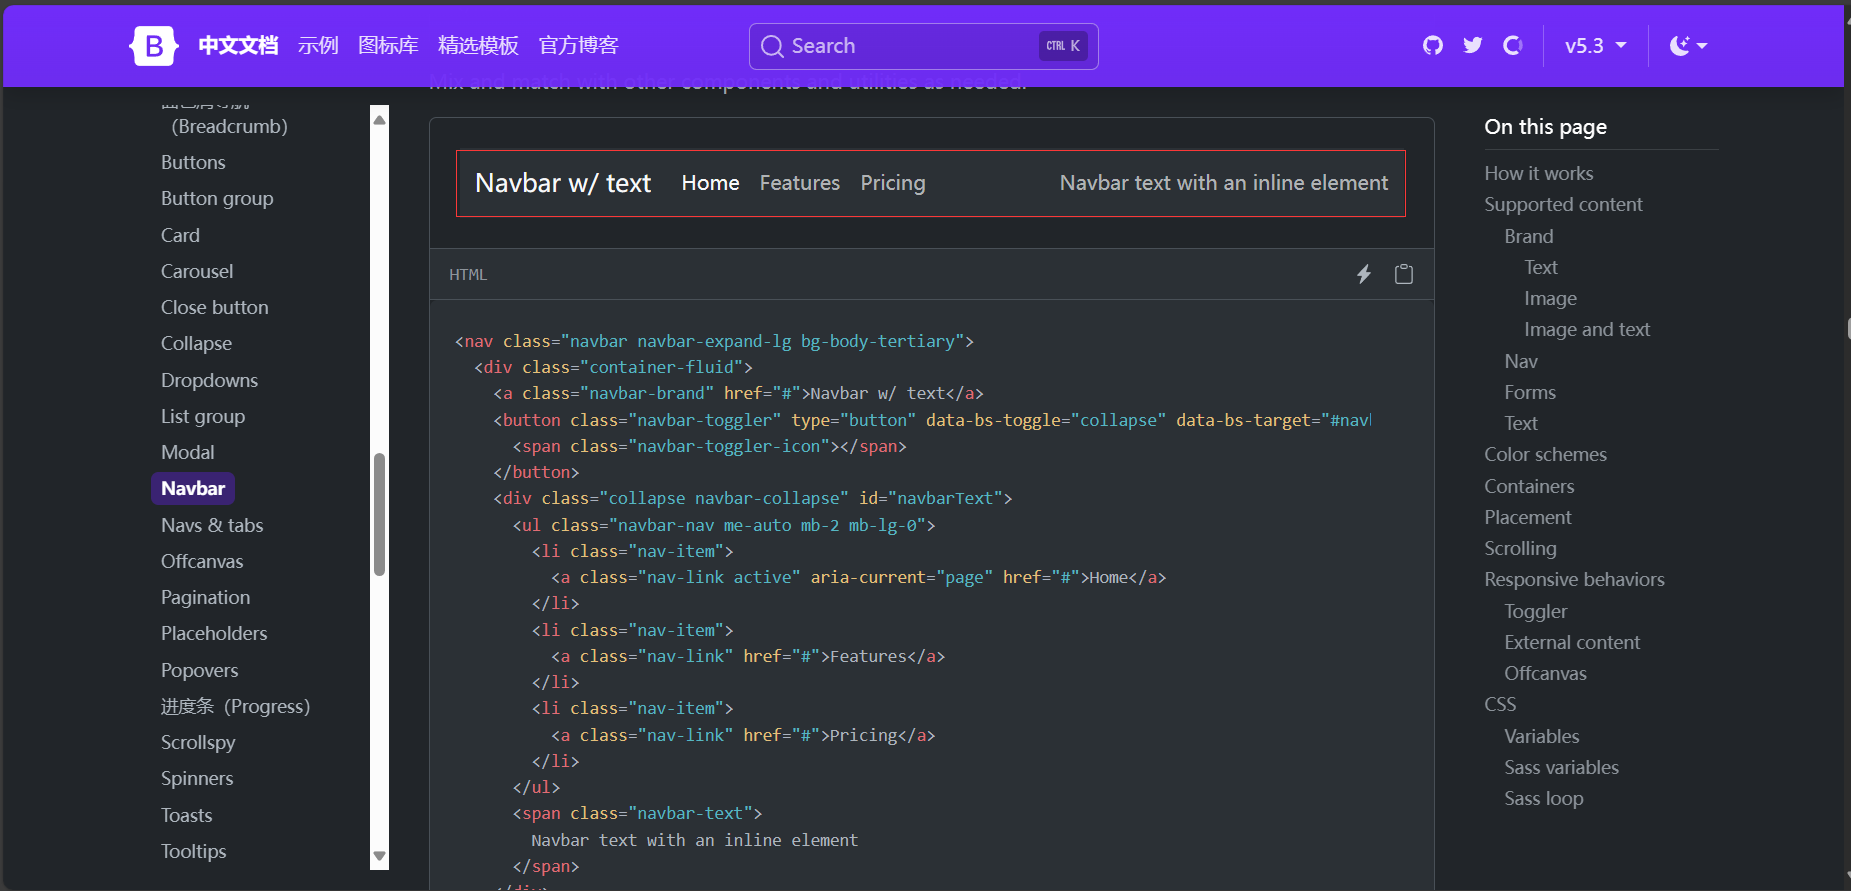
最终效果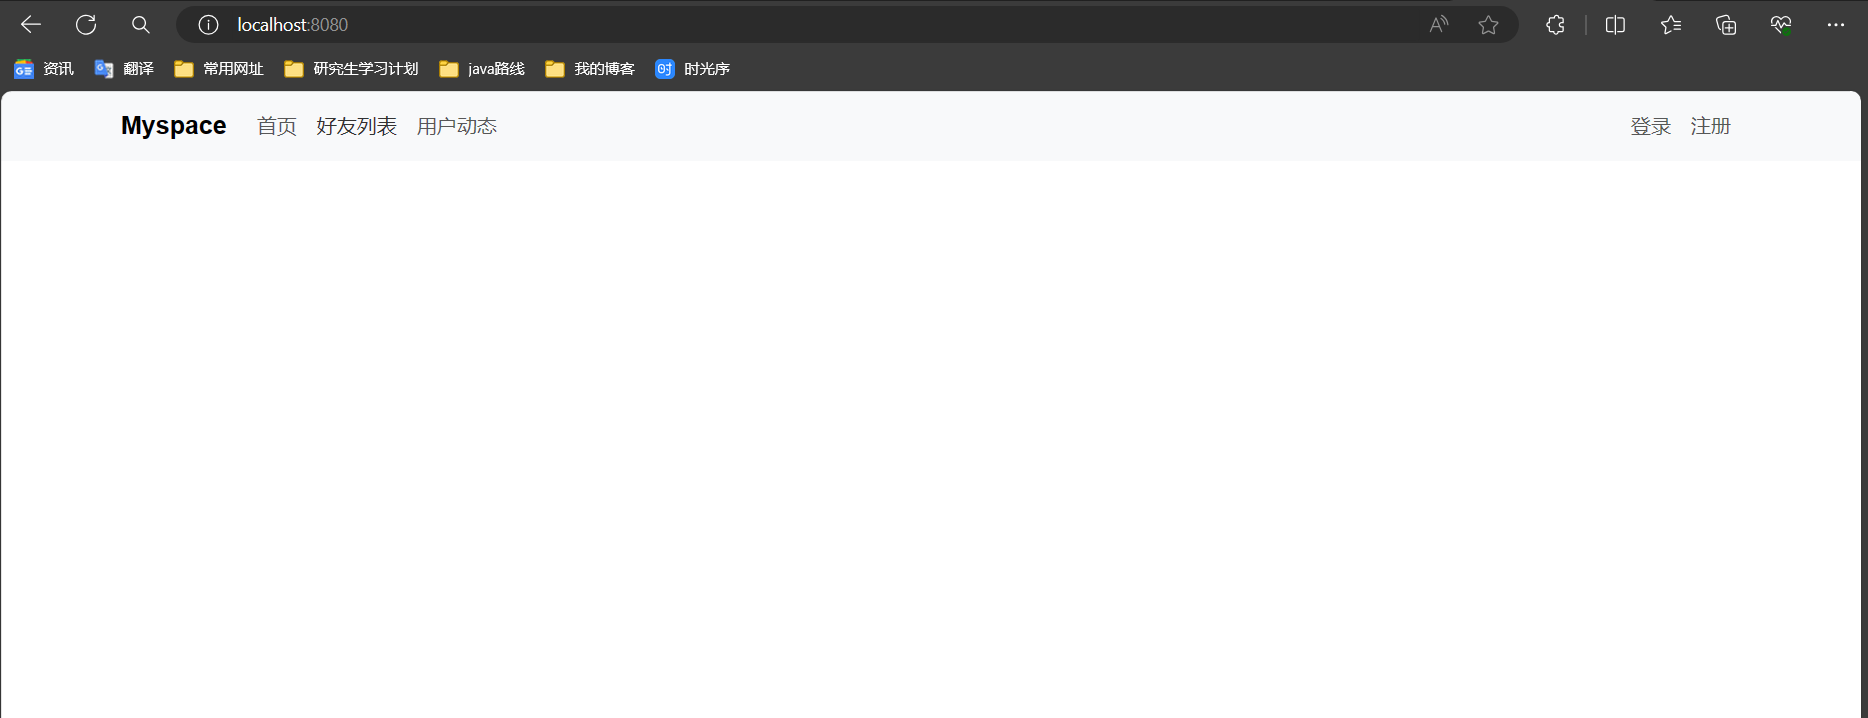
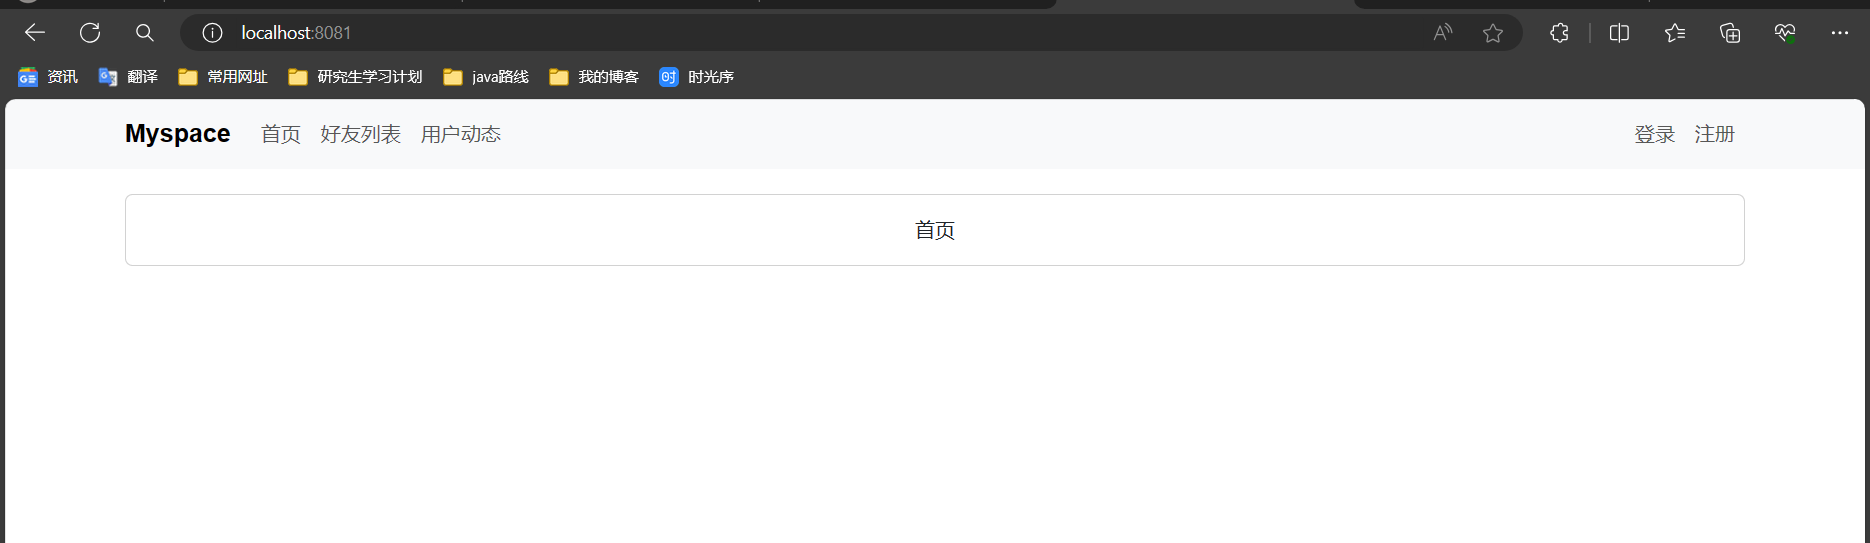
实现内容组件
使用bootstrap中的cards组件,将所有模块用一个框括起来,这样更加美观一点。
<template>
  <!-- class="container"用来调整中间内容区域的大小 -->
  <div class="container">
    <div class="home" >
     <div class="card">
       <div class="card-body" >
          首页
       </div>
    </div>
  </div>
  </div>
</template>

<script>
export default {
  name: 'HomeView',
  components: {

  }
}
</script>

<style scoped>
.container{
  margin-top: 20px;
}
</style>
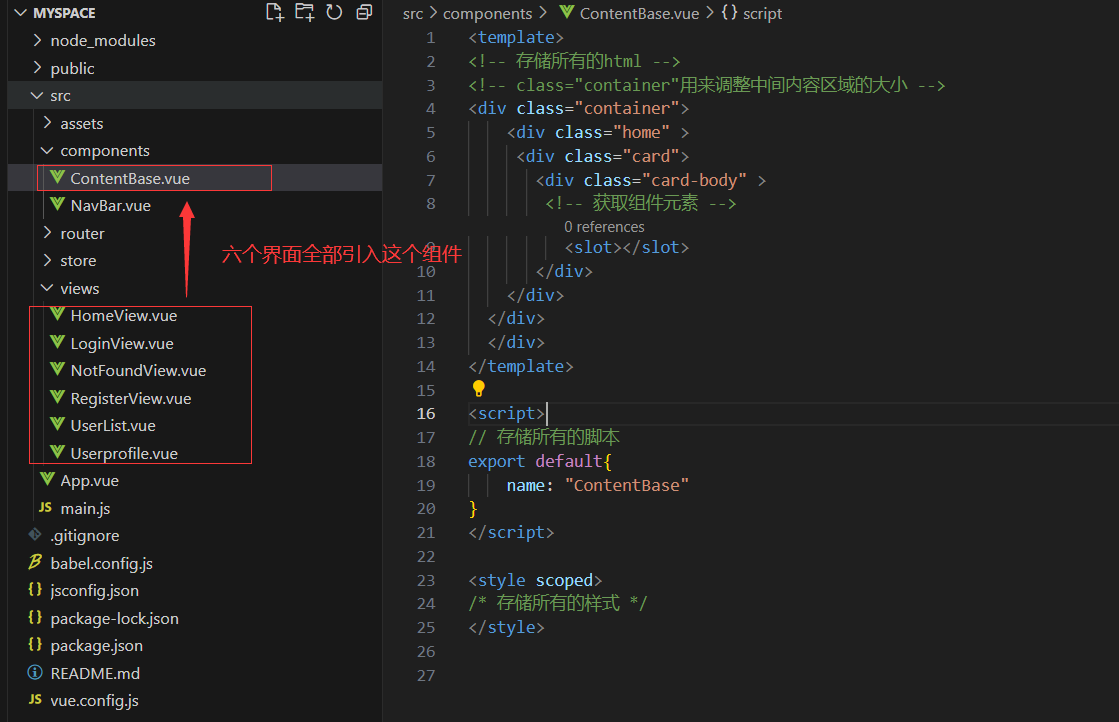
当出现多个组件由重复代码的时候,将公共的部分用一个组件来表示,这样做的好处是,方便整体修改。
<template>
<!-- 存储所有的html -->
<!-- class="container"用来调整中间内容区域的大小 -->
<div class="container">
    <div class="home" >
     <div class="card">
       <div class="card-body" >
        <!-- 获取组件元素 -->
          <slot></slot>
       </div>
    </div>
  </div>
  </div>
</template>

<script>
// 存储所有的脚本
export default{
    name: "ContentBase"
}
</script>

<style scoped>
/* 存储所有的样式 */
</style>
<template>
  <!-- class="container"用来调整中间内容区域的大小 -->
  <!-- 公共的部分用组件表示 -->
  <ContentBase>
    首页
  </ContentBase>
</template>

<script>
// 引入组件
import ContentBase from '../components/ContentBase.vue';
export default {
  name: 'HomeView',
  components: {
    ContentBase,
  }
}
</script>

<style scoped>
.container{
  margin-top: 20px;
}
</style>
实现路由(根据地址显示内容组件的页面)
import { createRouter, createWebHistory } from 'vue-router'
import HomeView from '../views/HomeView.vue'
import UserList from '@/views/UserListView.vue';
import LoginView from '@/views/LoginView.vue';
import NotFoundView from '@/views/NotFoundView.vue';
import RegisterView from '@/views/RegisterView.vue';
import Userprofile from '@/views/Userprofile.vue';
const routes = [
  {
    path: '/',
    name: 'home',
    component: HomeView
  },
  {
    path: '/userlist',
    name: 'userlist',
    component: UserList
  },
  {
    path: '/login',
    name: 'loginview',
    component: LoginView
  },
  {
    path: '/notfound',
    name: 'notfoundview',
    component: NotFoundView
  },
  {
    path: '/register',
    name: 'registerview',
    component: RegisterView
  },
  {
    path: '/userprofile',
    name: 'userprofile',
    component: Userprofile
  },

]

const router = createRouter({
  history: createWebHistory(),
  routes
})

export default router


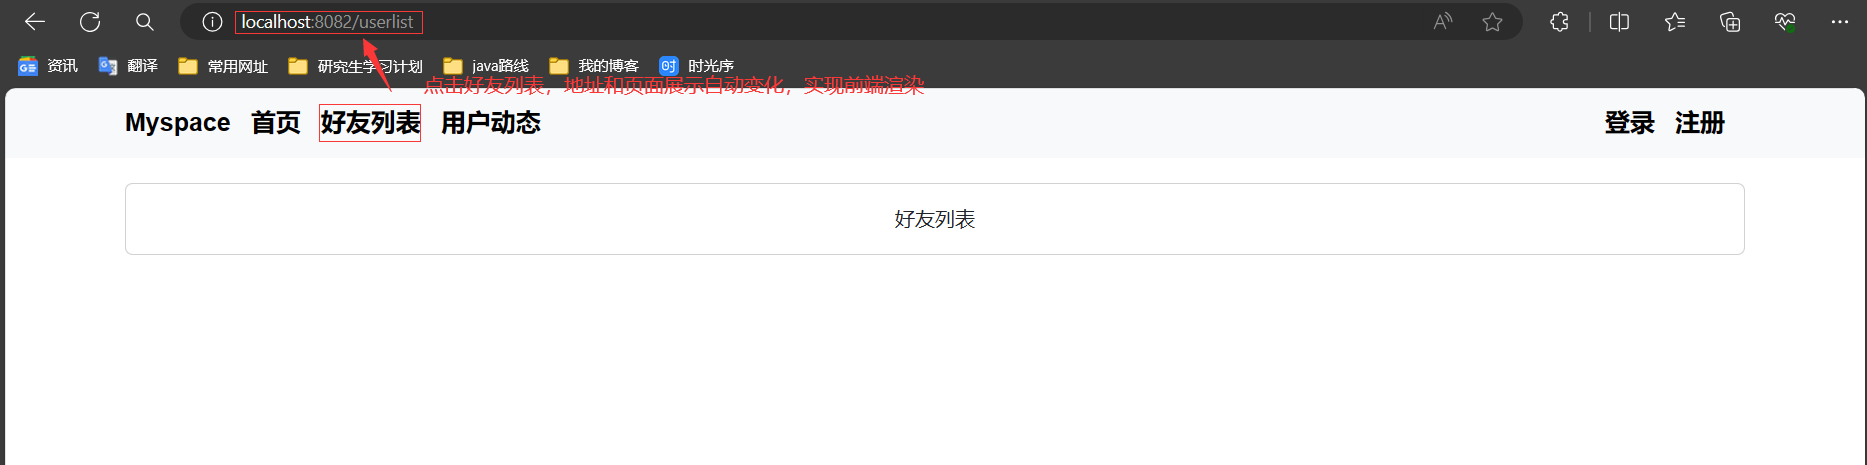
以上实现了修改导航栏,跳转到指定页面。接下来实现前端渲染。
前端渲染的理解
前端渲染是指在浏览器中使用JavaScript来动态生成页面内容的过程。通过前端渲染,可以实现更快的页面加载速度和更流畅的用户体验。
关于前端渲染的一些常见技术包括:
- 基于HTML模板的渲染:使用模板引擎如Handlebars、Mustache等来生成HTML页面。
- 基于组件的渲染:使用框架如React、Vue.js等来构建组件化的页面结构。
- 服务端渲染(SSR):在服务器端生成页面内容,减少客户端渲染的负担。
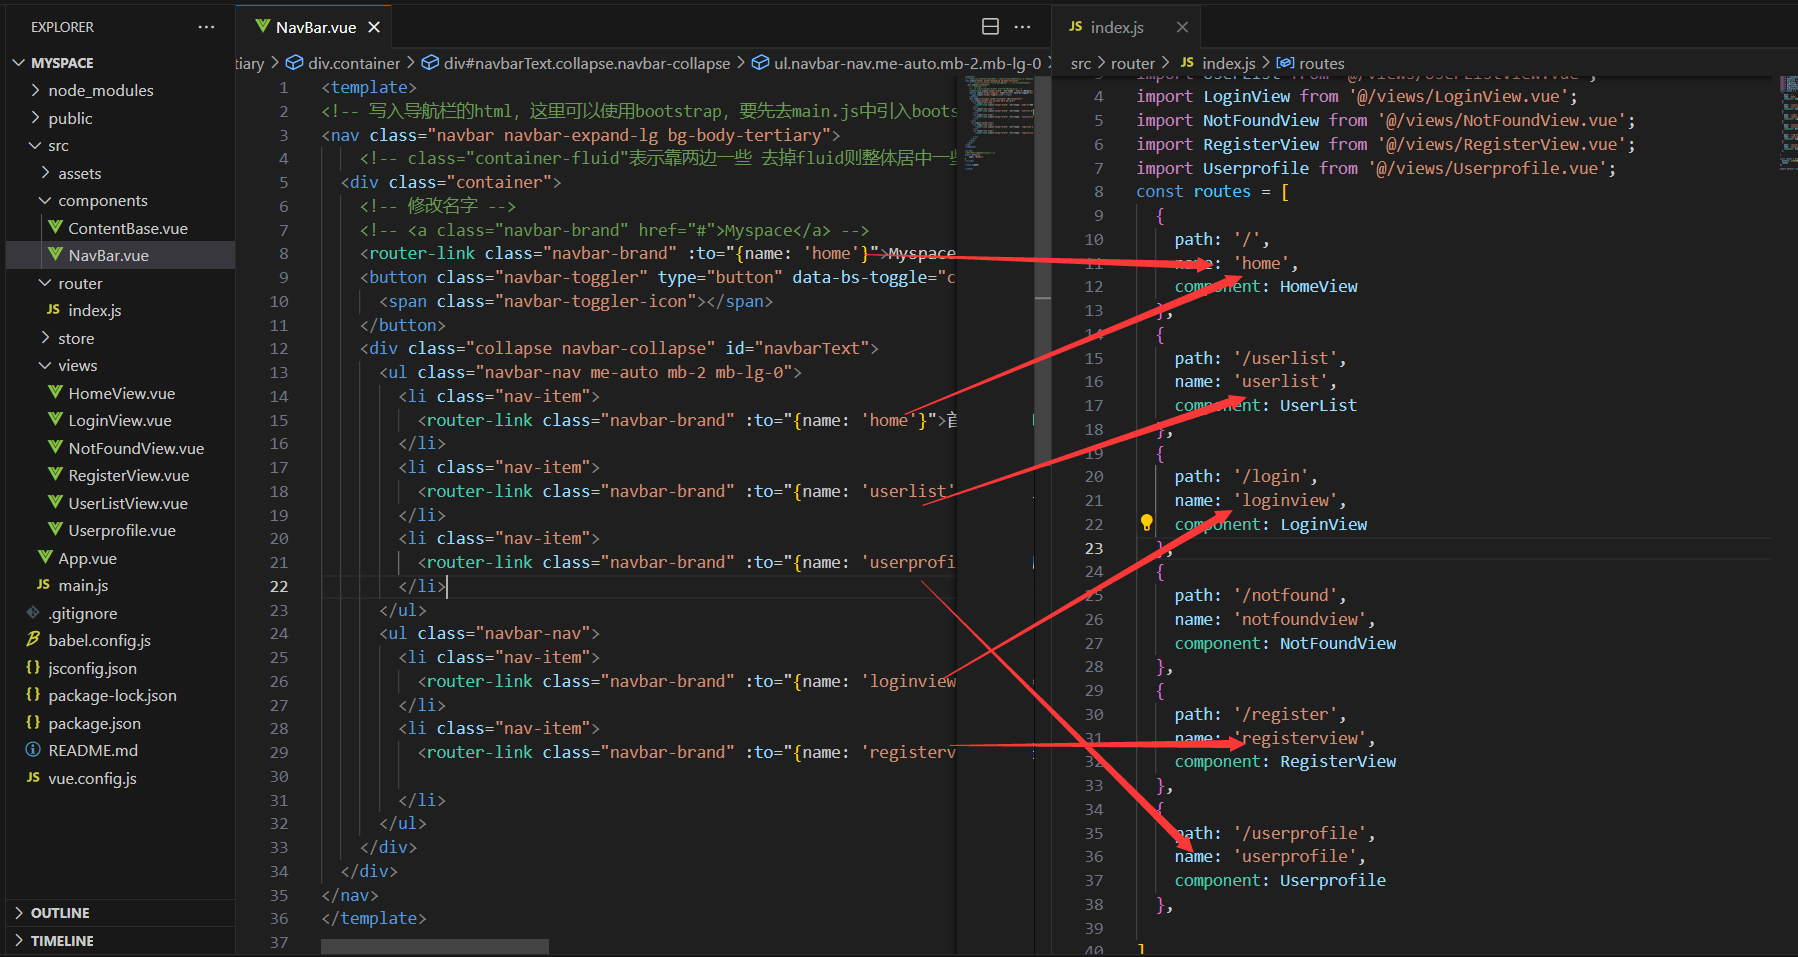
<router-link class="navbar-brand" :to="{name: 'home'}">Myspace</router-link>通过:to="{name: 'home'}"来进行绑定
<template>
<!-- 写入导航栏的html,这里可以使用bootstrap,要先去main.js中引入bootstrap,到bootstrap复制代码到这里-->
<nav class="navbar navbar-expand-lg bg-body-tertiary">
    <!-- class="container-fluid"表示靠两边一些 去掉fluid则整体居中一些-->
  <div class="container">
    <!-- 修改名字 -->
    <!-- <a class="navbar-brand" href="#">Myspace</a> -->
    <router-link class="navbar-brand" :to="{name: 'home'}">Myspace</router-link>
    <button class="navbar-toggler" type="button" data-bs-toggle="collapse" data-bs-target="#navbarText" aria-controls="navbarText" aria-expanded="false" aria-label="Toggle navigation">
      <span class="navbar-toggler-icon"></span>
    </button>
    <div class="collapse navbar-collapse" id="navbarText">
      <ul class="navbar-nav me-auto mb-2 mb-lg-0">
        <li class="nav-item">
          <router-link class="navbar-brand" :to="{name: 'home'}">首页</router-link>
        </li>
        <li class="nav-item">
          <router-link class="navbar-brand" :to="{name: 'userlist'}">好友列表</router-link>
        </li>
        <li class="nav-item">
          <router-link class="navbar-brand" :to="{name: 'userprofile'}">用户动态</router-link>
        </li>
      </ul>
      <ul class="navbar-nav">
        <li class="nav-item">
          <router-link class="navbar-brand" :to="{name: 'loginview'}">登录</router-link>
        </li>
        <li class="nav-item">
          <router-link class="navbar-brand" :to="{name: 'registerview'}">注册</router-link>

        </li>
      </ul>
    </div>
  </div>
</nav>
</template>

<script>
//写好之后,需要将他export出去
export default{
    name: "NavBar",
}
</script>

<style scoped>

</style>
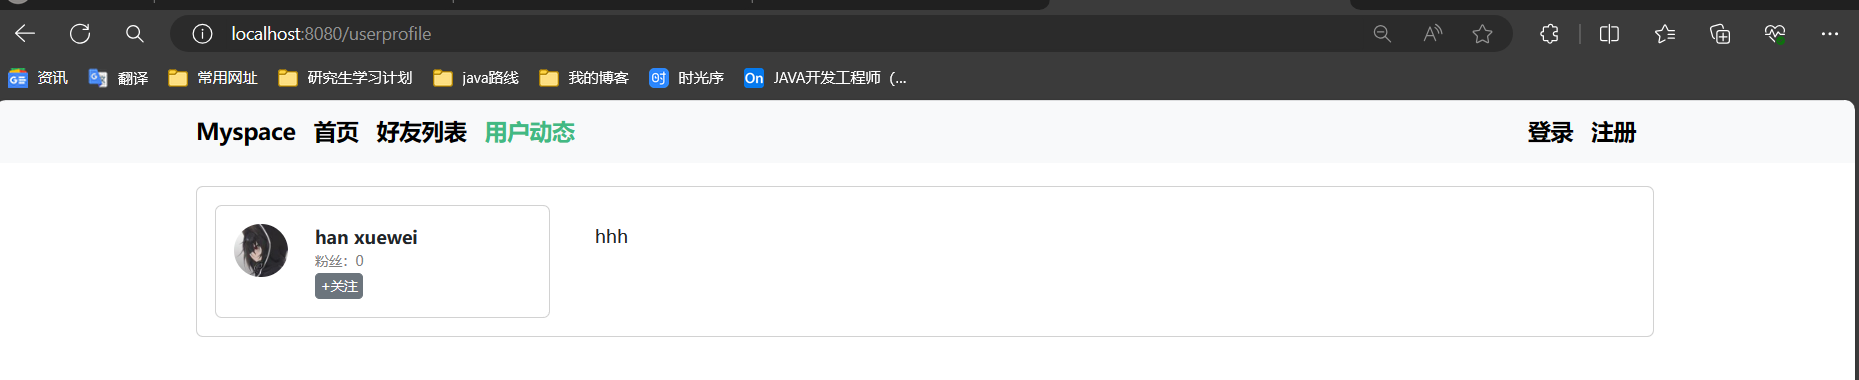
用户动态页面的具体实现
构思用户动态包含的模块,并在components包下创建组件
UserProfileInfo.vue:展示信息UserProfilePosts.vue:展示这个用户历史上发过的所有帖子UserProfileWriter.vue:用来动态发帖子
利用grid来实现整体页面布局,到bootstrap官网输入gird
在UserProfile.vue(总页面,包含上面三个组件,每个小组件又可以细分)中设置布局,存储数据
<template>
    <!-- class="container"用来调整中间内容区域的大小 -->
    <!-- 公共的部分用组件表示 -->
    <ContentBase>
      <!-- contentBase中包含Container -->
      <div class="row">
        <div class="col-3">
          用户信息
        </div>
        <div class="col-9">
          帖子列表
        </div>
      </div>
    </ContentBase>
  </template>

实现UserProfileInfo.vue,内部细分仍然使用grid来实现
- 在bootstrap中搜索images,添加元素
img-fluid完成<img class="img-fluid" src="https://cdn.acwing.com/media/user/profile/photo/142094_lg_26e65f985c.jpg" alt=" ">,这样图片就会自适应大小, - 如何将图片变成圆形,添加css样式
<style scoped>
    img {
       border-radius: 50%;
    }
</style>
- 在写另半边
- 用户名
- 粉丝
- 关注按钮
完整代码:
<template>
    <div class="card">
        <div class="card-body">
            <div class="row">
        <div class="col-3">
            <!-- 头像 -->
            <img class="img-fluid" src="https://cdn.acwing.com/media/user/profile/photo/142094_lg_26e65f985c.jpg" alt=" ">
        </div>
        <div class="col-9">
            <div class="username">Han xuewei</div>
            <div class="fans">粉丝:123</div>
            <button type="button" class="btn btn-secondary btn-sm">+关注</button>
        </div>
    </div>
        </div>
    </div>
</template>

<script>
export default{
    name: "UserProfileInfo",
}
</script>

<style scoped>
    img {
       border-radius: 50%;
    }
    .username {
        font-weight: bold;
    }
    .fans {
        font-size: 12px;
        color: gray;
    }
    button {
        padding: 2px 4px;
        font-size: 12px;
    }
</style>

在Userprofile中存储数据
<template>
    <!-- class="container"用来调整中间内容区域的大小 -->
    <!-- 公共的部分用组件表示 -->
    <ContentBase>
      <!-- contentBase中包含Container -->
      <div class="row">
        <div class="col-3">
          <UserProfileInfo/>
        </div>
        <div class="col-9">
          <UserProfilePosts/>
        </div>
      </div>
    </ContentBase>
  </template>

  <script>
  // 引入组件
  import UserProfilePosts from '@/components/UserProfilePosts.vue';
  import ContentBase from '../components/ContentBase.vue';
  import UserProfileInfo from '@/components/UserProfileInfo.vue';
  import { reactive } from 'vue';
  export default {
    name: 'UserProfile',
    components: {
      ContentBase,
      UserProfileInfo,
      UserProfilePosts,
    },
    /* setup是一个函数,用来定义许多变量的
       可以简写:
       setup(){

       }
    */
    setup: ()=> {
        // 定义user变量,当前页面的用户一般不会改变
         const user = reactive({
          //里面定义一些变量信息
           id: 1,
           username: "hanxuewei",
           lastName: "han",
           firstName: "xuewei",
           //存储是否关注当前主页对象,没有关注的状态才可以关注
           is_followed: false,
         })

        //  未来在template中用到的值都需要return出去
         return {
          user : user,
         }
    }
  }

  </script>
  <style scoped>
  .container{
    margin-top: 20px;
  }
  </style>
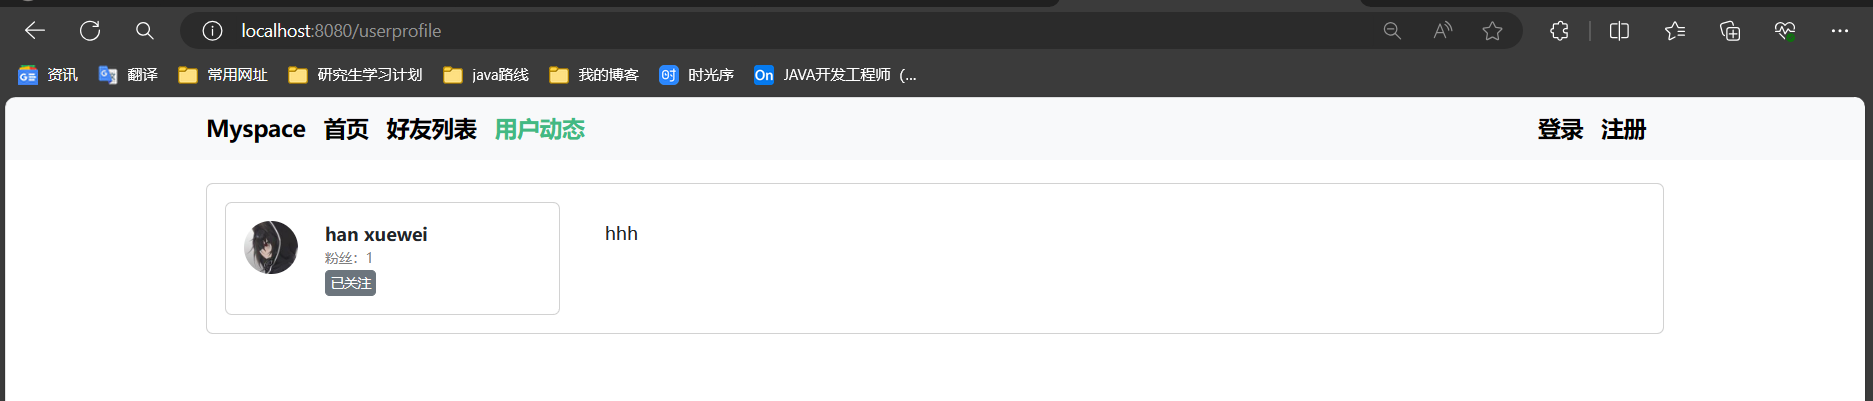
实现组件之间的数据传递
- 父组件传递给子组件信息是通过props组件实现。
- 子组件传递给父组件信息是通过调用函数(事件)的方式实现


父组件代码
<template>
    <!-- class="container"用来调整中间内容区域的大小 -->
    <!-- 公共的部分用组件表示 -->
    <ContentBase>
      <!-- contentBase中包含Container -->
      <div class="row">
        <div class="col-3">
          <!-- 子组件向父组件传递信息需要绑定事件 follow事件触发调用follow函数,unfollow事件触发调用unfollow函数-->
          <UserProfileInfo @follow="follow" @unfollow="unfollow" :user = "user"/>
        </div>
        <div class="col-9">
          <UserProfilePosts/>
        </div>
      </div>
    </ContentBase>
  </template>

  <script>
  // 引入组件
  import UserProfilePosts from '@/components/UserProfilePosts.vue';
  import ContentBase from '../components/ContentBase.vue';
  import UserProfileInfo from '@/components/UserProfileInfo.vue';
  import { reactive } from 'vue';
  export default {
    name: 'UserProfile',
    components: {
      ContentBase,
      UserProfileInfo,
      UserProfilePosts,
    },
    /* setup是一个函数,用来定义许多变量的
       可以简写:
       setup(){
       }
    */
    setup: ()=> {
        // 定义user变量,当前页面的用户一般不会改变
         const user = reactive({
          //里面定义一些变量信息
           id: 1,
           username: "hanxuewei",
           lastName: "han",
           firstName: "xuewei",
           //粉丝数
           followerCount: 0,
           //存储是否关注当前主页对象,没有关注的状态才可以关注
           is_followed: false,
         });
         //关注函数
        const follow = () => {
            if(user.is_followed){
              return;
            }
            user.is_followed = true;
            //粉丝数加一
            user.followerCount ++;
         }
        //取消关注函数
        const unfollow = () =>{
            if(!user.is_followed){
              return;
            }
            user.is_followed = false;
            user.followerCount --;
         }
        //  未来在template中用到的值都需要return出去
         return {
          user : user,
          follow,
          unfollow,
         }
    }
  }
  </script>
  <style scoped>
  .container{
    margin-top: 20px;
  }
  </style>
子组件代码
<template>
    <div class="card">
        <div class="card-body">
            <div class="row">
        <div class="col-3">
            <!-- 头像 -->
            <img class="img-fluid" src="https://cdn.acwing.com/media/user/profile/photo/142094_lg_26e65f985c.jpg" alt=" ">
        </div>
        <div class="col-9">
            <!-- 全名是组合而成的 -->
            <div class="username">{{ fullName }}</div>
            <div class="fans">粉丝:{{ user.followerCount }}</div>
            <!-- 使用标签 v-if -->
            <!-- 绑定函数标签:@click -->
            <button @click="follow" v-if="!user.is_followed" type="button" class="btn btn-secondary btn-sm">+关注</button>
            <button @click="unfollow" v-if="user.is_followed" type="button" class="btn btn-secondary btn-sm">已关注</button>
        </div>
    </div>
        </div>
    </div>
</template>

<script>
import { computed } from 'vue';

export default{
    name: "UserProfileInfo",
    //子组件希望接收父组件传递过来的一些参数,需要将接收的参数放到pops里面
    props: {
        user: {
            type: Object,
            required: true,
        },
    },
    //全名可以动态修改,当lastname和firstname变化,全面会动态变化
    setup(props,context){
        let fullName = computed(() => props.user.lastName + ' ' + props.user.firstName);
        //关注函数
        const follow = () => {
            // 触发父组件的时间表
            context.emit('follow');
        }
        const unfollow = () => {
            context.emit("unfollow");
        }
        //一定要记得返回
        return{
            fullName,
            follow,
            unfollow,
        }
    }
}
</script>

<style scoped>
    img {
       border-radius: 50%;
    }
    .username {
        font-weight: bold;
    }
    .fans {
        font-size: 12px;
        color: gray;
    }
    button {
        padding: 2px 4px;
        font-size: 12px;
    }
</style>
实现帖子列表UserProfilePosts.vue
<template>
    <!-- class="container"用来调整中间内容区域的大小 -->
    <!-- 公共的部分用组件表示 -->
    <ContentBase>
      <!-- contentBase中包含Container -->
      <div class="row">
        <div class="col-3">
          <!-- 子组件向父组件传递信息需要绑定事件 follow事件触发调用follow函数,unfollow事件触发调用unfollow函数-->
          <UserProfileInfo @follow="follow" @unfollow="unfollow" :user = "user"/>
        </div>
        <div class="col-9">
          <UserProfilePosts :posts="posts"/>
        </div>
      </div>
    </ContentBase>
  </template>

  <script>
  // 引入组件
  import UserProfilePosts from '@/components/UserProfilePosts.vue';
  import ContentBase from '../components/ContentBase.vue';
  import UserProfileInfo from '@/components/UserProfileInfo.vue';
  import { reactive } from 'vue';
  export default {
    name: 'UserProfile',
    components: {
      ContentBase,
      UserProfileInfo,
      UserProfilePosts,
    },
    /* setup是一个函数,用来定义许多变量的
       可以简写:
       setup(){
       }
    */
    setup: ()=> {
        // 定义user变量,当前页面的用户一般不会改变
         const user = reactive({
          //里面定义一些变量信息
           id: 1,
           username: "hanxuewei",
           lastName: "han",
           firstName: "xuewei",
           //粉丝数
           followerCount: 0,
           //存储是否关注当前主页对象,没有关注的状态才可以关注
           is_followed: false,
         });
         //帖子
         const posts = reactive({
            count: 3,
            posts: [
              {
                id: 1,
                userId: 1,
                content: "今天上了web课 真开心"
              },
              {
                id: 2,
                userId: 2,
                content: "今天上了算法课 更开心了"
              },
              {
                id: 3,
                userId: 3,
                content: "今天上了Acwing 开心极了"
              },
            ]

         });
         //关注函数
        const follow = () => {
            if(user.is_followed){
              return;
            }
            user.is_followed = true;
            //粉丝数加一
            user.followerCount ++;
         }
        //取消关注函数
        const unfollow = () =>{
            if(!user.is_followed){
              return;
            }
            user.is_followed = false;
            user.followerCount --;
         }
        //  未来在template中用到的值都需要return出去
         return {
          user : user,
          follow,
          unfollow,
          posts : posts,
         }
    }
  }
  </script>
  <style scoped>
  .container{
    margin-top: 20px;
  }
  </style>
<template>
    <!-- 用卡片括起来 -->
    <div class="card">
        <div class="card-body">
            <div v-for="post in posts.posts" :key="post.id">
                <div class="card single-post">
                    <div class="card-body">
                        {{ post.content }}
                    </div>
                </div>
            </div>
        </div>
    </div>
</template>

<script>
export default{
    name: "UserProfilePosts",
    props: {
        posts: {
            type: Object,
            required: true,
        },
    }
}
</script>

<style scoped>
.single-post{
    margin-top: 10px;
}
</style>

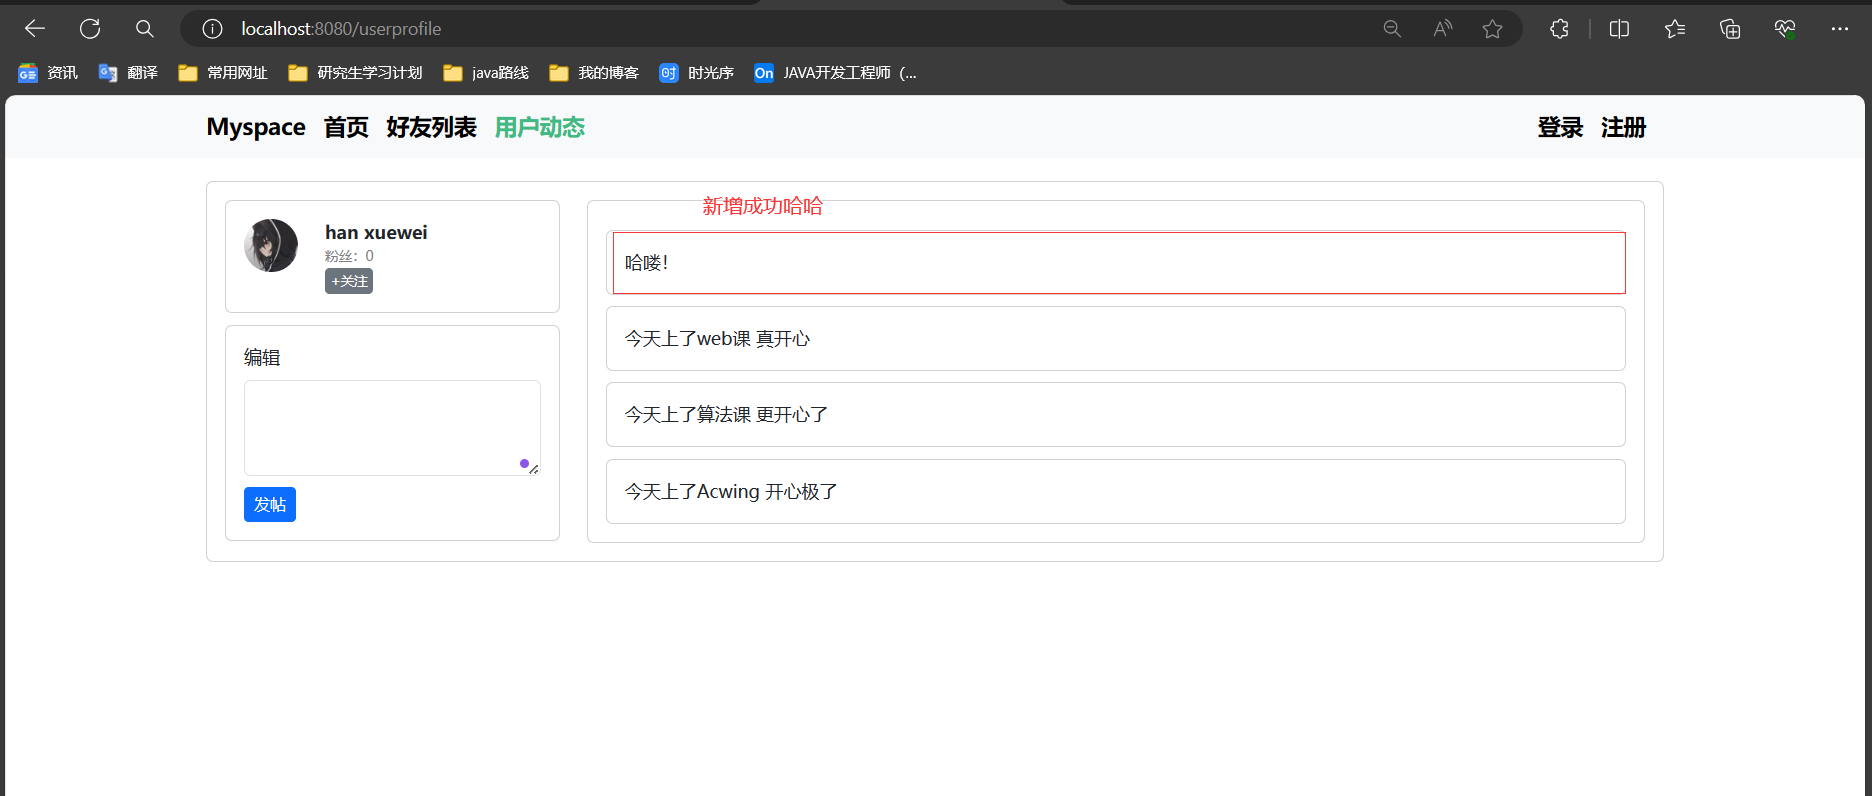
实现发帖UserProfileWriter.vue
实现过程:输入内容,点击发帖,子组件中触发<button @click="post_a_post" type="button" class="btn btn-primary btn-sm" >发帖</button>中post_a_post函数,这个函数中通过 context.emit('post_a_post',content.value);会触发父组件中的post_a_post函数,这个函数就会更新posts,就会重新渲染一遍UserProfilePost.vue组件。
父组件:
<template>
    <!-- class="container"用来调整中间内容区域的大小 -->
    <!-- 公共的部分用组件表示 -->
    <ContentBase>
      <!-- contentBase中包含Container -->
      <div class="row">
        <div class="col-3">
          <!-- 子组件向父组件传递信息需要绑定事件 follow事件触发调用follow函数,unfollow事件触发调用unfollow函数-->
          <UserProfileInfo @follow="follow" @unfollow="unfollow" :user = "user"/>
          <UserProfileWriter @post_a_post="post_a_post" />
        </div>
        <div class="col-9">
          <!-- 将函数绑定为一个事件 -->
          <UserProfilePosts :posts="posts"/>
        </div>
      </div>
    </ContentBase>
  </template>

  <script>
  // 引入组件
  import UserProfilePosts from '@/components/UserProfilePosts.vue';
  import ContentBase from '../components/ContentBase.vue';
  import UserProfileInfo from '@/components/UserProfileInfo.vue';
  import UserProfileWriter from '@/components/UserProfileWriter.vue';
  import { reactive } from 'vue';
  export default {
    name: 'UserProfile',
    components: {
      ContentBase,
      UserProfileInfo,
      UserProfilePosts,
      UserProfileWriter,
    },
    /* setup是一个函数,用来定义许多变量的
       可以简写:
       setup(){
       }
    */
    setup: ()=> {
        // 定义user变量,当前页面的用户一般不会改变
         const user = reactive({
          //里面定义一些变量信息
           id: 1,
           username: "hanxuewei",
           lastName: "han",
           firstName: "xuewei",
           //粉丝数
           followerCount: 0,
           //存储是否关注当前主页对象,没有关注的状态才可以关注
           is_followed: false,
         });
         //帖子
         const posts = reactive({
            count: 3,
            posts: [
              {
                id: 1,
                userId: 1,
                content: "今天上了web课 真开心"
              },
              {
                id: 2,
                userId: 2,
                content: "今天上了算法课 更开心了"
              },
              {
                id: 3,
                userId: 3,
                content: "今天上了Acwing 开心极了"
              },
            ]

         });
         //关注函数
        const follow = () => {
            if(user.is_followed){
              return;
            }
            user.is_followed = true;
            //粉丝数加一
            user.followerCount ++;
         }
        //取消关注函数
        const unfollow = () =>{
            if(!user.is_followed){
              return;
            }
            user.is_followed = false;
            user.followerCount --;
         }
         //传送帖子的内容
         const post_a_post = (content) => {
            posts.count++;//帖子数量+1
            posts.posts.unshift({
                id: posts.count,
                userId: 1,
                content: content,
            })//最新的在最上面,这个函数记忆一下
         };
        //  未来在template中用到的值都需要return出去
         return {
          user : user,
          follow,
          unfollow,
          posts : posts,
          post_a_post,
         }
    }
  }
  </script>
  <style scoped>
  .container{
    margin-top: 20px;
  }
  </style>
子组件:
<template>
    <div class="card edit-field">
        <div class="card-body">
            <!-- bootstrap中的form中寻找 -->
            <label for="exampleFormControlTextarea1" class="form-label">编辑</label>
            <!-- 让编辑区的内容和content绑定起来,也就是说{{ content }}显示的内容就是编辑区里面输入的内容 -->
            <textarea v-model="content" class="form-control" id="exampleFormControlTextarea1" rows="3"></textarea>
            <!-- bootstrap中的botton中寻找一个喜欢的按钮样式 -->
            <button @click="post_a_post" type="button" class="btn btn-primary btn-sm" >发帖</button>
        </div>
    </div>
</template>

<script>
import { ref } from 'vue';
export default {
    name: "UserProfileWriter",
    // 实现发帖的功能
    setup(props,context) {
        let content = ref('');

        // 定义一个click函数
        const post_a_post = () => {
            // context.emit触犯父组件
            context.emit('post_a_post',content.value);
            //想要取ref的值,一定要使用value,控制调试
            // console.log(content.value);
            //将内容清空
            content.value="";
        }
        return{
            content,
            post_a_post,
        }
    }
}
</script>

<style scoped>
.edit-field{
    margin-top: 10px;
}
button{
    margin-top: 10px;
}
</style>


 89
89


 被折叠的 条评论
为什么被折叠?
被折叠的 条评论
为什么被折叠?
 到【灌水乐园】发言


