


了解了View的绘制流程,并不是立刻就能自定义View了,我们还是需要工具的,那就是Canvas和Paint。不是很了解VIew的,请看上一篇博客,自定义View基础之——初识View。
Canvas代表画布,Paint代表画笔,有了画笔和画布,通过Canvas提供的API,我们当然想画什么就画什么了,接下来我们就看看绘图的基本方法。而在绘图之前,我们通常需要初始化画笔,设置下画笔的各个属性:
//画笔宽度
mPaint.setStrokeWidth(5);
//设置画笔风格,描边,填充,填充且描边
mPaint.setStyle(Paint.Style.STROKE);
//mPaint.setStyle(Paint.Style.FILL);
//mPaint.setStyle(Paint.Style.FILL_AND_STROKE);
//抗锯齿,平滑
//mPaint.setAntiAlias(true);
//设置画笔颜色
mPaint.setColor(Color.BLACK);
//设置字体的尺寸
//mPaint.setTextSize(30);1、绘制矩形,参数为左上角的横纵坐标,以及右下角的横纵坐标,即left,top,right,bottom
canvas.drawRect(0,0,150,100,mPaint);mPaint.setStrokeWidth(20);
canvas.drawPoint(200,50,mPaint);
mPaint.setStrokeWidth(5);
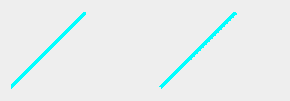
canvas.drawLine(250,100,350,0,mPaint);
RectF roundRectF=new RectF(400,0,550,100);
canvas.drawRoundRect(roundRectF,10,10,mPaint);
canvas.drawCircle(650,50,45,mPaint);

6、绘制多条直线,参数为pts,就是多个起始点结束点的坐标,每次每次都从pts中取4个值,代表startX,startY,stopX,stopY,等同于drawLine(pts[0], pts[1], pts[2], pts[3]),还有drawLine(pts[4], pts[5], pts[6], pts[7])依次下去。
mPaint.setColor(Color.CYAN);
float[] pts={0,250,100,150,200,250,300,150};
canvas.drawLines(pts,mPaint);
mPaint.setColor(getResources().getColor(android.R.color.holo_blue_light));
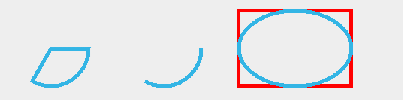
RectF arcRectF=new RectF(0,300,100,400);
canvas.drawArc(arcRectF,0,120,true,mPaint);
RectF arcRectF2=new RectF(150,300,250,400);
canvas.drawArc(arcRectF2,0,120,false,mPaint);
RectF ovalRectF=new RectF(300,300,450,400);
mPaint.setColor(Color.RED);
canvas.drawRect(ovalRectF,mPaint);
mPaint.setColor(getResources().getColor(android.R.color.holo_blue_light));
canvas.drawOval(ovalRectF,mPaint);
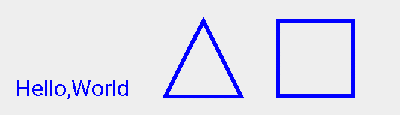
String text="Hello,World";
mPaint.setStyle(Paint.Style.FILL);
mPaint.setColor(Color.BLUE);
mPaint.setTextSize(30);
//mPaint.setTextAlign(Paint.Align.LEFT);
//mPaint.setFakeBoldText(true);
//mPaint.setUnderlineText(true);
//mPaint.setStrikeThruText(true);
canvas.drawText(text,0,600,mPaint);
mPaint.setStyle(Paint.Style.STROKE);
Path path=new Path();
path.moveTo(200,600);
path.lineTo(250,500);
path.lineTo(300,600);
path.close();
canvas.drawPath(path,mPaint);
Path path=new Path();
RectF rect=new RectF(350,500,450,600);
path.addRect(rect,Path.Direction.CW);
//path.addArc();
//path.addRoundRect();
//path.addOval();
//path.addCircle();
canvas.drawPath(path,mPaint);
Path path=new Path();
path.addCircle(250,850,200,Path.Direction.CW);
String text="阿乐真帅阿乐真帅呀呀呀呀";
mPaint.setColor(Color.RED);
mPaint.setStyle(Paint.Style.STROKE);
canvas.drawPath(path,mPaint);
mPaint.setColor(getResources().getColor(android.R.color.holo_blue_light));
mPaint.setTextSize(50);
mPaint.setStyle(Paint.Style.FILL);
canvas.drawTextOnPath(text,path,0,0,mPaint);

Path path1=new Path();
path1.addCircle(400,1400,200, Path.Direction.CW);
mPaint.setStyle(Paint.Style.STROKE);
canvas.drawPath(path1,mPaint);
mPaint.setColor(Color.RED);
mPaint.setStyle(Paint.Style.FILL);
canvas.drawTextOnPath(text,path1,100,50,mPaint);

PS:还是这样的博客写着省心啊,10分钟结束战斗,哇咔咔。。


 564
564

 被折叠的 条评论
为什么被折叠?
被折叠的 条评论
为什么被折叠?
 到【灌水乐园】发言


