


- ESP_ADF安装成功很大程度取决于网络,多尝试几次,建议github的连接git获取,其他方式下载不完全编译就会报错
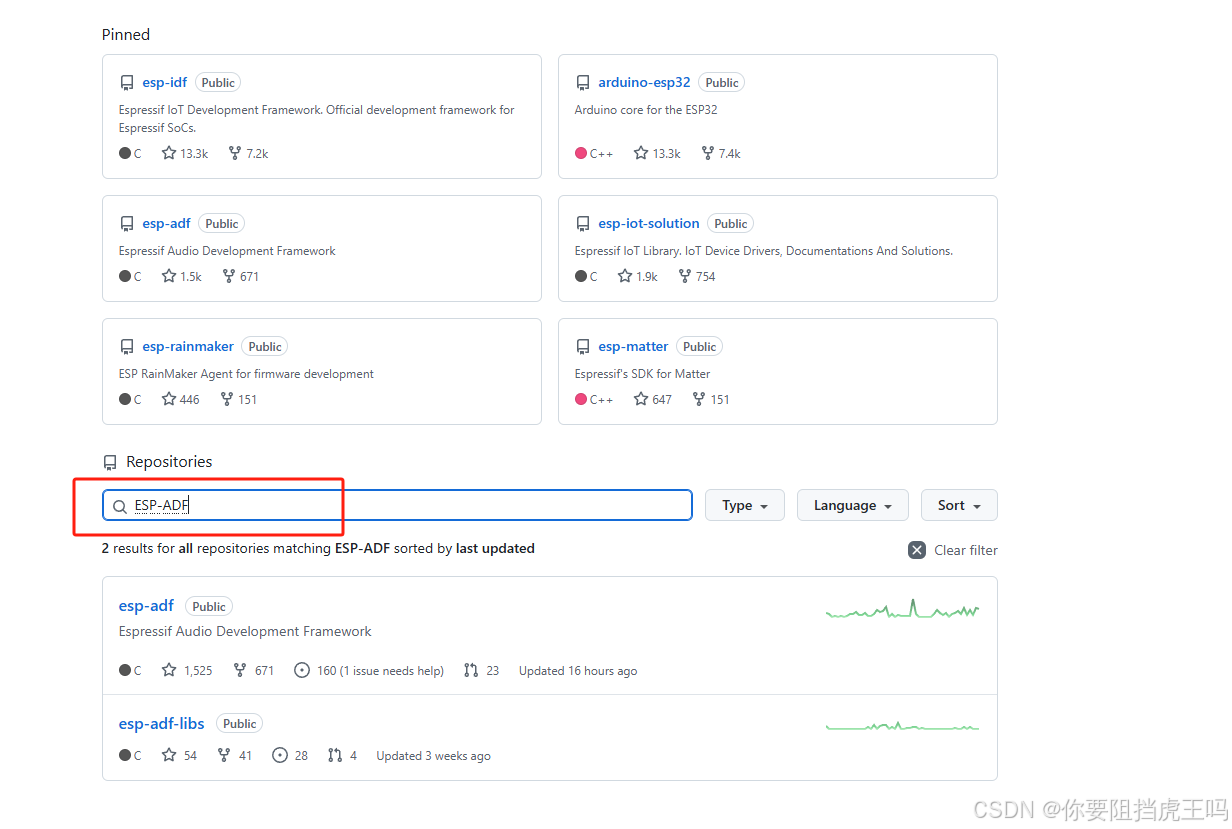
- 前往Espressif 仓库查看 Espressif github仓库,往下滑动搜索ESP-ADF
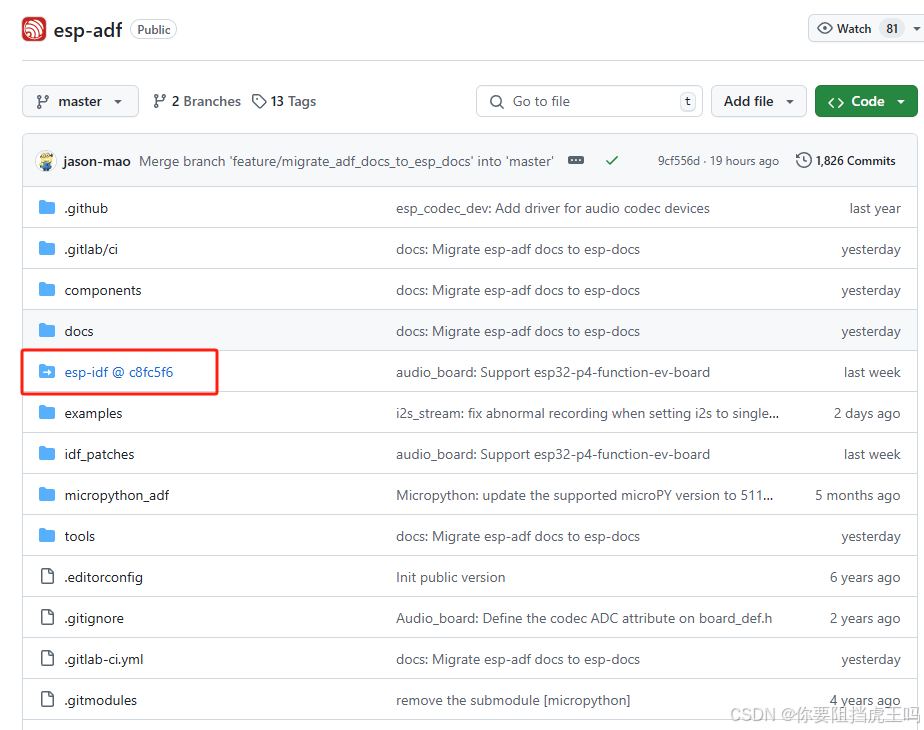
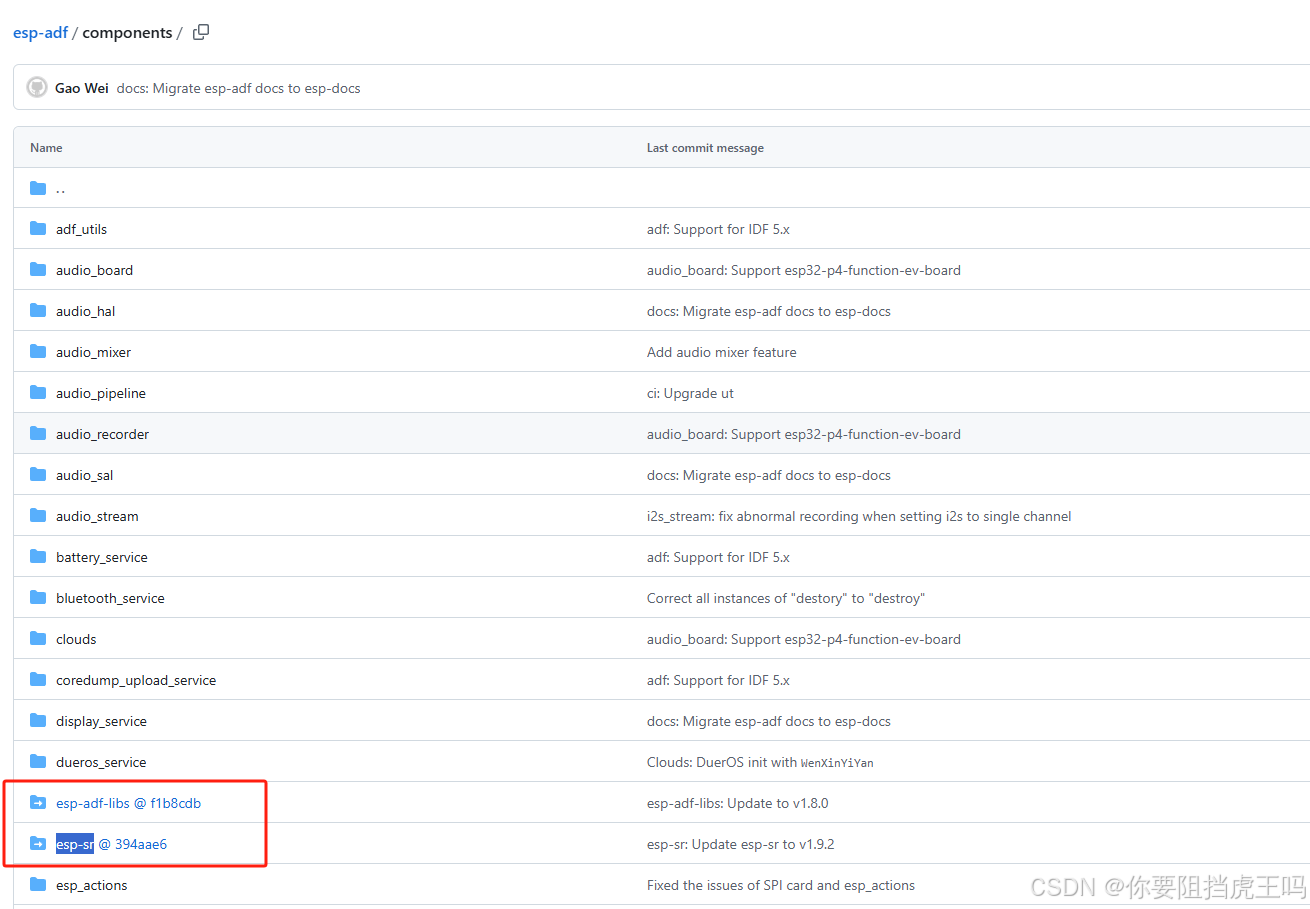
- 进入之后可以看到除了ESP-ADF外还有ESP-IDF ,components目录下的 esp-adf-libs 和 esp-sr
- 使用命令获取esp-adf,过程出错或中断可能导致安装失败,建议使用手机开启USB网络共享给电脑尝试,我自己尝试了N遍,换时间尝试几次。
git clone https://github.com/espressif/esp-adf.git	// 拉取esp-adf

git submodule update --init --recursive	// 同步更新子模块
-
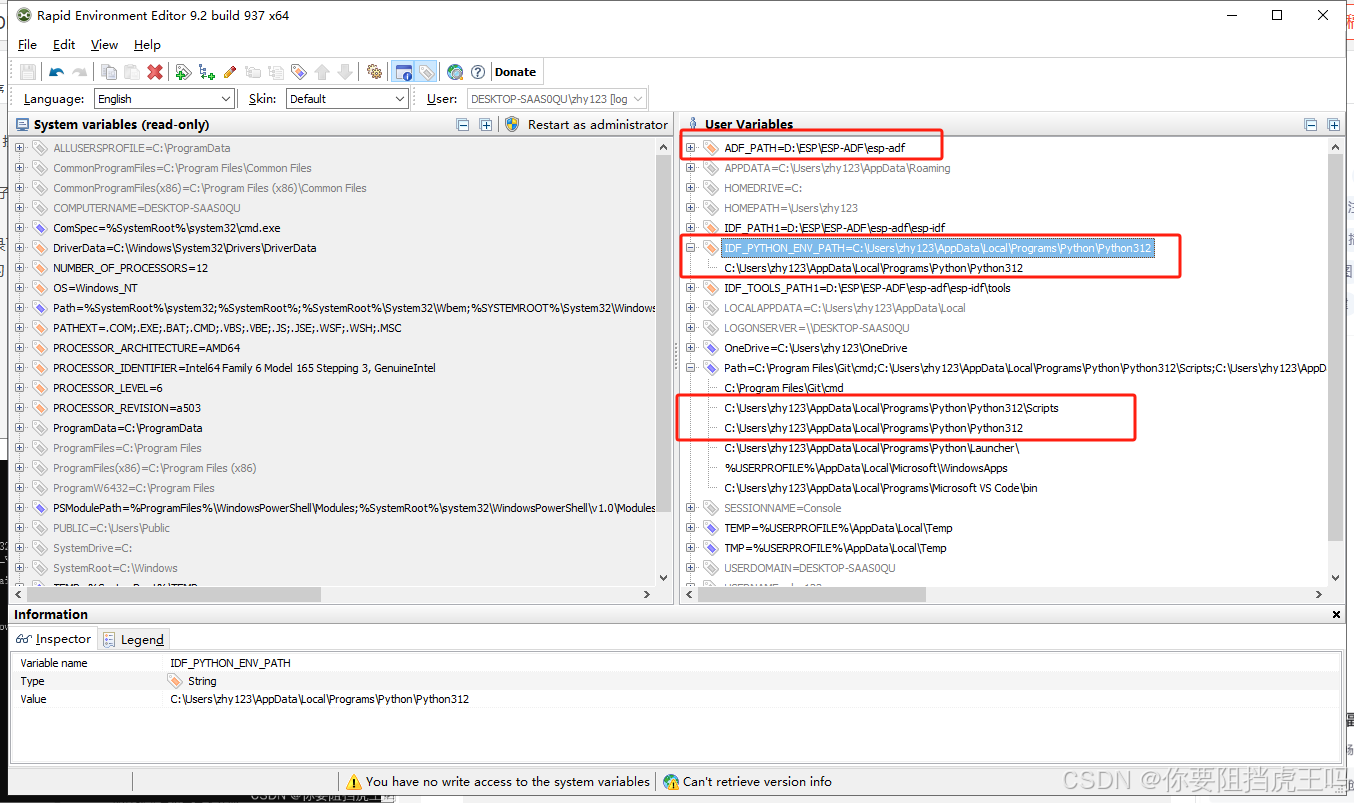
拉取完整的esp-adf后切换到esp-adf的目录下执行 install.bat 脚本,完成ESP-IDF的安装后 export.bat 才算完成。这个过程注意自电脑的 python版本 环境变量 还有 ESP-IDF 和 ESP-ADF的环境变量设置是否合理。
我用到的环境变量
-
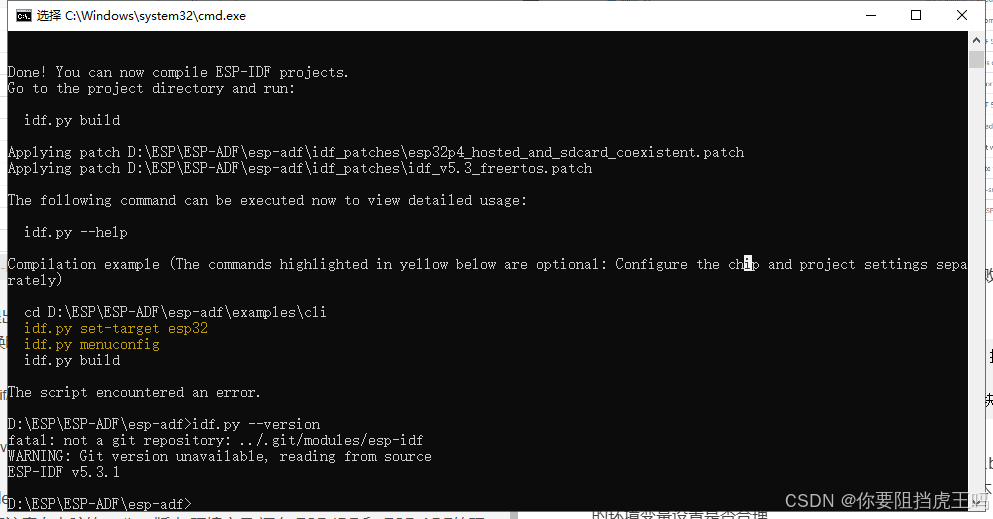
安装完成的界面
D:\ESP\ESP-ADF>cd esp-adf

D:\ESP\ESP-ADF\esp-adf>export.bat
ADF_PATH: D:\ESP\ESP-ADF\esp-adf
IDF_PATH: D:\ESP\ESP-ADF\esp-adf\esp-idf
Checking Python compatibility
Setting IDF_PATH: D:\ESP\ESP-ADF\esp-adf\esp-idf

Adding ESP-IDF tools to PATH...
WARNING: The following issue occurred while accessing the ESP-IDF version file in the Python environment: [Errno 2] No such file or directory: 'C:\\Users\\zhy123\\AppData\\Local\\Programs\\Python\\Python312\\idf_version.txt'. (Diagnostic information. It can be ignored.)
    C:\Users\zhy123\.espressif\tools\xtensa-esp-elf-gdb\14.2_20240403\xtensa-esp-elf-gdb\bin
    C:\Users\zhy123\.espressif\tools\riscv32-esp-elf-gdb\14.2_20240403\riscv32-esp-elf-gdb\bin
    C:\Users\zhy123\.espressif\tools\xtensa-esp-elf\esp-13.2.0_20240530\xtensa-esp-elf\bin
    C:\Users\zhy123\.espressif\tools\riscv32-esp-elf\esp-13.2.0_20240530\riscv32-esp-elf\bin
    C:\Users\zhy123\.espressif\tools\esp32ulp-elf\2.38_20240113\esp32ulp-elf\bin
    C:\Users\zhy123\.espressif\tools\cmake\3.24.0\bin
    C:\Users\zhy123\.espressif\tools\openocd-esp32\v0.12.0-esp32-20240318\openocd-esp32\bin
    C:\Users\zhy123\.espressif\tools\ninja\1.11.1\
    C:\Users\zhy123\.espressif\tools\idf-exe\1.0.3\
    C:\Users\zhy123\.espressif\tools\ccache\4.8\ccache-4.8-windows-x86_64
    C:\Users\zhy123\.espressif\tools\dfu-util\0.11\dfu-util-0.11-win64
    D:\ESP\ESP-ADF\esp-adf\esp-idf\tools

Checking if Python packages are up to date...
Constraint file: C:\Users\zhy123\.espressif\espidf.constraints.v5.3.txt
Requirement files:
 - D:\ESP\ESP-ADF\esp-adf\esp-idf\tools\requirements\requirements.core.txt
Python being checked: C:\Users\zhy123\AppData\Local\Programs\Python\Python312\Scripts\python.exe
Python requirements are satisfied.

Detected installed tools that are not currently used by active ESP-IDF version.
For removing old versions of riscv32-esp-elf-gdb, xtensa-esp-elf-gdb use command 'python.exe D:\ESP\ESP-ADF\esp-adf\esp-idf\tools\idf_tools.py uninstall'
For free up even more space, remove installation packages of those tools. Use option 'python.exe D:\ESP\ESP-ADF\esp-adf\esp-idf\tools\idf_tools.py uninstall --remove-archives'.


Done! You can now compile ESP-IDF projects.
Go to the project directory and run:

  idf.py build

Applying patch D:\ESP\ESP-ADF\esp-adf\idf_patches\esp32p4_hosted_and_sdcard_coexistent.patch
Applying patch D:\ESP\ESP-ADF\esp-adf\idf_patches\idf_v5.3_freertos.patch

The following command can be executed now to view detailed usage:

  idf.py --help

Compilation example (The commands highlighted in yellow below are optional: Configure the chip and project settings separately)

  cd D:\ESP\ESP-ADF\esp-adf\examples\cli
  idf.py set-target esp32
  idf.py menuconfig
  idf.py build

The script encountered an error.

D:\ESP\ESP-ADF\esp-adf>idf.py --version
fatal: not a git repository: ../.git/modules/esp-idf
WARNING: Git version unavailable, reading from source
ESP-IDF v5.3.1

D:\ESP\ESP-ADF\esp-adf>


 4584
4584

 被折叠的 条评论
为什么被折叠?
被折叠的 条评论
为什么被折叠?
 到【灌水乐园】发言


