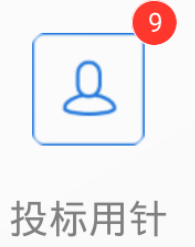
简单的自定义控件
1、ImageView+TextView+icon(TextView+shape):可控圆点为位置。。

1.0、Demo
- MyImageBtnView
public class MyImageBtnView extends RelativeLayout {
private ImageView top_image;
private TextView btn_text;
private TextView icon;
private Drawable top_drawable;
private String button_text;
private String icon_text;
private float icon_text_margin_right;
private float icon_text_margin_top;
public MyImageBtnView(Context context, AttributeSet attrs) {
this(context, attrs,0);
}
public MyImageBtnView(Context context, AttributeSet attrs, int defStyleAttr) {
super(context, attrs, defStyleAttr);
TypedArray a = context.obtainStyledAttributes(attrs, R.styleable.MyImageBtnView);
button_text = (String) a.getText(R.styleable.MyImageBtnView_button_text);
if (button_text == null) {
button_text = "";
}
icon_text = (String) a.getText(R.styleable.MyImageBtnView_icon_text);
if (icon_text == null) {
icon_text = "";
}
Drawable image = a.getDrawable(R.styleable.MyImageBtnView_top_image);
if (image != null) {
top_drawable = image;
} else {
throw new RuntimeException("图像资源为空");
}
icon_text_margin_right=a.getDimension(R.styleable.MyImageBtnView_icon_text_margin_right, DensityUtils.sp2px(getContext(),0));
icon_text_margin_top=a.getDimension(R.styleable.MyImageBtnView_icon_text_margin_top, DensityUtils.sp2px(getContext(),0));
LayoutInflater inflater = (LayoutInflater) context.getSystemService(Context.LAYOUT_INFLATER_SERVICE);
inflater.inflate(R.layout.my_image_button_view, this);
initView();
a.recycle();
}
private void initView() {
btn_text = (TextView) findViewById(R.id.my_image_text);
btn_text.setText(button_text);
Log.i("test",button_text+"button_text");
top_image= (ImageView) findViewById(R.id.my_btn_image);
top_image.setImageDrawable(top_drawable);
icon = (TextView) findViewById(R.id.my_image_icon);
icon.setText(icon_text);
if(icon_text.equals("0")){
icon.setVisibility(INVISIBLE);
}
RelativeLayout.LayoutParams params=(RelativeLayout.LayoutParams) icon.getLayoutParams();
params.rightMargin= (int) icon_text_margin_right;
params.topMargin= (int) icon_text_margin_top;
icon.setLayoutParams(params);
}
public String getButton_text() {
return button_text;
}
public void setButton_text(String sbutton_text) {
this.button_text = sbutton_text;
btn_text.setText(sbutton_text);
}
public Drawable getTop_drawable() {
return top_drawable;
}
public void setTop_drawable(Drawable stop_drawable) {
this.top_drawable = stop_drawable;
top_image.setImageDrawable(stop_drawable);
}
public ImageView getTop_image() {
return top_image;
}
}
<?xml version="1.0" encoding="utf-8"?>
<RelativeLayout xmlns:android="http://schemas.android.com/apk/res/android"
    android:layout_width="wrap_content"
    android:layout_height="wrap_content">
    <ImageView
        android:id="@+id/my_btn_image"
        android:layout_width="wrap_content"
        android:layout_height="wrap_content"
        android:layout_centerHorizontal="true"
        android:padding="10dp"
        android:src="@mipmap/user"
        />
    <TextView
        android:id="@+id/my_image_text"
        android:layout_below="@+id/my_btn_image"
        android:layout_marginTop="5dp"
        android:layout_width="wrap_content"
        android:layout_centerHorizontal="true"
        android:layout_height="wrap_content"
        android:textSize="12sp"
        android:text="投标用针" />
    <TextView
        android:id="@+id/my_image_icon"
        style="@style/RedInfoCricle"
        android:layout_alignEnd="@+id/my_btn_image"
        android:layout_marginLeft="0dp"
        android:text="9" />
    >
</RelativeLayout>
1.2、style: RedInfoCricle
  <style name="RedInfoCricle">
        <item name="android:layout_width">14dp</item>
        <item name="android:layout_height">14dp</item>
        <item name="android:textSize">8sp</item>
        <item name="android:textColor">@color/wel_text</item>
        <item name="android:gravity">center_vertical|center_horizontal</item>
        <item name="android:layout_gravity">center_horizontal</item>
        <item name="android:layout_marginLeft">10dp</item>
        <item name="android:background">@drawable/red_cricle</item>
    </style>
1.2.1、红点白外圈:shape:red_cricle.xml
<?xml version="1.0" encoding="utf-8"?>
<shape xmlns:android="http://schemas.android.com/apk/res/android"
    android:shape="oval"
    android:useLevel="false">

    <solid android:color="@color/ff170c"/>
    <stroke
        android:width="0.2dp"
        android:color="@color/wel_text"/>
    <size android:width="4dp"
    android:height="4dp"/>

</shape>
1.3、自定义属性,在values中新建:my_text_view_item.xml
<?xml version="1.0" encoding="utf-8"?>
<resources >
    <declare-styleable name="MyTextView">
    <attr name="text_type" format="string"/>
    <attr name="text_type_size" format="dimension"/>
    <attr name="text_type_color" format="color"/>

    <attr name="text_context" format="string"/>
    <attr name="text_context_size" format="dimension"/>
    <attr name="text_context_color" format="color"/>
    </declare-styleable>
</resources>
- reference:参考某一资源ID。format=”reference”
- color:颜色值。format=”color”
- boolean:布尔值。format=”boolean”
- dimension:尺寸值。format=”dimension”
- float:浮点值。format=”float”
- integer:整型值。format=”integer”
- string:字符串。format=”string”
- fraction:百分数。format=”fraction”
1.4、引用自定义控件
<com.tengda.taxwisdom.view.MyImageBtnView
                    android:layout_width="wrap_content"
                    android:layout_height="wrap_content"
                    app:button_text="哈哈"
                    app:icon_text="9"
                    app:icon_text_margin_right="2dp"
                    app:icon_text_margin_top="2dp"
                    app:top_image="@mipmap/zsgli_tbyz_01" />
2.0、其它自定义控件可以依葫芦画瓢了。。。。。


 1027
1027

 被折叠的 条评论
为什么被折叠?


