Record: Open-mmlab mmdetection3d installition in Ubuntu22.04

GitHub - open-mmlab/mmdetection3d: OpenMMLab's next-generation platform for general 3D object detection.

Environment:

Ubuntu22.04

GPU: Nvidia RTX A4000 

Nvidia Graphic Driver: 515.65.01

If you need to install Nvidia Driver in your Ubuntu system,  you can reference my previous blogThe record of Nvidia driver installation of Nvidia RTX A4000 in ubuntu22.04

1. Install MiniConda in your serverofficial website

Choose the corresponding version to your System, here I choosed Miniconda3 Linux 64-bit for Python 3.8

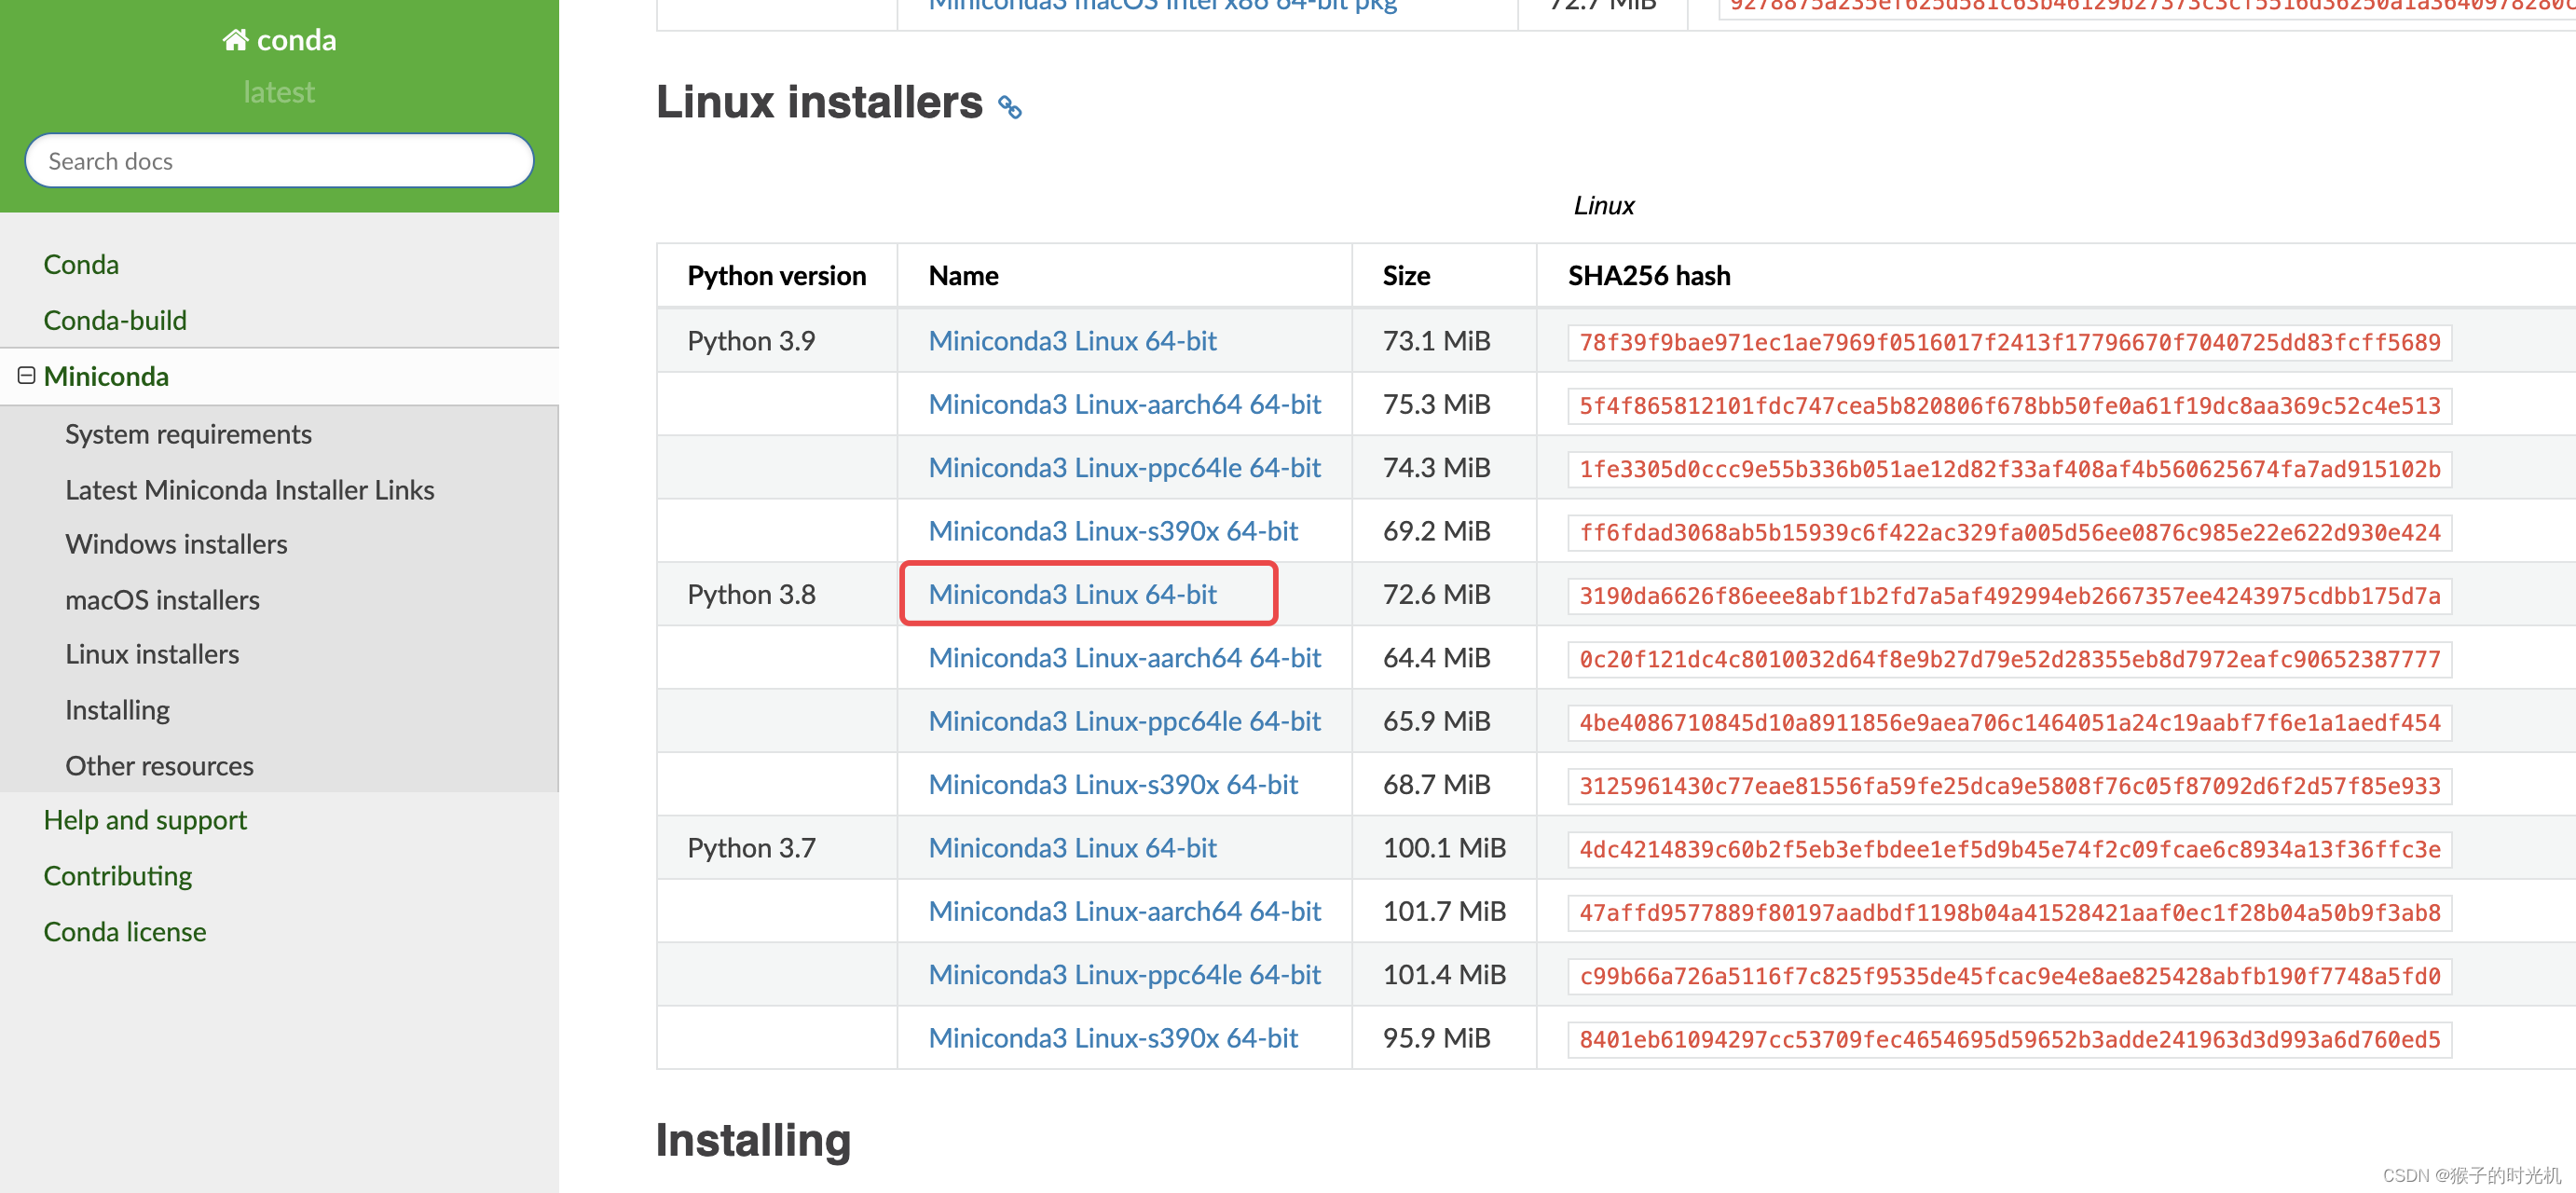
after you download it to your local, use bash command (Reference) to install, in my case, it is as follow,

bash Miniconda3-py38_4.12.0-Linux-x86_64.sh

 2. According to the official website to install step by step, and here I need to install pytorch and cuda in Step 2,  

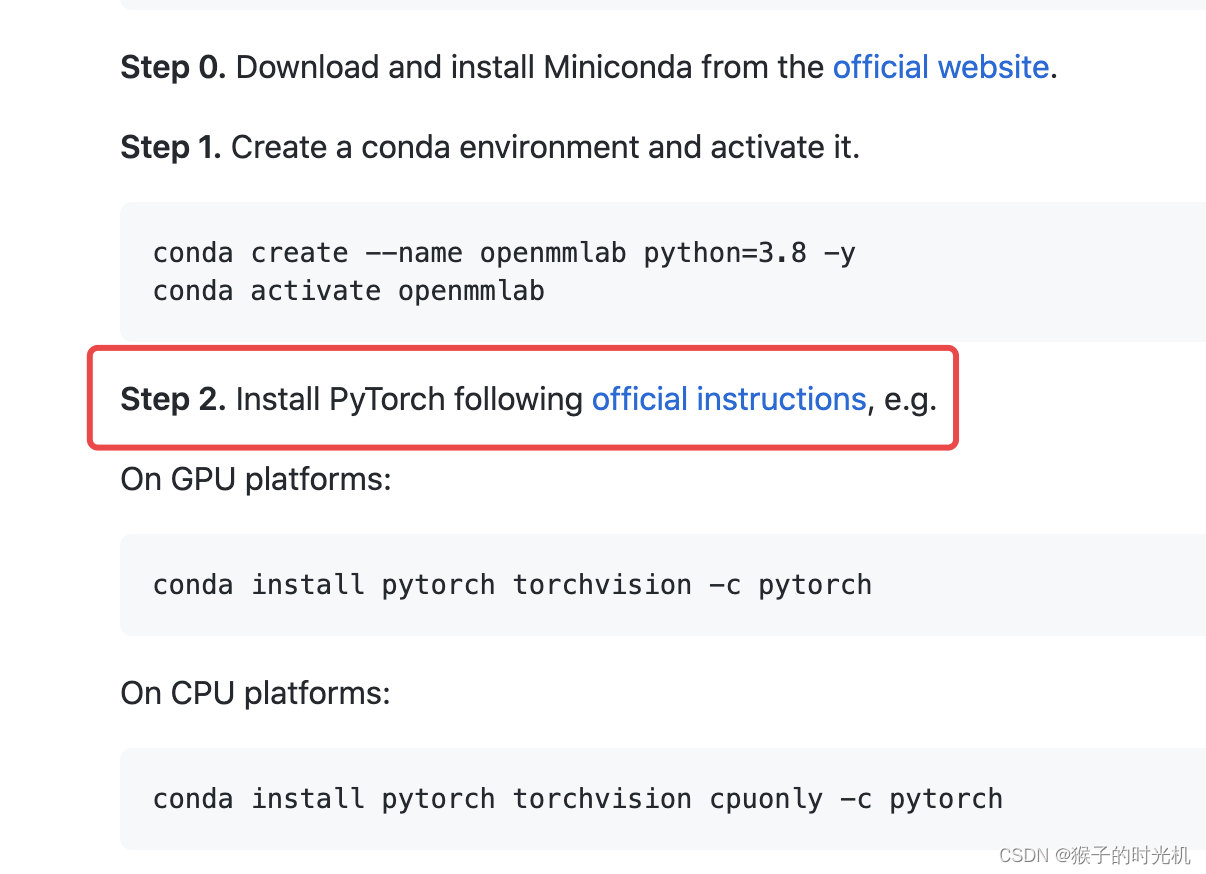
Here I just want to record what I did in this step for you as reference, you can use 

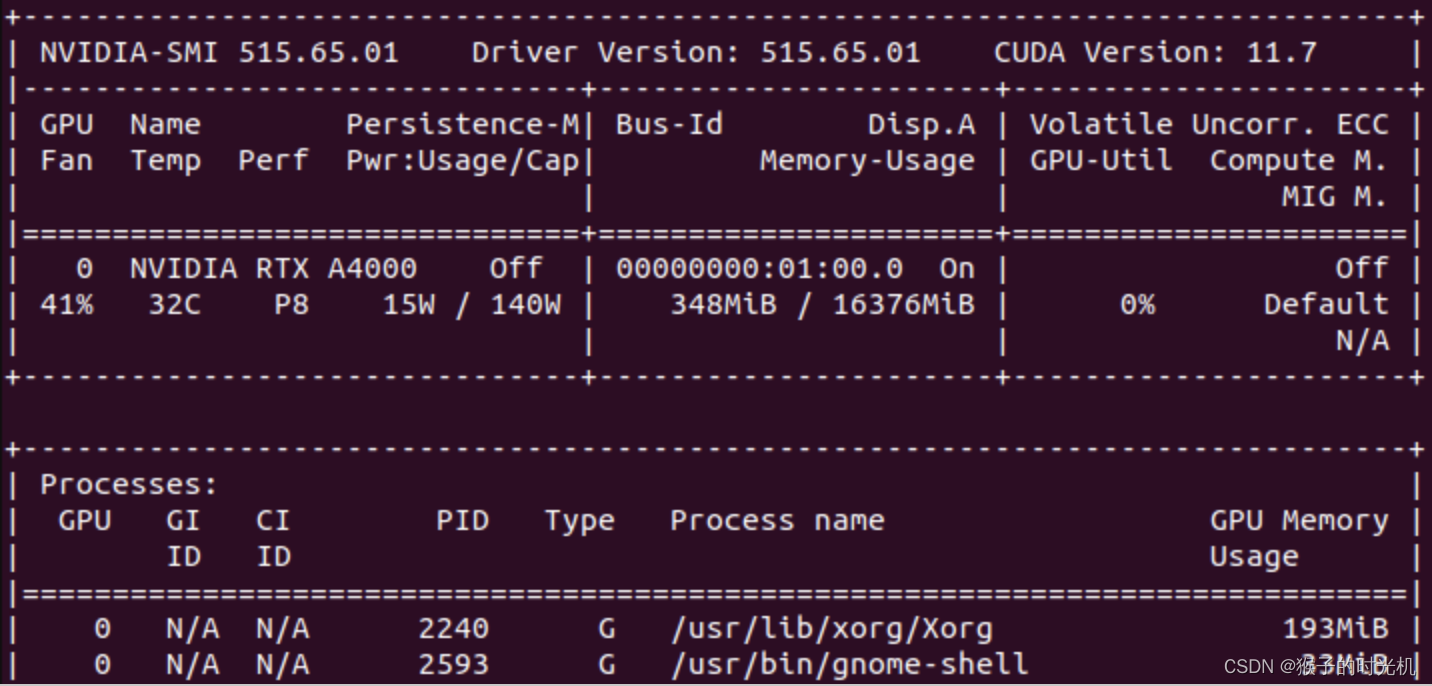
nvidia-smi to check your CUDA Version. 

nvidia-smi

Here, in my case , it is 11.7 version. In principle, CUDA versions are backward compatible. 

And then go to the Pytorch official website to make Command,  

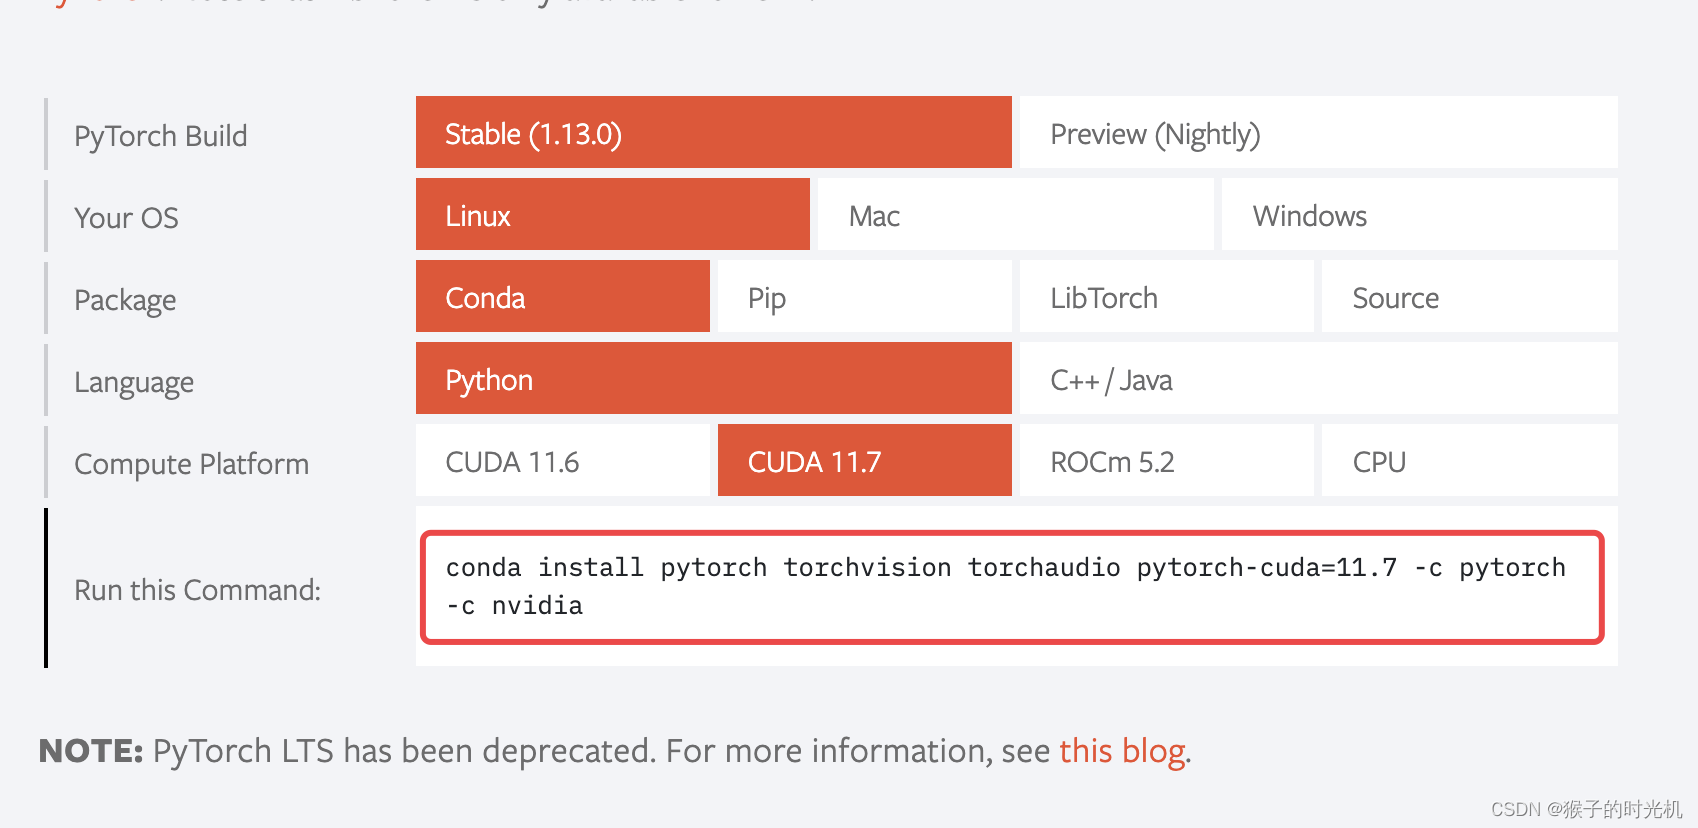
 In my case, the Command is

conda install pytorch torchvision torchaudio pytorch-cuda=11.7 -c pytorch -c nvidia

3. After you finished Step 2, then you can use Best Pratices to install quickly. 
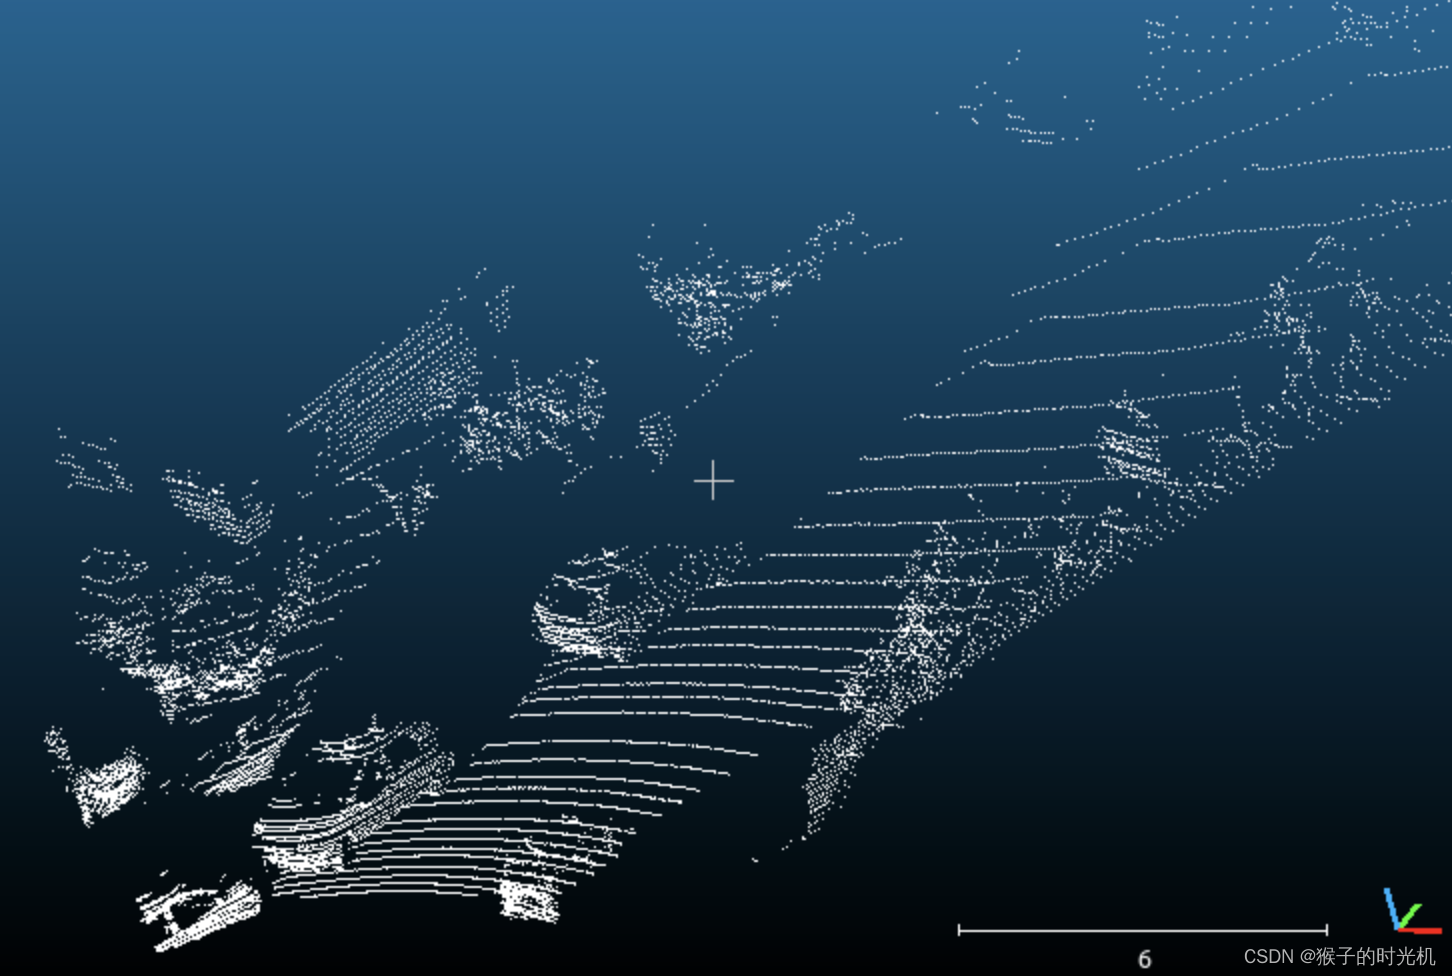
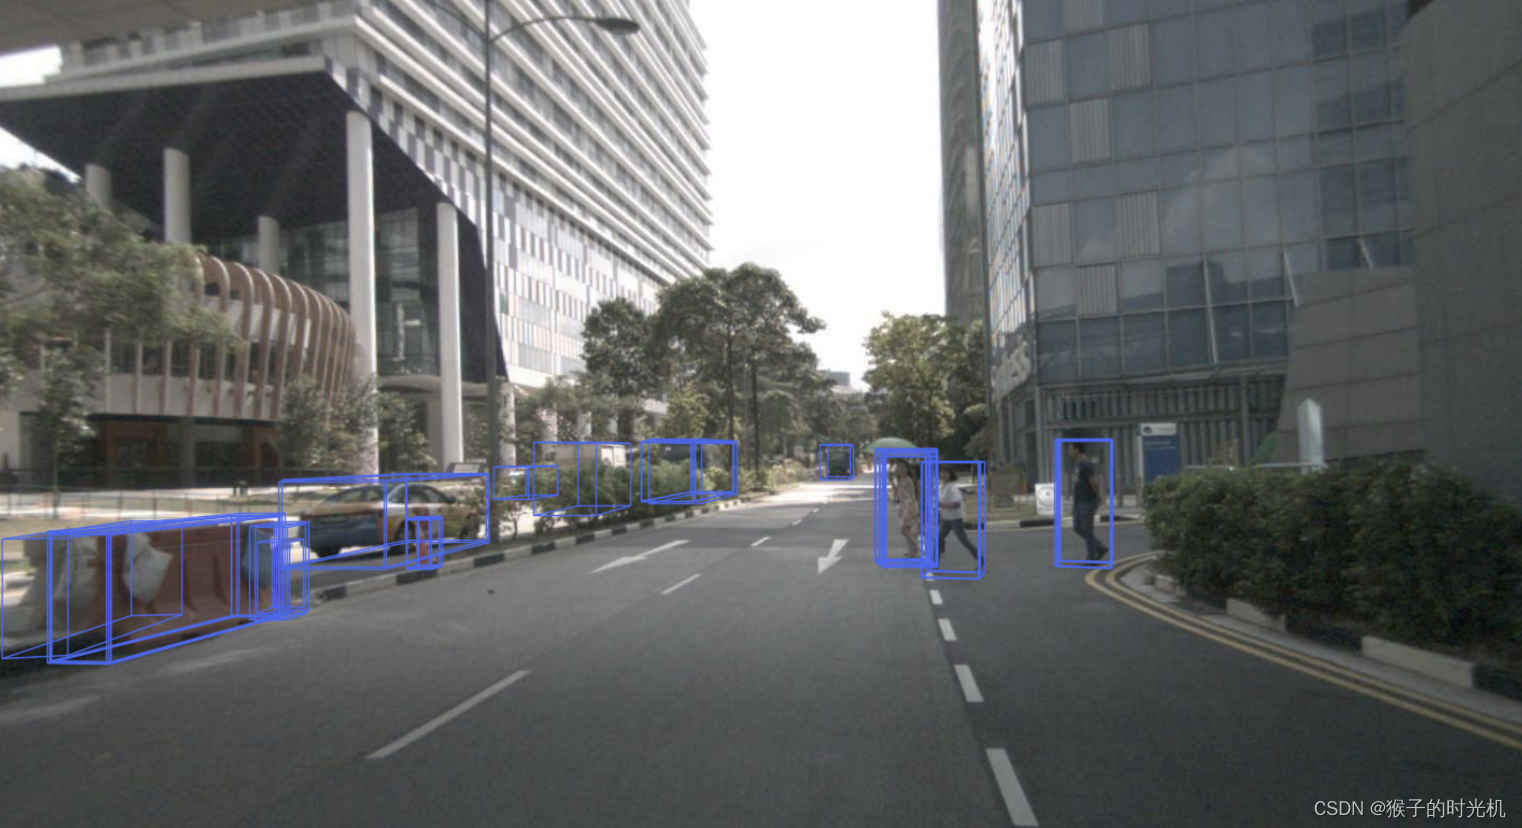
Some demo results:

  • 0
    点赞
  • 0
    收藏
    觉得还不错? 一键收藏
  • 0
    评论
要在Ubuntu 22.04上安装Open3D,你可以按照以下步骤进行操作: 1. 首先,确保你的系统已经安装了Nvidia驱动程序。你可以参考之前的博客文章\[1\]中的记录来安装Nvidia驱动程序。 2. 接下来,你需要安装一些依赖项。你可以使用以下命令安装这些依赖项: ``` sudo apt-get install build-essential cmake libglew-dev libglfw3-dev libjsoncpp-dev libpng-dev ``` 3. 下载Open3D的源代码。你可以从Open3D的官方网站上获取源代码。 4. 进入下载的源代码目录,并创建一个build目录。然后使用以下命令进入build目录: ``` cd open3d mkdir build cd build ``` 5. 在build目录中,运行以下命令来配置Open3D的构建: ``` sudo cmake -DCMAKE_INSTALL_PREFIX=/opt/Open3D/ -DBUILD_EIGEN3=ON -DBUILD_GLEW=ON -DBUILD_GLFW=ON -DBUILD_JSONCPP=ON -DBUILD_PNG=ON -DPYTHON_EXECUTABLE=/usr/bin/python .. ``` 6. 配置完成后,运行以下命令来编译和安装Open3D: ``` sudo make -j$(nproc) sudo make install ``` 7. 安装完成后,你可以在/opt/Open3D/目录下找到Open3D的安装文件。 请注意,上述步骤中的命令可能需要根据你的系统和需求进行调整。你可以参考Open3D的官方文档以获取更详细的安装指南。 #### 引用[.reference_title] - *1* [Record: Open-mmlab mmdetection3d installition in Ubuntu22.04](https://blog.csdn.net/houbucea/article/details/127814952)[target="_blank" data-report-click={"spm":"1018.2226.3001.9630","extra":{"utm_source":"vip_chatgpt_common_search_pc_result","utm_medium":"distribute.pc_search_result.none-task-cask-2~all~insert_cask~default-1-null.142^v91^insert_down28v1,239^v3^insert_chatgpt"}} ] [.reference_item] - *2* [ubuntu下安装Open3D](https://blog.csdn.net/Jhonny_yang/article/details/101030065)[target="_blank" data-report-click={"spm":"1018.2226.3001.9630","extra":{"utm_source":"vip_chatgpt_common_search_pc_result","utm_medium":"distribute.pc_search_result.none-task-cask-2~all~insert_cask~default-1-null.142^v91^insert_down28v1,239^v3^insert_chatgpt"}} ] [.reference_item] - *3* [Ubuntu 22.04从零开始安装Openpcdet 0.6.0——详细记录过程(含4090+CUDA11.8)](https://blog.csdn.net/weixin_44013732/article/details/130651896)[target="_blank" data-report-click={"spm":"1018.2226.3001.9630","extra":{"utm_source":"vip_chatgpt_common_search_pc_result","utm_medium":"distribute.pc_search_result.none-task-cask-2~all~insert_cask~default-1-null.142^v91^insert_down28v1,239^v3^insert_chatgpt"}} ] [.reference_item] [ .reference_list ]
评论
添加红包

请填写红包祝福语或标题

红包个数最小为10个

红包金额最低5元

当前余额3.43前往充值 >
需支付:10.00
成就一亿技术人!
领取后你会自动成为博主和红包主的粉丝 规则
hope_wisdom
发出的红包
实付
使用余额支付
点击重新获取
扫码支付
钱包余额 0

抵扣说明:

1.余额是钱包充值的虚拟货币,按照1:1的比例进行支付金额的抵扣。
2.余额无法直接购买下载,可以购买VIP、付费专栏及课程。

余额充值