


随着大模型的爆火,投入到生产环境的模型参数量规模也变得越来越大(从数十亿参数到千亿参数规模),从而导致大模型的推理成本急剧增加。因此,市面上也出现了很多的推理框架,用于降低模型推理延迟以及提升模型吞吐量。
本系列将针对TensorRT-LLM推理进行讲解。本文为该系列第二篇,将基于Bloom进行模型量化及推理。
环境搭建
基础配置:
- CUDA:12.2
- 镜像:nvcr.io/nvidia/pytorch:23.10-py3
由于服务器无法访问外网,只能预先准备好镜像,安装包、编译源码等,接下来准备安装 TensorRT-LLM,推荐使用 Docker 构建和运行 TensorRT-LLM,整个安装步骤参考 TensorRT-LLM 中构建 Docker 镜像的步骤。
首先,进入Docker容器。
css
复制代码
docker run -dt --name tensorrt_llm_lgd \
--restart=always \
--gpus all \
--network=host \
--shm-size=4g \
-m 64G \
-v /home/guodong.li/workspace:/workspace \
-w /workspace \
nvcr.io/nvidia/pytorch:23.10-py3 \
/bin/bash

docker exec -it tensorrt_llm_lgd bash
安装PyTorch、TensorRT、mpi4py等:
bash
复制代码
# 卸载TensorRT
pip uninstall -y tensorrt
pip uninstall -y torch-tensorrt

pip install mpi4py -i http://nexus3.xxx.com/repository/pypi/simple --trusted-host nexus3.xxx.com
pip install polygraphy-0.48.1-py2.py3-none-any.whl -i http://nexus3.xxx.com/repository/pypi/simple --trusted-host nexus3.xxx.com

# 重新安装PyTorch
pip install torch==2.1.0 -i http://nexus3.xxx.com/repository/pypi/simple --trusted-host nexus3.xxx.com
pip uninstall transformer-engine


# 重新安装TensorRT
tar -xf /tmp/TensorRT.tar -C /usr/local/
mv /usr/local/TensorRT-9.1.0.4 /usr/local/tensorrt
pip install /usr/local/tensorrt/python/tensorrt-*-cp310-*.whl -i http://nexus3.xxx.com/repository/pypi/simple --trusted-host nexus3.xxx.com
配置环境变量/etc/profile:
ini
复制代码
ENV LD_LIBRARY_PATH=/usr/local/tensorrt/lib:${LD_LIBRARY_PATH}
构建 TensorRT-LLM:
bash
复制代码
python3 ./scripts/build_wheel.py --clean --trt_root /usr/local/tensorrt --cuda_architectures "80-real"
由于离线构建,需修改配置文件:
- 修改pip源:
https://github.com/NVIDIA/TensorRT-LLM/blob/release/0.5.0/scripts/build_wheel.py#L65。 - 修改git远程仓库地址:
https://github.com/NVIDIA/TensorRT-LLM/blob/release/0.5.0/cpp/tests/CMakeLists.txt#L19
安装TensorRT-LLM:
bash
复制代码
pip install ./build/tensorrt_llm*.whl -i http://nexus3.xxx.com/repository/pypi/simple --trusted-host nexus3.xxx.com
至此,整个环境搭建就完成了。
基于 Bloom 模型开发实践简介
接下来以Bloom模型为例,进行 TensorRT-LLM 开发实践。
Bloom 示例中主要文件:
build.py:用于构建 TensorRT 引擎来运行Bloom模型。run.py:模型推理。summarize.py:使用模型来总结 CNN Dailymail 数据集中的文章。hf_bloom_convert.py:将HF格式的模型进行转换。
TensorRT-LLM 中,目前针对 Bloom 模型支持的特性如下:
- 支持 FP16
- 支持 INT8 & INT4 仅权重量化
- 支持 INT8 KV CACHE 量化
- 支持SmoothQuant 量化
- 支持张量并行
关于大模型量化之前的文章:大模型量化概述 进行过简要概述,后续有时间更详细的梳理常见的一些大模型量化技术。
数据与模型下载
下载Bloom模型,本文基于bloomz-3b进行量化和推理。
bash
复制代码
# 需先安装git-lfs,通常情况下前面已经安装过了。
# git lfs install

# 下载模型
rm -rf /workspace/model/bloomz-3b
mkdir -p /workspace/model/bloomz-3b && git clone https://huggingface.co/bigscience/bloomz-3b /workspace/model/bloomz-3b
下载数据集,本文会用到 CNN Dailymail 数据集和 LAMBADA 数据集。
构建 TensorRT 引擎
TensorRT-LLM 基于 HF 上 Bloom 的 checkpoint 构建 TensorRT 引擎。 如果未指定 checkpoint 目录,TensorRT-LLM 将使用虚拟权重构建引擎。
下面使用 build.py 脚本来构建TensorRT 引擎;通常,build.py 仅需单个 GPU,但如果您有推理所需的所有 GPU,则可以通过添加 --parallel_build 参数来启用并行构建,以使引擎构建过程更快。
注意:目前parallel_build功能仅支持单节点。
hf_bloom_convert.py 脚本常用参数说明:
- out_dir:模型格式转化之后的输出路径。
- in_file:原始模型路径。
- tensor_parallelism:模型推理时的张量并行度
- calibrate_kv_cache:生成 KV 缓存的缩放因子。 以 INT8 存储 KV Cache 时使用。
- smoothquant:使用Smoothquant对模型进行量化时设置α参数, ,并输出int8权重。第一次尝试最好是 0.5。 该参数必须在 [0, 1] 之间。
- storage_type:设置模型参数存储的数据类型。
build.py 脚本常用参数说明:
- model_dir:指定原始HF模型目录。
- bin_model_dir:SmoothQuant 或 KV CACHE 量化时,指定模型转换后的二进制文件。
- dtype:指定模型数据类型。
- use_gemm_plugin:设置gemm数据类型。
- use_gpt_attention_plugin:设置attention的数据类型。
- output_dir:引擎输出目录。
- use_layernorm_plugin:设置layernorm的数据类型。
- use_weight_only:设置仅权重量化,将各种 GEMM 的权重量化为 INT4/INT8。。
- weight_only_precision:设置仅权重量化时的权重精度。必须使用use_weight_only时该参数才会生效。
- use_smooth_quant:使用 SmoothQuant 方法量化各种 GEMM 的激活和权重。更细粒度的量化选项,使用 --per_channel 和 --per_token 参数选型。
- per_channel:默认情况下,对 GEMM 结果使用单个静态缩放因子。per_channel 相反,它为每个通道使用不同的静态缩放因子。后者通常更准确,但速度稍慢。
- per_token:默认情况下,我们使用单个静态缩放因子来缩放 int8 范围内的激活。per_token 在运行时为每个token选择一个自定义缩放因子。后者通常更准确,但速度稍慢。
- int8_kv_cache:默认情况下,使用 dtype 进行 KV 缓存。 int8_kv_cache为KV选择int8量化。
- use_parallel_embedding:默认情况下,嵌入并行被禁用。通过设置此参数,可以启用嵌入并行。
- embedding_sharding_dim:尝试通过在两层之间共享嵌入查找表来减小引擎大小。注意:当不满足条件时,该参数可能不会生效。
FP16
使用 HF 权重基于单 GPU 及 float16 精度构建引擎。使用 use_gemm_plugin 来防止准确性问题。
css
复制代码
python build.py --model_dir /workspace/model/bloomz-3b \
                --dtype float16 \
                --use_gemm_plugin float16 \
                --use_gpt_attention_plugin float16 \
                --output_dir /workspace/model/bloomz-3b_trt_engines/fp16/1-gpu/
输出模型引擎文件:
css
复制代码
> tree -h  /workspace/model/bloomz-3b_trt_engines/fp16/1-gpu/
├── [6.8G]  bloom_float16_tp1_rank0.engine
├── [1.2K]  config.json
└── [327K]  model.cache
仅 INT8 权重量化(W8A16)
使用单 GPU 和仅 INT8 权重量化构建引擎:
css
复制代码
python build.py --model_dir /workspace/model/bloomz-3b \
                --dtype float16 \
                --use_gemm_plugin float16 \
                --use_gpt_attention_plugin float16 \
                --use_weight_only \
                --output_dir /workspace/model/bloomz-3b_trt_engines/int8_weight_only/1-gpu/
输出模型引擎文件:
css
复制代码
> tree -h /workspace/model/bloomz-3b_trt_engines/int8_weight_only/1-gpu/

├── [4.6G]  bloom_float16_tp1_rank0.engine
├── [1.2K]  config.json
└── [317K]  model.cache
FP16 + 2路张量并行
使用2路张量并行构建引擎:
css
复制代码
python build.py --model_dir /workspace/model/bloomz-3b \
                --dtype float16 \
                --use_gemm_plugin float16 \
                --use_gpt_attention_plugin float16 \
                --output_dir /workspace/model/bloomz-3b_trt_engines/fp16/2-gpu/ \
                --world_size 2
输出模型引擎文件:
css
复制代码
> tree -h  /workspace/model/bloomz-3b_trt_engines/fp16/2-gpu/

├── [4.0G]  bloom_float16_tp2_rank0.engine
├── [4.0G]  bloom_float16_tp2_rank1.engine
├── [1.2K]  config.json
└── [327K]  model.cache
仅 INT8 权重量化 & INT8 KV CACHE 量化
下面使用仅 INT8 权重量化及 INT8 KV CACHE 量化:
对于 INT8 KV 缓存,hf_bloom_convert.py 脚本中有 --calibrate-kv-cache、-kv 选项。设置 -kv 将校准模型,然后导出 INT8 KV CACHE推理所需的缩放因子(scaling factors)。
diff
复制代码
python3 hf_bloom_convert.py \
-i /workspace/model/bloomz-3b \
-o /workspace/model/bloom-c-model/int8_kv_cache/3b \
--calibrate-kv-cache -t float16
输出结果:
css
复制代码
> tree -h /workspace/model/bloom-c-model/int8_kv_cache/3b
/workspace/model/bloom-c-model/int8_kv_cache/3b
└── [ 28K]  1-gpu
    ├── [2.1K]  config.ini
    ├── [5.0K]  model.final_layernorm.bias.bin
    ├── [5.0K]  model.final_layernorm.weight.bin
    ├── [5.0K]  model.layers.0.attention.dense.bias.bin
    ├── [ 12M]  model.layers.0.attention.dense.weight.0.bin
    ├── [ 15K]  model.layers.0.attention.query_key_value.bias.0.bin
    ├── [   4]  model.layers.0.attention.query_key_value.scale_y_quant_orig.bin
    ├── [ 38M]  model.layers.0.attention.query_key_value.weight.0.bin
    ├── [5.0K]  model.layers.0.input_layernorm.bias.bin
    ├── [5.0K]  model.layers.0.input_layernorm.weight.bin
    ├── [5.0K]  model.layers.0.mlp.dense_4h_to_h.bias.bin
    ├── [ 50M]  model.layers.0.mlp.dense_4h_to_h.weight.0.bin
    ├── [ 20K]  model.layers.0.mlp.dense_h_to_4h.bias.0.bin
    ├── [ 50M]  model.layers.0.mlp.dense_h_to_4h.weight.0.bin
    ├── [5.0K]  model.layers.0.post_attention_layernorm.bias.bin
    ├── [5.0K]  model.layers.0.post_attention_layernorm.weight.bin
    ├── [5.0K]  model.layers.10.attention.dense.bias.bin
    ├── [ 12M]  model.layers.10.attention.dense.weight.0.bin
    ├── [ 15K]  model.layers.10.attention.query_key_value.bias.0.bin
    ├── [   4]  model.layers.10.attention.query_key_value.scale_y_quant_orig.bin
    ├── [ 38M]  model.layers.10.attention.query_key_value.weight.0.bin
    ├── [5.0K]  model.layers.10.input_layernorm.bias.bin
    ├── [5.0K]  model.layers.10.input_layernorm.weight.bin
    ├── [5.0K]  model.layers.10.mlp.dense_4h_to_h.bias.bin
    ├── [ 50M]  model.layers.10.mlp.dense_4h_to_h.weight.0.bin
    ├── [ 20K]  model.layers.10.mlp.dense_h_to_4h.bias.0.bin
    ├── [ 50M]  model.layers.10.mlp.dense_h_to_4h.weight.0.bin
    ├── [5.0K]  model.layers.10.post_attention_layernorm.bias.bin
    ├── [5.0K]  model.layers.10.post_attention_layernorm.weight.bin
	...
    ├── [5.0K]  model.word_embeddings_layernorm.bias.bin
    ├── [5.0K]  model.word_embeddings_layernorm.weight.bin
    └── [1.2G]  model.wpe.bin
组合仅 INT8 权重量化及 INT8 KV CACHE 量化构建引擎:
sql
复制代码
# Build model with both INT8 weight-only and INT8 KV cache enabled

python build.py --bin_model_dir=/workspace/model/bloom-c-model/int8_kv_cache/3b/1-gpu \
                --dtype float16 \
                --use_gpt_attention_plugin float16 \
                --use_gemm_plugin float16 \
                --use_layernorm_plugin \
                --int8_kv_cache \
                --output_dir /workspace/model/bloom-3b-c-model/int8_kv_cache/ \
                --use_weight_only
运行结果:
bash
复制代码
tree -h /workspace/model/bloom-3b-c-model/int8_kv_cache/
/workspace/model/bloom-3b-c-model/int8_kv_cache/
├── [4.6G]  bloom_float16_tp1_rank0.engine
├── [1.2K]  config.json
└── [ 78K]  model.cache

0 directories, 3 files
SmoothQuant 量化(W8A8)
与 FP16 构建引擎处理 HF 权重并直接加载到 TensorRT-LLM 不同,SmoothQuant 需要加载 INT8 权重,该权重应在构建引擎之前进行预处理。
diff
复制代码
python3 hf_bloom_convert.py \
-i /workspace/model/bloomz-3b \
-o /workspace/model/bloom-3b-c-model/smooth/ \
--smoothquant 0.5 \
--tensor-parallelism 1 \
--storage-type float16
运行结果:
css
复制代码
> tree -h /workspace/model/bloom-3b-c-model/smooth/
/workspace/model/bloom-3b-c-model/smooth/
└── [100K]  1-gpu
    ├── [2.1K]  config.ini
    ├── [5.0K]  model.final_layernorm.bias.bin
    ├── [5.0K]  model.final_layernorm.weight.bin
    ├── [5.0K]  model.layers.0.attention.dense.bias.bin
    ├── [   4]  model.layers.0.attention.dense.scale_w_quant_orig.bin
    ├── [ 10K]  model.layers.0.attention.dense.scale_w_quant_orig.col.bin
    ├── [   4]  model.layers.0.attention.dense.scale_x_orig_quant.bin
    ├── [   4]  model.layers.0.attention.dense.scale_y_accum_quant.bin
    ├── [ 10K]  model.layers.0.attention.dense.scale_y_accum_quant.col.bin
    ├── [   4]  model.layers.0.attention.dense.scale_y_quant_orig.bin
    ├── [ 10K]  model.layers.0.attention.dense.smoother.0.bin
    ├── [ 12M]  model.layers.0.attention.dense.weight.0.bin
    ├── [6.2M]  model.layers.0.attention.dense.weight.int8.0.bin
    ├── [6.2M]  model.layers.0.attention.dense.weight.int8.col.0.bin
    ├── [ 15K]  model.layers.0.attention.query_key_value.bias.0.bin
    ├── [ 30K]  model.layers.0.attention.query_key_value.scale_w_quant_orig.bin
    ├── [ 30K]  model.layers.0.attention.query_key_value.scale_w_quant_orig.col.0.bin
    ├── [   4]  model.layers.0.attention.query_key_value.scale_x_orig_quant.bin
    ├── [ 30K]  model.layers.0.attention.query_key_value.scale_y_accum_quant.bin
    ├── [ 30K]  model.layers.0.attention.query_key_value.scale_y_accum_quant.col.0.bin
    ├── [   4]  model.layers.0.attention.query_key_value.scale_y_quant_orig.bin
    ├── [ 38M]  model.layers.0.attention.query_key_value.weight.0.bin
    ├── [ 19M]  model.layers.0.attention.query_key_value.weight.int8.0.bin
    ├── [ 19M]  model.layers.0.attention.query_key_value.weight.int8.col.0.bin
    ├── [5.0K]  model.layers.0.input_layernorm.bias.bin
    ├── [5.0K]  model.layers.0.input_layernorm.weight.bin
    ├── [5.0K]  model.layers.0.mlp.dense_4h_to_h.bias.bin
    ├── [   4]  model.layers.0.mlp.dense_4h_to_h.scale_w_quant_orig.bin
    ├── [ 10K]  model.layers.0.mlp.dense_4h_to_h.scale_w_quant_orig.col.bin
    ├── [   4]  model.layers.0.mlp.dense_4h_to_h.scale_x_orig_quant.bin
    ├── [   4]  model.layers.0.mlp.dense_4h_to_h.scale_y_accum_quant.bin
    ├── [ 10K]  model.layers.0.mlp.dense_4h_to_h.scale_y_accum_quant.col.bin
    ├── [   4]  model.layers.0.mlp.dense_4h_to_h.scale_y_quant_orig.bin
    ├── [ 40K]  model.layers.0.mlp.dense_4h_to_h.smoother.0.bin
    ├── [ 50M]  model.layers.0.mlp.dense_4h_to_h.weight.0.bin
    ├── [ 25M]  model.layers.0.mlp.dense_4h_to_h.weight.int8.0.bin
    ├── [ 25M]  model.layers.0.mlp.dense_4h_to_h.weight.int8.col.0.bin
    ├── [ 20K]  model.layers.0.mlp.dense_h_to_4h.bias.0.bin
    ├── [   4]  model.layers.0.mlp.dense_h_to_4h.scale_w_quant_orig.bin
    ├── [ 40K]  model.layers.0.mlp.dense_h_to_4h.scale_w_quant_orig.col.0.bin
    ├── [   4]  model.layers.0.mlp.dense_h_to_4h.scale_x_orig_quant.bin
    ├── [   4]  model.layers.0.mlp.dense_h_to_4h.scale_y_accum_quant.bin
    ├── [ 40K]  model.layers.0.mlp.dense_h_to_4h.scale_y_accum_quant.col.0.bin
    ├── [   4]  model.layers.0.mlp.dense_h_to_4h.scale_y_quant_orig.bin
    ├── [ 50M]  model.layers.0.mlp.dense_h_to_4h.weight.0.bin
    ├── [ 25M]  model.layers.0.mlp.dense_h_to_4h.weight.int8.0.bin
    ├── [ 25M]  model.layers.0.mlp.dense_h_to_4h.weight.int8.col.0.bin
    ├── [5.0K]  model.layers.0.post_attention_layernorm.bias.bin
    ├── [5.0K]  model.layers.0.post_attention_layernorm.weight.bin
	...
    ├── [5.0K]  model.word_embeddings_layernorm.bias.bin
    ├── [5.0K]  model.word_embeddings_layernorm.weight.bin
    └── [1.2G]  model.wpe.bin
通过 --use_smooth_quant 选型启动 INT8 量化。默认情况下,使用逐层量化(_per_tensor_)构建引擎:
ruby
复制代码
# Build model for SmoothQuant in the _per_tensor_ mode.
python3 build.py --bin_model_dir=/workspace/model/bloom-3b-c-model/smooth/1-gpu \
                 --use_smooth_quant \
                 --output_dir "/workspace/model/bloom-3b-c-model/smooth-quant" \
                 --use_gpt_attention_plugin float16
运行结果:
bash
复制代码
> tree -h /workspace/model/bloom-3b-c-model/smooth-quant
/workspace/model/bloom-3b-c-model/smooth-quant
├── [3.4G]  bloom_float16_tp1_rank0.engine
├── [1.2K]  config.json
└── [516K]  model.cache

0 directories, 3 files
同时,支持使用逐通道量化( _per_token_ + _per_channel_)构建引擎:
css
复制代码
# Build model for SmoothQuant in the _per_token_ + _per_channel_ mode
python3 build.py --bin_model_dir=/workspace/model/bloom-3b-c-model/smooth/1-gpu \
                 --use_smooth_quant \
                 --use_gpt_attention_plugin float16 \
                 --output_dir "/workspace/model/bloom-3b-c-model/smooth-quant-channel-token" \
                 --per_token \
                 --per_channel
运行结果:
bash
复制代码
tree -h /home/guodong.li/workspace/model/bloom-3b-c-model/smooth-quant-channel-token
/home/guodong.li/workspace/model/bloom-3b-c-model/smooth-quant-channel-token
├── [4.6G]  bloom_float16_tp1_rank0.engine
├── [1.2K]  config.json
└── [516K]  model.cache

0 directories, 3 files
注意:
- 目前需要为 SmoothQuant 启用 GPT 注意力插件(
--use_gpt_attention_plugin)。 - 使用
--bin_model_dir而不是--model_dir,是因为 SmoothQuant 量化时,模型需要二进制文件中的 INT8 权重和各种缩放(scales)。
模型推理
接下来运行模型进行推理,同时,使用rouge指标评估模型。
summarize.py 脚本常用参数说明:
- hf_model_location:指定HF模型和词表地址
- test_hf:测试HF
- test_trt_llm:测试TensorRT-LLM
- data_type:指定数据类型,该参数指定test_hf时使用,将模型参数转换成半精度
- dataset_path:指定数据集缓存目录
- engine_dir:指定引擎目录
FP16
css
复制代码
python summarize.py --test_trt_llm \
                    --hf_model_location /workspace/model/bloomz-3b \
                    --data_type fp16 \
                    --engine_dir /workspace/model/bloomz-3b_trt_engines/fp16/1-gpu/
仅 INT8 权重量化
css
复制代码
python summarize.py --test_trt_llm \
                    --hf_model_location /workspace/model/bloomz-3b \
                    --data_type fp16 \
                    --engine_dir /workspace/model/bloomz-3b_trt_engines/int8_weight_only/1-gpu/
运行过程:
ini
复制代码
[11/14/2023-09:54:48] [TRT-LLM] [I] Load tokenizer takes: 0.6626021862030029 sec
[11/14/2023-09:54:54] [TRT] [I] Loaded engine size: 4708 MiB
[11/14/2023-09:54:55] [TRT] [I] [MemUsageChange] Init cuBLAS/cuBLASLt: CPU +0, GPU +8, now: CPU 6142, GPU 46624 (MiB)
[11/14/2023-09:54:55] [TRT] [I] [MemUsageChange] Init cuDNN: CPU +2, GPU +10, now: CPU 6144, GPU 46634 (MiB)
[11/14/2023-09:54:55] [TRT] [W] TensorRT was linked against cuDNN 8.9.4 but loaded cuDNN 8.9.2
[11/14/2023-09:54:55] [TRT] [I] [MemUsageChange] TensorRT-managed allocation in engine deserialization: CPU +0, GPU +4703, now: CPU 0, GPU 4703 (MiB)
[11/14/2023-09:54:55] [TRT] [I] [MemUsageChange] Init cuBLAS/cuBLASLt: CPU +0, GPU +8, now: CPU 6149, GPU 48652 (MiB)
[11/14/2023-09:54:55] [TRT] [I] [MemUsageChange] Init cuDNN: CPU +0, GPU +8, now: CPU 6149, GPU 48660 (MiB)
[11/14/2023-09:54:55] [TRT] [W] TensorRT was linked against cuDNN 8.9.4 but loaded cuDNN 8.9.2
[11/14/2023-09:54:56] [TRT] [I] [MemUsageChange] TensorRT-managed allocation in IExecutionContext creation: CPU +0, GPU +0, now: CPU 0, GPU 4703 (MiB)
[11/14/2023-09:54:56] [TRT] [I] [MemUsageChange] Init cuBLAS/cuBLASLt: CPU +0, GPU +8, now: CPU 6195, GPU 48680 (MiB)
[11/14/2023-09:54:56] [TRT] [I] [MemUsageChange] Init cuDNN: CPU +1, GPU +10, now: CPU 6196, GPU 48690 (MiB)
[11/14/2023-09:54:56] [TRT] [W] TensorRT was linked against cuDNN 8.9.4 but loaded cuDNN 8.9.2
[11/14/2023-09:54:57] [TRT] [I] [MemUsageChange] TensorRT-managed allocation in IExecutionContext creation: CPU +0, GPU +0, now: CPU 0, GPU 4703 (MiB)
[11/14/2023-09:54:58] [TRT-LLM] [I] Load engine takes: 9.880424976348877 sec
/workspace/TensorRT-LLM/examples/bloom/summarize.py:165: UserWarning: To copy construct from a tensor, it is recommended to use sourceTensor.clone().detach() or sourceTensor.clone().detach().requires_grad_(True), rather than torch.tensor(sourceTensor).
  [torch.tensor(line_encoded[i], dtype=torch.int32), pad],
[11/14/2023-09:54:59] [TRT-LLM] [I] ---------------------------------------------------------
[11/14/2023-09:54:59] [TRT-LLM] [I] TensorRT-LLM Generated :
[11/14/2023-09:54:59] [TRT-LLM] [I]  Article : ['(CNN)James Best, best known for his portrayal of bumbling sheriff Rosco P. Coltrane on TV's "The Dukes of Hazzard," died Monday after a brief illness. He was 88. Best died in hospice in Hickory, North Carolina, of complications from pneumonia, said Steve Latshaw, a longtime friend and Hollywood colleague. Although he'd been a busy actor for decades in theater and in Hollywood, Best didn't become famous until 1979, when "The Dukes of Hazzard's" cornpone charms began beaming into millions of American homes almost every Friday night. For seven seasons, Best's Rosco P. Coltrane chased the moonshine-running Duke boys back and forth across the back roads of fictitious Hazzard County, Georgia, although his "hot pursuit" usually ended with him crashing his patrol car. Although Rosco was slow-witted and corrupt, Best gave him a childlike enthusiasm that got laughs and made him endearing. His character became known for his distinctive "kew-kew-kew" chuckle and for goofy catchphrases such as "cuff 'em and stuff 'em!" upon making an arrest. Among the most popular shows on TV in the early '80s, "The Dukes of Hazzard" ran until 1985 and spawned TV movies, an animated series and video games. Several of Best's "Hazzard" co-stars paid tribute to the late actor on social media. "I laughed and learned more from Jimmie in one hour than from anyone else in a whole year," co-star John Schneider, who played Bo Duke, said on Twitter. "Give Uncle Jesse my love when you see him dear friend." "Jimmy Best was the most constantly creative person I have ever known," said Ben Jones, who played mechanic Cooter on the show, in a Facebook post. "Every minute of his long life was spent acting, writing, producing, painting, teaching, fishing, or involved in another of his life's many passions." Born Jewel Guy on July 26, 1926, in Powderly, Kentucky, Best was orphaned at 3 and adopted by Armen and Essa Best, who renamed him James and raised him in rural Indiana. Best served in the Army during World War II before launching his acting career. In the 1950s and 1960s, he accumulated scores of credits, playing a range of colorful supporting characters in such TV shows as "The Twilight Zone," "Bonanza," "The Andy Griffith Show" and "Gunsmoke." He later appeared in a handful of Burt Reynolds' movies, including "Hooper" and "The End." But Best will always be best known for his "Hazzard" role, which lives on in reruns. "Jimmie was my teacher, mentor, close friend and collaborator for 26 years," Latshaw said. "I directed two of his feature films, including the recent 'Return of the Killer Shrews,' a sequel he co-wrote and was quite proud of as he had made the first one more than 50 years earlier." People we've lost in 2015 . CNN's Stella Chan contributed to this story.']
[11/14/2023-09:54:59] [TRT-LLM] [I]
 Highlights : ['James Best, who played the sheriff on "The Dukes of Hazzard," died Monday at 88 .\n"Hazzard" ran from 1979 to 1985 and was among the most popular shows on TV .']
[11/14/2023-09:54:59] [TRT-LLM] [I]
 Summary : [[' Actor James Best, best known for his role as bumbling sheriff Rosco P. Coltrane on TV's "The Dukes of Hazzard," has died at age 88.']]
[11/14/2023-09:54:59] [TRT-LLM] [I] ---------------------------------------------------------
/workspace/TensorRT-LLM/examples/bloom/summarize.py:165: UserWarning: To copy construct from a tensor, it is recommended to use sourceTensor.clone().detach() or sourceTensor.clone().detach().requires_grad_(True), rather than torch.tensor(sourceTensor).
  [torch.tensor(line_encoded[i], dtype=torch.int32), pad],
[11/14/2023-09:55:10] [TRT-LLM] [I] TensorRT-LLM (total latency: 10.436434745788574 sec)
[11/14/2023-09:55:10] [TRT-LLM] [I] TensorRT-LLM beam 0 result
[11/14/2023-09:55:11] [TRT-LLM] [I]   rouge1 : 30.60846842935061
[11/14/2023-09:55:11] [TRT-LLM] [I]   rouge2 : 11.315593160478784
[11/14/2023-09:55:11] [TRT-LLM] [I]   rougeL : 24.043680494718327
[11/14/2023-09:55:11] [TRT-LLM] [I]   rougeLsum : 26.250663629946125
FP16 + 2路张量并行
css
复制代码
mpirun -n 2 --allow-run-as-root \
    python summarize.py --test_trt_llm \
                        --hf_model_location /workspace/model/bloomz-3b \
                        --data_type fp16 \
                        --engine_dir /workspace/model/bloomz-3b_trt_engines/fp16/2-gpu/
运行过程:
ini
复制代码
[11/14/2023-09:58:13] [TRT-LLM] [MPI_Rank 1] [I] Load tokenizer takes: 0.4274311065673828 sec
[11/14/2023-09:58:13] [TRT-LLM] [MPI_Rank 0] [I] Load tokenizer takes: 0.45519232749938965 sec
[11/14/2023-09:58:17] [TRT] [I] Loaded engine size: 4094 MiB
[11/14/2023-09:58:18] [TRT] [I] [MemUsageChange] Init cuBLAS/cuBLASLt: CPU +0, GPU +8, now: CPU 5533, GPU 41994 (MiB)
[11/14/2023-09:58:18] [TRT] [I] [MemUsageChange] Init cuDNN: CPU +1, GPU +10, now: CPU 5534, GPU 42004 (MiB)
[11/14/2023-09:58:18] [TRT] [W] TensorRT was linked against cuDNN 8.9.4 but loaded cuDNN 8.9.2
[11/14/2023-09:58:19] [TRT] [I] Loaded engine size: 4094 MiB
[11/14/2023-09:58:20] [TRT] [I] [MemUsageChange] Init cuBLAS/cuBLASLt: CPU +0, GPU +8, now: CPU 5529, GPU 46010 (MiB)
[11/14/2023-09:58:20] [TRT] [I] [MemUsageChange] Init cuDNN: CPU +1, GPU +10, now: CPU 5530, GPU 46020 (MiB)
[11/14/2023-09:58:20] [TRT] [W] TensorRT was linked against cuDNN 8.9.4 but loaded cuDNN 8.9.2
[11/14/2023-09:58:23] [TRT] [I] [MemUsageChange] TensorRT-managed allocation in engine deserialization: CPU +0, GPU +4088, now: CPU 0, GPU 4088 (MiB)
[11/14/2023-09:58:23] [TRT] [I] [MemUsageChange] TensorRT-managed allocation in engine deserialization: CPU +0, GPU +4088, now: CPU 0, GPU 4088 (MiB)
[11/14/2023-09:58:23] [TRT] [I] [MemUsageChange] Init cuBLAS/cuBLASLt: CPU +0, GPU +8, now: CPU 5749, GPU 43220 (MiB)
[11/14/2023-09:58:23] [TRT] [I] [MemUsageChange] Init cuDNN: CPU +0, GPU +8, now: CPU 5749, GPU 43228 (MiB)
[11/14/2023-09:58:23] [TRT] [W] TensorRT was linked against cuDNN 8.9.4 but loaded cuDNN 8.9.2
[11/14/2023-09:58:23] [TRT] [I] [MemUsageChange] Init cuBLAS/cuBLASLt: CPU +0, GPU +8, now: CPU 5749, GPU 47236 (MiB)
[11/14/2023-09:58:23] [TRT] [I] [MemUsageChange] Init cuDNN: CPU +0, GPU +8, now: CPU 5749, GPU 47244 (MiB)
[11/14/2023-09:58:23] [TRT] [W] TensorRT was linked against cuDNN 8.9.4 but loaded cuDNN 8.9.2
[11/14/2023-09:58:23] [TRT] [I] [MemUsageChange] TensorRT-managed allocation in IExecutionContext creation: CPU +0, GPU +0, now: CPU 0, GPU 4088 (MiB)
[11/14/2023-09:58:23] [TRT] [I] [MemUsageChange] Init cuBLAS/cuBLASLt: CPU +1, GPU +8, now: CPU 5796, GPU 47262 (MiB)
[11/14/2023-09:58:23] [TRT] [I] [MemUsageChange] Init cuDNN: CPU +0, GPU +10, now: CPU 5796, GPU 47272 (MiB)
[11/14/2023-09:58:23] [TRT] [W] TensorRT was linked against cuDNN 8.9.4 but loaded cuDNN 8.9.2
[11/14/2023-09:58:24] [TRT] [I] [MemUsageChange] TensorRT-managed allocation in IExecutionContext creation: CPU +0, GPU +0, now: CPU 0, GPU 4088 (MiB)
[11/14/2023-09:58:24] [TRT] [I] [MemUsageChange] Init cuBLAS/cuBLASLt: CPU +0, GPU +8, now: CPU 5796, GPU 43246 (MiB)
[11/14/2023-09:58:24] [TRT] [I] [MemUsageChange] Init cuDNN: CPU +0, GPU +10, now: CPU 5796, GPU 43256 (MiB)
[11/14/2023-09:58:24] [TRT] [W] TensorRT was linked against cuDNN 8.9.4 but loaded cuDNN 8.9.2
[11/14/2023-09:58:24] [TRT] [I] [MemUsageChange] TensorRT-managed allocation in IExecutionContext creation: CPU +0, GPU +0, now: CPU 0, GPU 4088 (MiB)
[11/14/2023-09:58:24] [TRT] [I] [MemUsageChange] TensorRT-managed allocation in IExecutionContext creation: CPU +0, GPU +0, now: CPU 0, GPU 4088 (MiB)
[11/14/2023-09:58:25] [TRT-LLM] [MPI_Rank 0] [I] Load engine takes: 11.81023645401001 sec
[11/14/2023-09:58:25] [TRT-LLM] [MPI_Rank 1] [I] Load engine takes: 11.762826204299927 sec
/workspace/TensorRT-LLM/examples/bloom/summarize.py:165: UserWarning: To copy construct from a tensor, it is recommended to use sourceTensor.clone().detach() or sourceTensor.clone().detach().requires_grad_(True), rather than torch.tensor(sourceTensor).
  [torch.tensor(line_encoded[i], dtype=torch.int32), pad],
[11/14/2023-09:58:27] [TRT-LLM] [MPI_Rank 0] [I] ---------------------------------------------------------
[11/14/2023-09:58:27] [TRT-LLM] [MPI_Rank 0] [I] TensorRT-LLM Generated :
[11/14/2023-09:58:27] [TRT-LLM] [MPI_Rank 0] [I]  Article : ['(CNN)James Best, best known for his portrayal of bumbling sheriff Rosco P. Coltrane on TV's "The Dukes of Hazzard," died Monday after a brief illness. He was 88. Best died in hospice in Hickory, North Carolina, of complications from pneumonia, said Steve Latshaw, a longtime friend and Hollywood colleague. Although he'd been a busy actor for decades in theater and in Hollywood, Best didn't become famous until 1979, when "The Dukes of Hazzard's" cornpone charms began beaming into millions of American homes almost every Friday night. For seven seasons, Best's Rosco P. Coltrane chased the moonshine-running Duke boys back and forth across the back roads of fictitious Hazzard County, Georgia, although his "hot pursuit" usually ended with him crashing his patrol car. Although Rosco was slow-witted and corrupt, Best gave him a childlike enthusiasm that got laughs and made him endearing. His character became known for his distinctive "kew-kew-kew" chuckle and for goofy catchphrases such as "cuff 'em and stuff 'em!" upon making an arrest. Among the most popular shows on TV in the early '80s, "The Dukes of Hazzard" ran until 1985 and spawned TV movies, an animated series and video games. Several of Best's "Hazzard" co-stars paid tribute to the late actor on social media. "I laughed and learned more from Jimmie in one hour than from anyone else in a whole year," co-star John Schneider, who played Bo Duke, said on Twitter. "Give Uncle Jesse my love when you see him dear friend." "Jimmy Best was the most constantly creative person I have ever known," said Ben Jones, who played mechanic Cooter on the show, in a Facebook post. "Every minute of his long life was spent acting, writing, producing, painting, teaching, fishing, or involved in another of his life's many passions." Born Jewel Guy on July 26, 1926, in Powderly, Kentucky, Best was orphaned at 3 and adopted by Armen and Essa Best, who renamed him James and raised him in rural Indiana. Best served in the Army during World War II before launching his acting career. In the 1950s and 1960s, he accumulated scores of credits, playing a range of colorful supporting characters in such TV shows as "The Twilight Zone," "Bonanza," "The Andy Griffith Show" and "Gunsmoke." He later appeared in a handful of Burt Reynolds' movies, including "Hooper" and "The End." But Best will always be best known for his "Hazzard" role, which lives on in reruns. "Jimmie was my teacher, mentor, close friend and collaborator for 26 years," Latshaw said. "I directed two of his feature films, including the recent 'Return of the Killer Shrews,' a sequel he co-wrote and was quite proud of as he had made the first one more than 50 years earlier." People we've lost in 2015 . CNN's Stella Chan contributed to this story.']
[11/14/2023-09:58:27] [TRT-LLM] [MPI_Rank 0] [I]
 Highlights : ['James Best, who played the sheriff on "The Dukes of Hazzard," died Monday at 88 .\n"Hazzard" ran from 1979 to 1985 and was among the most popular shows on TV .']
[11/14/2023-09:58:27] [TRT-LLM] [MPI_Rank 0] [I]
 Summary : [[' Actor James Best, best known for his role as bumbling sheriff Rosco P. Coltrane on TV's "The Dukes of Hazzard," has died at age 88.']]
[11/14/2023-09:58:27] [TRT-LLM] [MPI_Rank 0] [I] ---------------------------------------------------------
/workspace/TensorRT-LLM/examples/bloom/summarize.py:165: UserWarning: To copy construct from a tensor, it is recommended to use sourceTensor.clone().detach() or sourceTensor.clone().detach().requires_grad_(True), rather than torch.tensor(sourceTensor).
  [torch.tensor(line_encoded[i], dtype=torch.int32), pad],
[11/14/2023-09:58:42] [TRT-LLM] [MPI_Rank 0] [I] TensorRT-LLM (total latency: 14.928563356399536 sec)
[11/14/2023-09:58:42] [TRT-LLM] [MPI_Rank 0] [I] TensorRT-LLM beam 0 result
[11/14/2023-09:58:43] [TRT-LLM] [MPI_Rank 0] [I]   rouge1 : 27.12991734291884
[11/14/2023-09:58:43] [TRT-LLM] [MPI_Rank 0] [I]   rouge2 : 8.273487794146279
[11/14/2023-09:58:43] [TRT-LLM] [MPI_Rank 0] [I]   rougeL : 21.08356714989421
[11/14/2023-09:58:43] [TRT-LLM] [MPI_Rank 0] [I]   rougeLsum : 23.51165220383353
SmoothQuant 量化
逐层量化:
css
复制代码
python summarize.py --test_trt_llm \
                    --hf_model_location /workspace/model/bloomz-3b \
                    --data_type fp16 \
                    --engine_dir /workspace/model/bloom-3b-c-model/smooth-quant
逐通道量化:
css
复制代码
python summarize.py --test_trt_llm \
                    --hf_model_location /workspace/model/bloomz-3b \
                    --data_type fp16 \
                    --engine_dir /workspace/model/bloom-3b-c-model/smooth-quant-channel-token
总结
本文简要介绍了TensorRT-LLM环境搭建,同时,基于Bloom进行模型量化及推理。码字不易,如果觉得有帮助,欢迎点赞收藏加关注。
如何系统的去学习大模型LLM ?
作为一名热心肠的互联网老兵,我意识到有很多经验和知识值得分享给大家,也可以通过我们的能力和经验解答大家在人工智能学习中的很多困惑,所以在工作繁忙的情况下还是坚持各种整理和分享。
但苦于知识传播途径有限,很多互联网行业朋友无法获得正确的资料得到学习提升,故此将并将重要的 AI大模型资料 包括AI大模型入门学习思维导图、精品AI大模型学习书籍手册、视频教程、实战学习等录播视频免费分享出来。
😝有需要的小伙伴,可以V扫描下方二维码免费领取🆓

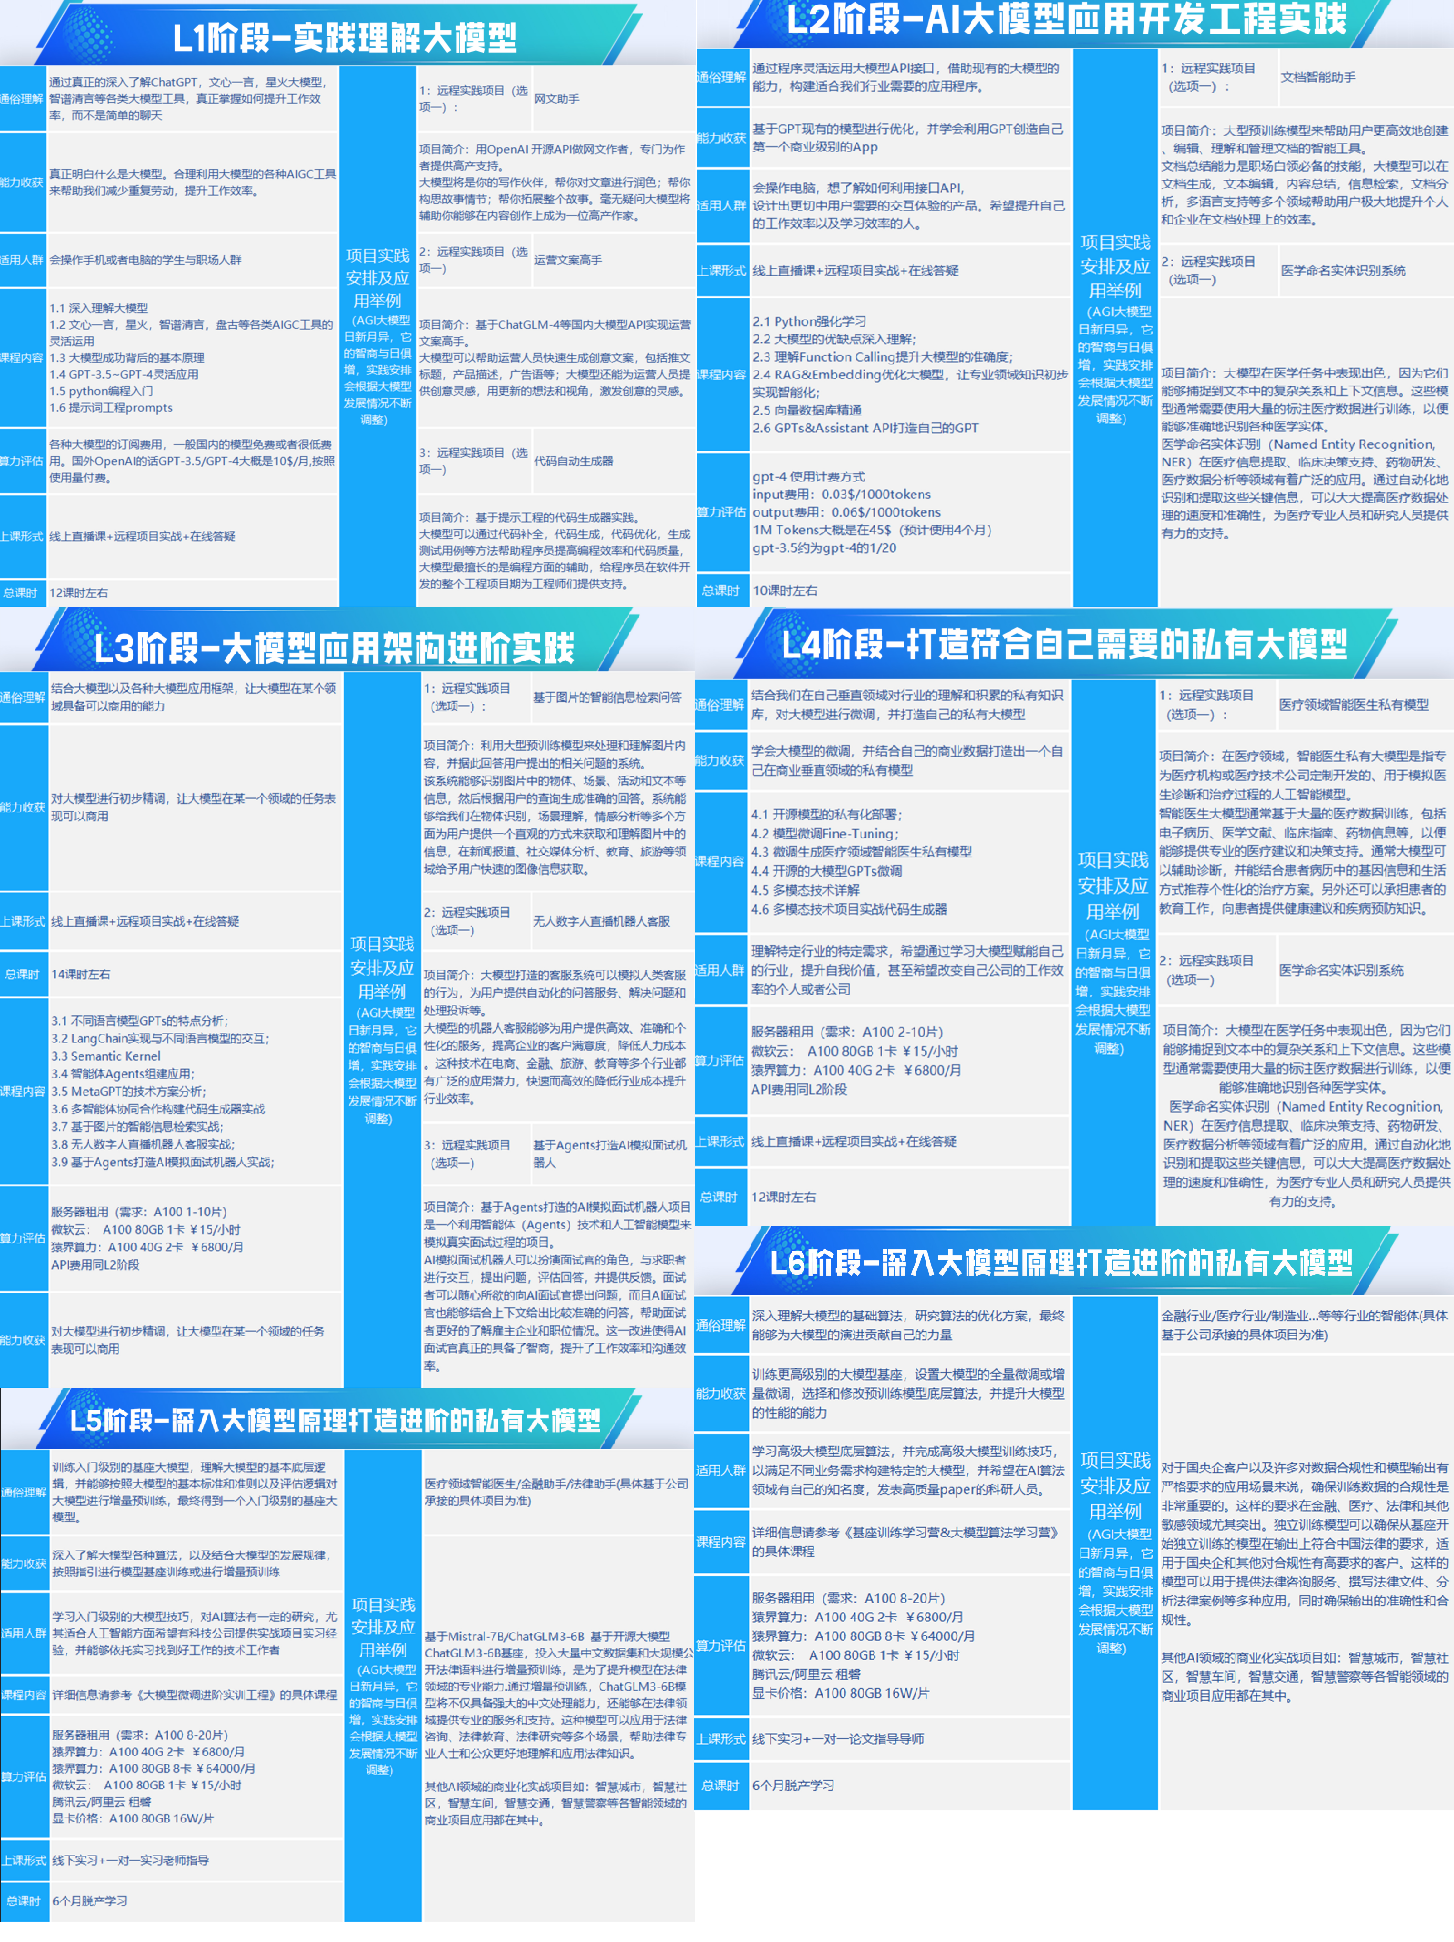
一、全套AGI大模型学习路线
AI大模型时代的学习之旅:从基础到前沿,掌握人工智能的核心技能!
二、640套AI大模型报告合集
这套包含640份报告的合集,涵盖了AI大模型的理论研究、技术实现、行业应用等多个方面。无论您是科研人员、工程师,还是对AI大模型感兴趣的爱好者,这套报告合集都将为您提供宝贵的信息和启示。
三、AI大模型经典PDF籍
随着人工智能技术的飞速发展,AI大模型已经成为了当今科技领域的一大热点。这些大型预训练模型,如GPT-3、BERT、XLNet等,以其强大的语言理解和生成能力,正在改变我们对人工智能的认识。 那以下这些PDF籍就是非常不错的学习资源。

四、AI大模型商业化落地方案

阶段1:AI大模型时代的基础理解
- 目标:了解AI大模型的基本概念、发展历程和核心原理。
- 内容:
- L1.1 人工智能简述与大模型起源
- L1.2 大模型与通用人工智能
- L1.3 GPT模型的发展历程
- L1.4 模型工程
- L1.4.1 知识大模型
- L1.4.2 生产大模型
- L1.4.3 模型工程方法论
- L1.4.4 模型工程实践 - L1.5 GPT应用案例
阶段2:AI大模型API应用开发工程
- 目标:掌握AI大模型API的使用和开发,以及相关的编程技能。
- 内容:
- L2.1 API接口
- L2.1.1 OpenAI API接口
- L2.1.2 Python接口接入
- L2.1.3 BOT工具类框架
- L2.1.4 代码示例 - L2.2 Prompt框架
- L2.2.1 什么是Prompt
- L2.2.2 Prompt框架应用现状
- L2.2.3 基于GPTAS的Prompt框架
- L2.2.4 Prompt框架与Thought
- L2.2.5 Prompt框架与提示词 - L2.3 流水线工程
- L2.3.1 流水线工程的概念
- L2.3.2 流水线工程的优点
- L2.3.3 流水线工程的应用 - L2.4 总结与展望
- L2.1 API接口
阶段3:AI大模型应用架构实践
- 目标:深入理解AI大模型的应用架构,并能够进行私有化部署。
- 内容:
- L3.1 Agent模型框架
- L3.1.1 Agent模型框架的设计理念
- L3.1.2 Agent模型框架的核心组件
- L3.1.3 Agent模型框架的实现细节 - L3.2 MetaGPT
- L3.2.1 MetaGPT的基本概念
- L3.2.2 MetaGPT的工作原理
- L3.2.3 MetaGPT的应用场景 - L3.3 ChatGLM
- L3.3.1 ChatGLM的特点
- L3.3.2 ChatGLM的开发环境
- L3.3.3 ChatGLM的使用示例 - L3.4 LLAMA
- L3.4.1 LLAMA的特点
- L3.4.2 LLAMA的开发环境
- L3.4.3 LLAMA的使用示例 - L3.5 其他大模型介绍
- L3.1 Agent模型框架
阶段4:AI大模型私有化部署
- 目标:掌握多种AI大模型的私有化部署,包括多模态和特定领域模型。
- 内容:
- L4.1 模型私有化部署概述
- L4.2 模型私有化部署的关键技术
- L4.3 模型私有化部署的实施步骤
- L4.4 模型私有化部署的应用场景
学习计划:
- 阶段1:1-2个月,建立AI大模型的基础知识体系。
- 阶段2:2-3个月,专注于API应用开发能力的提升。
- 阶段3:3-4个月,深入实践AI大模型的应用架构和私有化部署。
- 阶段4:4-5个月,专注于高级模型的应用和部署。
这份完整版的大模型 LLM 学习资料已经上传CSDN,朋友们如果需要可以微信扫描下方CSDN官方认证二维码免费领取【保证100%免费】
😝有需要的小伙伴,可以Vx扫描下方二维码免费领取🆓


 1511
1511


 被折叠的 条评论
为什么被折叠?
被折叠的 条评论
为什么被折叠?
 到【灌水乐园】发言


