


1. The Standard Shader
The standard is used to create Unity’s default material.
To choose the Standard Shader using the specular approach select Standard(Specular Setup). Otherwise use Standard for the metallic approach.
There are 3 sections to the standard shader. Rendering Mode, Main Maps and Secondary Maps.
Rendering Mode Section
Main Maps Section
The main map section defines the look of the material.
There are a few subjects that are worth covering first.
1. Optimisation. The standard shader is highly optimised. When the standard shader is built, two important things happen. All properties that are not being used are discarded. The build target is checked and the shader is optimised for that device.
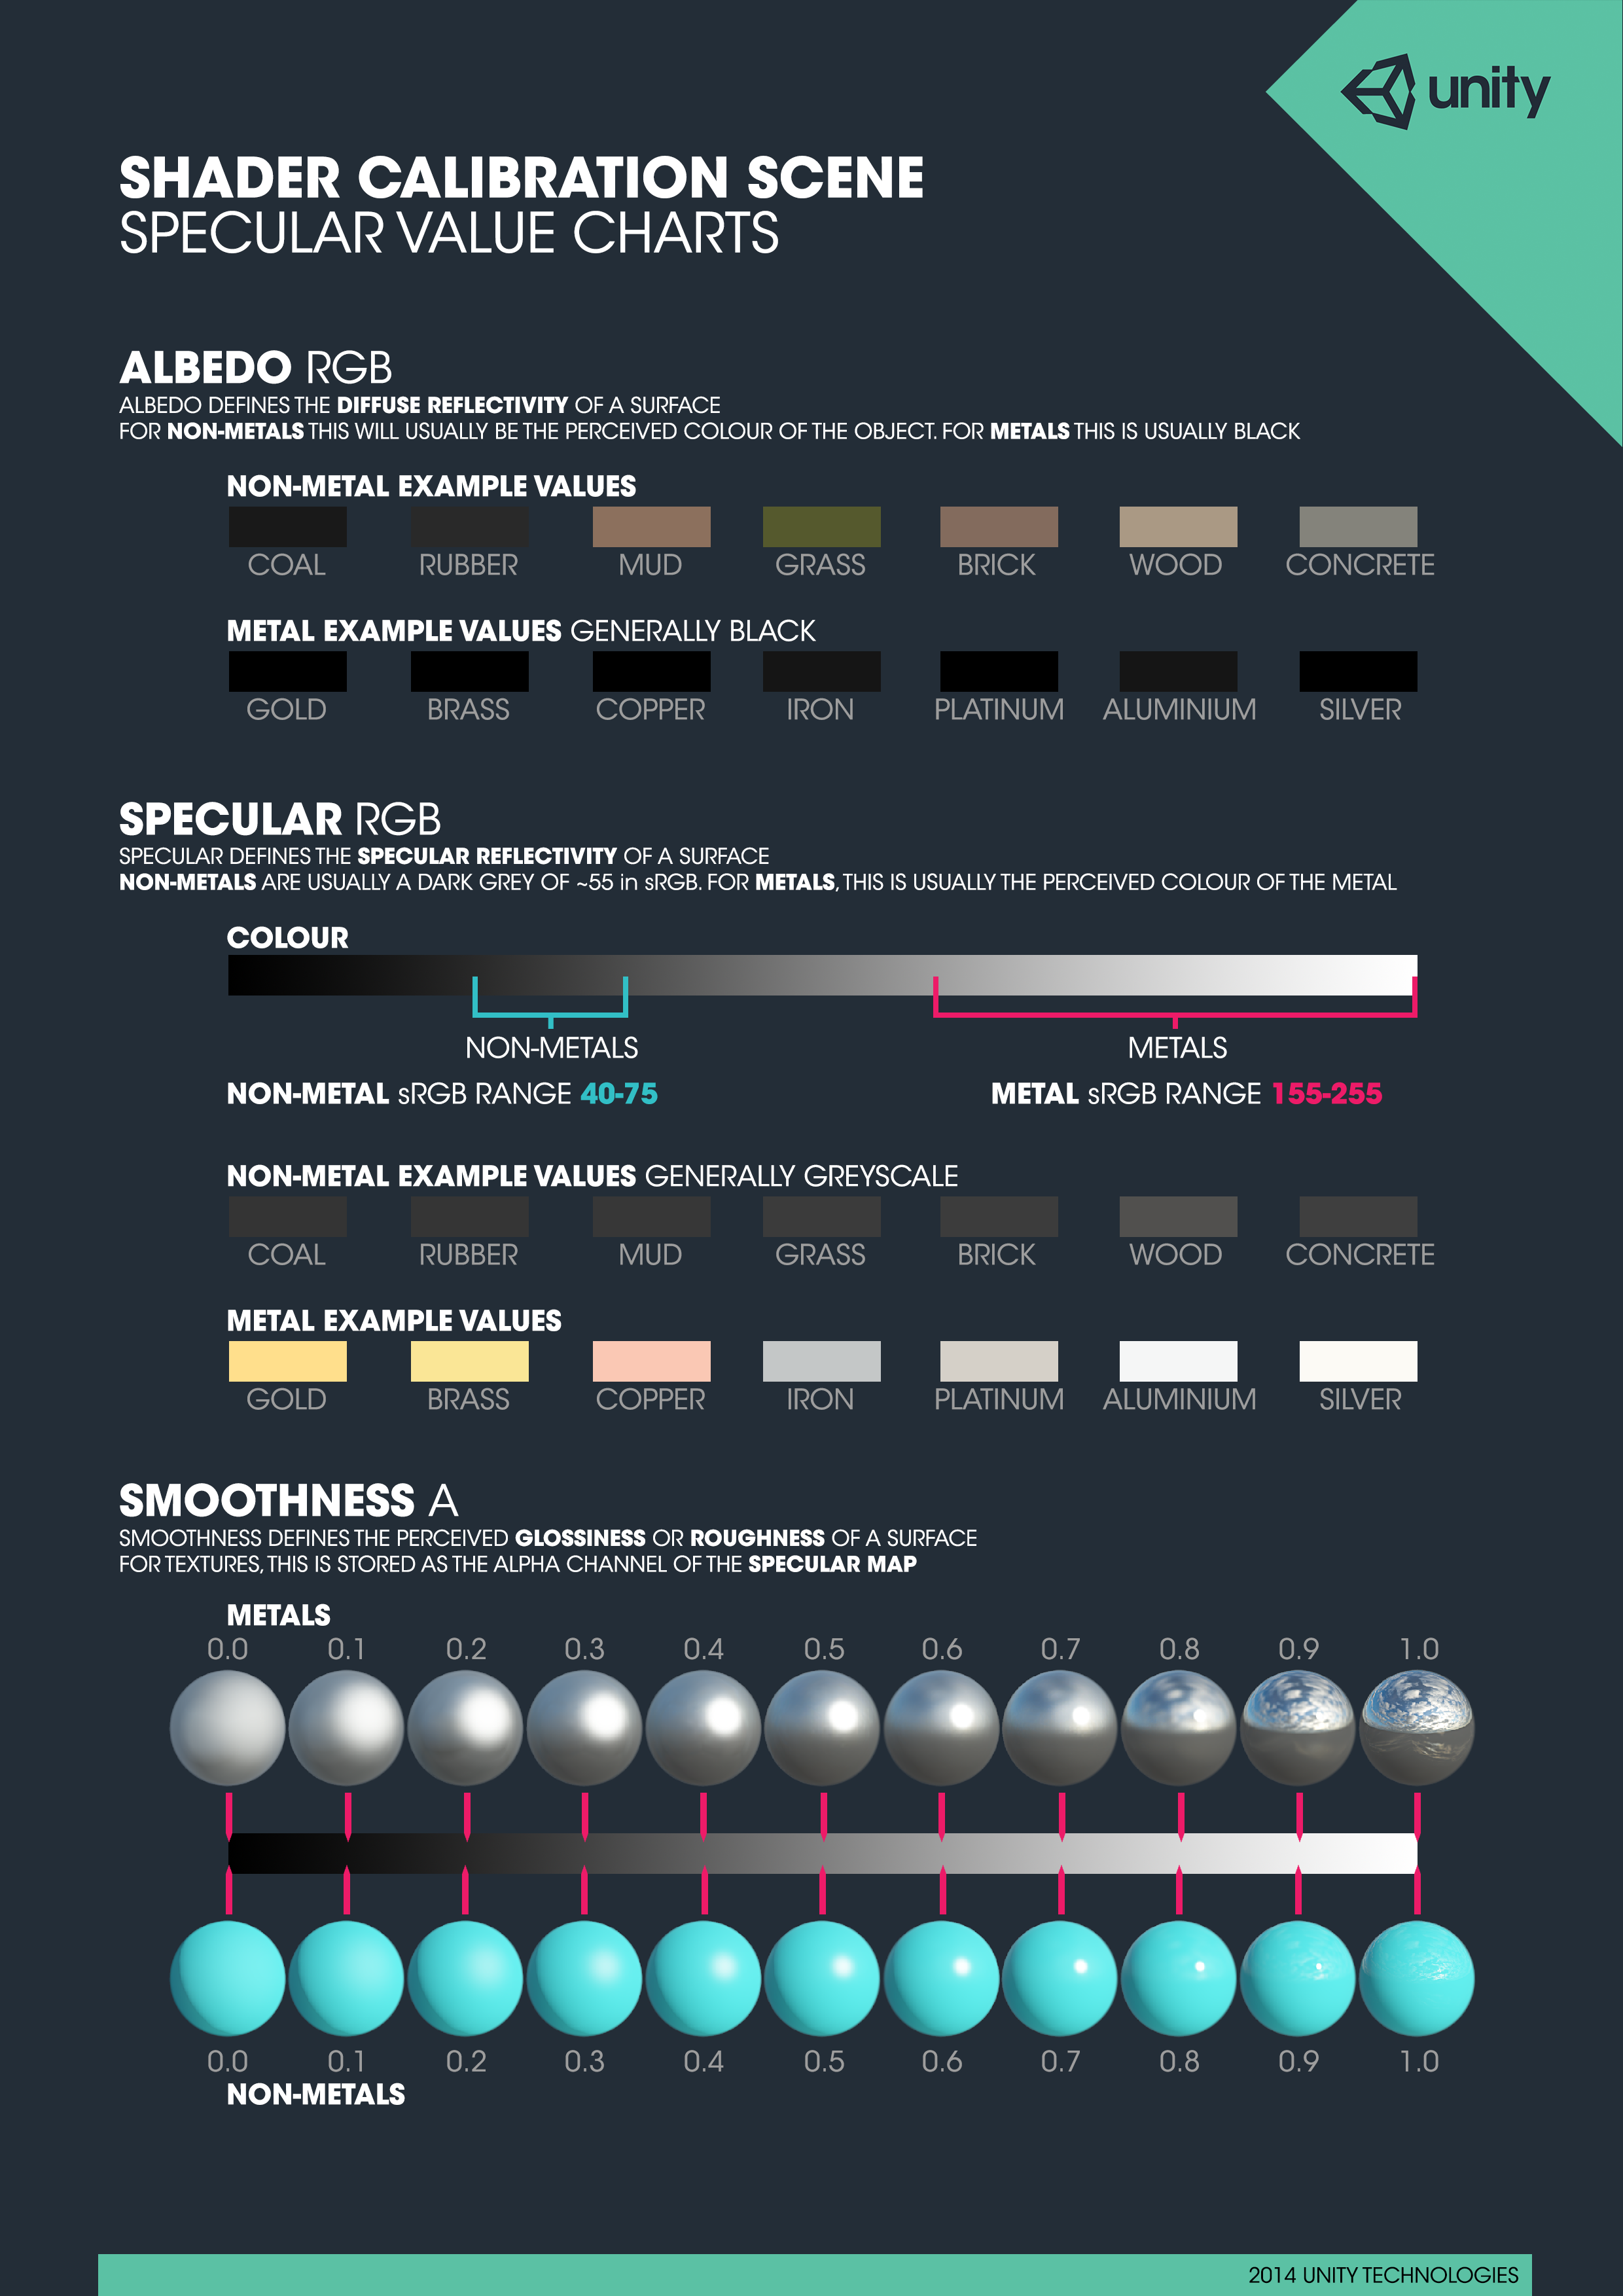
2. Physically-based shading. Physically-based shading tires to define certain physical aspects of a material’s surface. Including it’s diffuse colour, specular reflection and other properties so the materials behaves correctly and believably in all lighting environments.
In the main map section, each of these properties control one aspect of the final material. Each property can be defined by a texture map.
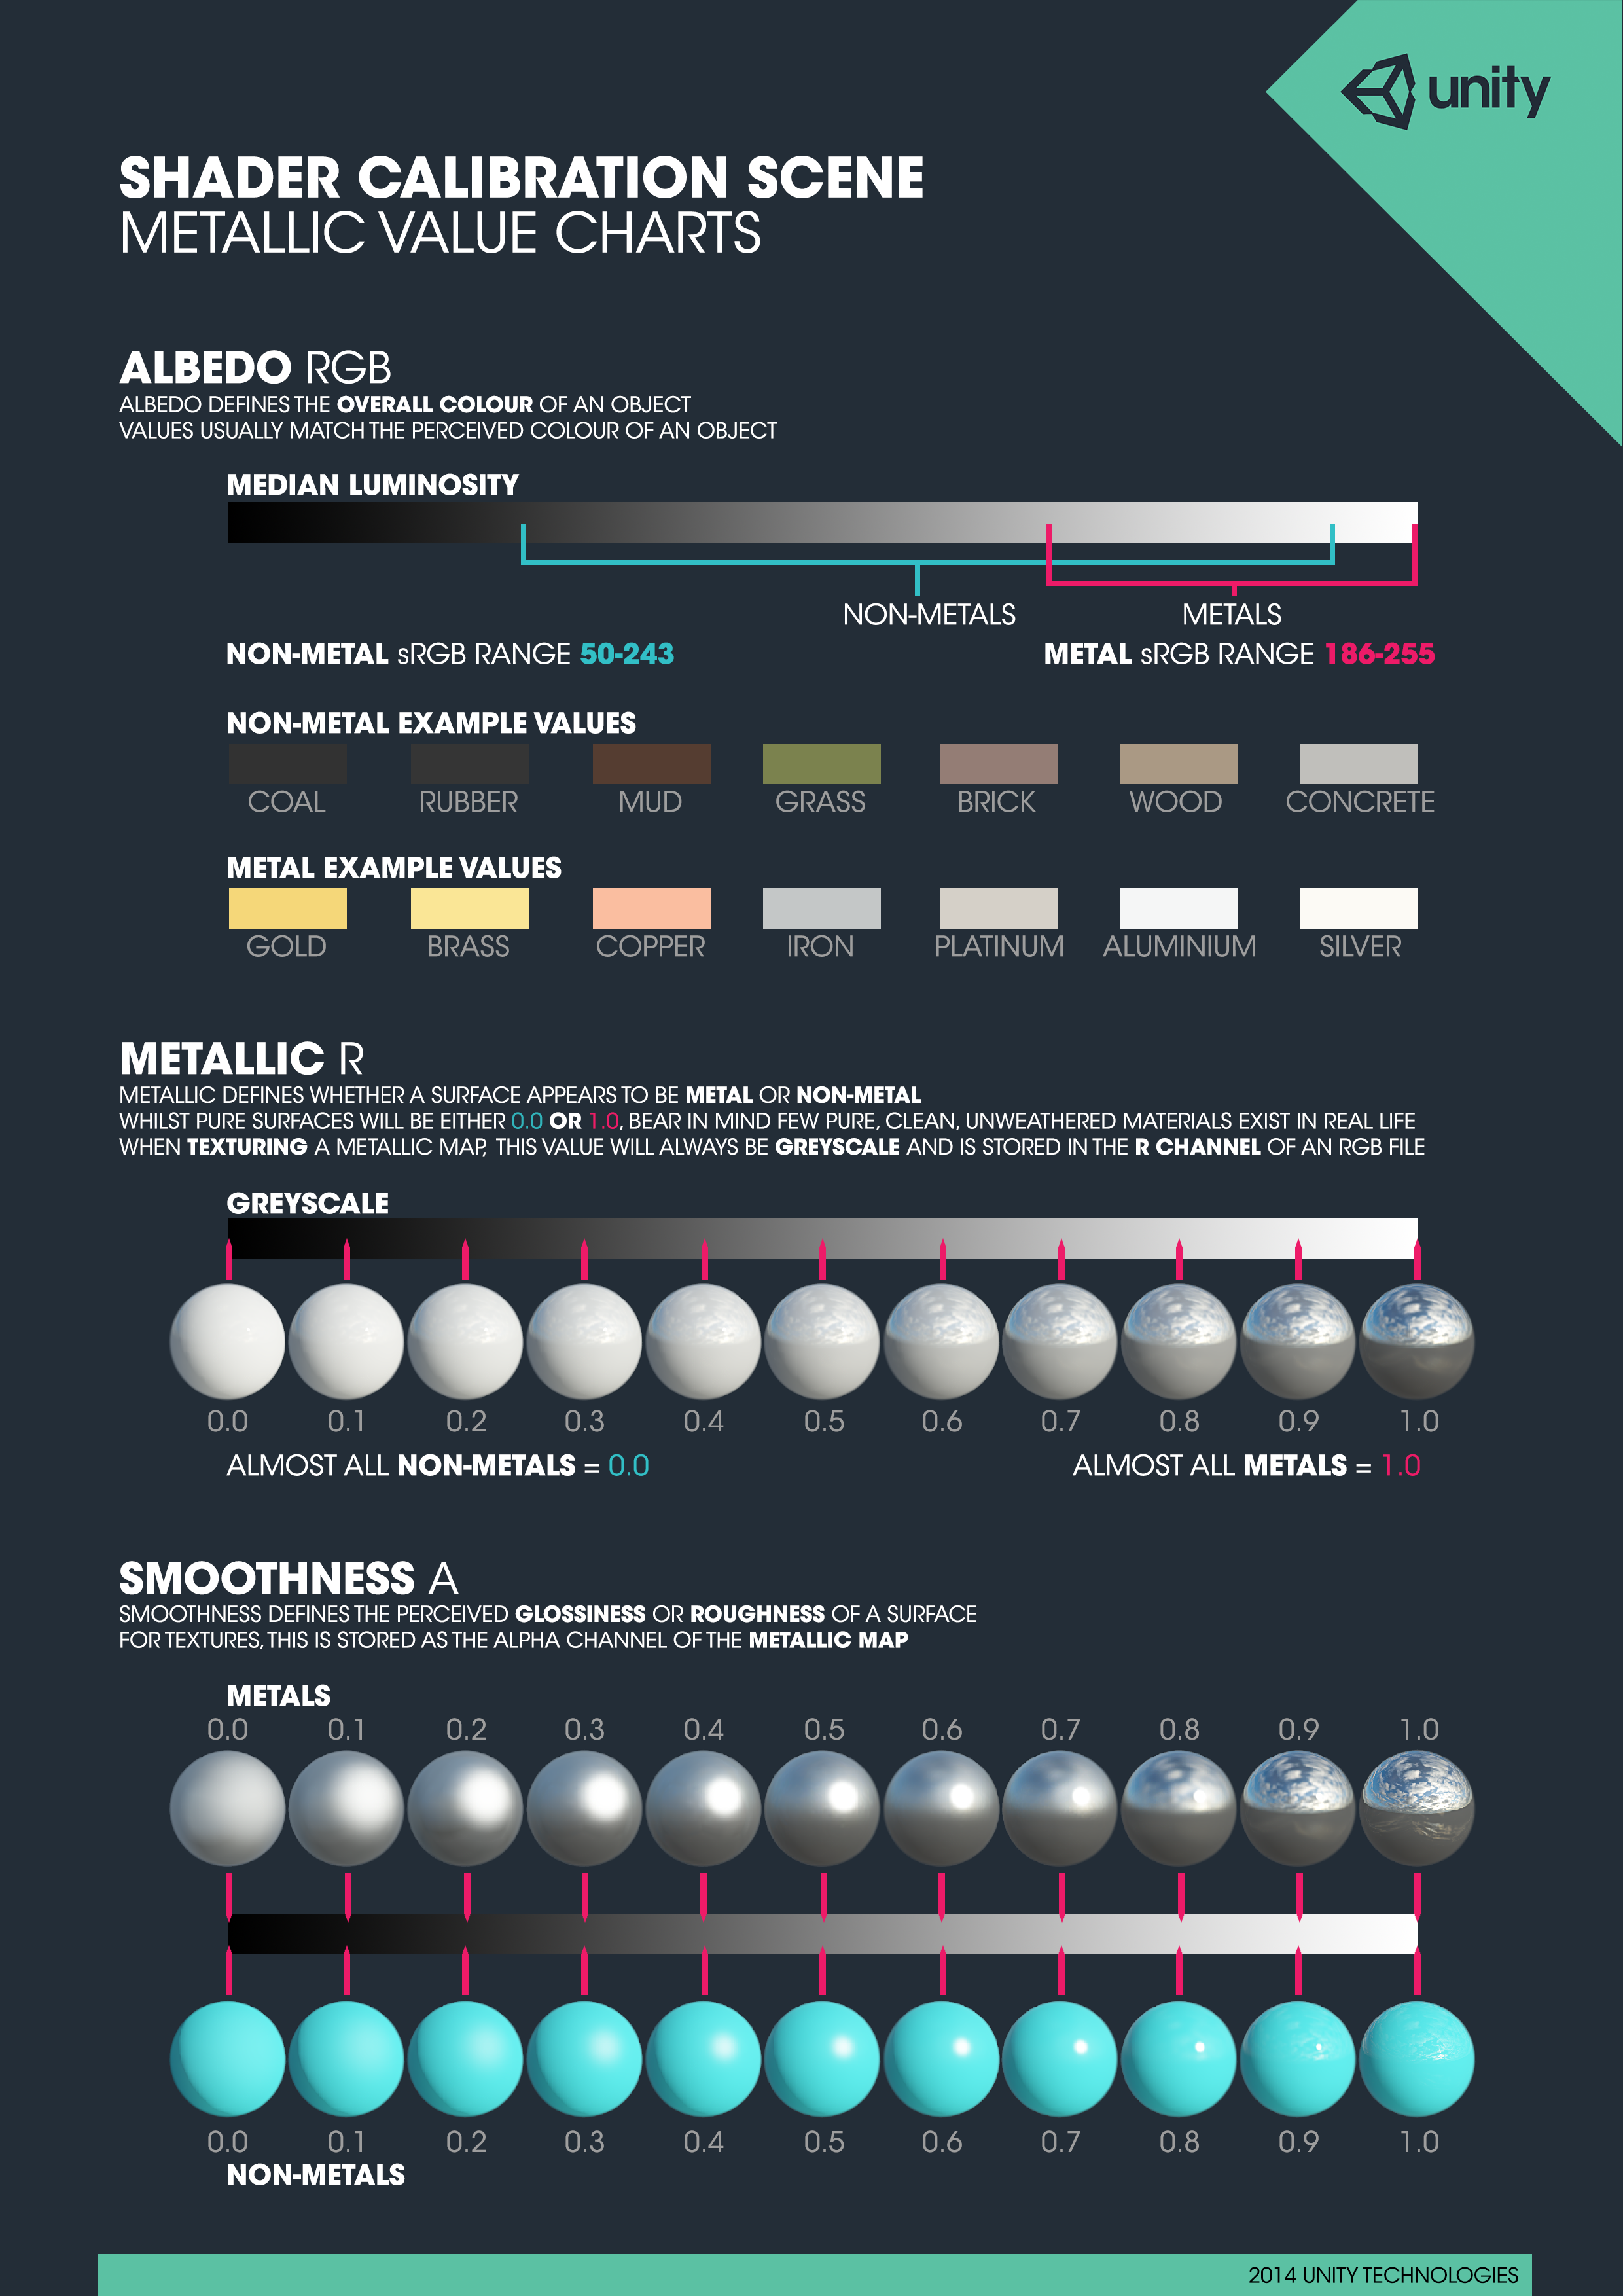
It is worth noting that when using a texture to define the metalness, the smoothness value must also be defined by that textures’s alpha channel. It is also worth noting that the metalness value is stored only in the red in the red channel of the metalness map’s RGB values. The green and blue channels are ignored. It is often easier however to visualise the metalness values of a texture if all three colour channels share the same map, so the texture appears as a greyscale image.
The Secondary Maps Section
The secondary maps are used to define additional surface detail. This additional detail, sometimes referred to as micro detail, is added on top of the surface defined by the main maps.
Related documentation
Working with Physically Based Rendering (Blog)
Authoring Physically-based Shading Materials
To avoid the guesswork involved in emulating real world materials, it is useful to follow a reliable known reference.The Standard Shader supports both a Specular Color and a Metallic workflow. They both define the color of the reflections leaving the surface. In the Specular workflow, color is specified directly, whilst in the Metallic workflow, the color is derived from a combination of the diffuse color and the metallic value set in the Standard Shader controls.
For the Viking Village project, we used the Standard Shader’s Specular Color Workflow. Our calibration scene, which you can download from the Asset Store, includes some handy calibration charts. We referenced the charts regularly when designing our materials.
When approaching materials you can choose between what we call the Specular and the Metallic workflows, each with its own set of values and a reference chart. In the Specular workflow you choose the color of the specularly reflected light directly, in the metallic workflow you choose if the material behaves like a metal when it is illuminated.
The specular value chart:
The metallic value chart:
Choosing between Specular or Metallic workflows is largely a matter of personal preference, you can usually get the same result whichever workflow you choose to use.
Aside from charts and values, gathering samples of real world surfaces is highly valuable. It is of great help to find the surface type you are trying to imitate and try to get an understanding of how it reacts to light.
Setting up the material
When starting out, it’s often useful to create a plain but tweakable representation of the materials using colors, values and sliders derived from the calibration charts. Then, you can apply textures while keeping the original material as a reference to confirm that characteristics are preserved.

Top row: untextured. Bottom row: textured. Left to right: Rock, Wood, Bone, Metal
About the calibration scene
Those having trouble importing the asset via Asset Store window, get the .zip file here (I hope it’s OK to publicize the link):
https://oc.unity3d.com/public.php?service=files&t=18b2bab9dfb976f05465244d0dd6344c
A very useful resource to those wanting a better understanding of Unity’s new Physically Based Shader and how to set up materials using both Specular and Default (metallic) setup. From the example materials, you’ll get a good idea on how to configure the shader / create maps for different elements such as metal, wood, skin, etc.
 最低0.47元/天 解锁文章


 被折叠的 条评论
为什么被折叠?
被折叠的 条评论
为什么被折叠?
 到【灌水乐园】发言


