


DiglogFragment自定义标题
1.自定义标题栏需要用到requestWindowFeature(Window.FEATURE_CUSTOM_TITLE),一般在inflate视图前调用,即:
在Activity中先于setContentView调用;
在DialogFragment中先于onCreateView中的inflate调用。
总而言之,要在视图生成之前定义好特性,为自定义标题做好准备。
2.视图绘制后,再用setFeatureInt(Window.FEATURE_CUSTOM_TITLE, R.layout.xxx)定制标题的布局,只需要传入相应的xml布局即可。
3.测试的代码:
public class TestFragment extends DialogFragment {

    private Button btnTest1;

    @Override
    public View onCreateView(LayoutInflater inflater, ViewGroup container, Bundle savedInstanceState) {
        getDialog().requestWindowFeature(Window.FEATURE_CUSTOM_TITLE);
        View view = inflater.inflate(R.layout.fragment_diglog_test, container);
        initView(view);
        return view;
    }

    @Override
    public void onActivityCreated(Bundle bundle) {
        super.onActivityCreated(bundle);
        //如此设置背景可以将标题栏也置于背景上,有浑然一体的视效
        getDialog().getWindow().setBackgroundDrawableResource(R.drawable.bg);
        getDialog().getWindow().setFeatureInt(Window.FEATURE_CUSTOM_TITLE, R.layout.dialog_title);
    }

    protected void initView(View view) {
        btnTest1 = (Button) view.findViewById(R.id.btn_test1);
        btnTest1.setOnClickListener(new OnClickListener() {

            @Override
            public void onClick(View v) {
                Log.d("tag", "btn");
            }
        });

    }
}
内容布局fragment_diglog_test.xml:
<?xml version="1.0" encoding="utf-8"?>
<LinearLayout xmlns:android="http://schemas.android.com/apk/res/android"
    android:layout_width="match_parent"
    android:layout_height="match_parent"
    android:orientation="vertical" >

    <Button
        android:id="@+id/btn_test1"
        android:layout_width="wrap_content"
        android:layout_height="wrap_content"
        android:textColor="#fff"
        android:text="@string/btn_test1" />

</LinearLayout>
自定义的标题布局dialog_title.xml:
<?xml version="1.0" encoding="utf-8"?>
<RelativeLayout xmlns:android="http://schemas.android.com/apk/res/android"
    android:layout_width="match_parent"
    android:layout_height="match_parent" >

    <TextView
        android:layout_width="wrap_content"
        android:layout_height="match_parent"
        android:layout_centerInParent="true"
        android:gravity="center"
        android:textColor="#fff"
        android:text="@string/dialog_title"
        android:textSize="24sp" />

    <ImageView
        android:id="@+id/iv_test"
        android:layout_width="30dp"
        android:layout_height="30dp"
        android:layout_alignParentRight="true"
        android:layout_centerVertical="true"
        android:layout_marginRight="10dp"
        android:background="@drawable/menu_input"
        android:clickable="true"
        android:focusable="true"
        android:focusableInTouchMode="true" />

</RelativeLayout>
得到的效果如下:
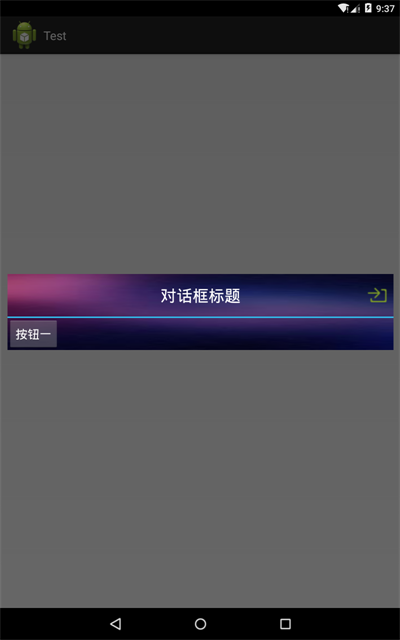
自定义标题的点击事件
需要注意是,标题中的控件并不能通过内容布局fragment_dialog_test.xml找到,也就是不能像【按钮一】通过btnTest1 = (Button) view.findViewById(R.id.btn_test1)实例化;因为标题是另一个布局,它所属的view和按钮所在view并不相同,按钮在dialog_fragment_test,而是在标题中的控件中dialog_title中。如果依葫芦画瓢,肯定是会报错的。
究其原因是view的问题,如何才能得到整个DialogFragment的view而非仅仅只是内容或标题的view,答案是:
getDialog()。
在获取标题栏控件的时候,需要用getDialog()来获取整个视图的view,再进行实例化。
ImageView ivTest1 = (ImageView) getDialog().findViewById(R.id.iv_test);
ivTest1.setOnClickListener(new OnClickListener() {

            @Override
            public void onClick(View v) {
                Log.d("tag", "title");
            }
        });
此时添加点击事件才能正常执行。


 3154
3154

 被折叠的 条评论
为什么被折叠?
被折叠的 条评论
为什么被折叠?
 到【灌水乐园】发言


