


项目前言
项目介绍
这个项目始于我参观一家食品加工厂的经历。当我穿行于设备间,机器的轰鸣和传送带运输一件件产品的景象给我留下了深刻印象。在与操作员交谈时,我得知了一个意外的消息:只要机器停机,他们就会面临着巨大的损失,比如传送带、齿轮箱或泵的一个小故障就能导致整条生产线停摆,从而造成昂贵的生产延误。这让我思考,是否有办法在故障发生前就预测到它们?
这个项目的想法就是这样被启发的。工业机器设备在许多行业中扮演着至关重要的角色。平均而言,成千上万的机器依赖传送系统来高效地传输产品。但如果这些机器中有一个出现故障,可能会导致企业损失数小时乃至数天的生产力。
于是我决定寻求一种解决方案:利用监听设备声音进行预测性维护。就像人的心跳一样,机器也有自己以声音形式的“心跳”,每台机器都有一个独特的声音特征,而这个声音如果出现异常,就表明可能存在某种问题。通过实时分析这些声音,我们可以识别潜在问题,并在它们造成重大停机时间之前进行修复。
就这样,Machine Medic,机械医生,诞生了。这是一个基于云的,由ai驱动的平台,通过监听机器的声音并及早检测故障,帮助行业避免不必要的停机,以避免昂贵的维修费用。让我们一步一步深入了解这是如何工作的。
项目步骤
一、设置 “MEDIC”系统
行空板有全面的wiki文档来指导你设置。我的项目使用了开源的 Web 应用程序 Jupyter Notebook来充分利用ai构建声音模型。
在设置了虚拟环境(venv)之后,现在是时候开始收集数据用于处理和训练模型了。
二、收集数据
在数据收集过程中,我遇到了一个问题——没有现成的、专门关注机器声音的数据集。所以为了构建一个强大的ai模型,我大部分时间都花在了数据收集上,特别是亲自去收集他们运动部件发出的独特音频信号。我记录了处于三种出于不同状态的机器关键运动部件的音频:良好、不良和老化。这些类别代表了设备健康状况的不同状态,为能够为训练模型创建一个多样化且有意义的数据集。
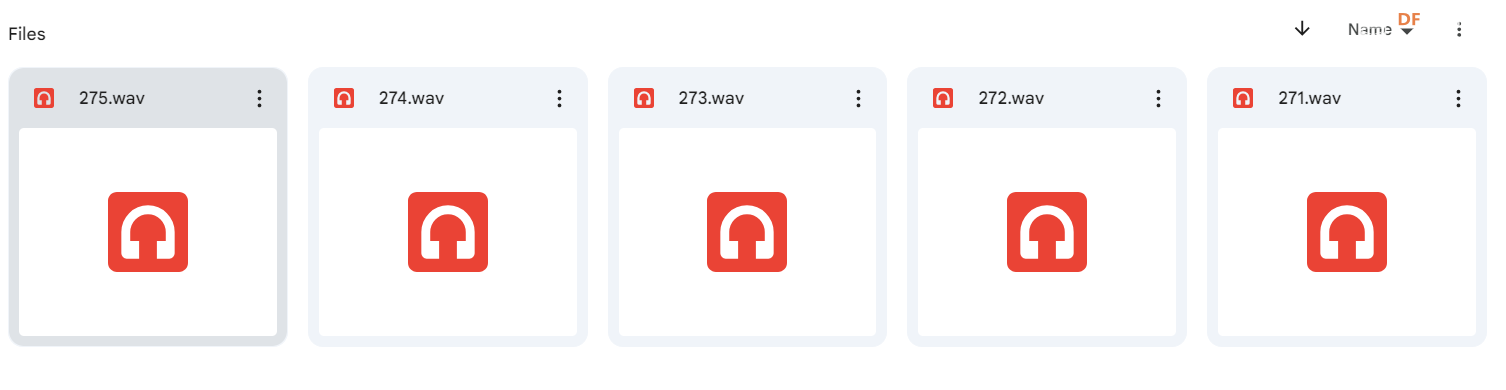
我在分别不同类别的设备的每个部件上录制了一分钟的声音,总共收集了5小时的音频文件。以下音频文件来自运行的设备的不同部件。

这个过程可以按需定制化,适用于任何为特定机器构建项目,只需遵循相同的步骤。以下是对设备链条中某部分的录音。
为了收集数据,需要在使用 Jupyter Notebook 创建的虚拟环境(venv)中运行该代码。
代码
# -*- coding: utf-8 -*-
import os
import time
from unihiker import Audio, GUI
u_gui = GUI()
audio = Audio()
text = None
buttonA = None
num_files = 5
recording_duration = 60 # 60 seconds
def start_recording():
global text, buttonA
buttonA.config(state="disabled")
for i in range(1, num_files + 1):
if text:
text.config(text=f"Recording {i}/{num_files} started...\nPlease wait...")
else:
text = u_gui.draw_text(text=f"Recording {i}/{num_files} started...\nPlease wait...", x=25, y=150, font_size=15, color='#FFFFFF')
file_name = f'machine_sound_{i}.wav'
audio.start_record(file_name)
time.sleep(recording_duration)
audio.stop_record()
text.config(text=f"Recording {i}/{num_files} completed. File saved as {file_name}")
time.sleep(3)
buttonA.config(state="normal")
background_image = u_gui.draw_image(image="1.png", x=0, y=0)
buttonA = u_gui.add_button(text="Start Recording", x=25, y=100, w=190, h=40, onclick=start_recording)
title_text = u_gui.draw_text(text='Machine Medic - Data Collection', y=50, font_size=22, color='#FFFFFF')
while True:
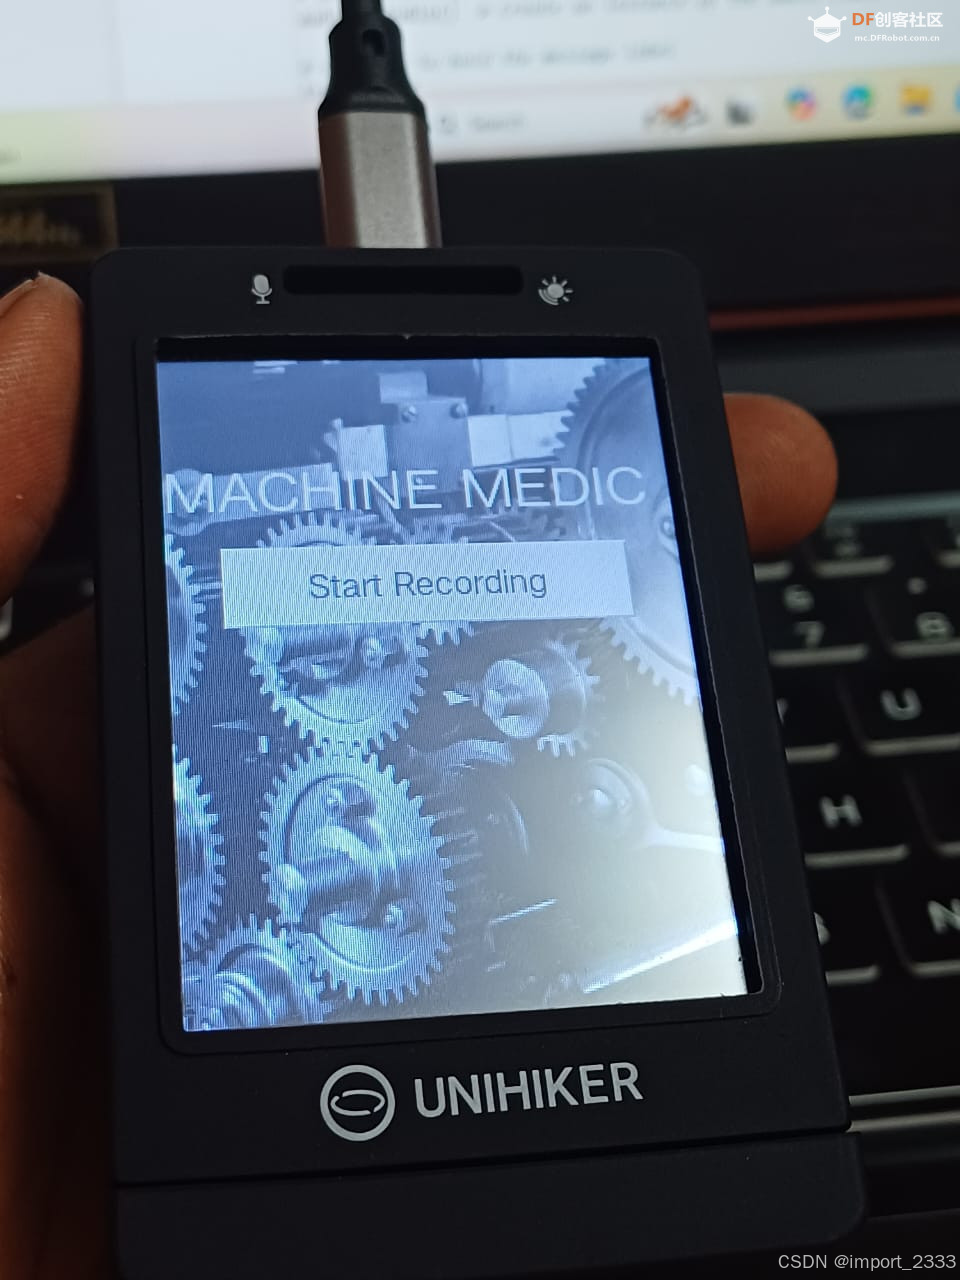
time.sleep(0.1)这个界面将运行并通过将其放置在机器的不同部位来收集声音数据:
三、训练ai模型
将数据集整理到根文件夹中。

音频文件排列的一个示例架构:
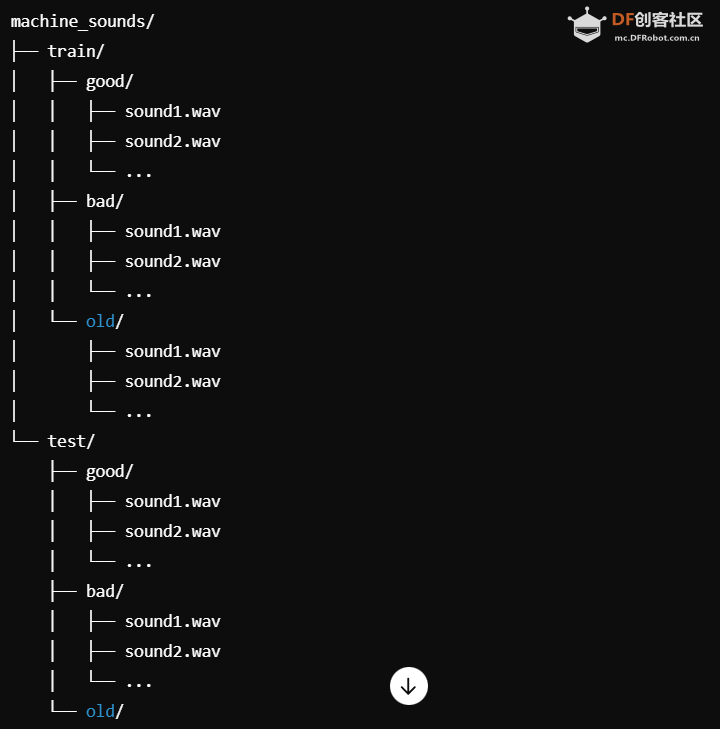
整理好数据集之后,接下来就是训练模型。
下面的代码实现了一个ai模型,用于分析机器的声音数据,并使用 MFCC(梅尔频率倒谱系数)作为特征。它涵盖了加载数据、预处理、构建神经网络模型、训练模型以及评估性能的步骤。
我已经在里面添加了许多注释,所以下面给出的代码是自解释性的。
代码
import os
import numpy as np
import librosa
import tensorflow as tf
import matplotlib.pyplot as plt
# Step 1: Load the Data
def load_data(base_path):
X = []
y = []
# Loop through each category
for label in os.listdir(base_path):
label_path = os.path.join(base_path, label)
if os.path.isdir(label_path):
# Loop through each audio file in the category
for file in os.listdir(label_path):
if file.endswith('.wav'):
file_path = os.path.join(label_path, file)
# Load the audio file
signal, sr = librosa.load(file_path, sr=None)
# Extract features (MFCC)
mfccs = librosa.feature.mfcc(y=signal, sr=sr, n_mfcc=40) # Corrected line
mfccs = np.mean(mfccs.T, axis=0)
X.append(mfccs)
y.append(label)
return np.array(X), np.array(y)
# Define the base paths where your training and testing data are stored
train_base_path = "/root/dataset/machinesounds/train" # Update this path
test_base_path = "/root/dataset/machinesounds/test" # Update this path
# Load the data
X_train, y_train = load_data(train_base_path)
X_test, y_test = load_data(test_base_path)
# Step 2: Preprocess the Data
# Encode the labels manually
unique_labels = np.unique(y_train) # Use y_train for encoding
label_to_index = {label: idx for idx, label in enumerate(unique_labels)}
y_train_encoded = np.array([label_to_index[label] for label in y_train])
y_test_encoded = np.array([label_to_index[label] for label in y_test]) # Encode test labels
# Reshape for the model
X_train = X_train.reshape(X_train.shape[0], X_train.shape[1], 1)
X_test = X_test.reshape(X_test.shape[0], X_test.shape[1], 1)
# Step 3: Build the Model
model = tf.keras.Sequential([
tf.keras.layers.Conv1D(16, kernel_size=2, activation='relu', input_shape=(X_train.shape[1], 1)),
tf.keras.layers.MaxPooling1D(pool_size=2),
tf.keras.layers.Conv1D(32, kernel_size=2, activation='relu'),
tf.keras.layers.MaxPooling1D(pool_size=2),
tf.keras.layers.Flatten(),
tf.keras.layers.Dense(64, activation='relu'),
tf.keras.layers.Dense(len(unique_labels), activation='softmax')
])
# Compile the model
model.compile(loss='sparse_categorical_crossentropy', optimizer='adam', metrics=['accuracy'])
# Step 4: Train the Model
history = model.fit(X_train, y_train_encoded, epochs=50, validation_data=(X_test, y_test_encoded))
# Step 5: Evaluate the Model
# Predictions
y_pred = np.argmax(model.predict(X_test), axis=-1)
# Calculate accuracy
accuracy = np.sum(y_pred == y_test_encoded) / len(y_test_encoded)
print(f'Accuracy: {accuracy * 100:.2f}%')
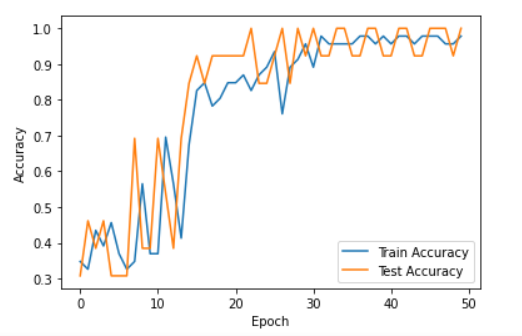
# Plotting the training history
plt.plot(history.history['accuracy'], label='Train Accuracy')
plt.plot(history.history['val_accuracy'], label='Test Accuracy')
plt.xlabel('Epoch')
plt.ylabel('Accuracy')
plt.legend()
plt.show()四、数据加载
函数 load_data(base_path) 从目录结构中读取音频文件,其中每个文件夹代表一个标签。它处理声音文件并提取 MFCC 特征:
MFCC(梅尔频率倒谱系数):用于表示音频信号的功率谱的特征,能捕捉相关的声音特性。该函数会遍历目录,使用 Librosa 加载 .wav 文件,计算每个文件的 MFCCs,并将它们平均以获得固定大小的特征向量。
五、预处理技术
MFCC 提取:主要的预处理步骤包括将原始音频信号转换为 MFCC,它将声音的关键特征压缩成模型可以处理的格式。标签编码:标签从字符串转换为数值,以便与模型的输出格式兼容。训练-测试分割:确保模型在未见过的数据上进行测试,防止过拟合。
重塑:将数据重塑以符合卷积神经网络的输入要求。
一旦你的模型准备好了,可以使用以下代码片段将模型保存到相同的目录中:
- model.save('my_trained_model.h5')
这个模型将被保存在同一个目录中。

完成后,项目的其余部分将集中于构建一个图形用户界面(GUI),该界面将触发模型并为输入的声音提供输出。最后的运行是为了设置图形用户界面和管理模型的后端。使用 Jupyter Notebook,在根目录中创建一个 main 文件并运行以下代码。确保模型名称与代码中给出的名称相匹配。模型应该存在于同一目录中。
代码
 # -*- coding: utf-8 -*-
import os
import numpy as np
import librosa
import tensorflow as tf
from pinpong.extension.unihiker import *
from unihiker import Audio, GUI
import time
import threading  # Import threading for non-blocking execution

# Load the pre-trained model
model_path = '/root/my_trained_model.h5'  # Update this path to your model
loaded_model = tf.keras.models.load_model(model_path)

# Load unique labels for prediction
unique_labels = ["Good", "Old", "Bad"]  # Update this with your actual labels

# Function to predict the machine state
def predict_audio(file_path):
    signal, sr = librosa.load(file_path, sr=None)
    mfccs = librosa.feature.mfcc(y=signal, sr=sr, n_mfcc=40)
    mfccs = np.mean(mfccs.T, axis=0)
    mfccs = mfccs.reshape(1, -1, 1)  # Reshape for the model
    prediction = np.argmax(loaded_model.predict(mfccs), axis=-1)
    return unique_labels[prediction[0]]

# Instantiate a GUI object
u_gui = GUI()

# Instantiate audio
audio = Audio()  # Create an instance of the audio class

# Variable to hold the message label
text = None
result_text = None  # New variable to hold the result text

# Create a variable to hold the button
buttonA = None

# Callback function for the Start Recording button
def start_recording():
    global text, buttonA  # Reference global variables

    # Disable the button to prevent multiple clicks
    buttonA.config(state="disabled")

    # Start the countdown in a separate thread
    countdown_thread = threading.Thread(target=countdown, args=(3,))
    countdown_thread.start()  # Start the thread

def countdown(t):
    global text
    # Show countdown
    for i in range(t, 0, -1):
        text.config(text=str(i).upper(), font_size=100, x=50, color='#FFFFFF')  # Update countdown text
        time.sleep(1)  # Delay for 1 second

    # After countdown, update the text to indicate recording status
    text.config(text="RECORDING STARTED...\nPLEASE WAIT...", font_size=15,x=10, color='#FFFFFF')

    # Start recording
    audio.start_record('machine_sound.wav')  # Start recording

    # Record for 15 seconds
    time.sleep(15)  # Recording duration
    audio.stop_record()  # Stop recording
    text.config(text="RECORDING STOPPED.", font_size=15, x=10, color='#FFFFFF')  # Update message

    # Wait for 3 seconds
    time.sleep(3)  # Wait before processing audio
    text.config(text="PLEASE WAIT.", font_size=15, x=10, color='#FFFFFF')
    process_audio()  # Process the audio

def process_audio():
    predicted_state = predict_audio('machine_sound.wav')  # Predict the machine state

    global result_text
    if result_text:  # If result text already exists, update it
        result_text.config(text=f"MACHINE STATE: {predicted_state.upper()}")
    else:  # Create result text if it doesn't exist
        result_text = u_gui.draw_text(text=f"MACHINE STATE: {predicted_state.upper()}", x=10, y=200, font_size=15, color='#FFFFFF')  # Center it

    # Re-enable the button after the processing is complete
    buttonA.config(state="normal")

# Load the background image
# Ensure '1.png' is present in the same directory as your script
background_image = u_gui.draw_image(image="1.png", x=0, y=0)  # Set to cover the entire screen

# Create the Start Recording button and store it in the global variable
buttonA = u_gui.add_button(text="Start Recording", x=25, y=100, w=190, h=40, onclick=start_recording)

# Display the title of the application on top of the background
title_text = u_gui.draw_text(text='MACHINE MEDIC', y=50, font_size=20, color='#FFFFFF')  # Adjust the y-position as needed

# Initialize message text for countdown and recording status
text = u_gui.draw_text(text="", x=10, y=150, font_size=15, color='#FFFFFF')  # Placeholder for message updates

# Main loop to keep the GUI running
while True:
    # Prevent the program from exiting or getting stuck
    time.sleep(0.1)
目前,现有模型利用了内置在行空板上的麦克风来进行小规模的声音分析。该模型旨在监控持续运作的传输带。为了将这个项目扩展至更大的流水传送带,我们计划沿着传送带的周围放置多个麦克风。这些麦克风将连接到行空板上,用于实时监控和分析系统不同部分的声音:
1.点击打开录制

2.等待倒计时,播放文件录音,然后将行空板靠近电脑,以监听设备声音。

3.模型会在15秒的录音结束后开始进行预测。下面视频中模型已经基于录音做出了预测,所监听的机械设备目前处于不良状态!
观看项目视频演示,请点击阅读原文
总结
对于这个项目,未来的目标是将此解决方案整合到生产线的各个部分的全面运营机器中。通过应用边缘计算,我们可以直接在机器现场处理声音数据,减少延迟并提高实时故障检测能力。这不仅将有助于在更大规模上预防机器停机,而且还可以使系统在不同行业中具有可扩展性。


 674
674

 被折叠的 条评论
为什么被折叠?
被折叠的 条评论
为什么被折叠?
 到【灌水乐园】发言


