


学习这篇文章之前请完成目前发布的所有视觉学习的所有内容,否则你可能会产生“跟不上的疑惑”。
当然了,你学完了也不一定能跟上,哈哈哈哈!
文章目录
前言
从这篇开始我们正式进入基于深度学习的目标检测的领域。现在目标检测的模型非常之多,但是我还是喜欢让大家从yolov5学习,因为简单,并且容易去给大家讲解。从这章开始,将大家一起学习如何根据github上面的说明进行学习,以此抛转引玉,之后大家可以学着学习其他模型。
请注意,我并不带大家一点一点吃透yolov5网络模型,这是你自己下去该学习的。
一、环境配置:从零搭建 YOLOv5 开发环境
1.前期准备
根据之前的学习相信你现在应该已经有了以下基础环境
- 名叫yolov5(或者其他)并安装了pytorch的conda环境
- 与环境配套的CUDA、CUDNN(conda安装的pytorch自带)
- nvidia显卡
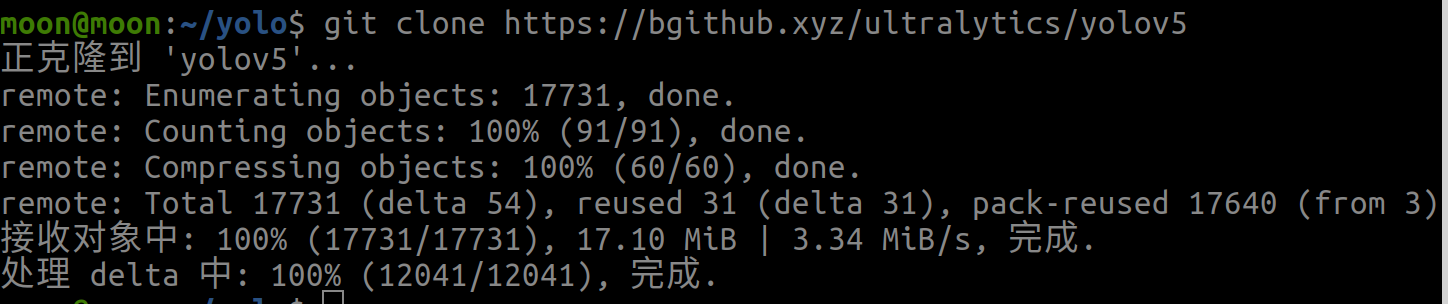
2.拉取yolov5源码
#我在主目录下创建了一个yolo文件夹用于存放我们学习的所有yolo模型
cd ~/yolo
#如果觉得慢,别忘记加速技巧
git cloen https://github.com/ultralytics/yolov5
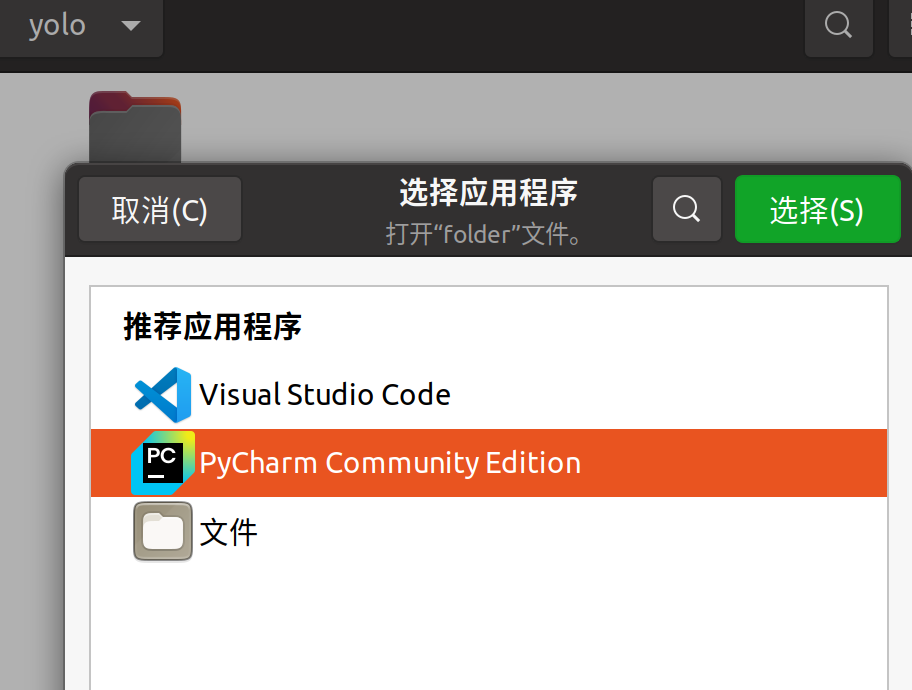
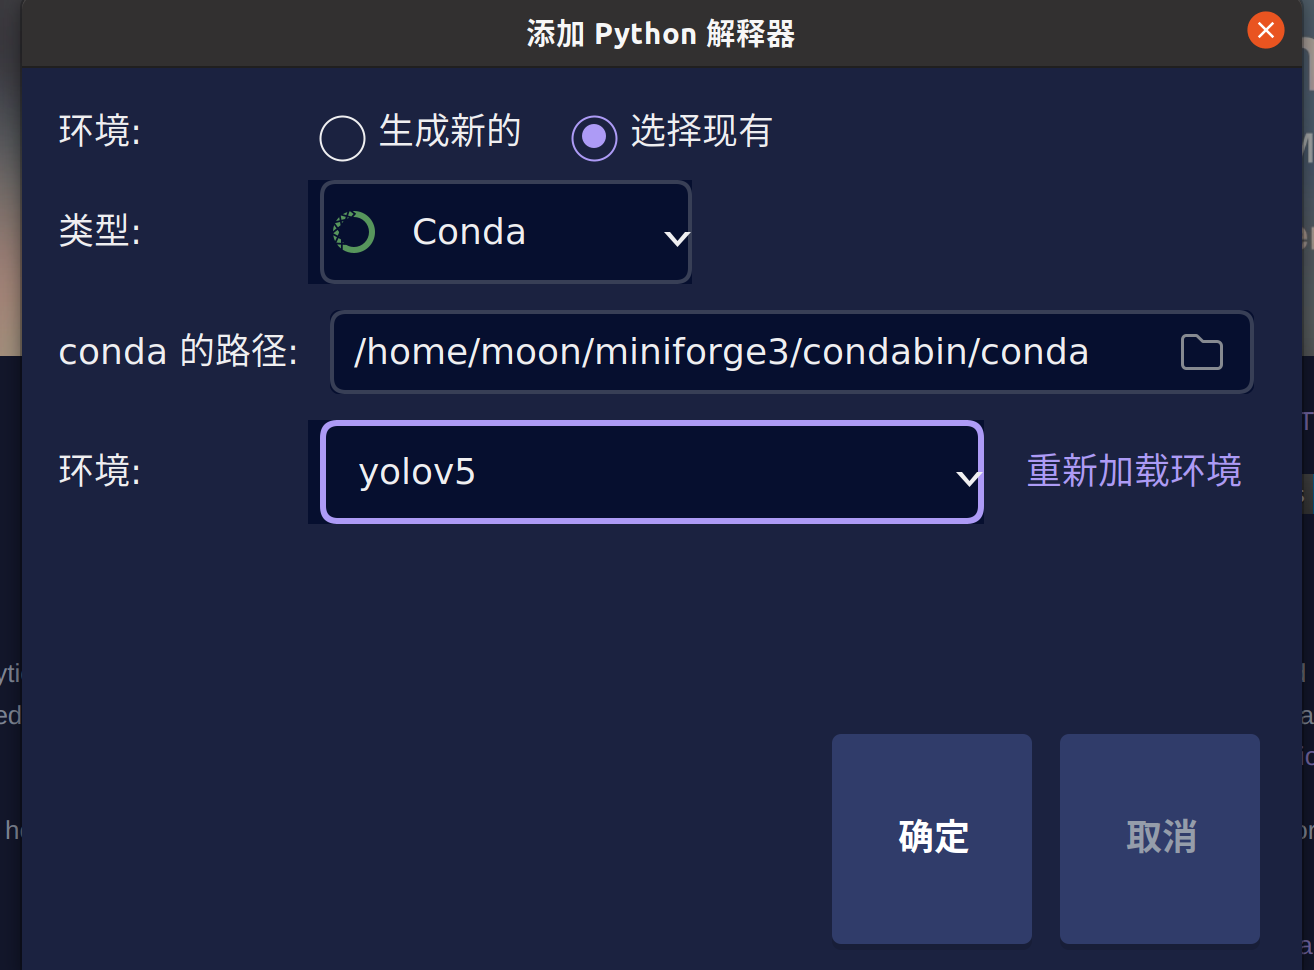
3. pycharm关联conda环境并打开yolov5文件夹
忘记步骤的同学到墙边罚站去
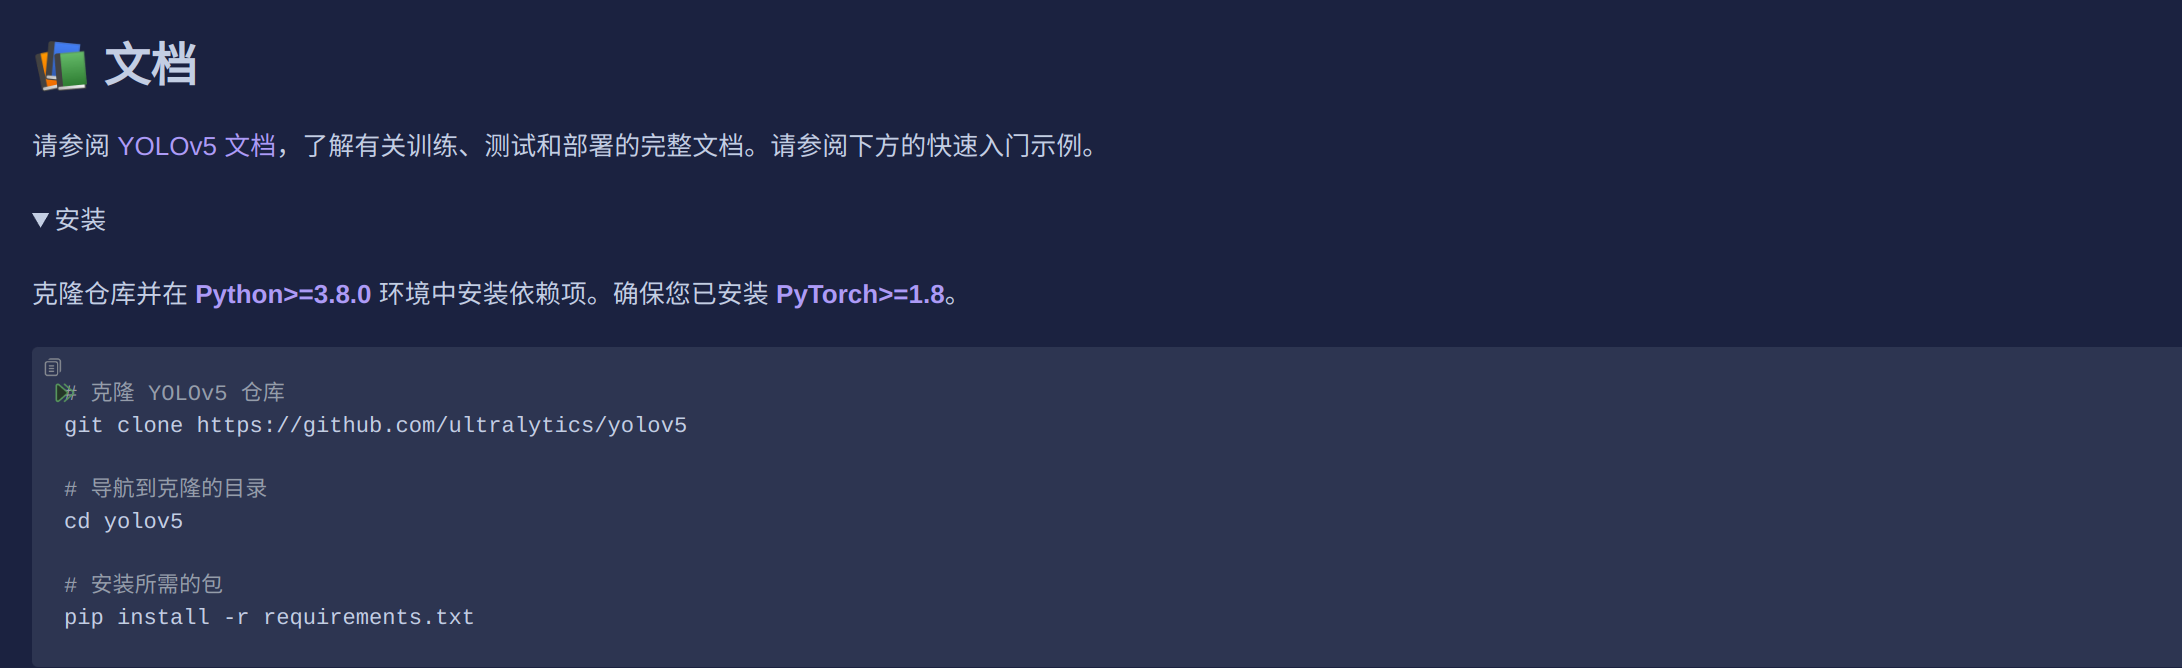
4.安装yolov5依赖
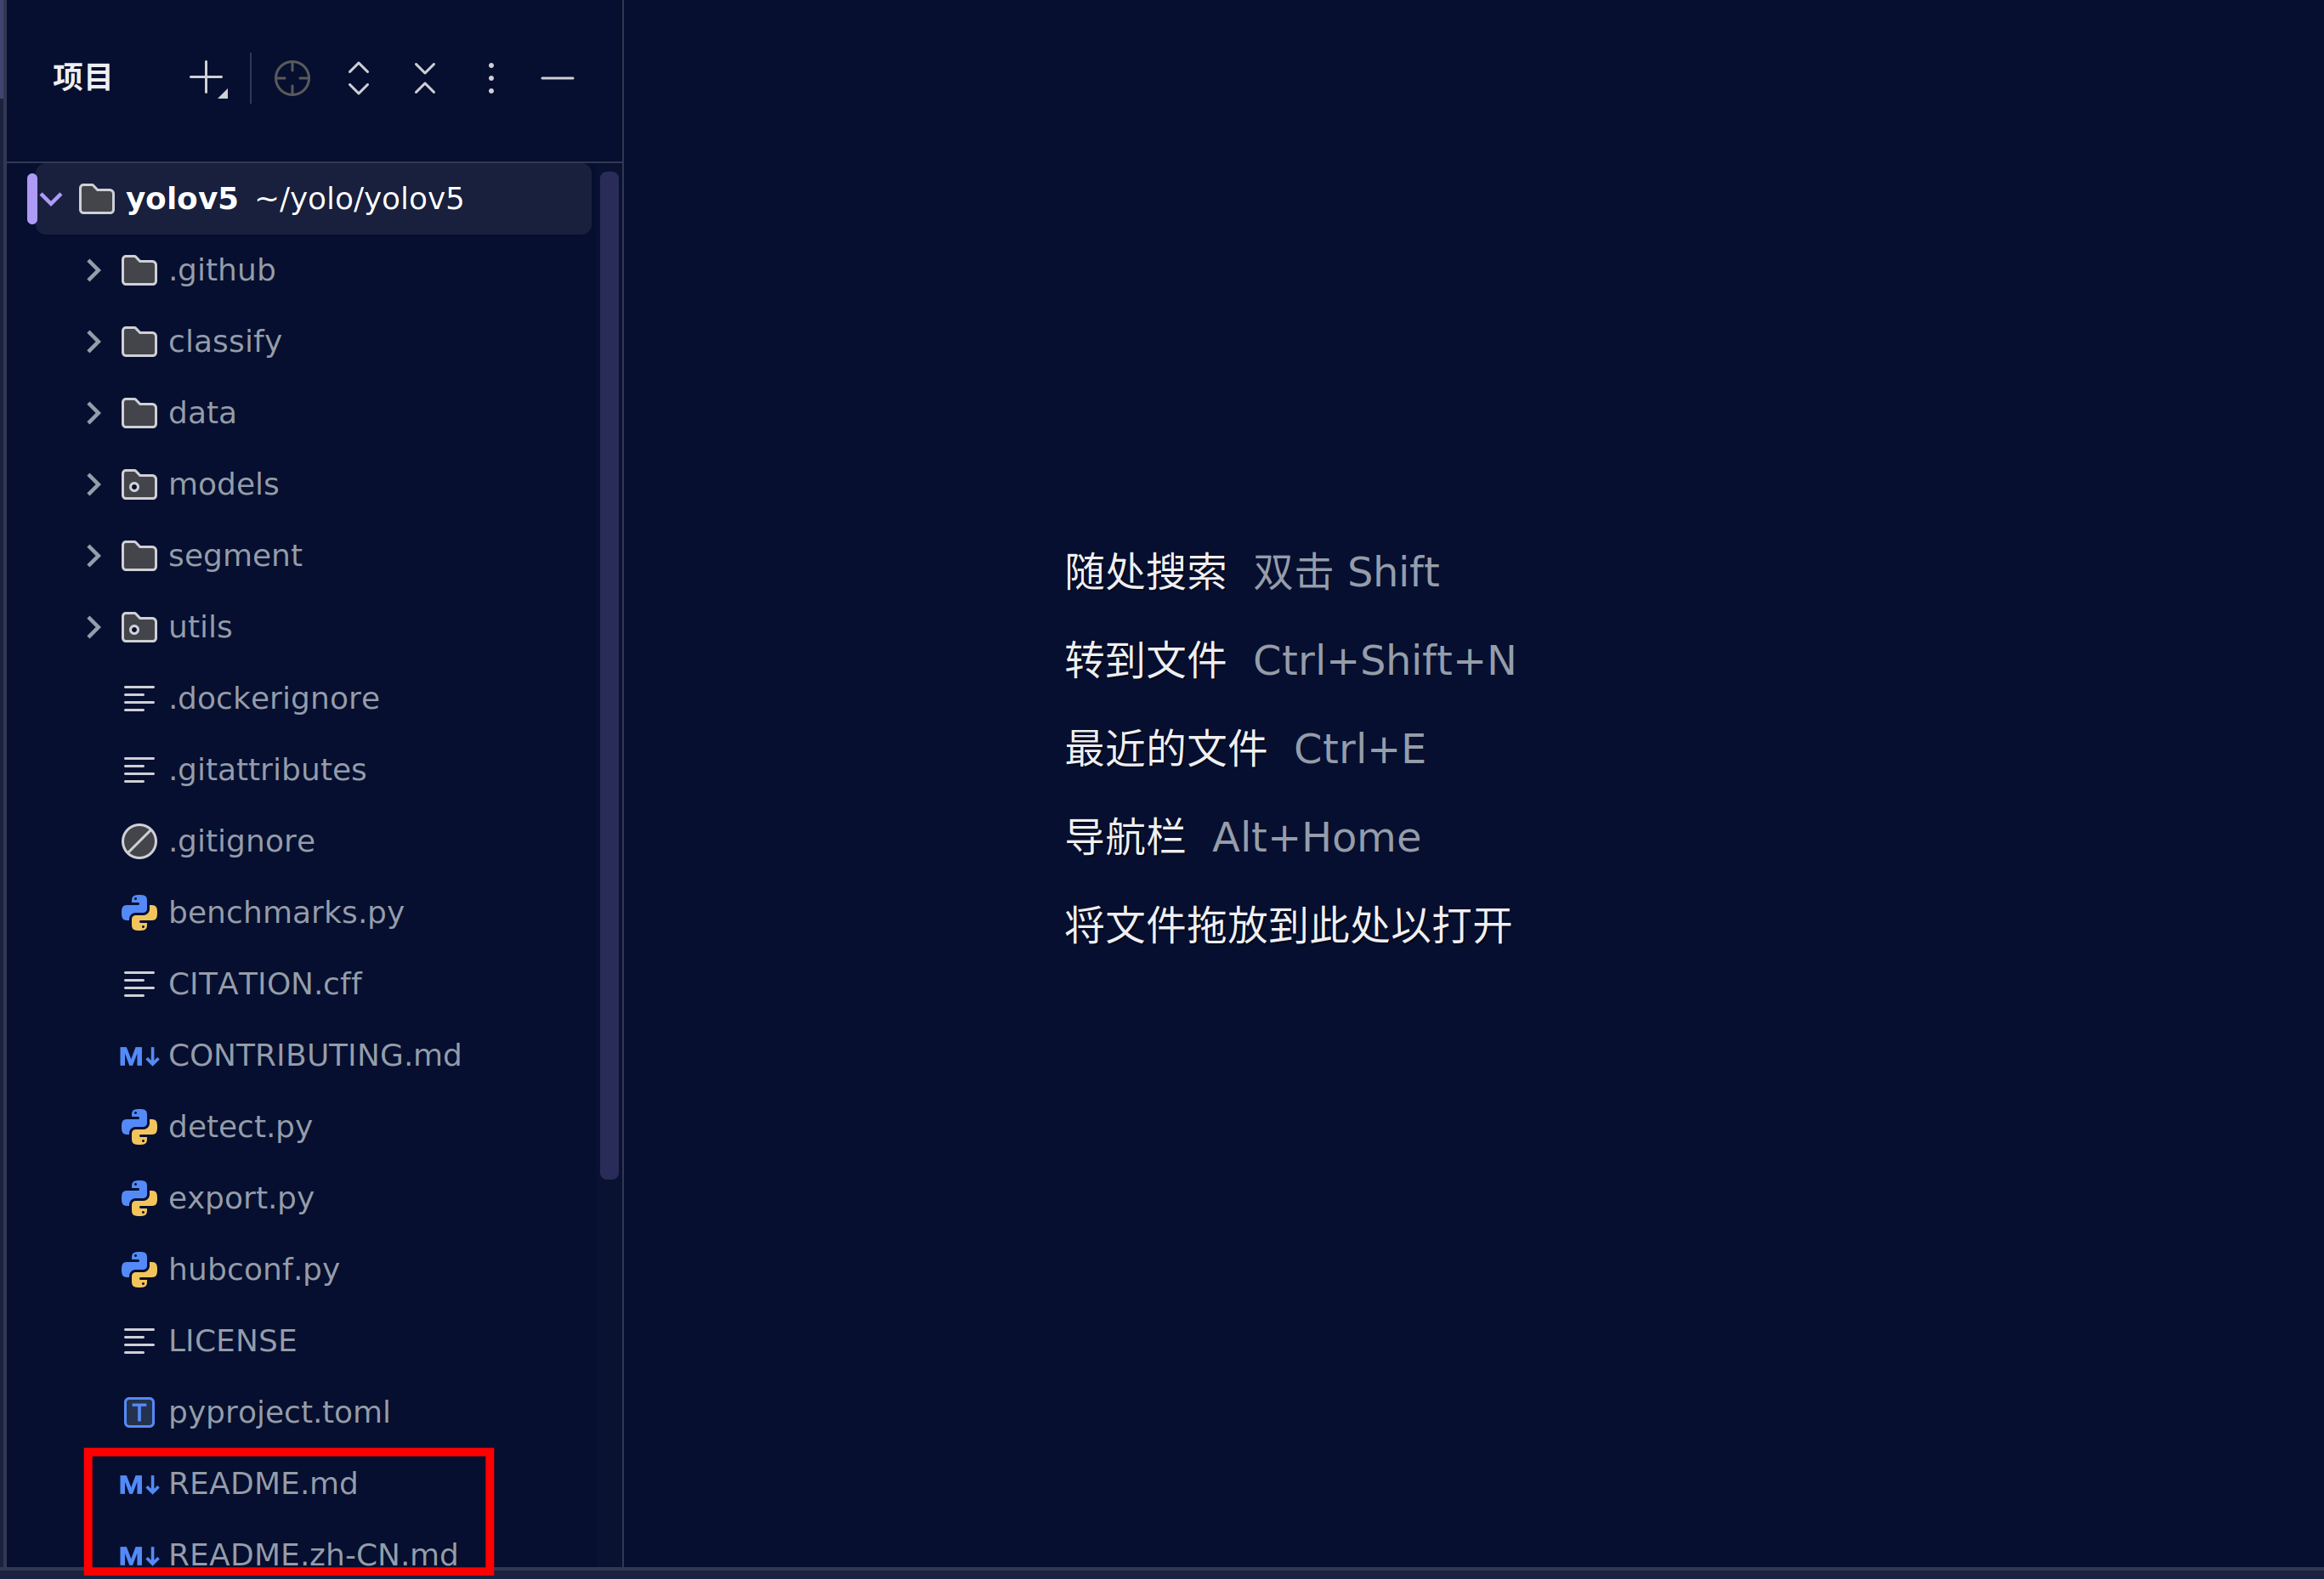
我们可以在pycharm中看到yolov5的文件夹结构,这时我们找到.md文件,一般来说github上的代码都会写这样一个md说明文件,帮助我们更好的使用他们的代码。yolov5为我们提供了中文的版本,所以我们选择zh-CN的版本
这是md文件的结构,在这张图片的右上角有着图片渲染功能和文本对应图片功能
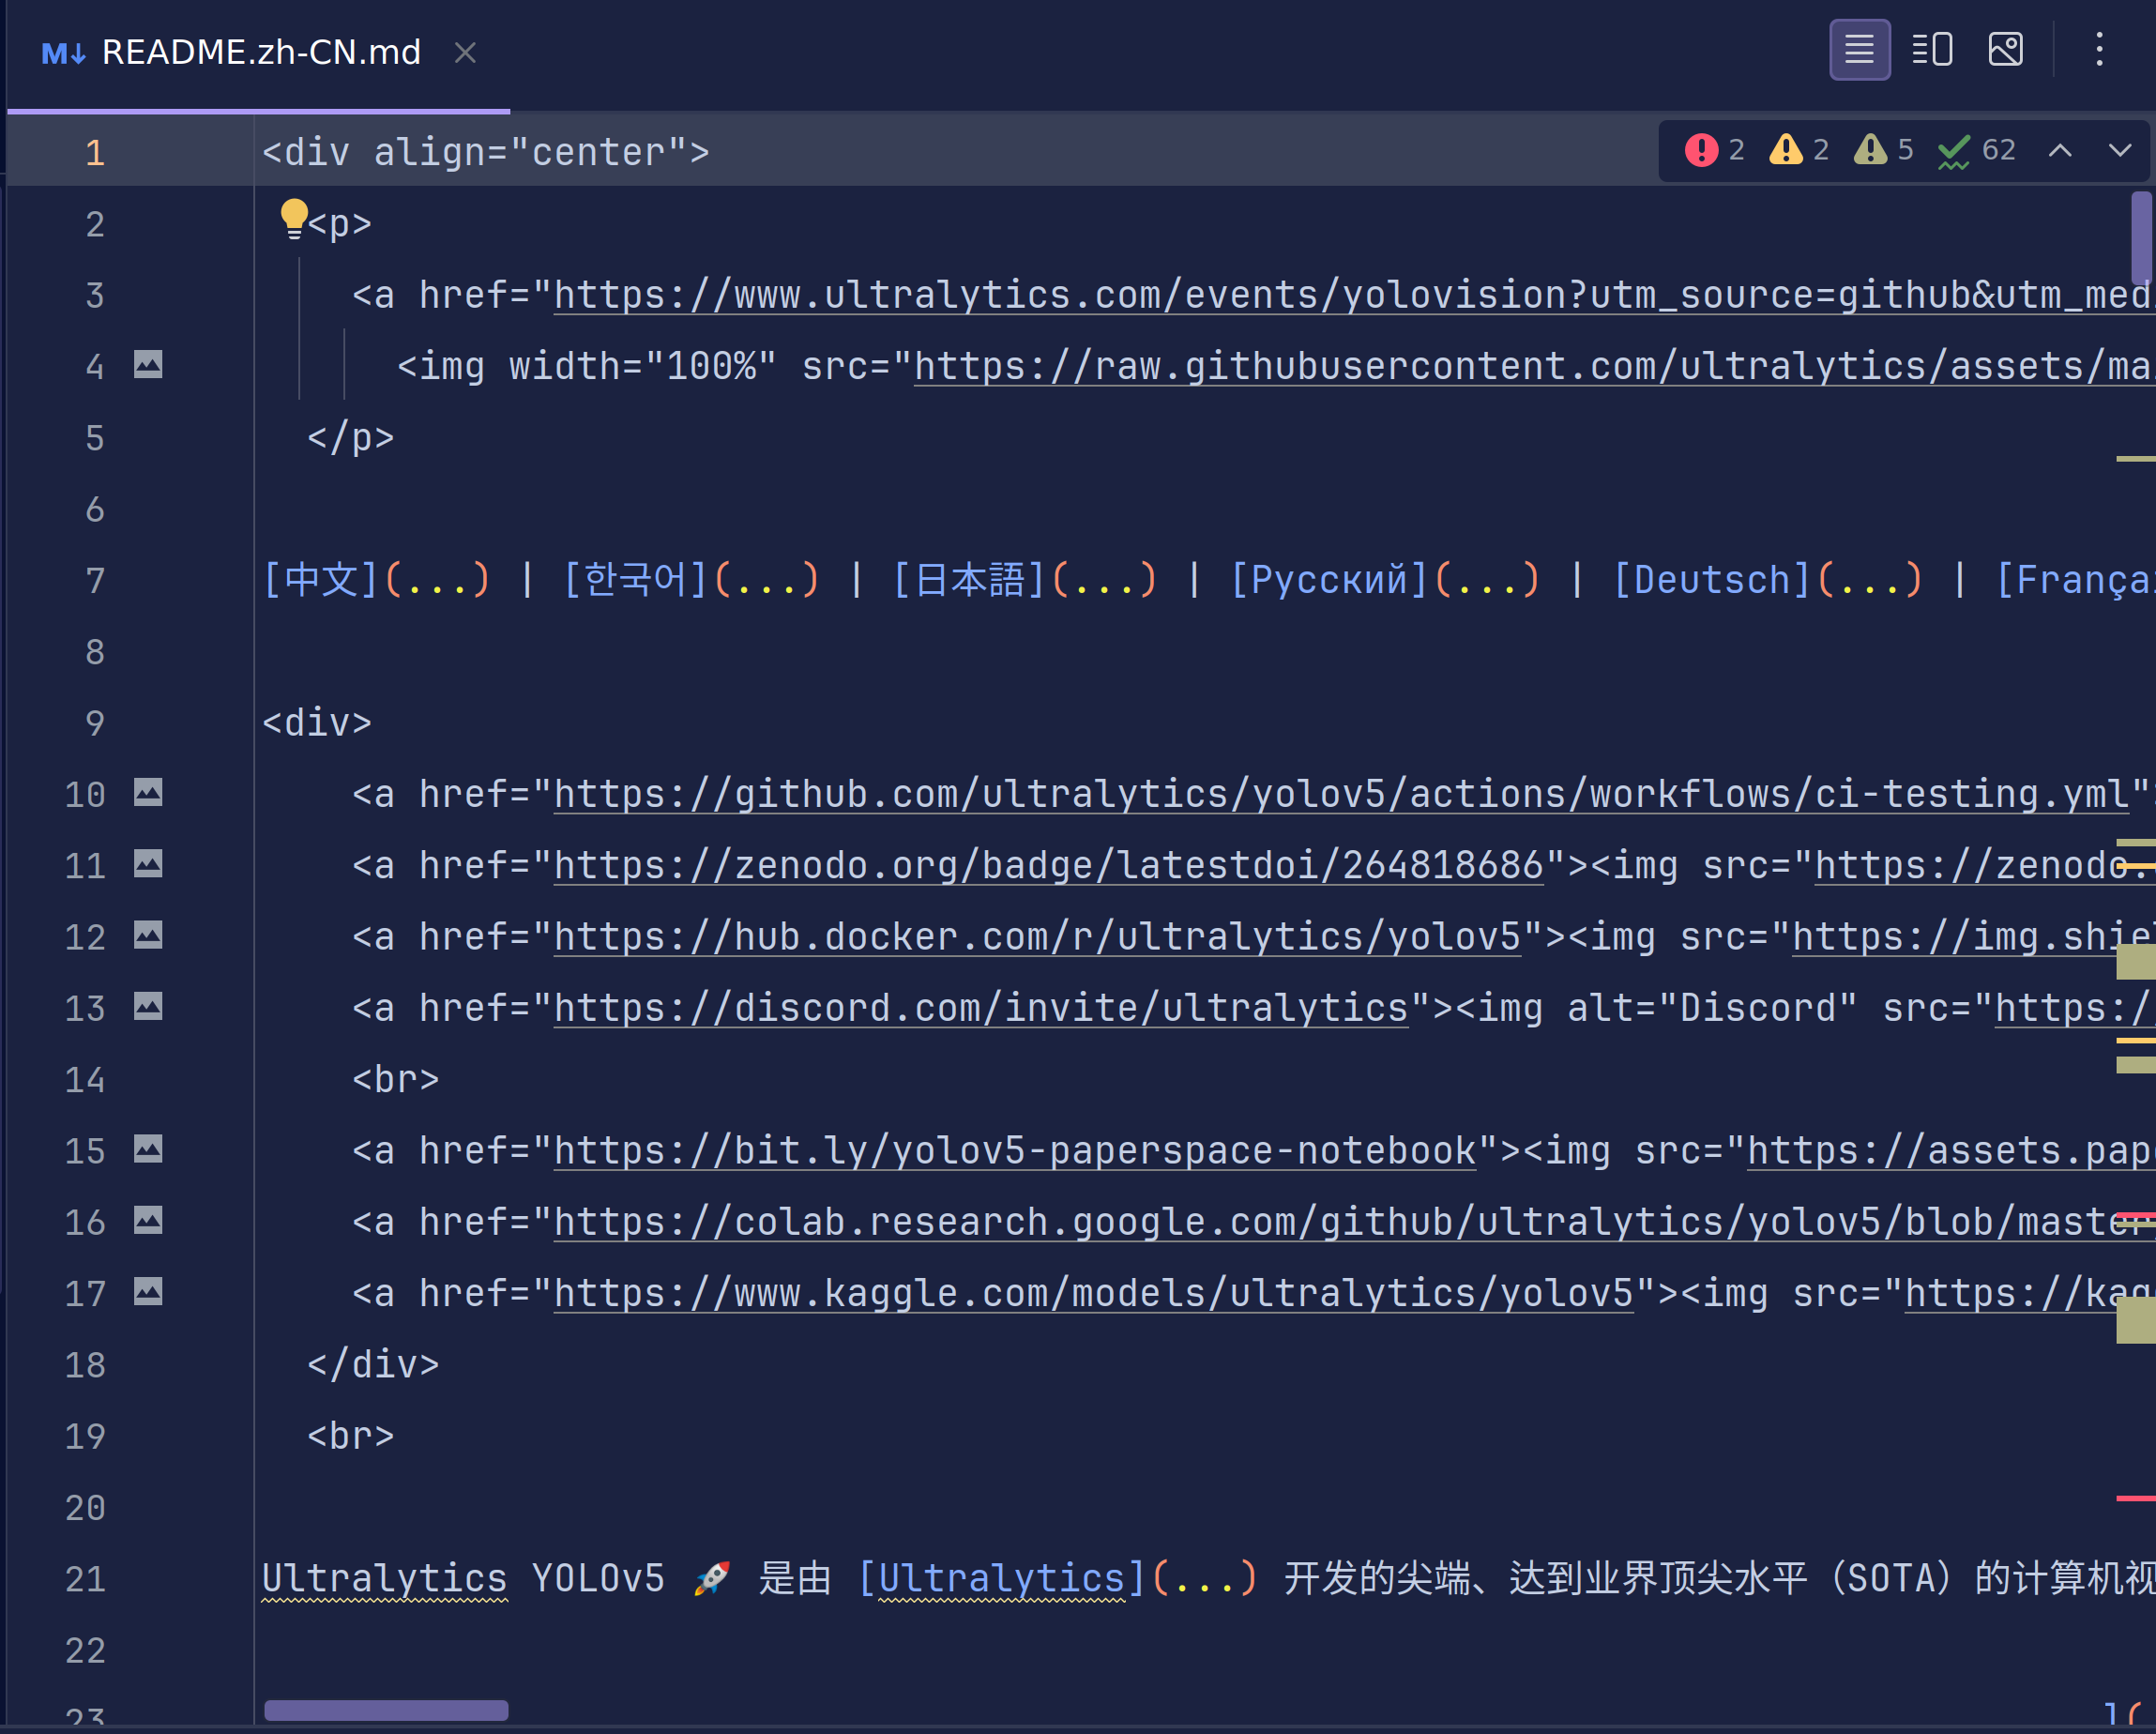
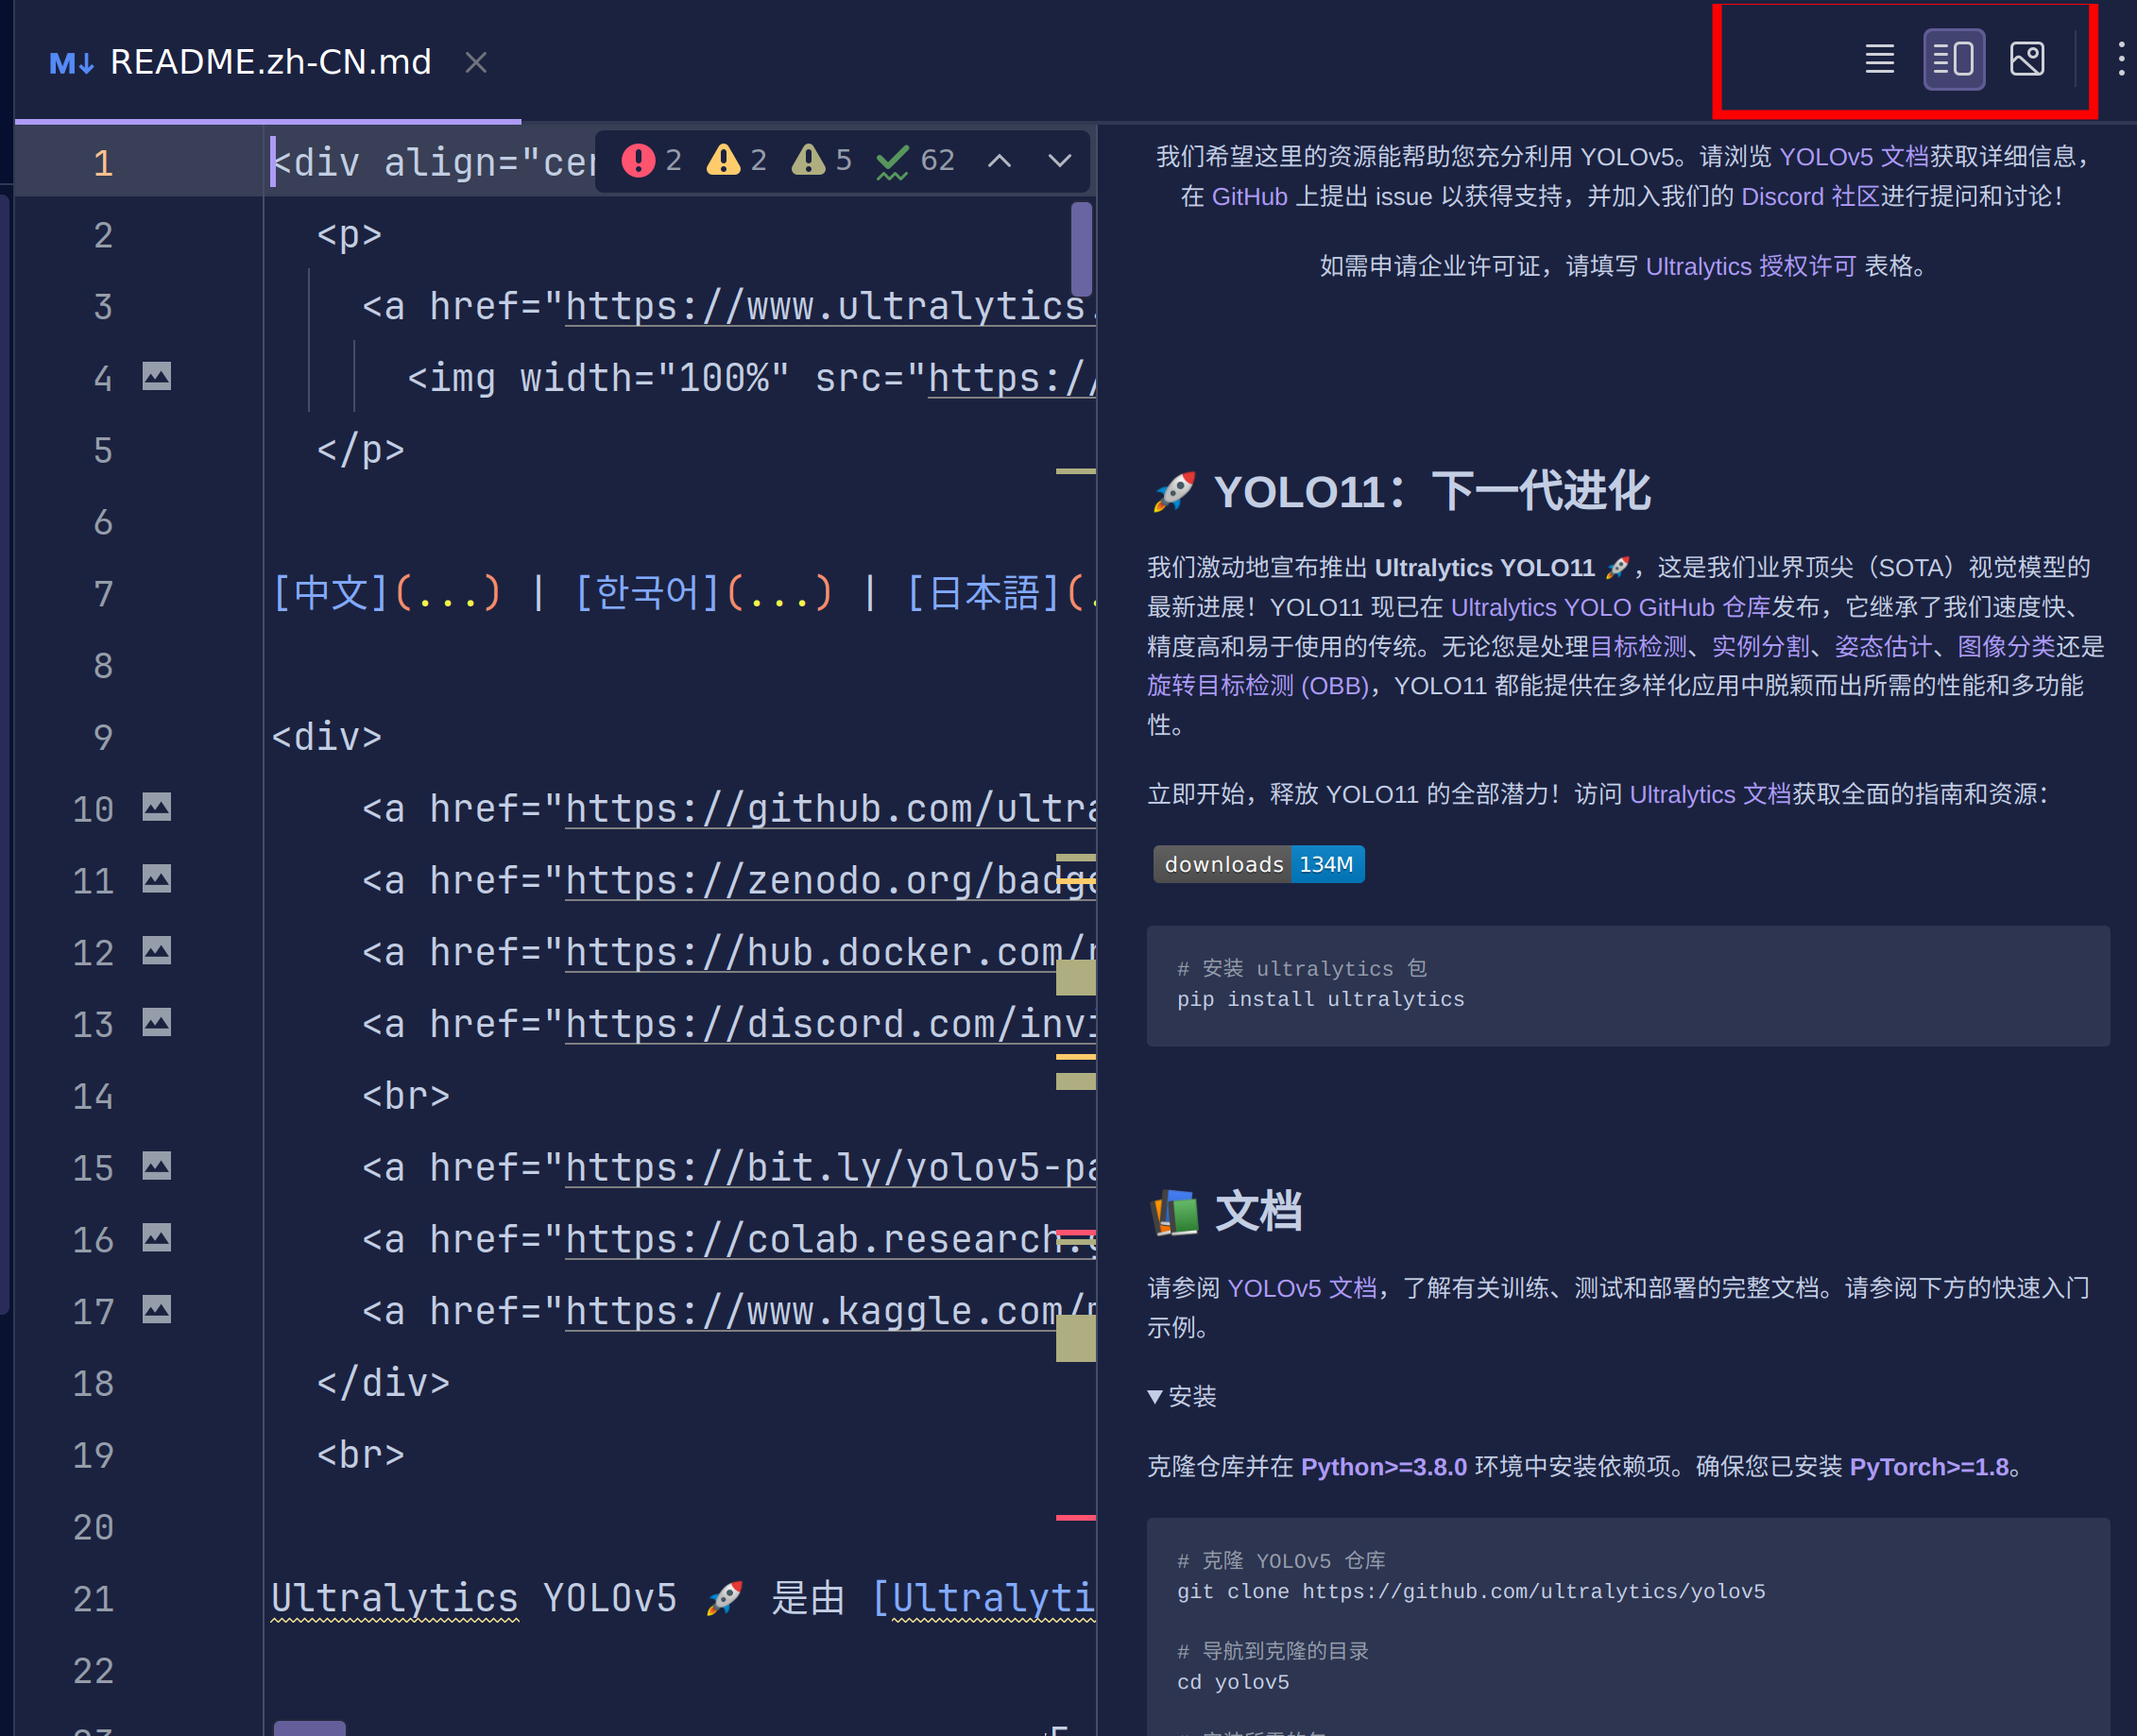
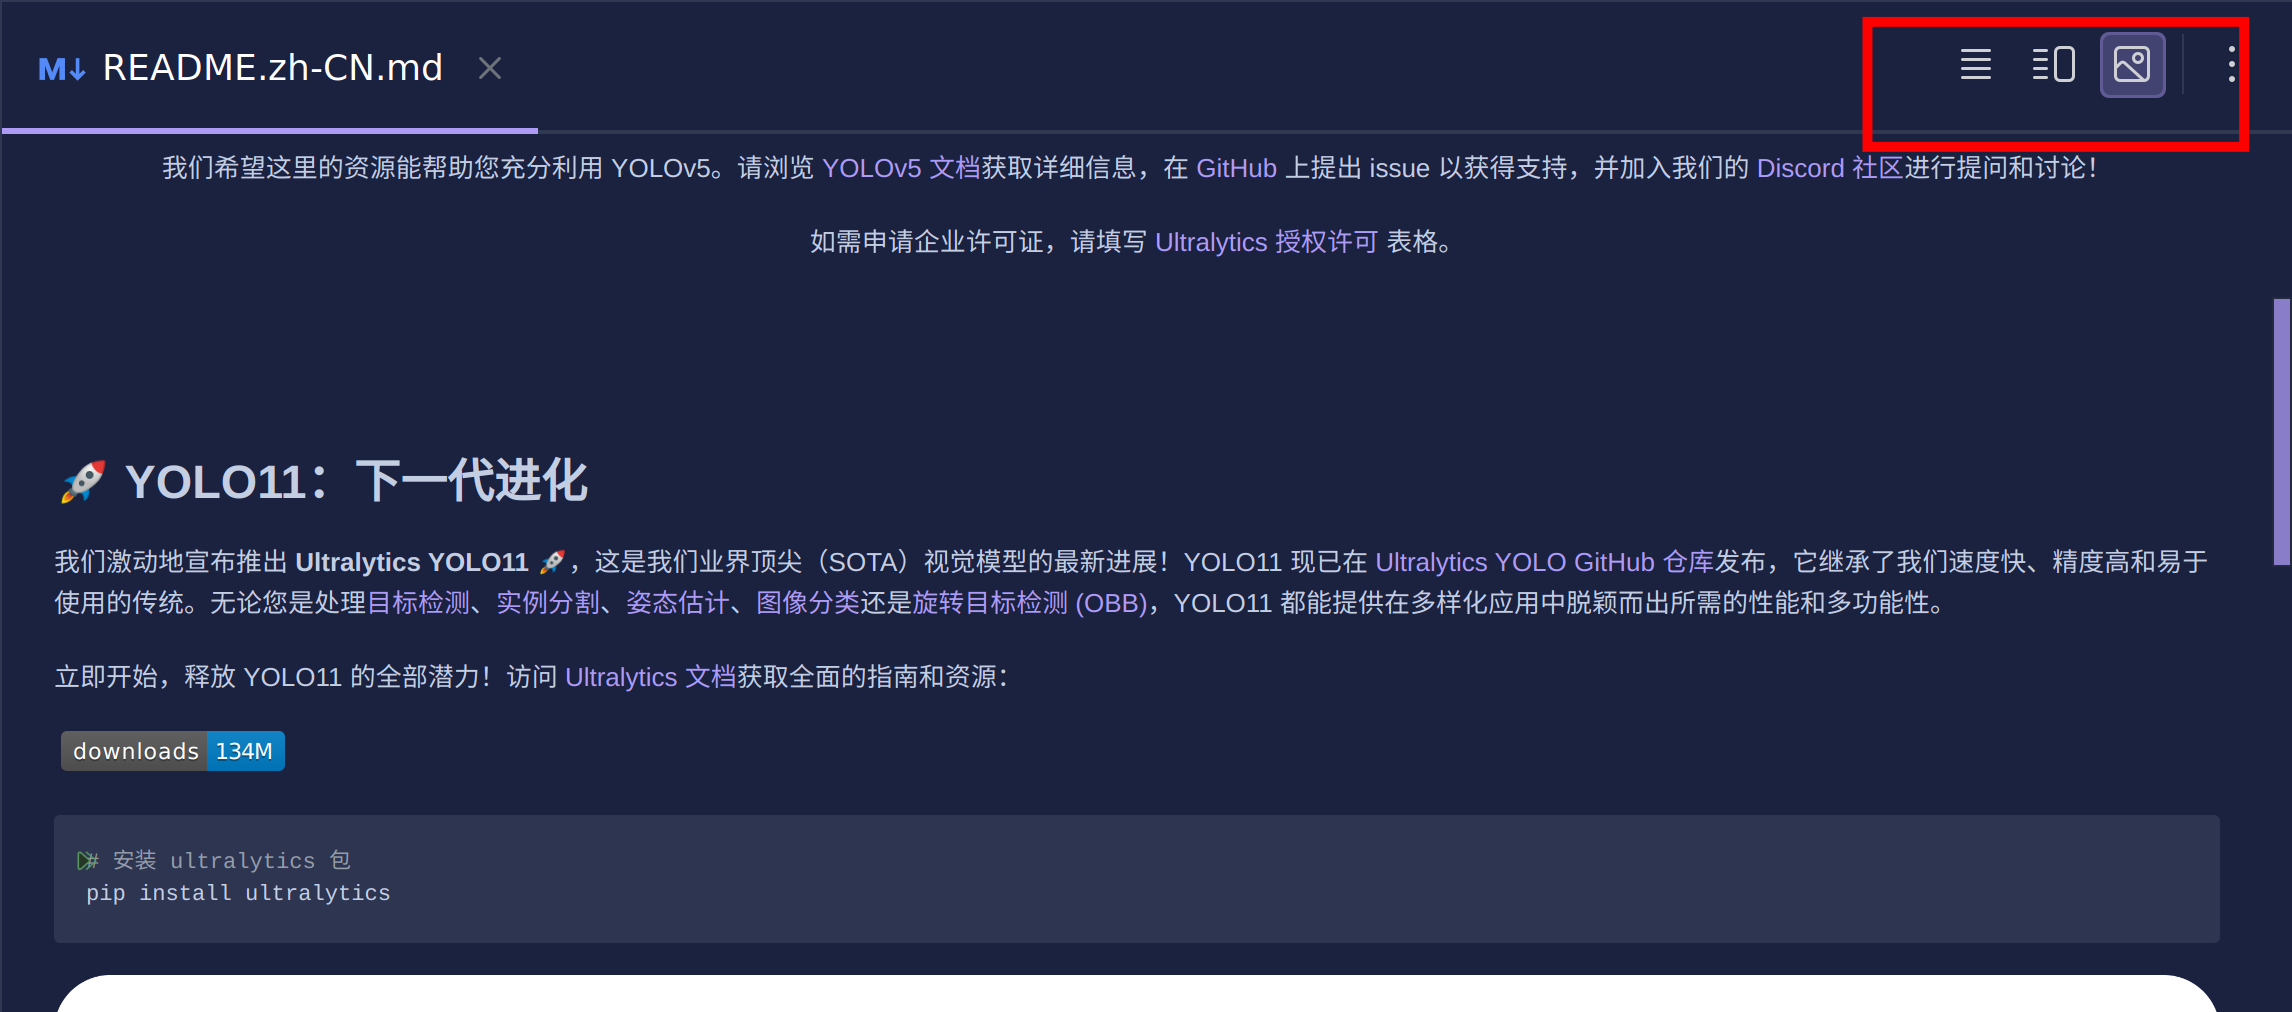
我们使用第三个图片渲染功能继续操作。
细心的你应该会发现,这与我们打开的github主页的描述是相同的。

说明github会为访问者默认加载.md文件以提供更好的体验。
下面的教程你可以选择看浏览器中的教程,也可以看pycharm中渲染的教程。
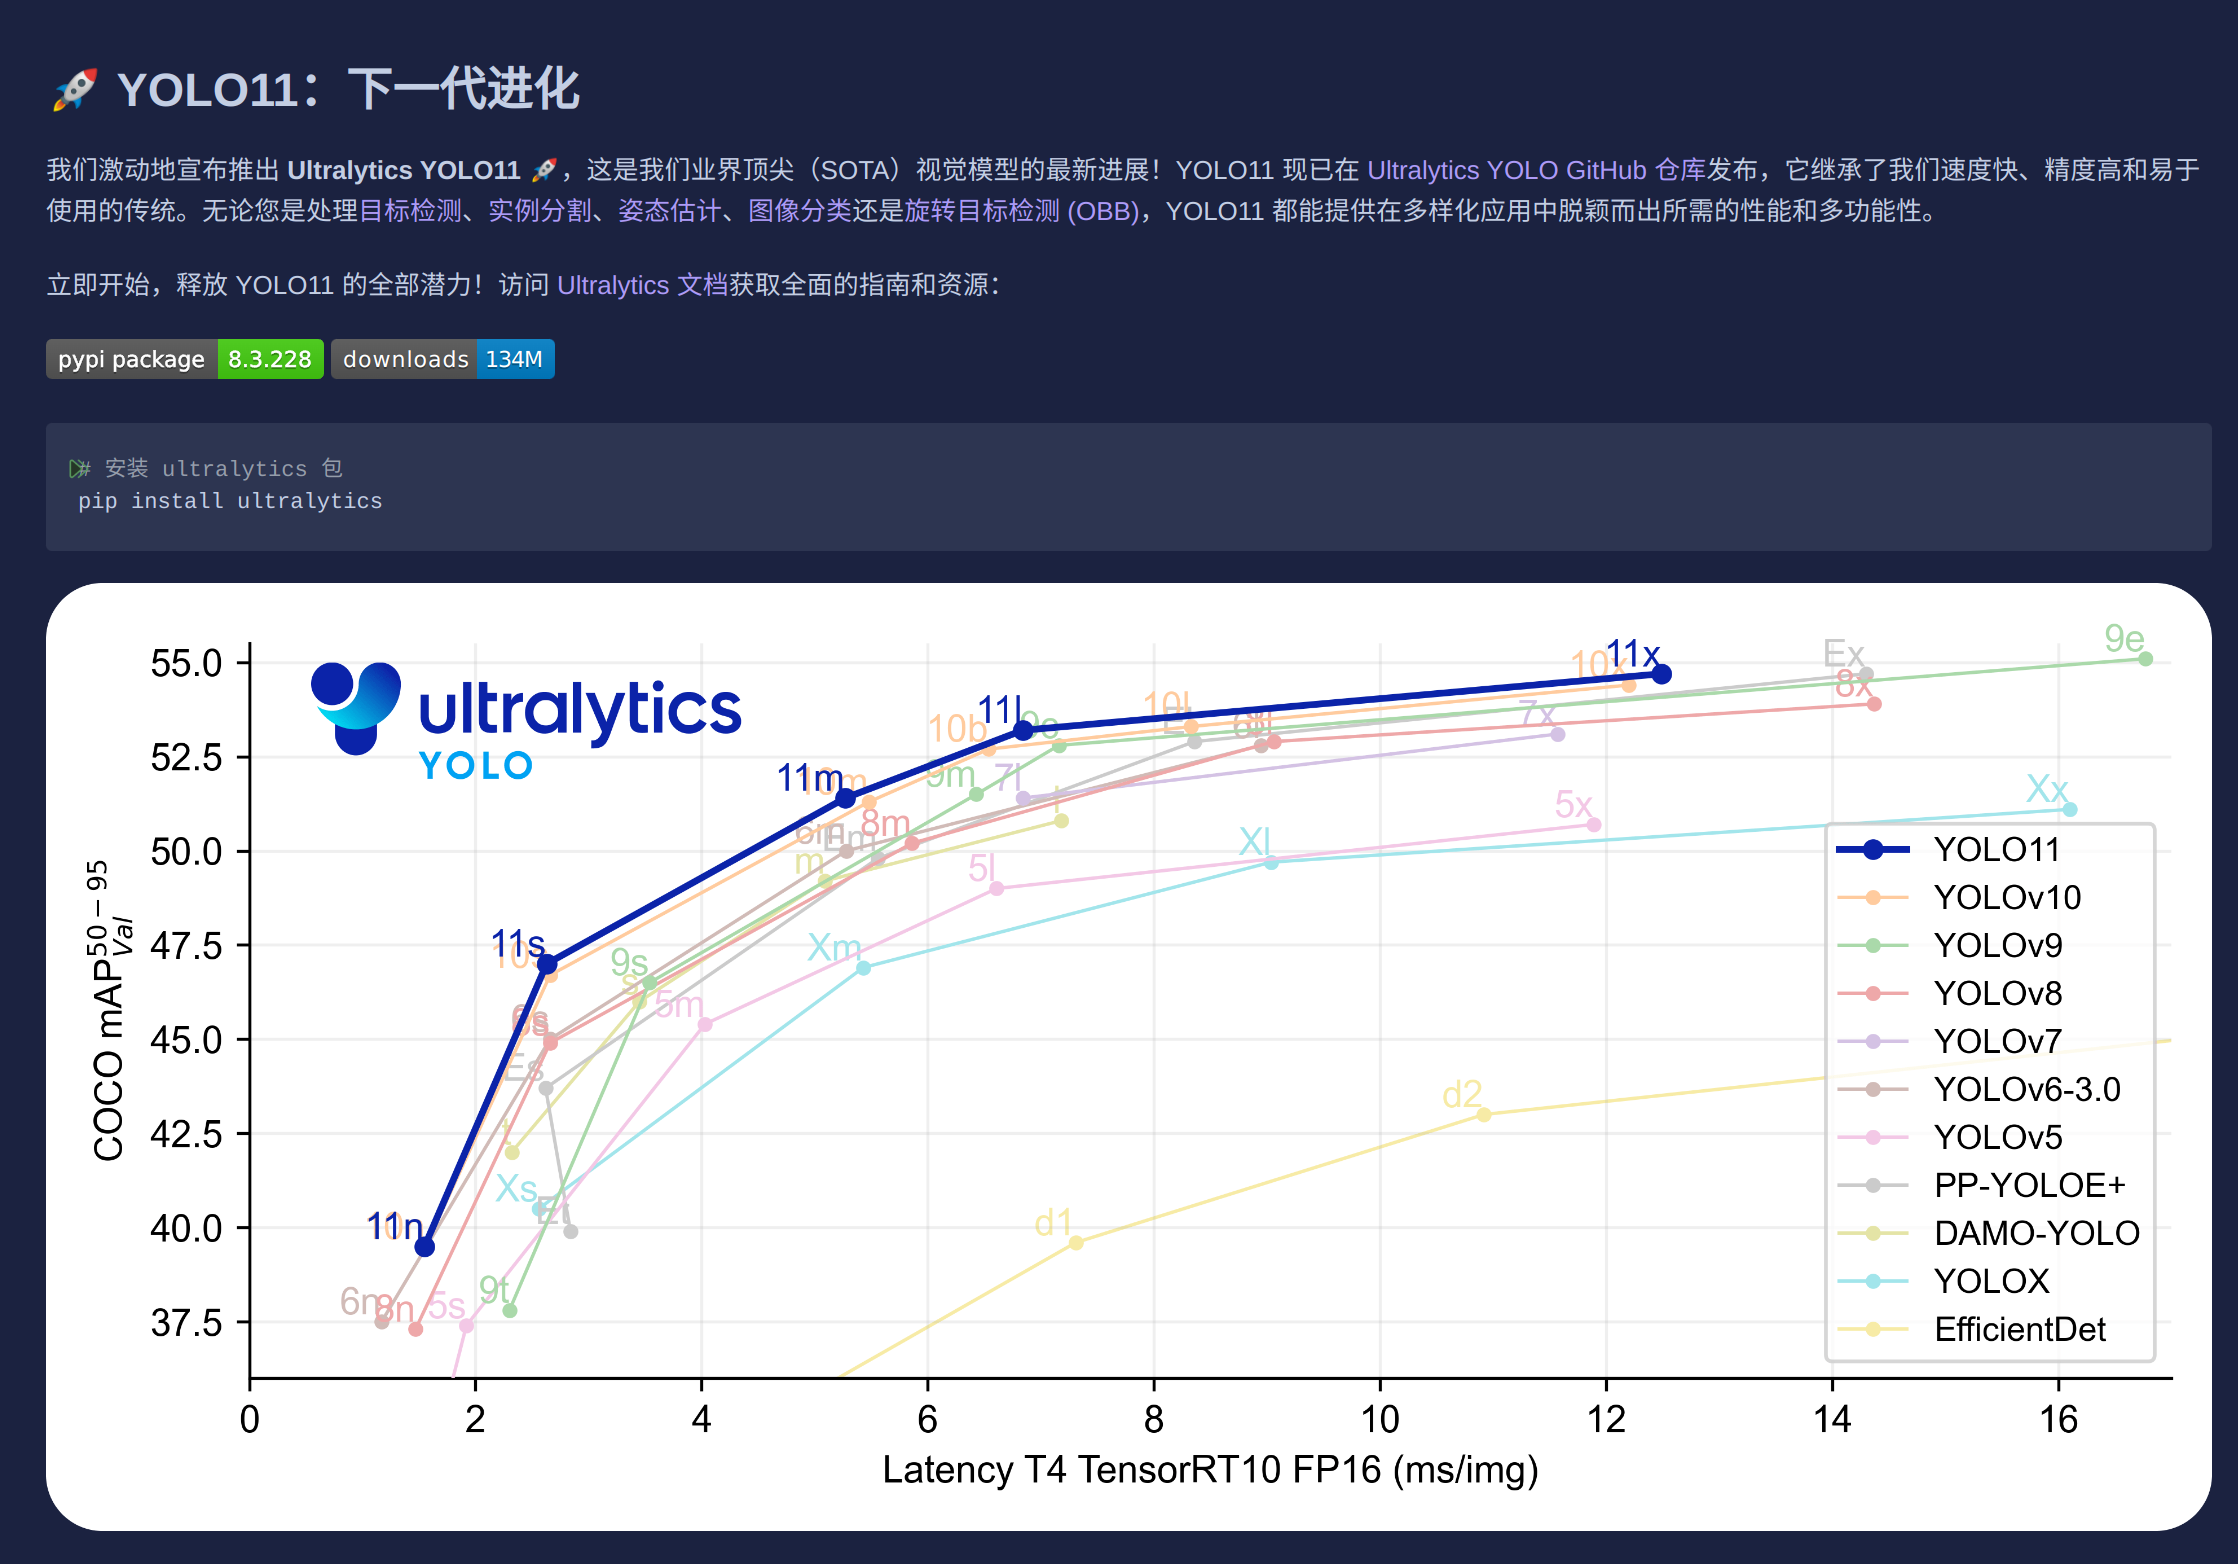
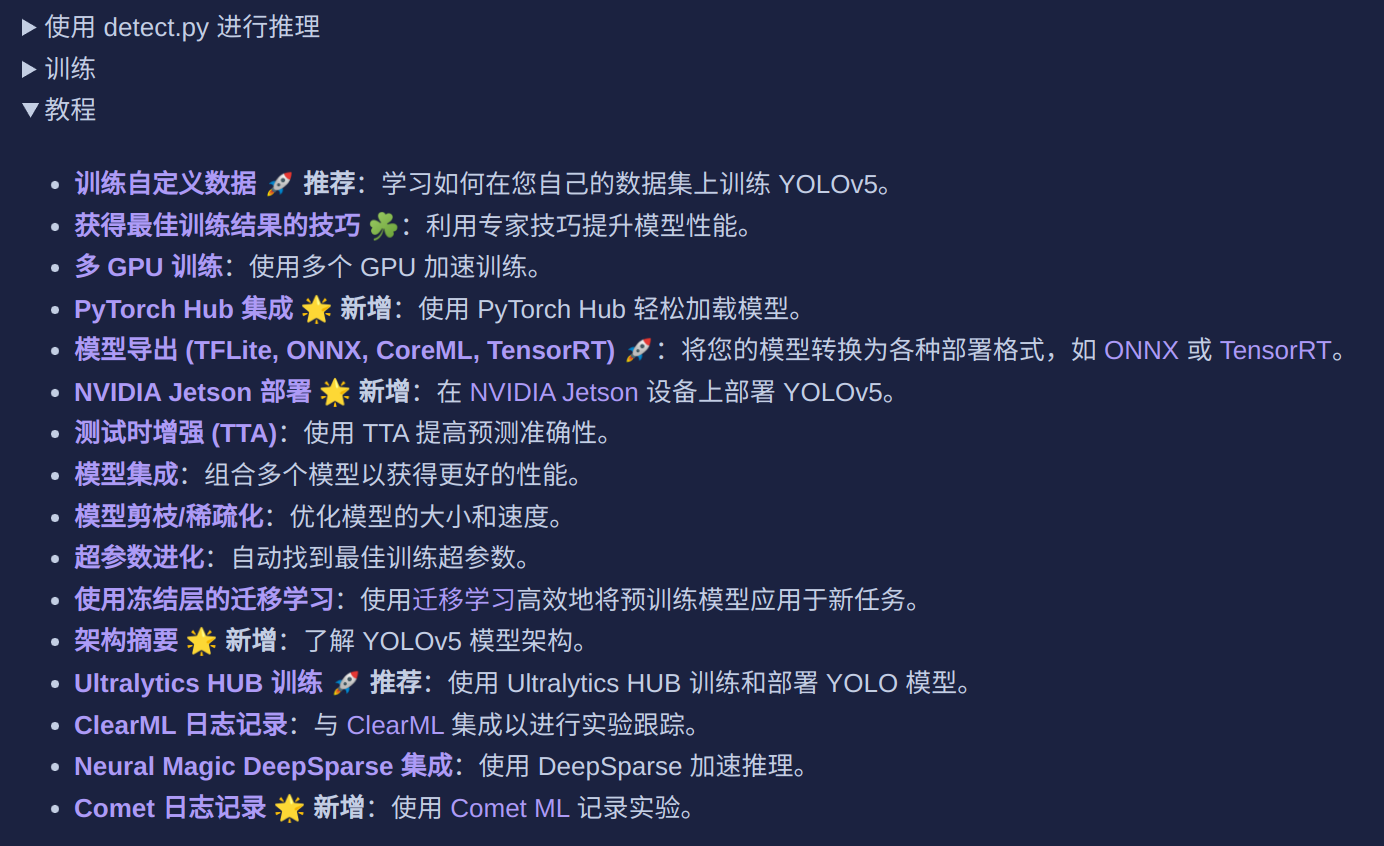
这里为我们提供了最新的yolov11实现,但是这不是我们今天的目的。所以我们继续往下滑。
这里给出了一个非常明确的安装教程。当然你也可以去看yolov5文档,这是yolov5官方给出的教程,非常权威。与我接下来的教程是差不多的。
https://docs.ultralytics.com/yolov5/
如果你选择留下继续,那我们正式开始。打开左下角的终端
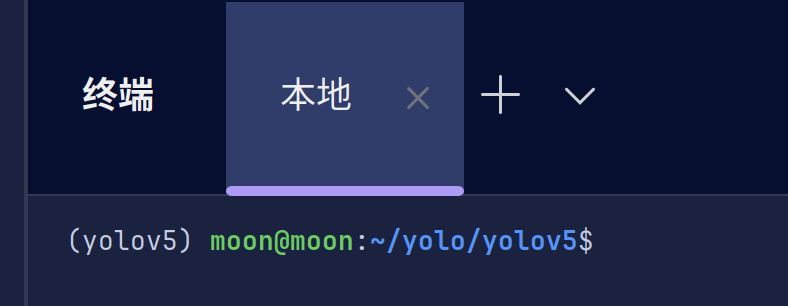
它会自动激活关联的虚拟环境并且进入到当前文件夹下
此时我们来跟着教程进行pip配置
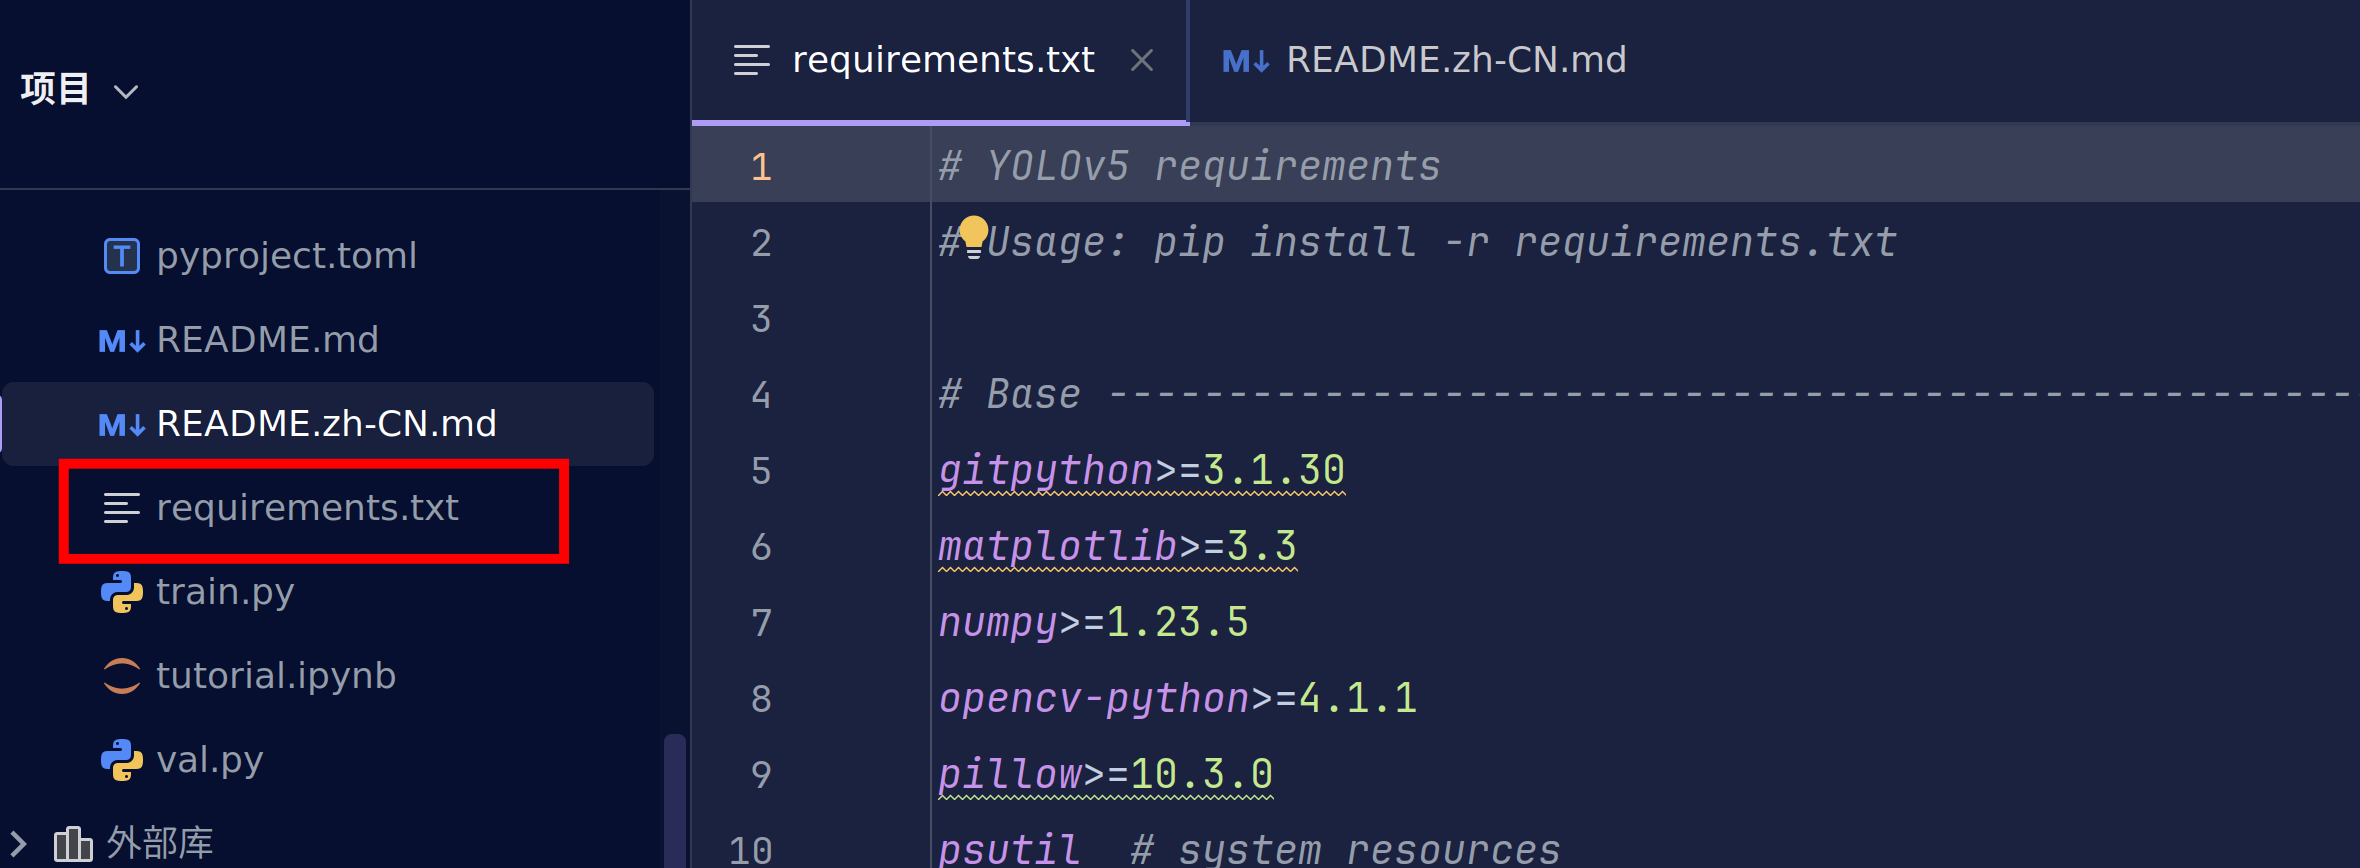
pip install -r requirements.txt

requirements.txt描述的是这个代码里所需要的所有依赖要求。这个命令会更根据requirements.txt中的各种pip包的要求进行安装当前环境所需要的包

此时已经完成了yolov5环境的配置。
文档的最后给出了非常详细的教程,大家也可以自己去学习。
这里我们使用detect.py去验证一下环境的安装。
运行按钮只教一次(左侧文件栏选中右键运行也是一样的)

此时会出现一堆红色的东西,先不要害怕。我们简单分析一下。
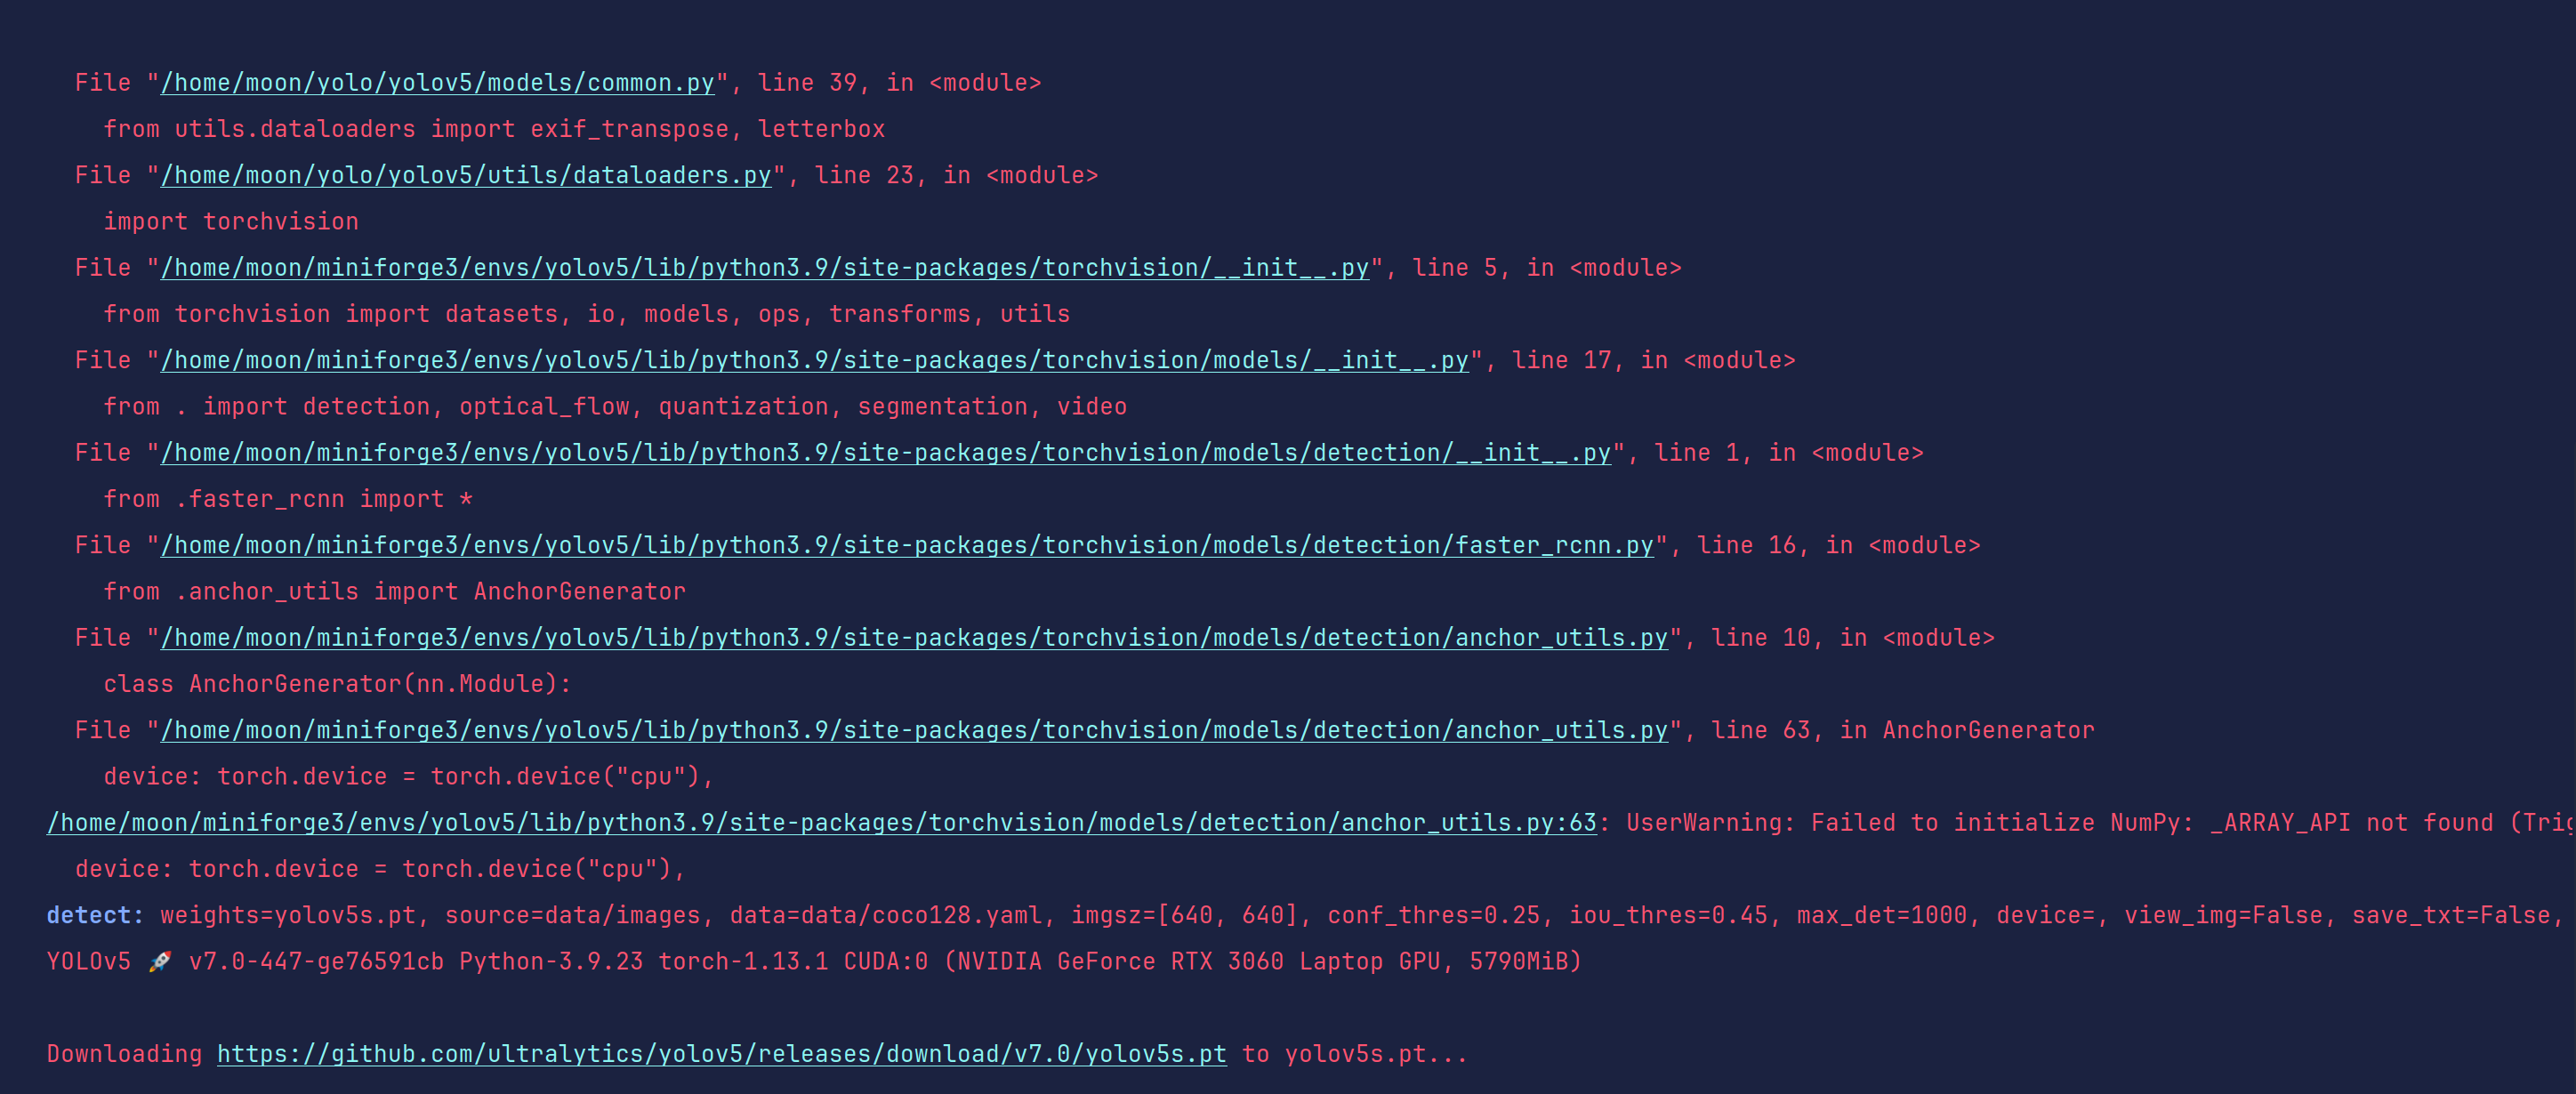
detect: weights=yolov5s.pt, source=data/images, data=data/coco128.yaml, imgsz=[640, 640], conf_thres=0.25,
iou_thres=0.45, max_det=1000, device=, view_img=False, save_txt=False,
save_format=0, save_csv=False, save_conf=False, save_crop=False,
nosave=False, classes=None, agnostic_nms=False, augment=False,
visualize=False, update=False, project=runs/detect, name=exp,
exist_ok=False, line_thickness=3, hide_labels=False, hide_conf=False,
half=False, dnn=False, vid_stride=1 YOLOv5 🚀 v7.0-447-ge76591cb
Python-3.9.23 torch-1.13.1 CUDA:0 (NVIDIA GeForce RTX 3060 Laptop GPU,
5790MiB)
这条信息侧面告诉了我们当前的所有环境,大家可以通过这个来判断是否成功安装pytorch和驱动。
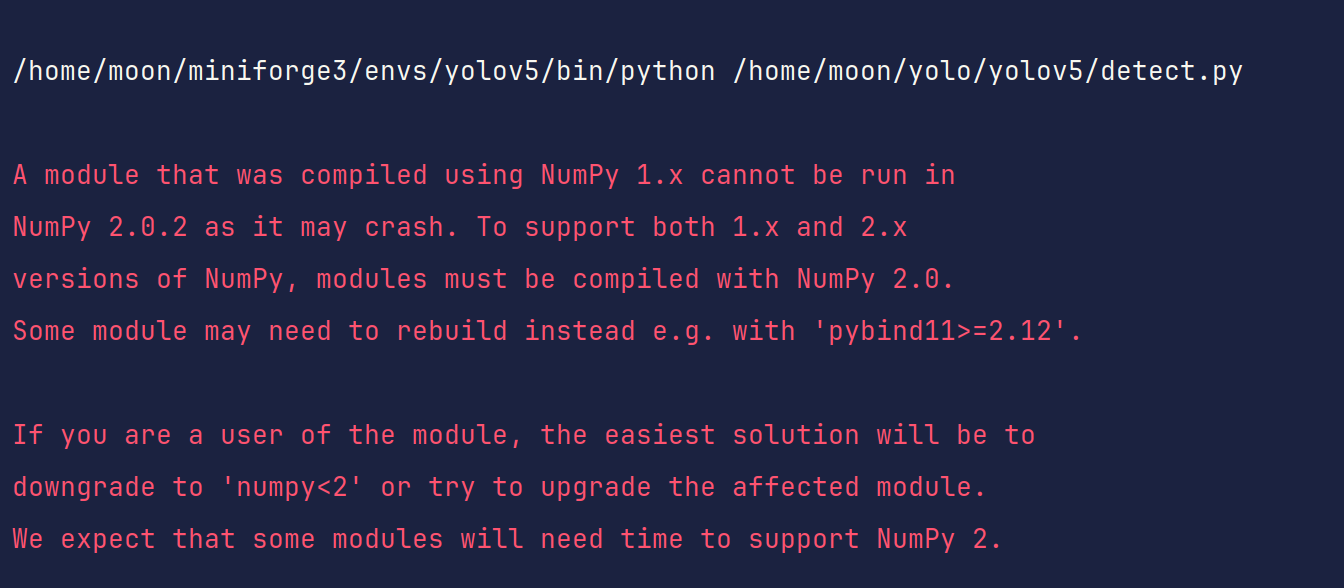
这里告诉我们最好使用numpy1.x,我们当前的numpy2.0.2,因此我们需要改一下版本。
这里我选择使用numpy1.23.5
pip install numpy==1.23.5

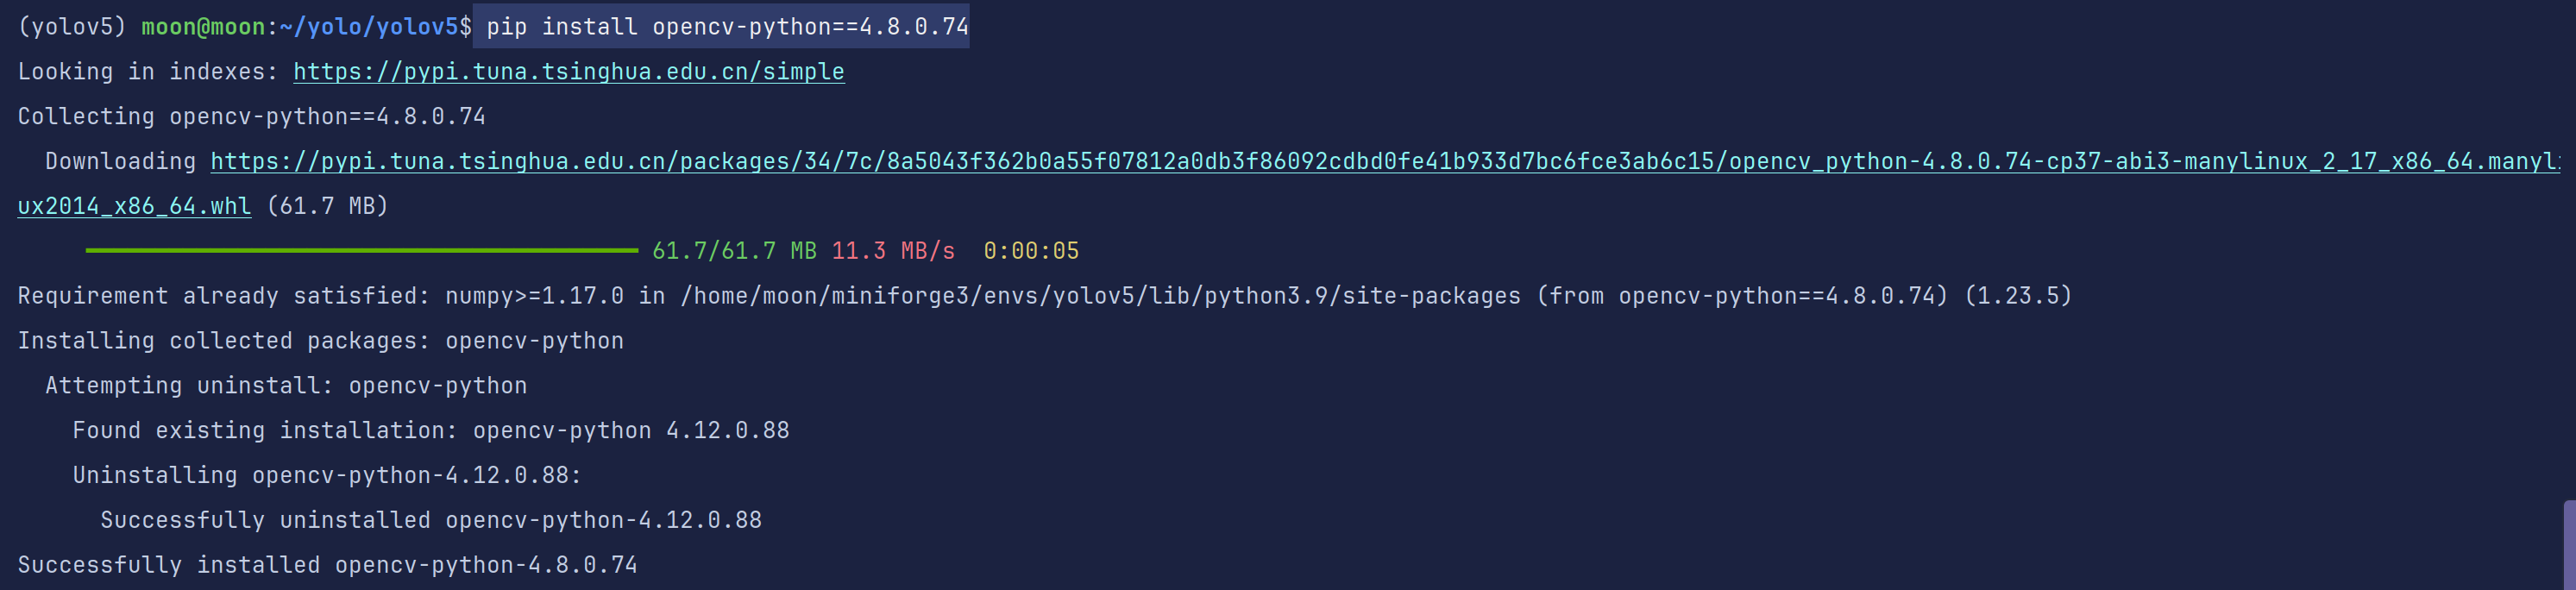
这里会给一个opencv包依赖的错误,这是因为在pip install -r requirements.tx时,通常在满足要求的条件下安装当前包的最新版,我们不需要4.12的opencv,这里降成4.8.0的即可
pip install opencv-python==4.8.0

这里我使用的清华源报错找不到4.8.0,但是给出了存在的所有版本。这个告诉我们需要安装对应标签名一模一样的版本。
pip install opencv-python==4.8.0.74
重新运行detect.py

没有了之前的错误,只留下我们的训练配置信息
此时显示我们需要yolov5s.pt并且在访问github去下载。
那我们肯定选择手动加速一下~顺便把yolov5n.pt也下载一下
wget https://github.com/ultralytics/yolov5/releases/download/v7.0/yolov5s.pt
wget https://github.com/ultralytics/yolov5/releases/download/v7.0/yolov5n.pt
直接下载到我们的yolov5项目文件夹即可
重新运行detect.py
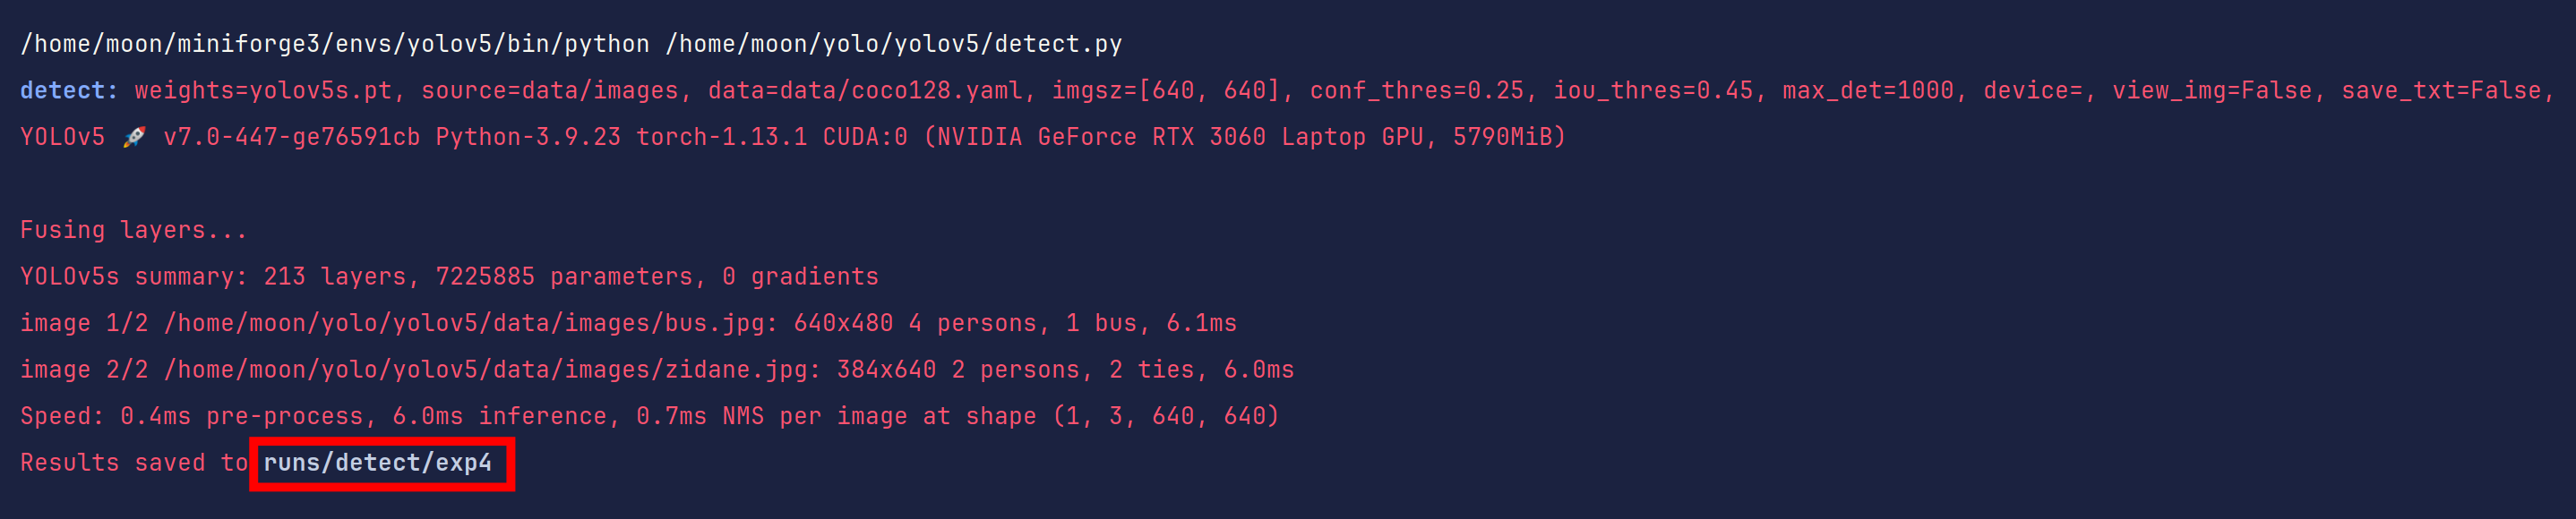
好了,现在你应该发现了,这其实是一个模型测试文件,用于测试yolov5s.pt模型同时也是测试yolov5环境的工具,我们后期也会通过这个测试我们自己训练的代码。
我们找到runs/detect/exp4文件夹看看里面的内容(路径是基于当前目录的)

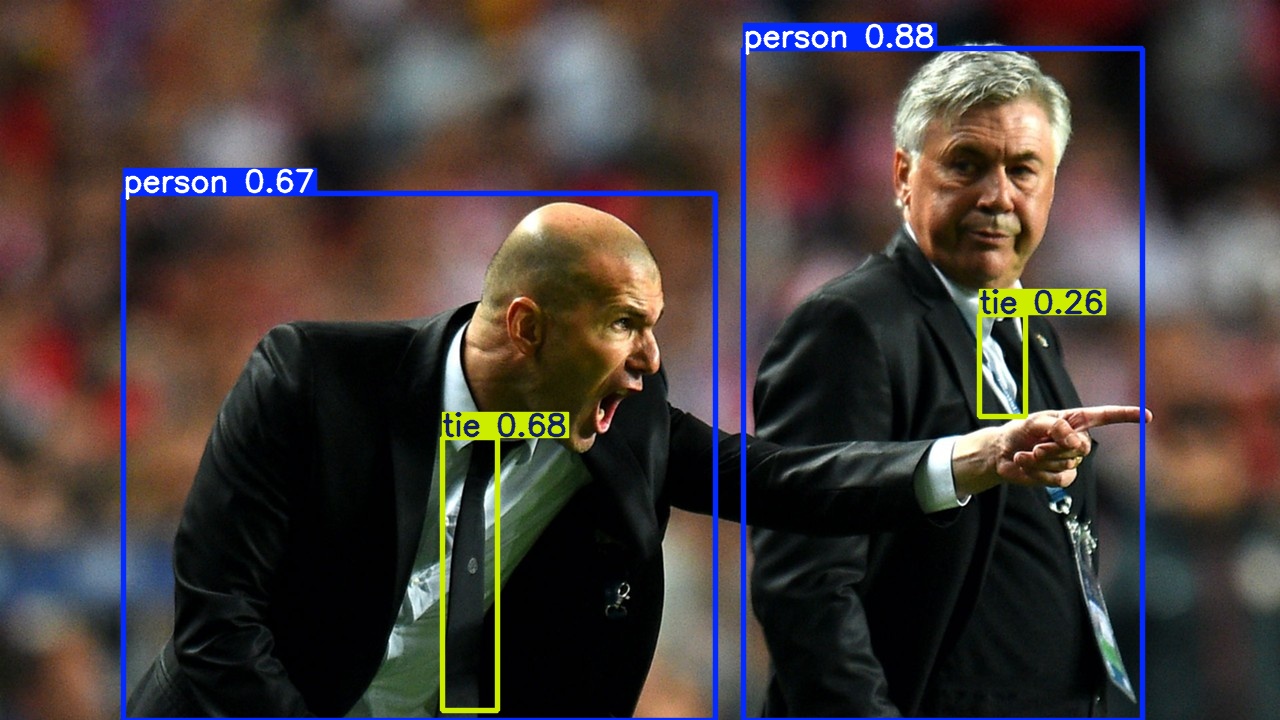
如果你也看到这些,恭喜你通过yolov5环境测试
二、数据集准备:从图片到训练数据的魔法转换
1.准备自己的数据集
在视觉学习中我们已经了解到我们常见的数据集格式,如coco、yolo、voc等等。
这里你应该要先自主打标做好自己的数据集,或者是使用公开数据集。在比赛的时候一个好的数据集比你使用更先进的模型所起的效果要好的多。
data/scripts中给出了下载常见数据集的代码,但是一般都需要加速哦
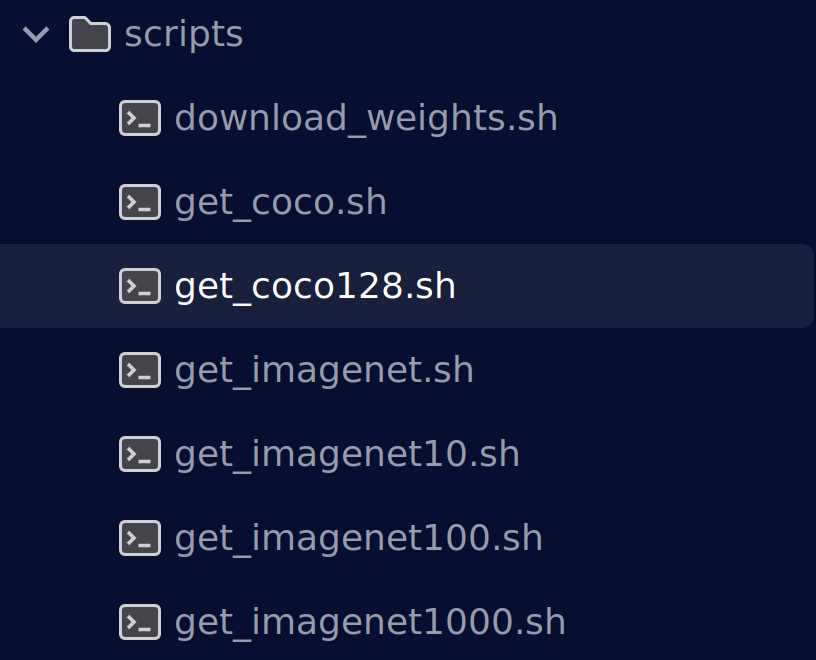
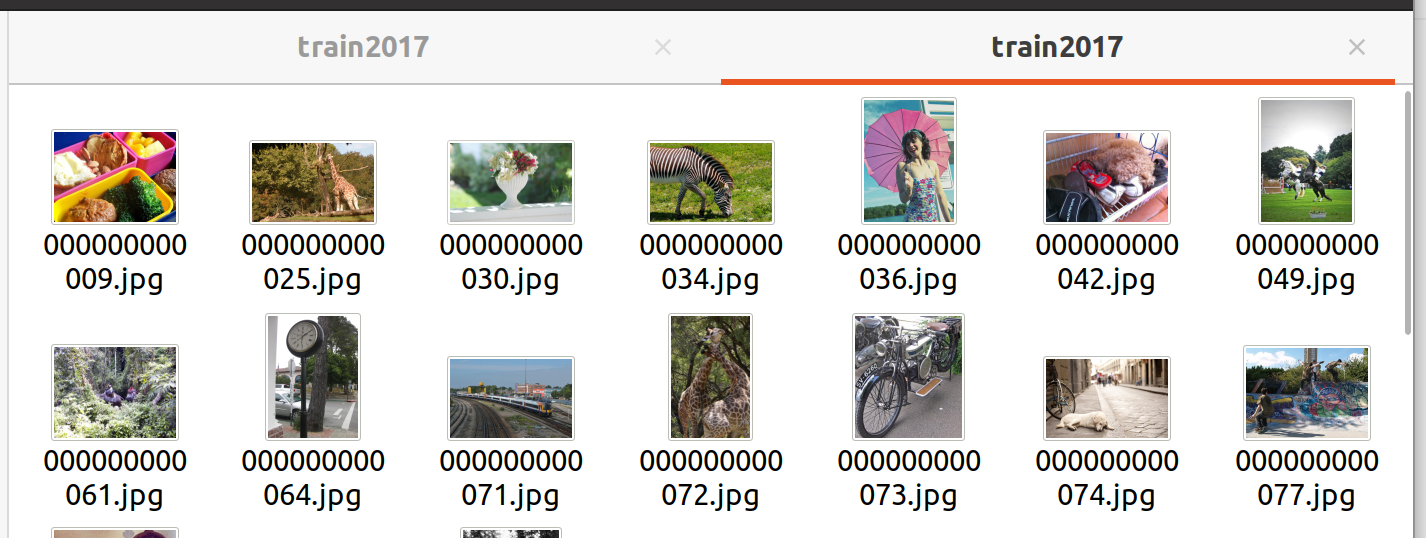
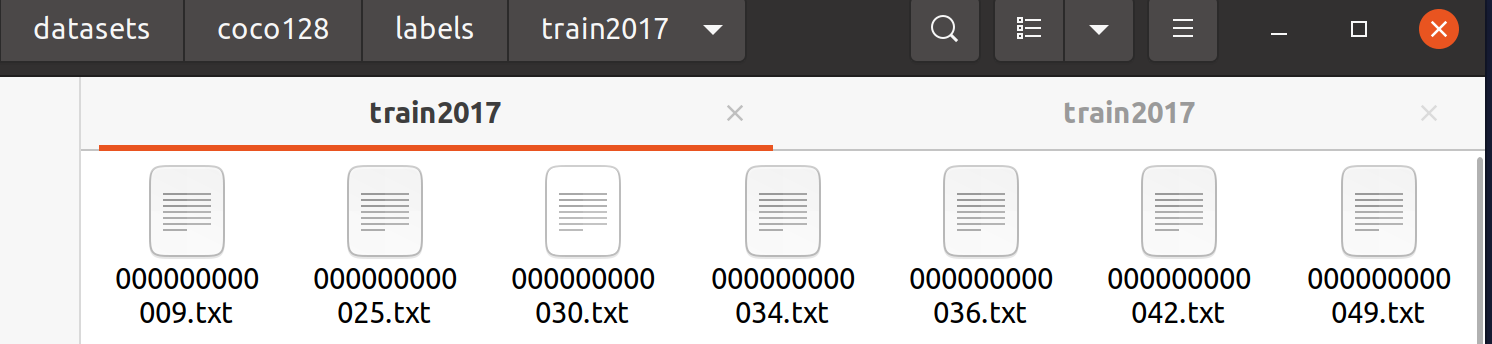
下载coco128数据集看一下,标准yolo数据集格式
2.数据集目录规范
看这篇文章之前相信你已经看了机器学习训练的那篇文章,这个时候对数据集的结构和读取方式有了初步的了解。
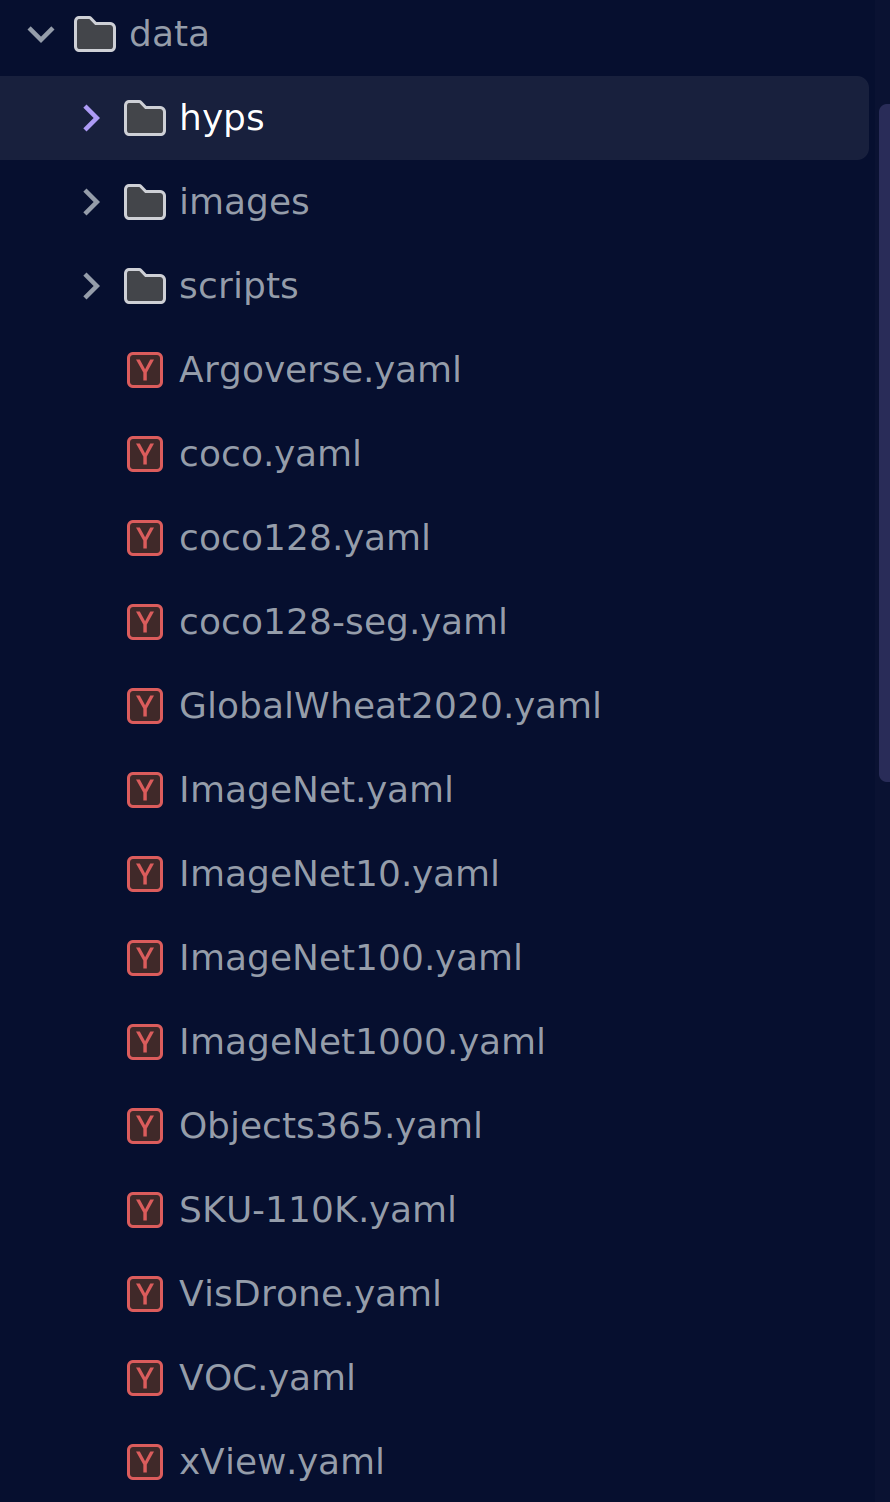
在yolov5/data目录下存放着一堆yaml文件,这是数据集读取文件,我们可以看到目前主流的几种数据集格式ImageNet、coco、VOC等等。
我们打开一个coco.yaml查看一下内容
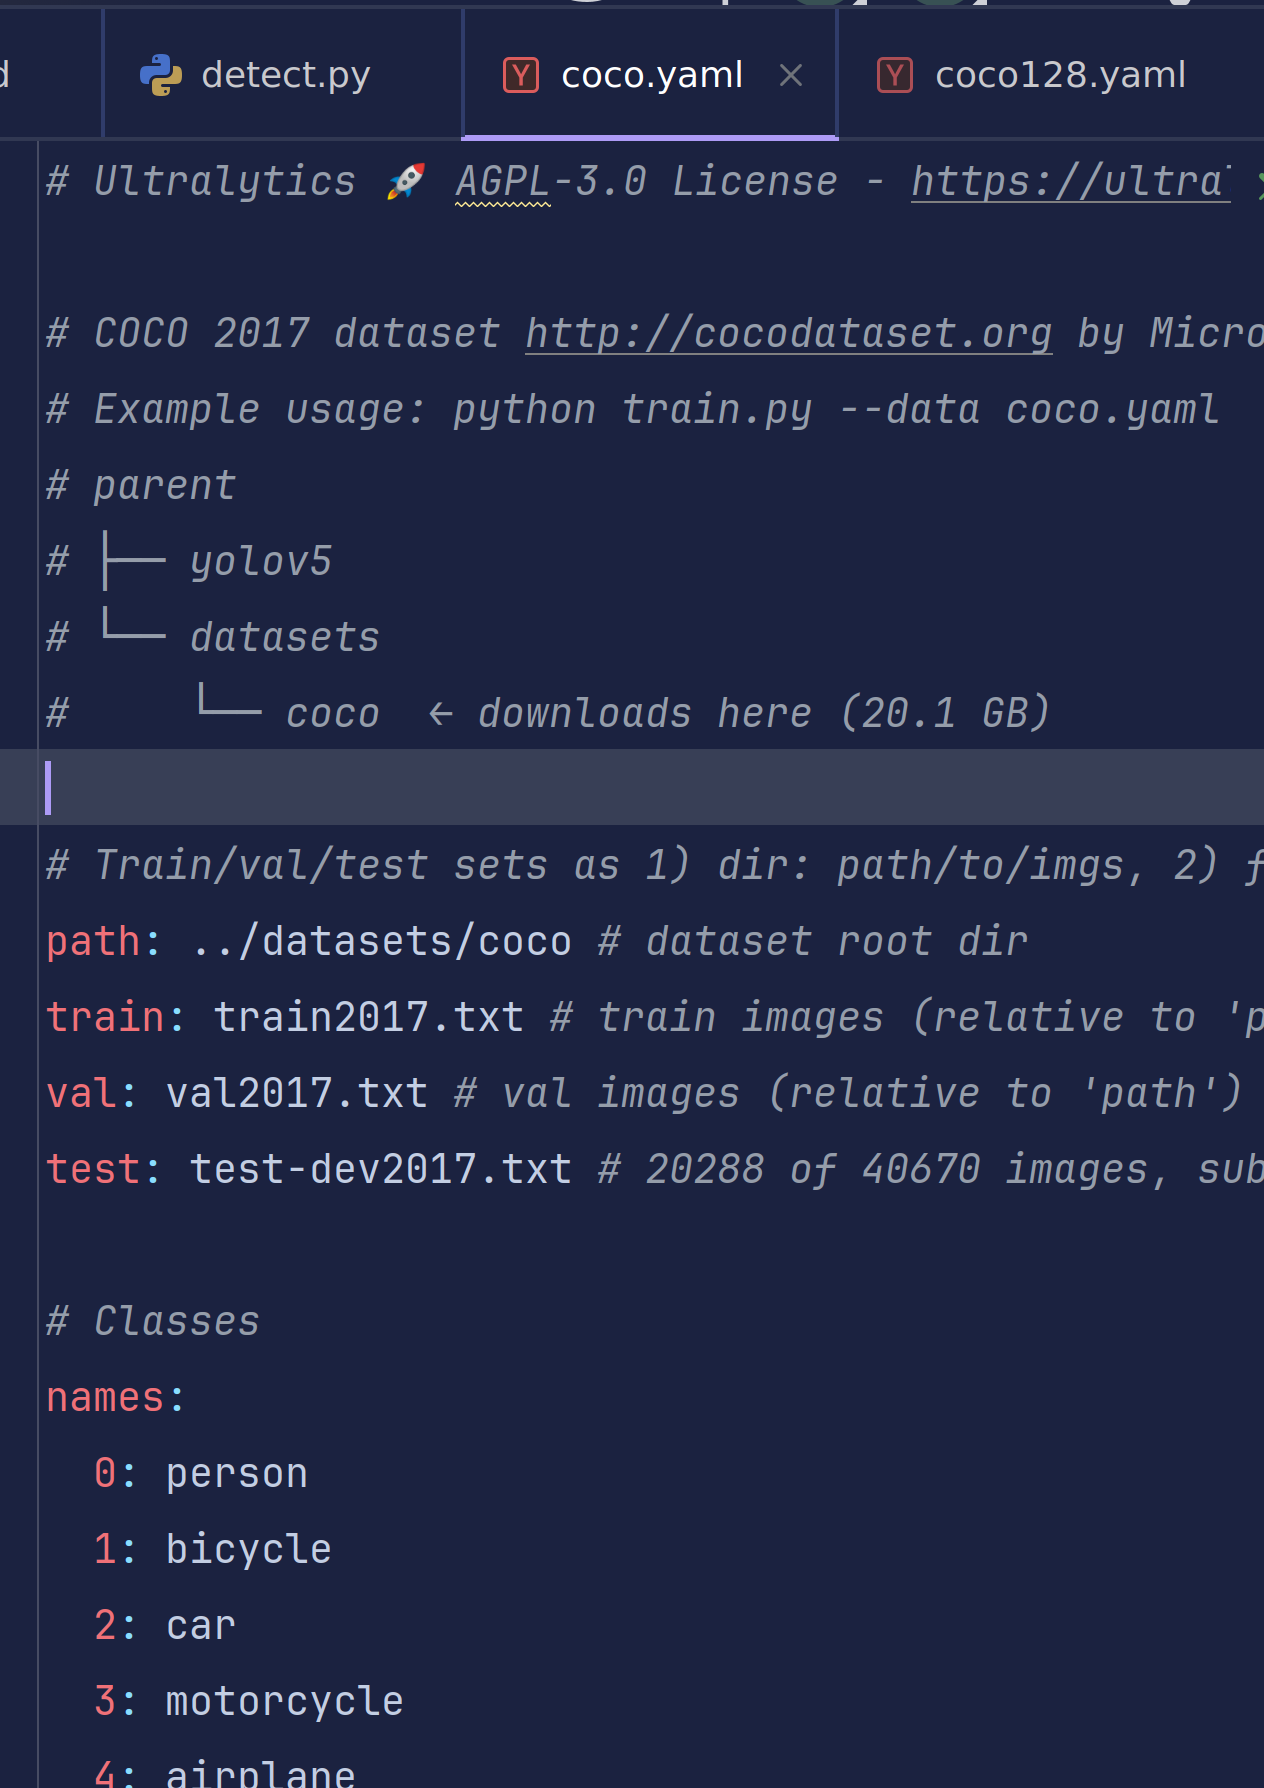
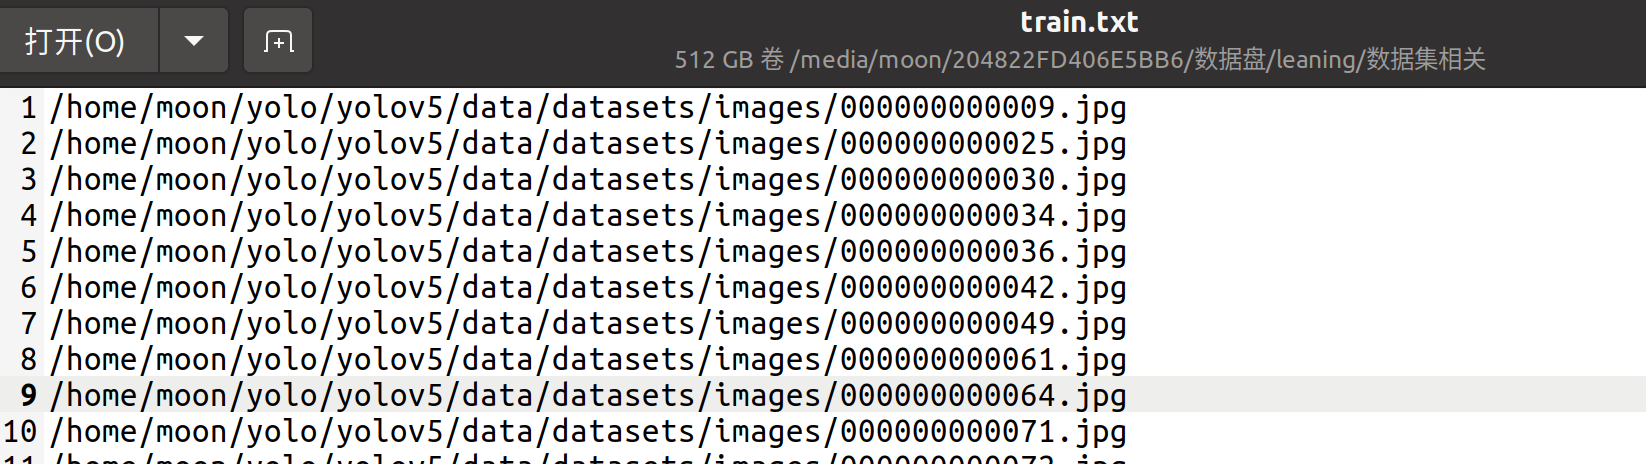
这是典型的coco数据集格式,它通过读取存放着每行以图像路径 为格式的txt文件进行读取数据集
#Train/val/test sets as 1) dir: path/to/imgs, 2) file: path/to/imgs.txt, or 3) list: [path/to/imgs1, path/to/imgs2, …]
注释也给出了训练集和数据集的格式要求
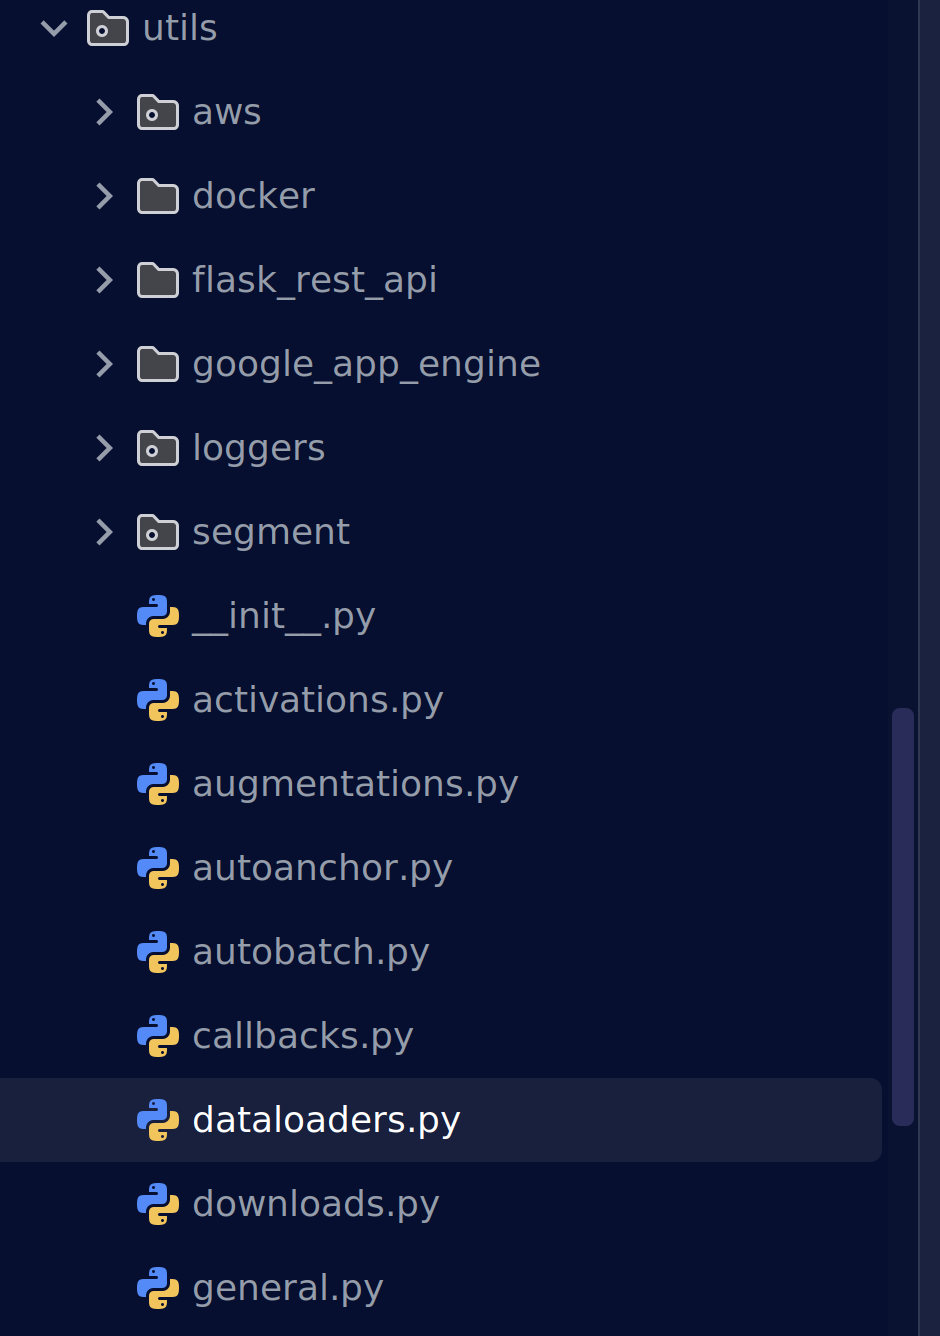
能够读取多种数据集格式的原因肯定与它的dataloader.py有关
class LoadImagesAndLabels(Dataset):
"""Loads images and their corresponding labels for training and validation in YOLOv5."""
cache_version = 0.6 # dataset labels *.cache version
rand_interp_methods = [cv2.INTER_NEAREST, cv2.INTER_LINEAR, cv2.INTER_CUBIC, cv2.INTER_AREA, cv2.INTER_LANCZOS4]
def __init__(
self,
path,
img_size=640,
batch_size=16,
augment=False,
hyp=None,
rect=False,
image_weights=False,
cache_images=False,
single_cls=False,
stride=32,
pad=0.0,
min_items=0,
prefix="",
rank=-1,
seed=0,
):
"""Initializes the YOLOv5 dataset loader, handling images and their labels, caching, and preprocessing."""
self.img_size = img_size
self.augment = augment
self.hyp = hyp
self.image_weights = image_weights
self.rect = False if image_weights else rect
self.mosaic = self.augment and not self.rect # load 4 images at a time into a mosaic (only during training)
self.mosaic_border = [-img_size // 2, -img_size // 2]
self.stride = stride
self.path = path
self.albumentations = Albumentations(size=img_size) if augment else None
try:
f = [] # image files
for p in path if isinstance(path, list) else [path]:
p = Path(p) # os-agnostic
if p.is_dir(): # dir
f += glob.glob(str(p / "**" / "*.*"), recursive=True)
# f = list(p.rglob('*.*')) # pathlib
elif p.is_file(): # file
with open(p) as t:
t = t.read().strip().splitlines()
parent = str(p.parent) + os.sep
f += [x.replace("./", parent, 1) if x.startswith("./") else x for x in t] # to global path
# f += [p.parent / x.lstrip(os.sep) for x in t] # to global path (pathlib)
else:
raise FileNotFoundError(f"{prefix}{p} does not exist")
self.im_files = sorted(x.replace("/", os.sep) for x in f if x.split(".")[-1].lower() in IMG_FORMATS)
# self.img_files = sorted([x for x in f if x.suffix[1:].lower() in IMG_FORMATS]) # pathlib
assert self.im_files, f"{prefix}No images found"
except Exception as e:
raise Exception(f"{prefix}Error loading data from {path}: {e}\n{HELP_URL}") from e
# Check cache
self.label_files = img2label_paths(self.im_files) # labels
cache_path = (p if p.is_file() else Path(self.label_files[0]).parent).with_suffix(".cache")
try:
cache, exists = np.load(cache_path, allow_pickle=True).item(), True # load dict
assert cache["version"] == self.cache_version # matches current version
assert cache["hash"] == get_hash(self.label_files + self.im_files) # identical hash
except Exception:
cache, exists = self.cache_labels(cache_path, prefix), False # run cache ops
# Display cache
nf, nm, ne, nc, n = cache.pop("results") # found, missing, empty, corrupt, total
if exists and LOCAL_RANK in {-1, 0}:
d = f"Scanning {cache_path}... {nf} images, {nm + ne} backgrounds, {nc} corrupt"
tqdm(None, desc=prefix + d, total=n, initial=n, bar_format=TQDM_BAR_FORMAT) # display cache results
if cache["msgs"]:
LOGGER.info("\n".join(cache["msgs"])) # display warnings
assert nf > 0 or not augment, f"{prefix}No labels found in {cache_path}, can not start training. {HELP_URL}"
# Read cache
[cache.pop(k) for k in ("hash", "version", "msgs")] # remove items
labels, shapes, self.segments = zip(*cache.values())
nl = len(np.concatenate(labels, 0)) # number of labels
assert nl > 0 or not augment, f"{prefix}All labels empty in {cache_path}, can not start training. {HELP_URL}"
self.labels = list(labels)
self.shapes = np.array(shapes)
self.im_files = list(cache.keys()) # update
self.label_files = img2label_paths(cache.keys()) # update
# Filter images
if min_items:
include = np.array([len(x) >= min_items for x in self.labels]).nonzero()[0].astype(int)
LOGGER.info(f"{prefix}{n - len(include)}/{n} images filtered from dataset")
self.im_files = [self.im_files[i] for i in include]
self.label_files = [self.label_files[i] for i in include]
self.labels = [self.labels[i] for i in include]
self.segments = [self.segments[i] for i in include]
self.shapes = self.shapes[include] # wh
# Create indices
n = len(self.shapes) # number of images
bi = np.floor(np.arange(n) / batch_size).astype(int) # batch index
nb = bi[-1] + 1 # number of batches
self.batch = bi # batch index of image
self.n = n
self.indices = np.arange(n)
if rank > -1: # DDP indices (see: SmartDistributedSampler)
# force each rank (i.e. GPU process) to sample the same subset of data on every epoch
self.indices = self.indices[np.random.RandomState(seed=seed).permutation(n) % WORLD_SIZE == RANK]
# Update labels
include_class = [] # filter labels to include only these classes (optional)
self.segments = list(self.segments)
include_class_array = np.array(include_class).reshape(1, -1)
for i, (label, segment) in enumerate(zip(self.labels, self.segments)):
if include_class:
j = (label[:, 0:1] == include_class_array).any(1)
self.labels[i] = label[j]
if segment:
self.segments[i] = [segment[idx] for idx, elem in enumerate(j) if elem]
if single_cls: # single-class training, merge all classes into 0
self.labels[i][:, 0] = 0
# Rectangular Training
if self.rect:
# Sort by aspect ratio
s = self.shapes # wh
ar = s[:, 1] / s[:, 0] # aspect ratio
irect = ar.argsort()
self.im_files = [self.im_files[i] for i in irect]
self.label_files = [self.label_files[i] for i in irect]
self.labels = [self.labels[i] for i in irect]
self.segments = [self.segments[i] for i in irect]
self.shapes = s[irect] # wh
ar = ar[irect]
# Set training image shapes
shapes = [[1, 1]] * nb
for i in range(nb):
ari = ar[bi == i]
mini, maxi = ari.min(), ari.max()
if maxi < 1:
shapes[i] = [maxi, 1]
elif mini > 1:
shapes[i] = [1, 1 / mini]
self.batch_shapes = np.ceil(np.array(shapes) * img_size / stride + pad).astype(int) * stride
# Cache images into RAM/disk for faster training
if cache_images == "ram" and not self.check_cache_ram(prefix=prefix):
cache_images = False
self.ims = [None] * n
self.npy_files = [Path(f).with_suffix(".npy") for f in self.im_files]
if cache_images:
b, gb = 0, 1 << 30 # bytes of cached images, bytes per gigabytes
self.im_hw0, self.im_hw = [None] * n, [None] * n
fcn = self.cache_images_to_disk if cache_images == "disk" else self.load_image
with ThreadPool(NUM_THREADS) as pool:
results = pool.imap(lambda i: (i, fcn(i)), self.indices)
pbar = tqdm(results, total=len(self.indices), bar_format=TQDM_BAR_FORMAT, disable=LOCAL_RANK > 0)
for i, x in pbar:
if cache_images == "disk":
b += self.npy_files[i].stat().st_size
else: # 'ram'
self.ims[i], self.im_hw0[i], self.im_hw[i] = x # im, hw_orig, hw_resized = load_image(self, i)
b += self.ims[i].nbytes * WORLD_SIZE
pbar.desc = f"{prefix}Caching images ({b / gb:.1f}GB {cache_images})"
pbar.close()
def check_cache_ram(self, safety_margin=0.1, prefix=""):
"""Checks if available RAM is sufficient for caching images, adjusting for a safety margin."""
b, gb = 0, 1 << 30 # bytes of cached images, bytes per gigabytes
n = min(self.n, 30) # extrapolate from 30 random images
for _ in range(n):
im = cv2.imread(random.choice(self.im_files)) # sample image
ratio = self.img_size / max(im.shape[0], im.shape[1]) # max(h, w) # ratio
b += im.nbytes * ratio**2
mem_required = b * self.n / n # GB required to cache dataset into RAM
mem = psutil.virtual_memory()
cache = mem_required * (1 + safety_margin) < mem.available # to cache or not to cache, that is the question
if not cache:
LOGGER.info(
f"{prefix}{mem_required / gb:.1f}GB RAM required, "
f"{mem.available / gb:.1f}/{mem.total / gb:.1f}GB available, "
f"{'caching images ✅' if cache else 'not caching images ⚠️'}"
)
return cache
def cache_labels(self, path=Path("./labels.cache"), prefix=""):
"""Caches dataset labels, verifies images, reads shapes, and tracks dataset integrity."""
x = {} # dict
nm, nf, ne, nc, msgs = 0, 0, 0, 0, [] # number missing, found, empty, corrupt, messages
desc = f"{prefix}Scanning {path.parent / path.stem}..."
with Pool(NUM_THREADS) as pool:
pbar = tqdm(
pool.imap(verify_image_label, zip(self.im_files, self.label_files, repeat(prefix))),
desc=desc,
total=len(self.im_files),
bar_format=TQDM_BAR_FORMAT,
)
for im_file, lb, shape, segments, nm_f, nf_f, ne_f, nc_f, msg in pbar:
nm += nm_f
nf += nf_f
ne += ne_f
nc += nc_f
if im_file:
x[im_file] = [lb, shape, segments]
if msg:
msgs.append(msg)
pbar.desc = f"{desc} {nf} images, {nm + ne} backgrounds, {nc} corrupt"
pbar.close()
if msgs:
LOGGER.info("\n".join(msgs))
if nf == 0:
LOGGER.warning(f"{prefix}WARNING ⚠️ No labels found in {path}. {HELP_URL}")
x["hash"] = get_hash(self.label_files + self.im_files)
x["results"] = nf, nm, ne, nc, len(self.im_files)
x["msgs"] = msgs # warnings
x["version"] = self.cache_version # cache version
try:
np.save(path, x) # save cache for next time
path.with_suffix(".cache.npy").rename(path) # remove .npy suffix
LOGGER.info(f"{prefix}New cache created: {path}")
except Exception as e:
LOGGER.warning(f"{prefix}WARNING ⚠️ Cache directory {path.parent} is not writeable: {e}") # not writeable
return x
def __len__(self):
"""Returns the number of images in the dataset."""
return len(self.im_files)
# def __iter__(self):
# self.count = -1
# print('ran dataset iter')
# #self.shuffled_vector = np.random.permutation(self.nF) if self.augment else np.arange(self.nF)
# return self
def __getitem__(self, index):
"""Fetches the dataset item at the given index, considering linear, shuffled, or weighted sampling."""
index = self.indices[index] # linear, shuffled, or image_weights
hyp = self.hyp
if mosaic := self.mosaic and random.random() < hyp["mosaic"]:
# Load mosaic
img, labels = self.load_mosaic(index)
shapes = None
# MixUp augmentation
if random.random() < hyp["mixup"]:
img, labels = mixup(img, labels, *self.load_mosaic(random.choice(self.indices)))
else:
# Load image
img, (h0, w0), (h, w) = self.load_image(index)
# Letterbox
shape = self.batch_shapes[self.batch[index]] if self.rect else self.img_size # final letterboxed shape
img, ratio, pad = letterbox(img, shape, auto=False, scaleup=self.augment)
shapes = (h0, w0), ((h / h0, w / w0), pad) # for COCO mAP rescaling
labels = self.labels[index].copy()
if labels.size: # normalized xywh to pixel xyxy format
labels[:, 1:] = xywhn2xyxy(labels[:, 1:], ratio[0] * w, ratio[1] * h, padw=pad[0], padh=pad[1])
if self.augment:
img, labels = random_perspective(
img,
labels,
degrees=hyp["degrees"],
translate=hyp["translate"],
scale=hyp["scale"],
shear=hyp["shear"],
perspective=hyp["perspective"],
)
nl = len(labels) # number of labels
if nl:
labels[:, 1:5] = xyxy2xywhn(labels[:, 1:5], w=img.shape[1], h=img.shape[0], clip=True, eps=1e-3)
if self.augment:
# Albumentations
img, labels = self.albumentations(img, labels)
nl = len(labels) # update after albumentations
# HSV color-space
augment_hsv(img, hgain=hyp["hsv_h"], sgain=hyp["hsv_s"], vgain=hyp["hsv_v"])
# Flip up-down
if random.random() < hyp["flipud"]:
img = np.flipud(img)
if nl:
labels[:, 2] = 1 - labels[:, 2]
# Flip left-right
if random.random() < hyp["fliplr"]:
img = np.fliplr(img)
if nl:
labels[:, 1] = 1 - labels[:, 1]
# Cutouts
# labels = cutout(img, labels, p=0.5)
# nl = len(labels) # update after cutout
labels_out = torch.zeros((nl, 6))
if nl:
labels_out[:, 1:] = torch.from_numpy(labels)
# Convert
img = img.transpose((2, 0, 1))[::-1] # HWC to CHW, BGR to RGB
img = np.ascontiguousarray(img)
return torch.from_numpy(img), labels_out, self.im_files[index], shapes
def load_image(self, i):
"""Loads an image by index, returning the image, its original dimensions, and resized dimensions.
Returns (im, original hw, resized hw)
"""
im, f, fn = (
self.ims[i],
self.im_files[i],
self.npy_files[i],
)
if im is None: # not cached in RAM
if fn.exists(): # load npy
im = np.load(fn)
else: # read image
im = cv2.imread(f) # BGR
assert im is not None, f"Image Not Found {f}"
h0, w0 = im.shape[:2] # orig hw
r = self.img_size / max(h0, w0) # ratio
if r != 1: # if sizes are not equal
interp = cv2.INTER_LINEAR if (self.augment or r > 1) else cv2.INTER_AREA
im = cv2.resize(im, (math.ceil(w0 * r), math.ceil(h0 * r)), interpolation=interp)
return im, (h0, w0), im.shape[:2] # im, hw_original, hw_resized
return self.ims[i], self.im_hw0[i], self.im_hw[i] # im, hw_original, hw_resized
def cache_images_to_disk(self, i):
"""Saves an image to disk as an *.npy file for quicker loading, identified by index `i`."""
f = self.npy_files[i]
if not f.exists():
np.save(f.as_posix(), cv2.imread(self.im_files[i]))
def load_mosaic(self, index):
"""Loads a 4-image mosaic for YOLOv5, combining 1 selected and 3 random images, with labels and segments."""
labels4, segments4 = [], []
s = self.img_size
yc, xc = (int(random.uniform(-x, 2 * s + x)) for x in self.mosaic_border) # mosaic center x, y
indices = [index] + random.choices(self.indices, k=3) # 3 additional image indices
random.shuffle(indices)
for i, index in enumerate(indices):
# Load image
img, _, (h, w) = self.load_image(index)
# place img in img4
if i == 0: # top left
img4 = np.full((s * 2, s * 2, img.shape[2]), 114, dtype=np.uint8) # base image with 4 tiles
x1a, y1a, x2a, y2a = max(xc - w, 0), max(yc - h, 0), xc, yc # xmin, ymin, xmax, ymax (large image)
x1b, y1b, x2b, y2b = w - (x2a - x1a), h - (y2a - y1a), w, h # xmin, ymin, xmax, ymax (small image)
elif i == 1: # top right
x1a, y1a, x2a, y2a = xc, max(yc - h, 0), min(xc + w, s * 2), yc
x1b, y1b, x2b, y2b = 0, h - (y2a - y1a), min(w, x2a - x1a), h
elif i == 2: # bottom left
x1a, y1a, x2a, y2a = max(xc - w, 0), yc, xc, min(s * 2, yc + h)
x1b, y1b, x2b, y2b = w - (x2a - x1a), 0, w, min(y2a - y1a, h)
elif i == 3: # bottom right
x1a, y1a, x2a, y2a = xc, yc, min(xc + w, s * 2), min(s * 2, yc + h)
x1b, y1b, x2b, y2b = 0, 0, min(w, x2a - x1a), min(y2a - y1a, h)
img4[y1a:y2a, x1a:x2a] = img[y1b:y2b, x1b:x2b] # img4[ymin:ymax, xmin:xmax]
padw = x1a - x1b
padh = y1a - y1b
# Labels
labels, segments = self.labels[index].copy(), self.segments[index].copy()
if labels.size:
labels[:, 1:] = xywhn2xyxy(labels[:, 1:], w, h, padw, padh) # normalized xywh to pixel xyxy format
segments = [xyn2xy(x, w, h, padw, padh) for x in segments]
labels4.append(labels)
segments4.extend(segments)
# Concat/clip labels
labels4 = np.concatenate(labels4, 0)
for x in (labels4[:, 1:], *segments4):
np.clip(x, 0, 2 * s, out=x) # clip when using random_perspective()
# img4, labels4 = replicate(img4, labels4) # replicate
# Augment
img4, labels4, segments4 = copy_paste(img4, labels4, segments4, p=self.hyp["copy_paste"])
img4, labels4 = random_perspective(
img4,
labels4,
segments4,
degrees=self.hyp["degrees"],
translate=self.hyp["translate"],
scale=self.hyp["scale"],
shear=self.hyp["shear"],
perspective=self.hyp["perspective"],
border=self.mosaic_border,
) # border to remove
return img4, labels4
def load_mosaic9(self, index):
"""Loads 1 image + 8 random images into a 9-image mosaic for augmented YOLOv5 training, returning labels and
segments.
"""
labels9, segments9 = [], []
s = self.img_size
indices = [index] + random.choices(self.indices, k=8) # 8 additional image indices
random.shuffle(indices)
hp, wp = -1, -1 # height, width previous
for i, index in enumerate(indices):
# Load image
img, _, (h, w) = self.load_image(index)
# place img in img9
if i == 0: # center
img9 = np.full((s * 3, s * 3, img.shape[2]), 114, dtype=np.uint8) # base image with 4 tiles
h0, w0 = h, w
c = s, s, s + w, s + h # xmin, ymin, xmax, ymax (base) coordinates
elif i == 1: # top
c = s, s - h, s + w, s
elif i == 2: # top right
c = s + wp, s - h, s + wp + w, s
elif i == 3: # right
c = s + w0, s, s + w0 + w, s + h
elif i == 4: # bottom right
c = s + w0, s + hp, s + w0 + w, s + hp + h
elif i == 5: # bottom
c = s + w0 - w, s + h0, s + w0, s + h0 + h
elif i == 6: # bottom left
c = s + w0 - wp - w, s + h0, s + w0 - wp, s + h0 + h
elif i == 7: # left
c = s - w, s + h0 - h, s, s + h0
elif i == 8: # top left
c = s - w, s + h0 - hp - h, s, s + h0 - hp
padx, pady = c[:2]
x1, y1, x2, y2 = (max(x, 0) for x in c) # allocate coords
# Labels
labels, segments = self.labels[index].copy(), self.segments[index].copy()
if labels.size:
labels[:, 1:] = xywhn2xyxy(labels[:, 1:], w, h, padx, pady) # normalized xywh to pixel xyxy format
segments = [xyn2xy(x, w, h, padx, pady) for x in segments]
labels9.append(labels)
segments9.extend(segments)
# Image
img9[y1:y2, x1:x2] = img[y1 - pady :, x1 - padx :] # img9[ymin:ymax, xmin:xmax]
hp, wp = h, w # height, width previous
# Offset
yc, xc = (int(random.uniform(0, s)) for _ in self.mosaic_border) # mosaic center x, y
img9 = img9[yc : yc + 2 * s, xc : xc + 2 * s]
# Concat/clip labels
labels9 = np.concatenate(labels9, 0)
labels9[:, [1, 3]] -= xc
labels9[:, [2, 4]] -= yc
c = np.array([xc, yc]) # centers
segments9 = [x - c for x in segments9]
for x in (labels9[:, 1:], *segments9):
np.clip(x, 0, 2 * s, out=x) # clip when using random_perspective()
# img9, labels9 = replicate(img9, labels9) # replicate
# Augment
img9, labels9, segments9 = copy_paste(img9, labels9, segments9, p=self.hyp["copy_paste"])
img9, labels9 = random_perspective(
img9,
labels9,
segments9,
degrees=self.hyp["degrees"],
translate=self.hyp["translate"],
scale=self.hyp["scale"],
shear=self.hyp["shear"],
perspective=self.hyp["perspective"],
border=self.mosaic_border,
) # border to remove
return img9, labels9
@staticmethod
def collate_fn(batch):
"""Batches images, labels, paths, and shapes, assigning unique indices to targets in merged label tensor."""
im, label, path, shapes = zip(*batch) # transposed
for i, lb in enumerate(label):
lb[:, 0] = i # add target image index for build_targets()
return torch.stack(im, 0), torch.cat(label, 0), path, shapes
@staticmethod
def collate_fn4(batch):
"""Bundles a batch's data by quartering the number of shapes and paths, preparing it for model input."""
im, label, path, shapes = zip(*batch) # transposed
n = len(shapes) // 4
im4, label4, path4, shapes4 = [], [], path[:n], shapes[:n]
ho = torch.tensor([[0.0, 0, 0, 1, 0, 0]])
wo = torch.tensor([[0.0, 0, 1, 0, 0, 0]])
s = torch.tensor([[1, 1, 0.5, 0.5, 0.5, 0.5]]) # scale
for i in range(n): # zidane torch.zeros(16,3,720,1280) # BCHW
i *= 4
if random.random() < 0.5:
im1 = F.interpolate(im[i].unsqueeze(0).float(), scale_factor=2.0, mode="bilinear", align_corners=False)[
0
].type(im[i].type())
lb = label[i]
else:
im1 = torch.cat((torch.cat((im[i], im[i + 1]), 1), torch.cat((im[i + 2], im[i + 3]), 1)), 2)
lb = torch.cat((label[i], label[i + 1] + ho, label[i + 2] + wo, label[i + 3] + ho + wo), 0) * s
im4.append(im1)
label4.append(lb)
for i, lb in enumerate(label4):
lb[:, 0] = i # add target image index for build_targets()
return torch.stack(im4, 0), torch.cat(label4, 0), path4, shapes4
YOLOv5 之所以能“三合一”支持
目录:path/to/imgs
文件:path/to/imgs.txt
列表:[path1, path2, …]
是在类 __init__构造函数里用 「三段判断」 把三种写法统一转成「图片绝对路径列表」。
path = path if isinstance(path, list) else [path]

f = []  # 最终收集到的图片绝对路径
for p in path:              # 遍历每个元素(可能是目录、txt、或单路径)
    p = Path(p)             # 变成 OS 无关路径对象

    # === 1. 目录模式 ===
    if p.is_dir():
        # 递归扫描所有常见图片后缀
        f += glob.glob(str(p / "**" / "*.*"), recursive=True)

    # === 2. 文件模式(.txt 清单) ===
    elif p.is_file() and p.suffix == '.txt':
        with open(p) as t:
            # 每行一张图,允许相对路径
            parent = str(p.parent)
            for line in t.read().strip().splitlines():
                line = line.strip()
                if line.startswith('./'):
                    line = parent + line[1:]   # ./a.jpg → 绝对
                f.append(line)

    # === 3. 单文件(不是 txt)→ 直接抛异常 ===
    elif p.is_file():
        raise ValueError(f"{p} 不是 .txt 清单,请检查路径")

    # === 4. 不存在 → 抛异常 ===
    else:
        raise FileNotFoundError(f"{p} 不存在")
| 你在 yaml 里写 | 经过上面循环后 f 的内容 | 说明 |
|---|---|---|
train: /data/images | [/data/images/0001.jpg, /data/images/0002.jpg, ...] | 目录递归扫描 |
train: /data/train.txt | 文件内每行一张图 → 同上列表 | 清单模式,路径可相对可绝对 |
train: [/data/A, /data/B] | A/ 下所有图 + B/ 下所有图 | 列表即批量目录/清单混合 |
通过这种方式将图片数据集转换为一个图片绝对路径列表方便后续会加载成缓存便于快速读取。
这时候有同学可能就有疑问,很多时候我们只在 yaml 里写了图片目录,却从来没有显式给出标签路径, 但是程序仍然能"秒定位"到对应的 .txt 标签文件。
这是因为yolov5默认了一个“关键词”,只要你的文件夹叫 images 和 labels,并且放在同一父目录下,YOLOv5 就能自动推导出标签路径,无需你在 yaml 里再写一行。所以我们在写yaml文件时无需再写一遍标签文件的存放路径。也就是说只要代码读取到了你的图像基本上就能找到你的标签文件
# 代码位置:utils/dataloaders.py  ~  img2label_paths()
def img2label_paths(img_paths):
    # Define label paths as a function of image paths
    sa, sb = os.sep + 'images' + os.sep, os.sep + 'labels' + os.sep  # /images/, /labels/
    return [sb.join(x.rsplit(sa, 1)).rsplit('.', 1)[0] + '.txt' for x in img_paths]
names是另一个“关键词”,代表标签名和索引的映射
names索引从0开始,标志着数据集中的待测物体的类别。
好的,现在你应该明白了yolov5是如何加载数据集的了。
学长这里给出以前学习使用的一款水果数据集。这里要感谢当时帮助我一起打标的同学,大小大概一个多G,并不是整个水果数据集的全部。
链接: https://pan.baidu.com/s/1R70mSnvV6_t5l0VkYEJBNQ 提取码: p9xd
–来自百度网盘超级会员v6的分享
已经划分好了训练集和验证集。但是今天并不打算就这样进行训练,而是将原有的训练集作为数据集划分为训练集和验证集,将原有的验证集作为测试集进行测试。
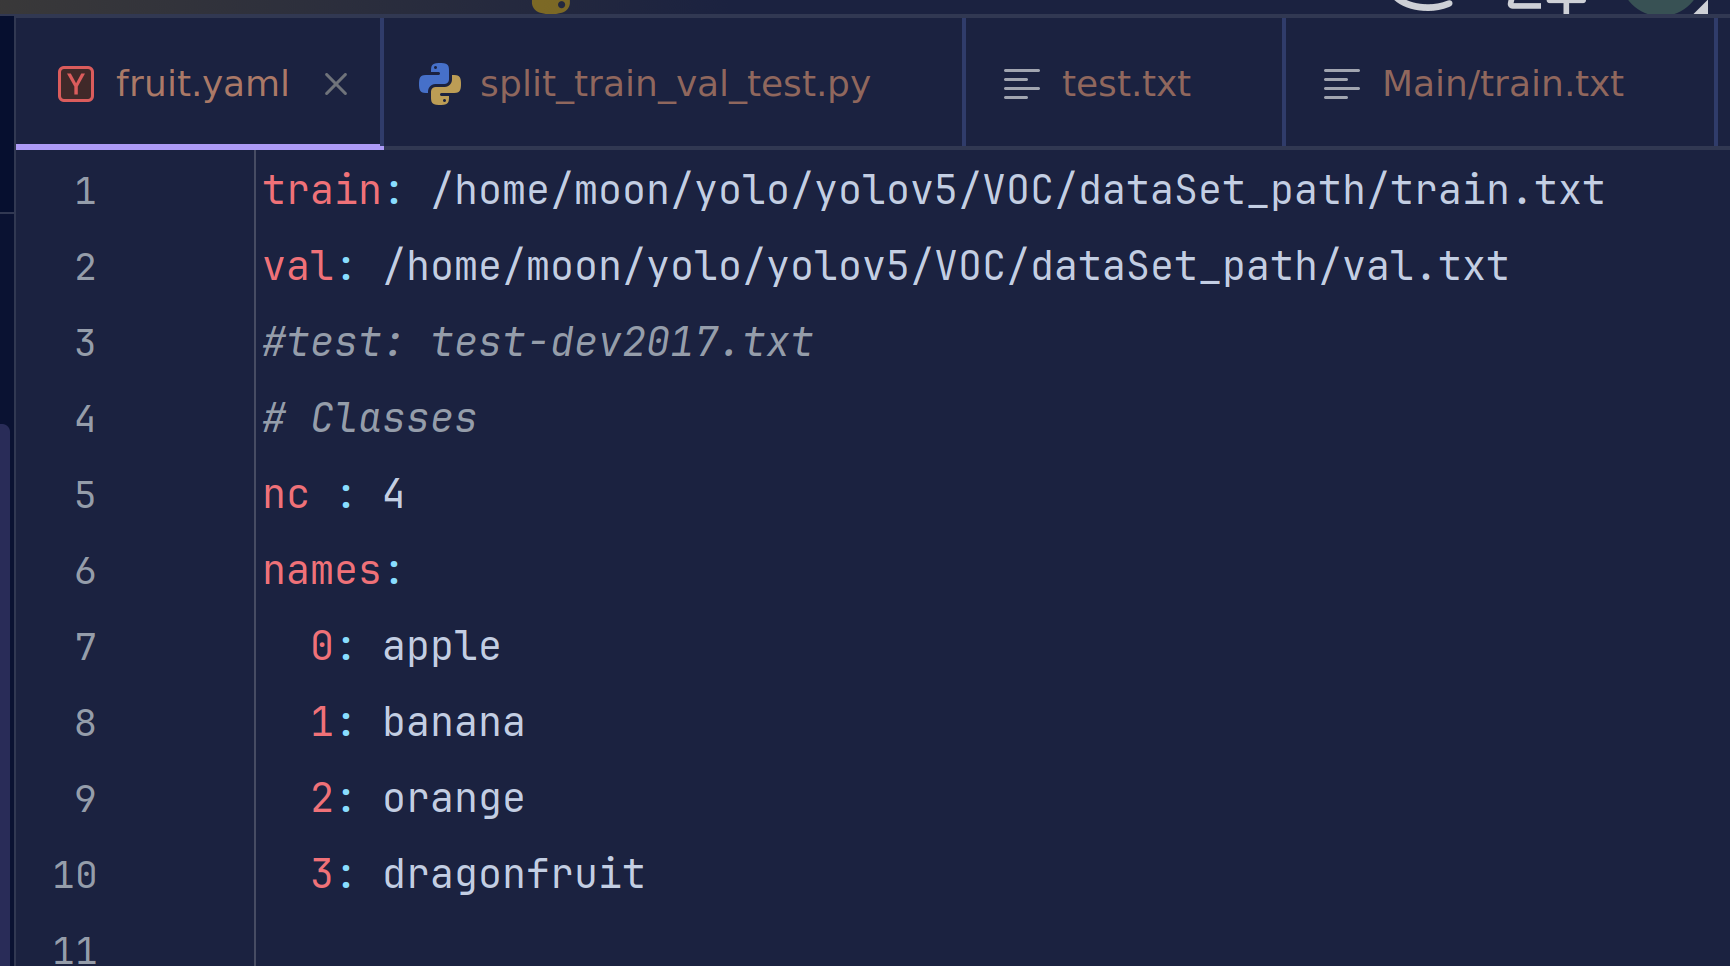
首先让我们为我们的水果数据集制作我们的yaml配置文件
只需要设置训练集验证集和测试集的路径、我们的标签名(苹果、香蕉、橙子、火龙果)以及种类数nc

之前说过,yolo训练的时候使用的是txt标签文件,但是我们的标签是xml格式,所以我们需要对其做一个转换。并不是说不可以一开始直接打标成yolo格式,是因为xml标签可视的信息更多,便于我们在打标时快速发现问题。
3.数据集划分
刚才说过我们要将数据集进行划分,一般来说训练集和验证集的比例是7:3或者8:2,如果将一个数据集划分为训练集、验证集和测试集,则为7:2:1,8:1:1或者6:3:1这个大家可以自行选择。划分的不同也会影响训练的结果。
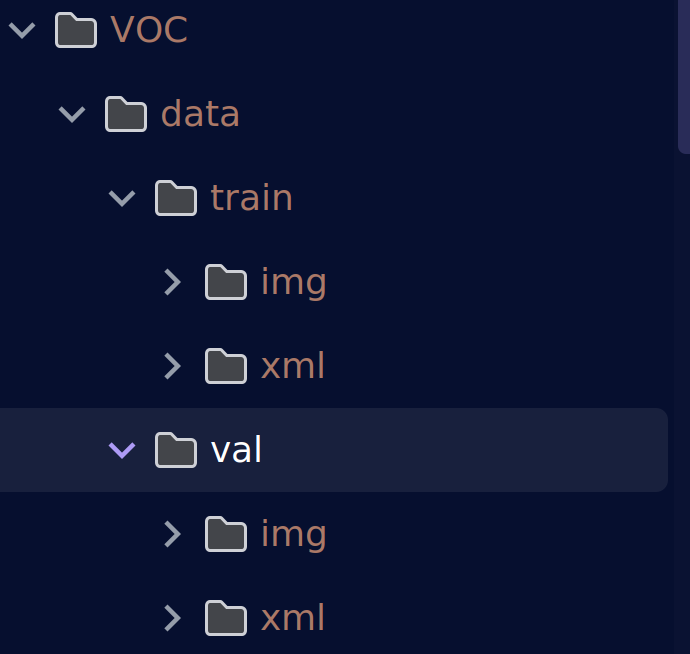
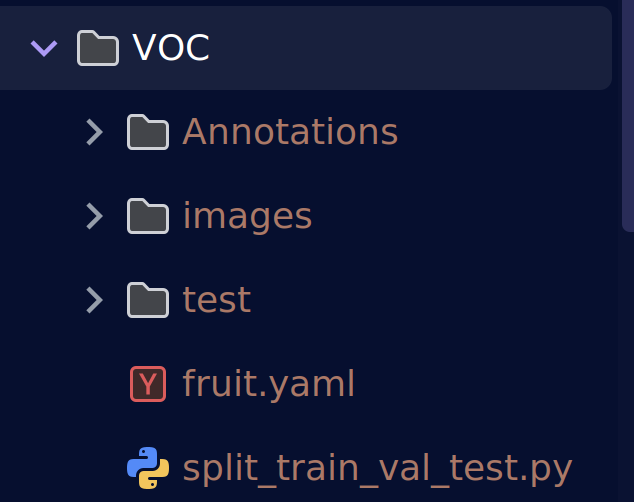
我们这里给出划分三种数据集的代码,由于不需要测试集,我们置零或者注销相关代码。为了好看,我把数据集文件夹重新命名并移动了一下。
将原val中的xml文件夹删除,因为测试集不需要标签,img改为test并移到data同级目录下。将原train文件夹中的img和xml改成为images和Annotations,移到test同级目录下,删除空的data之类文件夹后得到一个看着更加标准的数据集。
images:图像文件夹
Annotations:标签文件夹
test:测试图片
代码可以专门作为划分数据集的代码,支持训练集、验证集和测试集并可以自主定义划分的标签后缀并不局限于xml文件
#!/usr/bin/env python3
# -*- coding: utf-8 -*-
"""
VOC 格式数据集划分(支持 train/val/test)
用法示例:
python split_voc.py --xml_dir /data/VOC/Annotations --out_dir /data/VOC/ImageSets
python split_voc.py --xml_dir ./Anno --out_dir ./Sets --train 0.8 --val 0.1 --test 0.1 --seed 123 --ext .json
"""
import random
import argparse
from pathlib import Path
def split_dataset(ann_dir: Path, out_dir: Path,
train_ratio: float = 0.7, val_ratio: float = 0.2, test_ratio: float = 0.1,
seed: int = 42, ext: str = '.xml'):
"""划分数据集为 train/val/test 三个清单文件"""
if abs(train_ratio + val_ratio + test_ratio - 1.0) > 1e-6:
raise ValueError("train_ratio + val_ratio + test_ratio 必须 = 1.0")
# ① 收集所有标注文件
files = sorted(ann_dir.rglob(f'*{ext}')) # 递归 + 排序
if not files:
raise FileNotFoundError(f"{ann_dir} 下未找到 *{ext} 文件")
# ② 随机打乱
random.seed(seed)
indices = list(range(len(files)))
random.shuffle(indices)
# ③ 计算切分点
train_size = int(len(files) * train_ratio)
val_size = int(len(files) * val_ratio)
test_size = len(files) - train_size - val_size # 剩余给 test
# ④ 写入清单(自动建目录)
out_dir.mkdir(parents=True, exist_ok=True)
stems = [p.stem for p in files] # 去掉后缀,兼容多"."文件名
def write_list(name, idxs):
(out_dir / f'{name}.txt').write_text('\n'.join([stems[i] for i in idxs]) + '\n')
write_list('train', indices[:train_size])
write_list('val', indices[train_size:train_size + val_size])
write_list('test', indices[train_size + val_size:])
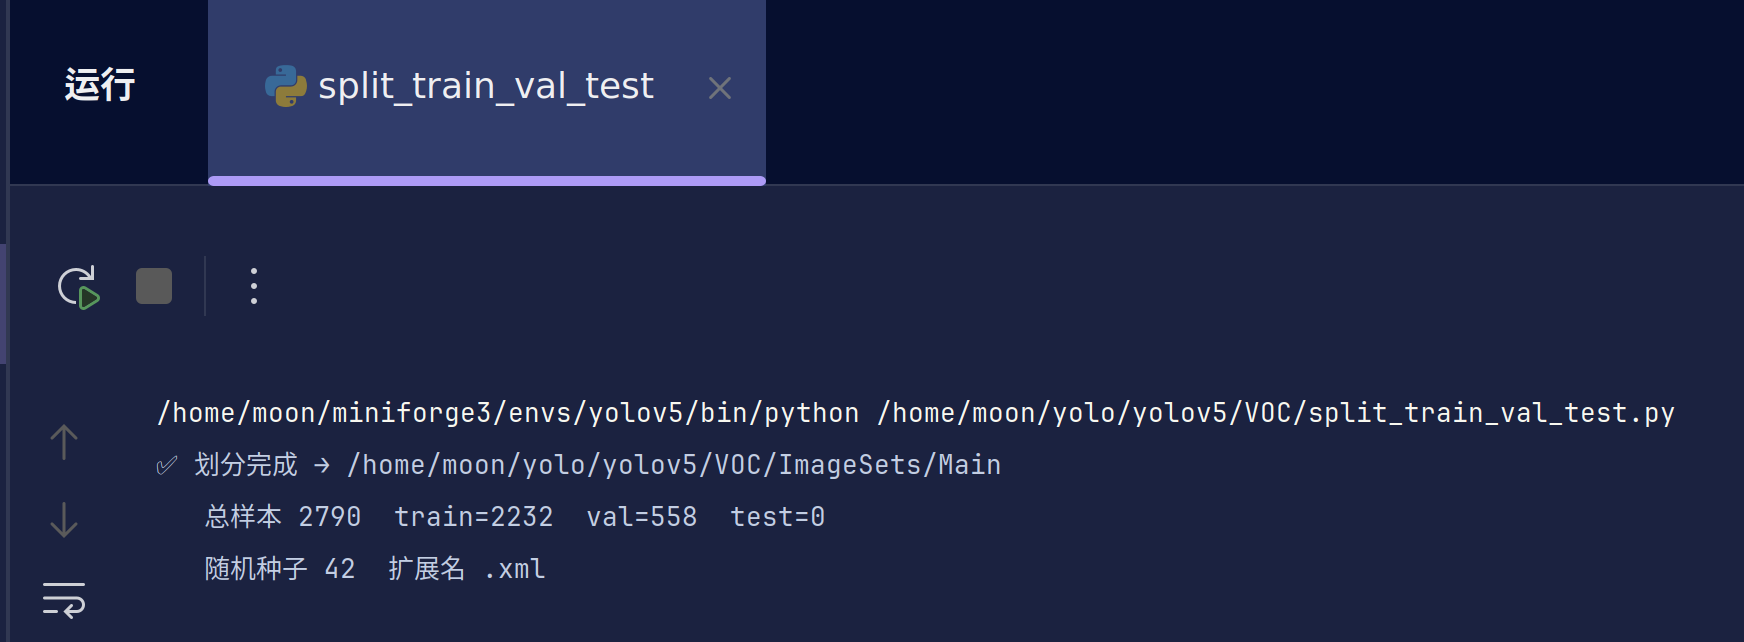
print(f"✅ 划分完成 → {out_dir}")
print(f" 总样本 {len(files)} train={train_size} val={val_size} test={test_size}")
print(f" 随机种子 {seed} 扩展名 {ext}")
def main():
parser = argparse.ArgumentParser(description='VOC 格式数据集划分(支持 train/val/test)')
parser.add_argument('--xml_dir', type=Path, default="/home/moon/yolo/yolov5/VOC/Annotations", help='标注目录(会递归搜索)')
parser.add_argument('--out_dir', type=Path, default="/home/moon/yolo/yolov5/VOC/ImageSets/Main", help='输出清单目录')
parser.add_argument('--train', type=float, default=0.7, help='训练集比例(默认 0.7)')
parser.add_argument('--val', type=float, default=0.3, help='验证集比例(默认 0.2)')
parser.add_argument('--test', type=float, default=0, help='测试集比例(默认 0.1)')
parser.add_argument('--seed', type=int, default=42, help='随机种子(默认 42)')
parser.add_argument('--ext', type=str, default='.xml', help='标注扩展名(默认 .xml)')
args = parser.parse_args()
split_dataset(args.xml_dir, args.out_dir,
train_ratio=args.train, val_ratio=args.val, test_ratio=args.test,
seed=args.seed, ext=args.ext)
if __name__ == '__main__':
main()
用法:
标注文件目录:/home/moon/yolo/yolov5/VOC/Annotations(对应自己的修改)
输出目录:/home/moon/yolo/yolov5/VOC/ImageSets/Main(建议只修改ImageSets之前的路径,即/home/moon/yolo/yolov5/VOC)
划分比例:train=0.7, val=0.3, test=0(可自定义)
随机种子:42(随机程度)
文件扩展名:.xml(标签后缀)
这里我选择使用8:2进行划分
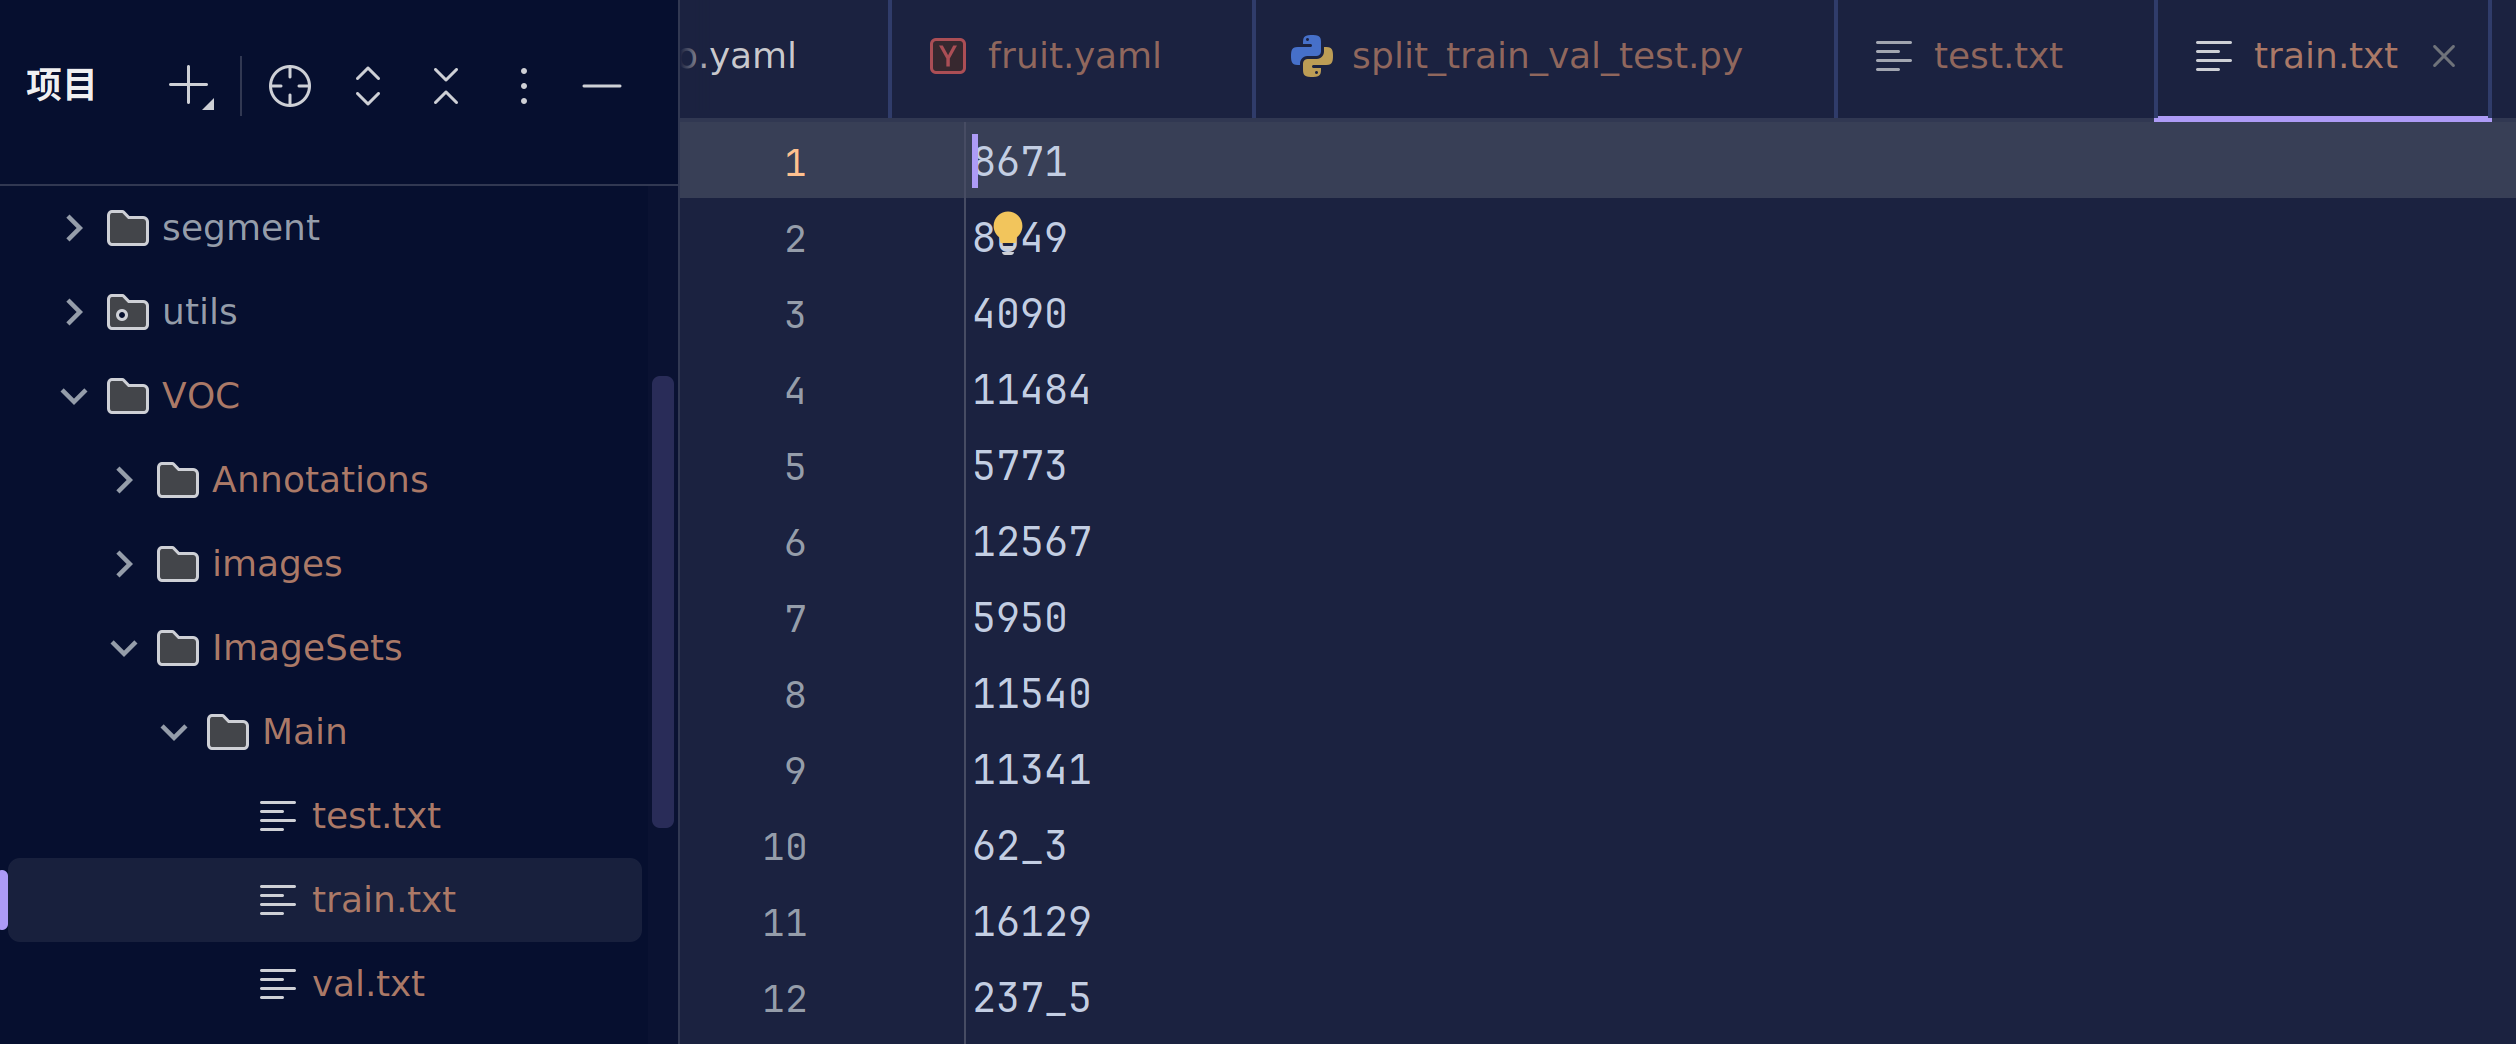
生成的txt文件是逐行存储图片文件名(不带后缀),有时候除不尽可能test会有一到两个,大家自己简单移动到任意一个即可。
此时的train.txt和val并不是我们训练所需要的,可以认为是中间产物。
下一步我们将xml标签转换为yolo标签并加上绝对路径或者相对路径。
4.数据集格式转换
在之前视觉学习中我们已经说过了xml与yolo的映射关系,这里直接给出一个转换代码
# -*- coding: utf-8 -*-
import xml.etree.ElementTree as ET
import os
import argparse
from pathlib import Path
from os import getcwd
# 支持的图片格式
SUPPORTED_IMAGE_FORMATS = ['.jpg', '.jpeg', '.png', '.bmp', '.tiff', '.tif', '.webp']
def find_image_file(image_id, image_dir):
"""查找对应标注文件的图片文件"""
for ext in SUPPORTED_IMAGE_FORMATS:
image_path = image_dir / f"{image_id}{ext}"
if image_path.exists():
return image_path
return None
def convert(size, box):
"""将边界框坐标转换为YOLO格式"""
dw = 1.0 / size[0]
dh = 1.0 / size[1]
x = (box[0] + box[1]) / 2.0 - 1
y = (box[2] + box[3]) / 2.0 - 1
w = box[1] - box[0]
h = box[3] - box[2]
x = x * dw
w = w * dw
y = y * dh
h = h * dh
return x, y, w, h
def convert_annotation(image_id, ann_dir, label_dir, classes):
"""转换单个标注文件"""
xml_file = ann_dir / f"{image_id}.xml"
if not xml_file.exists():
print(f"⚠️ 警告:标注文件不存在 {xml_file}")
return False
try:
tree = ET.parse(xml_file)
root = tree.getroot()
size = root.find('size')
if size is None:
print(f"⚠️ 警告:{xml_file} 中未找到size信息")
return False
w = int(size.find('width').text)
h = int(size.find('height').text)
label_file = label_dir / f"{image_id}.txt"
with open(label_file, 'w', encoding='utf-8') as out_file:
for obj in root.iter('object'):
difficult_elem = obj.find('difficult')
difficult = difficult_elem.text if difficult_elem is not None else '0'
name_elem = obj.find('name')
if name_elem is None:
continue
cls = name_elem.text
if cls not in classes or int(difficult) == 1:
continue
cls_id = classes.index(cls)
xmlbox = obj.find('bndbox')
if xmlbox is None:
continue
try:
xmin = float(xmlbox.find('xmin').text)
xmax = float(xmlbox.find('xmax').text)
ymin = float(xmlbox.find('ymin').text)
ymax = float(xmlbox.find('ymax').text)
except (AttributeError, ValueError) as e:
print(f"⚠️ 警告:{xml_file} 中边界框格式错误: {e}")
continue
# 标注越界修正
xmin = max(0, min(xmin, w))
xmax = max(0, min(xmax, w))
ymin = max(0, min(ymin, h))
ymax = max(0, min(ymax, h))
b = (xmin, xmax, ymin, ymax)
bb = convert((w, h), b)
out_file.write(f"{cls_id} {' '.join([f'{a:.6f}' for a in bb])}\n")
return True
except ET.ParseError as e:
print(f"❌ 错误:解析XML文件失败 {xml_file}: {e}")
return False
except Exception as e:
print(f"❌ 错误:处理文件 {xml_file} 时发生异常: {e}")
return False
def main():
parser = argparse.ArgumentParser(description='VOC转YOLO格式,支持多种图片格式')
parser.add_argument('--voc_root', type=Path, default='/home/moon/yolo/yolov5/VOC',
help='VOC数据集根目录')
parser.add_argument('--classes', nargs='+', default=['apple', 'banana', 'orange', 'dragonfruit'],
help='类别列表')
parser.add_argument('--image_dir', type=str, default='images',
help='图片目录名称(相对于voc_root)')
parser.add_argument('--ann_dir', type=str, default='Annotations',
help='标注文件目录名称(相对于voc_root)')
parser.add_argument('--sets_dir', type=str, default='ImageSets/Main',
help='数据集划分文件目录(相对于voc_root)')
parser.add_argument('--output_dir', type=str, default='dataSet_path',
help='输出文件列表目录(相对于voc_root)')
args = parser.parse_args()
# 设置路径
voc_root = Path(args.voc_root)
image_dir = voc_root / args.image_dir
ann_dir = voc_root / args.ann_dir
sets_dir = voc_root / args.sets_dir
label_dir = voc_root / 'labels'
output_dir = voc_root / args.output_dir
classes = args.classes
sets = ['train', 'val', 'test']
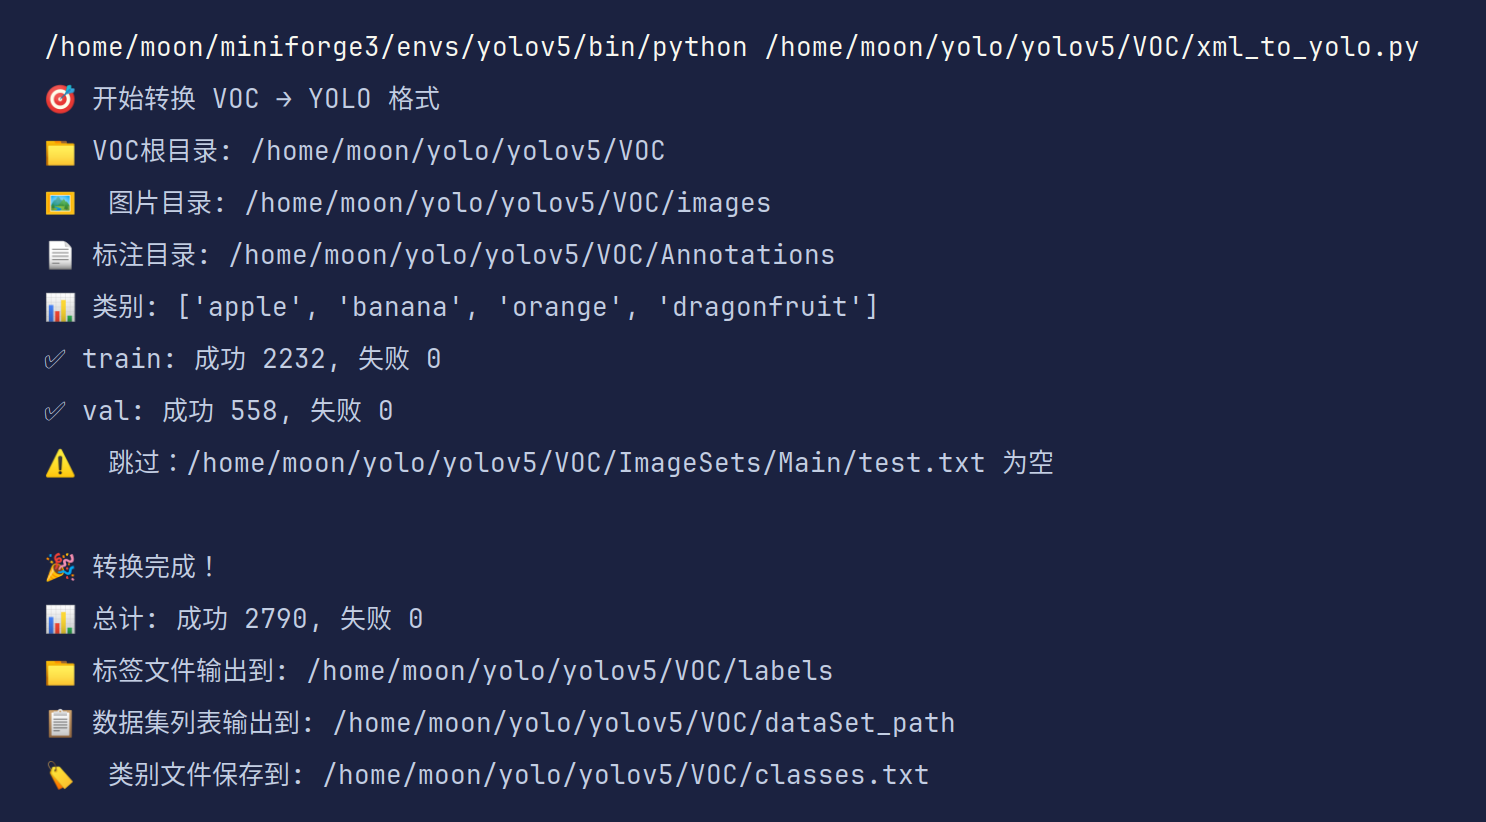
print(f"🎯 开始转换 VOC → YOLO 格式")
print(f"📁 VOC根目录: {voc_root}")
print(f"🖼️ 图片目录: {image_dir}")
print(f"📄 标注目录: {ann_dir}")
print(f"📊 类别: {classes}")
# 创建输出目录
label_dir.mkdir(parents=True, exist_ok=True)
output_dir.mkdir(parents=True, exist_ok=True)
total_success = 0
total_failed = 0
for image_set in sets:
set_file = sets_dir / f"{image_set}.txt"
if not set_file.exists():
print(f"⚠️ 跳过:{set_file} 不存在")
continue
try:
with open(set_file, 'r', encoding='utf-8') as f:
image_ids = [line.strip() for line in f.readlines() if line.strip()]
except Exception as e:
print(f"❌ 错误:读取 {set_file} 失败: {e}")
continue
if not image_ids:
print(f"⚠️ 跳过:{set_file} 为空")
continue
# 创建数据集列表文件
list_file = output_dir / f"{image_set}.txt"
success_count = 0
failed_count = 0
with open(list_file, 'w', encoding='utf-8') as f_list:
for image_id in image_ids:
# 查找图片文件
image_path = find_image_file(image_id, image_dir)
if image_path is None:
print(f"⚠️ 警告:未找到图片文件 {image_id}")
failed_count += 1
continue
# 转换标注
if convert_annotation(image_id, ann_dir, label_dir, classes):
f_list.write(f"{image_path}\n")
success_count += 1
else:
failed_count += 1
total_success += success_count
total_failed += failed_count
print(f"✅ {image_set}: 成功 {success_count}, 失败 {failed_count}")
print(f"\n🎉 转换完成!")
print(f"📊 总计: 成功 {total_success}, 失败 {total_failed}")
print(f"📁 标签文件输出到: {label_dir}")
print(f"📋 数据集列表输出到: {output_dir}")
# 保存类别文件
classes_file = voc_root / 'classes.txt'
with open(classes_file, 'w', encoding='utf-8') as f:
for cls in classes:
f.write(f"{cls}\n")
print(f"🏷️ 类别文件保存到: {classes_file}")
if __name__ == '__main__':
main()
用法:
–voc_root: VOC数据集根目录(一般修改这个即可)
–classes: 类别列表(需与yaml文件中类别顺序对应)
–image_dir: 图片目录名(已经默认为images)
–ann_dir: 标注文件目录名(已经默认为Annotations)
–sets_dir: 数据集划分文件目录(默认无需更改)
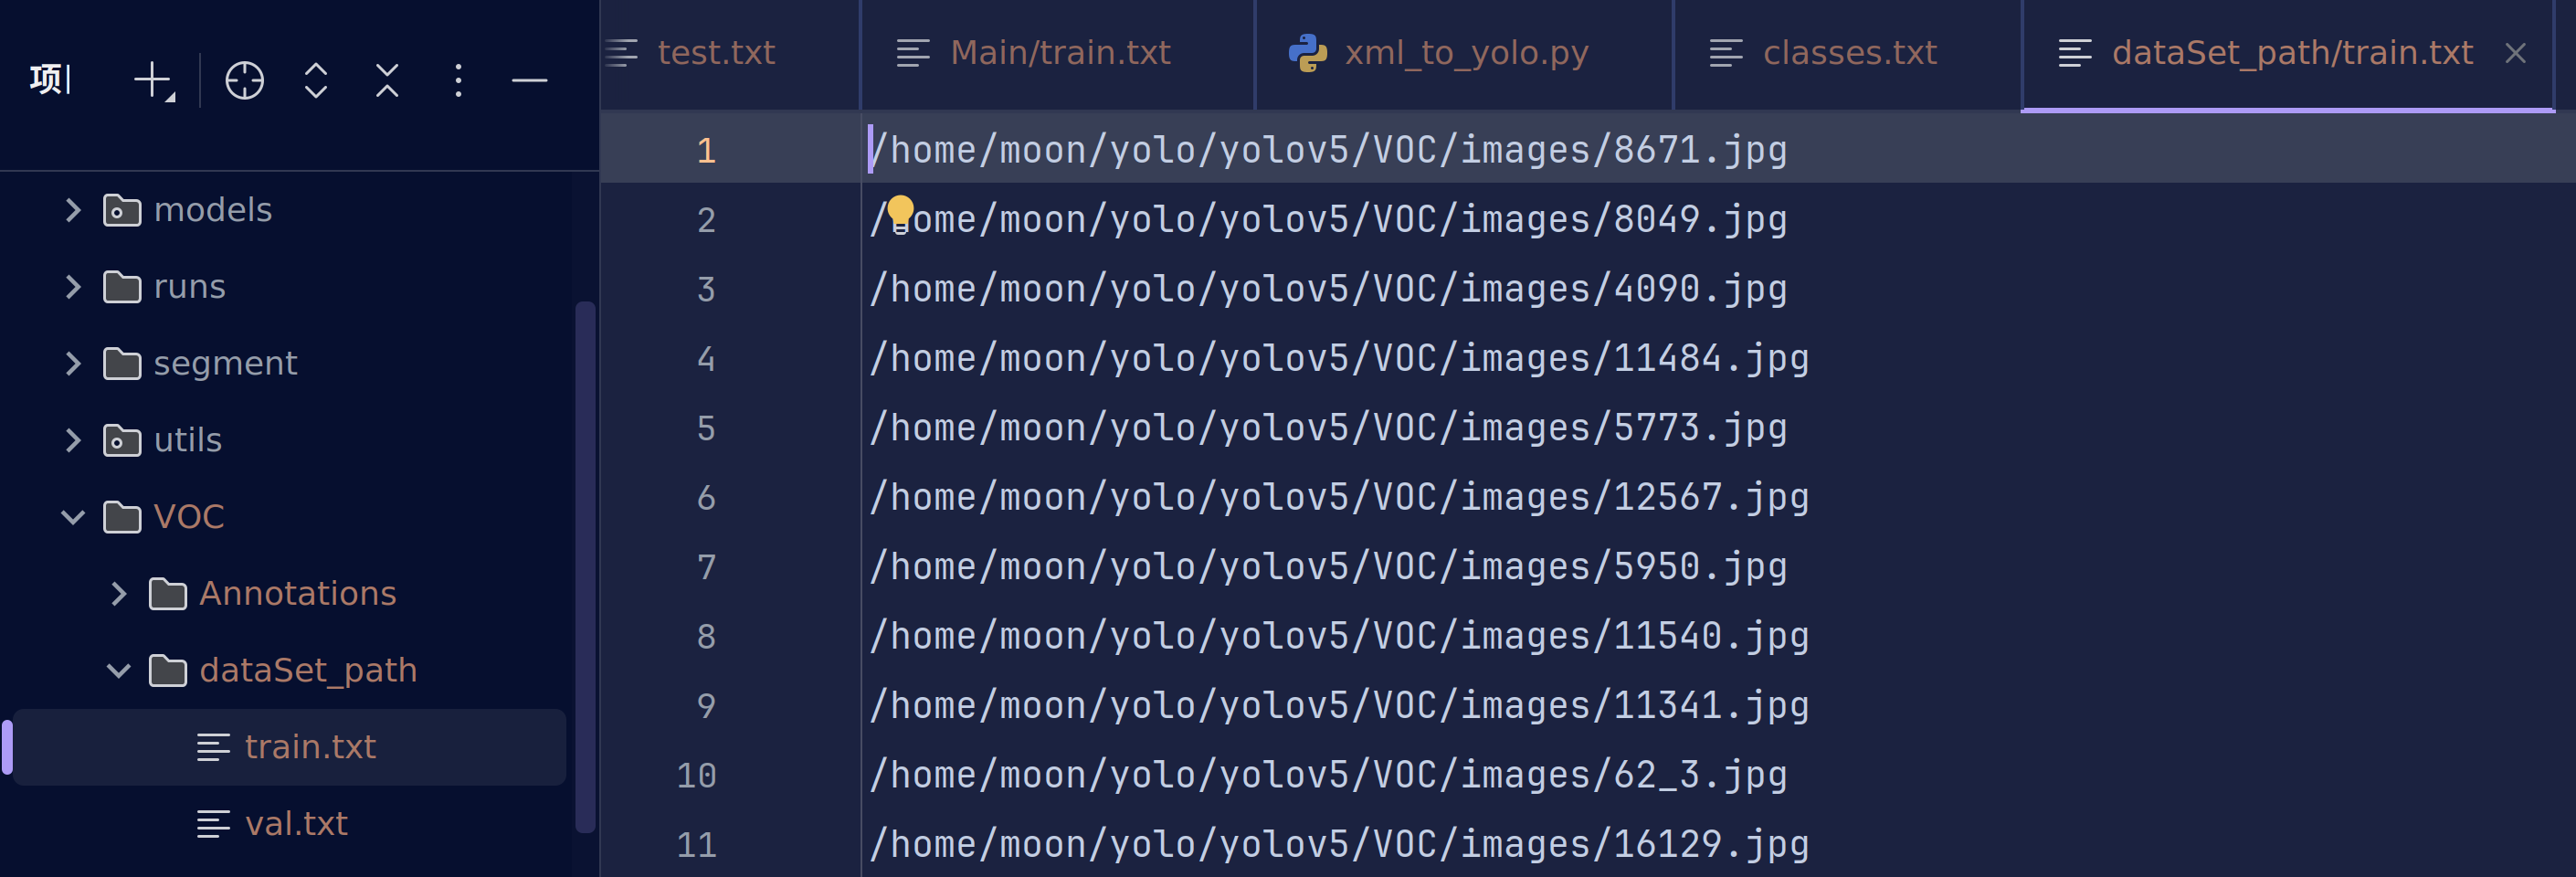
最终在dataSet_path文件夹下得到我们真正需要的txt文件
现在让我们补全yaml文件吧
三、模型训练:从零开始训练你的检测模型
1.选择合适的预训练模型
预训练模型 = 别人已经替你训练好的神经网络权重文件。
我们往往并不需要从零开始训练,而是直接加载别人练好的参数,再在我们的小数据集上**微调(Fine-Tune)**即可。可以说大多数情况我们做的都是微调模型,而不是从零训练。
站在巨人肩膀上处理问题!
| 从零训练 | 预训练 + 微调 |
|---|---|
| 需要海量数据 | 几百~几千张就能用 |
| 需要昂贵算力 | 普通 GPU/CPU 即可 |
| 收敛慢、易过拟合 | 收敛快、泛化好 |
| 领域 | 预训练模型 | 作用 |
|---|---|---|
| 图像 | ResNet50、EfficientNet、YOLOv5s.pt | 识别、检测、分割 |
| 文本 | BERT、GPT、T5 | 翻译、问答、生成 |
| 语音 | Wav2Vec 2.0 | 语音识别、合成 |
| 多模态 | CLIP | 图文匹配、零样本分类 |
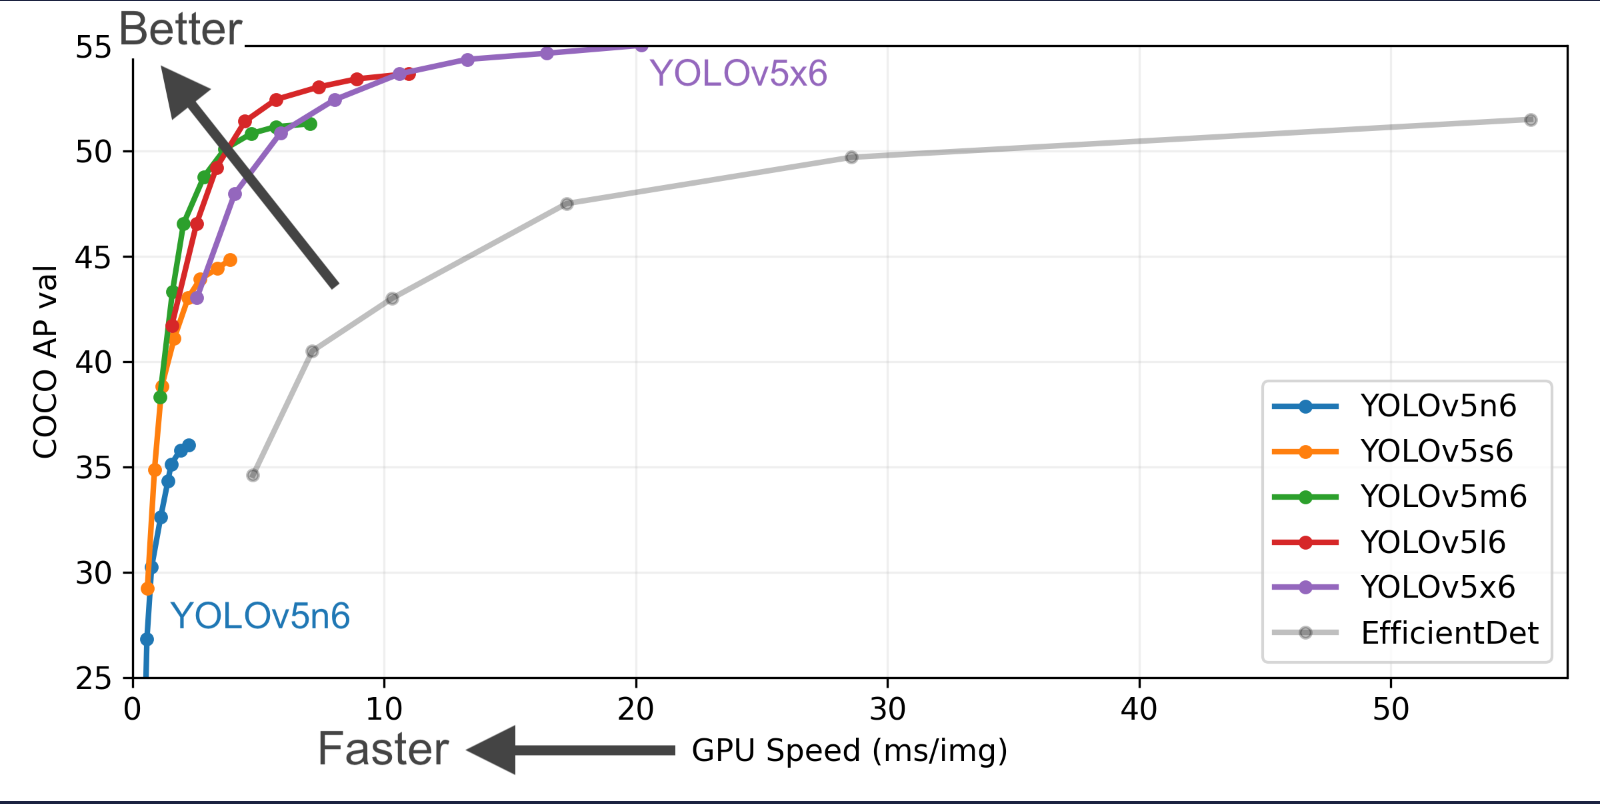
yolov5官方给出了从n到x的不同规模的预训练权重,在之前我们已经下载好了n和s,大家也可以尝试其他的模型。
通过这张表大家也可以很明显看出来越往下模型效果越好,参数量越大,所需要的算力资源越大。算力的重要性一目了然。
在小样本数据集中我的笔记本GPU只能支持我使用到s或者m,但是对于机器人比赛已经绰绰有余了。

2.网络配置文件
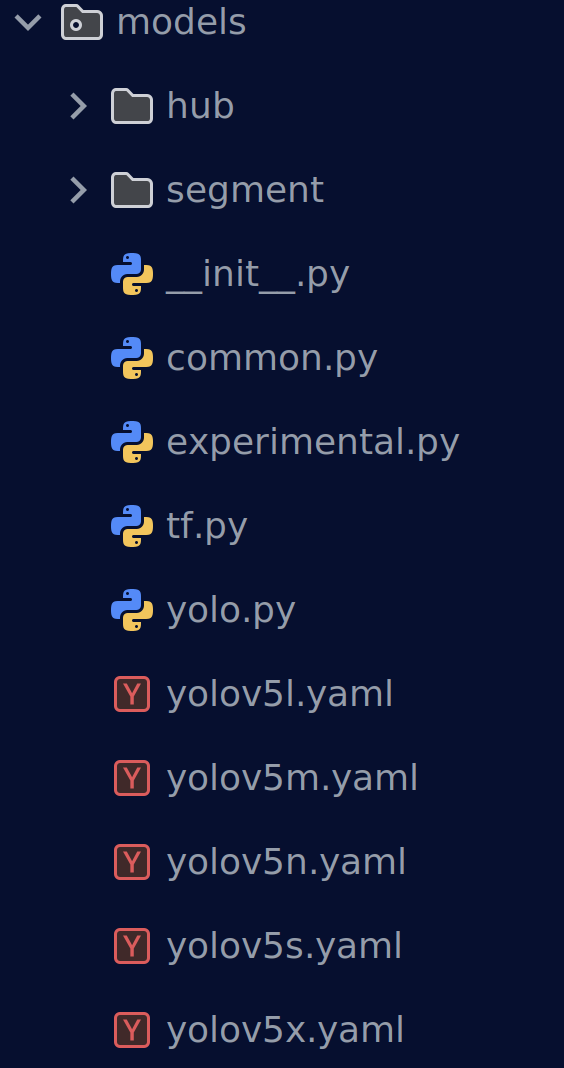
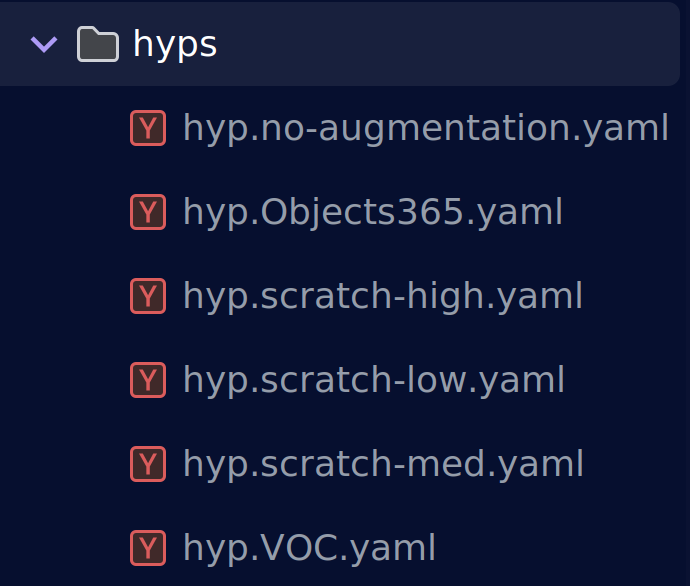
在yolov5/models文件夹中存储着网络模型和不同模型参数的网络配置yaml文件
我们打开yolov5n.yaml
# Ultralytics 🚀 AGPL-3.0 License - https://ultralytics.com/license

# Parameters
nc: 80 # number of classes
depth_multiple: 0.33 # model depth multiple
width_multiple: 0.25 # layer channel multiple
anchors:
  - [10, 13, 16, 30, 33, 23] # P3/8
  - [30, 61, 62, 45, 59, 119] # P4/16
  - [116, 90, 156, 198, 373, 326] # P5/32

# YOLOv5 v6.0 backbone
backbone:
  # [from, number, module, args]
  [
    [-1, 1, Conv, [64, 6, 2, 2]], # 0-P1/2
    [-1, 1, Conv, [128, 3, 2]], # 1-P2/4
    [-1, 3, C3, [128]],
    [-1, 1, Conv, [256, 3, 2]], # 3-P3/8
    [-1, 6, C3, [256]],
    [-1, 1, Conv, [512, 3, 2]], # 5-P4/16
    [-1, 9, C3, [512]],
    [-1, 1, Conv, [1024, 3, 2]], # 7-P5/32
    [-1, 3, C3, [1024]],
    [-1, 1, SPPF, [1024, 5]], # 9
  ]

# YOLOv5 v6.0 head
head: [
    [-1, 1, Conv, [512, 1, 1]],
    [-1, 1, nn.Upsample, [None, 2, "nearest"]],
    [[-1, 6], 1, Concat, [1]], # cat backbone P4
    [-1, 3, C3, [512, False]], # 13

    [-1, 1, Conv, [256, 1, 1]],
    [-1, 1, nn.Upsample, [None, 2, "nearest"]],
    [[-1, 4], 1, Concat, [1]], # cat backbone P3
    [-1, 3, C3, [256, False]], # 17 (P3/8-small)

    [-1, 1, Conv, [256, 3, 2]],
    [[-1, 14], 1, Concat, [1]], # cat head P4
    [-1, 3, C3, [512, False]], # 20 (P4/16-medium)

    [-1, 1, Conv, [512, 3, 2]],
    [[-1, 10], 1, Concat, [1]], # cat head P5
    [-1, 3, C3, [1024, False]], # 23 (P5/32-large)

    [[17, 20, 23], 1, Detect, [nc, anchors]], # Detect(P3, P4, P5)
  ]
可以清晰看到整个网络模型的架构,开头的nc数量在训练时会被我们数据集yaml文件中的nc进行覆盖
这次训练我们就简单使用一下yolov5n这个权重
3.训练参数
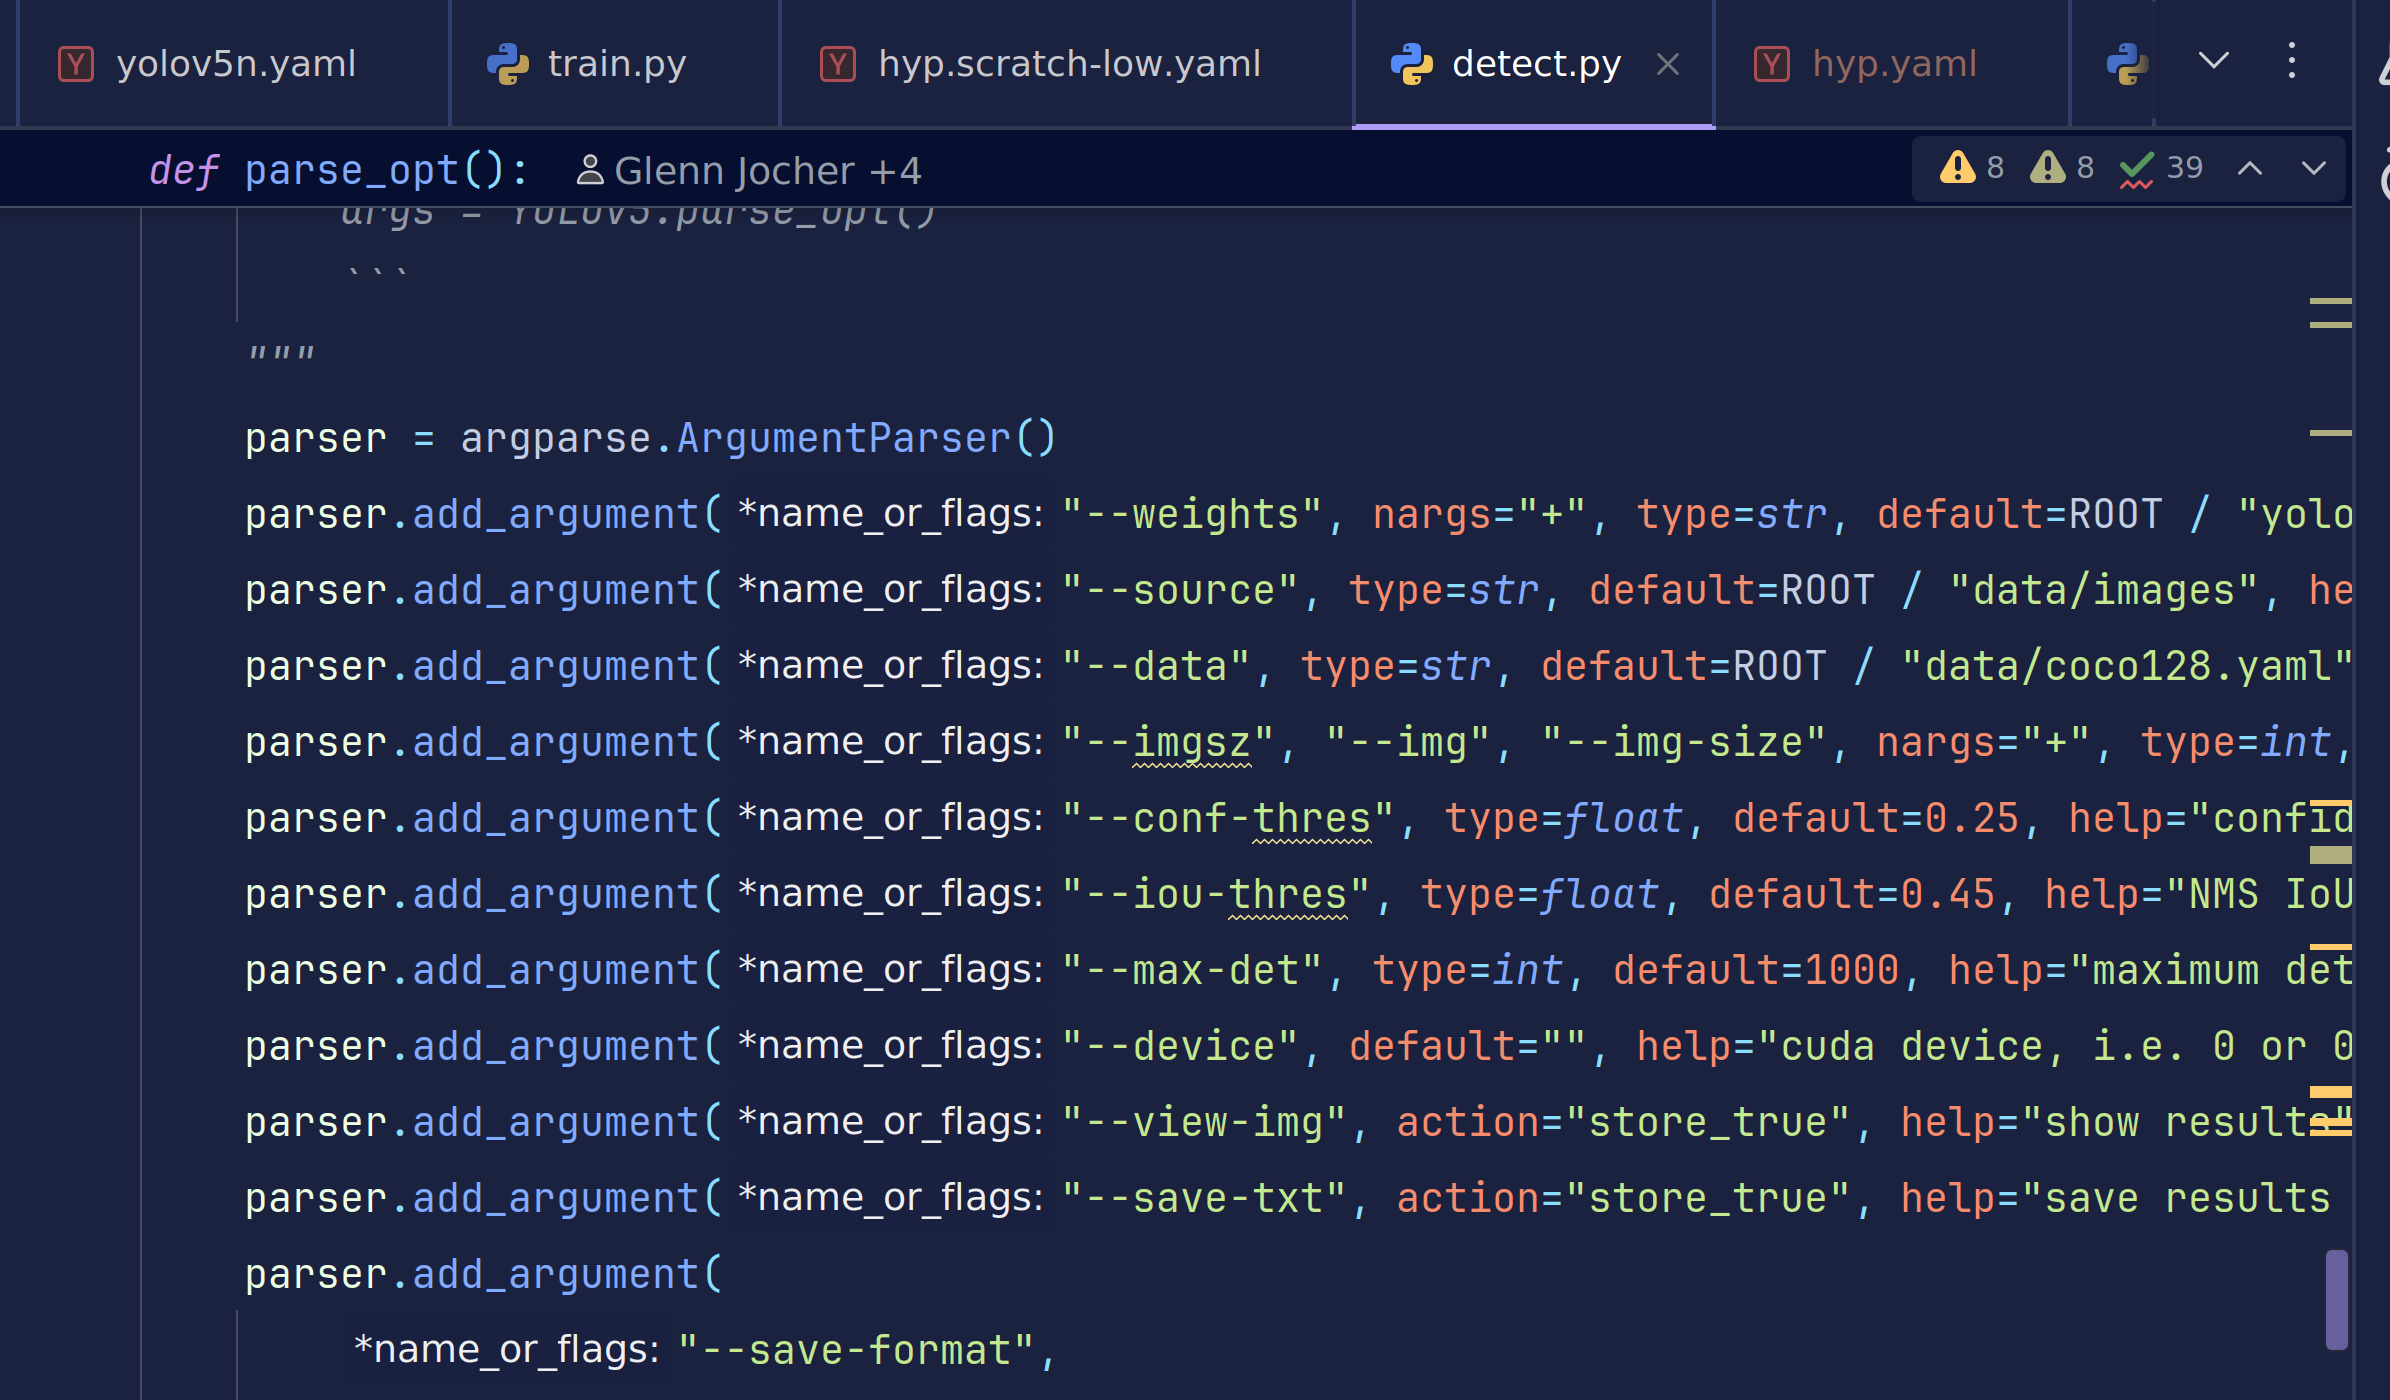
打开trian.py,官方就已经给出了单GPU和多GPU训练的指令。从这里开始,我们的训练指令并不是简单的一个按钮了,而是在终端中执行python命令,通过不同配置参数完成我们的训练
yolov5在train.py中给出了参数的英文解释
这里以表格的形式给出中文解释,但是英文的表述应该更加准确,所以大家需要提高英语水平。
🔧 1. 模型与权重
| 参数 | 默认值 | 白话解释 | 要不要改 |
|---|---|---|---|
weights | yolov5s.pt | 预训练权重;换模型就改它 | 常用 |
cfg | ‘’ | 网络结构 yaml;空=用 weights 自带 | 一般不动 |
data | coco128.yaml | 数据集配置文件;换数据必改 | 常用 |
hyp | hyp.scratch-low.yaml | 超参配方;调参才动 | 进阶 |
🎯 2. 训练规模
| 参数 | 默认值 | 白话解释 | 要不要改 |
|---|---|---|---|
epochs | 100 | 总轮次;小数据集 50-300 | 常用 |
batch_size | 16 | 总批量;显存占满即可 | 必调 |
imgsz | 640 | 输入分辨率;大=慢+准 | 常用 |
optimizer | SGD | 优化器;换 Adam/AdamW 可改 | 可选 |
⚡ 3. 加速与技巧
| 参数 | 默认值 | 白话解释 | 要不要改 |
|---|---|---|---|
rect | False | 矩形训练(batch 内少 padding) | 推理常用 |
cache | None | RAM/Disk 缓存;数据少→ram | 常用 |
multi_scale | False | ±50% 分辨率抖动;涨点慢 | 可选 |
single_cls | False | 多类当单类练;特殊需求 | 极少 |
sync_bn | False | 多卡同步 BN;DDP 才有效 | 多卡必开 |
🧊 4. 正则与约束
| 参数 | 默认值 | 白话解释 | 要不要改 |
|---|---|---|---|
label_smoothing | 0.0 | 标签平滑;防过拟合 | 可选 |
freeze | [0] | 冻结层; backbone=10 只练头 | 微调常用 |
cos_lr | False | 余弦退火;学习率曲线更平滑 | 可选 |
⏹️ 5. 早停与保存
| 参数 | 默认值 | 白话解释 | 要不要改 |
|---|---|---|---|
patience | 100 | 早停忍耐轮次;无提升即停 | 可减小 |
save_period | -1 | 每 N 轮存 ckpt;-1=只存 best/last | 大模型可 10 |
nosave | False | 只存 final;省磁盘 | 极少 |
🌐 6. 分布式 & 设备
| 参数 | 默认值 | 白话解释 | 要不要改 |
|---|---|---|---|
device | ‘’ | GPU 编号;‘’=自动 | 常用 |
workers | 8 | 数据加载线程;CPU 多可增大 | 报错再减 |
local_rank | -1 | DDP 自动注入;手动勿改 | 勿动 |
🏃 7. 训练控制
| 参数 | 默认值 | 白话解释 | 要不要改 |
|---|---|---|---|
resume | False | 断点续训;给路径或 True | 中断必用 |
evolve | 0 | 超参进化;>0=遗传算法调参 | 调参才开 |
📁 8. 输出路径
| 参数 | 默认值 | 白话解释 | 要不要改 |
|---|---|---|---|
project | runs/train | 实验根目录 | 可改 |
name | exp | 子文件夹;exp/ exp2/ … | 可改 |
exist_ok | False | 允许覆盖旧实验 | 调试时可开 |
这么多参数!学长,这我怎么背,诶~记住下面这段话
换数据改 data,换模型改 weights,显存决定 batch_size,epochs从200慢慢减,其余默认先跑着看!
调参是一门经验与技术并存的学问,同一个模型,调参调的好不仅训练快效果还好。
4.训练开始
在你大致了解上述参数时,我们就可以进行训练了
# 使用预训练权重启动训练,绝对/相对路径都可
python train.py --img 640 --batch 16 --epochs 100 \
                --data VOC/fruit.yaml --weights yolov5n.pt
我们的图片大小为标准的480P,也就是640*480,为了不丢失信息,我们一般使用640大小,当然你也可以选择480,都是以正方形作为训练
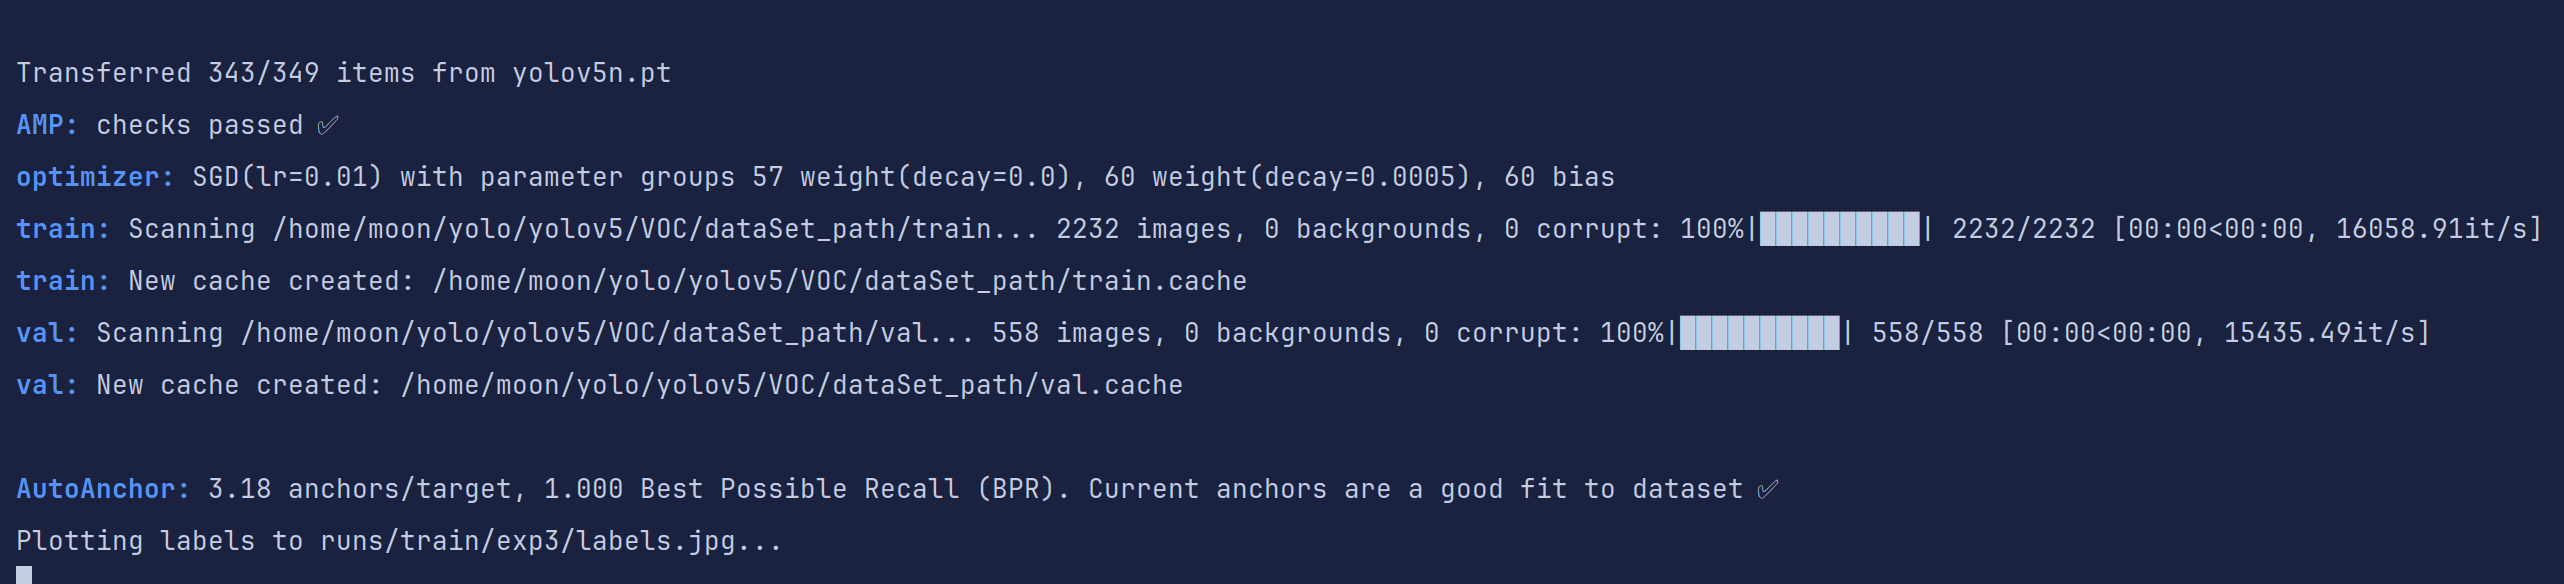
训练开始,之前我们已经有了机器学习训练的经验了,起手仍然是打印超参数信息和设备信息。
第一次需要下载缺失的字体,你也可以进行手动加速,我直接暂停手动下载重新开始
这里是训练的超参数,也是改进的重要依据

网络模型
加载数据集并转换为缓存,如果训练出现是因为数据集的错误,需要删除对应缓存重新生成
开始训练,训练轮数,GPU显存占用,loss值,和一系列评价指标
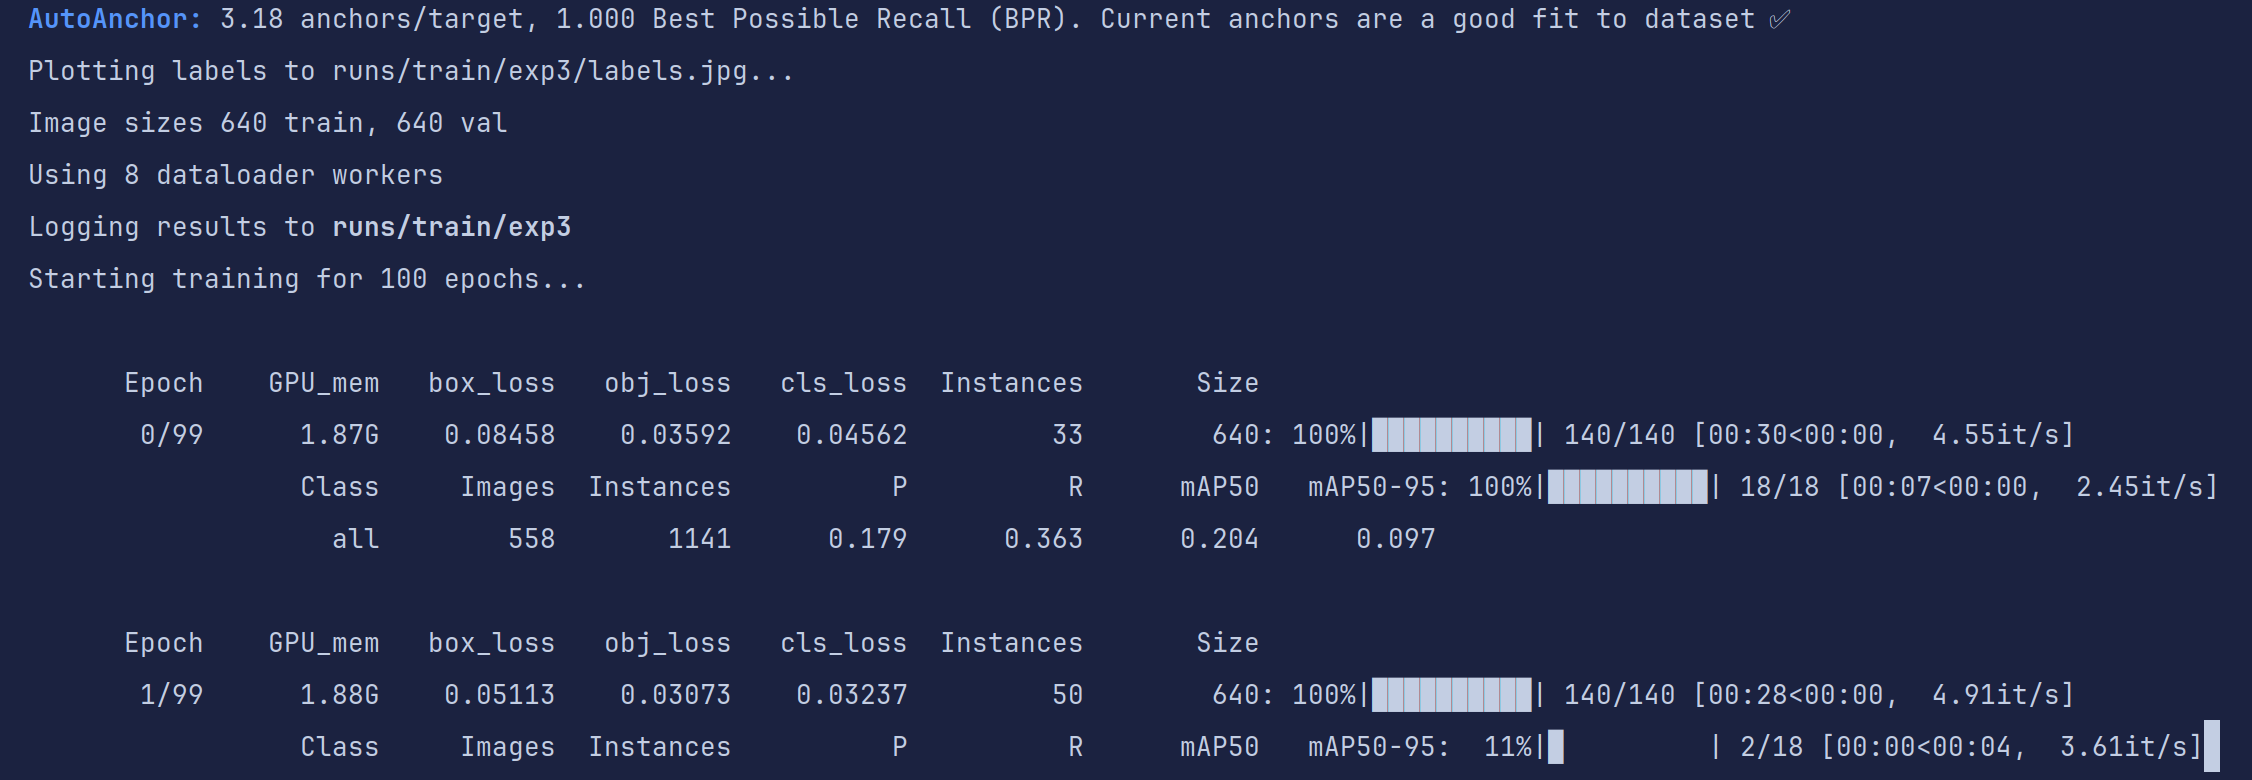
耐心等待训练结束(cpu和GPU训练速度相差可能有5-10倍甚至更多),如果出现out of memory字样说明你的显存不够用了,减少batch或者换小模型吧

不到一小时,训练结果就出来了,对于要应用于比赛的目标检测模型来说,我们的目的就是把四个评价指标在不过拟合的情况下尽可能的刷高。
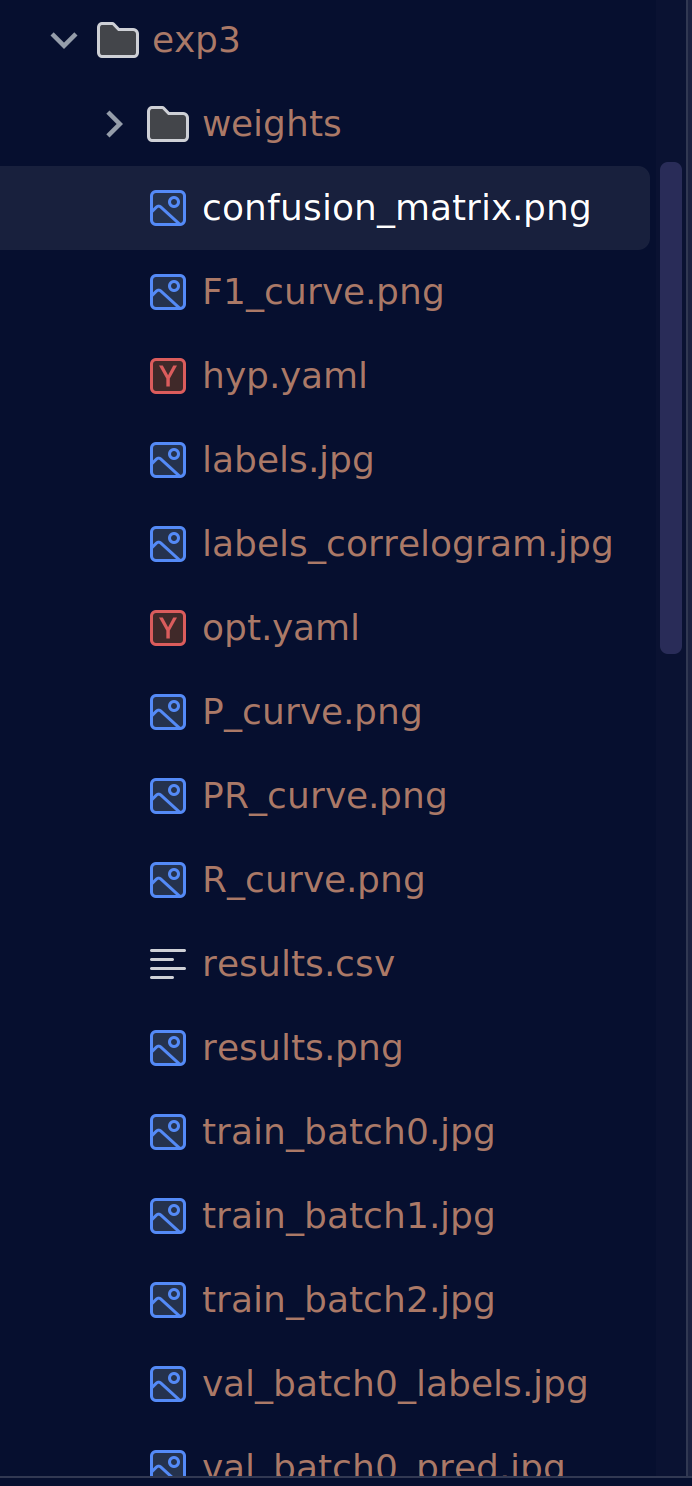
我们先看看产出文件夹内的东西

混淆矩阵(Confusion Matrix):是分类任务中最常用的性能可视化工具之一
| 真实类 | 对角线值 | 主要错误去向 | 解读 |
|---|---|---|---|
| apple | ~0.97 | 几乎无 | 分得非常准 |
| banana | ~0.88 | 少量→apple | 基本正确,偶被认成苹果 |
| orange | ~0.80 | 少量→banana | 尚可,偶被认成香蕉 |
| dragonfruit | ~0.60 | 大量→background | 最难类,近四成被当背景 |
| background | ~0.98 | 少量→dragonfruit | 背景学得很好,但把火龙果也当背景 |
后续分析/改进方向:
- dragonfruit 召回低
增大数据量 / 增强 / 调高该类损失权重
检查标注:是否框太小/被遮挡?
- apple → banana 混淆
颜色/形状相似 → 加 HSV 增强、MixUp、Copy-Paste
调高输入分辨率(imgsz=832)让细节更明显
- 背景误检龙果
负样本里加「龙果局部」patch,降低 False Positive
调低背景类置信度阈值(conf_thres)
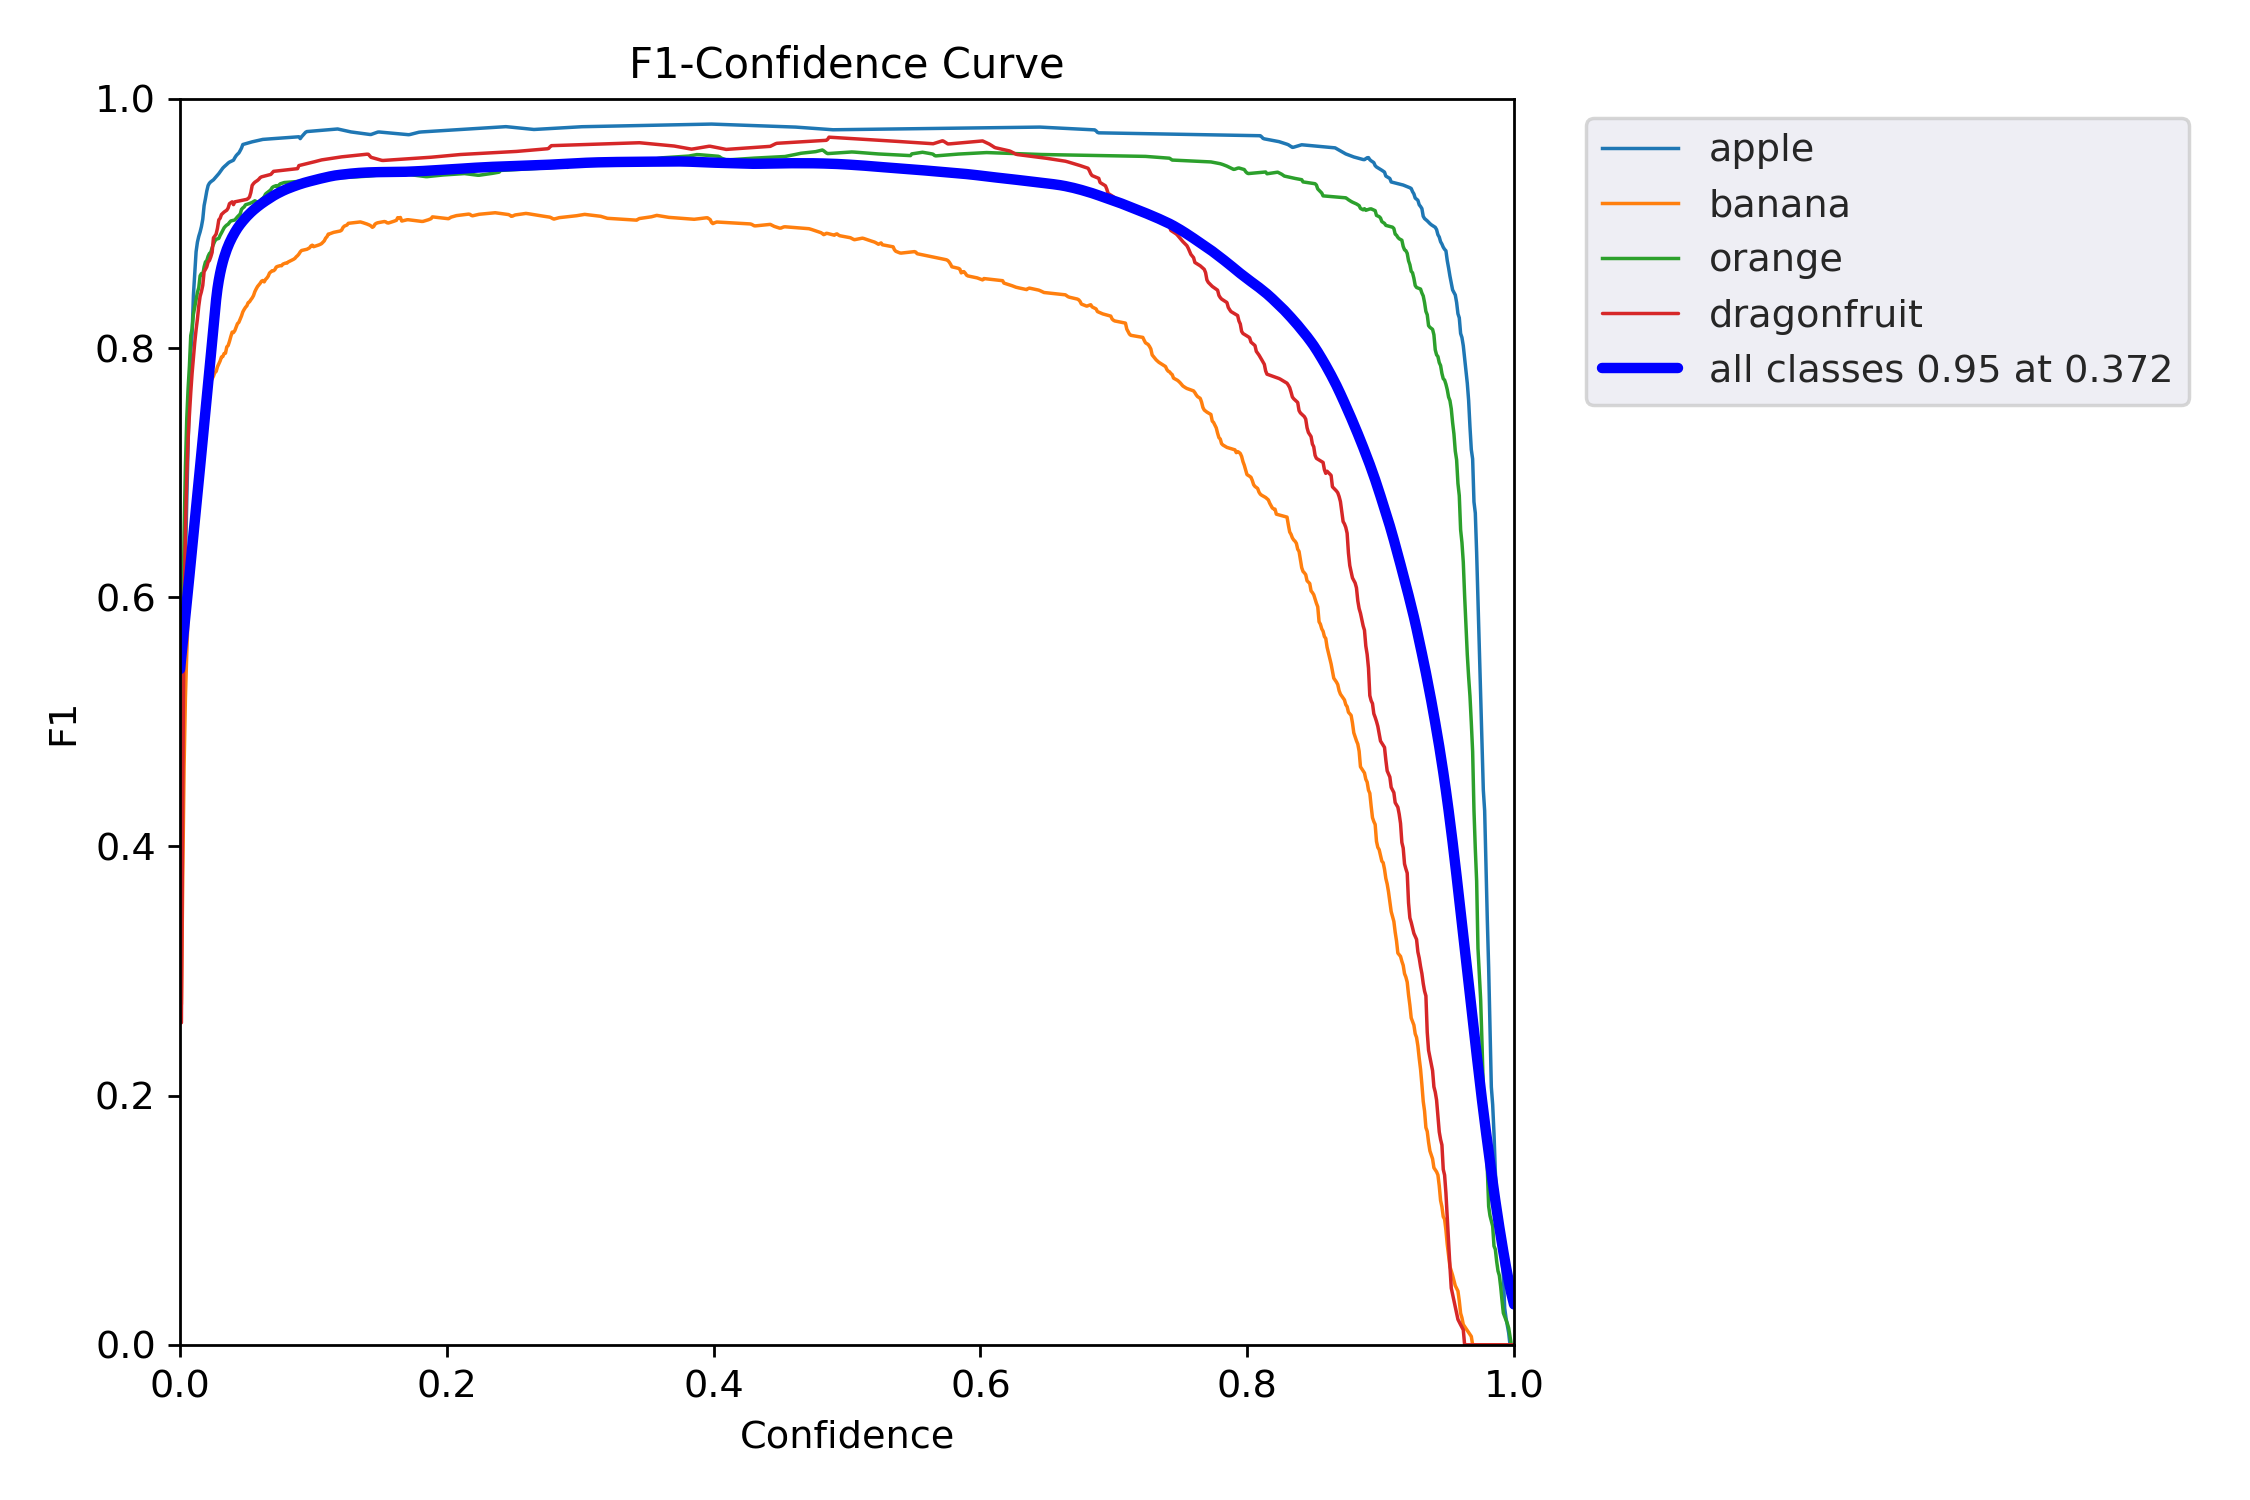
F1-Confidence 曲线(F1 得分随置信度阈值变化的趋势图),它告诉你:
当模型把“置信度 ≥ x” 的样本才当作正例时,各类别的 F1 得分是多少?最优阈值在哪?
| 类别 | 峰值 F1 | 最优阈值* | 说明 |
|---|---|---|---|
| apple | ~0.97 | ~0.25 | 最稳;低阈值就能高 F1 |
| banana | ~0.88 | ~0.30 | 良好;稍松即可 |
| orange | ~0.80 | ~0.35 | 中等;阈值要更严 |
| dragonfruit | ~0.60 | ~0.45 | 最差;必须高置信才可靠 |
| all classes | 0.95 @ 0.372 | 0.372 | 全局最优阈值 |
告诉我们:
dragonfruit 单独补救
调高该类损失权重
增加该类训练样本 / 增强
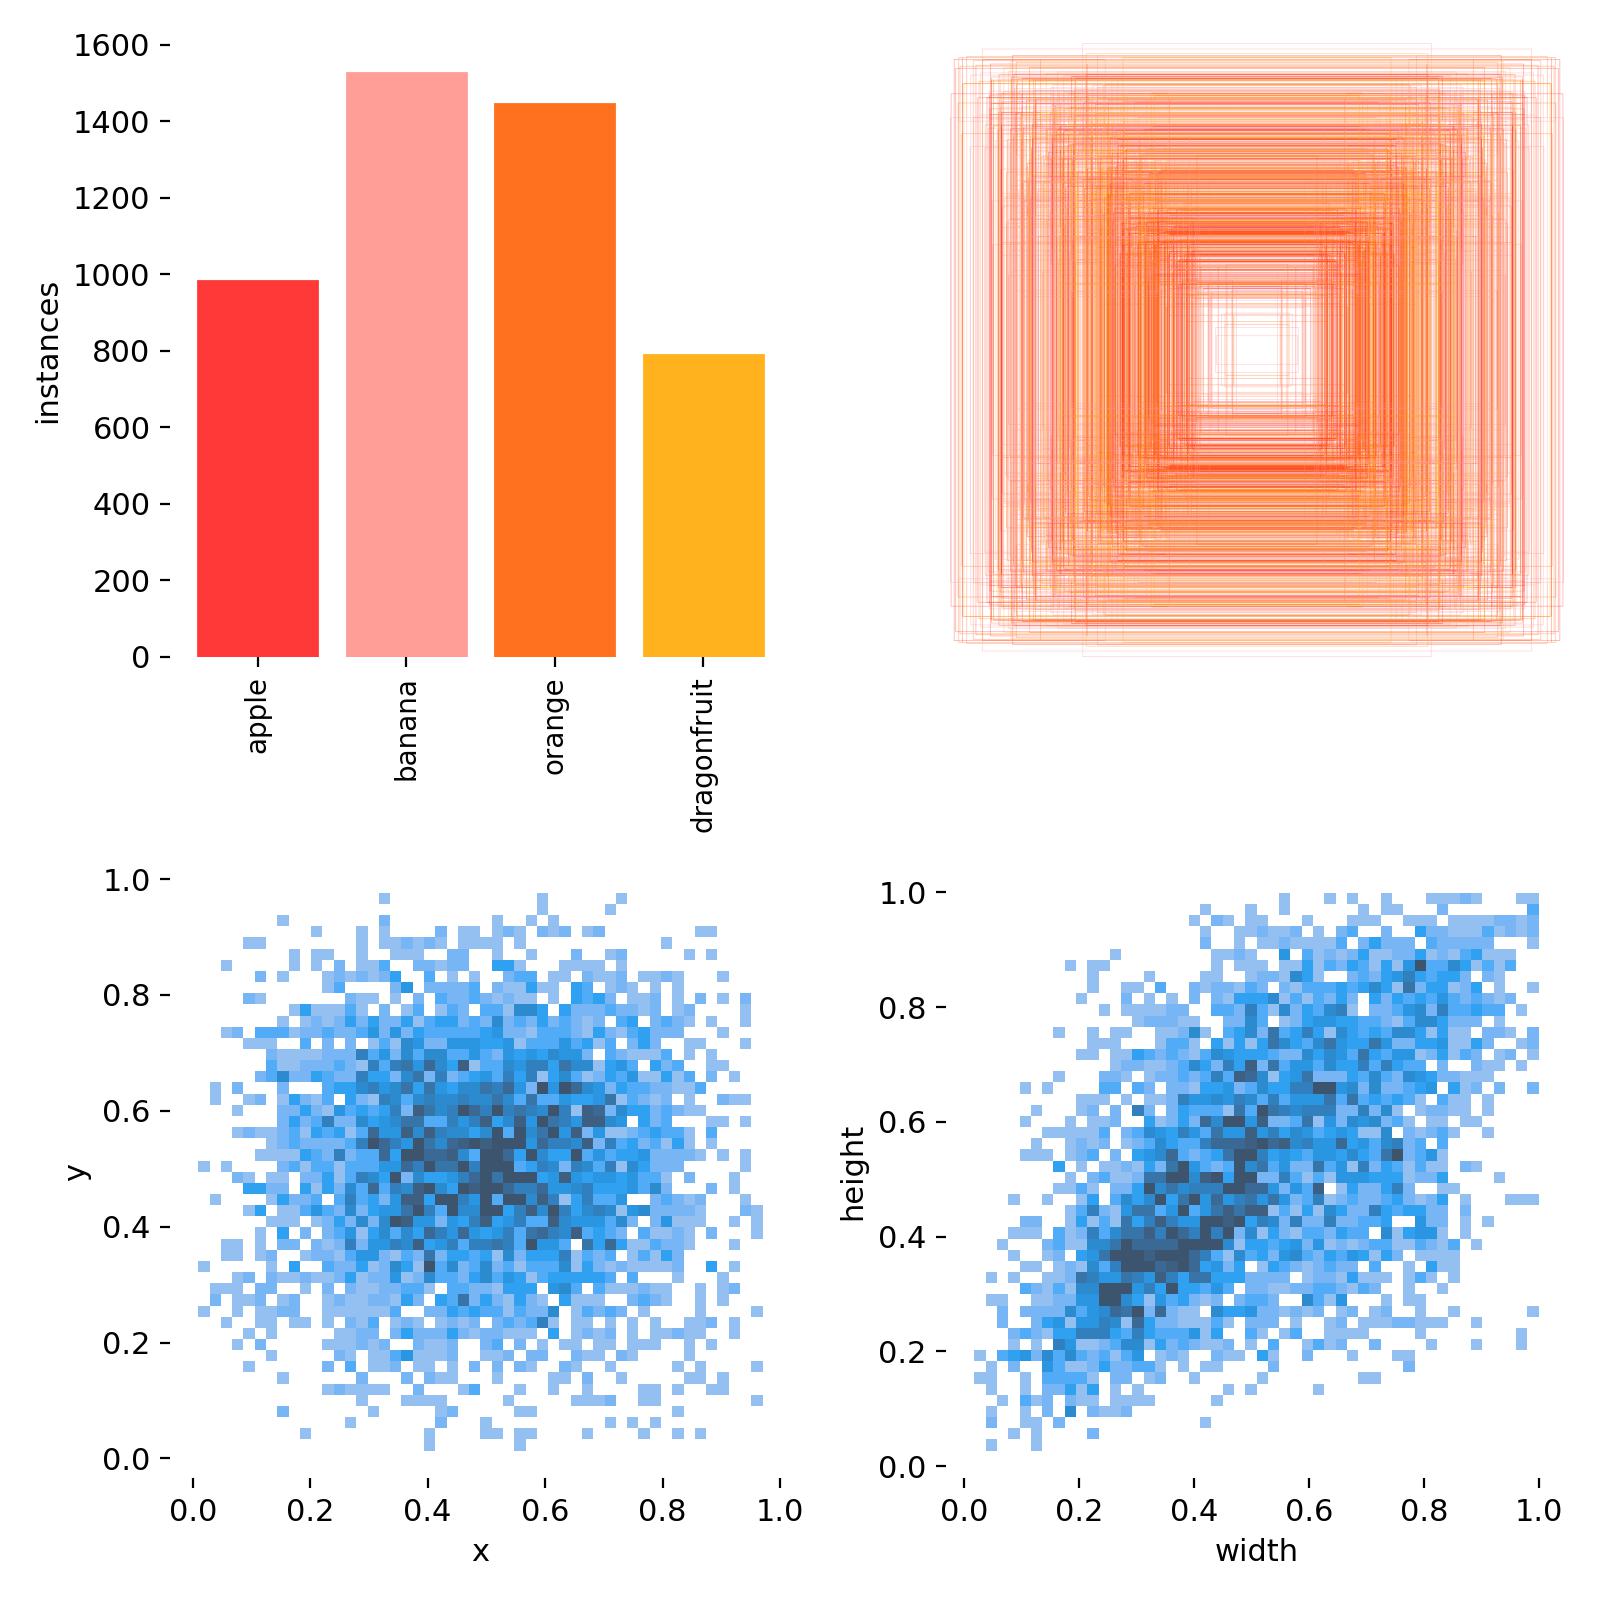
标签-尺寸」分布热力图(Labels-Width 散点密度图),用来告诉你:
数据集中所有目标的 归一化宽度 与 实例数量 的关系,以及每个宽度区间里各类别各占多少。
| 宽度区间 | 计数峰值 | 主导类别 | 解读 |
|---|---|---|---|
| 0.05–0.15 | ~1200 个 | dragonfruit 青色占大头 | 小目标最多,龙果偏小 |
| 0.15–0.30 | ~800 个 | banana/orange 交替 | 中等目标,香蕉橙子为主 |
| 0.30–0.60 | ~400 个 | apple 红色突出 | 大目标多是苹果 |
| >0.6 | <100 个 | 几乎无 | 极大目标极少 |
- 小目标(<0.1)过多
增大数据增强 Copy-Paste、Mosaic 比例
调高 anchor_t=4.0 或自定义小 anchor
训练时 imgsz 增大(832/1024)让小目标变大
- 大目标(>0.5)过少
检查是否框被截断或图片分辨率不足
主动添加「近距离拍摄」样本
- 类别-尺寸失衡
dragonfruit 全是小框 → 专门补大框样本
apple 全是大框 → 补中远距离拍摄
- 与 anchor 对比
运行 python utils/autoanchor.py --data your.yaml
看当前 anchor 是否与小目标峰值对齐,不对齐就重算

Labels Correlogram(标签相关矩阵图),它把数据集中所有目标框的 4 个几何属性两两配对,画出散点密度 + 线性关系,一眼就能看出:
框的宽-高、中心点 x-y、尺寸-位置 之间有没有规律、有没有异常
| 子图 | 现象 | 解读 |
|---|---|---|
| width vs height | 散点呈对角带状 | 宽≈高 → 大多数目标是近似正方形框 |
| x vs y | 均匀散布在 0-1 | 目标在图像全域均匀出现,无显著聚类 |
| width vs x | 两端稍暗,中间亮 | 大目标更集中在画面中心(透视自然现象) |
| height vs y | 同上 | 垂直方向同理 |
| 对角线直方图 | 近似高斯 | 尺寸分布单峰,无严重长尾 |
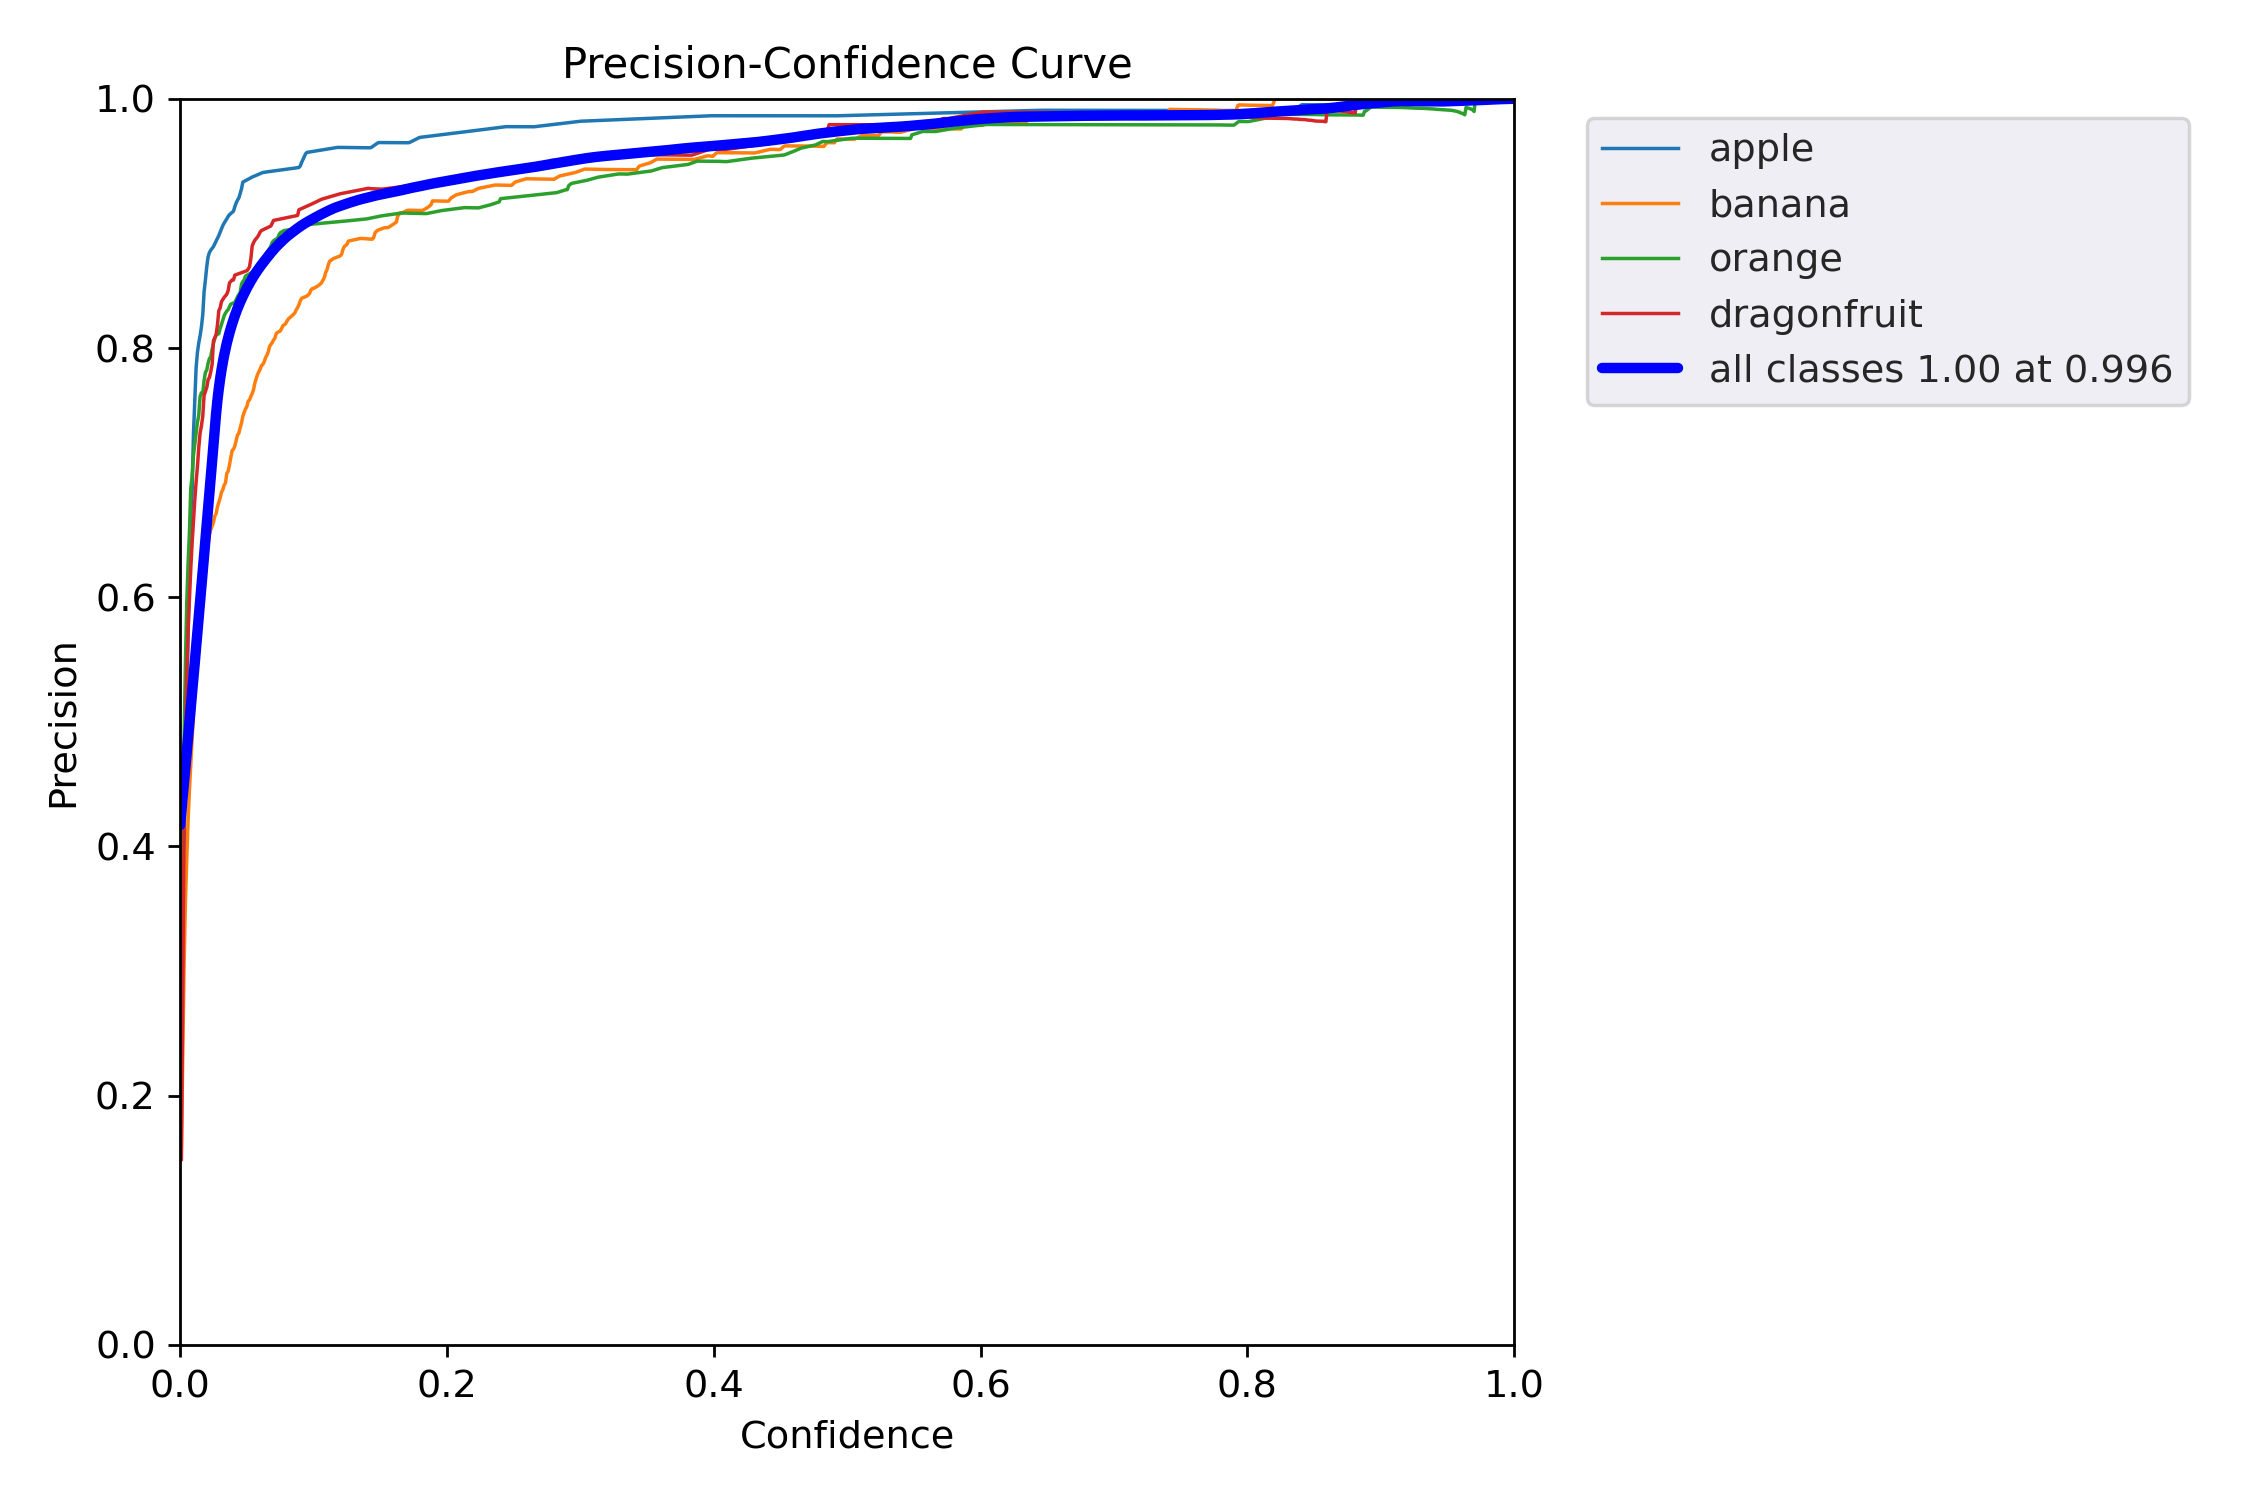
Precision-Confidence 曲线(精度随置信度阈值变化的趋势),它告诉你:
当模型只把“置信度 ≥ x” 的样本当作正例时,每一类的 Precision(查准率)是多少?
越高越好,越靠左越好。
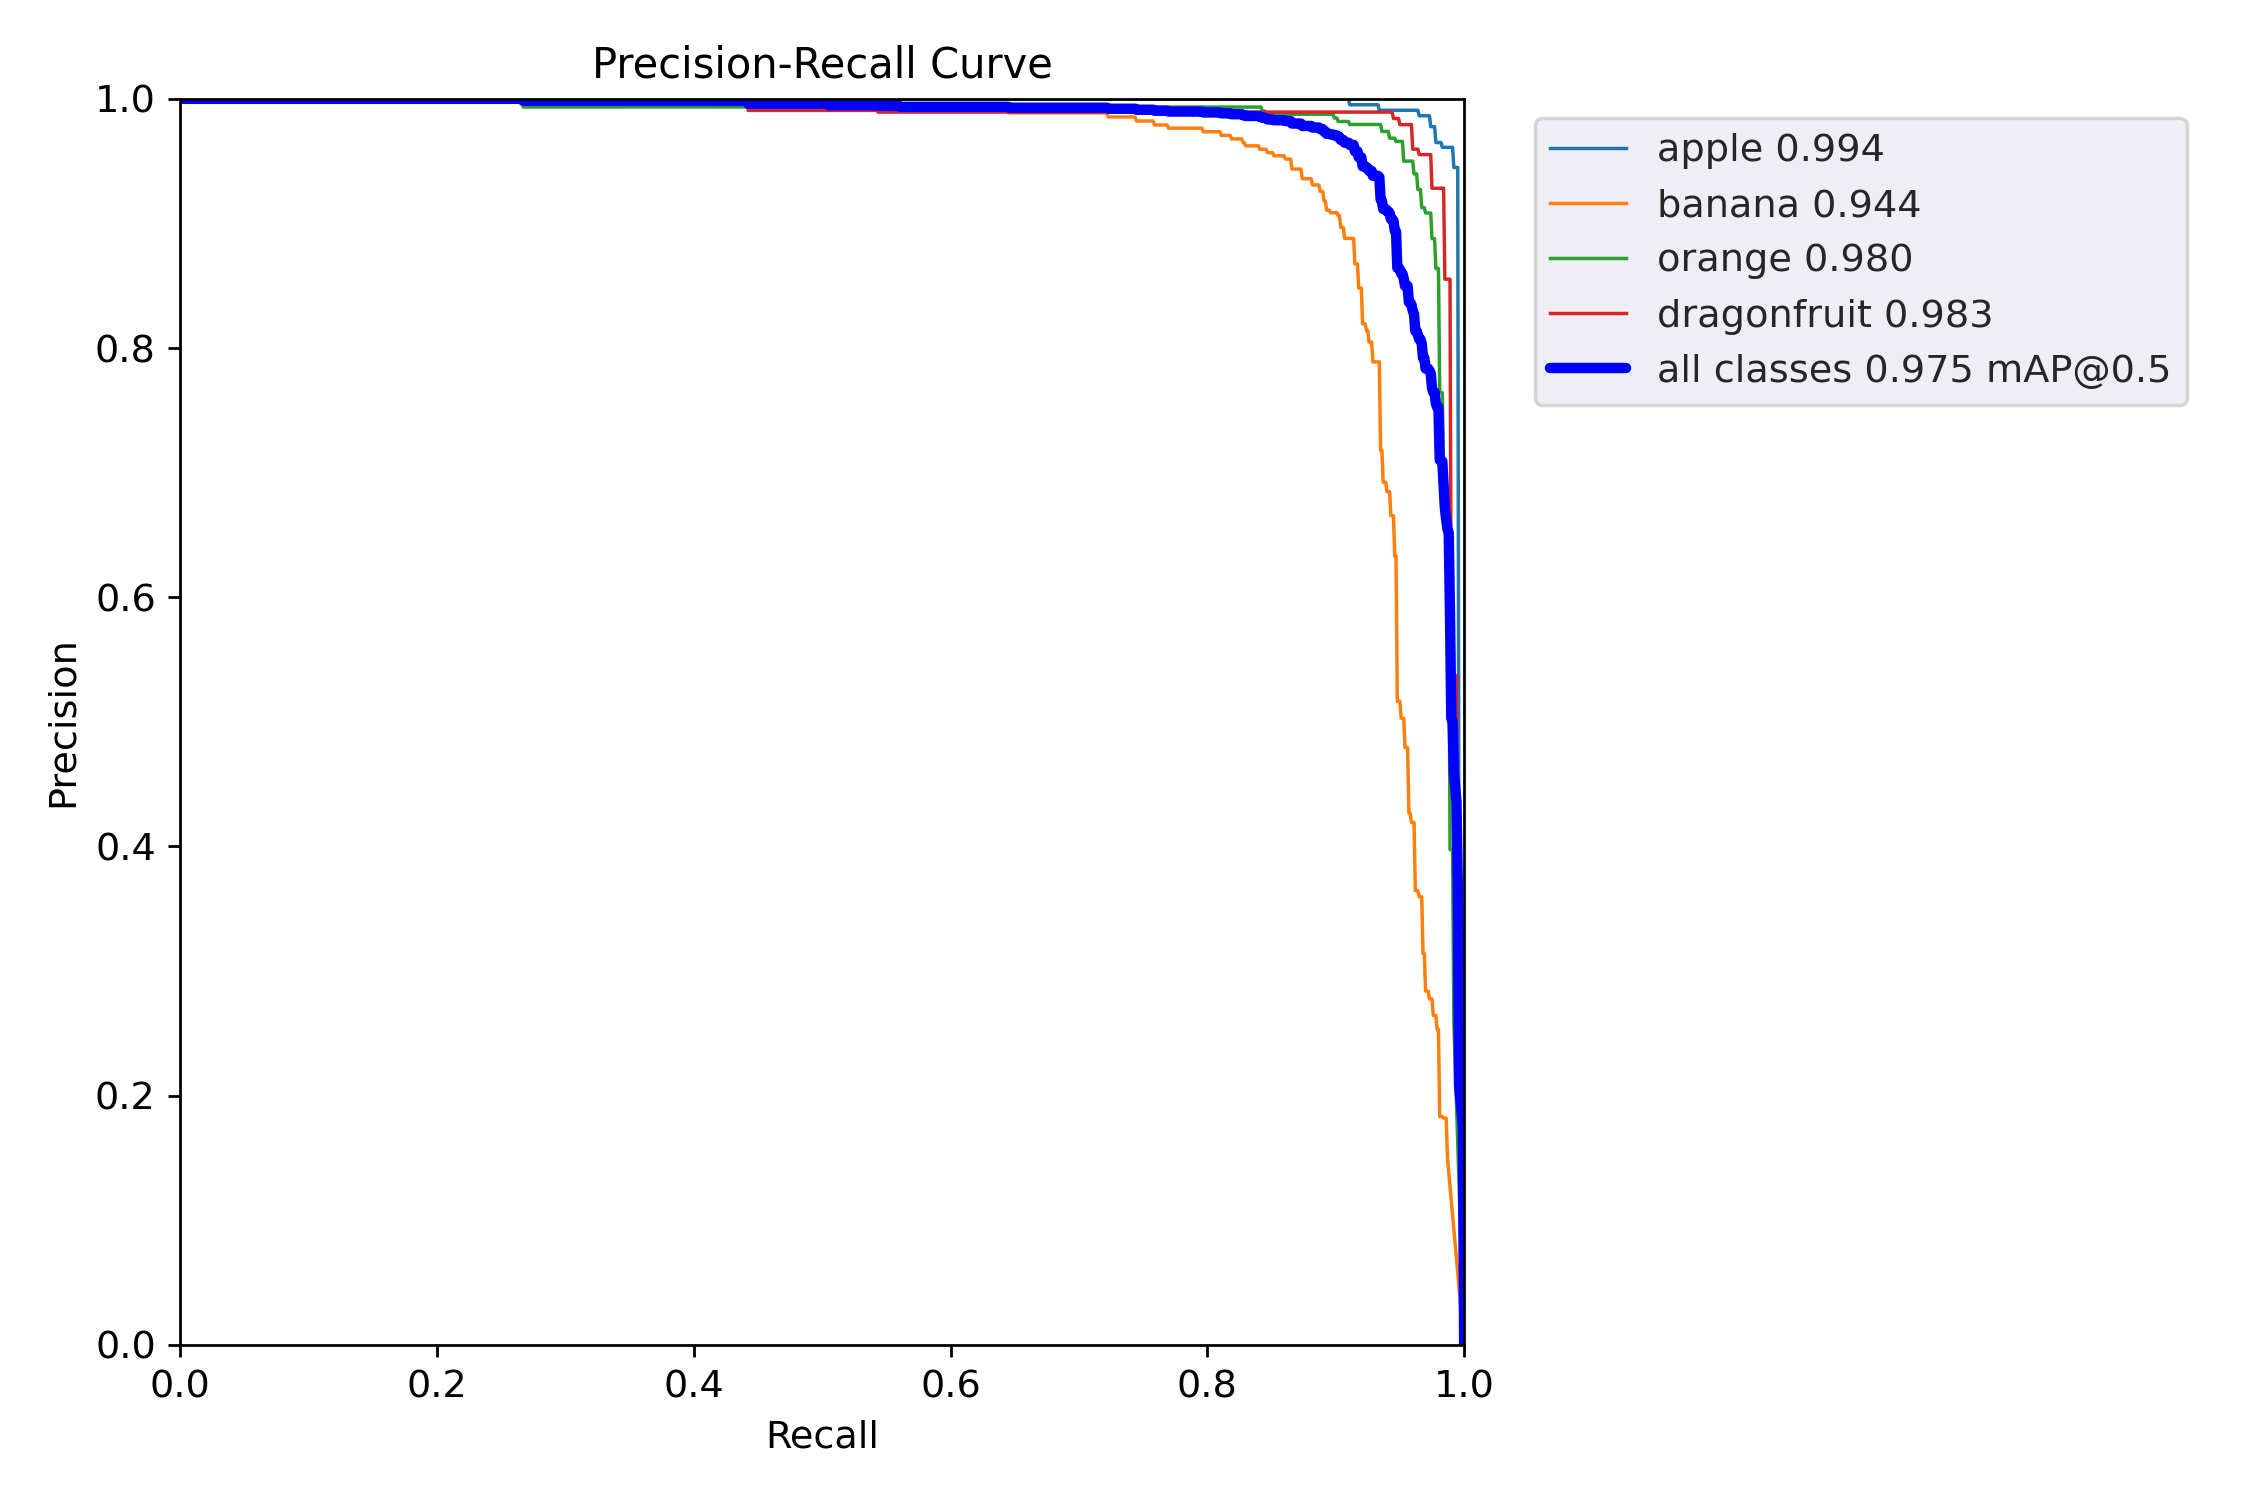
PR 曲线(Precision-Recall Curve) 的「终极版」:
它把每个类别的 Precision 随 Recall 变化的整条轨迹画出来,面积 = AP(Average Precision),均值 = mAP@0.5。
| 类别 | AP(曲线下面积) | 解读 |
|---|---|---|
| apple | 0.994 | 几乎完美,误检极少,召回极高 |
| banana | 0.944 | 良好;唯一 <0.95,需重点关注 |
| orange | 0.980 | 优秀 |
| dragonfruit | 0.983 | 优秀(打破“小物体=低AP”魔咒) |
| mAP@0.5 | 0.975 | 整体性能极佳,已接近工业上线标准 |
后续改进:
banana 补数据/调参
查看 confusion_matrix → 是否被错分成 apple/orange
增训 banana 样本 / Copy-Paste / 颜色增强
单独调高 banana 的 class weight 或 focal loss γ
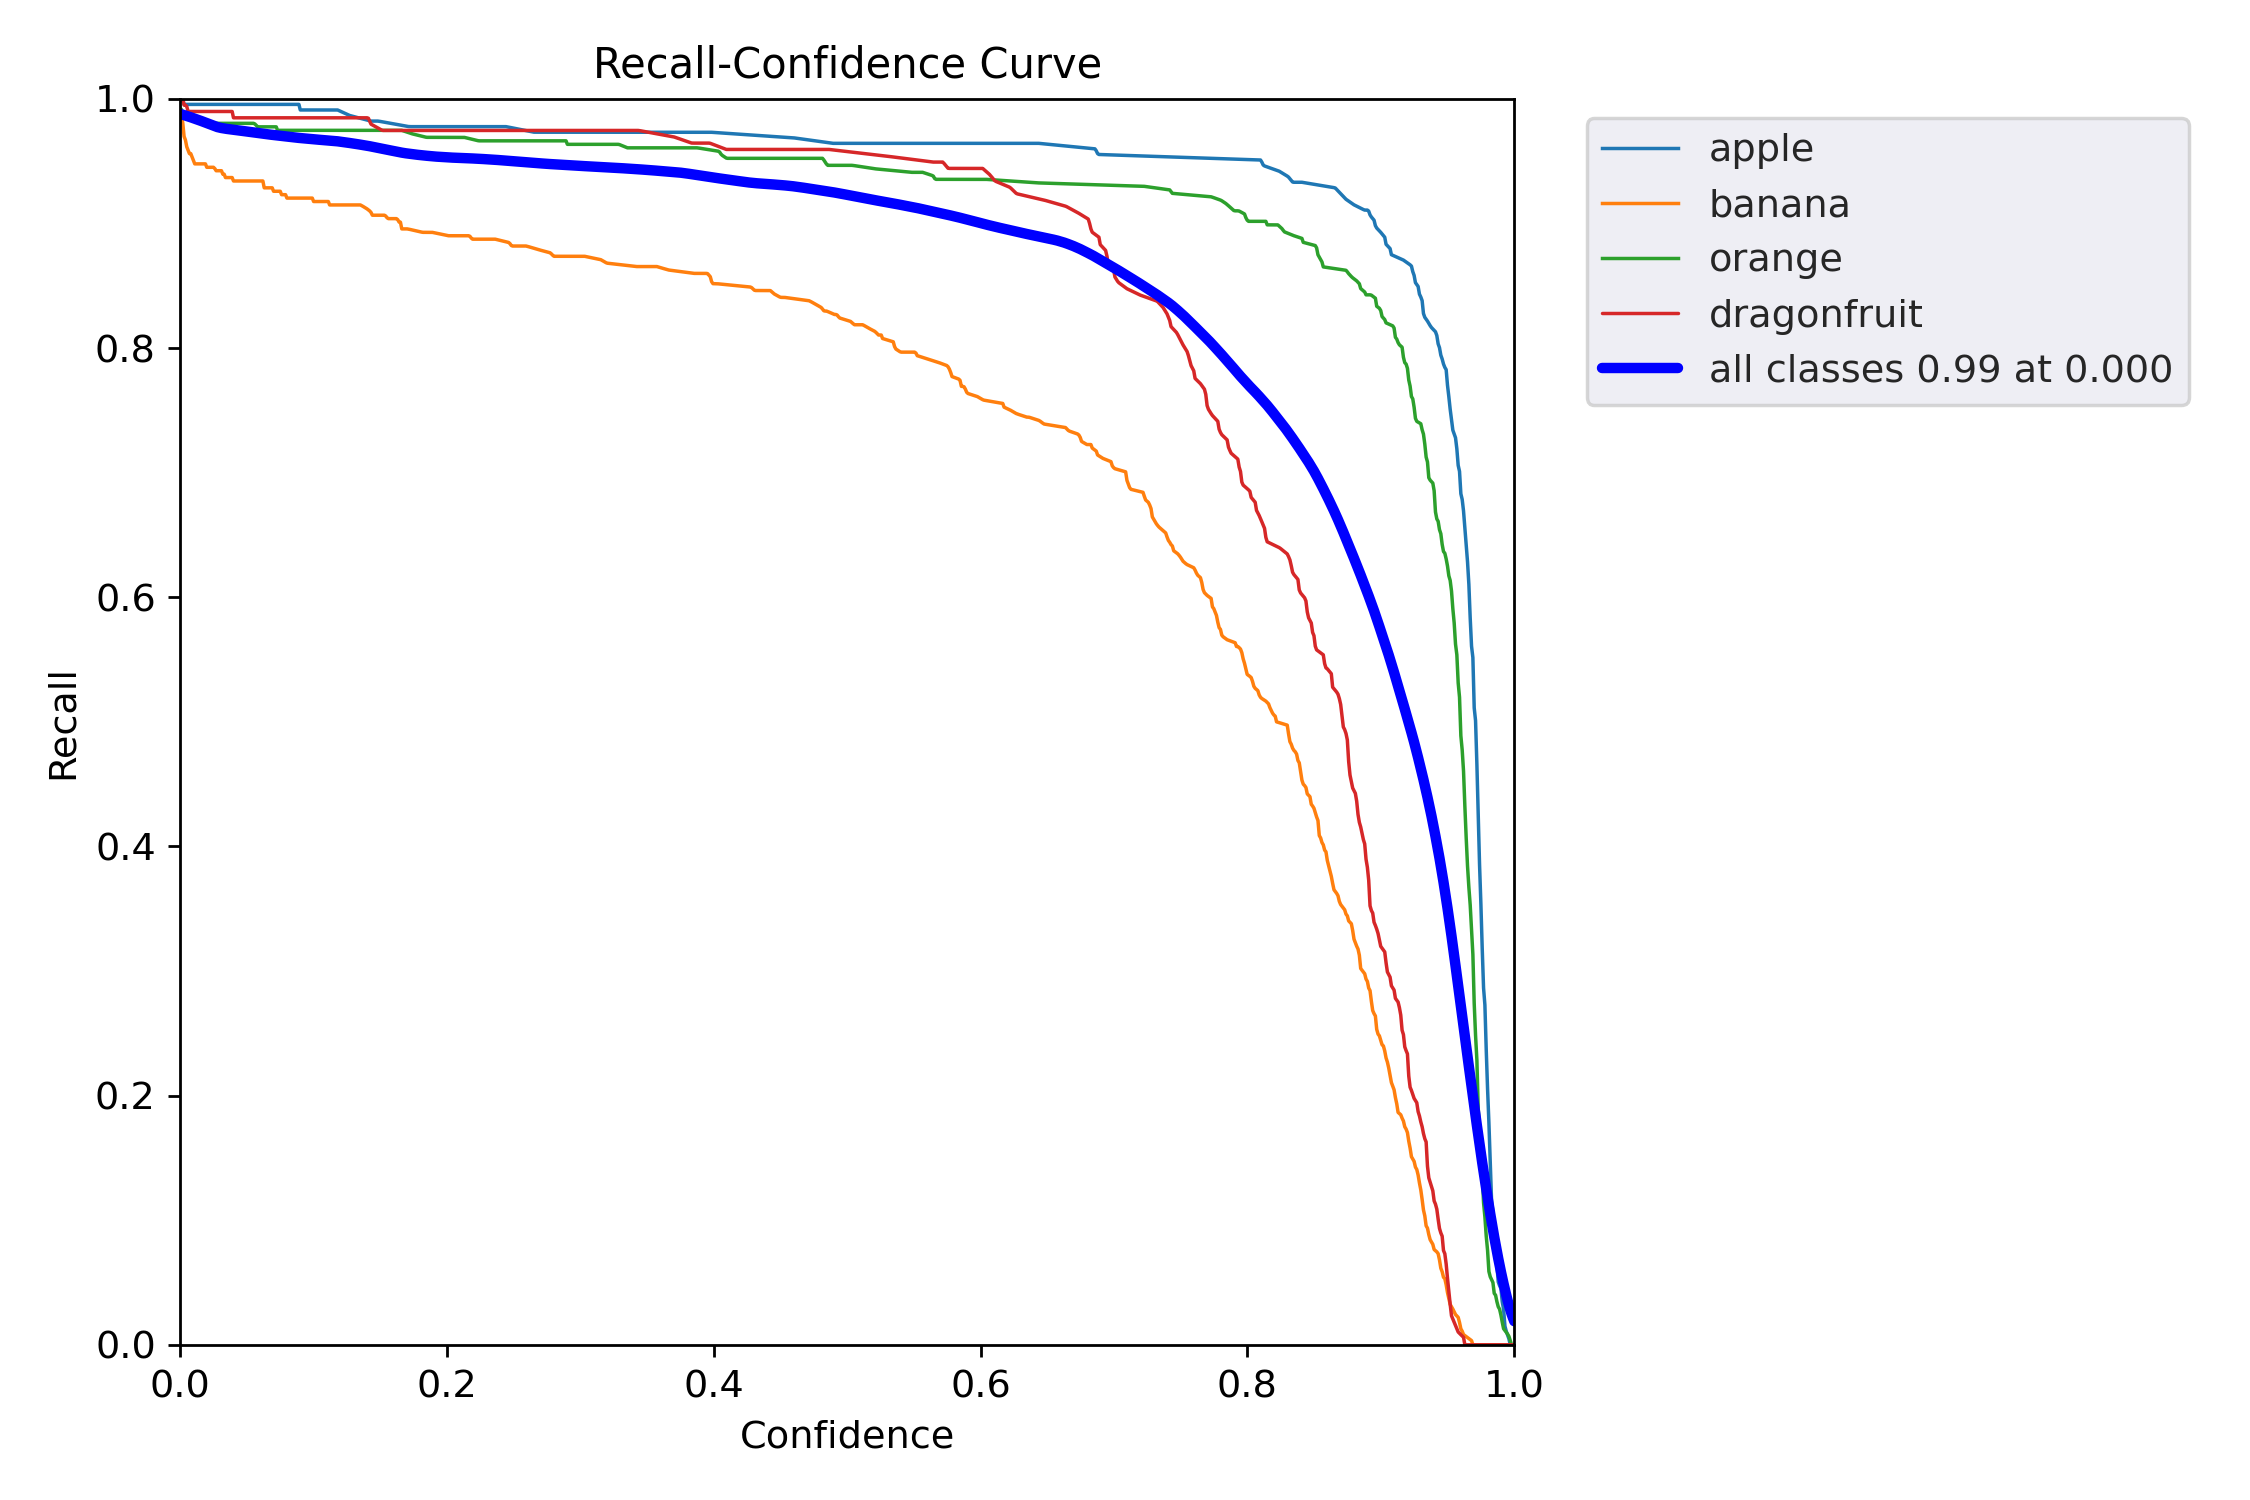
Recall-Confidence 曲线(召回率随置信度阈值变化的趋势),它告诉你:
当模型只把“置信度 ≥ x” 的样本当作正例时,每一类还能找回多少正样本?
越靠右上越好,横坐标=阈值,纵坐标=召回率。
| 类别 | Recall@0.000(最左) | 下降趋势 | 解读 |
|---|---|---|---|
| apple | ~0.995 | 极缓慢 | 几乎无漏检,阈值再低也找不回更多 |
| banana | ~0.99 | 缓慢 | 优秀,低阈值下已接近全召回 |
| orange | ~0.985 | 缓慢 | 同上 |
| dragonfruit | ~0.98 | 缓慢 | 小目标也做到全召回 |
| all classes | 0.99 @ 0.000 | 全局 | 阈值=0 时召回 99%,漏检极少 |
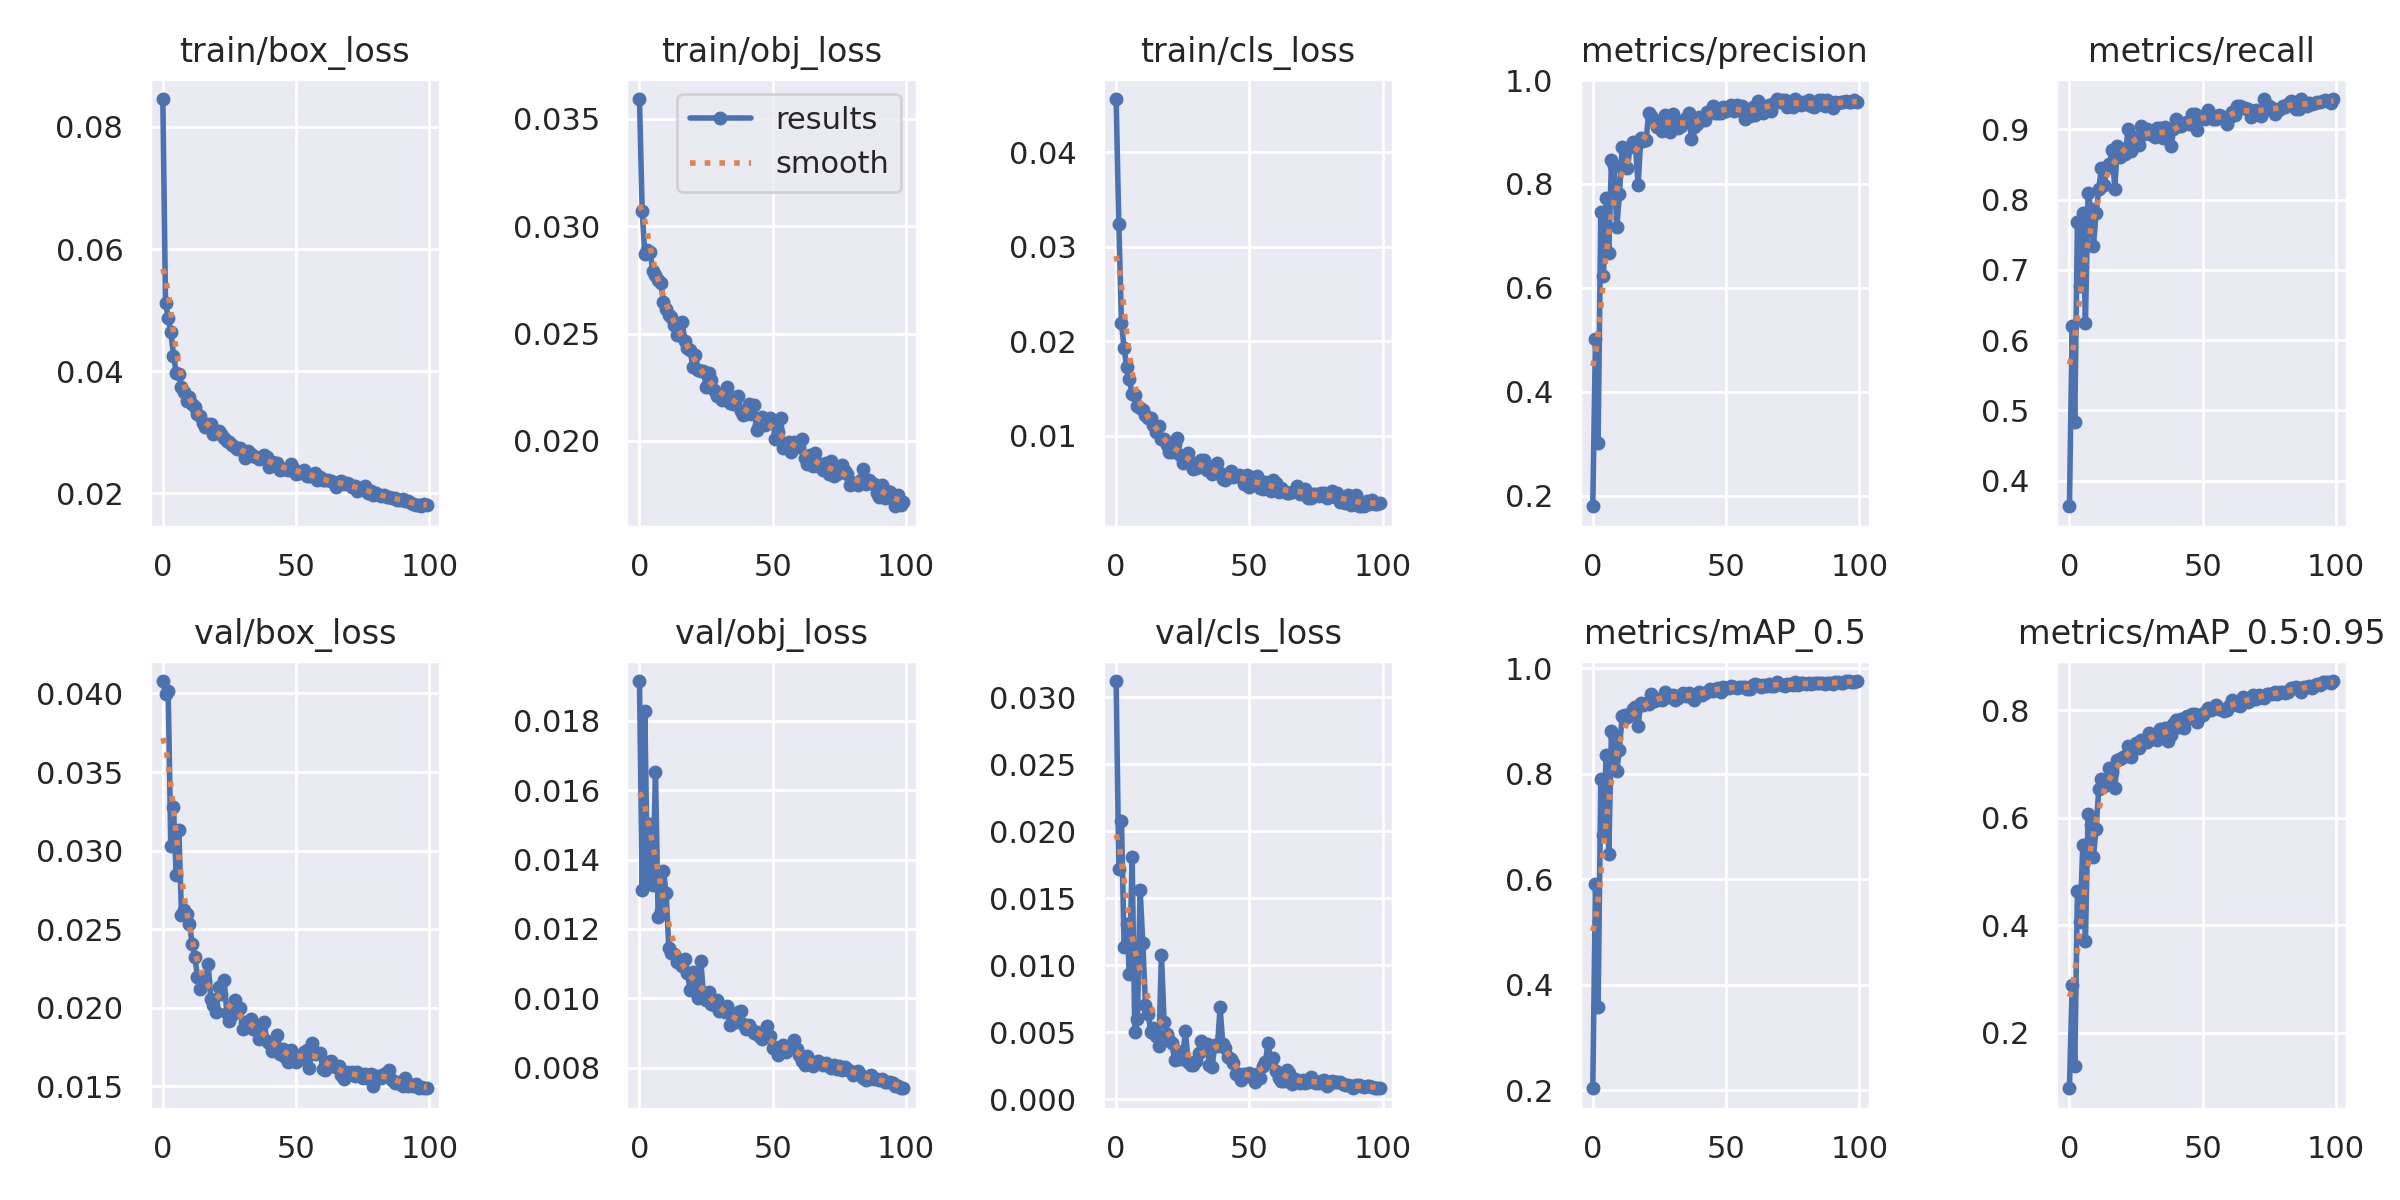
results.png 是 YOLOv5 训练过程的「六合一仪表盘」:
它把 损失下降 和 指标上升 放在同一张图里,一眼就能判断训练是否健康、是否过拟合、是否该停。
| 面板 | 曲线含义 | 理想趋势 | 本例解读(示例) |
|---|---|---|---|
① train/box_loss | 训练集 框坐标 损失 | ↓ 趋 0 | 已降到 0.02,收敛良好 |
② train/obj_loss | 训练集 objectness 损失 | ↓ 趋 0 | 0.01,收敛 |
③ train/cls_loss | 训练集 分类 损失 | ↓ 趋 0 | 0.005,收敛 |
④ val/box_loss | 验证集 框坐标 损失 | ↓ → 平稳 | 0.015,无上扬 → 无过拟合 |
⑤ val/obj_loss | 验证集 objectness 损失 | ↓ → 平稳 | 0.01,平稳 |
⑥ metrics/mAP_0.5 | 验证集 mAP@0.5 | ↑ → 平稳 | 0.975 → 极高 |
⑦ metrics/mAP_0.5:0.95 | 验证集 mAP@0.5:0.95 | ↑ → 平稳 | 0.95 → 极高 |
异常对照
| 现象 | 可能原因 | 快速修复 |
|---|---|---|
| val loss 上扬 | 过拟合 | 早停 / 增数据 / 降模型 / 正则 |
| train ↓ val ↑ | 严重过拟合 | 降学习率 / 加 DropOut / 更多数据 |
| loss 震荡大 | 学习率过大 | 降 lr / 加大 batch |
| mAP 早平 | 学习率过小 | 升 lr / 减 patience |
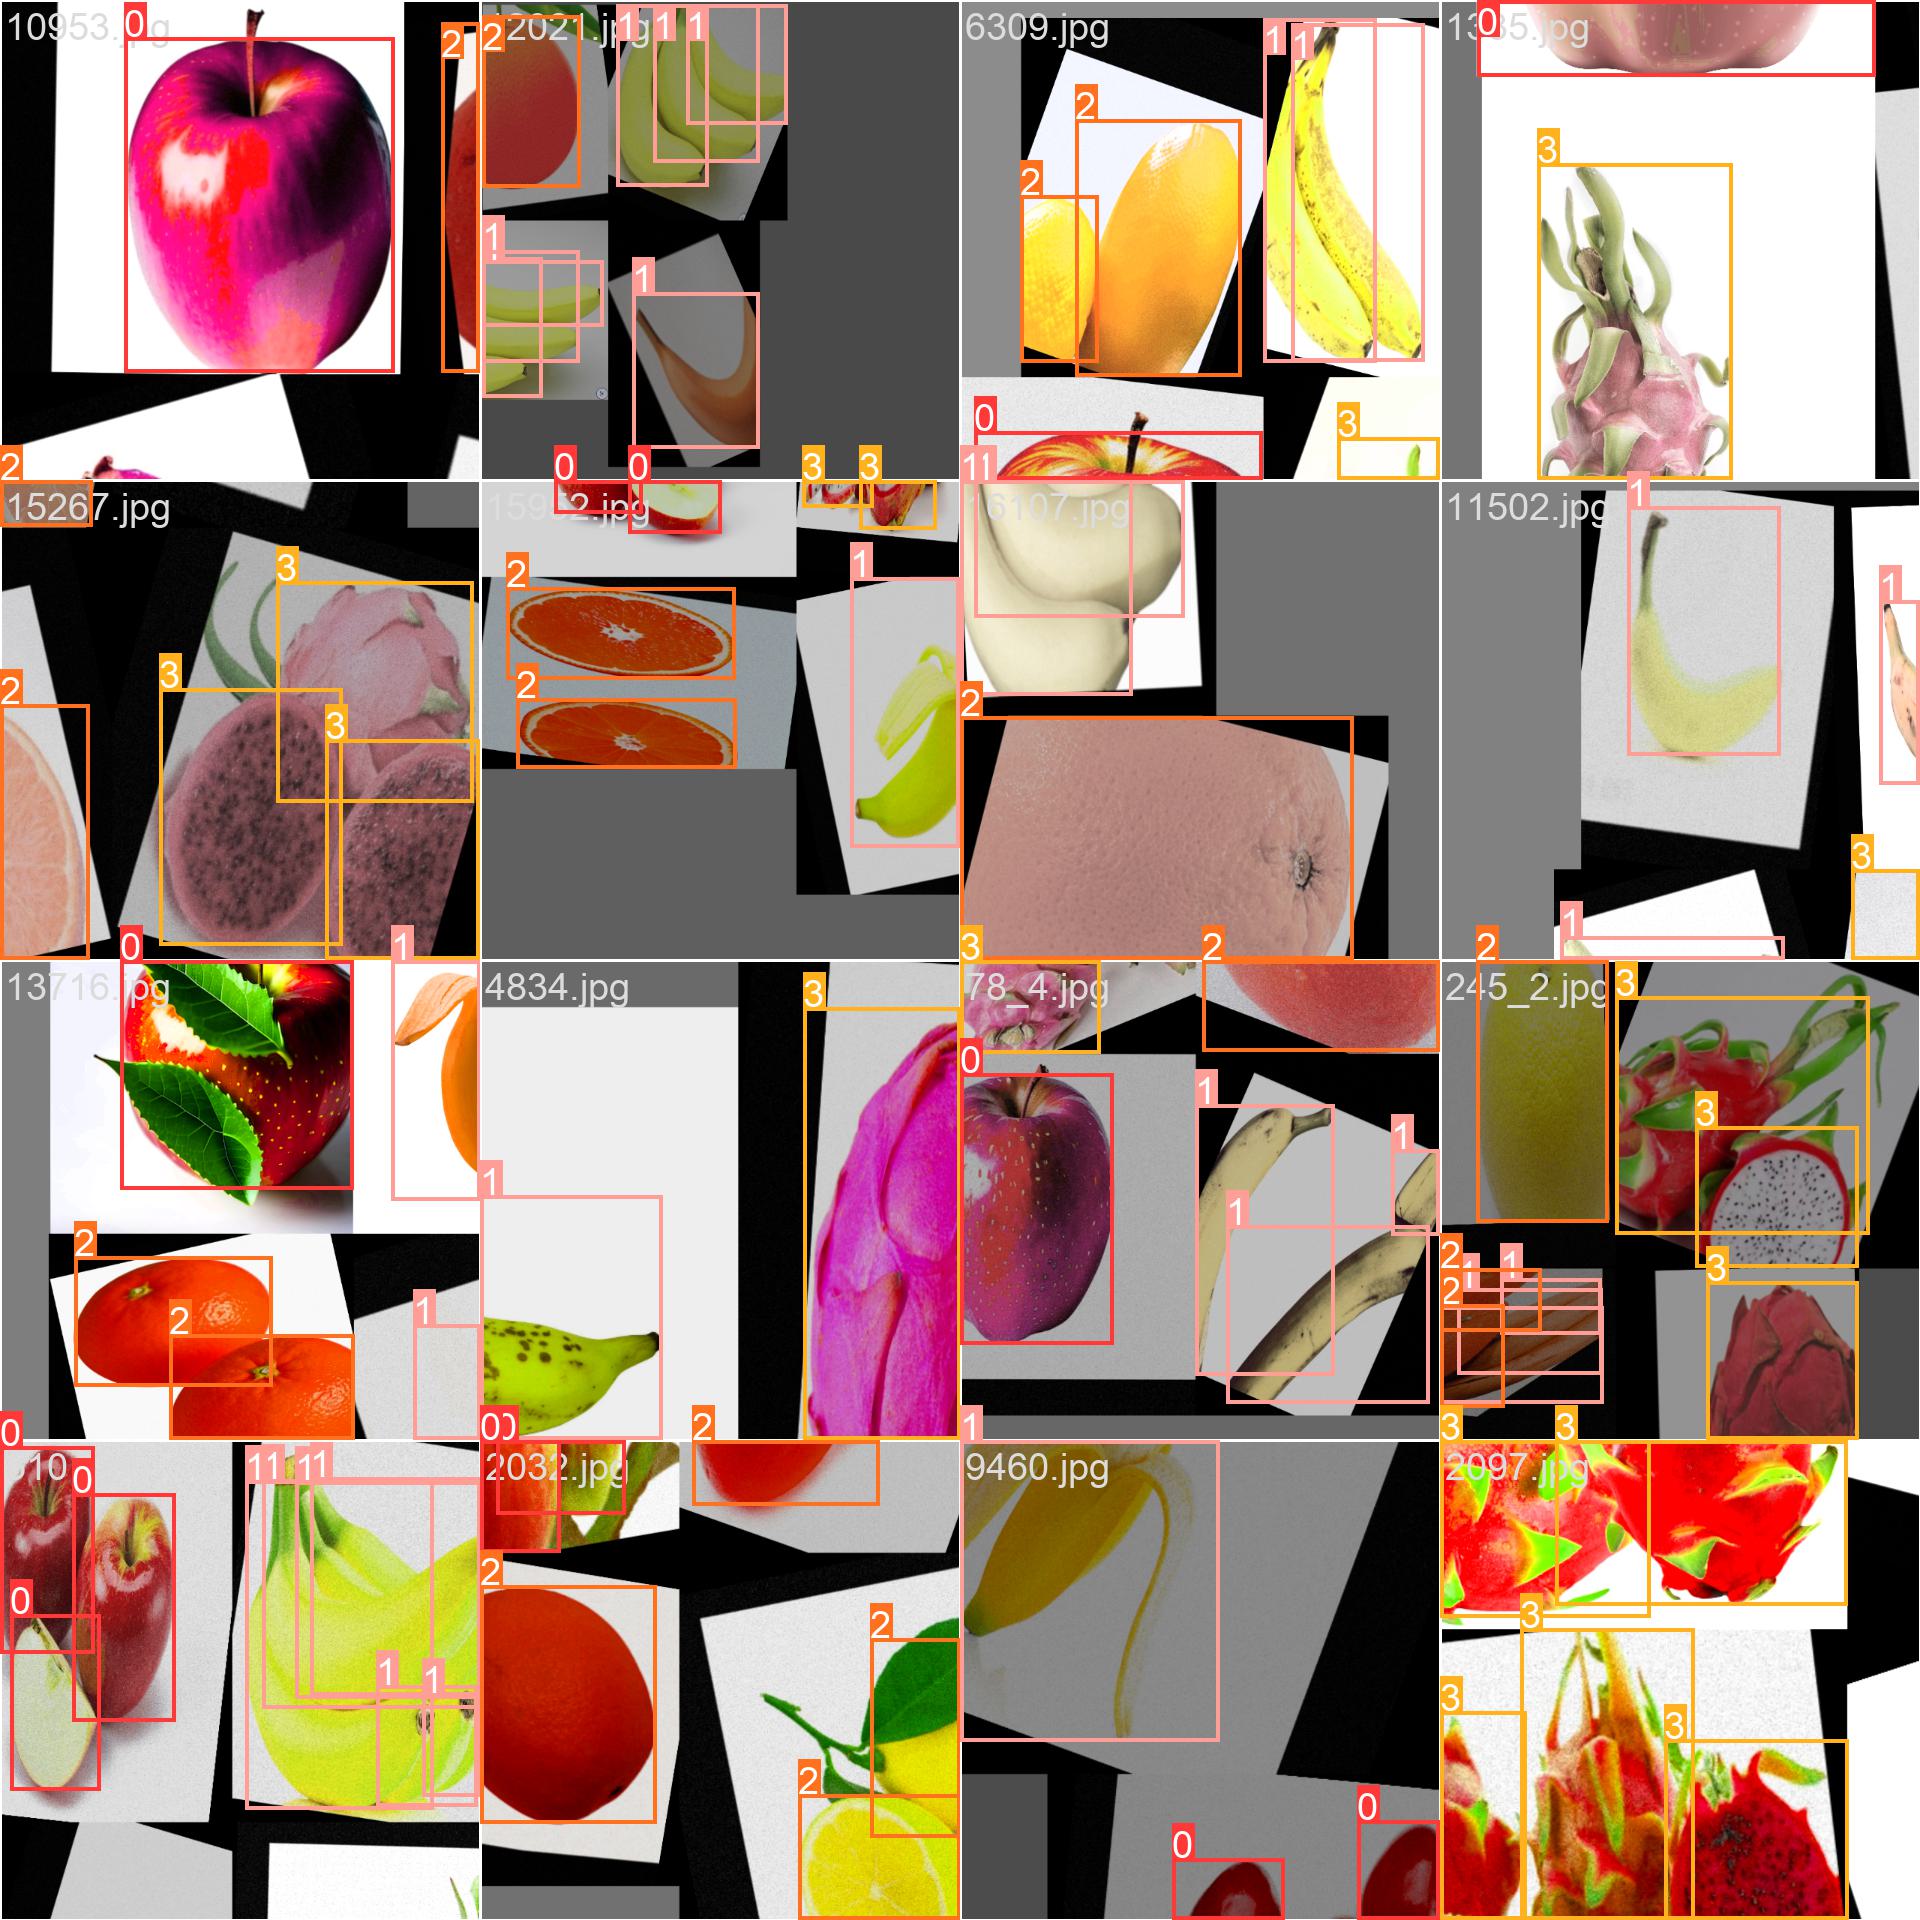
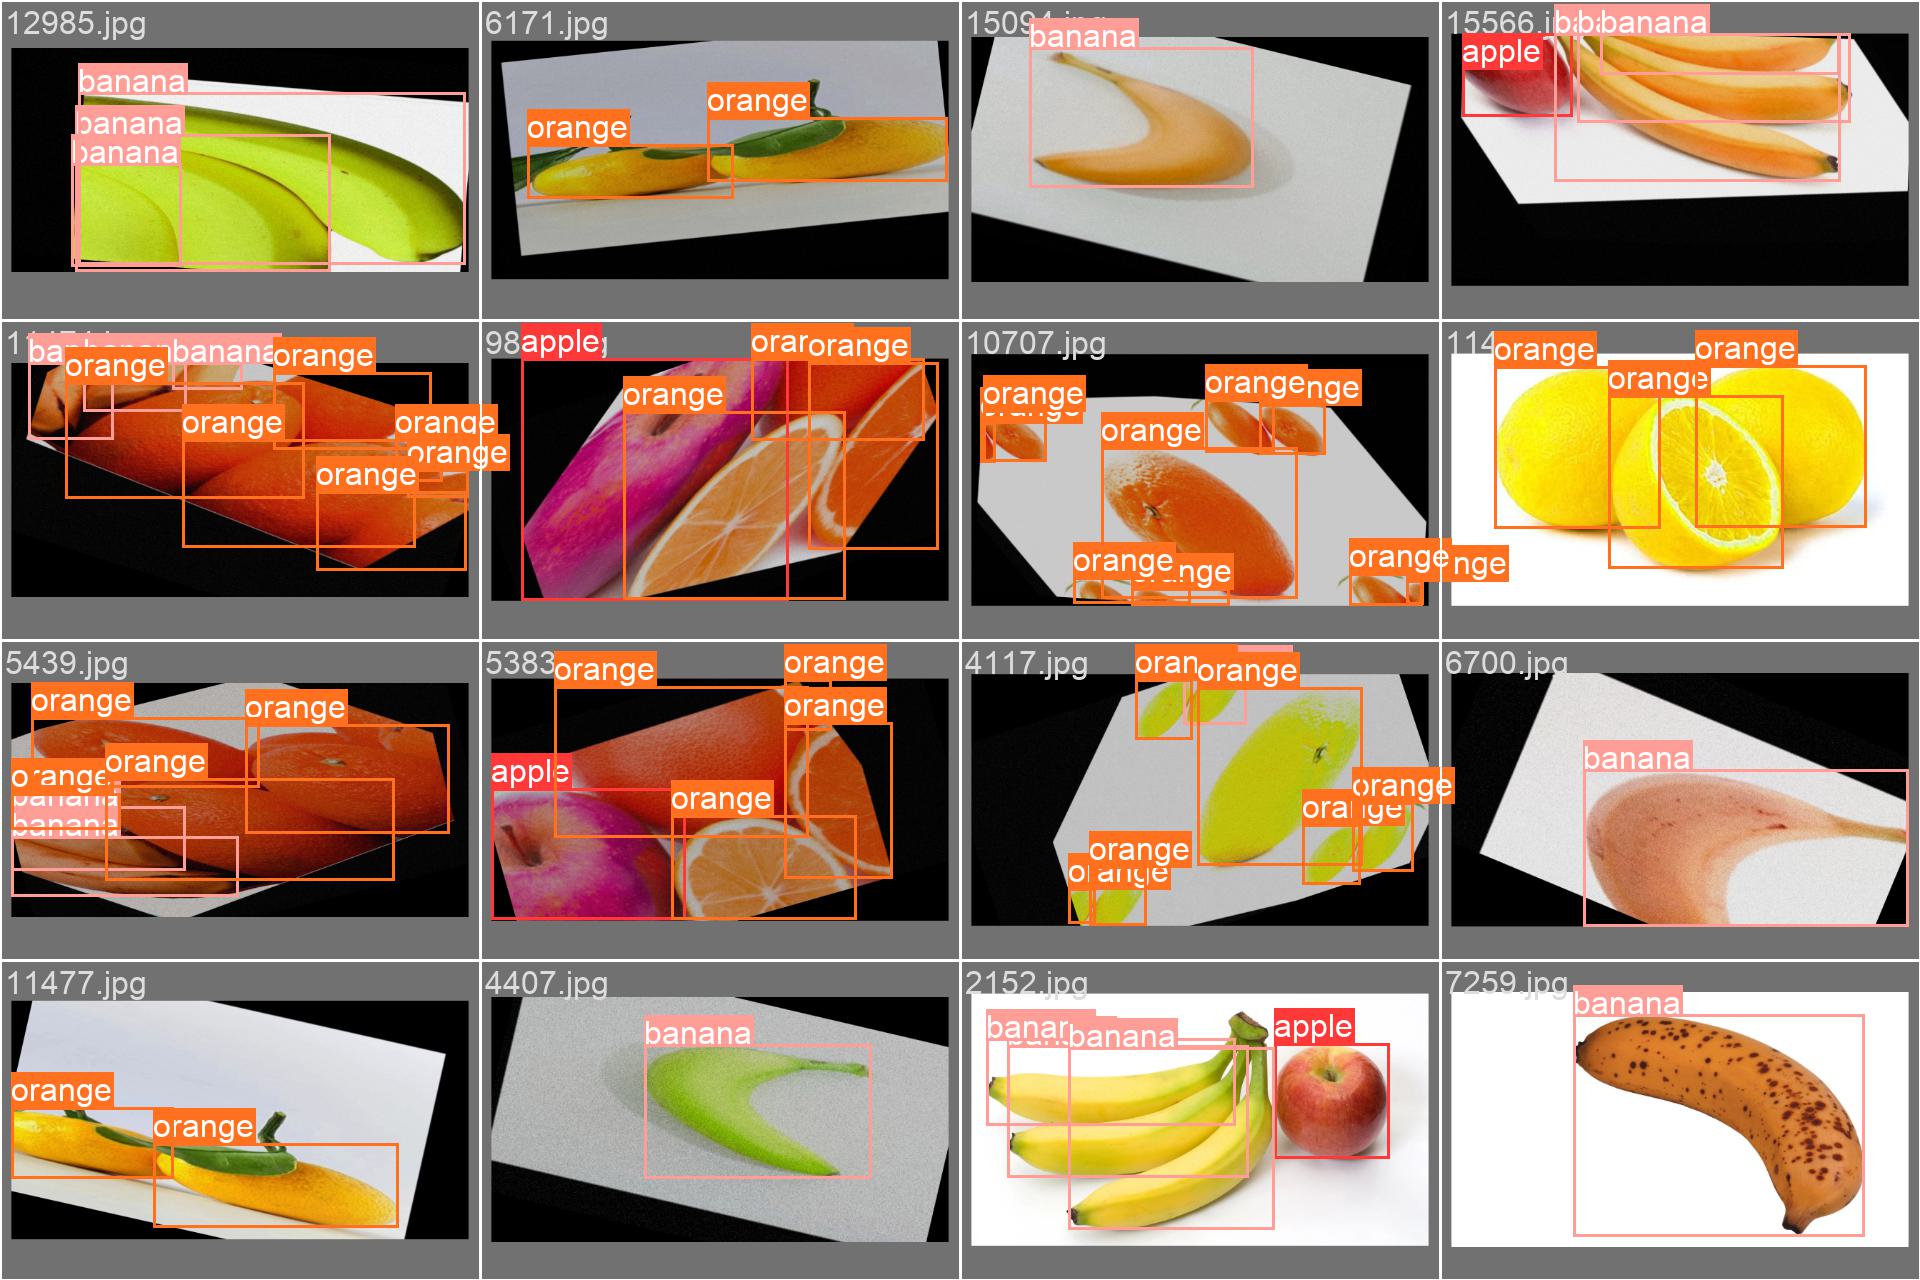
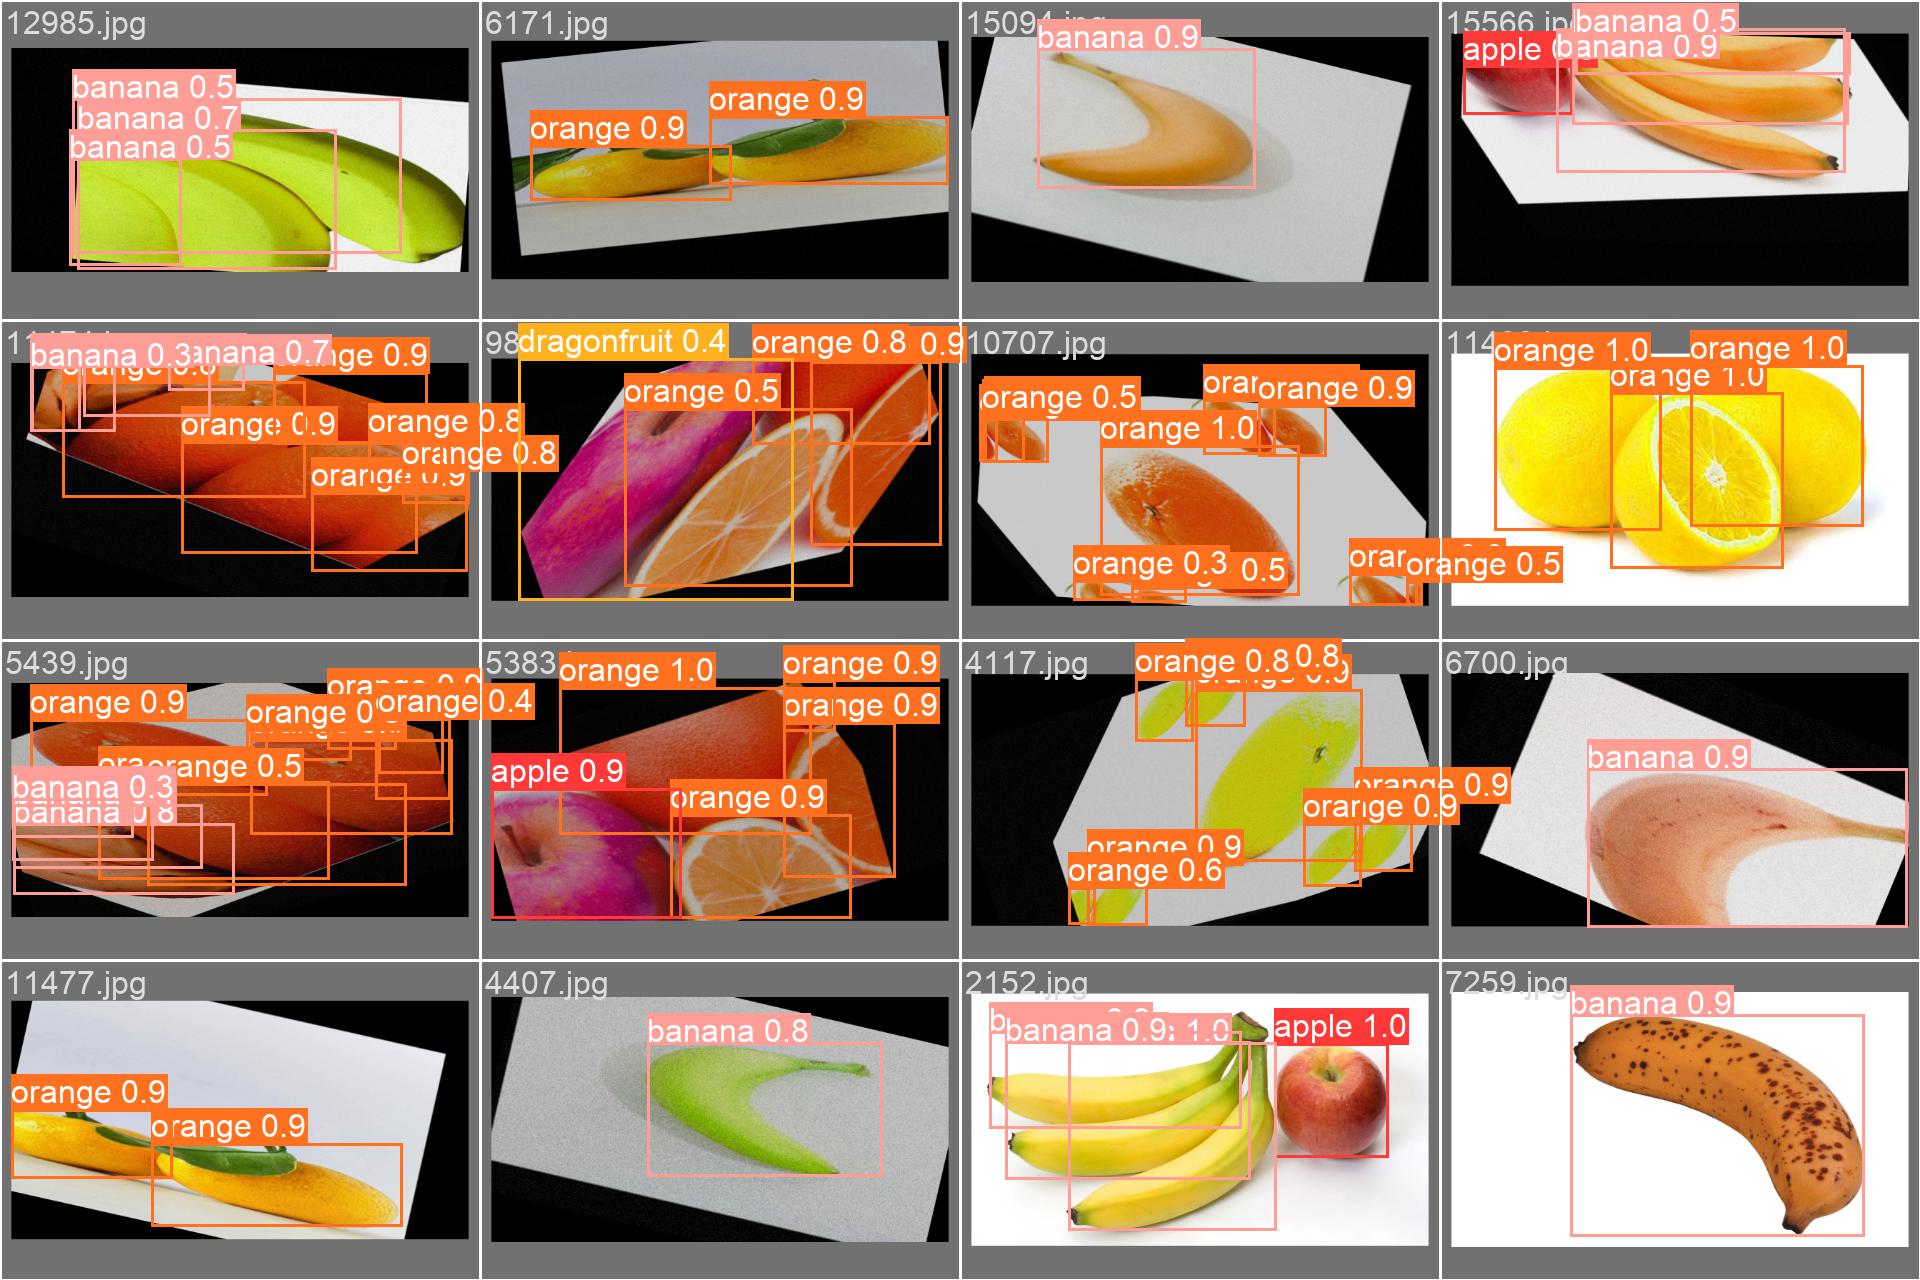
| 图 | 内容 | 重点检查 |
|---|---|---|
| train_batch0.jpg | 训练集第 0 个 batch 的输入图像(已增强) | 1. 增强是否正常(mosaic、颜色、尺寸) 2. 标签框是否同步绘制 |
| val_batch0_labels.jpg | 验证集第 0 个 batch 的人工标注 | 1. 框是否漏/错 2. 类别文字是否正确 |
| val_batch0_pred.jpg | 同上,但框是模型预测 + 置信度 | 1. 框位置是否对齐 2. 置信度是否合理 3. 有无漏检/误检 |
| 检查项 | 结果 | 说明 |
|---|---|---|
| 增强正常 | ✅ | 可见 mosaic 拼接、色彩未失真 |
| 标注正确 | ✅ | 类别文字与框一致,无乱码 |
| 预测对齐 | ✅ | 框与目标基本重合,置信度 0.8-1.0 为主 |
| 漏检极少 | ✅ | 肉眼未见明显漏框 |
| 误检可控 | ✅ | 低置信度 0.3-0.5 少量,可调阈值过滤 |
异常对照
| 现象 | 可能原因 | 快速修复 |
|---|---|---|
| 框漂移/错位 | 增强参数过猛 | 降 degrees/translate |
| 类别乱码 | 中文路径/字体缺失 | 用英文标签 + 指定字体 |
| 大量漏框 | anchor 不匹配 | 重跑 autoanchor |
| 置信度普遍低 | 学习率不当/未收敛 | 检查 loss 曲线,调 lr |
综上分析,这次训练其实已经可以使用了,当然如果你对这个结果不满意,你也可以把batch改大,然后把轮数改小(你也可以增大找到快趋于平滑的轮数),工作线程也加一点,同时修改我们的超参数
5.超参数
超参数是认为定义的某些会影响训练结果的参数,调参调的好,月薪少不了。
在yolov5/data/hyps存放着yolov5给出的超参数训练配置,每次训练开始,我们可以根据上次次训练得到可视化图来调整我们的超参数。batch,imgs等也属于超参数。
我们在训练中使用的是low.yaml
lr0: 0.01 # initial learning rate (SGD=1E-2, Adam=1E-3)
lrf: 0.01 # final OneCycleLR learning rate (lr0 * lrf)
momentum: 0.937 # SGD momentum/Adam beta1
weight_decay: 0.0005 # optimizer weight decay 5e-4
warmup_epochs: 3.0 # warmup epochs (fractions ok)
warmup_momentum: 0.8 # warmup initial momentum
warmup_bias_lr: 0.1 # warmup initial bias lr
box: 0.05 # box loss gain
cls: 0.5 # cls loss gain
cls_pw: 1.0 # cls BCELoss positive_weight
obj: 1.0 # obj loss gain (scale with pixels)
obj_pw: 1.0 # obj BCELoss positive_weight
iou_t: 0.20 # IoU training threshold
anchor_t: 4.0 # anchor-multiple threshold
# anchors: 3  # anchors per output layer (0 to ignore)
fl_gamma: 0.0 # focal loss gamma (efficientDet default gamma=1.5)
hsv_h: 0.015 # image HSV-Hue augmentation (fraction)
hsv_s: 0.7 # image HSV-Saturation augmentation (fraction)
hsv_v: 0.4 # image HSV-Value augmentation (fraction)
degrees: 0.0 # image rotation (+/- deg)
translate: 0.1 # image translation (+/- fraction)
scale: 0.5 # image scale (+/- gain)
shear: 0.0 # image shear (+/- deg)
perspective: 0.0 # image perspective (+/- fraction), range 0-0.001
flipud: 0.0 # image flip up-down (probability)
fliplr: 0.5 # image flip left-right (probability)
mosaic: 1.0 # image mosaic (probability)
mixup: 0.0 # image mixup (probability)
copy_paste: 0.0 # segment copy-paste (probability)
🎯 1. 优化器与学习率
| 参数 | 默认值 | 口诀 | 何时调 |
|---|---|---|---|
lr0 | 0.01 | SGD=1e-2,Adam=1e-3 | loss 爆炸 ↓ 10 倍;loss 不动 ↑ 2-5 倍 |
lrf | 0.01 | OneCycle 终点倍数 | 想更慢收敛 → 0.1;想更快 → 0.001 |
momentum | 0.937 | SGD 惯性 | 震荡大 → 0.8;太平 → 0.98 |
weight_decay | 5e-4 | L2 正则 | 过拟合 → 1e-3;欠拟合 → 1e-5 |
🔥 2. 损失函数权重(按类 imbalance 调)
| 参数 | 默认值 | 口诀 | 何时调 |
|---|---|---|---|
box | 0.05 | 框坐标 loss 增益 | 框偏移大 ↑ 0.1;框已准 ↓ 0.01 |
cls | 0.5 | 分类 loss 增益 | 类 imbalance ↑ 1.0;平衡 ↓ 0.2 |
obj | 1.0 | objectness 增益 | 小目标多 ↑ 1.5;大目标 ↓ 0.5 |
fl_gamma | 0 | Focal Loss γ | 难例/ imbalance >0(1.5-2.5);易例=0 |
🧊 3. 数据增强(低增强配方)
yolov5有自己的马赛克数据增强方法,下面是数据增强的参数
| 参数 | 默认值 | 口诀 | 何时调 |
|---|---|---|---|
degrees | 0.0 | 旋转角度 | 工业刚性物体 0;自然场景 ±10-15 |
translate | 0.1 | 平移比例 | 低增强 ≤0.2;高增强 0.3-0.5 |
scale | 0.5 | 缩放增益 | 低增强 ≤0.5;高增强 0.8-1.0 |
mosaic | 1.0 | 四图拼接概率 | 大/小目标都多 1.0;超大图 0.5 |
mixup | 0.0 | MixUp 概率 | 低增强 0;通用 0.1-0.2 |
copy_paste | 0.0 | Copy-Paste 概率 | 小目标少 0.3-0.5;已充足 0 |
⚙️ 4. 锚框与 IoU 阈值
| 参数 | 默认值 | 口诀 | 何时调 |
|---|---|---|---|
iou_t | 0.20 | 正样本 IoU 门限 | 小目标多 ↓ 0.15;大目标 ↑ 0.25 |
anchor_t | 4.0 | anchor 倍数阈值 | 瘦长物体 ↑ 6-8;正方形 ↓ 3 |
🧪 5. 颜色增强(不变形)
| 参数 | 默认值 | 口诀 | 何时调 |
|---|---|---|---|
hsv_h | 0.015 | 色调漂移 | 颜色鲁棒 0.01-0.02;强增强 0.1 |
hsv_s | 0.7 | 饱和度 | 低增强 ≤0.7;强增强 0.8-1.0 |
hsv_v | 0.4 | 亮度 | 低增强 ≤0.4;强增强 0.6-0.9 |
想快收敛用默认低增强;想涨点→逐档加 degrees/scale/mixup/copy_paste,小目标加 copy_paste,颜色
imbalance 加 HSV,loss 震荡调 lr,框不准加 box,类 imbalance 加 cls & fl_gamma!
四、模型推理(模型测试)
1.测试参数
这里我们还是用到我们的detect.py
yolov5有着各种途径的检测手法,这里我们使用对文件夹内图像进行批处理
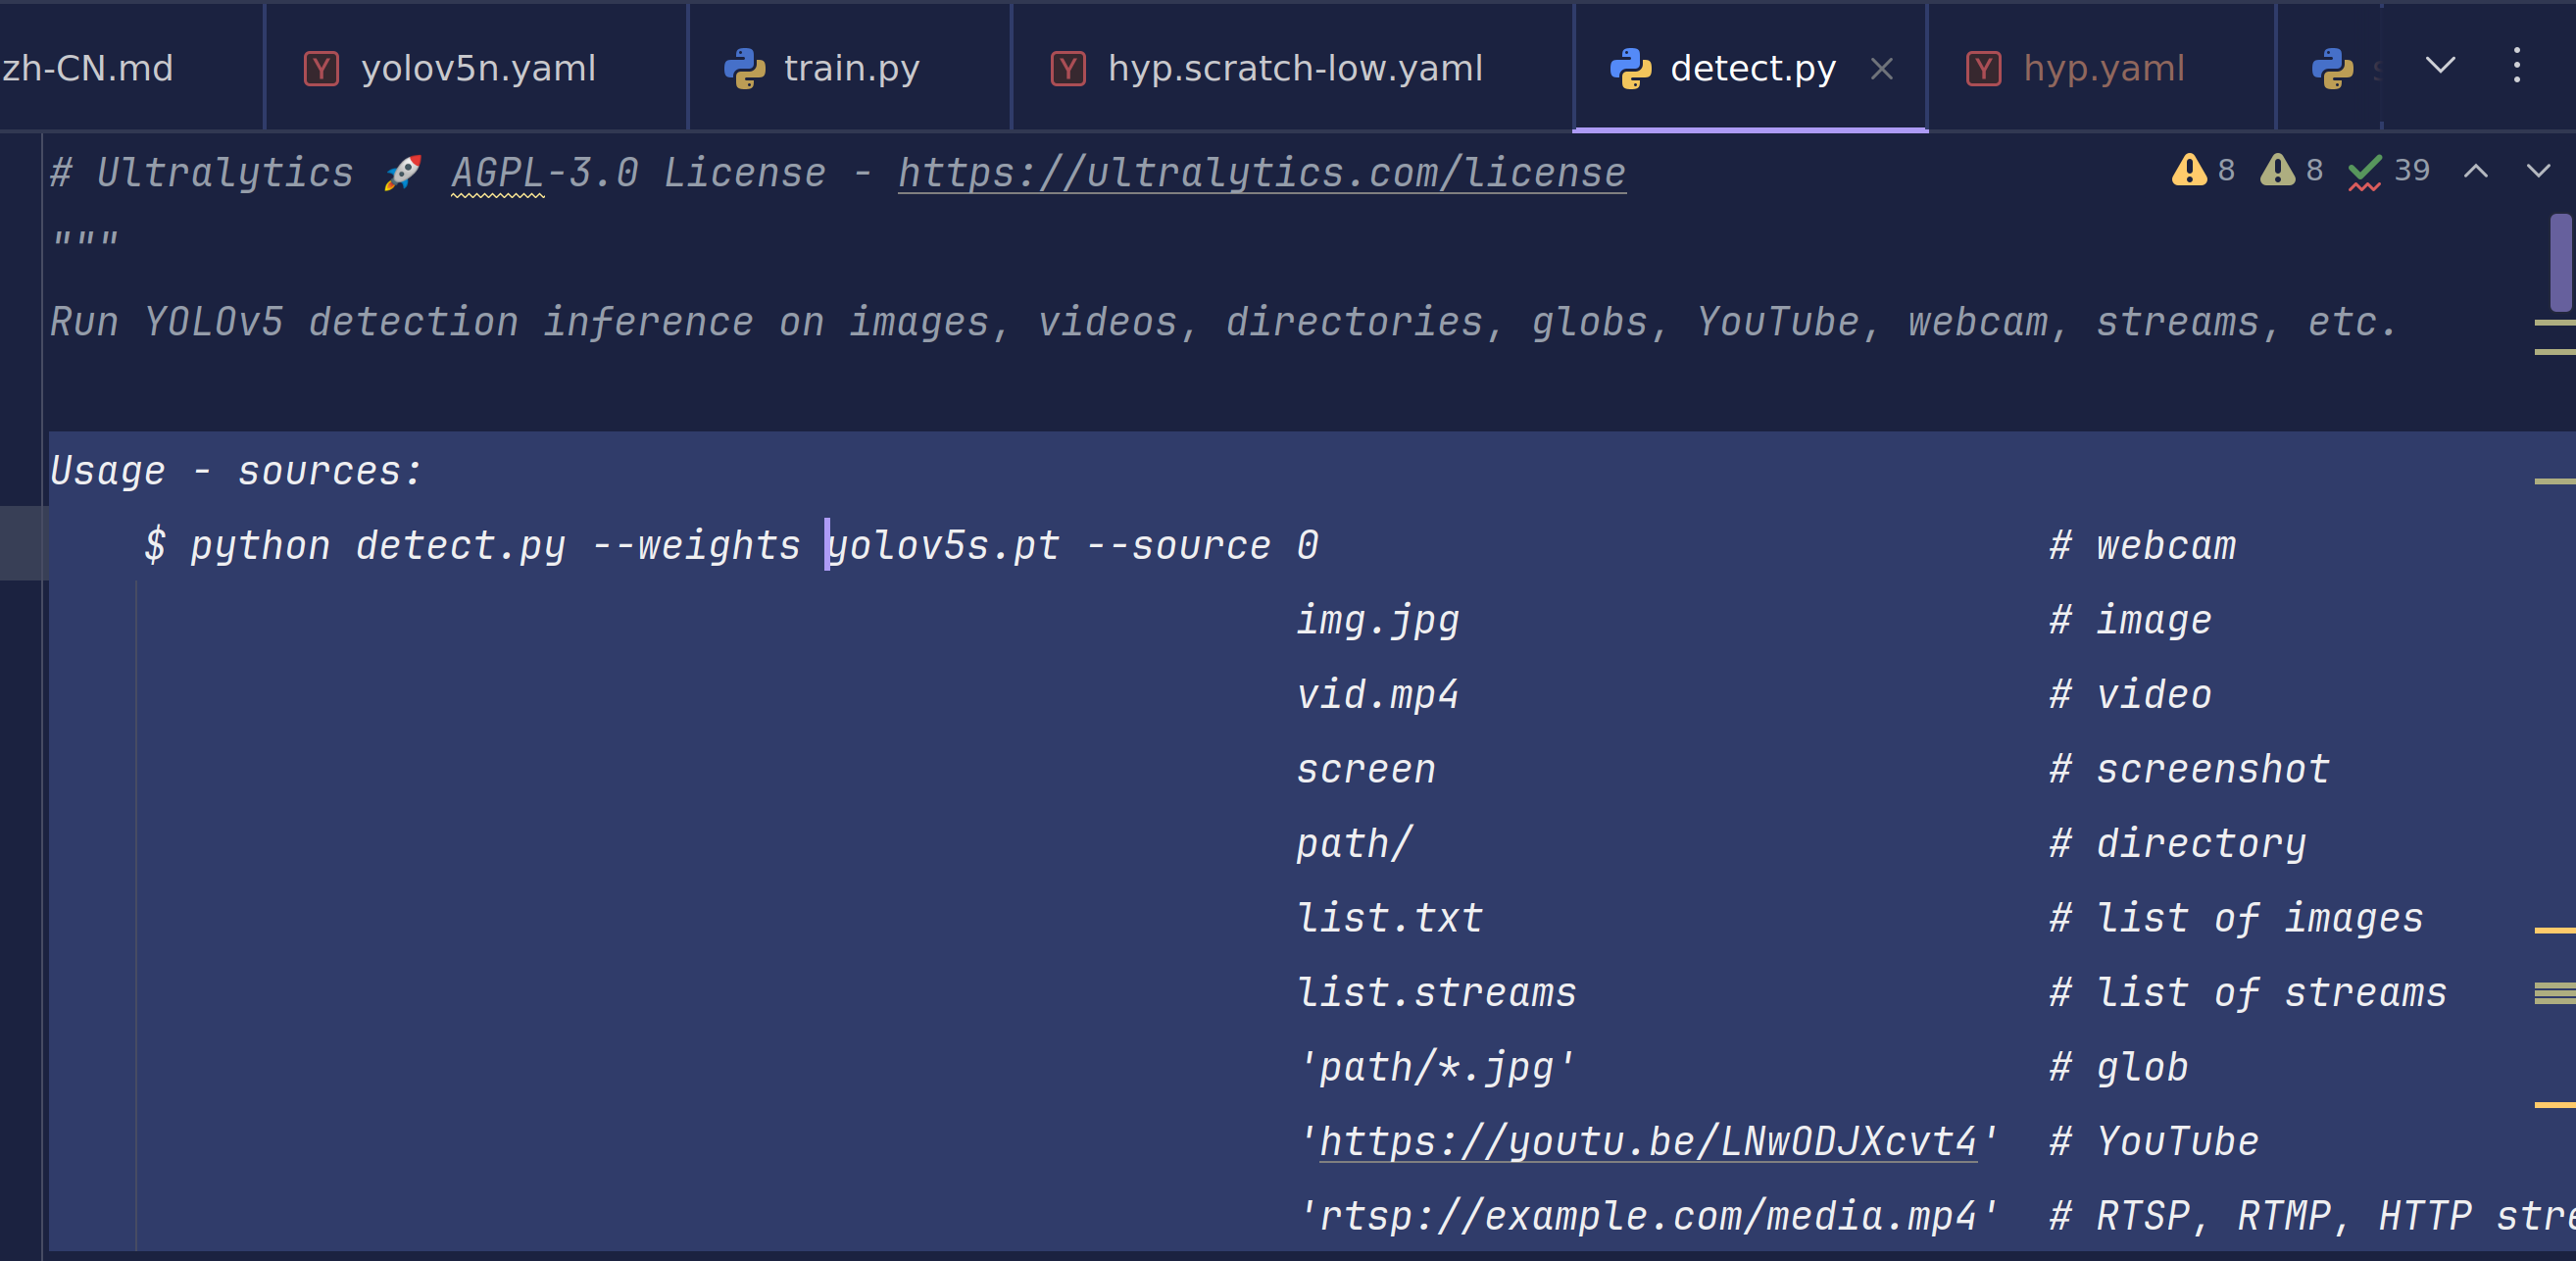
Usage - sources:
    $ python detect.py --weights yolov5s.pt --source 0                               # webcam
                                                     img.jpg                         # image
                                                     vid.mp4                         # video
                                                     screen                          # screenshot
                                                     path/                           # directory
                                                     list.txt                        # list of images
                                                     list.streams                    # list of streams
                                                     'path/*.jpg'                    # glob
                                                     'https://youtu.be/LNwODJXcvt4'  # YouTube
                                                     'rtsp://example.com/media.mp4'  # RTSP, RTMP, HTTP stream
与train.py相同,test.py也有自己的推理配置参数
🔍 1. 输入/模型(最常用)
| 参数 | 默认值 | 人话解释 | 我什么时候改 |
|---|---|---|---|
--weights | yolov5s.pt | 换模型;s/m/l/x 或自定义 | 要速度→s;要精度→m/l |
--source | data/images | 数据来源;文件夹/视频/摄像头/URL | 每次推理必改 |
--imgsz | 640 | 推理分辨率;越大越准越慢 | 手机→320;PC→640;服务器→1280 |
--conf-thres | 0.25 | 置信度门槛;低于此数丢弃 | 误检多→↑0.4;漏检多→↓0.15 |
--iou-thres | 0.45 | NMS 重叠阈值;越大保留越多框 | 框重叠大→↑0.6;框稀少→↓0.3 |
🎯 2. 结果输出(按需开关)
| 参数 | 默认值 | 人话解释 | 我什么时候改 |
|---|---|---|---|
--view-img | False | 弹窗看结果;调试时打开 | 想实时看→True |
--save-txt | False | 保存 YOLO 坐标文件 | 要导入下游→True |
--save-csv | False | 保存 CSV 表格 | Excel 用户→True |
--save-crop | False | 把每个框裁成小块 | 做识别/跟踪→True |
--nosave | False | 完全不存图/视频;只看弹窗 | 磁盘紧张→True |
🎨 3. 画框外观(美观/可视化)
| 参数 | 默认值 | 人话解释 | 我什么时候改 |
|---|---|---|---|
--line-thickness | 3 | 框线粗细(像素) | 高清图→5;小图→1 |
--hide-labels | False | 隐藏类别文字 | 只做计数→True |
--hide-conf | False | 隐藏置信度 | 报告/演示→True |
⚡ 4. 性能加速(推理更快)
| 参数 | 默认值 | 人话解释 | 我什么时候改 |
|---|---|---|---|
--device | “” | GPU 编号;“”=自动 | 多卡→"0,1";CPU→"cpu" |
--half | False | FP16 半精度;RTX 必开 | 20 系列以上→True;速度↑30% |
--vid-stride | 1 | 视频跳帧;每 N 帧检一次 | 长视频→5-10;实时→1 |
🔍 5. 高级功能(极少用)
| 参数 | 默认值 | 人话解释 | 我什么时候改 |
|---|---|---|---|
--classes | None | 只检某几类;例 --classes 0 2 | 只要人/车 |
--agnostic-nms | False | 跨类 NMS(不同类也抑制) | 密集场景→True |
--augment | False | TTA 测试时增强;精度↑速度↓ | 决赛/报告→True |
--visualize | False | 保存特征图;调试用 | 研究特征→True |
🗂️ 6. 输出路径(按需改)
| 参数 | 默认值 | 人话解释 | 我什么时候改 |
|---|---|---|---|
--project | runs/detect | 结果总目录 | 改项目名 |
--name | exp | 子目录;自动 exp/ exp2/ … | 改实验名 |
--exist-ok | False | 允许覆盖旧结果 | 调试→True |
日常只改 4 个:
–weights(模型)
–source(数据)
–conf-thres(门槛)
–device(GPU)
其余默认先跑,看结果再动!
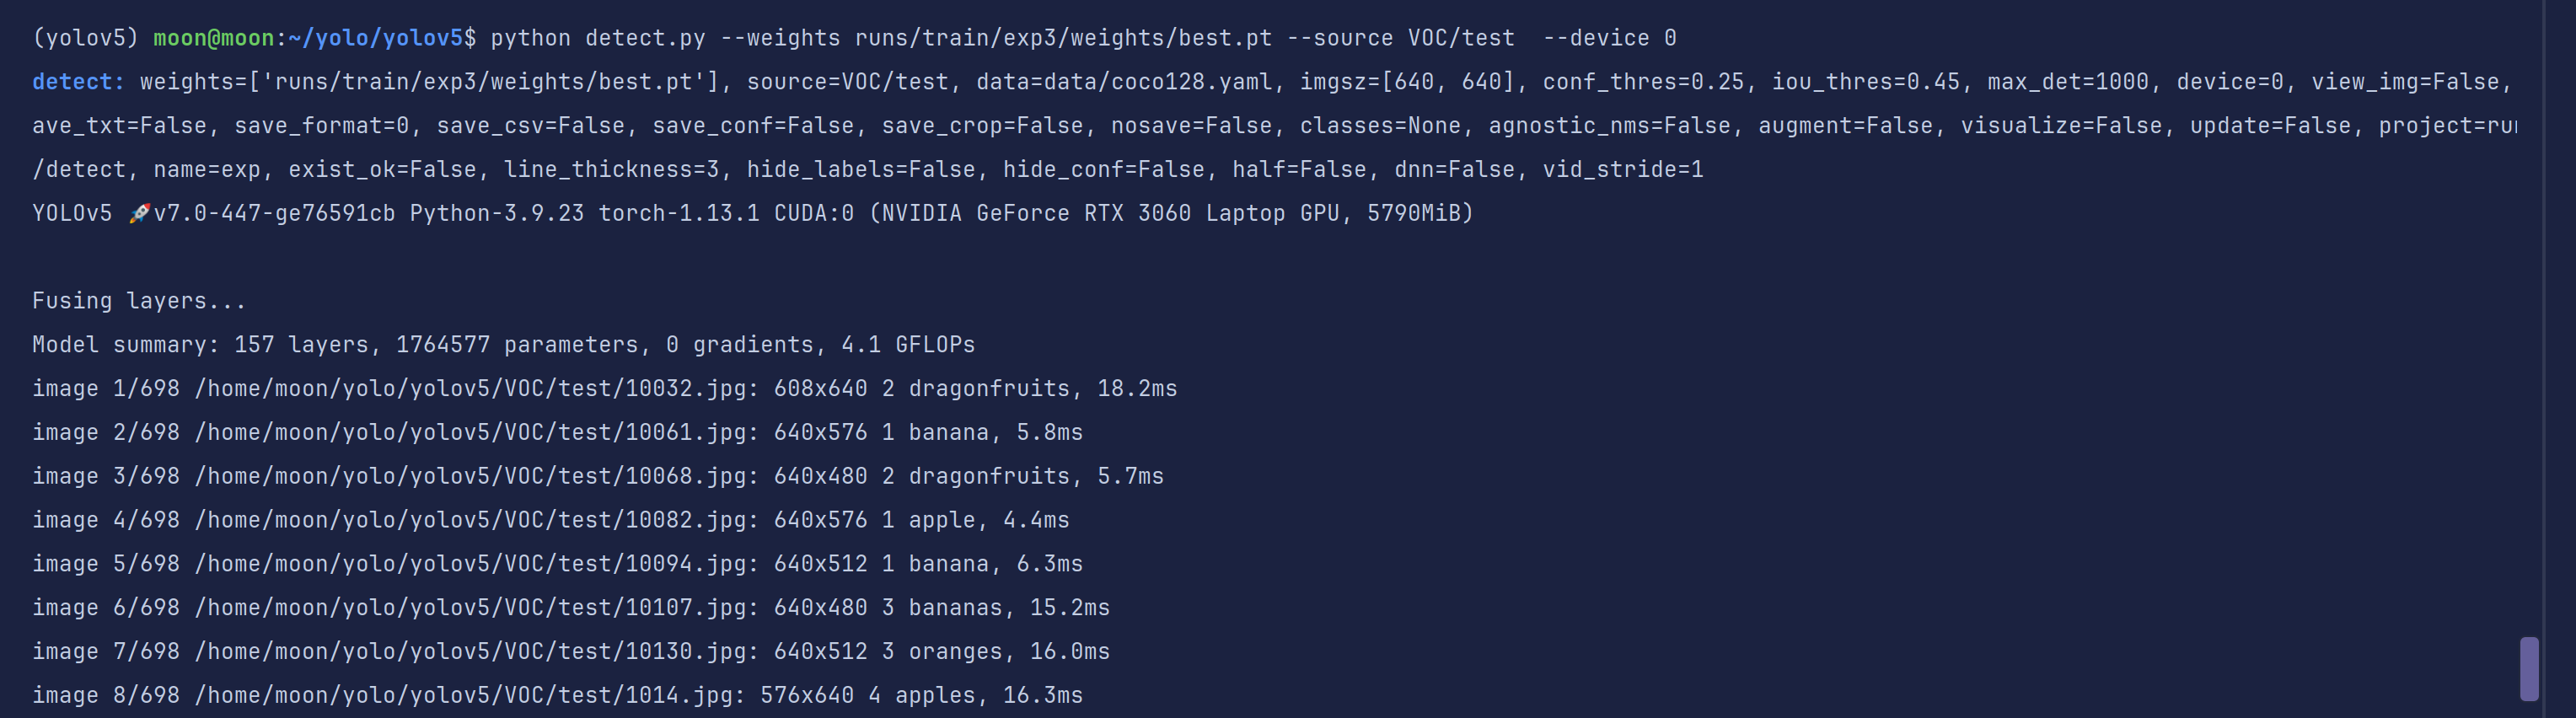
2.开始测试
#我们以阈值超过0.8作为可见
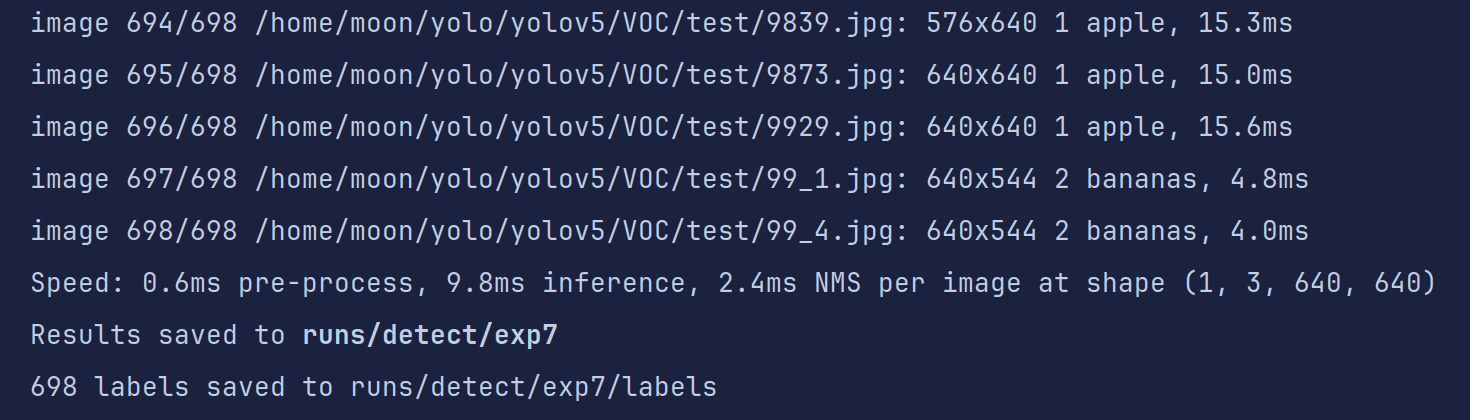
python detect.py --weights runs/train/exp3/weights/best.pt --source VOC/test --conf-thres 0.8 --device 0
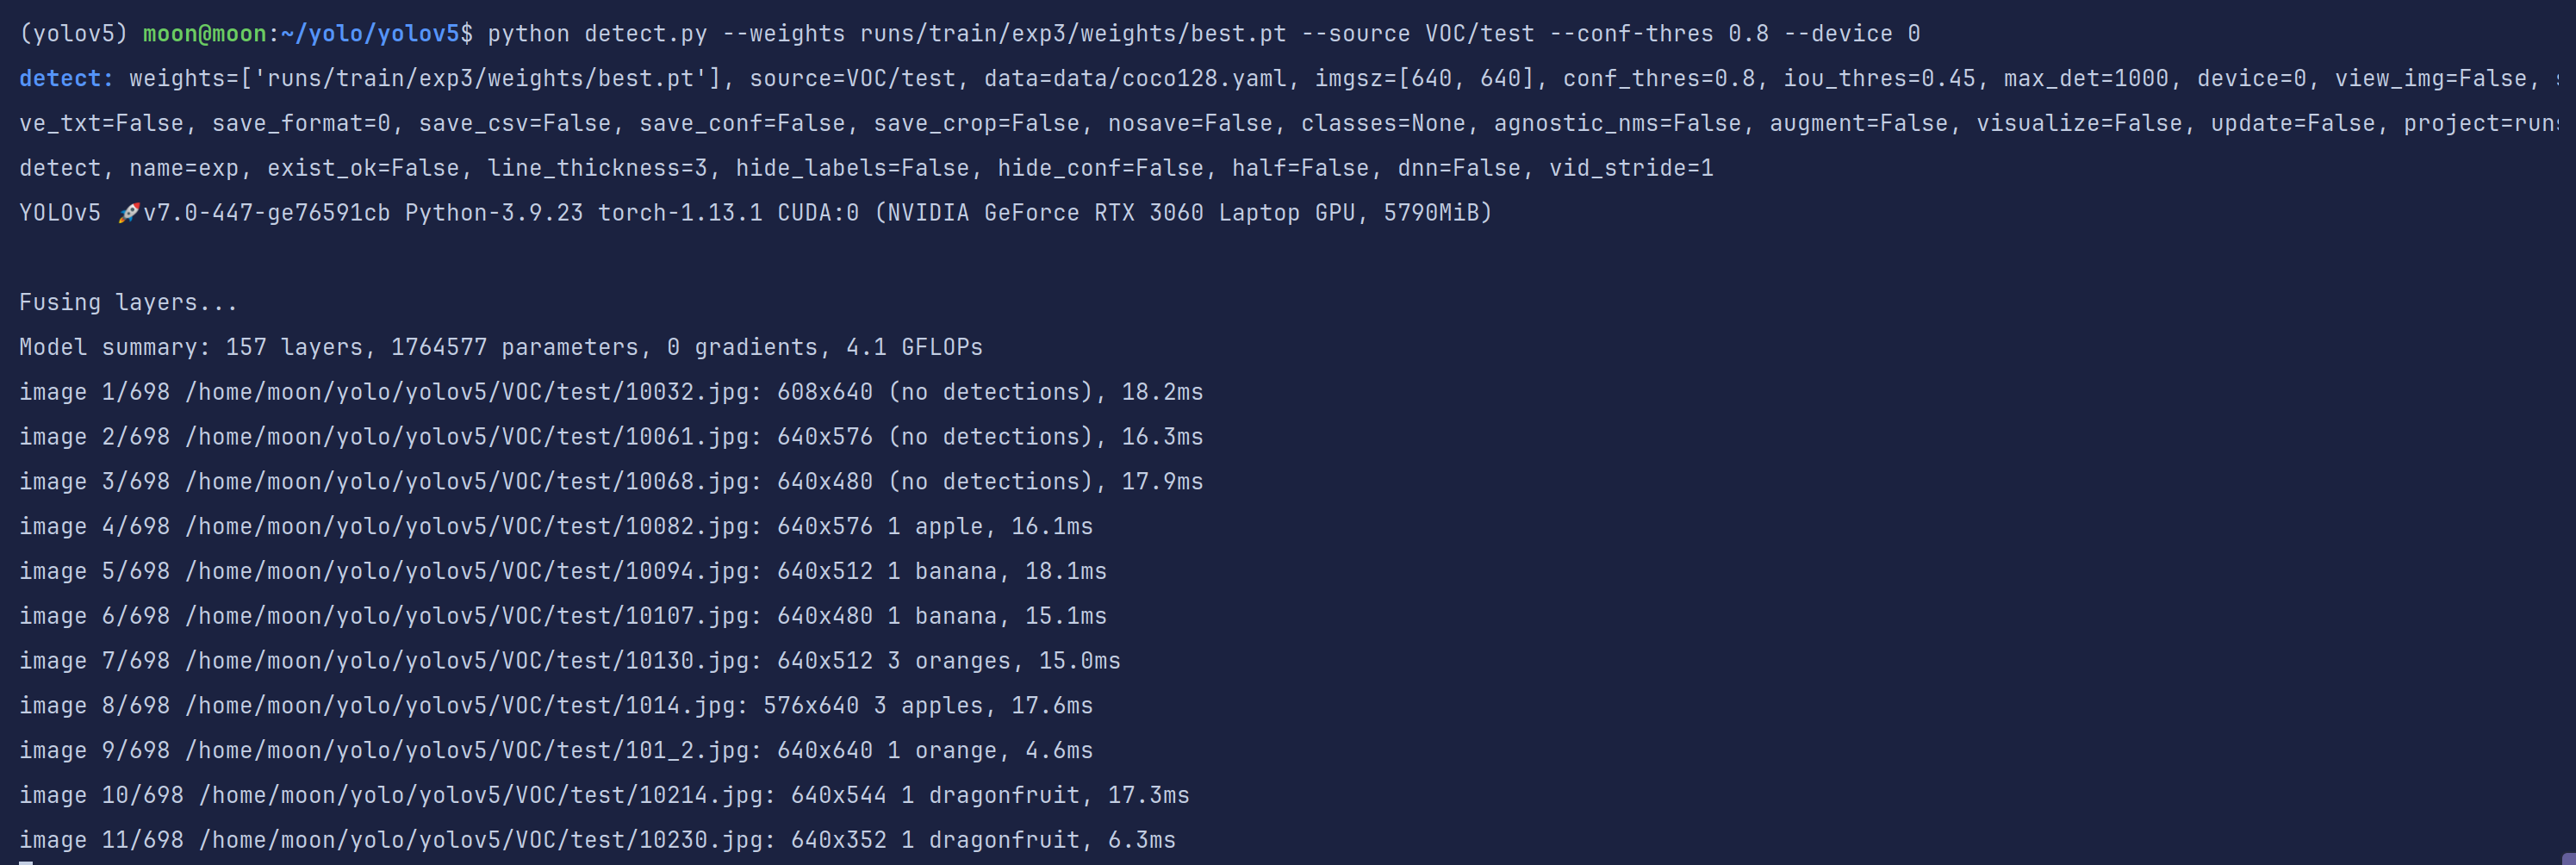
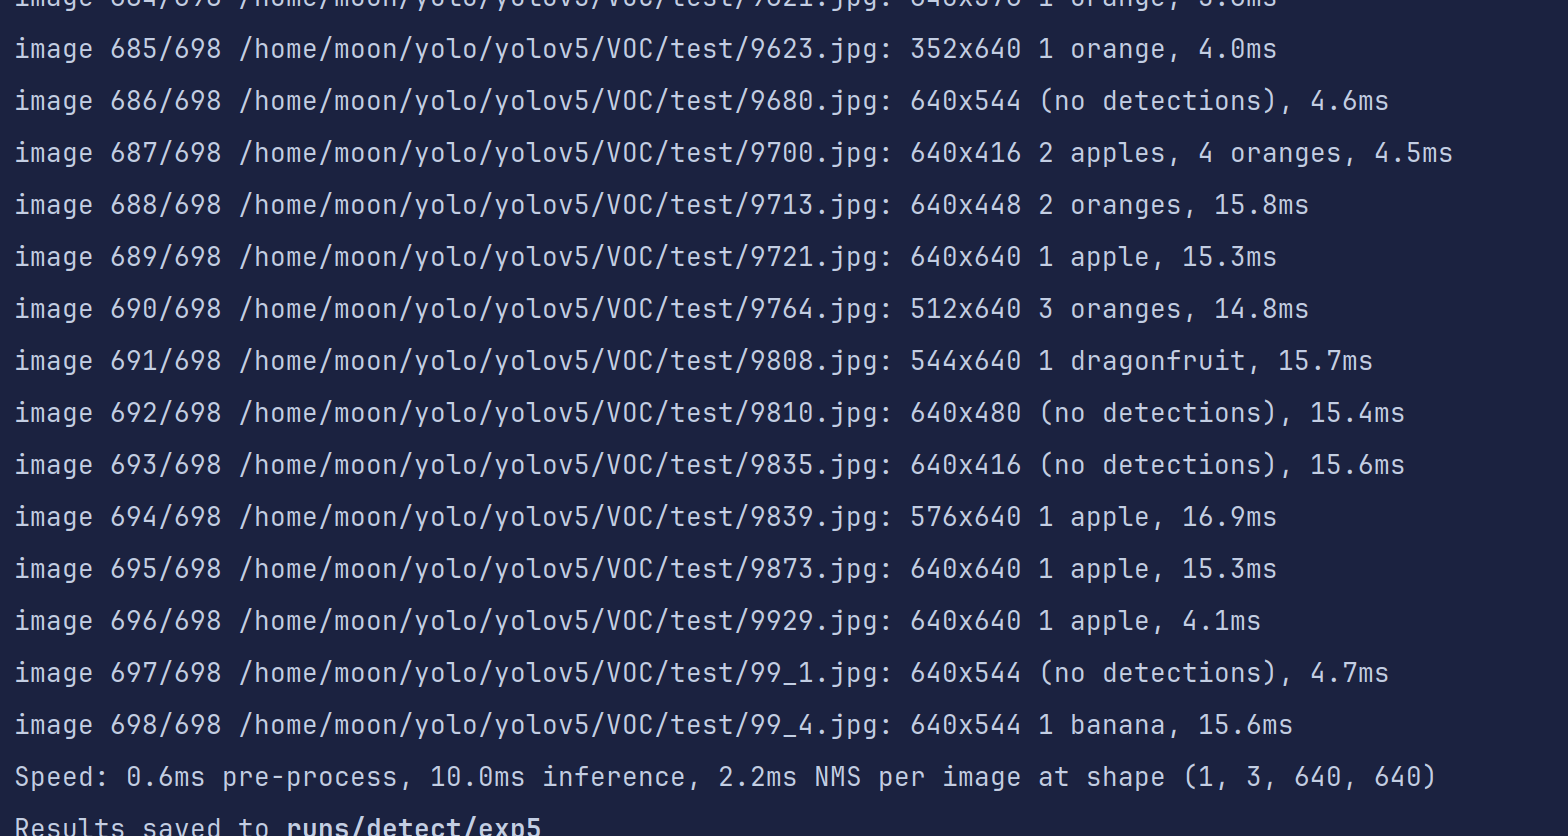
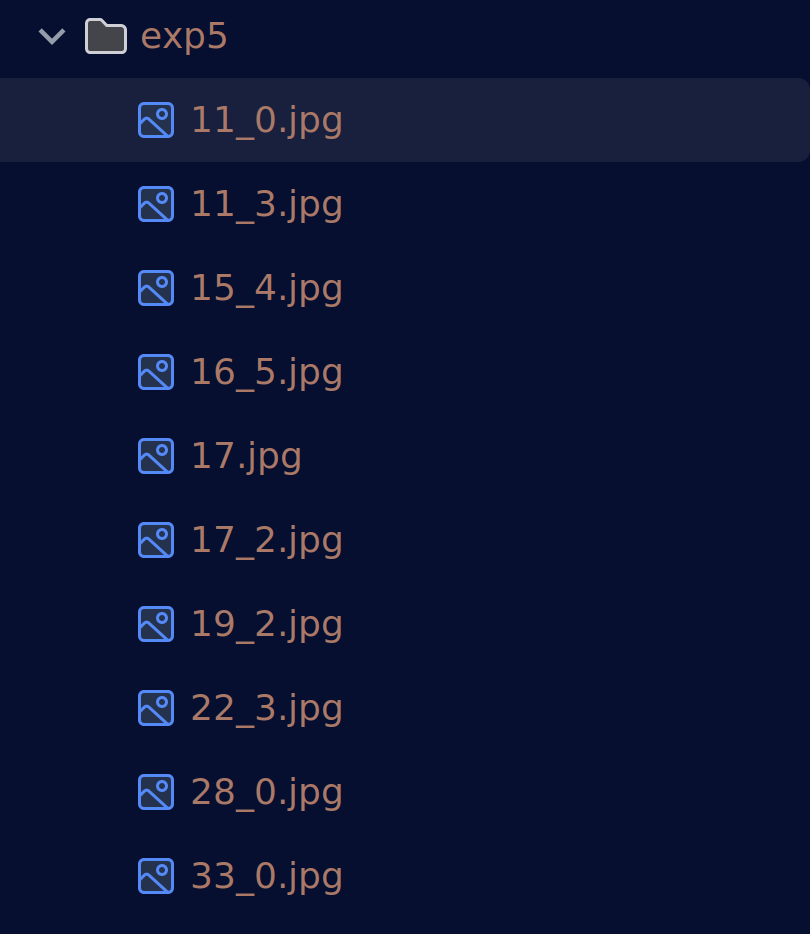
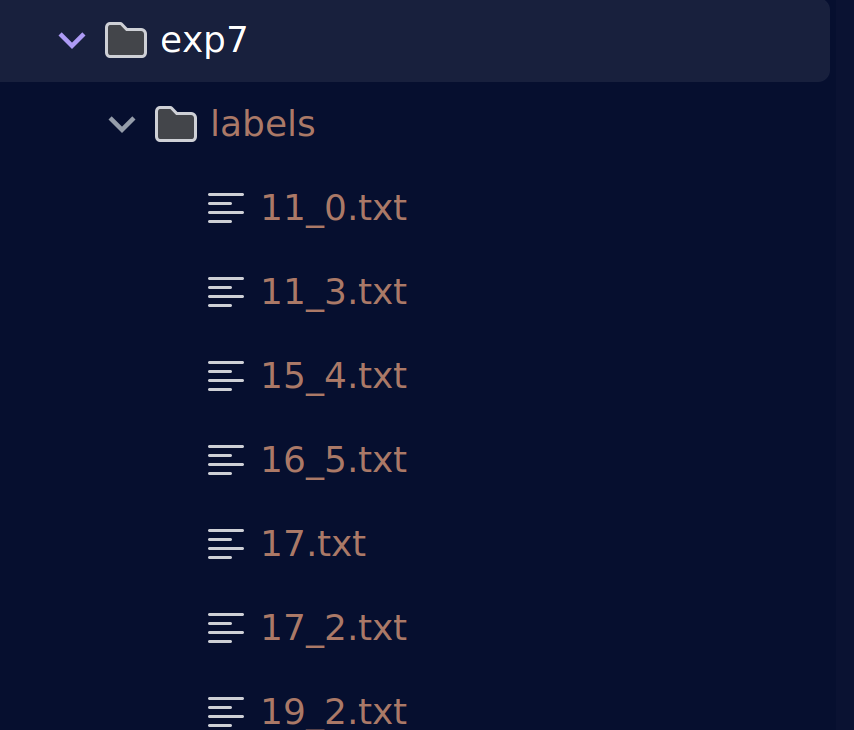
发现还是有一些图片是没有识别到的,我们到输出结果文件夹看一眼
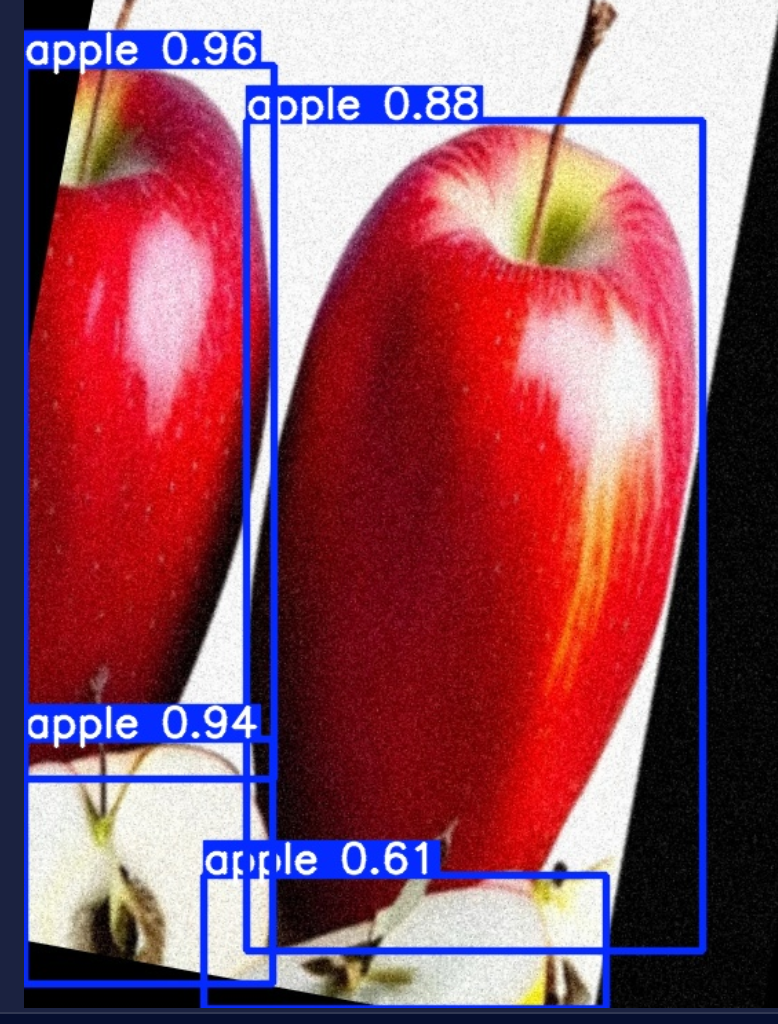
这里就有四分之一个苹果没有识别全,可能是我们给的阈值太高了
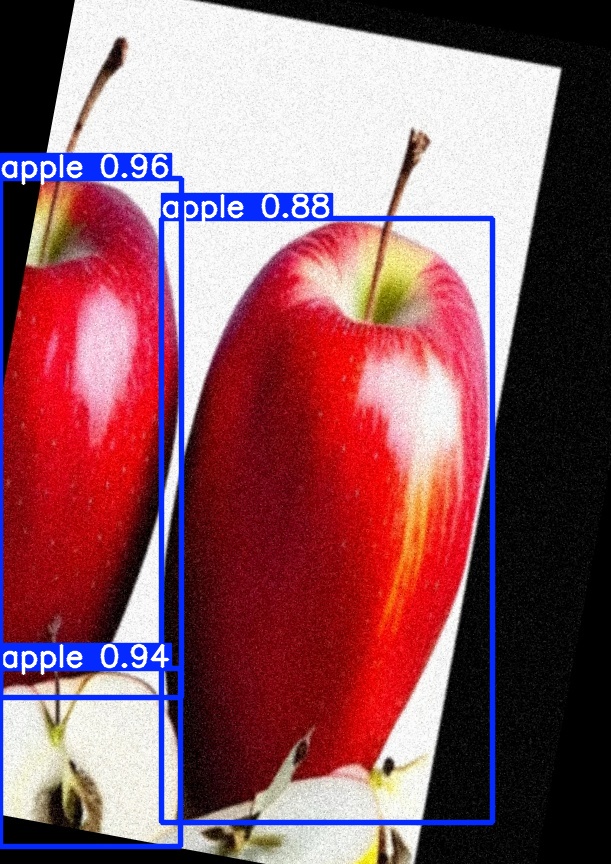
再试一次,使用默认阈值0.25,发现有很多之前没有检测到的现在显示检测到了
右下角这个苹果也识别出来了,但是置信度不高。
这就要求我们在实际使用的时候要把握好置信度的使用,你到底是要查准,还是要查全。
3.半自动数据增强思想
有时候我们无法一开始就获得大量有效的数据集,自己又不想浪费大量时间去打标几千张图片。这个时候我们可以使用detect.py中**–save-txt**参数。我们可以进行几百张数据集规模的打标然后训练。
同时对原始数据集进行数据增强但不增强标签。

代码运行完毕后会再生成一个标签文件夹存放测试数据的txt标签
是不是变相的实现了数据增强呢?
至于你是否要把txt标签文件再转换为xml标签,就看你个人咯。
完全可以写一个标签转换代码嘛~
顺便说一句,搞视觉的你手里不得有coco、txt、xml等主流格式的转换代码嘛~
什么?
你没有?想想自己有没有努力!!!
import os
import glob
from PIL import Image
import xml.etree.ElementTree as ET
from xml.dom import minidom

# 配置路径(请根据实际情况修改)
yolo_dir = '/path/to/yolo/labels'  # YOLO标签目录
output_xml_dir = '/path/to/output/xml'  # XML输出目录
img_dir = '/path/to/images'  # 图片目录
missing_labels_log = '/path/to/missing_labels.txt'  # 缺失标签记录文件

# 类别标签映射(必须与YOLO类别ID对应)
labels = ["person", "car", "bicycle"]  # 示例类别

# 确保输出目录存在
os.makedirs(output_xml_dir, exist_ok=True)

# 获取所有图片路径(支持多种格式)
img_paths = glob.glob(os.path.join(img_dir, '*.jpg')) + \
            glob.glob(os.path.join(img_dir, '*.png')) + \
            glob.glob(os.path.join(img_dir, '*.jpeg'))

missing_images = []
processed_count = 0

for img_path in img_paths:
    processed_count += 1
    img_name = os.path.splitext(os.path.basename(img_path))[0]

    if processed_count % 100 == 0:
        print(f"Processing: {processed_count}/{len(img_paths)}")

    try:
        # 打开图片获取尺寸
        with Image.open(img_path) as img:
            width, height = img.size

        # 检查标签文件是否存在
        label_path = os.path.join(yolo_dir, f"{img_name}.txt")
        if not os.path.exists(label_path):
            missing_images.append(img_path)
            continue

        # 创建XML结构
        annotation = ET.Element('annotation')
        ET.SubElement(annotation, 'folder').text = 'VOC2007'
        ET.SubElement(annotation, 'filename').text = os.path.basename(img_path)

        size = ET.SubElement(annotation, 'size')
        ET.SubElement(size, 'width').text = str(width)
        ET.SubElement(size, 'height').text = str(height)
        ET.SubElement(size, 'depth').text = '3' if img.mode == 'RGB' else '1'

        # 解析YOLO标签
        with open(label_path, 'r') as f:
            lines = f.readlines()

        for line in lines:
            parts = line.strip().split()
            if len(parts) < 5:
                continue

            try:
                class_id = int(parts[0])
                # 检查类别ID是否有效
                if class_id < 0 or class_id >= len(labels):
                    print(f"Warning: Invalid class ID {class_id} in {label_path}")
                    continue

                # 转换YOLO格式为像素坐标
                x_center = float(parts[1]) * width
                y_center = float(parts[2]) * height
                w = float(parts[3]) * width
                h = float(parts[4]) * height

                # 计算边界框并确保在图像范围内
                xmin = max(0, int(x_center - w/2))
                ymin = max(0, int(y_center - h/2))
                xmax = min(width, int(x_center + w/2))
                ymax = min(height, int(y_center + h/2))

                # 跳过无效边界框
                if xmin >= xmax or ymin >= ymax:
                    continue

                # 添加对象节点
                obj = ET.SubElement(annotation, 'object')
                ET.SubElement(obj, 'name').text = labels[class_id]
                ET.SubElement(obj, 'pose').text = 'Unspecified'
                ET.SubElement(obj, 'truncated').text = '0'
                ET.SubElement(obj, 'difficult').text = '0'

                bbox = ET.SubElement(obj, 'bndbox')
                ET.SubElement(bbox, 'xmin').text = str(xmin)
                ET.SubElement(bbox, 'ymin').text = str(ymin)
                ET.SubElement(bbox, 'xmax').text = str(xmax)
                ET.SubElement(bbox, 'ymax').text = str(ymax)

            except (ValueError, IndexError) as e:
                print(f"Error parsing line in {label_path}: {line.strip()} - {e}")

        # 格式化并保存XML
        xml_str = ET.tostring(annotation, 'utf-8')
        pretty_xml = minidom.parseString(xml_str).toprettyxml(indent="    ")

        output_path = os.path.join(output_xml_dir, f"{img_name}.xml")
        with open(output_path, 'w') as xml_file:
            xml_file.write(pretty_xml)

    except Exception as e:
        print(f"Error processing {img_path}: {str(e)}")

# 记录缺失标签
if missing_images:
    with open(missing_labels_log, 'w') as f:
        f.write("\n".join(missing_images))
    print(f"{len(missing_images)} images missing labels logged")

print(f"Conversion completed. Processed {len(img_paths)} images")
五、调试指南:常见问题与解决方案(持续更新,欢迎与我反馈,我会及时补充)
6.1 CUDA Out of Memory
现象:RuntimeError: CUDA out of memory
解决:
# 降低批量大小
python train.py --batch 8 ...

# 启用混合精度训练
python train.py --batch 16 --device 0 --amp ...
6.2 标签格式错误
现象:ValueError: not enough values to unpack
解决:
- 检查标签文件是否为 YOLO 格式(类别 ID、中心点坐标、宽高)
- 确认
data.yaml中的nc与实际类别数一致
6.3 模型推理速度慢
现象:FPS 低于预期
解决:
- 使用量化/剪枝优化模型
- 升级显卡驱动
- 启用 TensorRT 或 ONNX Runtime 加速
总结:
通过本文的系统学习,你可以快速掌握 YOLOv5 的训练和推理了。实际应用中,建议结合具体场景调整参数(如小目标检测需增大 iou_thr),并善用可视化工具(如 TensorBoard)监控训练过程。遇到问题时,优先检查数据质量(标签准确性、图片分辨率一致性)和硬件配置(显存、CUDA 版本)。


 948
948

 被折叠的 条评论
为什么被折叠?
被折叠的 条评论
为什么被折叠?
 到【灌水乐园】发言


