


Table of Contents
图片编辑工具pinta, 在图片上添加文字, 安装命令如下:
Ubuntu16.04通过Anaconda安装TensorFlow(CPU) python2.7
完成! 重新启动后就可以在 Sublime Text 3 中 使用 Fcitx了! 注意: 皮肤可能需要自己选择 ^_^
-
安装视频播放器VLC
sudo add-apt-repository ppa:videolan/master-daily
sudo apt-get update
sudo apt-get install vlc-
修改菜單到下方
终端输入:
gsettings set com.canonical.Unity.Launcher launcher-position Bottom
出现错误:
GLib-GIO-Message: Using the 'memory' GSettings backend. Your settings will not be saved or shared with other applications.
解决方案:(源自https://hk.saowen.com/a/ebbd364855b4987bcf2718a46b5045fb246b6ef0f5b72c5c8278e63bc09dd959)
export GIO_EXTRA_MODULES=/usr/lib/x86_64-linux-gnu/gio/modules/

gsettings set com.canonical.Unity.Launcher launcher-position Bottom
-
点击应用程序图标即可最小化
gsettings set org.compiz.unityshell:/org/compiz/profiles/unity/plugins/unityshell/ launcher-minimize-window true截屏: https://blog.csdn.net/weixin_41898923/article/details/84620978
-
图片编辑工具pinta, 在图片上添加文字, 安装命令如下:
sudo apt-get install pinta
-
Ubuntu16.04通过Anaconda安装TensorFlow(CPU) python2.7
-
对于.deb文件,双击安装即可
如谷歌浏览器的安装
sudo dpkg -i ****.deb
如搜狗拼音的安装
-
sublime-text-3安装:
sudo add-apt-repository ppa:webupd8team/sublime-text-3
sudo apt-get update
sudo apt-get install sublime-text-installer
将来若要移除它: sudo apt-get remove sublime-text-installer
和它有关的博客网址: https://blog.csdn.net/lee_j_r/article/details/55214175
中文输入法解决:https://blog.csdn.net/CMbug/article/details/48525837
安装 Sublime Text 3
安装 Fcitx 输入法 + 皮肤
修复 Sublime Text 3's 在 Ubuntu(Debian) 系统下的无法输入中文(CJK 字符)输入法的问题注意
这个修复仅当在终端中使用 subl . 调用Sublime Text 的时有效
使用方法
sudo apt-get update
克隆项目到本地 :
git clone https://github.com/lyfeyaj/sublime-text-imfix.git
运行脚本 :
cd sublime-text-imfix && ./sublime-imfix
完成! 重新启动后就可以在 Sublime Text 3 中 使用 Fcitx了! 注意: 皮肤可能需要自己选择 ^_^
-
caffe安装
教程1
git clone https://github.com/BVLC/caffe.git #从github上获取caffe
cd caffe
cp Makefile.config.example Makefile.config #此句各个教程里都有
———————————————————————————————————————————————————
subl Makefile.config
因为目前我还没有安装sublim所以对于此命令我用的是:
sudo gedit Makefile.config
修改文件
1.应用 cudnn
将
#USE_CUDNN := 1
修改成:
USE_CUDNN := 1
2.使用 python 接口
将
#WITH_PYTHON_LAYER := 1
修改为
WITH_PYTHON_LAYER := 1
3.修改 python 路径
INCLUDE_DIRS := $(PYTHON_INCLUDE) /usr/local/include
LIBRARY_DIRS := $(PYTHON_LIB) /usr/local/lib /usr/lib
修改为:
INCLUDE_DIRS := $(PYTHON_INCLUDE) /usr/local/include /usr/include/hdf5/serial
LIBRARY_DIRS := $(PYTHON_LIB) /usr/local/lib /usr/lib /usr/lib/x86_64-linux-gnu /usr/lib/x86_64-linux-gnu/hdf5/serial
___________________________________________________________________________________________
然后修改 /usr/local/cuda/include/host_config.h 文件 : 这个我没弄
将
#error-- unsupported GNU version! gcc versions later than 4.9 are not supported!
改为
//#error-- unsupported GNU version! gcc versions later than 4.9 are not supported!
____________________________________________________________________________________________
OK ,可以开始编译了,在 caffe 目录下执行 :
make all -j8 出现错误,因为运行的太快了,把-j8去掉即可
若想执行make all -j8, 修改Makefile.config文件,下面为修改后的,注释掉太高的速度
CUDA_ARCH := #-gencode arch=compute_20,code=sm_20 \
#-gencode arch=compute_20,code=sm_21 \
-gencode arch=compute_30,code=sm_30 \
-gencode arch=compute_35,code=sm_35 \
-gencode arch=compute_50,code=sm_50 \
-gencode arch=compute_52,code=sm_52 \
#-gencode arch=compute_60,code=sm_60 \
#-gencode arch=compute_61,code=sm_61 \
#-gencode arch=compute_61,code=compute_61
———————————————————————————————————————————————————
make all
出现错误:
NVCC src/caffe/layers/eltwise_layer.cu
nvcc fatal : Unknown option 'Xcompiler-fPIC'
Makefile:594: recipe for target '.build_release/cuda/src/caffe/layers/eltwise_layer.o' failed
make: *** [.build_release/cuda/src/caffe/layers/eltwise_layer.o] Error 1
解决方案:
修改 caffe 目录下的 Makefile 文件:
将:
NVCCFLAGS +=-ccbin=$(CXX) -Xcompiler-fPIC $(COMMON_FLAGS)
替换为:
NVCCFLAGS += -D_FORCE_INLINES -ccbin=$(CXX) -Xcompiler -fPIC $(COMMON_FLAGS)
将:
LIBRARIES += glog gflags protobuf boost_system boost_filesystem m hdf5_hl hdf5
改为:
LIBRARIES += glog gflags protobuf boost_system boost_filesystem m hdf5_serial_hl hdf5_serial
———————————————————————————————————————————————————
make pycaffe
出现错误:
CXX/LD -o python/caffe/_caffe.so python/caffe/_caffe.cpp
python/caffe/_caffe.cpp:10:31: fatal error: numpy/arrayobject.h: 没有那个文件或目录
compilation terminated.
Makefile:508: recipe for target 'python/caffe/_caffe.so' failed
make: *** [python/caffe/_caffe.so] Error 1
解决方案:
在home目录下安装,在caffe目录下安装均可
sudo apt-get install python-numpy
然后运行
make pycaffe
最后加下面这句 到 bashrc最后:
gedit ~/.bashrcexport PYTHONPATH=/home/aicrobo/caffe/python:$PYTHONPATH
-
cuda安装
1)系统设置 -> 软件和更新 -> 附加驱动 -> 选择英伟达驱动
2)为了方便开始安装过程的路径查找,把下载的cuda_8.0.44_linux.run安装文件移动到 HOME 路径
3)Ctrl + Alt + F1 进入文本模式,输入帐号密码登录
4)在文本模式登录后首先关闭桌面服务:
sudo service lightdm stop
5)sudo ./ cuda_8.0.44_linux.run
执行此命令约1分钟后会出现 0%信息,此时按q键,然后按照提示先输入 accept ,然后让选择是否安装 nvidia 驱动,若未安装则输入 “y”,若确保已安装正确驱动则输入“n”。我选的n
当选y的时候OpenGL不安装,nvidia-xconfig不安装
剩下的选择则都输入“y”确认安装或确认默认路径安装
6)打开桌面服务:
sudo service lightdm start
7)配置 CUDA 环境变量
sudo gedit ~/.bashrc
在该文件最后加入以下两行并保存:(这两行中间的内容在文本格式下有显示,按自己电脑的来)
export PATH=/usr/local/cuda-8.0/bin:$PATH
export LD_LIBRARY_PATH=/usr/local/cuda-8.0/lib64:$LD_LIBRARY_PATH
终端上会出现:
** (gedit:5927): WARNING **: Set document metadata failed: 不支持设置属性 metadata::gedit-position
没事,忽略
8)使该配置生效: source ~/.bashrc
第6步 验证 CUDA 8.0 是否安装成功
分别执行以下命令:
cd NVIDIA_CUDA-8.0_Samples/1_Utilities/deviceQuery
sudo make
./deviceQuery
若看到类似以下信息则说明 cuda 已安装成功:
./deviceQuery Starting...
CUDA Device Query (Runtime API) version (CUDART static linking)
Detected 1 CUDA Capable device(s)
Device 0: "GeForce 940MX"
CUDA Driver Version / Runtime Version 9.0 / 8.0
CUDA Capability Major/Minor version number: 5.0
Total amount of global memory: 2003 MBytes (2100232192 bytes)
( 3) Multiprocessors, (128) CUDA Cores/MP: 384 CUDA Cores
GPU Max Clock rate: 1189 MHz (1.19 GHz)
Memory Clock rate: 2000 Mhz
Memory Bus Width: 64-bit
L2 Cache Size: 1048576 bytes
Maximum Texture Dimension Size (x,y,z) 1D=(65536), 2D=(65536, 65536), 3D=(4096, 4096, 4096)
Maximum Layered 1D Texture Size, (num) layers 1D=(16384), 2048 layers
Maximum Layered 2D Texture Size, (num) layers 2D=(16384, 16384), 2048 layers
Total amount of constant memory: 65536 bytes
Total amount of shared memory per block: 49152 bytes
Total number of registers available per block: 65536
Warp size: 32
Maximum number of threads per multiprocessor: 2048
Maximum number of threads per block: 1024
Max dimension size of a thread block (x,y,z): (1024, 1024, 64)
Max dimension size of a grid size (x,y,z): (2147483647, 65535, 65535)
Maximum memory pitch: 2147483647 bytes
Texture alignment: 512 bytes
Concurrent copy and kernel execution: Yes with 1 copy engine(s)
Run time limit on kernels: Yes
Integrated GPU sharing Host Memory: No
Support host page-locked memory mapping: Yes
Alignment requirement for Surfaces: Yes
Device has ECC support: Disabled
Device supports Unified Addressing (UVA): Yes
Device PCI Domain ID / Bus ID / location ID: 0 / 1 / 0
Compute Mode:
< Default (multiple host threads can use ::cudaSetDevice() with device simultaneously) >
deviceQuery, CUDA Driver = CUDART, CUDA Driver Version = 9.0, CUDA Runtime Version = 8.0, NumDevs = 1, Device0 = GeForce 940MX
Result = PASS
-
cudnn安装
cd cuda/include/ #打开include目录
sudo cp cudnn.h /usr/local/cuda/include/ #复制头文件
cd ../lib64 #打开lib64目录
sudo cp lib* /usr/local/cuda/lib64/ #复制库文件
建立软连接
终端输入
cd /usr/local/cuda/lib64/
sudo rm -rf libcudnn.so libcudnn.so.5 #删除原有动态文件
sudo ln -s libcudnn.so.5.1.10 libcudnn.so.5 #生成软衔接,5.1.10按自己电脑的来,看cuda/lib64/ 中是多少
sudo ln -s libcudnn.so.5 libcudnn.so #生成软衔接
nvcc -V 命令验证是否安装成功
若出现以下信息则表示安装成功:
nvcc: NVIDIA (R) Cuda compiler driver
Copyright (c) 2005-2016 NVIDIA Corporation
Built on Sun_Sep__4_22:14:01_CDT_2016Cuda compilation tools, release 8.0, V8.0.44
-
为知笔记安装
sudo add-apt-repository ppa:wiznote-teamsudo apt-get updatesudo apt-get install wiznotecomputer→ usr → share → applications → 能找到安装的wiznote
-
qt安装
chmod +x qt-opensource-linux-x64-5.9.1.run
./qt-opensource-linux-x64-5.9.1.run
出现窗口一路next,这次安装我选择全部,跳过了邮件登录
-
pip安装
https://blog.csdn.net/weixin_37911283/article/details/70799481
sudo apt-get install python-pip python-dev build-essential
sudo pip install --upgrade pip -
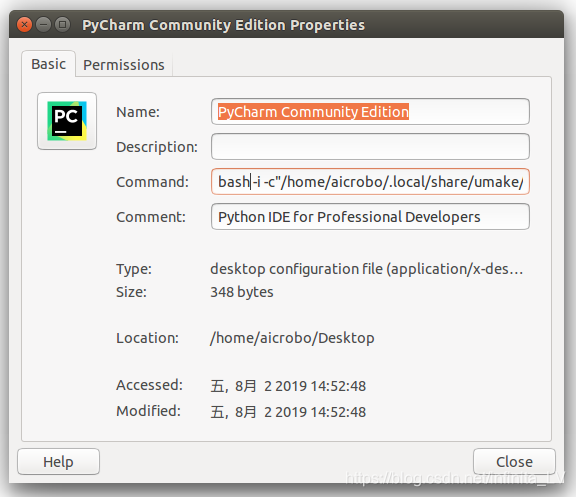
pycharm安装
先在PyCharm官网下载安装包,链接:https://www.jetbrains.com/pycharm/download/#section=linux
选择平台为Linux,专业版收费,选择Community版,点击DOWNLOAD下载。
# 下载完成后,cd到下载目录,解压安装包
tar -zxvf pycharm-community-2019.1.3.tar.gz

# cd到bin目录下
cd pycharm-community-2019.1.3/bin

# 执行下面命令出现对话框
sh ./pycharm.sh按博客https://blog.csdn.net/weixin_43790276/article/details/89439943对出现的对话框进行选择即可
继承bash环境变量:


-
labelme
conda create --name=labelme python=2.7

source activate labelme

conda install pyqt

pip install labelme
输入: labelme 启动labelme
注意: 文件夹路径中不能有中文


 4万+
4万+

 被折叠的 条评论
为什么被折叠?
被折叠的 条评论
为什么被折叠?
 到【灌水乐园】发言


