


This series of articles are the study notes of "Interfacing with the Arduino", by Prof. Harris, Department of Computer Science, University of California, Irvine. This article is the notes of week 4, lessen 3.
This article is the study notes of "Interfacing with the Arduino" week4, lesson 3. It mainly talk about WiFi shield.
3. Lesson 3
3.1 Lecture 3.1 - WiFi Shield
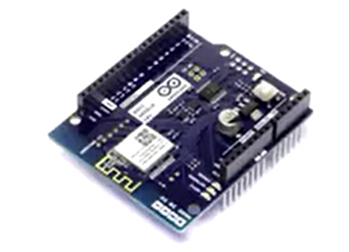
3.1.1 WiFi Shield
So we talked about the Ethernet shield, and now we'll talk about a WiFi shield. Actually it's relatively similar, I mean what it does at a high level is basically the same thing as an Ethernet shield.
(1) Allows you to connect to the internet through a wireless interface
It allows you to connect to the internet, but it does it through a wireless interface, rather than a wired interface like an Ethernet shield would do. So in a lot of ways it's very similar from a programmer's point of view. Sending data on one shield versus sending on another is a very similar operation.
(2) IEEE 802.11 (WiFi) standard is used
The IEEE standard uses is 802.11 There are varieties of this, V, there are suffixes, N, I can't remember which one they're on now, but 802.11 something is the current WiFi standard.
(3) library is similar to the Ethernet library,
So, the library is similar to the Ethernet library, not exactly the same.
3.1.2 WiFi Initialization
(1) Wifi.begin(); -no arguments; just initializes the shield
WiFi Initialization, so what do you do first? Wifi.begin so that's very common. No arguments, if you pass no arguments it just initializes the shield, so that's one way to call Wifi.begin. Just no arguments, it powers up the shield and initializes it.
(2) Wifi.begin(ssid); -connects to the network ssid
Now, a common way to do it is to call WiFi.begin with one argument, ssid. SSID is the name of the network that you wanna connect to. Now this is something you don't generally have with an ethernet shield. You don't have a choice of networks to connect to, you've just got a network, and you connect to it. With WiFi you often can view many networks, so you gotta pick one and SSID is the name of that network. You pass that as an argument, it'll connect to that network.
(3) Wifi.begin(ssid, pass); - connects to ssid with WPA-2 password
Now, you can also call WiFi.begin with two arguments. The first argument is the SSID, the second argument is the password. You would use this if the network had WPA2 encryption and it required a password, so you pass the password as an argument to that you could connect to the network.
(4) Wifi.begin(ssid, keyindex, key); - connects to ssid with key as WEP password
Now another way to do it is to call WiFi.begin with three arguments, the SSID, and then a key index, and a key. So this is used when the network uses WEP encryption, and when it does that, WEP encryption has several keys, you can have up to four different keys to choose from. So key index is going to be the number of the key that you are choosing. And the key is going to effectively be the password that you are using to get into the network.
So all four of these options are different ways that you can set up your connection, depending on the type of network that you're using.
3.1.3 Wifi Client and Server
(1) Same as Ethernet client and server process
So once you've connected, once you've joined the network, then a lot of this part about you acting as a client and a server is very similar to the Ethernet shield.
(2) WifiClient
- WiFiClient client;
- result = client.connect(ip,port);
- client.stop();
Instead of an Ethernet client, you've got a WiFiClient. So you create a WiFiClient if you're acting as the client and you client connect. So you call client connect, client.connect with that IP address and a port. This is actually the same as with the Ethernet client. And client.stop stops communication.
(3) WiFiServer: slightly different
- WiFiServer server(port);
- Server.begin();
- starts server listening on port
Now WiFiServer it invokes slightly differently. When you want to access the server you call server with port, it's phrased a little bit differently. Before with the Ethernet we said server equals our Ethernet server port, but it accomplishes the same goal. And then you call server.begin to start the server listening on the port, actually that's the same as with the Ethernet library too.
3.1.4 Scanning WiFi Networks
Now scanning for WiFi networks. This is something you don't generally do with Ethernet, you're not scanning for Ethernet networks. You're plugged into a network and that's that. With WiFi, you often want to scan, look at the networks around you, and pick one to connect to.
(1) Which network (SSID) should you connect to?
(2) netnum = WiFi.scanNetworks(); -Returns the number of networks available
Sort of answering the question which SSID should I connect to? So one thing is you're gonna wanna scan for networks. It's very common to scan for networks so they they provide a function, WiFi.scanNetworks. That returns the number of networks available. It doesn't return the names of networks, just the number. if it found 5 networks it returns a 5.
(3) ssid = WiFi.SSID(i); - Returns the SSID of the ith network
Now, if you wanna find, let's say you know there are five networks, and you wanna find the actual names of the networks, the SSIDs of the networks, you can call this function WiFi.SSID. You pass it an integer i, and it returns the SSID of the ith network. So if you know there are five networks, you can call SSID of 0, 1, 2, 3, and it will return the SSID of all those networks.
(4) strength = WiFi.RSSI(i); - Returns the signal strength of the ith network (-80 to 0)
Now, often in order to pick the network that you want, you go for highest strength, or it's a common consideration. So you can also find out the strength of a network by calling RSSI. So if you call WiFi.RSSI, you give it an i, which is the number of the network, it will return the signal strength of the network. It would return you a number between -80 to 0, 0 being the highest strength, and -80 the lowest strength.
(5) enc = WiFi.encryptionType(i); - Returns the encryption type used in the ith netwrok
-
WEP, WPA, WPA2, none, multiple possible
And one more thing that's a factor in figuring out what network you wanna connect to, is the type of encryption you use, maybe you're looking for an open network, something like that. So there's this function encryptionType, WiFi.encryptionType. You give it an i which is the number of the network and it returns the type of encryption used in the network. It returns a code, 0, 1, 2, 3, 4, depending on the type of encryption, so zero I think is WEP encryption. Zero is for WEP, one is for WPA, two is for WPA2, and three is for no encryption, and then four is for multiple possible encryption.
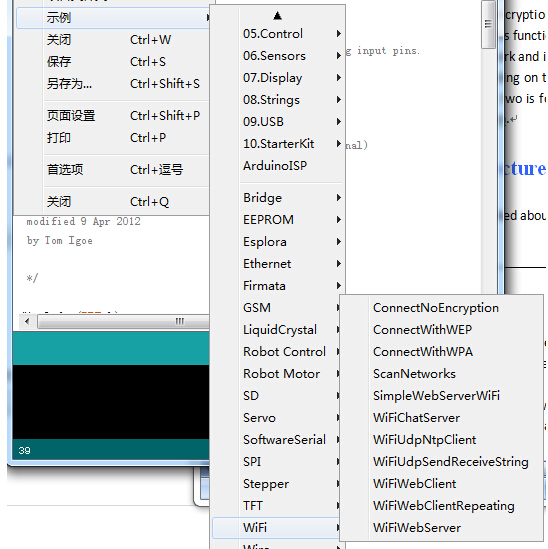
3.2 Lecture 3.2 - WiFi Shield Demo
Here demonstrates the WiFi Shield Demo from Arduino examples.


 953
953

 被折叠的 条评论
为什么被折叠?
被折叠的 条评论
为什么被折叠?
 到【灌水乐园】发言


