


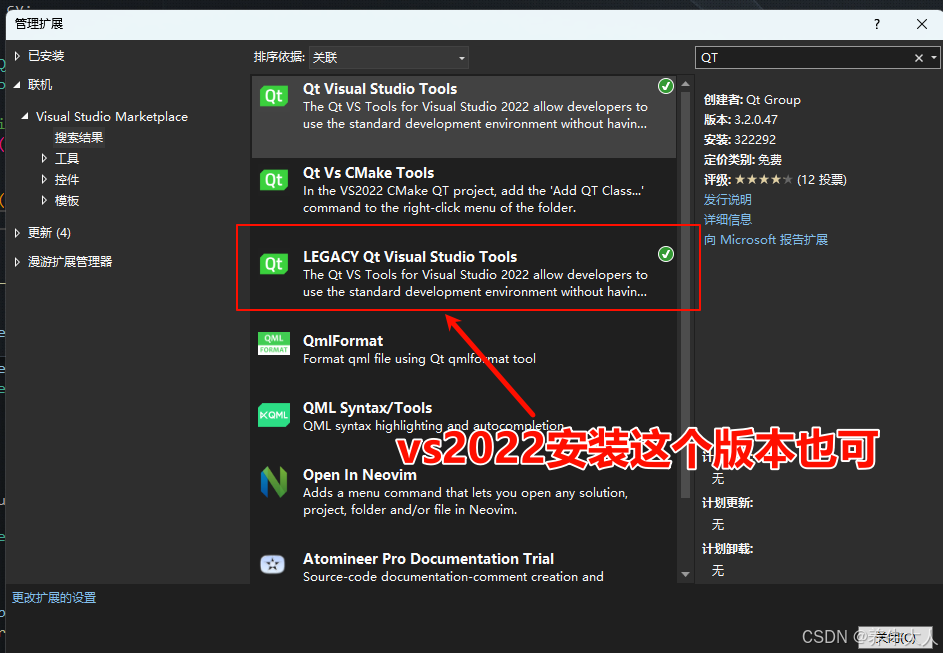
要在vs2022创建QT项目,先要安装一个插件Qt Visual Studio Tools,根据个人经验选择LEGACY Qt Visual Studio Tools好一些,看以下内容之前建议先在vs2022中配置好opencv,配置方式建议以属性表的形式保存在硬盘上。
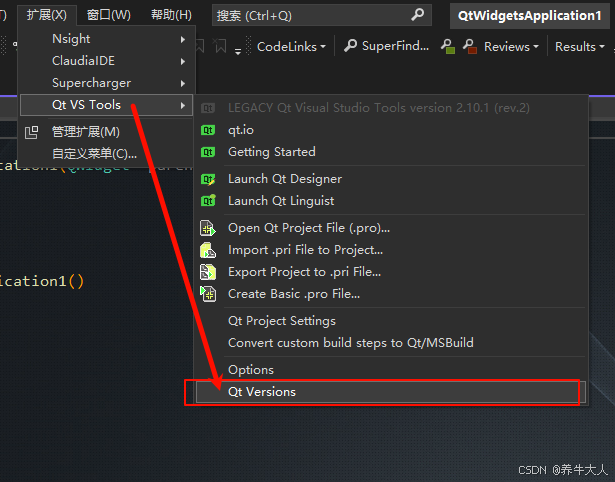
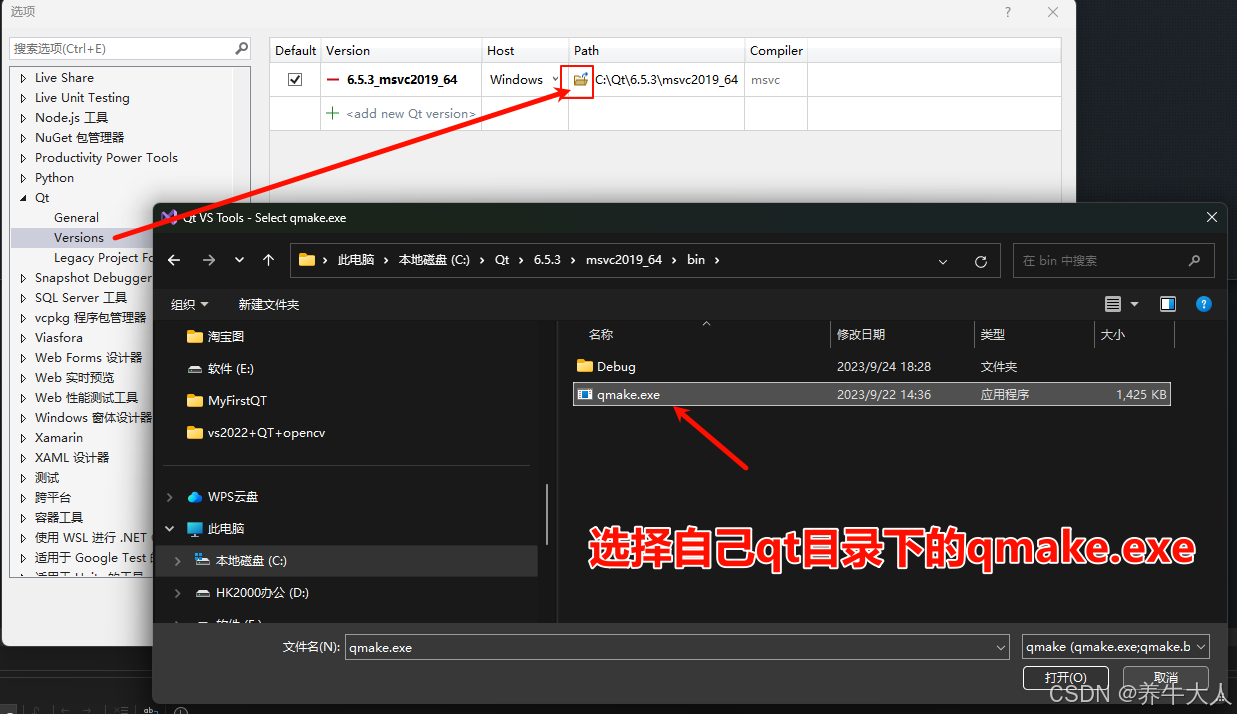
设置QT路径
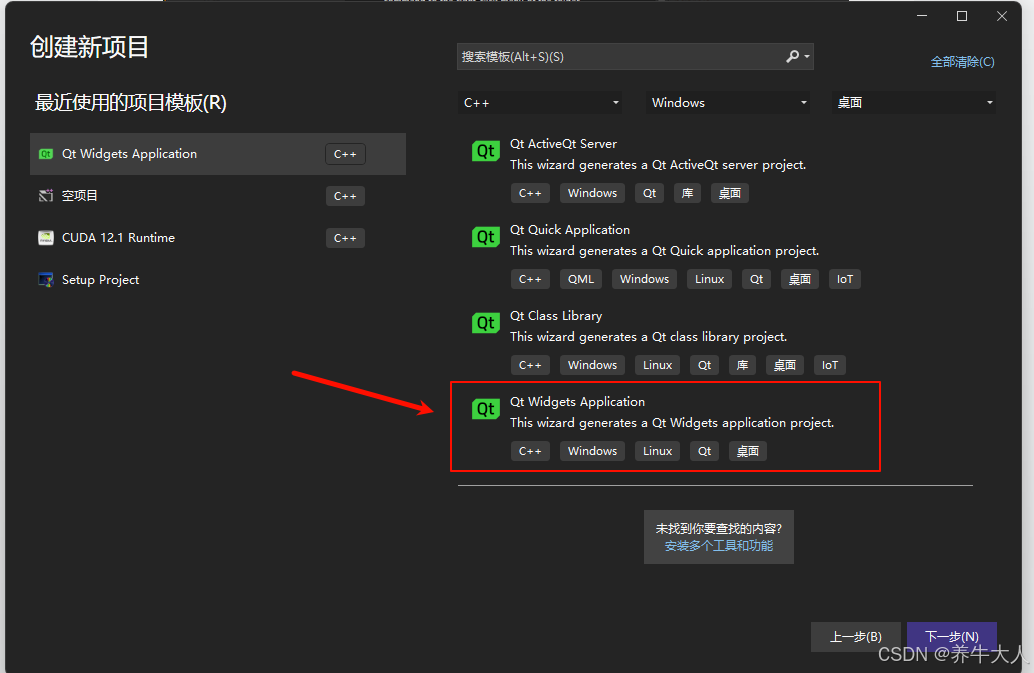
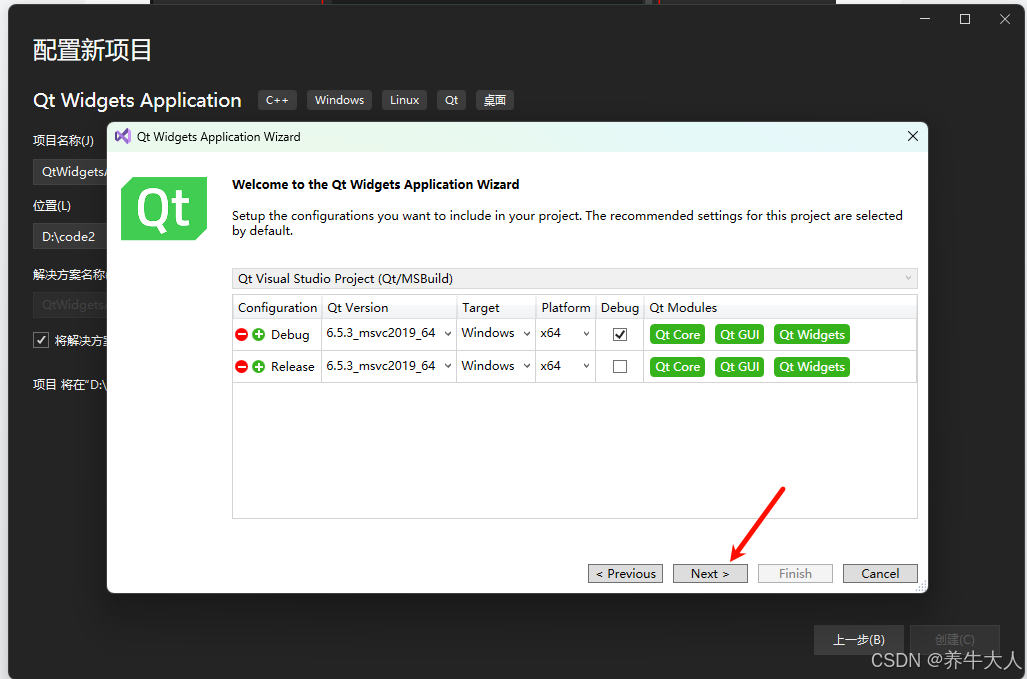
打开vs2022 ,选择Qt Widgets Application


这里不清楚为什么只能选择一个,就默认Next吧
 点Finish后如下图所示,双击ui文件


修改头文件,增加2行,
private slots:
    void on_buttonOpen_clicked();
以及修改最后1行如图
Ui::QtWidgetsApplication1Class *ui;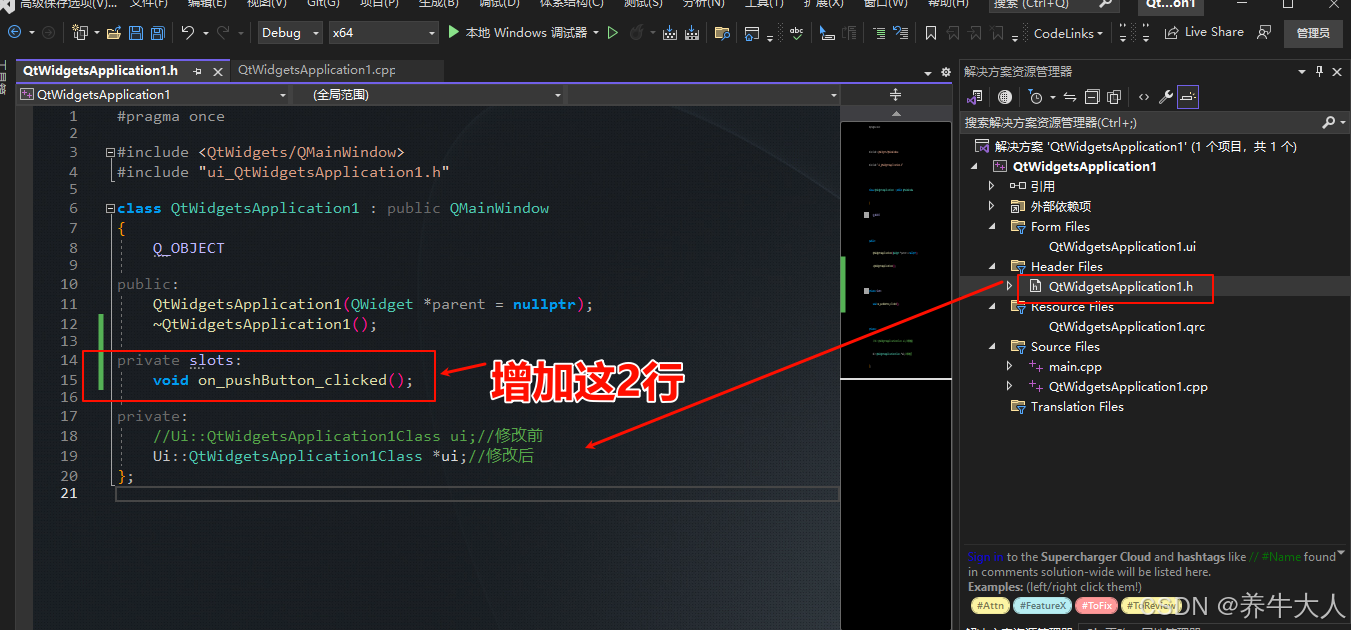
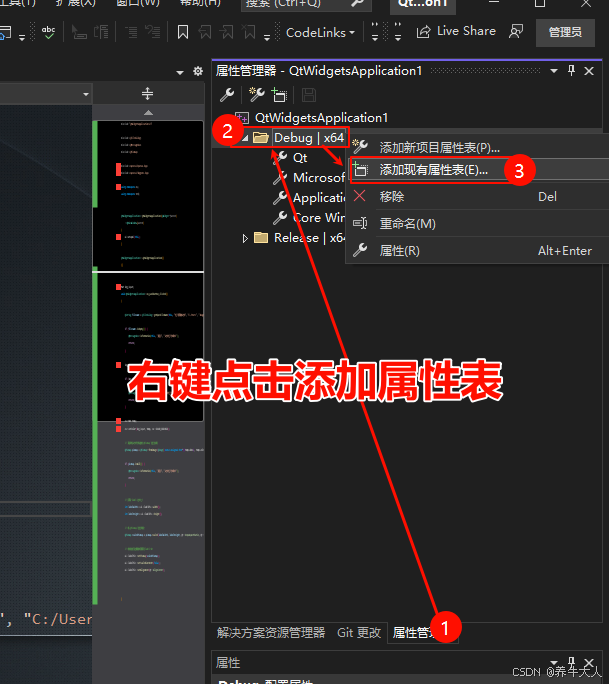
修改主文件cpp之前,先加载配置好的opencv属性表(这个是vs2022中配置opencv的问题,这里不详细展开,主要讲vs中qt的使用)
opencv的属性表加载之后,就可以调用opencv功能了,QtWidgetsApplication1.cpp头部增加以下代码

修改后的内容如下
#include "qtpro2.h"
#include <QFileDialog>
#include <QMessageBox>
#include <QPixmap>
#include <opencv2/opencv.hpp>
#include <opencv2/imgproc.hpp>
using namespace cv;
using namespace std;
qtpro2::qtpro2(QWidget *parent)
: QMainWindow(parent), ui(new Ui::qtpro2Class)
{
//ui.setupUi(this);
ui->setupUi(this);
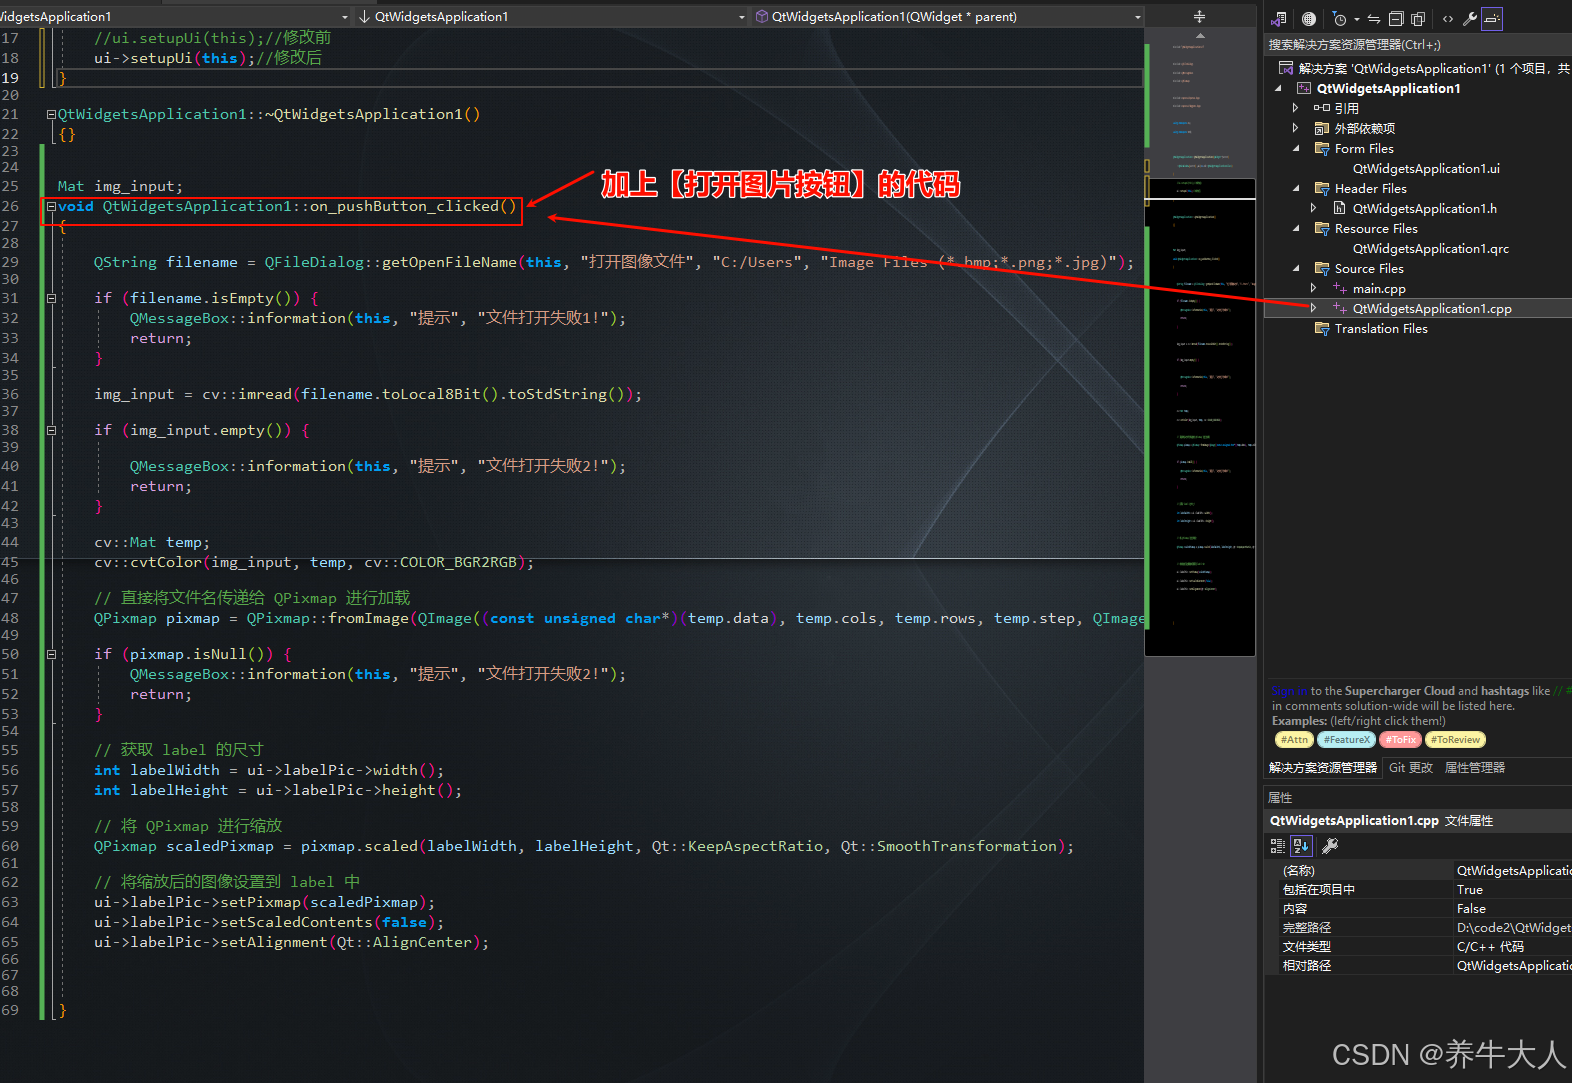
}给打开图片这个按钮加上代码,功能是读取一张图片,并等比例(不变形)缩放后显示在Qlabel中
Mat img_input;
void QtWidgetsApplication1::on_pushButton_clicked()
{
QString filename = QFileDialog::getOpenFileName(this, "打开图像文件", "C:/Users", "Image Files (*.bmp;*.png;*.jpg)");
if (filename.isEmpty()) {
QMessageBox::information(this, "提示", "文件打开失败1!");
return;
}
img_input = cv::imread(filename.toLocal8Bit().toStdString());
if (img_input.empty()) {
QMessageBox::information(this, "提示", "文件打开失败2!");
return;
}
cv::Mat temp;
cv::cvtColor(img_input, temp, cv::COLOR_BGR2RGB);
// 直接将文件名传递给 QPixmap 进行加载
QPixmap pixmap = QPixmap::fromImage(QImage((const unsigned char*)(temp.data), temp.cols, temp.rows, temp.step, QImage::Format_RGB888));
if (pixmap.isNull()) {
QMessageBox::information(this, "提示", "文件打开失败2!");
return;
}
// 获取 label 的尺寸
int labelWidth = ui->labelPic->width();
int labelHeight = ui->labelPic->height();
// 将 QPixmap 进行缩放
QPixmap scaledPixmap = pixmap.scaled(labelWidth, labelHeight, Qt::KeepAspectRatio, Qt::SmoothTransformation);
// 将缩放后的图像设置到 label 中
ui->labelPic->setPixmap(scaledPixmap);
ui->labelPic->setScaledContents(false);
ui->labelPic->setAlignment(Qt::AlignCenter);
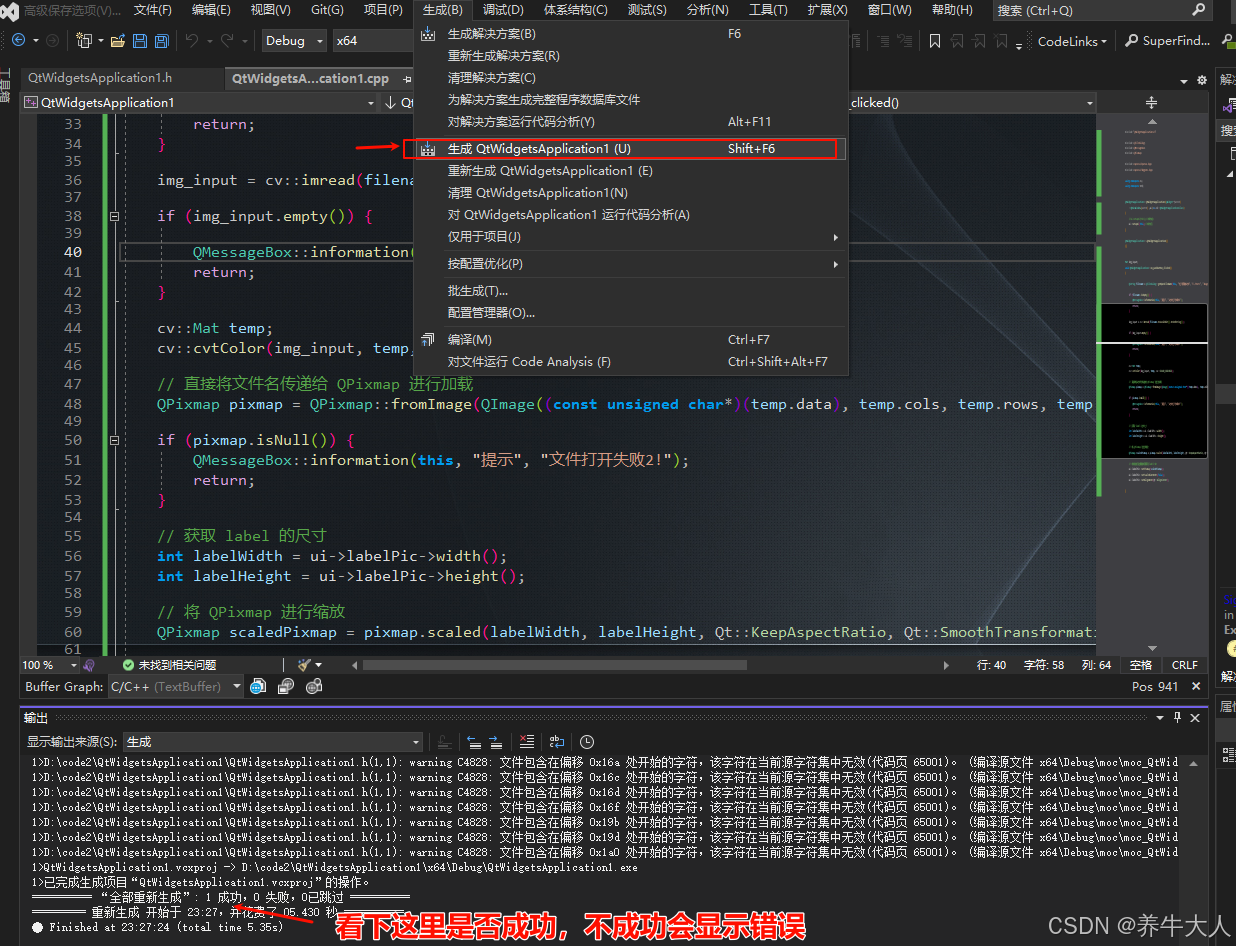
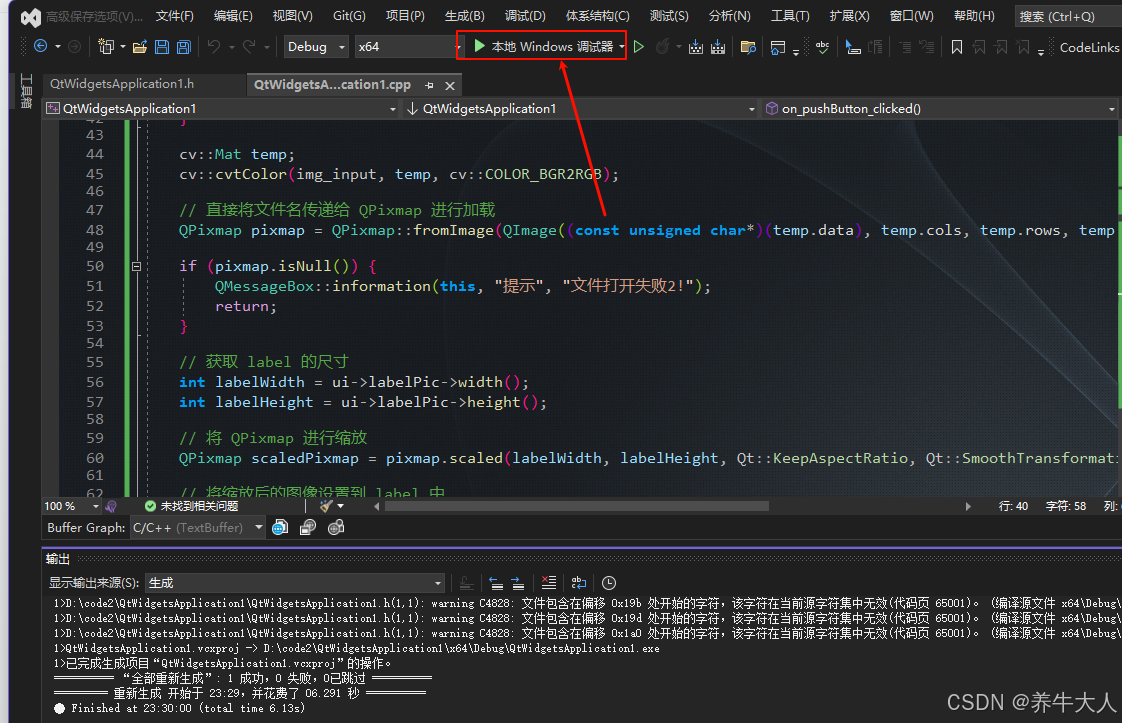
}到这一步,基本功能就完成,可以先生成项目,再运行看下
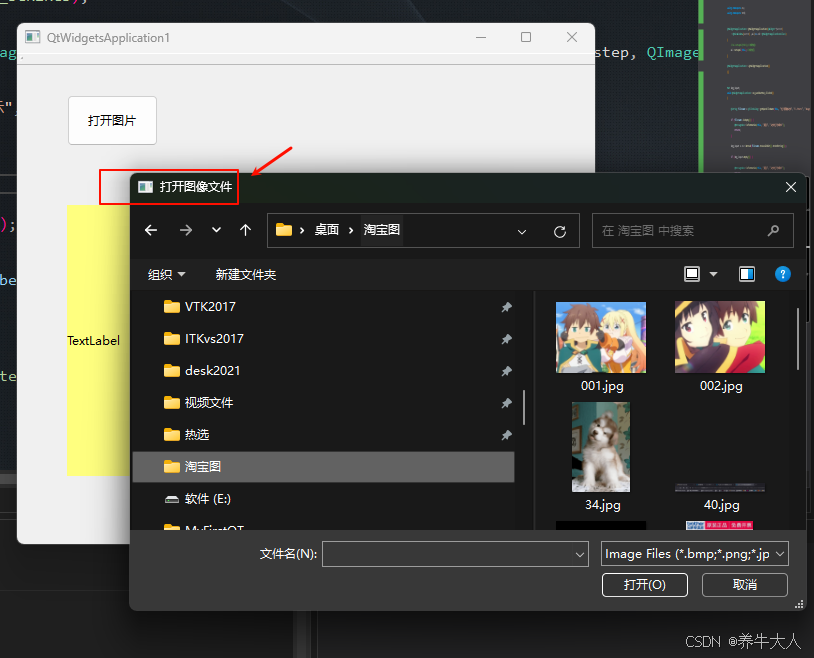
运行之后 ,可以看到可以选择图片了,不过窗口标题中文乱码
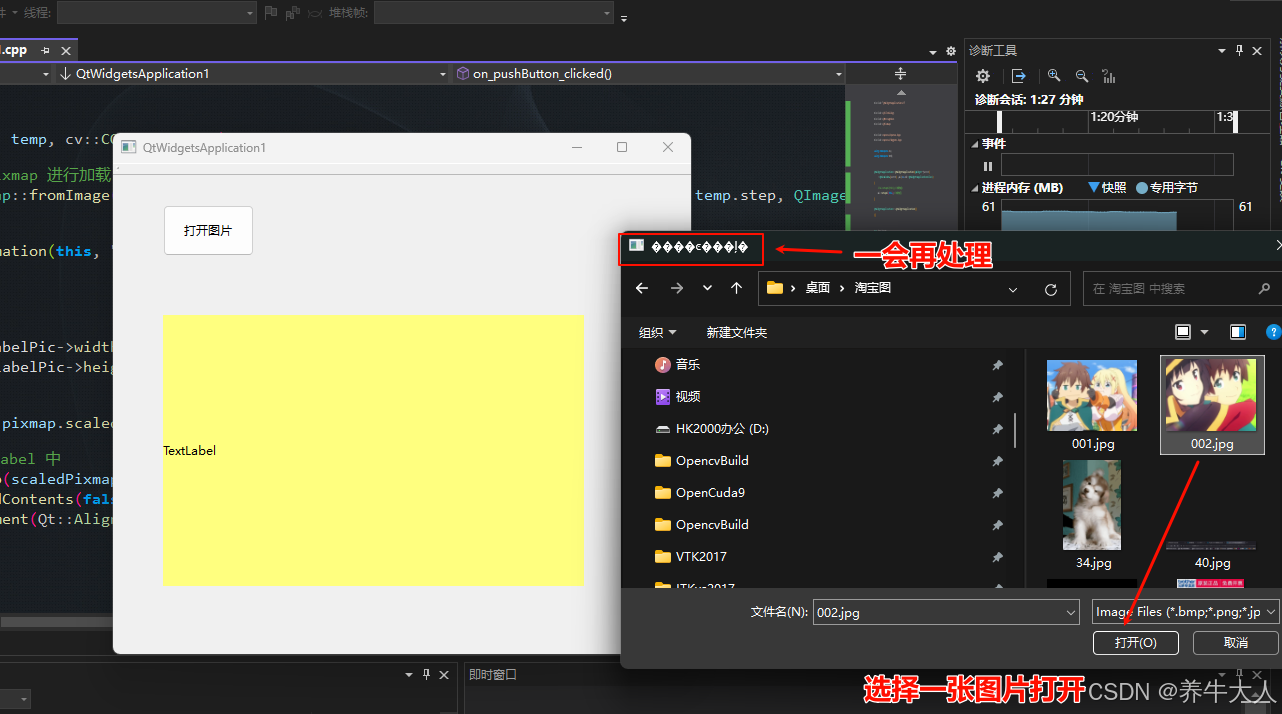
没意外的话,图片会显示在Label中,现在处理下标题乱码问题
 .
.
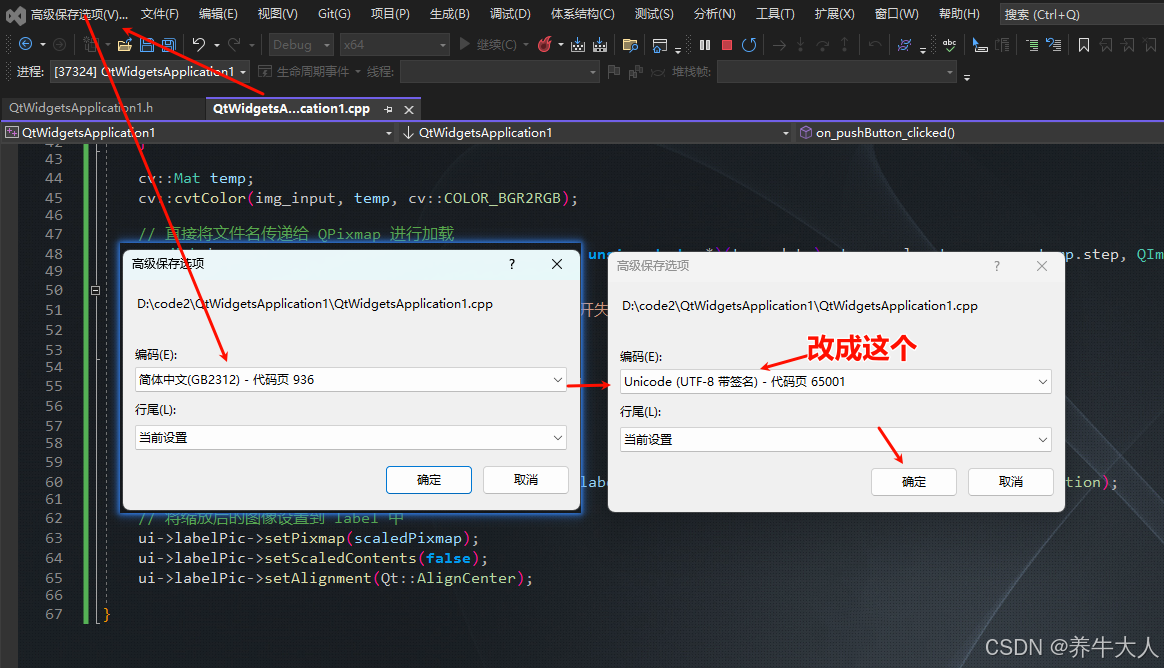
保存之后,要重新生成,再运行,我这里是生效了
至此,vs20022中使用qt调用opencv,从0到1的跨越应该是成功了,后面如果时间允许,再加一些图片处理的功能,像锐化,素描化并保存的功能,希望对新手有点点帮助哈
QtWidgetsApplication1.cpp 全部代码
#include "QtWidgetsApplication1.h"

#include <QFileDialog>
#include <QMessageBox>
#include <QPixmap>

#include <opencv2/opencv.hpp>
#include <opencv2/imgproc.hpp>

using namespace cv;
using namespace std;


QtWidgetsApplication1::QtWidgetsApplication1(QWidget *parent)
    : QMainWindow(parent) ,ui(new Ui::QtWidgetsApplication1Class)
{
    //ui.setupUi(this);//修改前
    ui->setupUi(this);//修改后
}

QtWidgetsApplication1::~QtWidgetsApplication1()
{}


Mat img_input;
void QtWidgetsApplication1::on_pushButton_clicked()
{

    QString filename = QFileDialog::getOpenFileName(this, "打开图像文件", "C:/Users", "Image Files (*.bmp;*.png;*.jpg)");

    if (filename.isEmpty()) {
        QMessageBox::information(this, "提示", "文件打开失败1!");
        return;
    }

    img_input = cv::imread(filename.toLocal8Bit().toStdString());

    if (img_input.empty()) {

        QMessageBox::information(this, "提示", "文件打开失败2!");
        return;
    }

    cv::Mat temp;
    cv::cvtColor(img_input, temp, cv::COLOR_BGR2RGB);

    // 直接将文件名传递给 QPixmap 进行加载
    QPixmap pixmap = QPixmap::fromImage(QImage((const unsigned char*)(temp.data), temp.cols, temp.rows, temp.step, QImage::Format_RGB888));

    if (pixmap.isNull()) {
        QMessageBox::information(this, "提示", "文件打开失败2!");
        return;
    }

    // 获取 label 的尺寸
    int labelWidth = ui->labelPic->width();
    int labelHeight = ui->labelPic->height();

    // 将 QPixmap 进行缩放
    QPixmap scaledPixmap = pixmap.scaled(labelWidth, labelHeight, Qt::KeepAspectRatio, Qt::SmoothTransformation);

    // 将缩放后的图像设置到 label 中
    ui->labelPic->setPixmap(scaledPixmap);
    ui->labelPic->setScaledContents(false);
    ui->labelPic->setAlignment(Qt::AlignCenter);

}


 1887
1887

 被折叠的 条评论
为什么被折叠?
被折叠的 条评论
为什么被折叠?
 到【灌水乐园】发言


